- X11vnc
- Contents
- Setting up x11vnc
- Installation
- Starting
- Setting X authority
- Setting a password
- Running constantly
- Accessing
- SSH Tunnel
- Troubleshooting
- Screensaver problem
- IPv6 port different from IPv4 port
- Copying and Pasting
- Session closes unexpectedly
- Tips and tricks
- Run x11vnc «system-wide» in (GDM and GNOME Shell)
- Run x11vnc «system-wide» in (SDDM and Plasma)
- Change x11vnc password in each boot
- How to Setup X11VNC Server on Ubuntu & LinuxMint
- Step 1 – Install X11VNC
- Step 2 – Create Password
- Step 3 – Start X11VNC Server
- Step 4 – Connect from VNC Clinet
- Step 5 – Setup AutoStart on Boot
- Conclusion
- Related Posts
- How to Switch Python Version in Ubuntu & Debian
- How to Create SFTP Only User in Debian 11
- Common Apache Commands on Ubuntu & Debian
- 53 Comments
X11vnc
x11vnc is a VNC server, it allows one to view remotely and interact with real X displays (i.e. a display corresponding to a physical monitor, keyboard, and mouse) with any VNC viewer. While it is not developed any longer by its original author Karl Runge, LibVNC and the GitHub community have taken over the development.
x11vnc does not create an extra display (or X desktop) for remote control. Instead, it shows in real time the existing X11 display, unlike Xvnc, part of TigerVNC, which is an alternatives VNC server available in the official repositories.
Also note that x11vnc is not shipped with a client viewer. Any VNC viewer should do the job and be compatible with the x11vnc server while not necessarily using all its functionalities. TigerVNC’s vncviewer is a recommended client.
Contents
Setting up x11vnc
Installation
Install x11vnc from the official repositories.
Starting
First, start X either by startx or through a display manager. You may need to set up X to run headless too.
Then, run the following command, all available options are explained in x11vnc(1) .
Another option is to place the x11vnc command line in a script which is called at login, for example:
Setting X authority
You may set an X authority file for the VNC server. This is accomplished by using the -auth argument followed by the appropriate file, which will depend on how your X server was started. Generally, assigning an X authority file requires running x11vnc as root.
Start X
If that fails, you may have to run instead (as root):
Where user is the username of the user who is running the X server.
Running from xinetd
X11vnc can be run using a xinetd service, which only starts X11vnc once a user connects.
Create an xinetd service entry for x11vnc, for example:
After reloading xinetd.service , X11vnc will start once a client connects to port 5900.
Systemd
To run x11vnc when system boots, create the override with systemctl edit x11vnc.service . The content should be like the following
Replace the second ExecStart with the command you run interactively. Run systemctl enable x11vnc.service if you need.
Newer versions of GDM uses /run/user. Example for user 120 (gdm), used for login screen.
or see Troubleshooting section below
Lightdm
Running from the bash:
SDDM uses an unpredictable UUID for the auth file [1] therefore one needs to:
Embedding this into a systemd .service file will require a trick to evaluate the find command as shown here [2].
Setting a password
uses the password found in
/.vnc/passwd , where the password is obscured with a fixed key in a VNC compatible format, or alternatively in
/.vnc/passwdfile , where the first line of the file contains the password. If none of these files can be located, it prompts the user for a password which is saved in
/.vnc/passwd and is used right away.
The VNC viewer should then prompt for a password when connecting.
Running constantly
By default, x11vnc will accept the first VNC session and shutdown when the session disconnects. In order to avoid that, start x11vnc with either the -many or the -forever argument, like this:
It is also possible to use the following command :
this will restart the server once the session is finished
Accessing
Get a VNC client on another computer, and type in the IP address of the computer running x11vnc. Hit connect, and you should be set.
If you are attempting to access a VNC server / computer (running x11vnc) from outside of its network then you will need to ensure that it has port 5900 forwarded.
SSH Tunnel
You need to have SSH installed and configured.
Use the -localhost flag with x11vnc for it to bind to the local interface. Once that is done, you can use SSH to tunnel the port; then, connect to VNC through SSH.
(You will likely have to provide passwords/passphrases to login from your current location into your remote_host Unix account; we assume you have a login account on remote_host and it is running the SSH server)
And then in another terminal window on your current machine run the command:
Troubleshooting
1. You can check your ip address and make sure port 5900 is forwarded by visiting this [dead link 2020-04-03 ⓘ] website.
 The factual accuracy of this article or section is disputed.
2. Tested only on GNOME + GDM
If you cannot start the tunnel, and get error like XOpenDisplay(«:0») failed, Check if you have a
/.Xauthority directory. If that does not exist, You can create one easily (Actually a symlink to actual one) by running command given below as normal user NOT ROOT OR USING Sudo as below:
then try above tunneling example and it should work fine. Further if you want this to be automatically done each time Xorg is restarted, create the xprofile file & make is executable as below
3. GNOME 3 and x11vnc
If you are using GNOME 3 and x11vnc and you get the following errors
Try running x11vnc like
Please update if this works / not works for any other display manager or desktop environment.
Screensaver problem
If screensaver starts every 1-2 second, start x11vnc with -nodpms key.
IPv6 port different from IPv4 port
The default behavior for the command:
is for the server to listen to TCP port 5908 and TCP6 port 5900. For the server to listen to the same TCP6 port, also use the -rfbportv6 option to force the IPv6 listening port. For example:
Copying and Pasting
If copying and pasting does not work as expected, particularly if pasting to the remote side is not working or clipboard behaviour is not as expected, try adding -xkb :
Although the documentation does not indicate -xkb specifically for clipboard problems, it resolved an issue where vim complained that there was nothing in the * register.
Session closes unexpectedly
x11vnc enables the X Damage extension by default, which significantly reduces the load when the screen is not changing much and detects changed areas more quickly. This extension is known to cause issues[4][5][6][7], and it may cause the session to close unexpectedly with caught XIO error messages appearing at the log. This issue can be circumvented by using the -noxdamage option.
Tips and tricks
![]() This article or section needs language, wiki syntax or style improvements. See Help:Style for reference.
This article or section needs language, wiki syntax or style improvements. See Help:Style for reference.![]()
Run x11vnc «system-wide» in (GDM and GNOME Shell)
Perform the following steps to run x11vnc in GDM to log in and then run x11vnc in a GNOME shell user session for a «system-wide» x11vnc:
First we need to create a systemd service to launch an x11vnc server in GDM:
This will start an x11vnc server protected by the password stored at user_home/.vnc/passwd that shows GDM to any connected VNC client, however as you may notice, if you click on any of the users, as soon as you log in, all the VNC clients will show a black screen. To fix this, we need to create another systemd service that will start another x11vnc server in the GNOME Shell session as soon as you log in:
Now, you need to keep the following in mind:
- As you may notice in the ExecStart part of the systemd service, the command that executes can be separated in two tasks: first it stops x11vnc-gdm.service (killing the GDM x11vnc server) and then it starts the x11vnc server for the user in the GNOME shell session. This is done because if you keep running the GDM x11vnc server in the background, the new x11vnc server for the user will use the next available port, and you would need to change your client connection settings to connect either to the GDM x11vnc server or for your user-specific x11vnc server. A setup like this is useful because the GDM x11vnc server stops as soon as you log in into your account.
- You need to create a service like this for each user that you want to have this functionality. (Do not forget to replace your_user and user_home with your actual username.)
- You may need to change the -display :X part of the command to match your system settings. You can view your current display by running echo $DISPLAY . Use the resulting output to match the systemd service.
Now, as you might notice, x11vnc-gnome-shell.service is executed as your (probably) unprivileged user. This presents a problem if we want to stop the x11vnc-gdm.service , so we need to allow the user to stop the GDM service. This can be accomplished using sudo, but we need to allow the execution of only that specific command without a password. This can be done as follows:
Execute visudo(8) as root:
At the end of the file, add the following line and save your changes:
Now you simply need to enable x11vnc-gdm.service and x11vnc-gnome-shell-your_user.service . When you restart your computer, both of them will start running and you can connect to your GDM and GNOME Shell using VNC.
Run x11vnc «system-wide» in (SDDM and Plasma)
To run x11vnc when the system boots into SDDM (if the aforementioned methods do not work for you), just edit x11vnc.service as follows:
Remember to change your_user in the path, or use the preferred auth method. Disable the old x11vnc.service and reload the systemd manager configuration. Reenable the x11vnc.service unit afterwards.
Change x11vnc password in each boot
A setup like this could be useful if you need to share your desktop with several people that you do not trust and if you do not want to manually change the password every time. Such a setup would generate boot-unique passwords, so if you share your password with someone, you only need to reboot your computer (or re-run the systemd service) to change the password.
The new generated password will be stored as plain text in
/.vnc/autovncpass , so it can be accessed with
To accomplish this, perform the following steps:
First install the expect package.
Then, create the following script anywhere in your home directory:
Now we need to create a systemd unit file that will execute the script at boot time:
Finally, start/enable the service to change the password. You can access the current password with
Источник
How to Setup X11VNC Server on Ubuntu & LinuxMint
X11VNC is the popular VNC server for creating remote desktop connection and access the remote desktop. It works will almost all the desktop environments available for Ubuntu and Debian based systems. Using remote desktop connection we can connect any remote system and access graphical user interface and work. We can use any available vnc viewer like the tight vnc viewer, real vnc viewer or ultra vnc viewer.
X11VNC can be a better remote support software for you. This tutorial will help you to set up the x11vnc server on your Ubuntu, LinuxMint & Debian system and connect using vnc viewer from the client system.
Step 1 – Install X11VNC
X11vnc packages are available under default repositories. Open a terminal and run the following commands to update default repositories and install required packages.
Step 2 – Create Password
Now create a password to connect using vnc viewer from the client system. This will not require any username to connect vnc.
Step 3 – Start X11VNC Server
After the successful installation of the x11vnc server on your system. Let’s start it using the following command. Change the parameters as per your setup.
The VNC server will start on default port 5900. In case the port 5900 is busy with some other service, it will automatically select the next available port like 5901.
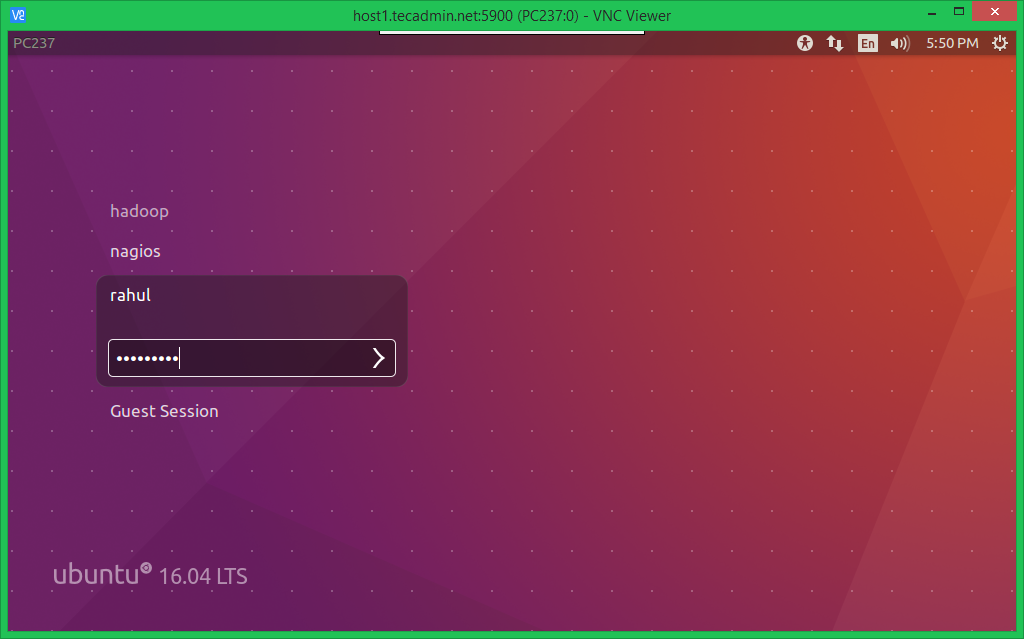
Step 4 – Connect from VNC Clinet
To connect to the server using VNC, you need a VNC client on your system. For this tutorial, I am using RealVNC viewer on our system. You can use any other client of your choice.
Step 5 – Setup AutoStart on Boot
Finally setup the auto start of x11vnc server on system boot. Create a x11vnc.conf file under /etc/init/ directory using following content.
Conclusion
You can successfully configured VNC server on your Ubuntu or Debian system.
Related Posts
How to Switch Python Version in Ubuntu & Debian
How to Create SFTP Only User in Debian 11
Common Apache Commands on Ubuntu & Debian
53 Comments

I downloaded MX-19.3_386.iso, did no system updates and setup x11vnc with their installer was a real pain in the arse (can’t remote login) but this manual get it to work. THANK YOU.
I have set it up and it is working fine. Thank you so much for your guidance.
Can you please help to enable file transfer from client to server and guide how to do file server.
I installed a server following these instructions. But what to do on the client-side to connect? What’s the connect address if the server is hidden behind NAT?
When I try x11vnc -auth guess -forever -loop -noxdamage -repeat -rfbauth /home/
— x11vnc loop: waiting for: 35530
09/07/2020 12:35:54 passing arg to libvncserver: -rfbauth
09/07/2020 12:35:54 passing arg to libvncserver: /home/
09/07/2020 12:35:54 passing arg to libvncserver: -rfbport
09/07/2020 12:35:54 passing arg to libvncserver: 5900
09/07/2020 12:35:54 x11vnc version: 0.9.16 lastmod: 2019-01-05 pid: 35530
09/07/2020 12:35:54 -auth guess: failed for display=’localhost:10.0′
— x11vnc loop: sleeping 2000 ms —
Has anyone ran into this and if so found a solution for it?
Have you installed net-tools as well?
try to run without “sudo”
I am trying to get this to autorun on startup. I have done so once by another way, but I cannot remember how. Now I am trying to set this up on a different computer and cannot remember what I did. I am using Linus Mint. I am moving over to the newest 20 version.
Everything works fine up to the point of setting up the autostart. Any help would be appreciated. I can’t seem to figure it out.
This article suggests placing an x11vnc.conf file in /etc/init. That didn’t do anything for me. But I have success with this:
1) Start x11vnc manually. I just launched it from the main menu – it’s under internet after a “normal” install
2) Use the system tray gui to tweak settings, and then under Advanced – Actions – Settings use the save-settings command to create a config file “
/.x11vncrc”. Note that this does NOT save the password. It will still prompt you for it locally. Which is quite annoying if you are remote and need to reboot your home/office system.
3) Use the command line “x11vnc -storepasswd” to generate the encrypted authentication file “
/.vnc/passwd”. Then edit the “
/.x11vncrc” file and uncomment the -rfbauth line and use the full path “/home//.vnc/passwd” as the parameter.
4) Go to the main Mint menu – settings, open Startup Applications, and add the x11vnc app there. In the startup command field, use “x11vnc -rc /home//.x11vnc”. I also have had better success adding a 10-15 second delay in that same startup dialog box.
If it is still running, go to the system tray, right-click the x11vnc icon, and choose Stop (or use any other means you choose to kill the process. Then while still in the Settings – Startup Applications screen, highlight the app and click the gear symbol at the bottom to test the launch. It should start in a few seconds. Then test connecting from a viewer to verify all is good.
All this is assuming Cinnamon desktop, but it seems like I did essentially the exact same thing with XFCE. Not sure about other desktops. Works great when connecting from another Linux pc running Remmina. Works well enough from Windows with TightVNC viewer, but I have to play with scaling a bit because it tries to send all my active desktops/workspaces and multiple monitors vertically stacked and I really want to just see one workspace at a time like I would if I was actually looking at the screen locally. To tell the truth, I have switched over to AnyDesk for most of my remote access needs, but still have vnc running as a backup.
Good luck
Hi,
Just installed Ubuntu 20.04.LTS and X11VNC wasn’t working using:
$ sudo x11vnc -auth guess -forever -loop -noxdamage -repeat -rfbauth /home/rahul/.vnc/passwd -rfbport 5900 -shared
the console was “spitting out” -auth guess: failed for display:’:0′
I had to do extra steps:
Disabled “Wayland” display manager by editing /etc/gdm3/custom.conf and setting WaylandEnable=false
Execute:
x11vnc -auth /run/user/1000/gdm/Xauthority -forever -loop -noxdamage -repeat -rfbauth /home/USERNAME/.vnc/passwd -rfbport 5900 -shared
Also, the “autostart on Boot” doesn’t work.
I’m using a 18.04 LTS fresh install upgraded to 20.04 LTS. So maybe this /etc/init/… is “deprecated”.
Still trying to figure this one out.
hi , i have multiples screens when im scrolling down (while im connected), how to fix that ?
Источник


