- Introducing KDE neon
- Solid Core, Latest Features
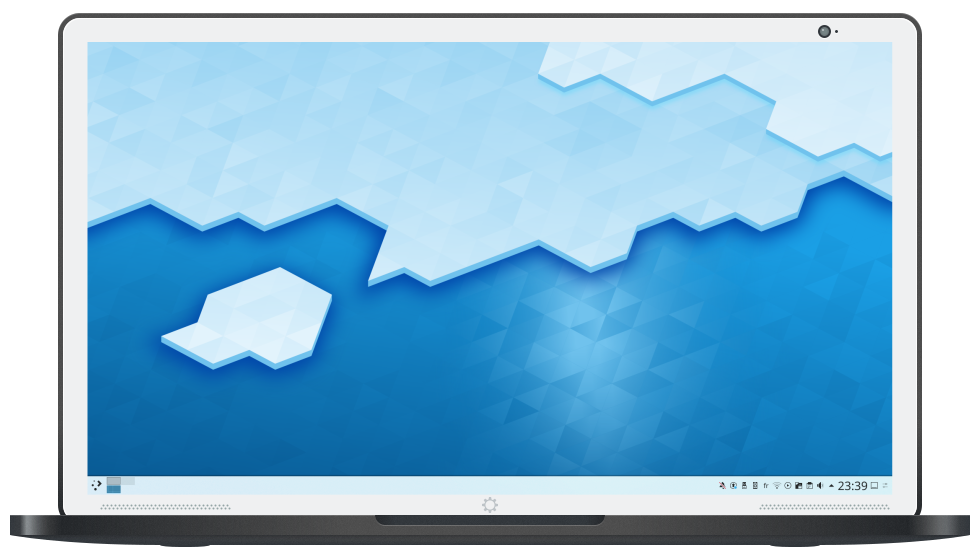
- Make Computing Your Own with Plasma Desktop
- Shells
- Neon linux ��������� ����� ���������
- Is this «the KDE distro»? 🔗
- Will there be a version using non LTS Ubuntu releases? 🔗
- Is it a distro? 🔗
- Is it a rolling distro? 🔗
- What is the difference between KDE neon and using plain Ubuntu? 🔗
- Why Ubuntu? 🔗
- Can I turn Kubuntu into KDE neon with a PPA? 🔗
- Is KDE neon an add-on to Kubuntu? 🔗
- Can I use a desktop other than Plasma? 🔗
- Is KDE neon 64bit only? 🔗
- Why are the download mirrors not https? 🔗
- What is KDE? 🔗
- How do I Update to the Latest Software? 🔗
- Donate to KDE Why Donate?
- Visit the KDE MetaStore
- Live Images
- User Edition 64-bit
- Testing Edition 64-bit
- Unstable Edition 64-bit
- Developer Edition 64-bit
- Shells
- Docker Images
- Snap Packages
- Donate to KDE Why Donate?
- Visit the KDE MetaStore
- Установка KDE Neon
- Подготовка к установке
- Шаг 1. Подготовка образа
- Шаг 2. Запись установочного Live USB в Windows 10
- Шаг 3. Подготовка загрузки с Live USB
- Установка KDE Neon
- Шаг 4. Особенности установки
- Шаг 5. Запуск установщика
- Шаг 6. Выбор языка
- Шаг 7. Региональные настройки
- Шаг 8. Настройки клавиатуры
- Шаг 9. Разметка дискового пространства
- Шаг 10. Выбор типа таблицы разделов
- Шаг 11. Порядок разделов на диске
- Шаг 12. Имя пользователя и компьютера
- Шаг 13. Установка и перезагрузка
- Шаг 14. Первый запуск KDE Neon
- Шаг 15. Установка обновлений
- Выводы
Introducing KDE neon
The latest and greatest of KDE community software packaged on a rock-solid base.
Solid Core, Latest Features
More than ever people expect a stable desktop with cutting-edge features, all in a package which is easy to use and ready to make their own.
KDE neon is the intersection of these needs using a stable Ubuntu long-term release as its core, packaging the hottest software fresh from the KDE Community ovens. Compute knowing you have a solid foundation and enjoy the features you experience in the world’s most customisable desktop.
You should use KDE neon if you want the latest and greatest from the KDE community but the safety and stability of a Long Term Support release. When you don’t want to worry about strange core mechanics and just get things done with the latest features. When you want your computer as your tool, something that belongs to you, that you can trust and that delivers day after day, week after week, year after year. Here it is: now get stuff done.
Make Computing Your Own with Plasma Desktop
We think that your desktop is YOUR desktop. Make it unique with the option to dive into every minimal detail from visuals to work patterns.
Plasma Desktop from the KDE community is a smart, effective, and beautiful environment from the very first time you start it. Using KDE neon, Plasma and KDE applications will be continuously updated, so no more waiting, adding package archives or downloading source code if you want what’s new.
Shells
 Get a powerful, secure desktop that you can take anywhere. Access your Shells on multiple devices from a smart TV to your smartphone. You can even breathe fresh life into that old computer. Make your next computer a computer in the cloud with Shells.
Transform any device into a powerful, secure desktop with Shells. Whether you want to code on your smartphone or produce a fresh new track on your TV, with Shells you can unlock the full performance and experience of a desktop computer on any device.
KDE earns a small commission when you use this link.
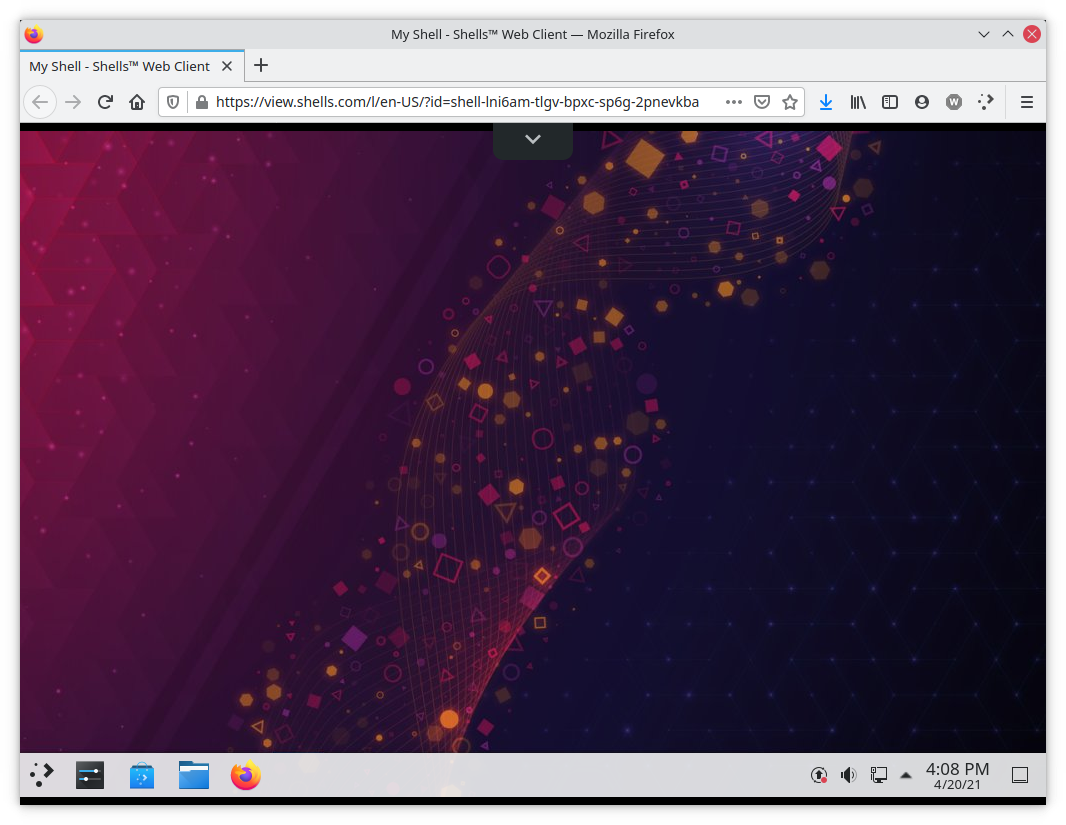
A Shells desktop running KDE neon in a web browser
Источник
Neon linux ��������� ����� ���������
KDE neon is a rapidly updated software repository. Most users will want to use the packages built from released software which make up our User Edition. KDE contributors and testers can use the packages built from KDE Git in the Testing and Unstable Editions. It uses the foundation of the latest Ubuntu LTS (20.04).
Is this «the KDE distro»? 🔗
Nope. KDE believes it is important to work with many distributions, as each brings unique value and expertise for their respective users. This is one project out of hundreds from KDE.
Will there be a version using non LTS Ubuntu releases? 🔗
No, we plan only to base on the latest LTS version of Ubuntu, this comes with Linux and graphics stack updates to keep drivers relevant. We will backport other software as needed.
Is it a distro? 🔗
Not quite, it’s a package archive with the latest KDE software on top of a stable base. While we have installable images, unlike full Linux distributions we’re only interested in KDE software.
Is it a rolling distro? 🔗
Not quite, it’s a package archive with the latest KDE software on top of a stable base. Unlike rolling distros only the KDE software will be updated continuously.
What is the difference between KDE neon and using plain Ubuntu? 🔗
KDE neon will provide users with more up-to-date packages of Qt and cutting-edge KDE software.
Why Ubuntu? 🔗
We use Ubuntu as a base for KDE neon because the KDE neon team feels it offers the best technology as a stable release and the best third party support. The KDE neon team is familiar with Ubuntu having worked with it for over a decade. We also feel that Ubuntu users will miss out if they do not have up to date KDE software. It is otherwise unrelated to the Ubuntu project or Canonical.
Can I turn Kubuntu into KDE neon with a PPA? 🔗
We recommend that you install a fresh KDE neon from the provided ISO images. But you can indeed add an APT repository to switch from Kubuntu to KDE neon. This is absolutely not tested or supported. If things take a turn for the worse you are expected to be knowledgable enough to repair your system on your own. A web search should quickly give you relevant information on how to do this.
Is KDE neon an add-on to Kubuntu? 🔗
KDE neon sits on top of the Ubuntu core foundations, which means the majority of software built for Ubuntu core will work fine, even when not explicitly supported by the KDE neon team. KDE neon is however not compatible with Kubuntu, as there is vast overlap in the base offerings of both Kubuntu and KDE neon. You can not use both systems at the same time. Installing KDE neon will simply replace Kubuntu.
Can I use a desktop other than Plasma? 🔗
This probably won’t work (probably won’t even install). It most certainly isn’t supported even if the desktop installs. KDE neon focuses on KDE software, most other software is not supported and you should not be surprised if you can not install it or it stops working at any point in time due to an update.
Is KDE neon 64bit only? 🔗
Yes. As computers without 64bit have become increasingly rare, we have chosen to focus our resources on higher-quality 64bit builds.
Why are the download mirrors not https? 🔗
The mirrors are generously donated for KDE use by various organisations but several don’t support https so our downloads are http only. However the images are GPG signed so you can be sure they match what was created by our builders.
What is KDE? 🔗
The KDE® Community is an international technology team dedicated to creating a free and user-friendly computing experience, offering an advanced graphical desktop, a wide variety of applications for communication, work, education and entertainment and a platform to easily build new applications upon.
How do I Update to the Latest Software? 🔗
KDE neon does continuous deployment of the latest KDE software which means there are nearly always new versions of our software to update to. We recommend using Plasma Discover’s updater which appears in your panel: 
If you prefer to use the command line you can use the pkcon command:
This will install all new packages and uses the same PackageKit code as Plasma Discover. Some uses of apt do not install new packages which makes it less suitable for KDE neon.
Donate to KDE Why Donate?
Visit the KDE MetaStore
Show your love for KDE! Purchase books, mugs, apparel, and more to support KDE.
Источник
Live Images
Live images are ideal for people who want a clean installation. Use a live image to replace your existing system, install alongside existing operating systems, or simply try KDE neon without affecting their computer.

User Edition 64-bit
Featuring the latest officially released KDE software on a stable base. Ideal for everyday users.

Testing Edition 64-bit
Featuring pre-release KDE software built the same day from bugfix branches. Good for testing. There is no QA. Will contain bugs.
Unstable Edition 64-bit
Featuring pre-release KDE software built the same day from new feature branches. Good for testing. There is no QA. Will contain many bugs.
Developer Edition 64-bit
Unstable Editon plus development libraries pre-installed.
Install using ROSA Image Writer for
GPG signatures signed by KDE neon ISO Signing Key (0xDEACEA00075E1D76) are available alongside the ISOs for verification.
Shells
Get a powerful, secure desktop that you can take anywhere. Access your Shells on multiple devices from a smart TV to your smartphone. You can even breathe fresh life into that old computer. Make your next computer a computer in the cloud with Shells.
Transform any device into a powerful, secure desktop with Shells. Whether you want to code on your smartphone or produce a fresh new track on your TV, with Shells you can unlock the full performance and experience of a desktop computer on any device.
KDE earns a small commission when you use this link.
A Shells desktop running KDE neon in a web browser
Docker Images
 Docker Images are great for testing or developing on KDE software without the need to re-install your operating system or a virtual machine. We build ours daily on Docker Hub.
Snap Packages
 Many KDE apps now are available as Snap packages which can be installed on any Linux distro. Most of these are currently made from KDE neon packaging on the KDE neon servers.
First set up Snap on your system, you can then install packages from the Store or through Plasma Discover.
Builds from releases go into the Candidate channel and when confirmed good into the Release channel. Builds from Git master go into Edge channel and from Git beta branches into the Stable channel.
Special Case Editions:
- Korean Testing Edition Live/Install Image pre-configured with Korean locale.
- Pinebook Remix Images build with some non-free drivers for the ARM based Pinebook laptop.
Donate to KDE Why Donate?
Visit the KDE MetaStore
Show your love for KDE! Purchase books, mugs, apparel, and more to support KDE.
Источник
Установка KDE Neon
Для выполнения обновления рабочего стола в Linux приходится подключать дополнительные ресурсы. Разработчики популярной среды KDE решили проблему, выпустив собственный дистрибутив, в котором репозиторий содержит самые актуальные обновления визуальной среды.
Проект KDE Neon основывается на релизах Ubuntu с долговременной поддержкой, что позволяет пользователям продолжать использование стабильных LTS, одновременно получая свежую версию Plasma в момент релиза. Да, подход неоригинальный, но удобный. На момент написания этого текста KDE Neon выходит вместе с Ubuntu 20.04 LTS (Focal Fossa) и, в отличие от Kubuntu, уже содержит новейшую версию Plasma 5.19.4. В этой статье мы расскажем о том, как устанавливать KDE Neon.
Подготовка к установке
Для установки подойдёт любое устройство, отвечающее системным требованиям для свежего релиза Ubuntu 20.04:
- процессор с двумя ядрами, частотой от 1.6 ГГц и поддержкой архитектуры x64;
- оперативная память — минимум 4 Гб;
- свободное пространство на жёстком диске — от 25 Гб.
Шаг 1. Подготовка образа
Для выполнения загрузки дистрибутива следует перейти на сайт проекта KDE Neon и в разделе Download KDE Neon скачать файл с расширением .iso. Для повседневного использования подойдёт редакция User Edition — в списке она будет самой первой. Остальные варианты предназначены для разработчиков в среде KDE.

Шаг 2. Запись установочного Live USB в Windows 10
Записать образ на любой внешний носитель для выполнения установки можно с помощью различных специализированных программ. В среде Windows 10 рекомендуем использовать утилиту Rufus, с помощью которой установочную USB-флешку можно сделать при помощи всего трёх кликов мышкой: 1) выбрать образ для записи; 2) согласиться на запись в iso-режиме; 3) согласиться на форматирование флешки.

Как только индикатор прогресса дойдёт до своего завершения установочный дистрибутив Live USB с KDE Neon будет готов.
Шаг 3. Подготовка загрузки с Live USB
Для запуска установки с USB-носителя необходимо настроить BIOS или UEFI соответствующим образом. Попасть в настройки можно на старте, до начала загрузки операционной системы с помощью нажатия клавиш Del либо F2 (в зависимости от производителя материнской платы). Если для входа в настройки BIOS используется другая клавиша, она будет указана в заставке внизу экрана.
В разделе Boot необходимо переместить носитель с дистрибутивом на первое место в списке устройств загрузки и выйти из программы настройки, предварительно сохранив сделанные изменения. Данный интерфейс на разных машинах выглядит по-разному, но общие принципы одинаковы.

Установка KDE Neon
После перезагрузки компьютера должна начаться установка KDE Neon.
Шаг 4. Особенности установки
Как и для основного релиза Ubuntu 20.04, установщик загружает KDE Neon в виде Live-образа, позволяющего полноценно использовать ОС, но с некоторыми ограничениями. Этого вполне достаточно для того, чтобы ознакомиться с возможностями ОС, но не устанавливать её сразу (пункт меню Try without installing). В данном случае выбираем пункт Install для выполнения собственно установки:

Шаг 5. Запуск установщика
Запускается установка KDE Neon после двойного клика по ярлыку Install System, находящемуся в левом верхнем углу экрана:

Шаг 6. Выбор языка
Первым появится окно приветствия, в котором предлагается выбрать язык интерфейса установщика.

Шаг 7. Региональные настройки
Далее предлагается выбрать регион, часовой пояс, язык интерфейса и региональные форматы:

Шаг 8. Настройки клавиатуры
Затем нужно будет выбрать раскладку клавиатуры и её тип:

Шаг 9. Разметка дискового пространства
В данном статье рассматривалась установка ОС на виртуальный диск. Инсталлятор KDE Neon может самостоятельно выполнить необходимую разметку, но в процессе сотрёт все данные на выбранном диске. Системным при таком варианте станет весь диск. Для новичков, использующих только одну ОС, подойдёт вариант Стереть диск. Предварительный результат такой автоматической разметки показан в том же окне: раздел /swap — в конце, остальное пространство — для нужд ОС и пользователя:

Однако, есть возможность улучшить производительность за счёт другого варианта разметки. Для этого нужно выбрать вариант Ручная разметка и нажать кнопку Далее:

Шаг 10. Выбор типа таблицы разделов
При ручной разметке первым делом следует определиться с таблицей разделов. В окне установщика необходимо нажать кнопку Новая таблица разделов и выбрать один из двух вариантов — MBR или GPT:

Принципиальная разница между типами заключается в поддерживаемых объёмах жёстких дисков и в количестве создаваемых разделов. MBR не может использовать более 2 Тб на дисках и создавать более четырёх разделов. GPT избавлена от этих ограничений и прекрасно работает с Linux, поэтому для KDE Neon подойдёт идеально. В GPT нет разделения по типу разделов: основные, логические и расширенные.
Важно! Если вы собираетесь одновременно работать и с Windows и с Linux на одном диске, выбирать на этом этапе надо MBR, так как операционные системы Microsoft могут запускаться только с primary-раздела.
Шаг 11. Порядок разделов на диске
Разделы создаются просто: в результате нажатия кнопки Создать появляется окно с настройками, в котором можно задать размер диска в мегабайтах, выбрать тип файловой системы и указать что будет монтироваться в создаваемом разделе:

Первой точкой монтирования следует объявить раздел /boot:

Следующим сделаем раздел /swap, размер которого рекомендуется задавать вдвое большим объёма оперативной памяти:

Всё остальное пространство предоставим в распоряжение ОС и пользователя. Можно также создать отдельный раздел /home.

Рекомендуемый здесь порядок расположения разделов поможет обеспечить более быструю загрузку ОС, быстрый доступ к разделу подкачки и достаточно места для нужд ОС и пользователя.

Шаг 12. Имя пользователя и компьютера
Следующий этап — раздел Пользователи. Здесь следует задать имя пользователя, логин и пароль, а также имя компьютера. Флажок Автоматический вход без запроса пароля стоит установить в том случае, если компьютер планируется использовать в режиме свободного доступа.

Шаг 13. Установка и перезагрузка
После выполнения всех настроек будет произведена установка KDE Neon на выбранный и размеченный диск. По завершению установки инсталлятор предложит перезагрузку.

Не забудьте извлечь установочный носитель перед запуском, в противном случае Live-образ запустится заново.
Шаг 14. Первый запуск KDE Neon
Экран регистрации пользователя появится после загрузки ОС. Пользователь должен ввести пароль, заданный во время установки (если был задан в процессе установки):

Шаг 15. Установка обновлений
Для свежеустановленной ОС могут потребоваться обновления. Загрузку их можно осуществить, кликнув по значку Обновления в правом углу панели задач.

После установки всех необходимых дополнений и обновлений установка KDE Neon завершена.

Выводы
Теперь вы знаете как установить KDE Neon на компьютер. Разработчики как следует постарались и сделали отличную операционную систему, совмещающую в себе удобство и стабильность Ubuntu LTS с актуальностью последних разработок. Автоматический инсталлятор поможет установить ОС с минимальным вмешательством пользователя. Установить и обновить KDE Neon сможет даже неопытный пользователь Linux.
Источник


