- Debian Ubuntu “netstat: command not found” Error Solution and Netstat Installation
- Search Netstat Packages
- Install Netstat with Net-Tools Package
- Alternatives of Netstat
- What is Netstat-Nat Package
- How to Install netstat Command in Linux
- How to Install netstat Command in Linux
- How to Use netstat Command in Linux
- 1. Viewing the Network Routing Table
- 2. Display Network Interface Statistics
- 3. Show Network Connections
- 4. Show Network Services
- If You Appreciate What We Do Here On TecMint, You Should Consider:
- How to Use Netstat Command in Linux to Check a Specific Port
- Listing All Ports and Sockets Using netstat:
- Listing All the Listening Ports and Sockets with netstat:
- Listing All the Listening TCP Ports with netstat:
- Listing All the Listening UDP Ports with netstat:
- Find out What Service Name Represent What Port:
- How to Get Help with netstat:
- Как установить Netstat в Linux
- от sasza
- Как установить Netstat на Ubuntu
- Как установить Netstat в Debian
- Как установить Netstat в Arch Linux
- Как установить Netstat в Fedora Linux
- Как установить Netstat в OpenSUSE Linux
Debian Ubuntu “netstat: command not found” Error Solution and Netstat Installation
Ubuntu is most used Linux distributions. Canonical provides enterprise support for Ubuntu desktops and servers. netstat is easy to use tool for network operations. In this tutorial we will look how to solve netstat: command not found error and install netstat tool to the Ubuntu and Debian.
Search Netstat Packages
Ubuntu and Debian systems uses deb packages which is managed with apt online package manager. We will use apt to search netstat related package.
 Search Netstat Packages
Install Netstat with Net-Tools Package
As we see in previous step netstat search listed a lot of package names. The package which provides netstat command is net-tools and we will install is with apt install .
Alternatives of Netstat
If we need or want to check alternative to the netstat we can look following commands.
What is Netstat-Nat Package
When searching for netstat command apt will list netstat-nat package which provides network related commands focused on NAT . We can get detailed information about netstat-nat package with the following command.
 What is Netstat-Nat Package
Источник
How to Install netstat Command in Linux
Netstat – derived from the words network and statistics – is a command-line utility used by system administrators for analyzing network statistics. It displays a whole manner of statistics such as open ports and corresponding addresses on the host system, routing table, and masquerade connections.
In this article, we will walk you through how you can install the netstat command in different Linux distributions.
How to Install netstat Command in Linux
The package that contains netstat is called net-tools. On modern systems, the netstat utility comes pre-installed and there’s no need to install it.
On older systems, however, you are likely to bump into an error when you run the netstat command. Therefore, to install netstat on Linux distributions, run the command.
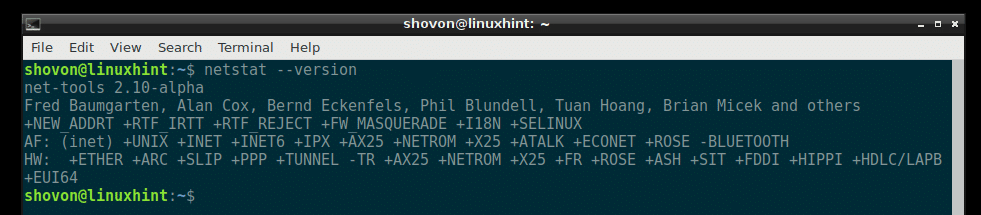
Once installed, run the command below to check the version of netstat installed.
How to Use netstat Command in Linux
You can invoke the netstat command on any of the Linux distributions to get different statistics on your network.
1. Viewing the Network Routing Table
You use the -r flag to show the network routing table to get something similar to the output below.
![]() List Network Routing Table
List Network Routing Table
The -n option forces netstat to print addresses separated by dots instead of using symbolic network names. The option is useful for avoiding address lookups over a network.
2. Display Network Interface Statistics
Use the -i flag to get an output of statistics of a network interface that is configured. The -a option prints all present interfaces in the kernel.
![]() List Network Interface Statistics
List Network Interface Statistics
3. Show Network Connections
The netstat command utility supports options that display active or passive sockets using the options -t , -n , and -a . The flags show RAW, UDP, TCP, or UNIX connection sockets. Adding the -a option, it will sow sockets ready for connection.
![]() List Network Connections
List Network Connections
4. Show Network Services
To list services, their current state, and their corresponding ports, run the command.
![]() List Network Services
List Network Services
In this article, we shed light on how you can install netstat command and how it is used to checking a wide array of network statistics. It’s also important to point out that netstat has been deprecated and instead ss utility has taken its place in displaying more refined network statistics.
If You Appreciate What We Do Here On TecMint, You Should Consider:
TecMint is the fastest growing and most trusted community site for any kind of Linux Articles, Guides and Books on the web. Millions of people visit TecMint! to search or browse the thousands of published articles available FREELY to all.
If you like what you are reading, please consider buying us a coffee ( or 2 ) as a token of appreciation.

We are thankful for your never ending support.
Источник
How to Use Netstat Command in Linux to Check a Specific Port
netstat command is a part of the net-tools utility package on Debian 9 Stretch. It may not be installed by default on your Debian 9 Stretch operating system. The net-tools package is available in the official package repository of Debian 9 Stretch. So installing it is very easy.
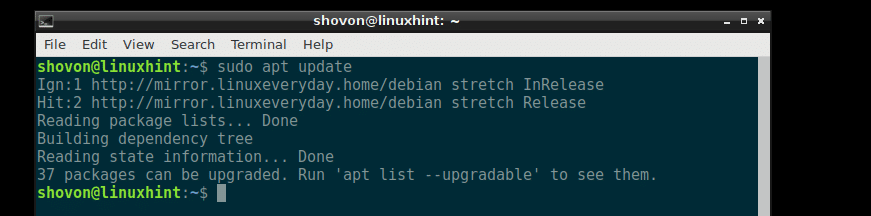
First update the apt package repository cache of your Debian 9 Stretch machine with the following command:

The apt package repository cache should be updated.
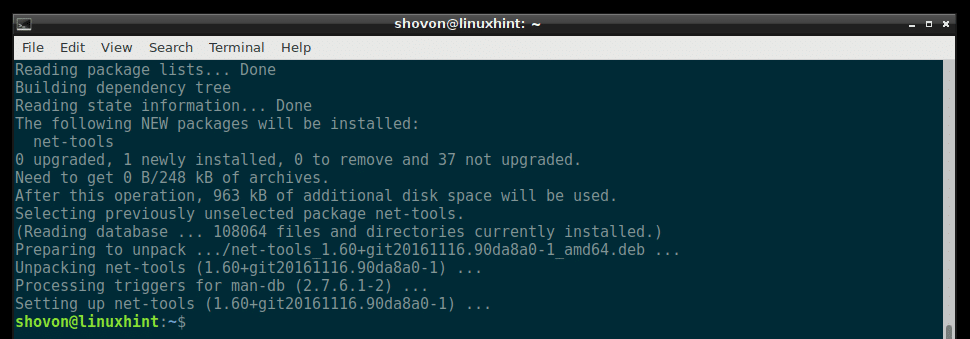
Now run the following command to install the net-tools utility on Debian 9 Stretch:

net-tools should be installed.
Now check whether netstat is working with the following command:
Listing All Ports and Sockets Using netstat:
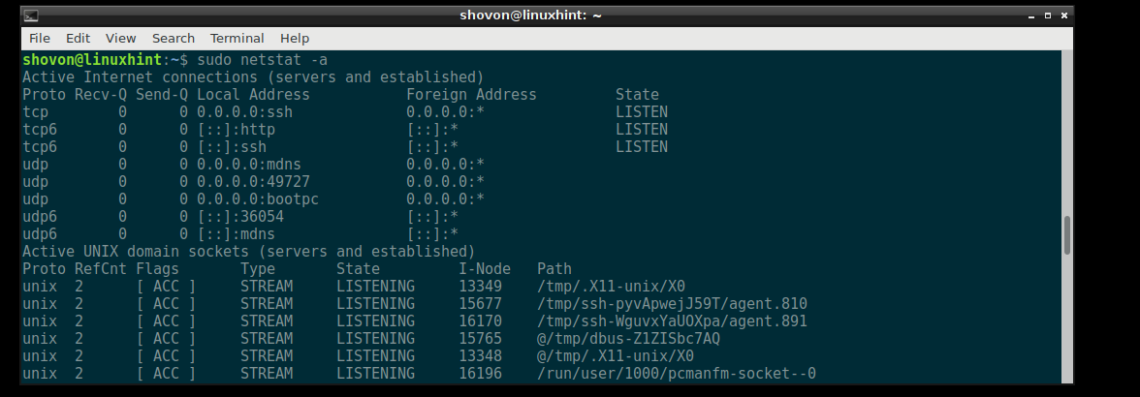
You can list all the opened ports and connected sockets on your Debian 9 machine with the following command:


As you can see, all the opened ports and sockets are listed. It’s a very long list.
Listing All the Listening Ports and Sockets with netstat:
You can use netstat to see a list of all the ports and sockets that are listening with the following command:


As you can see, all the ports and sockets on your Debian 9 machine is listed. It’s a long list.
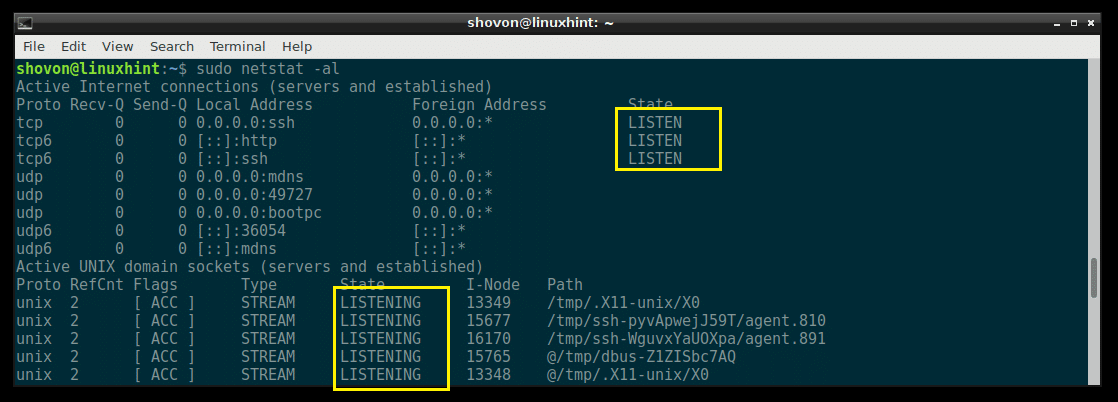
Listing All the Listening TCP Ports with netstat:
You can list all the TCP (Transmission Control Protocol) ports that are listening using netstat with the following command:


As you can see, all the TCP ports that are listening is listed.

In the output of netstat, all the common ports are replaced by the service name by default. For example, the port 80 by default is the port for the HTTP (HyperText Transfer Protocol), which we all are familiar with. So in the output of netstat, it is shown as http instead of port 80 as you can see in the marked section of the screenshot below.

If you need the port number, not the service name, then you can run the following netstat command:


As you can see from the marked section of the screenshot below, the service names are replaced by the port number.

Listing All the Listening UDP Ports with netstat:
If you want to list all the UDP (User Datagram Protocol) ports that are listening on your Debian 9 machine, you can do so with the following netstat command:


All the listening UDP ports should be listed. Just like the TCP port example, the common port numbers are replaced by the service names by default here as well, as you can see from the marked section of the screenshot below.
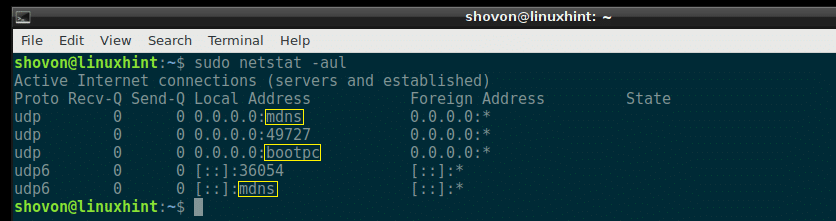
But the ports that are not common are not replaced by the service names as you can see from the marked section of the screenshot below.

If you want all the ports to be displayed, not the service name as before, then run the following netstat command:


As you can see from the marked section of the screenshot below, the service names are replaced by the UDP port number.

Find out What Service Name Represent What Port:
Debian 9 Stretch has a service file which can be found at /etc/services
You can open the service file /etc/services with the following command:

The contents of the /etc/services file:
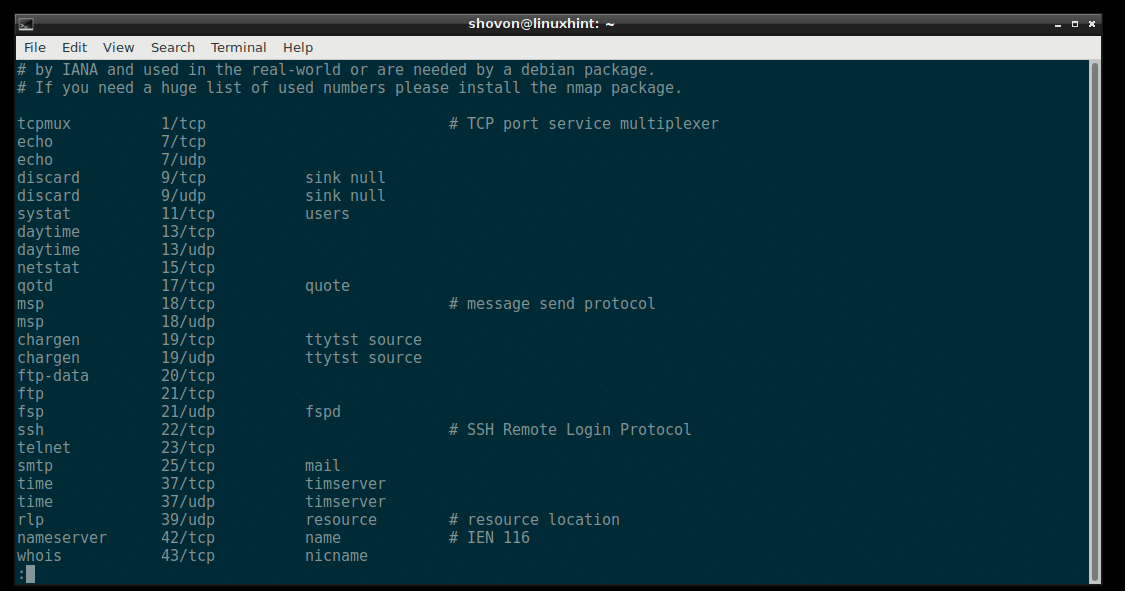
The /etc/services file contains a long list of service name, and the port number and protocol of that specific service that a client or server may use. Programs on Linux system such as netstat uses this file to resolve the port numbers to service names and vice versa.
The service name, port number and protocol of the SSH service in /etc/services file:

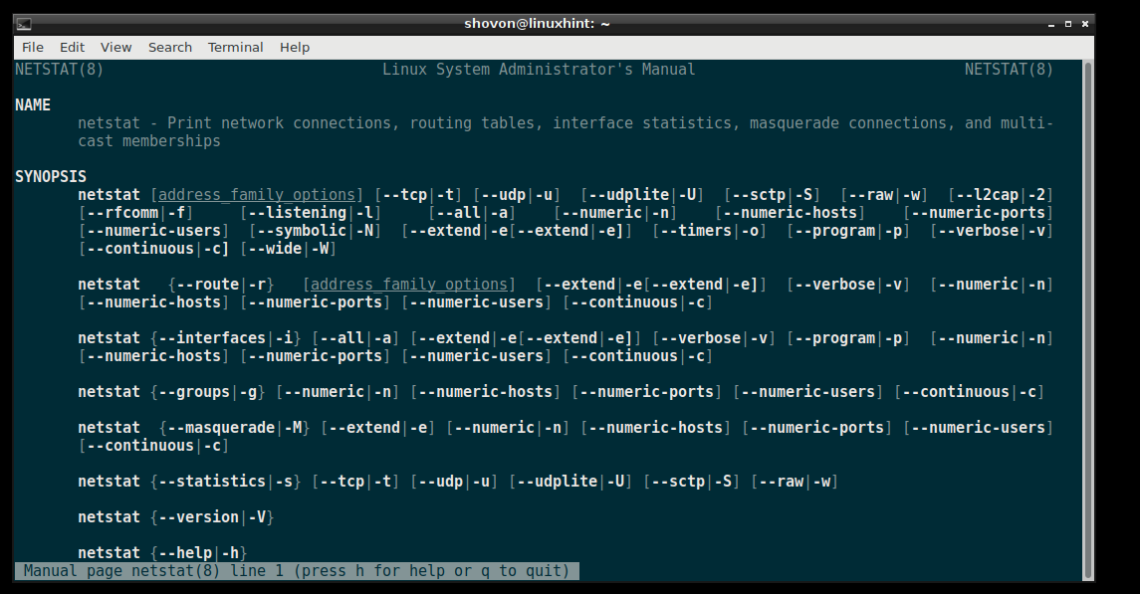
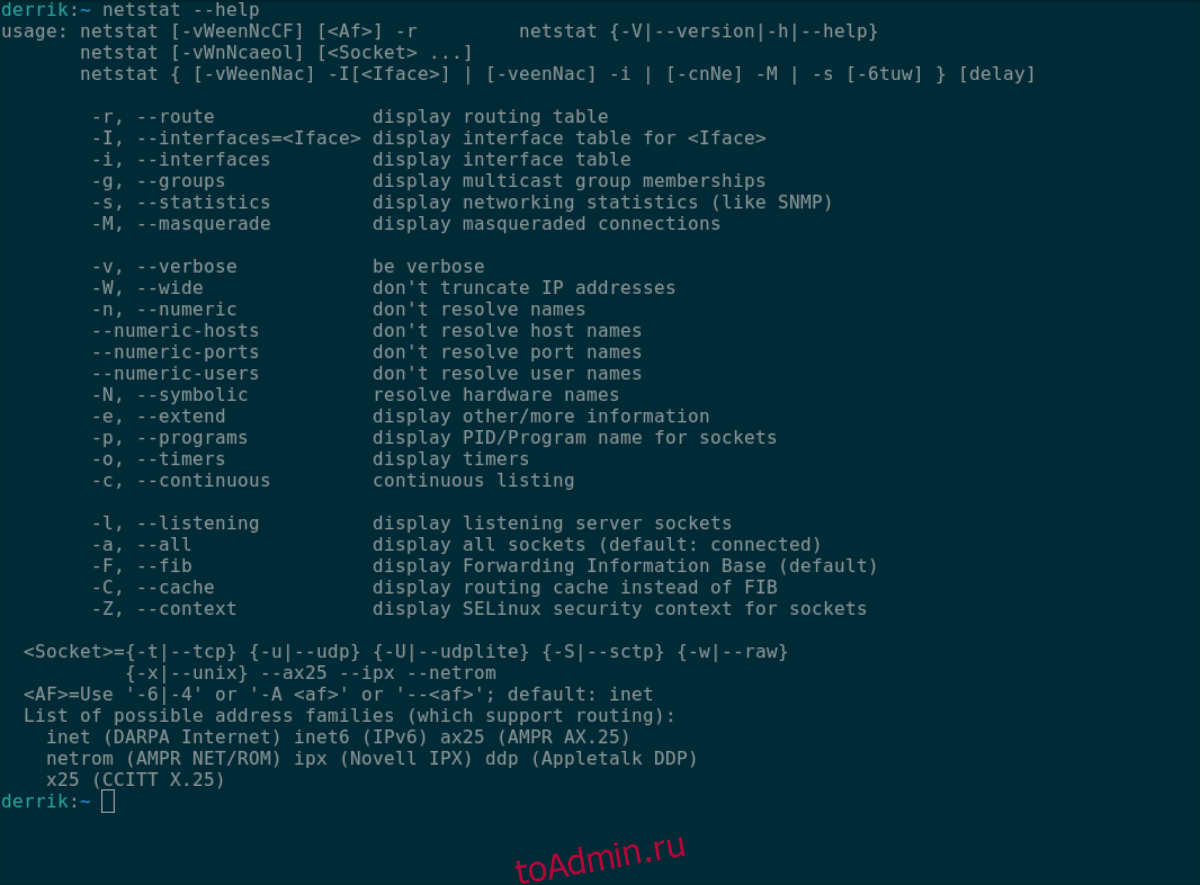
How to Get Help with netstat:
On Debian 9 Stretch, if you need any help with the netstat command, you can just go to the manpage of netstat and you should be able to get a clear documentation of what netstat command line options are available and what they do.
To go to the manpage of netstat, run the following command:

The netstat manpage:
That’s how you show listening ports on Debian 9 Stretch with netstat. Thanks for reading this article.
Источник
Как установить Netstat в Linux
от sasza
Netstat — это инструмент Linux, который системные администраторы используют для анализа сетевой статистики. Это пригодится, когда вы пытаетесь глубже изучить свою Linux-машину и то, как она работает с сетью. В этом руководстве мы покажем вам, как установить Netstat на ваш компьютер с Linux.
Как установить Netstat на Ubuntu
Приложение Netstat широко доступно для всех операционных систем Linux, включая такие, как Ubuntu. Однако, чтобы начать установку этой программы в вашей системе Ubuntu, вы должны запустить окно терминала.
Чтобы открыть окно терминала на рабочем столе Ubuntu, нажмите Ctrl + Alt + T на клавиатуре. Вы также можете найти «Терминал» в меню приложения. Когда окно терминала открыто, используйте команду Apt install ниже, чтобы установить пакет «net-tools». Этот пакет содержит Netstat.
После ввода приведенной выше команды Ubuntu попросит вас ввести пароль. Сделай так. Затем нажмите кнопку Y, чтобы подтвердить, что вы хотите установить программное обеспечение. После нажатия Y Ubuntu установит пакет «net-tools», который предоставит вам доступ к Netstat.
Как установить Netstat в Debian

В репозитории программного обеспечения Debian есть пакет net-tools, очень похожий на Ubuntu. В результате вы сможете установить его из терминала. Чтобы начать процесс установки, вам нужно будет запустить окно терминала.
Чтобы открыть окно терминала, нажмите Ctrl + Alt + T на клавиатуре. Или найдите «Терминал» в меню приложения и откройте его таким образом. Когда окно терминала открыто, можно начинать установку.
Используя окно терминала, установите пакет «net-tools» в вашу систему. Вы можете установить этот пакет в Debian, используя команду Apt-get ниже.
После того, как вы введете команду установки выше, менеджер пакетов Debian попросит вас ввести пароль. Затем, используя клавиатуру, введите свой пароль и нажмите клавишу Enter.
После нажатия клавиши Enter Debian попросит вас нажать клавишу Y, чтобы продолжить установку. Когда вы это сделаете, Netstat будет установлен на вашем компьютере.
Как установить Netstat в Arch Linux
Приложение Netstat доступно в Arch Linux всем пользователям. Однако это инструмент командной строки, поэтому вам нужно будет открыть окно терминала, чтобы приложение заработало. Чтобы открыть окно терминала, нажмите Ctrl + Alt + T на клавиатуре. Или найдите «терминал» в меню приложения и запустите его таким образом.
Когда у вас открыто окно терминала, используйте команду Pacman для установки пакета «net-tools» на ваш компьютер Arch Linux.
После выполнения указанной выше команды Arch Linux запросит у вас пароль. Используя клавиатуру, введите свой пароль. Затем нажмите клавишу Y, чтобы подтвердить, что вы хотите установить пакет. Когда вы это сделаете, Arch Linux установит Netstat.
Как установить Netstat в Fedora Linux
Netstat доступен для пользователей Fedora Linux через официальные репозитории программного обеспечения. В некоторых системах Fedora Linux этот инструмент [month] уже установлен. Однако, если у вас еще нет Netstat, вы можете заставить его работать с помощью диспетчера пакетов DNF.
Чтобы начать установку, откройте окно терминала на рабочем столе Fedora. Вы можете сделать это, нажав Ctrl + Alt + T. Или найдите «Терминал» в меню приложения. Когда окно терминала открыто и готово к использованию, установите программу «net-tools» в Fedora с помощью команды dnf install.
После ввода приведенной выше команды Fedora попросит вас ввести пароль. Сделайте это с помощью клавиатуры. После ввода вашего пароля DNF соберет все зависимости, необходимые для установки программного обеспечения. Затем он попросит вас нажать клавишу Y, чтобы продолжить. Сделайте это, чтобы установить Netstat в Fedora.
Как установить Netstat в OpenSUSE Linux
Программа Netstat доступна всем пользователям OpenSUSE Leap и OpenSUSE Tumbleweed через репозиторий программного обеспечения OpenSUSE Oss. Чтобы начать установку, откройте окно терминала, нажав Ctrl + Alt + T на клавиатуре, или найдите «Терминал» в меню приложения.
Когда окно терминала открыто и готово к использованию, введите следующую команду установки zypper ниже, чтобы установить пакет «net-tools» на вашем компьютере OpenSUSE.
Когда вы вводите указанную выше команду, OpenSUSE запросит ваш пароль. Введите его с клавиатуры. Затем нажмите команду Y после того, как SUSE покажет вам все пакеты, которые будут установлены. После нажатия клавиши Y Netstat будет настроен на вашем ПК с OpenSUSE Linux.
Источник


