- What is Linux File System? Easy Guide
- What is Linux File System?
- What are the Linux File System Types?
- What file system does my system use?
- What is Top Level in Linux?
- What Are the Linux File System Directories?
- /bin – essential utilities
- /boot – Boot for a Boot
- /dev – Devices or Files
- /etc – Configuration files
- /home – Home Folder Containment
- /lib – Libraries for Programs
- /media – Mounted Media
- /mnt – Temporary Mounts
- /opt – Optional Packages
- /proc – Kernel and Process Pseudo Files
- /root – Root User Directory
- /sbin – System Administration Programs
- /tmp – Temporary Files
- /usr – User Shared Read-Only Data
- /var – Variable Data
- Newest linux file system
- 1.1 Terminology #Edit source
- 1.2 Btrfs #Edit source
- 1.2.1 Key Features #Edit source
- 1.2.2 The Root File System Setup on SUSE Linux Enterprise Server #Edit source
- 1.2.2.1 Mounting Compressed Btrfs File Systems #Edit source
- 1.2.2.2 Mounting Subvolumes #Edit source
- 1.2.2.3 Checking for Free Space #Edit source
- 1.2.3 Migration from Ext and ReiserFS File Systems to Btrfs #Edit source
- 1.2.4 Btrfs Administration #Edit source
- 1.2.5 Btrfs Quota Support for Subvolumes #Edit source
- 1.2.6 Btrfs send/receive #Edit source
- 1.2.6.1 Prerequisites #Edit source
- 1.2.6.2 Incremental Backups #Edit source
- 1.2.7 Data Deduplication Support #Edit source
- 1.2.8 Deleting Subvolumes from the Root File System #Edit source
- 1.3 XFS #Edit source
- 1.3.1 High Scalability by Using Allocation Groups #Edit source
- 1.3.2 High Performance through Efficient Management of Disk Space #Edit source
- 1.3.3 Preallocation to Avoid File System Fragmentation #Edit source
- 1.4 Ext2 #Edit source
- 1.5 Ext3 #Edit source
- 1.5.1 Easy and Highly Reliable Upgrades from Ext2 #Edit source
- 1.5.2 Reliability and Performance #Edit source
- 1.5.3 Converting an Ext2 File System into Ext3 #Edit source
- 1.5.4 Ext3 File System Inode Size and Number of Inodes #Edit source
- 1.6 Ext4 #Edit source
- 1.7 ReiserFS #Edit source
- 1.8 Other Supported File Systems #Edit source
- 1.9 Large File Support in Linux #Edit source
What is Linux File System? Easy Guide
You may already know a little bit about Linux, but you may not know exactly how your data is being handled under the hood. Because if you’re like a lot of other Linux users, you just take for granted these sorts of things.
But your Linux file system isn’t so carefree, so, today that’s exactly what we will be talking about – the Linux File System.
Table of Contents
What is Linux File System?
Linux file system is the collection of data and/or files stored in a computer’s hard disk or storage, your computer relies on this file system to ascertain the location and positioning of files in your storage, were it not there, the files would act as if they are invisible, obviously causing many problems.
There are actually many different file systems that exist for Linux, if you’re wondering which one you should use, we will provide a comprehensive list of the file systems that are supported by Linux.
What are the Linux File System Types?
Upon installation, Linux offers various file systems like the ones below that you can select from:
- Ext
- Ext2
- Ext3
- Ext4
- JFS
- XFS
- btrfs
- swap
We’ll delve into each one of these Linux File Systems and give a brief description.
Ext: “ext” is an acronym that stands for “extended file system” and was created in 1992 and is the very first file system designed specifically for Linux.
Its functionality was designed partly based on the UNIX file system. The purpose of its creation originally was to innovate beyond the file system used before it (the MINIX file system) and overcome its limitations.
As this file system is about 30 years old at the time this article was written, many Linux distros no longer support it, so it is not really used anymore.
Ext2: also referred to as “second extended system”. Created in 1993, ext2 was designed to be the successor of the original extension system for Linux.
It innovated in areas such as storage capacity, and general performance. This file system notably allows for up to 2 TB of data. Like ext, this file system is very old, so it really should just be avoided.
Ext3: ext3, or third extended system, created in 2001, surpasses ext2 in that it is a journaling file system. A journaling file system is a system that records in a separate log changes and updates to files and data before such actions have been completed.
This means that if for some reason, the computer or hard disk(s) crash or experience some kind of power failure, this separate log containing the changes made before the crash can be used to access that stored data, thus repairing and restoring the files upon reboot.
Nowadays, there are so many better options to choose from that there’s hardly any reason to use this extended file system anymore either.
Ext4: ext4, standing for “fourth extended system”, was created in 2006. Because this file system overcomes numerous limitations that the third extended system had, it is both widely used, and the default file system that most Linux distros use.
While it may not be the most cutting edge, it is absolutely reliable and stable – which is really valuable in Linux.
Thus, if you aren’t particularly keen on racking your brain between the different pros and cons of all the many file systems you can choose from, we definitely recommend you just go with this one.
JFS: The file system JFS was created by IBM in 1990 and the name JFS is an acronym standing for Journaling File System, as we’ve already covered this concept with the number 3 file system in this article, you should already be quite familiar with what exactly this means.
It’s easy to recover data after a power failure and quite reliable. What’s more is it uses less CPU power than the other file systems.
XFS: xfs, an acronym that stands for “Extent File System”, was created by Silicon Graphics and originally made for their OS “IRIX”, but was later given to Linux.
Created in 1990, XFS is a 64-bit high performance journaling file system. It’s particularly noteworthy for how incredibly well it works with very large files. Though contrarily, not especially the
best with smaller files.
Btrfs: btrfs, which is yet another acronym standing for B Tree File System, created by Oracle in 2009. It is regarded as a rival file system to ext4, though it’s consensus that overall ext4 is the better file system, as it transfers data faster and offers more stability but although this is the case, that does not mean btrfs isn’t worth looking into.
There are a couple things that are unique and advantageous about btrfs. And in general it has excellent performance.
If you couldn’t tell already from the comparisons made in our list, ext4 is and is regarded as the best Linux File System.
What file system does my system use?
If you’re wondering which file system your distro has by default or simply just which one you have currently, you can define that for yourself using some pretty nifty commands in your terminal.
There are multiple ways that you can do this, but we’ll show you the easiest one down below:
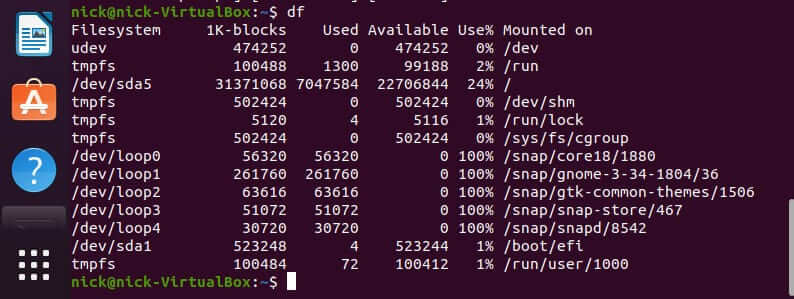
Short for “disk free”, df is a command used to display the free disk space in Linux and other similar operating systems. It is also used to understand and ascertain the file systems that are mounted.
Now, you may have noticed that I mentioned that this command can be used to define the file system mounted, but when you run the “df” command yourself, there is no mention of any types of file systems. (shown below)
Well, that is where this interesting little option comes in: open your terminal and execute this command:
This is a variation of the df command. It will display the file system type along with other currently irrelevant information. (shown below)
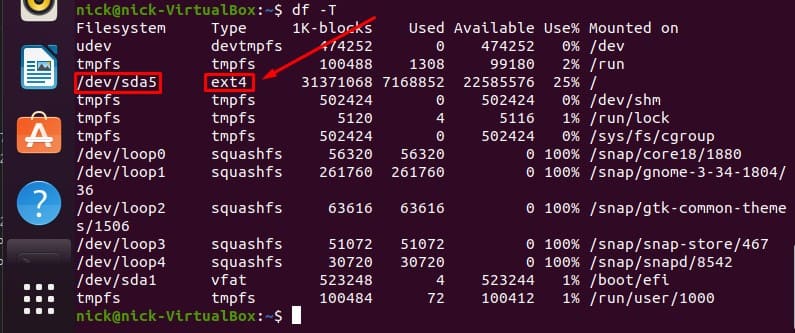
As you can see, in the second column under “Type” the file system type is defined. You should now be able to ascertain which file system you currently have mounted on your Linux distro.
What is Top Level in Linux?
/ is the top level directory of a Linux system. The name “top level” means the “root”, thus it is the root directory of the system. Though it is separate from “/root directory”, so you shouldn’t confuse the two.
All other directories stem from this top level directory like a pyramid. This concept is not unique to Linux, as the same thing can be observed in other Operating Systems such as a very interesting one you may have heard of called Windows. Windows has partitions such as C: and D:.
In Linux, these directories in the so-called “pyramid” exist in a hierarchy with a specific structure. This can be observed in your terminal by using the command:
, and then displaying the directories and files while in the top level directory. (shown below)

Most distros have the same structure, and the differences between some of them being only minuscule. Now that you know what the top level directory is, let’s take a comprehensive dive into what the rest of these directories are and what you can do with them.
What Are the Linux File System Directories?
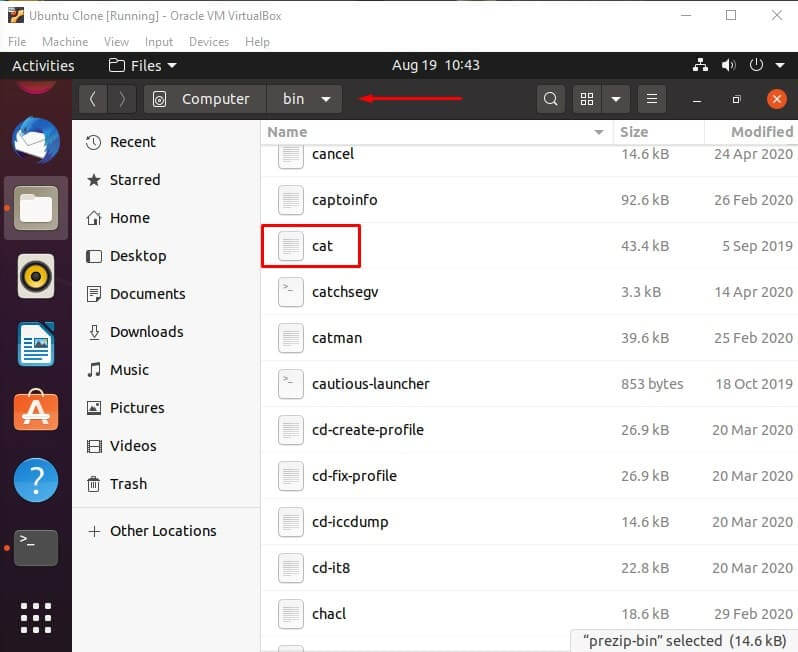
/bin – essential utilities
The directory contains the core system programs and important utilities. For example, commonly used and well known commands such as “cat” are located in “/bin”.
The reason for this is that if these utilities are not stored in this directory, there is no certainty that the system will have access to them if there isn’t a file system mounted.
There is the directory /sbin that is very similar to /bin, as it contains core system administration binaries (programs).
/boot – Boot for a Boot
Contains files that are required in order for the system to be booted. For example, BIOS, which stands for Basic Input/Output System.
The BIOS is responsible for executing the Master Boot Record (MBR) boot loader.
It checks the integrity of the hard disk(s) of the system before launching the MBR. /boot also contains Linux kernels and many other files in addition to BIOS.
Though, these files’ configuration files are not stored in /boot, rather they are stored in /etc, along with the many other various config files.
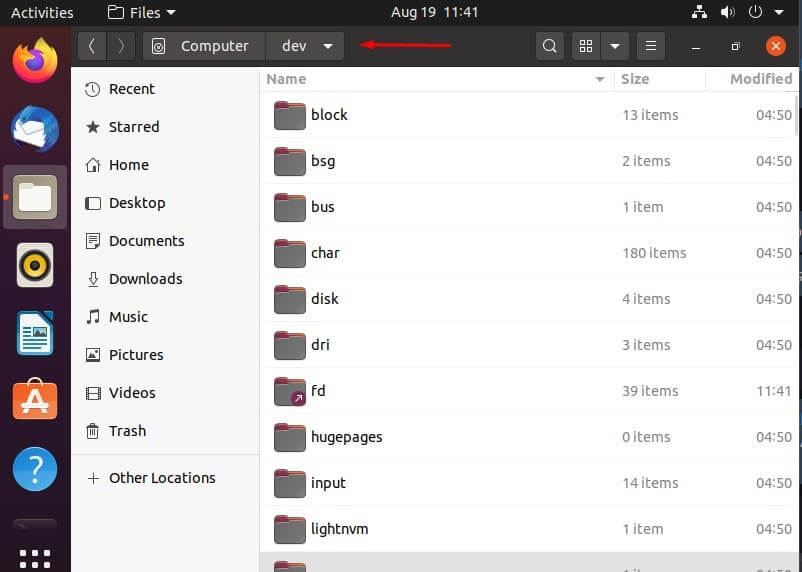
/dev – Devices or Files
Linux displays connected devices as files and the /dev directory contains these files. Though, the thing is, as you can see by the title, these are not “actual” files, they just appear as files. /dev is also where physical drives can be mounted.
/etc – Configuration files
As we discussed before, the configuration files of BIOS and other similar files can be found in /etc. You can edit these configuration files in a text editor as you see fit.
Basically, every single kind of configuration file is located in /etc, including but not limited to system configuration files.
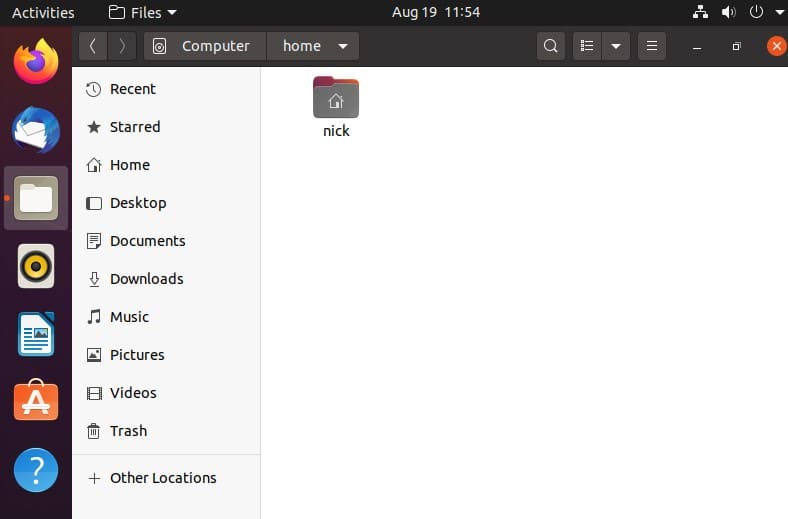
/home – Home Folder Containment
There’s a home folder for every user on your system and each one is contained together in the /home directory. These folders are created using the name of your user name.
For example, your user name is joe, so your home folder would be located in /home/joe.
These home folders contain your user data files and configuration files that are specific to the user, which is also the one of the only types of configuration files that are stored elsewhere besides /etc as we explained above.
If one wants to modify other files on a system, they must become the root user, as each user only has write permissions for their own home folder.
/lib – Libraries for Programs
Each program or binary uses specific libraries to function and the /lib directory is where these libraries can be located.
/media – Mounted Media
Contains subdirectories where your physical media devices are mounted. For example, a CD, if inserted into your system, you can access its contents through its directory that is created in the /media directory upon insertion.
/mnt – Temporary Mounts
This directory is used for mounting temporary file systems. If you are using a file system for a very specific purpose and for a relatively brief period of time, you would probably mount it in /mnt. Though you can mount it anywhere on the system if you so chose.
/opt – Optional Packages
The /opt directory contains a set of subdirectories where optional software packages are located and managed by the package manager.
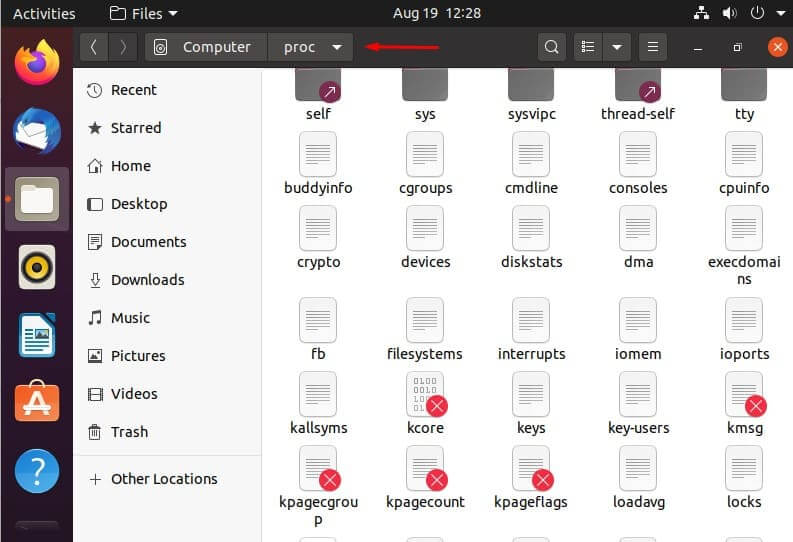
/proc – Kernel and Process Pseudo Files
The /proc directory is another interesting case of a directory that contains these “fake” files, very similarly to the /dev directory that we discussed earlier in this list. These files are special files that are actually, and interestingly, system and process information.
/root – Root User Directory
As we’ve discussed before, every user has his own home directory. This is the home directory of the root user. The root user’s home directory is located at /root.
Which is noteworthy because it is, unlike the rest of the users’ home directories, not located in /home. Like we’ve said above, in an earlier section of this article, /root is different from the root directory “/”, and this fact should be committed to memory if possible.
/sbin – System Administration Programs
The /sbin directory is similar to the /bin directory in that it contains essential programs. But it differs with the addition that it is intended to be used by the root user.
/tmp – Temporary Files
The /tmp directory is used to store temporary files that are deleted when the system is restarted. Utilities such as tmpwatch can be used to delete these temporary files in the /tmp directory.
/usr – User Shared Read-Only Data
The /usr directory is used to contain applications and files that are used and shared by and between users.
/var – Variable Data
The /var directory is used like the /usr directory, only instead of being read-only, it is writable. This directory contains system logs and other various variable data.
And with that, we conclude this topic. You should now have a pretty solid idea about what a Linux File System is and how to use it. Hope you learned something and thanks for reading!
Источник
Newest linux file system
SUSE Linux Enterprise Server ships with different file systems from which to choose, including Btrfs, Ext4, Ext3, Ext2, ReiserFS and XFS. Each file system has its own advantages and disadvantages. For a side-by-side feature comparison of the major file systems in SUSE Linux Enterprise Server , see https://www.suse.com/releasenotes/x86_64/SUSE-SLES/12-SP5/#TechInfo.Filesystems (File System Support and Sizes). This chapter contains an overview of how these file systems work and what advantages they offer.
With SUSE Linux Enterprise 12, Btrfs is the default file system for the operating system and XFS is the default for all other use cases. SUSE also continues to support the Ext family of file systems, ReiserFS and OCFS2. By default, the Btrfs file system will be set up with subvolumes. Snapshots will be automatically enabled for the root file system using the snapper infrastructure. For more information about snapper, refer to ChapterВ 7, System Recovery and Snapshot Management with Snapper.
Professional high-performance setups might require a highly available storage system. To meet the requirements of high-performance clustering scenarios, SUSE Linux Enterprise Server includes OCFS2 (Oracle Cluster File System 2) and the Distributed Replicated Block Device (DRBD) in the High Availability Extension add-on. These advanced storage systems are not covered in this guide. For information, see the SUSE Linux Enterprise High Availability Extension Administration Guide at http://www.suse.com/doc.
It is very important to remember that no file system best suits all kinds of applications. Each file system has its particular strengths and weaknesses, which must be taken into account. In addition, even the most sophisticated file system cannot replace a reasonable backup strategy.
The terms data integrity and data consistency , when used in this section, do not refer to the consistency of the user space data (the data your application writes to its files). Whether this data is consistent must be controlled by the application itself.
Unless stated otherwise in this section, all the steps required to set up or change partitions and file systems can be performed by using the YaST Partitioner (which is also strongly recommended). For information, see ChapterВ 12, Advanced Disk Setup.
1.1 Terminology #Edit source
A data structure that is internal to the file system. It ensures that all of the on-disk data is properly organized and accessible. Essentially, it is “ data about the data. ” Almost every file system has its own structure of metadata, which is one reason the file systems show different performance characteristics. It is extremely important to maintain metadata intact, because otherwise all data on the file system could become inaccessible.
A data structure on a file system that contains a variety of information about a file, including size, number of links, pointers to the disk blocks where the file contents are actually stored, and date and time of creation, modification, and access.
In the context of a file system, a journal is an on-disk structure containing a type of log in which the file system stores what it is about to change in the file system’s metadata. Journaling greatly reduces the recovery time of a file system because it has no need for the lengthy search process that checks the entire file system at system start-up. Instead, only the journal is replayed.
1.2 Btrfs #Edit source
Btrfs is a copy-on-write (COW) file system developed by Chris Mason. It is based on COW-friendly B-trees developed by Ohad Rodeh. Btrfs is a logging-style file system. Instead of journaling the block changes, it writes them in a new location, then links the change in. Until the last write, the new changes are not committed.
1.2.1 Key Features #Edit source
Btrfs provides fault tolerance, repair, and easy management features, such as the following:
Writable snapshots that allow you to easily roll back your system if needed after applying updates, or to back up files.
Subvolume support: Btrfs creates a default subvolume in its assigned pool of space. It allows you to create additional subvolumes that act as individual file systems within the same pool of space. The number of subvolumes is limited only by the space allocated to the pool.
The online check and repair functionality scrub is available as part of the Btrfs command line tools. It verifies the integrity of data and metadata, assuming the tree structure is fine. You can run scrub periodically on a mounted file system; it runs as a background process during normal operation.
Different RAID levels for metadata and user data.
Different checksums for metadata and user data to improve error detection.
Integration with Linux Logical Volume Manager (LVM) storage objects.
Integration with the YaST Partitioner and AutoYaST on SUSE Linux Enterprise Server . This also includes creating a Btrfs file system on Multiple Devices (MD) and Device Mapper (DM) storage configurations.
Offline migration from existing Ext2, Ext3, and Ext4 file systems.
Boot loader support for /boot , allowing to boot from a Btrfs partition.
Multivolume Btrfs is supported in RAID0, RAID1, and RAID10 profiles in SUSE Linux Enterprise Server 12 SP4 . Higher RAID levels are not supported yet, but might be enabled with a future service pack.
Use Btrfs commands to set up transparent compression.
1.2.2 The Root File System Setup on SUSE Linux Enterprise Server #Edit source
By default, SUSE Linux Enterprise Server is set up using Btrfs and snapshots for the root partition. Snapshots allow you to easily roll back your system if needed after applying updates, or to back up files. Snapshots can easily be managed with the SUSE Snapper infrastructure as explained in ChapterВ 7, System Recovery and Snapshot Management with Snapper. For general information about the SUSE Snapper project, see the Snapper Portal wiki at OpenSUSE.org (http://snapper.io).
When using a snapshot to roll back the system, it must be ensured that data such as user’s home directories, Web and FTP server contents or log files do not get lost or overwritten during a roll back. This is achieved by using Btrfs subvolumes on the root file system. Subvolumes can be excluded from snapshots. The default root file system setup on SUSE Linux Enterprise Server as proposed by YaST during the installation contains the following subvolumes. They are excluded from snapshots for the reasons given below.
A rollback of the boot loader configuration is not supported. The directories listed above are architecture-specific. The first two directories are present on AMD64/Intel 64 machines, the latter two on IBM POWER and on IBM zВ Systems, respectively.
If /home does not reside on a separate partition, it is excluded to avoid data loss on rollbacks.
Third-party products usually get installed to /opt . It is excluded to avoid uninstalling these applications on rollbacks.
Contains data for Web and FTP servers. It is excluded to avoid data loss on rollbacks.
/tmp , /var/tmp , /var/cache , /var/crash
All directories containing temporary files and caches are excluded from snapshots.
This directory is used when manually installing software. It is excluded to avoid uninstalling these installations on rollbacks.
The default location for virtual machine images managed with libvirt. Excluded to ensure virtual machine images are not replaced with older versions during a rollback. By default, this subvolume is created with the option no copy on write .
Directories containing mails or mail queues are excluded to avoid a loss of mails after a rollback.
Contains zone data for the DNS server. Excluded from snapshots to ensure a name server can operate after a rollback.
/var/lib/mariadb , /var/lib/mysql , /var/lib/pgqsl
These directories contain database data. By default, these subvolumes are created with the option no copy on write .
Log file location. Excluded from snapshots to allow log file analysis after the rollback of a broken system.
Warning: Support for Rollbacks
Rollbacks are only supported by the SUSE support if you do not remove any of the preconfigured subvolumes. You may, however, add additional subvolumes using the YaST Partitioner.
1.2.2.1 Mounting Compressed Btrfs File Systems #Edit source
Note: GRUBВ 2 and LZO Compressed Root
GRUBВ 2 cannot read an lzo compressed root. You need a separate /boot partition to use compression.
Since SLE12 SP1, compression for Btrfs file systems is supported. Use the compress or compress-force option and select the compression algorithm, lzo or zlib (the default). The zlib compression has a higher compression ratio while lzo is faster and takes less CPU load.
In case you create a file, write to it, and the compressed result is greater or equal to the uncompressed size, Btrfs will skip compression for future write operations forever for this file. If you do not like this behavior, use the compress-force option. This can be useful for files that have some initial non-compressable data.
Note, compression takes effect for new files only. Files that were written without compression are not compressed when the file system is mounted with the compress or compress-force option. Furthermore, files with the nodatacow attribute never get their extents compressed:
In regard to encryption, this is independent from any compression. After you have written some data to this partition, print the details:
If you want this to be permanent, add the compress or compress-force option into the /etc/fstab configuration file. For example:
1.2.2.2 Mounting Subvolumes #Edit source
A system rollback from a snapshot on SUSE Linux Enterprise Server is performed by booting from the snapshot first. This allows you to check the snapshot while running before doing the rollback. Being able to boot from snapshots is achieved by mounting the subvolumes (which would normally not be necessary).
In addition to the subvolumes listed in Section 1.2.2, “The Root File System Setup on SUSE Linux Enterprise Server ” a volume named @ exists. This is the default subvolume that will be mounted as the root partition ( / ). The other subvolumes will be mounted into this volume.
When booting from a snapshot, not the @ subvolume will be used, but rather the snapshot. The parts of the file system included in the snapshot will be mounted read-only as / . The other subvolumes will be mounted writable into the snapshot. This state is temporary by default: the previous configuration will be restored with the next reboot. To make it permanent, execute the snapper rollback command. This will make the snapshot that is currently booted the new default subvolume, which will be used after a reboot.
1.2.2.3 Checking for Free Space #Edit source
File system usage is usually checked by running the df command. On a Btrfs file system, the output of df can be misleading, because in addition to the space the raw data allocates, a Btrfs file system also allocates and uses space for metadata.
Consequently a Btrfs file system may report being out of space even though it seems that plenty of space is still available. In that case, all space allocated for the metadata is used up. Use the following commands to check for used and available space on a Btrfs file system:
Shows the total size of the file system and its usage. If these two values in the last line match, all space on the file system has been allocated.
btrfs filesystem df
Shows values for allocated ( total ) and used space of the file system. If the values for total and used for the metadata are almost equal, all space for metadata has been allocated.
btrfs filesystem usage
Shows data similar to that of the two previous commands combined.
For more information refer to man 8 btrfs-filesystem and https://btrfs.wiki.kernel.org/index.php/FAQ.
1.2.3 Migration from Ext and ReiserFS File Systems to Btrfs #Edit source
You can migrate data volumes from existing Ext (Ext2, Ext3, or Ext4) or ReiserFS to the Btrfs file system. The conversion process occurs offline and in place on the device. The file system needs at least 15% of available free space on the device.
To convert the file system to Btrfs, take the file system offline, then enter:
To roll back the migration to the original file system, take the file system offline, then enter:
Warning: Root File System Conversion not Supported
Converting the root file system to Btrfs is not supported. Either keep the existing file system or re-install the whole system from scratch.
Important: Possible Loss of Data
When rolling back to the original file system, all data will be lost that you added after the conversion to Btrfs. That is, only the original data is converted back to the previous file system.
1.2.4 Btrfs Administration #Edit source
Btrfs is integrated in the YaST Partitioner and AutoYaST. It is available during the installation to allow you to set up a solution for the root file system. You can use the YaST Partitioner after the installation to view and manage Btrfs volumes.
Btrfs administration tools are provided in the btrfsprogs package. For information about using Btrfs commands, see the man 8 btrfs , man 8 btrfsck , and man 8 mkfs.btrfs commands. For information about Btrfs features, see the Btrfs wiki at http://btrfs.wiki.kernel.org.
1.2.5 Btrfs Quota Support for Subvolumes #Edit source
The Btrfs root file system subvolumes /var/log , /var/crash and /var/cache can use all of the available disk space during normal operation, and cause a system malfunction. To help avoid this situation, SUSE Linux Enterprise Server now offers Btrfs quota support for subvolumes. If you set up the root file system by using the respective YaST proposal, it is prepared accordingly: quota groups ( qgroup ) for all subvolumes are already set up. To set a quota for a subvolume in the root file system, proceed as follows:
Note: Btrfs Quota Groups Can Incur Degraded Performance
On SUSE Linux Enterprise Server 12 SP4 , using Btrfs quota groups can degrade file system performance.
Enable quota support:
Get a list of subvolumes:
Quotas can only be set for existing subvolumes.
Set a quota for one of the subvolumes that was listed in the previous step. A subvolume can either be identified by path (for example /var/tmp ) or by 0/ SUBVOLUME ID (for example 0/272 ). The following example sets a quota of five GB for /var/tmp .
The size can either be specified in bytes (5000000000), kilobytes (5000000K), megabytes (5000M), or gigabytes (5G). The resulting values in bytes slightly differ, since 1024 Bytes = 1 KiB, 1024 KiB = 1 MiB, etc.
To list the existing quotas, use the following command. The column max_rfer shows the quota in bytes.
Tip: Nullifying a Quota
In case you want to nullify an existing quota, set a quota size of none :
To disable quota support for a partition and all its subvolumes, use btrfs quota disable :
See the man 8 btrfs-qgroup and man 8 btrfs-quota for more details. The UseCases page on the Btrfs wiki (https://btrfs.wiki.kernel.org/index.php/UseCases) also provides more information.
1.2.6 Btrfs send/receive #Edit source
Btrfs allows to make snapshots to capture the state of the file system. Snapper, for example, uses this feature to create snapshots before and after system changes, allowing a rollback. However, together with the send/receive feature, snapshots can also be used to create and maintain copies of a file system in a remote location. This feature can, for example, be used to do incremental backups.
A btrfs send operation calculates the difference between two read-only snapshots from the same subvolume and sends it to a file or to STDOUT. A Btrfs receive operation takes the result of the send command and applies it to a snapshot.
1.2.6.1 Prerequisites #Edit source
To use Btrfs’s send/receive feature, the following requirements need to be met:
A Btrfs file system is required on the source side ( send ) and on the target side ( receive ).
Btrfs send/receive operates on snapshots, therefore the respective data needs to reside in a Btrfs subvolume.
Snapshots on the source side need to be read-only.
SUSE Linux Enterprise 12 SP2 or better. Earlier versions of SUSE Linux Enterprise do not support send/receive.
1.2.6.2 Incremental Backups #Edit source
The following procedure shows the basic usage of Btrfs send/receive using the example of creating incremental backups of /data (source side) in /backup/data (target side). /data needs to be a subvolume.
ProcedureВ 1.1: Initial Setup #
Create the initial snapshot (called snapshot_0 in this example) on the source side and make sure it is written to the disk:
A new subvolume /data/bkp_data is created. It will be used as the basis for the next incremental backup and should be kept as a reference.
Send the initial snapshot to the target side. Since this is the initial send/receive operation, the complete snapshot needs to be sent:
A new subvolume /backup/bkp_data is created on the target side.
When the initial setup has been finished, you can create incremental backups and send the differences between the current and previous snapshots to the target side. The procedure is always the same:
Create a new snapshot on the source side.
Send the differences to the target side.
Optional: Rename and/or clean up snapshots on both sides.
ProcedureВ 1.2: Performing an Incremental Backup #
Create a new snapshot on the source side and make sure it is written to the disk. In the following example the snapshot is named bkp_data_ CURRENT_DATE:
A new subvolume, for example /data/bkp_data_2016-07-07 , is created.
Send the difference between the previous snapshot and the one you have created to the target side. This is achieved by specifying the previous snapshot with the option -p SNAPSHOT .
A new subvolume /backup/bkp_data_2016-07-07 is created.
As a result four snapshots, two on each side, exist:
| /data/bkp_data |
| /data/bkp_data_2016-07-07 |
| /backup/bkp_data |
| /backup/bkp_data_2016-07-07 |
Now you have three options for how to proceed:
Keep all snapshots on both sides. With this option you can roll back to any snapshot on both sides while having all data duplicated at the same time. No further action is required. When doing the next incremental backup, keep in mind to use the next-to-last snapshot as parent for the send operation.
Only keep the last snapshot on the source side and all snapshots on the target side. Also allows to roll back to any snapshot on both sides—to do a rollback to a specific snapshot on the source side, perform a send/receive operation of a complete snapshot from the target side to the source side. Do a delete/move operation on the source side.
Only keep the last snapshot on both sides. This way you have a backup on the target side that represents the state of the last snapshot made on the source side. It is not possible to roll back to other snapshots. Do a delete/move operation on the source and the target side.
To only keep the last snapshot on the source side, perform the following commands:
The first command will delete the previous snapshot, the second command renames the current snapshot to /data/bkp_data . This ensures that the last snapshot that was backed up is always named /data/bkp_data . As a consequence, you can also always use this subvolume name as a parent for the incremental send operation.
To only keep the last snapshot on the target side, perform the following commands:
The first command will delete the previous backup snapshot, the second command renames the current backup snapshot to /backup/bkp_data . This ensures that the latest backup snapshot is always named /backup/bkp_data .
Tip: Sending to a Remote Target Side
To send the snapshots to a remote machine, use SSH:
1.2.7 Data Deduplication Support #Edit source
Btrfs supports data deduplication by replacing identical blocks in the file system with logical links to a single copy of the block in a common storage location. SUSE Linux Enterprise Server provides the tool duperemove for scanning the file system for identical blocks. When used on a Btrfs file system, it can also be used to deduplicate these blocks. duperemove is not installed by default. To make it available, install the package duperemove .
Note: Use Cases
As of SUSE Linux Enterprise Server 12 SP4 duperemove is not suited to deduplicate the entire file system. It is intended to be used to deduplicate a set of 10 to 50 large files that possibly have lots of blocks in common, such as virtual machine images.
duperemove can either operate on a list of files or recursively scan a directory:
It operates in two modes: read-only and de-duping. When run in read-only mode (that is without the -d switch), it scans the given files or directories for duplicated blocks and prints them. This works on any file system.
Running duperemove in de-duping mode is only supported on Btrfs file systems. After having scanned the given files or directories, the duplicated blocks will be submitted for deduplication.
For more information see man 8 duperemove .
1.2.8 Deleting Subvolumes from the Root File System #Edit source
You may need to delete one of the default Btrfs subvolumes from the root file system for specific purposes. One of them is transforming a subvolume—for example @/home or @/srv —into a file system on a separate device. The following procedure illustrates how to delete a Btrfs subvolume:
Identify the subvolume you need to delete (for example @/opt ). Notice that the root path has always subvolume ID ‘5’.
Find the device name that hosts the root partition:
Mount the root file system (subvolume with ID 5) on a separate mount point (for example /mnt ):
Delete the @/opt partition from the mounted root file system:
Unmount the previously mounted root file system:
1.3 XFS #Edit source
Originally intended as the file system for their IRIX OS, SGI started XFS development in the early 1990s. The idea behind XFS was to create a high-performance 64-bit journaling file system to meet extreme computing challenges. XFS is very good at manipulating large files and performs well on high-end hardware. XFS is the default file system for data partitions in SUSE Linux Enterprise Server .
A quick review of XFS’s key features explains why it might prove to be a strong competitor for other journaling file systems in high-end computing.
1.3.1 High Scalability by Using Allocation Groups #Edit source
At the creation time of an XFS file system, the block device underlying the file system is divided into eight or more linear regions of equal size. Those are called allocation groups . Each allocation group manages its own inodes and free disk space. Practically, allocation groups can be seen as file systems in a file system. Because allocation groups are rather independent of each other, more than one of them can be addressed by the kernel simultaneously. This feature is the key to XFS’s great scalability. Naturally, the concept of independent allocation groups suits the needs of multiprocessor systems.
1.3.2 High Performance through Efficient Management of Disk Space #Edit source
Free space and inodes are handled by B + trees inside the allocation groups. The use of B + trees greatly contributes to XFS’s performance and scalability. XFS uses delayed allocation , which handles allocation by breaking the process into two pieces. A pending transaction is stored in RAM and the appropriate amount of space is reserved. XFS still does not decide where exactly (in file system blocks) the data should be stored. This decision is delayed until the last possible moment. Some short-lived temporary data might never make its way to disk, because it is obsolete by the time XFS decides where actually to save it. In this way, XFS increases write performance and reduces file system fragmentation. Because delayed allocation results in less frequent write events than in other file systems, it is likely that data loss after a crash during a write is more severe.
1.3.3 Preallocation to Avoid File System Fragmentation #Edit source
Before writing the data to the file system, XFS reserves (preallocates) the free space needed for a file. Thus, file system fragmentation is greatly reduced. Performance is increased because the contents of a file are not distributed all over the file system.
Note: The new XFS On-disk Format
Starting with version 12, SUSE Linux Enterprise Server supports the new “ on-disk format ” (v5) of the XFS file system. XFS file systems created by YaST will use this new format. The main advantages of this format are automatic checksums of all XFS metadata, file type support, and support for a larger number of access control lists for a file.
Note that this format is not supported by SUSE Linux Enterprise kernels older than version 3.12, by xfsprogs older than version 3.2.0, and GRUBВ 2 versions released before SUSE Linux Enterprise 12. This will be problematic if the file system should also be used from systems not meeting these prerequisites.
If you require interoperability of the XFS file system with older SUSE systems or other Linux distributions, format the file system manually using the mkfs.xfs command. This will create an XFS file system in the old format (unless you use the -m crc=1 option).
1.4 Ext2 #Edit source
The origins of Ext2 go back to the early days of Linux history. Its predecessor, the Extended File System, was implemented in April 1992 and integrated in Linux 0.96c. The Extended File System underwent several modifications and, as Ext2, became the most popular Linux file system for years. With the creation of journaling file systems and their short recovery times, Ext2 became less important.
A brief summary of Ext2’s strengths might help understand why it was—and in some areas still is—the favorite Linux file system of many Linux users.
Being an “ old-timer ” , Ext2 underwent many improvements and was heavily tested. This might be the reason people often refer to it as rock-solid. After a system outage when the file system could not be cleanly unmounted, e2fsck starts to analyze the file system data. Metadata is brought into a consistent state and pending files or data blocks are written to a designated directory (called lost+found ). In contrast to journaling file systems, e2fsck analyzes the entire file system and not only the recently modified bits of metadata. This takes significantly longer than checking the log data of a journaling file system. Depending on file system size, this procedure can take half an hour or more. Therefore, it is not desirable to choose Ext2 for any server that needs high availability. However, because Ext2 does not maintain a journal and uses less memory, it is sometimes faster than other file systems.
Because Ext3 is based on the Ext2 code and shares its on-disk format and its metadata format, upgrades from Ext2 to Ext3 are very easy.
1.5 Ext3 #Edit source
Ext3 was designed by Stephen Tweedie. Unlike all other next-generation file systems, Ext3 does not follow a completely new design principle. It is based on Ext2. These two file systems are very closely related to each other. An Ext3 file system can be easily built on top of an Ext2 file system. The most important difference between Ext2 and Ext3 is that Ext3 supports journaling. In summary, Ext3 has three major advantages to offer:
1.5.1 Easy and Highly Reliable Upgrades from Ext2 #Edit source
The code for Ext2 is the strong foundation on which Ext3 could become a highly acclaimed next-generation file system. Its reliability and solidity are elegantly combined in Ext3 with the advantages of a journaling file system. Unlike transitions to other journaling file systems, such as ReiserFS or XFS, which can be quite tedious (making backups of the entire file system and re-creating it from scratch), a transition to Ext3 is a matter of minutes. It is also very safe, because re-creating an entire file system from scratch might not work flawlessly. Considering the number of existing Ext2 systems that await an upgrade to a journaling file system, you can easily see why Ext3 might be of some importance to many system administrators. Downgrading from Ext3 to Ext2 is as easy as the upgrade. Perform a clean unmount of the Ext3 file system and remount it as an Ext2 file system.
1.5.2 Reliability and Performance #Edit source
Some other journaling file systems follow the “ metadata-only ” journaling approach. This means your metadata is always kept in a consistent state, but this cannot be automatically guaranteed for the file system data itself. Ext3 is designed to take care of both metadata and data. The degree of “ care ” can be customized. Enabling Ext3 in the data=journal mode offers maximum security (data integrity), but can slow down the system because both metadata and data are journaled. A relatively new approach is to use the data=ordered mode, which ensures both data and metadata integrity, but uses journaling only for metadata. The file system driver collects all data blocks that correspond to one metadata update. These data blocks are written to disk before the metadata is updated. As a result, consistency is achieved for metadata and data without sacrificing performance. A third option to use is data=writeback , which allows data to be written to the main file system after its metadata has been committed to the journal. This option is often considered the best in performance. It can, however, allow old data to reappear in files after crash and recovery while internal file system integrity is maintained. Ext3 uses the data=ordered option as the default.
1.5.3 Converting an Ext2 File System into Ext3 #Edit source
To convert an Ext2 file system to Ext3:
Create an Ext3 journal by running tune2fs -j as the root user.
This creates an Ext3 journal with the default parameters.
To specify how large the journal should be and on which device it should reside, run tune2fs -J instead together with the desired journal options size= and device= . More information about the tune2fs program is available in the tune2fs man page.
Edit the file /etc/fstab as the root user to change the file system type specified for the corresponding partition from ext2 to ext3 , then save the changes.
This ensures that the Ext3 file system is recognized as such. The change takes effect after the next reboot.
To boot a root file system that is set up as an Ext3 partition, add the modules ext3 and jbd in the initrd . Do so by
opening or creating /etc/dracut.conf.d/10-filesystem.conf and adding the following line (mind the leading whitespace):
and running the dracut -f command.
Reboot the system.
1.5.4 Ext3 File System Inode Size and Number of Inodes #Edit source
An inode stores information about the file and its block location in the file system. To allow space in the inode for extended attributes and ACLs, the default inode size for Ext3 was increased from 128 bytes on SLES 10 to 256 bytes on SLES 11. As compared to SLES 10, when you make a new Ext3 file system on SLES 11, the default amount of space preallocated for the same number of inodes is doubled, and the usable space for files in the file system is reduced by that amount. Thus, you must use larger partitions to accommodate the same number of inodes and files than were possible for an Ext3 file system on SLES 10.
When you create a new Ext3 file system, the space in the inode table is preallocated for the total number of inodes that can be created. The bytes-per-inode ratio and the size of the file system determine how many inodes are possible. When the file system is made, an inode is created for every bytes-per-inode bytes of space:
The number of inodes controls the number of files you can have in the file system: one inode for each file. To address the increased inode size and reduced usable space available, the default for the bytes-per-inode ratio was increased from 8192 bytes on SLES 10 to 16384 bytes on SLES 11. The doubled ratio means that the number of files that can be created is one-half of the number of files possible for an Ext3 file system on SLES 10.
Important: Changing the Inode Size of an Existing Ext3 File System
After the inodes are allocated, you cannot change the settings for the inode size or bytes-per-inode ratio. No new inodes are possible without re-creating the file system with different settings, or unless the file system gets extended. When you exceed the maximum number of inodes, no new files can be created on the file system until some files are deleted.
When you make a new Ext3 file system, you can specify the inode size and bytes-per-inode ratio to control inode space usage and the number of files possible on the file system. If the blocks size, inode size, and bytes-per-inode ratio values are not specified, the default values in the /etc/mked2fs.conf file are applied. For information, see the mke2fs.conf(5) man page.
Use the following guidelines:
Inode size:В The default inode size is 256 bytes. Specify a value in bytes that is a power of 2 and equal to 128 or larger in bytes and up to the block size, such as 128, 256, 512, and so on. Use 128 bytes only if you do not use extended attributes or ACLs on your Ext3 file systems.
Bytes-per-inode ratio:В The default bytes-per-inode ratio is 16384 bytes. Valid bytes-per-inode ratio values must be a power of 2 equal to 1024 or greater in bytes, such as 1024, 2048, 4096, 8192, 16384, 32768, and so on. This value should not be smaller than the block size of the file system, because the block size is the smallest chunk of space used to store data. The default block size for the Ext3 file system is 4 KB.
In addition, you should consider the number of files and the size of files you need to store. For example, if your file system will have many small files, you can specify a smaller bytes-per-inode ratio, which increases the number of inodes. If your file system will have very large files, you can specify a larger bytes-per-inode ratio, which reduces the number of possible inodes.
Generally, it is better to have too many inodes than to run out of them. If you have too few inodes and very small files, you could reach the maximum number of files on a disk that is practically empty. If you have too many inodes and very large files, you might have free space reported but be unable to use it because you cannot create new files in space reserved for inodes.
If you do not use extended attributes or ACLs on your Ext3 file systems, you can restore the SLES 10 behavior specifying 128 bytes as the inode size and 8192 bytes as the bytes-per-inode ratio when you make the file system. Use any of the following methods to set the inode size and bytes-per-inode ratio:
Modifying the default settings for all new Ext3 files:В In a text editor, modify the defaults section of the /etc/mke2fs.conf file to set the inode_size and inode_ratio to the desired default values. The values apply to all new Ext3 file systems. For example:
At the command line:В Pass the inode size ( -I 128 ) and the bytes-per-inode ratio ( -i 8192 ) to the mkfs.ext3(8) command or the mke2fs(8) command when you create a new Ext3 file system. For example, use either of the following commands:
During installation with YaST:В Pass the inode size and bytes-per-inode ratio values when you create a new Ext3 file system during the installation. In the YaST Partitioner on the Edit Partition page under Formatting Options , select Format partition Ext3 , then click Options . In the File system options dialog, select the desired values from the Block Size in Bytes , Bytes-per-inode , and Inode Size drop-down box.
For example, select 4096 for the Block Size in Bytes drop-down box, select 8192 from the Bytes per inode drop-down box, select 128 from the Inode Size drop-down box, then click OK .

During installation with AutoYaST:В In an AutoYaST profile, you can use the fs_options tag to set the opt_bytes_per_inode ratio value of 8192 for -i and the opt_inode_density value of 128 for -I:
For information, see https://www.suse.com/support/kb/doc.php?id=7009075 ( SLES11 ext3 partitions can only store 50% of the files that can be stored on SLES10 [Technical Information Document 7009075]).
1.6 Ext4 #Edit source
In 2006, Ext4 started as a fork from Ext3. It eliminates some storage limitations of Ext3 by supporting volumes with a size of up to 1 exbibyte, files with a size of up to 16 tebibytes and an unlimited number of subdirectories. It also introduces several performance enhancements such as delayed block allocation and a much faster file system checking routine. Ext4 is also more reliable by supporting journal checksums and by providing time stamps measured in nanoseconds. Ext4 is fully backward compatible to Ext2 and Ext3—both file systems can be mounted as Ext4.
1.7 ReiserFS #Edit source
Officially one of the key features of the 2.4 kernel release, ReiserFS has been available as a kernel patch for 2.2.x SUSE kernels since version 6.4. ReiserFS was designed by Hans Reiser and the Namesys development team. It has proven itself to be a powerful alternative to Ext2. Its key assets are better disk space usage, better disk access performance, faster crash recovery, and reliability through data journaling.
Important: Support of ReiserFS in SUSE Linux Enterprise Server 12
Existing ReiserFS partitions are supported for the lifetime of SUSE Linux Enterprise Server 12 specifically for migration purposes. Support for creating new ReiserFS file systems has been removed starting with SUSE Linux Enterprise Server 12.
1.8 Other Supported File Systems #Edit source
Table 1.1, “File System Types in Linux” summarizes some other file systems supported by Linux. They are supported mainly to ensure compatibility and interchange of data with different kinds of media or foreign operating systems.
TableВ 1.1: File System Types in Linux #
File System Type
Compressed ROM file system: A compressed read-only file system for ROMs.
High Performance File System: The IBM OS/2 standard file system. Only supported in read-only mode.
Standard file system on CD-ROMs.
This file system originated from academic projects on operating systems and was the first file system used in Linux. Today, it is used as a file system for floppy disks.
fat , the file system originally used by DOS, is today used by various operating systems.
Network File System: Here, data can be stored on any machine in a network and access might be granted via a network.
WindowsВ NT file system; read-only.
Server Message Block is used by products such as Windows to enable file access over a network.
Used on SCO Unix, Xenix, and Coherent (commercial Unix systems for PCs).
Used by BSD, SunOS, and NextStep. Only supported in read-only mode.
Unix on MS-DOS: Applied on top of a standard fat file system, achieves Unix functionality (permissions, links, long file names) by creating special files.
Virtual FAT: Extension of the fat file system (supports long file names).
1.9 Large File Support in Linux #Edit source
Originally, Linux supported a maximum file size of 2В GiB (2 31 bytes). Unless a file system comes with large file support, the maximum file size on a 32-bit system is 2 GiB.
Currently, all of our standard file systems have LFS (large file support), which gives a maximum file size of 2 63 bytes in theory. TableВ 1.2, “Maximum Sizes of Files and File Systems (On-Disk Format, 4 KiB Block Size)” offers an overview of the current on-disk format limitations of Linux files and file systems. The numbers in the table assume that the file systems are using 4 KiB block size, which is a common standard. When using different block sizes, the results are different. The maximum file sizes in TableВ 1.2, “Maximum Sizes of Files and File Systems (On-Disk Format, 4 KiB Block Size)” can be larger than the file system’s actual size when using sparse blocks.
Note: Binary Multiples
In this document: 1024 Bytes = 1 KiB; 1024 KiB = 1 MiB; 1024 MiB = 1 GiB; 1024 GiB = 1 TiB; 1024 TiB = 1 PiB; 1024 PiB = 1 EiB (see also NIST: Prefixes for Binary Multiples.
Источник


