- Пропал Wi-Fi на ноутбуке в Windows. Нет Wi-Fi адаптера в диспетчере устройств
- Исчез Wi-Fi адаптер с диспетчера устройств
- Как решить проблему и вернуть Wi-Fi адаптер?
- Fix: No Wifi Option in Settings on Windows 10
- What causes the Wifi Option to disappear in Windows Settings on Windows 10?
- Solution 1: Check the Wifi Card
- Solution 2: Turning On the Required Service
- Solution 3: Update Wifi Driver
- Solution 4: Reinstall Wifi Driver
- Solution 5: Tweak Power Management
- FIX: WiFi won’t Turn On, Wireless Networks Not Available (Windows 10, 8)
- How to fix the «No Wi-Fi Networks» issue on Windows 10, 8.1 & 8.
Пропал Wi-Fi на ноутбуке в Windows. Нет Wi-Fi адаптера в диспетчере устройств
Не редко мне задают вопросы по проблеме, когда на ноутбуке, или компьютере пропадает Wi-Fi. Не просто отключается от сети, а полностью пропадает Wi-Fi адаптер и само подключение. В Windows исчезает все, что связано с Wi-Fi. Нет беспроводного адаптера в сетевых подключениях. Нет кнопки «Wi-Fi», значка на панели уведомлений и раздела в параметрах (если мы говорим о Windows 10) . В диспетчере устройств так же нет WLAN (Wireless) адаптера, который отвечает за подключение к беспроводным сетям. Ну и соответственно компьютер не видит Wi-Fi сети, и нет возможности к ним подключится.
В большинстве случаев, проблема появляется внезапно. Все работало, выключили ноутбук, включили и Wi-Fi на ноутбуке нет вообще. В отдельных случаях такая неприятность может появится после обновления Windows, или драйверов. А может после установки какой-то программы, или смены настроек. По своему опыту могу сказать, что не редко Wi-Fi исчезает после чистки ноутбука от пыли, или ремонта.
- Бывает, что ноутбук просто не видит какую-то конкретную сеть, или все сети. При этом адаптер есть в диспетчере устройств, есть настройки связанные с беспроводной сетью и т. д. Это немного другая проблема, о которой я писал в статье почему ноутбук не видит Wi-Fi сеть роутера и Windows 10 не видит Wi-Fi.
- Так же может быть, что сам роутер перестает раздавать Wi-Fi. В таком случае, сеть недоступна на всех устройствах.
Чтобы найти решение, нужно сначала разобраться в причине. Почему случилось так, что ноутбук внезапно перестал видеть Wi-Fi сети и нет вообще никаких настроек связанных с этим.
К сожалению, как я заметил, эта проблема чаще всего связана с поломкой самого Wi-Fi модуля. Если рекомендации описанные ниже в статье вам не помогут, то почитайте статью: Wi-Fi адаптер для ноутбука. Чем заменить встроенный Wi-Fi модуль.
- Нужно подумать и вспомнить, что делали перед появлением проблемы. Возможно, решение придет само.
- Перезагрузите ноутбук. Если у вас Windows 10, то нужно выполнить перезагрузку. А не Выкл./Вкл.
- Если у вас ПК с внешним Wi-Fi адаптером, то проверьте, подключен ли он. Попробуйте подключить в другой USB-порт. Обратите внимание, мигает ли индикатор на адаптере.
- Если Wi-Fi пропал после чистки, или ремонта ноутбука, то скорее всего просто не подключили (плохо подключили, повредили) сам Wi-Fi модуль в ноутбуке. Если вы сами это делали, то разберите ноутбук и проверьте подключение Wi-Fi модуля и антенны.
Исчез Wi-Fi адаптер с диспетчера устройств
Если сетевой кабель не подключен, то иконка на панели уведомлений будет такой:

Если зайти в управление адаптерами, то там скорее всего будет только Ethernet (или «Подключение по локальной сети» в Windows 7) . Ну может быть еще Блютуз. А нам нужен адаптер «Беспроводная сеть», или «Беспроводное сетевое соединение».

В диспетчере устройств открываем вкладку «Сетевые адаптеры». Скорее всего, вы там не обнаружите адаптера в названии которого есть «Wireless», «WLAN», «Wi-Fi». А нам нужен именно он.

Посмотрите, нет ли в диспетчере устройств неизвестного устройства. Или устройства с желтым восклицательным знаком. Если есть, то вполне возможно, что это наш беспроводной адаптер, у которого просто проблемы с драйверами.
Особенно обратите внимание на раздел «Другие устройства». Есть ли там что-то типа «Сетевой контроллер».

Если он есть, то нужно просто установить драйвер.
Как решить проблему и вернуть Wi-Fi адаптер?
К сожалению, как я уже писал выше в статье, в большинстве случаев это аппаратная проблема. То есть, поломка самого модуля. И программно (какими то настройками) ее не решить. Нужно менять сам модуль, или подключать внешний адаптер по USB. Если это ноутбук.
Все решения сводятся к повторной установке драйвера на Wi-Fi. Возможно, если сам адаптер исправен, это поможет. Ну можно еще Windows переустановить. Может в системе что-то, но это очень вряд ли.
И так, вернемся к драйверу. Вам достаточно зайти на сайт производителя ноутбука, через поиск найти свою модель и скачать драйвер для WLAN (Wi-Fi) . Затем запустить его установку. Если в начале установки драйвера появится ошибка, что устройство в системе не обнаружено, или что-то в этом роде, то я практически уверен, что это аппаратная поломка.
Подробные инструкции по установке драйверов:
Если вы все перепробовали, и в диспетчере устройств нет вообще никаких адаптеров связанных с беспроводными сетями, в том числе неизвестных устройств, то придется нести ноутбук в ремонт, или подключать USB Wi-Fi адаптер. Есть небольшие, которые отлично подходят для ноутбуков.
Fix: No Wifi Option in Settings on Windows 10
Some users have reported that out of the blue there is no Wifi tab in the Network and Internet category of Windows Settings. The issue is often due to the required services not running or your outdated Wifi drivers. Most of us use a Wifi card on our system instead of wired connections because we prefer it that way. There is not much change in the speed of the internet connection, however, just to save us from the troubles of a wired connection, we opt for a Wifi card.
The said issue can, in some cases, be due to your operating system. In such a case, the Windows is either not detecting the Wifi card or something is preventing it from doing so. Nonetheless the issue can easily be dealt with by applying a few specific solutions.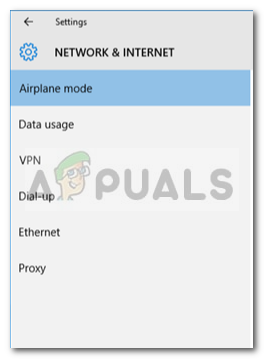
What causes the Wifi Option to disappear in Windows Settings on Windows 10?
Well, the reason you do not receive a Wifi tab in Windows settings is probably that your Windows is not detecting it. The issue is often caused by the following factors —
- Required services. The Wifi on your system requires certain services to be running in order for it to operate properly. If the required services are stopped, it can cause the issue.
- Wifi drivers. The Wifi drivers on your system are responsible for establishing a connection between the wireless card and the system. Corrupted or obsolete drivers can cause the issue to occur.
Now, in order to solve your problem, follow through the given solutions. However, some solutions might not be applicable to certain cases so make sure you go through them all.
Solution 1: Check the Wifi Card
If your motherboard comes without a built-in wireless card and you have bought a Wifi card for the system separately, this solution is for you. Before you get into the other solutions, please make sure that you have connected the wifi card correctly as in the case of incorrect connectivity, the card won’t be detected by Windows and you will get the said problem.
If you are using a laptop or your motherboard comes with built-in wifi, jump to the next solution.
Solution 2: Turning On the Required Service
Some users have reported that their issue was due to the required Wifi services not running. Therefore, make sure to check the required services before proceeding. Here’s how to do it:
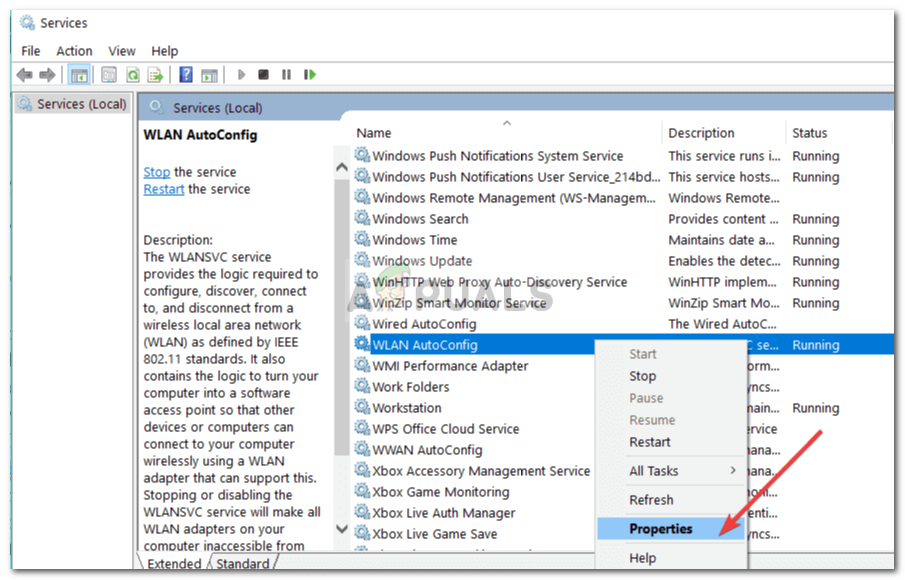
- Go to Start Menu, type in Services and open it up.
- In the Services window, locate the WLAN Autoconfig service.
- Right-click on it and select Properties.
 WLAN Autoconfig – Windows Services
 - Change the Startup type to ‘Automatic’ and click Start to run the service. Starting WLAN Autoconfig Service
- Click Apply and then hit OK.
- Check if this fixes the issue.
 WLAN Autoconfig – Windows Services
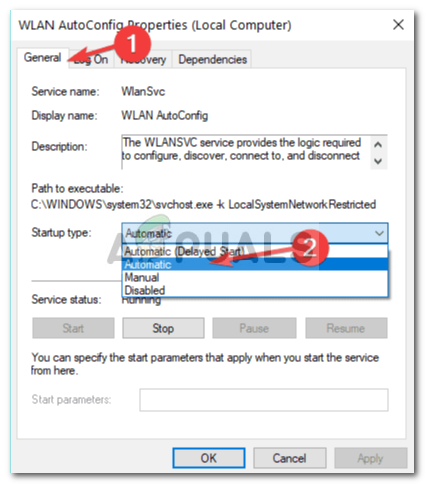 Starting WLAN Autoconfig Service
Solution 3: Update Wifi Driver
In some cases, you are unable to see the Wifi option in Windows Settings because your Wifi drivers are obsolete. In such a scenario, you should try updating the driver automatically. Here’s how to do it:
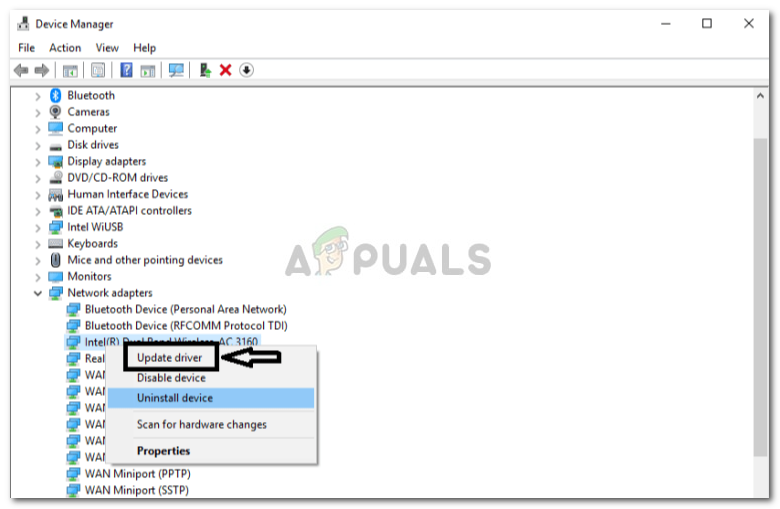
- Open Start Menu, type Device Manager and open it up.
- Expand the Network adapters list.
- Locate your Wireless card, right-click it and select ‘Update driver’. Updating Wireless Driver
- Click ‘Browse my computer for driver software’.
- Select ‘Let me pick from a list of available drivers on my computer’.
- Hit Next.
- Wait for it to complete and then check if your issue is solved.
 Updating Wireless Driver
Solution 4: Reinstall Wifi Driver
There are scenarios where your Wifi driver is corrupted in which case merely updating your driver won’t fix the issue. In such an event, you will have to reinstall your Wifi driver by downloading the driver from your manufacturer’s website. Here’s how:
- Open up the Device Manager.
- Expand the Network adapters list and locate your wireless driver.
- Double-click it to open up Properties.
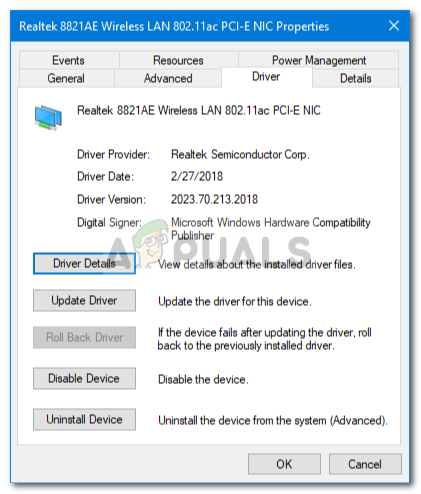
- Switch to the Driver tab and note down your driver details. Wireless Driver Details
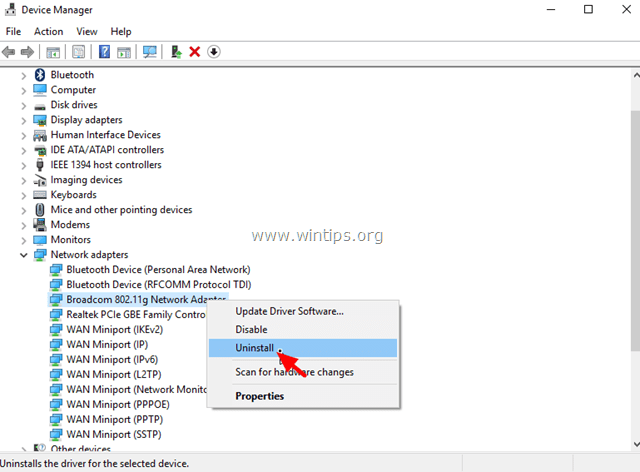
- Close the Properties window, right-click on your wireless card and click Uninstall. Uninstalling Wireless Driver
 Wireless Driver Details
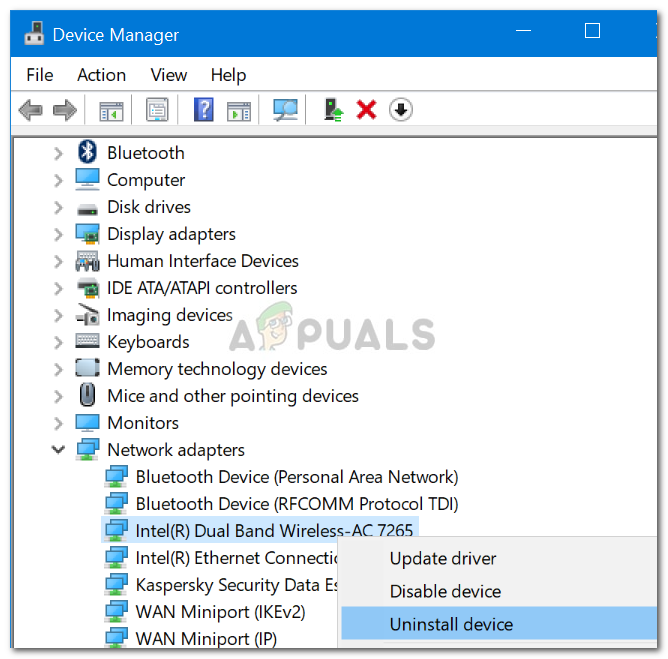 Uninstalling Wireless Driver
After you have uninstalled your wireless card driver, head to your manufacturer’s website and download the latest drivers for your Wifi card. Install the drivers and then restart your system.
Solution 5: Tweak Power Management
If the Wifi option in Windows Settings disappears out of the blue, this can be due to your card driver’s power settings. Therefore, to get the Wifi option back, you will have to edit the Power Management settings. Here’s how:
- Open up Device Manager and expand the Network Adapters list.
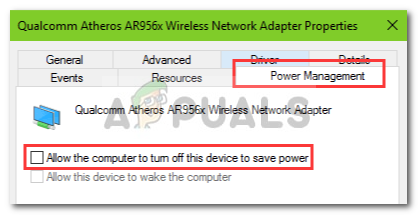
- Double-click your wireless card and then switch to the Power Management tab.
- Uncheck the ‘Allow this computer to turn off this device to save power’ box. Changing Wireless Driver Power Settings
- Click OK.
 Changing Wireless Driver Power Settings
FIX: WiFi won’t Turn On, Wireless Networks Not Available (Windows 10, 8)
Last updated on August 20th, 2017
The «No Wireless Networks Connections are available» problem can occur on Windows 10 after installing a new Windows 10 update through Automatic Updates or after you have upgraded Windows 7, 8 or Windows 8.1 to Windows 10. Despite of the Wi-Fi connectivity issue, the built-in Ethernet adapter may work properly and without any problems.

In the case that you face problems with the Wireless connection (WiFi does not work, No WiFi connections) on Windows 10, then this tutorial will show you some methods to fix the problem.
The methods and solutions below apply to the following issues:
- No WiFi connections on Windows 10 or Windows 8, 8.1
- No Wi-Fi is available after Windows 10 update or upgrade.
- Wireless Connections Unavailable on Windows 8, 8.1 or 10.
- Wi-Fi not working on Windows 10 or Windows 8, 8.1.
- WiFi won’t turn on in Windows 10
- Wi-Fi stopped working after Windows 10 upgrade or update.
- No Wireless connections on Windows 10 or Windows 8, 8.1.
- Wireless Networks Not Available on Windows 10, 8.
How to fix the «No Wi-Fi Networks» issue on Windows 10, 8.1 & 8.
Method 1. Ensure that Wireless Adapter is Enabled
Method 2. Make sure that WiFi is ON and Airplane Mode is OFF.
Method 3. Perform a Full Shutdown.
Method 4. Modify Wi-Fi Adapter’s Power Management Settings.
Method 5. Update WiFi Adapter’s driver.
Method 6. Uninstall and Reinstall the WiFi adapter.
Other Methods to fix Wireless Connectivity Issues.
Method 1. Ensure that Wireless Adapter is Enabled.
First of all make sure that the Wireless adapter is not disabled. To do that:
1. Press “Windows”  + “R” keys to load the Run dialog box.
2 Type ncpa.cpl and press Enter.

3. Right click on the Wireless network (Wi-Fi) connection and select Enable. *
* Note: If you see the Disable option available, then your card is already enabled, but you can give a try to Disable and re-Enable it.

Method 2. Make sure that Wi-Fi is ON and Airplane Mode is OFF.
1. Click the Start menu  and click Settings
  .
.
2. Open Network and Internet.
3. Select the Airplane Mode on the left and ensure that:
1. Airplane Mode is OFF.
2. Wi-Fi is On.

Method 3. Perform A Full Shutdown.
Windows 10 and Windows 8 use a new technology that is called Fast Startup in order to start Windows quickly. By using the Fast Startup feature, Windows don’t need to reinitialize all drivers and system files upon starting up, so the operating system is loaded faster.
To perform a full shutdown in order to reinitialize WiFi adapter:
1. Click the Start  menu and then click the Power
  button.
2. Now press and HOLD DOWN the SHIFT key (on your keyboard) and then click Shutdown.

3. Wait until all indicator lights turn Off and then Power On your computer again.
Method 4. Modify Wireless Adapter’s Power Management settings.
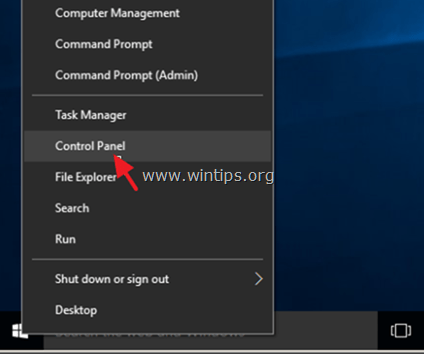
1. Right-click on the Start menu  and choose Control Panel.
2. Change the View By (at the up right) to Small icons and then open Power Options.

3. Click Change plan settings (next to «Balanced») and then select Change advanced power settings.
4. Scroll down to find and expand the Wireless Adapter Settings.
5. Now set the On Battery and Plugged in Setting to Maximum Performance.

Method 5. Update WiFi Adapter’s driver.
Important: Before proceeding, connect your computer to the Internet by using an Ethernet cable.
1. Right click on the Start menu and select Device Manager.

2. Click to expand Network Adapters.
3. Right click at the problematic Wireless Adapter and select Update Driver Software.

4. A the next screen choose «Search automatically for updated driver software«.

5. Let Windows find and install the latest driver for your Wi-Fi adapter.
6. Restart your computer.
Method 6. Uninstall and Reinstall the WiFi adapter.
Important: Before proceeding, connect your computer to the Internet by using an Ethernet cable.
1. Open Device Manager.
2. Click to expand Network Adapters.
3. Right click at the problematic Wireless Adapter and select Uninstall.
4. Press OK at the warning message to remove the installed Wi-Fi adapter.
5. When the driver uninstall is completed, right click at the computer name on the top (or at the Action menu on the top) and select Scan for hardware changes.
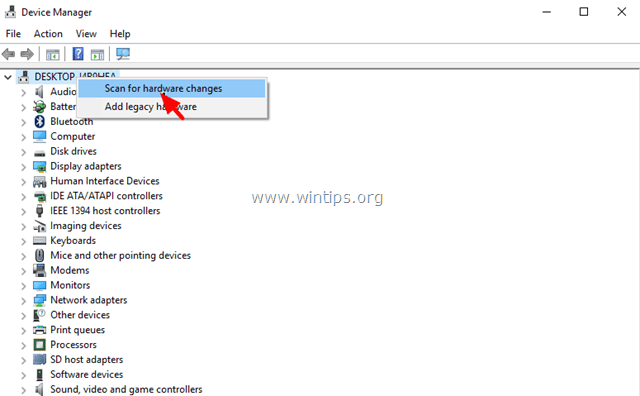
6. Wait until Windows installs the Wireless driver.
7. Restart your computer.
Other Methods to fix Wireless Connectivity Problems.
1. Uninstall VPN Software.
– If you have upgraded to Windows 10 from a previous version (Windows 8.1, 8 or 7) and you have a VPN software previously installed, then proceed and uninstall it. After the uninstall, restart your computer and see if the «No Wi-Fi connectivity» problem is resolved. If not, then proceed and run the troubleshooter on this link:
Other Methods to fix Wireless Connectivity Issues.
1. Uninstall VPN Software.
— If you have upgraded to Windows 10 from a previous Windows version (7, 8 or 8.1) and you have installed a VPN software, then uninstall it and restart your computer. If the problem persists then run the troubleshooter from this link: https://support.microsoft.com/en-us/kb/3084164.
2. Uninstall any third party Security Program (Antivirus/Firewall).
– Sometimes the installed security program may block Network connections, especially after updating Windows. In this case, it is better to uninstall the old version of your security program and install the latest version.
3. Change the «802.11n Bandwidth» setting.
– If your Wireless adapter supports the 802.11n Networking Standard, then try to set the «802.11n Bandwidth» setting to «20MHz/40MHz Auto». To do that:
1. Navigate to Device Manager.
2. Right click on the Wireless Adapter and select Properties.
3. In Advanced tab, find and set the «802.11n Bandwidth» (channel width) to «20 MHz only» or to «20MHz/40MHz Auto«.
That’s it! Let me know if this guide has helped you by leaving your comment about your experience. Please like and share this guide to help others.


