- Fix: No Hard Drives Found in Windows 7 Installer
- Why Windows 7 Setup cannot find your hard drive
- Method 1: Format/Clean the Hard drive using ‘diskpart’ in command prompt
- Method 2: Load the hard drive storage controller drivers from a USB into the Windows setup
- Method 3: Change the boot controller mode in BIOS
- Method 4: Reset BIOS
- Method 5: Use a different SATA port
- При установке Windows не видит жесткий диск
- Что можно сделать, если Windows не видит диск
- Проверьте, определяется ли ваш диск в BIOS
- Добавьте драйвер на установочную флешку
- Проверьте режимы ACHI, IDE в BIOS
Fix: No Hard Drives Found in Windows 7 Installer
Windows 7 was hands down the most popular operating system. Since Windows 10 is relatively new and has had its share of bugs and incompatibility, Windows 7 is still being used by millions of people as an alternative. This means that people are still actively buying Windows 7 licenses and installing the operating system on their PC. However, there is a common problem where the Windows 7 setup does not recognize the hard drive that you want to install into. All you see on the setup is a blank list box when it comes to choosing a drive to install into. There is also a vague message preceded by an exclamation in a yellow triangle stating “No drivers found Click load driver to provide a mass storage driver for installation.” This article will explore this problem, give the reasons why it occurs and finish off by giving you working solutions to the problem.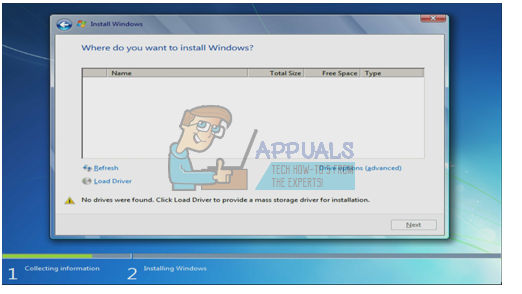
Why Windows 7 Setup cannot find your hard drive
In order to read the hard drive, Windows must have the motherboard storage controller drivers, unlike the BIOS setup. Windows setup usually loads all the hard disk drivers but if your motherboard was unveiled after the release of Windows 7, then there is a likelihood that your drivers are not loaded hence the hard disk cannot be detected. You might see the hard drive in the BIOS setup but the Windows setup will not be able to find it.
Another common reason why your hard drive cannot be detected in the volume file format. Windows usually read NTFS file format, so if your hard disk is new or was previously used in Ubuntu, Mac or Linux, there is a possibility that its file format is unreadable by the Windows setup.
The motherboard and hard drives also connect in different ways (dictated by the motherboard storage controller) which determines how data is exchanged to and from the drive and the interface that is used in BIOS. This includes EFI/UEFI, SATA/IDE, SATA/ATA, SATA/AHCI, and SATA/RAID. Using the wrong connection protocol can lead to a conflict hence your hard drive will not be detected by the BIOS and by Windows setup.
Below is how you can resolve this issue. Start with this method 3, 4 & 5 if your BIOS is not able to detect your hard disk.
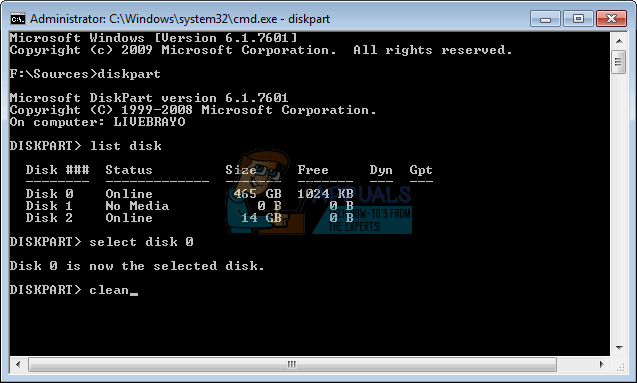
Method 1: Format/Clean the Hard drive using ‘diskpart’ in command prompt
If your hard drive is detected by BIOS then using the “clean” command will format the hard drive and set the NTFS file format. You will lose any data that was saved in the hard disk so use this method if you are absolutely sure you don’t need the data in the hard drive.
- Insert your Windows 7 bootable disc or USB and restart your computer.
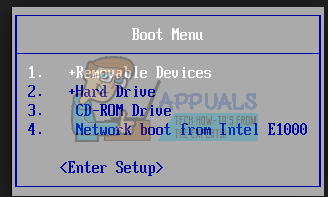
- Press F12 to bring up the boot device options and choose the USB or DVD/RW (whichever has your Windows 7 setup)

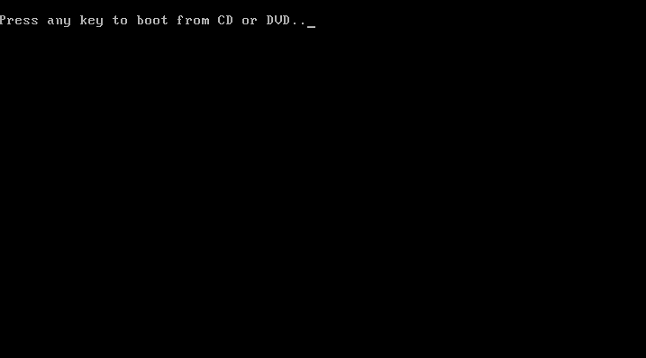
- A screen will come up asking you to press any key to boot from DVD/RW or USB. Press any key to boot up Windows 7 setup.
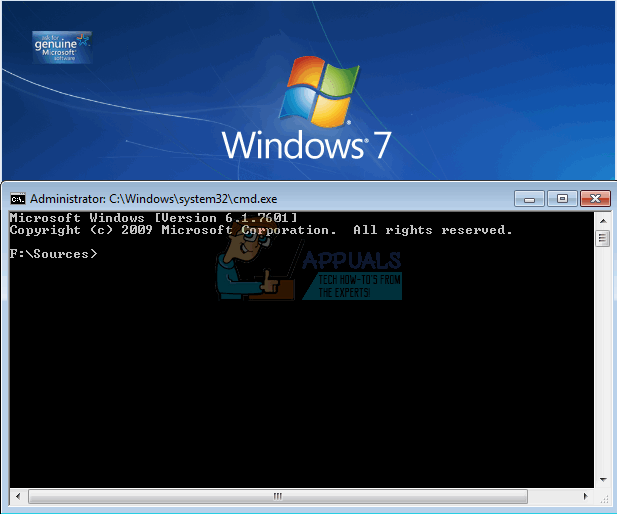
- When the welcome screen comes up on Windows Setup, press Shift + F10, which will display a command prompt (similar to choosing a language > Repair > Command Prompt)
- Type “diskpart” (no quotes) and press enter.
- Type “list disk” and press enter.
- Hopefully, you can see your drive in the list. You should see a number identifying it. Now type “select disk X” (where X is the number identifying your drive) and press enter.
- Type “clean” and press enter. This will write a blank MBR, you will lose any data on the hard drive if you did have anything on it.
- No retry installing Windows 7
Alternatively, remove your HDD, slave it to a machine that already has Windows and format the drive using an NTFS file system. When finished, fix the HDD back on your machine and start your win7 installation.
Method 2: Load the hard drive storage controller drivers from a USB into the Windows setup
If your SATA/storage controller is newer than your Windows 7 version, then this method will load the missing storage controller drivers needed to detect your hard disk.
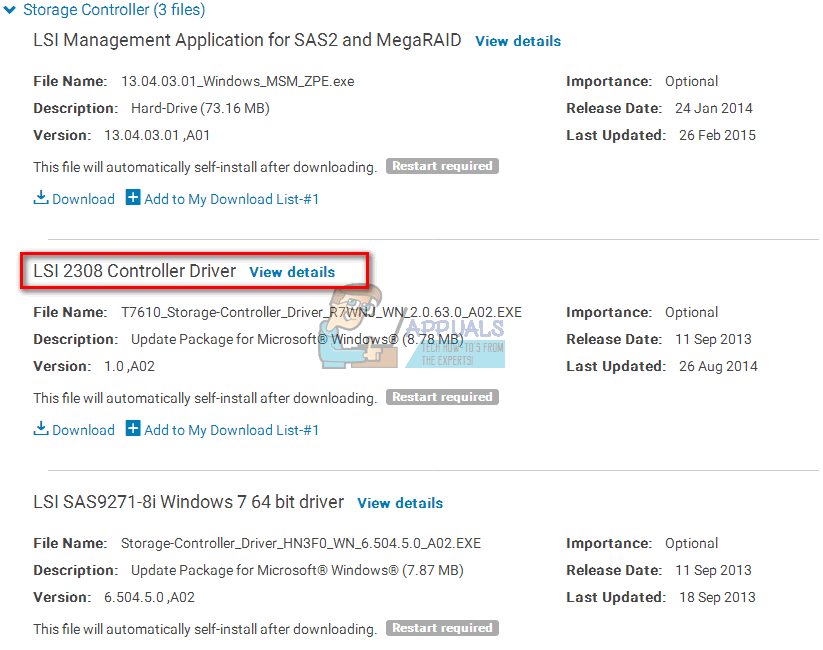
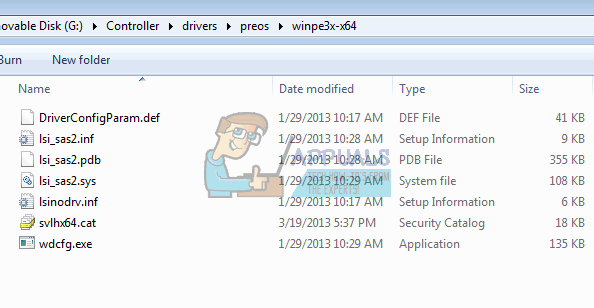
- Working from another PC, download the hard drive host/storage controller drivers from your motherboard manufacturer, or from your PC manufacturer website (assuming you have not changed the motherboard that came with your computer)
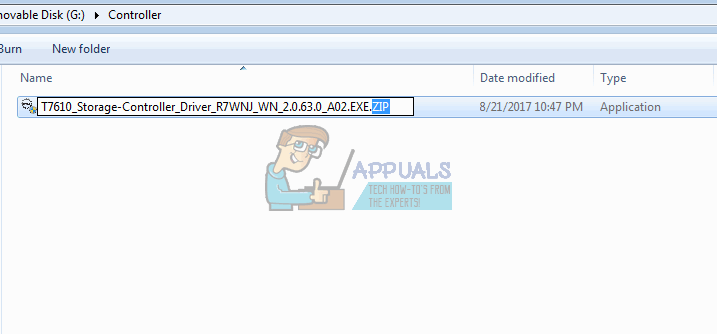
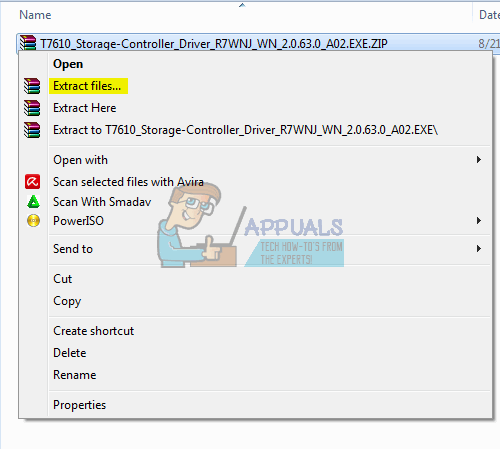
- Extract the zip file into your USB drive (if it a .exe file, add a .zip file at the end and extract to your USB)
- Insert your Windows 7 bootable disc and the USB drive into the PC with the installation problem and restart it.
- Press F12 to bring up the boot device options and choose the USB or DVD/RW (whichever has your Windows 7 setup)
- A screen will come up asking you to press any key to boot from DVD/RW or USB. Press any key to boot up Windows 7 setup.
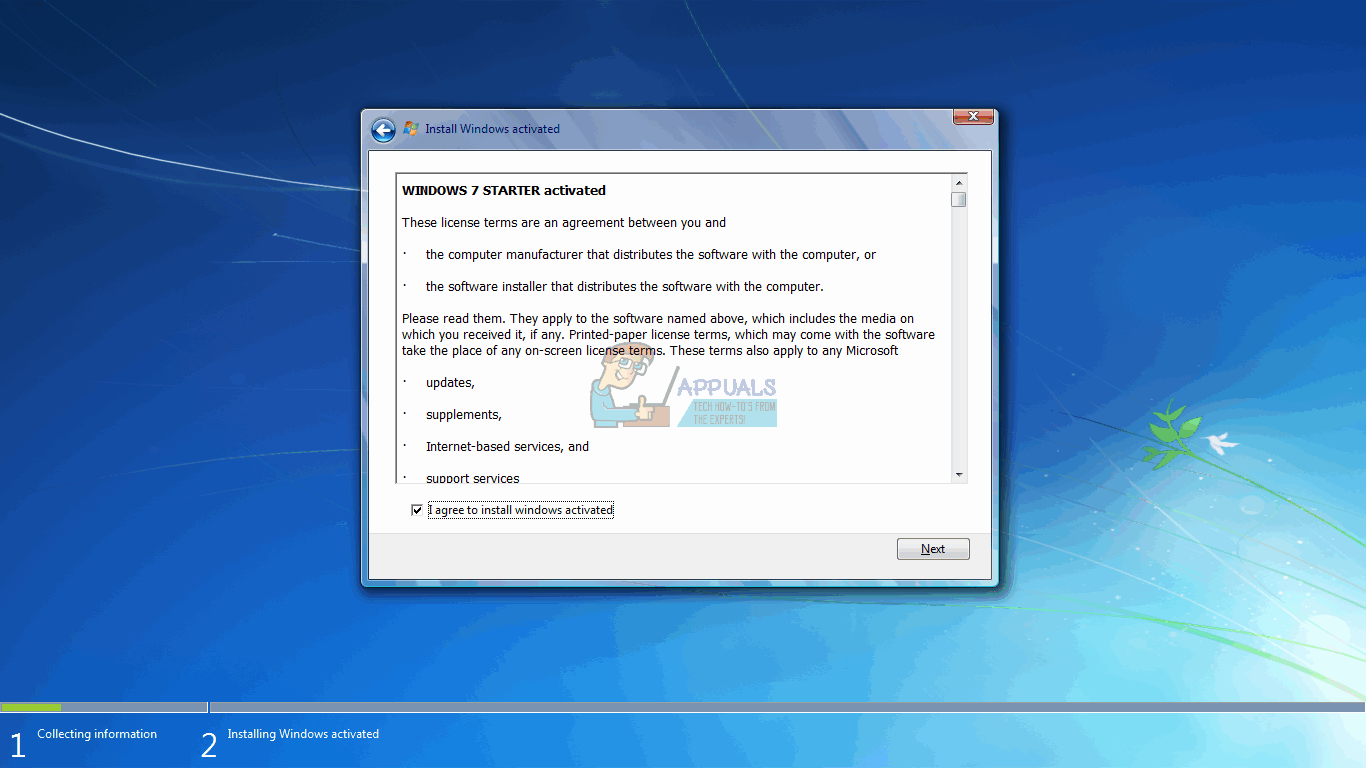
- When the welcome screen comes up on Windows Setup, choose a language and click next
- Accept the license and terms and then click next
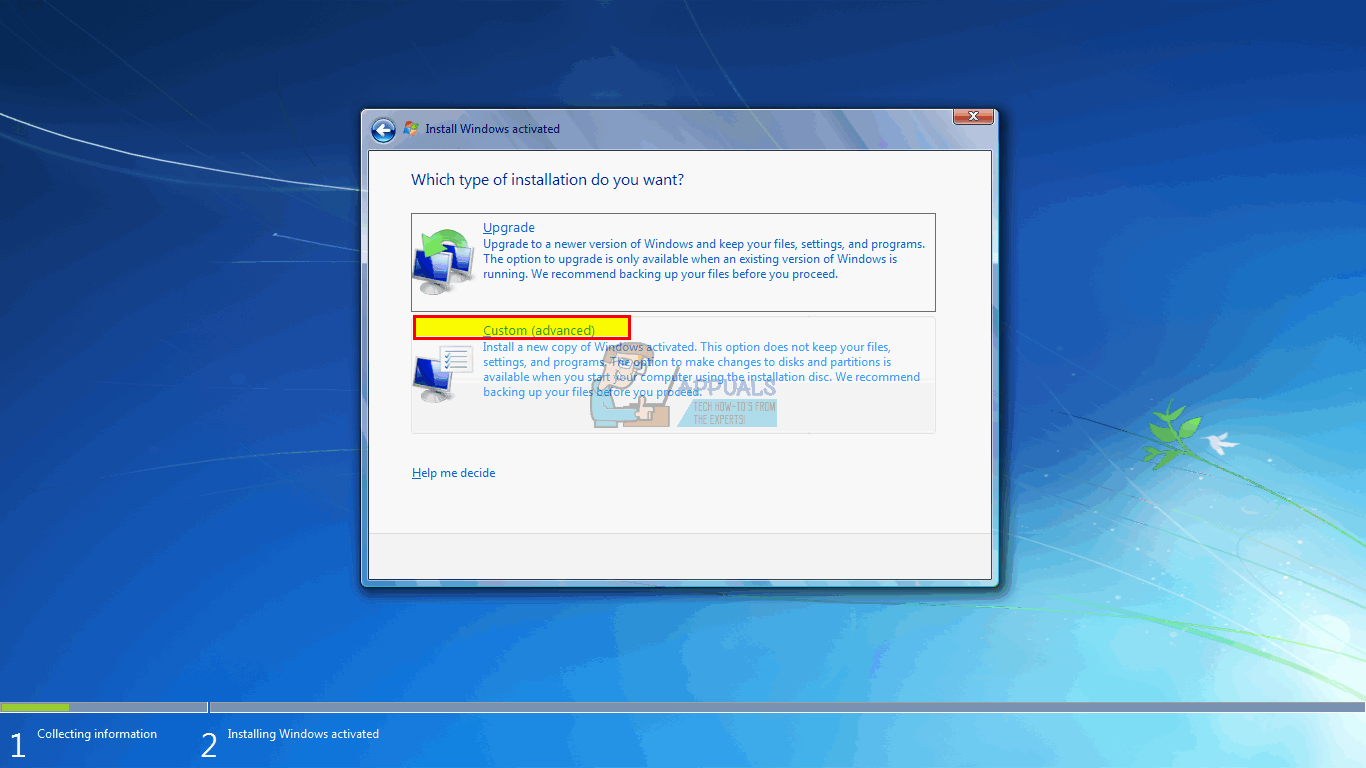
- Select the Custom (advanced) installation
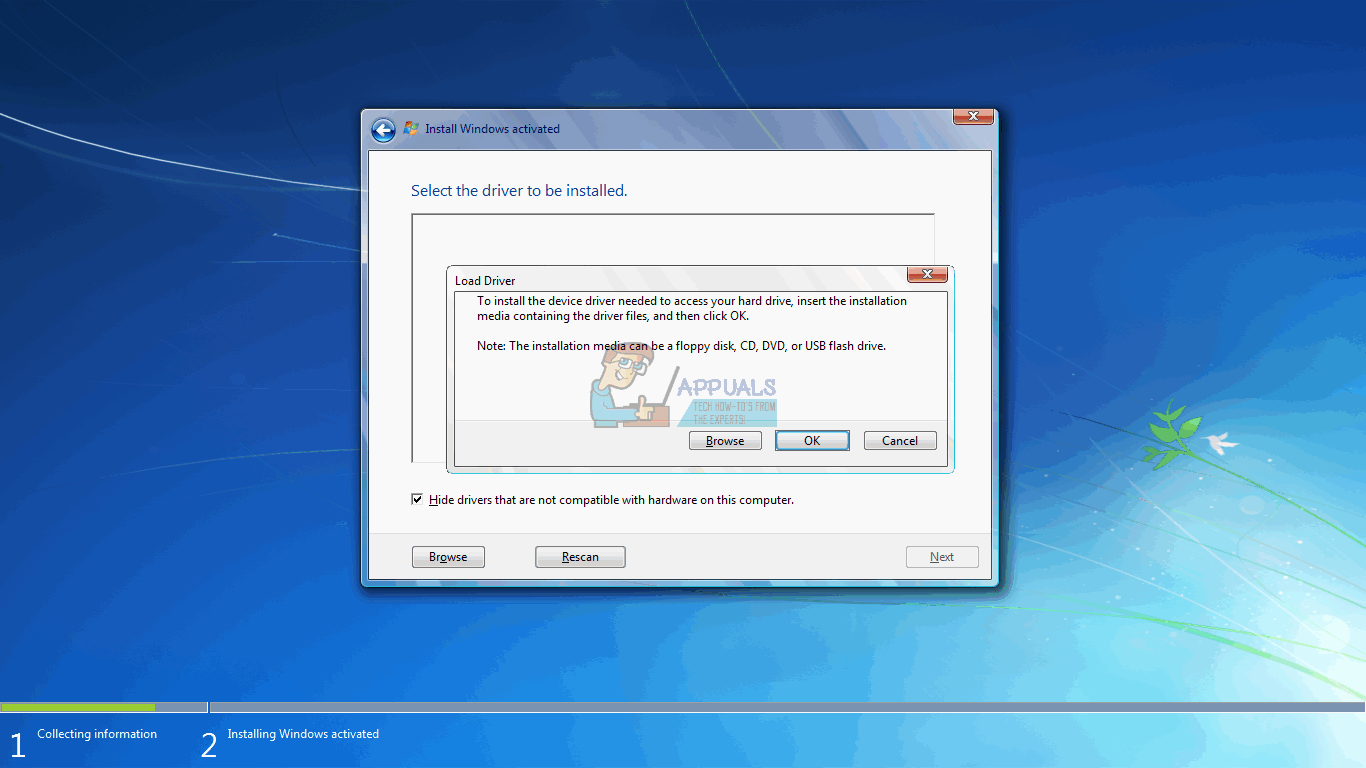
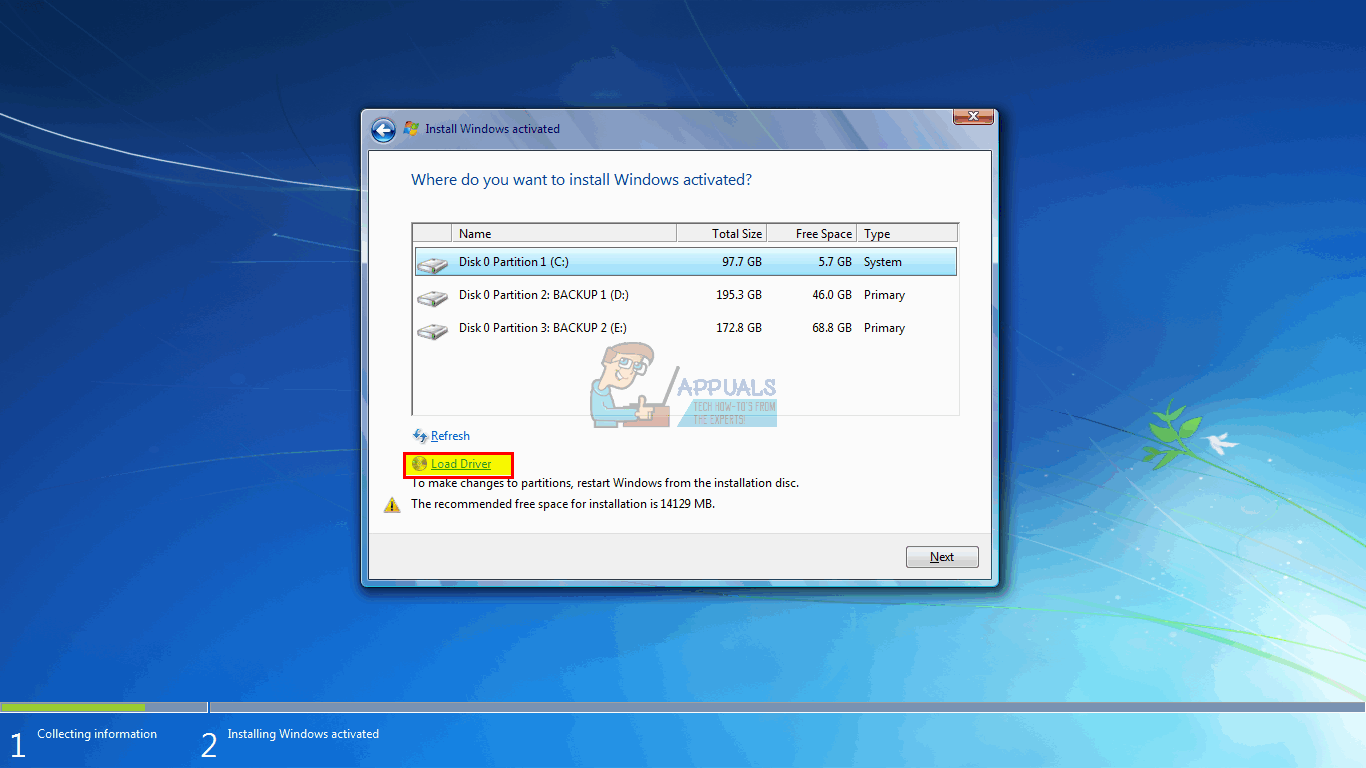
- Windows will ask you where you want to install the OS but there won’t be anything in the list.
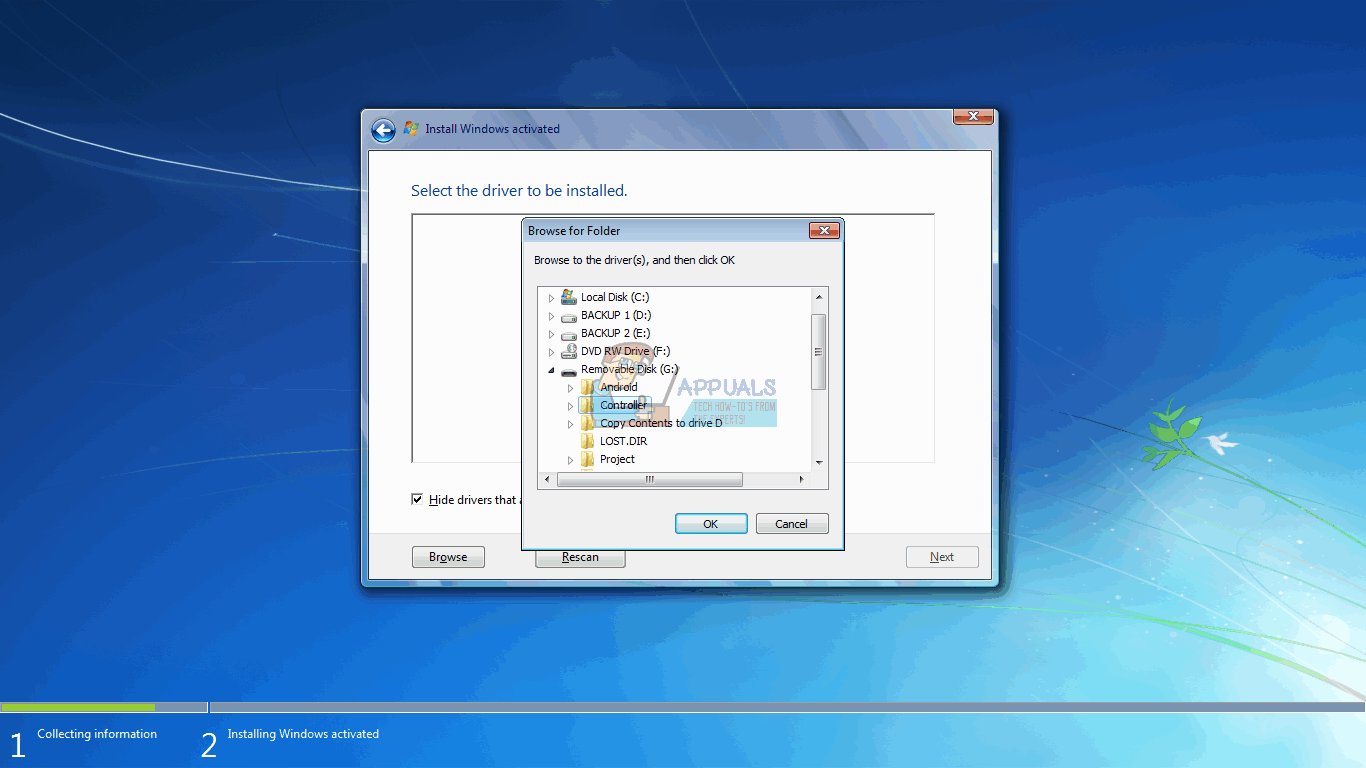
- Click the ‘load driver’ link at the left bottom of the Window.
- If you receive a message box asking you to plug in the device with your drivers, click on “OK” (or click Cancel and then Browse… to manually search for the driver. You have to pinpoint the driver for this case. If necessary, close the warning about no suitable drivers, and uncheck the Hide drivers… checkbox)
- Browse to the correct drive letter and location for the USB drive and click OK
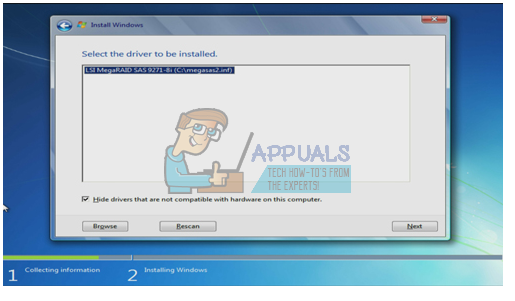
- Once the driver is found, you will be prompted to select the controller from the list. Make sure it is selected and click Next:
- The hard drive will now be shown and ready to begin the Windows 7 installation: choose a drive and click “Next” to continue with your installation.
Method 3: Change the boot controller mode in BIOS
This method will help if your BIOS cannot detect the hard drive. By changing to the correct BIOS interface and data exchange mechanism, the Windows 7 setup will be able to find your hard drive. You have the option of EFI/UEFI or SATA that has four boot modes (ATA, RAID, IDE, AHCI).
- Switch off your PC and restart it
- Quickly press F2 or F10 to boot into BIOS
- Go to the “Advanced” tab and scroll down to “SATA Mode.”
- Press enter and choose a mode. Go to exit and exit after saving changes. Restart and check if your HDD is now detected by the BIOS. Do this until it is detected.
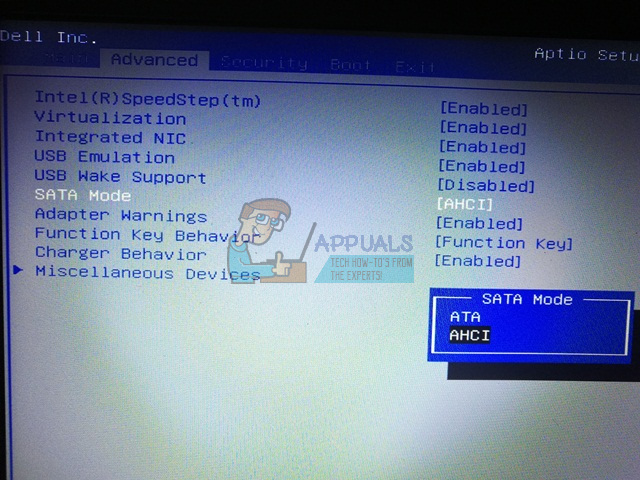
If you are using RAID on your computer, change it to AHCI or IDE. Otherwise, just change whatever controller is selected and check to see if the issue persists. After doing so, format the disk using the first method or you can also use Acronis True Image to complete the formatting process.
UEFI motherboard might miss this option since they only have one type of storage controller protocol. Note that this method and the controller mode options might be different for different computers. You can get the controller mode under “Host controller” “IDE Configuration” “SATA configuration” or something similar.
Method 4: Reset BIOS
If you changed the storage controller configuration due to an update of any sort, you could try resetting your BIOS.
- Switch off your PC and restart it
- Quickly press F2 or F10 to boot into BIOS
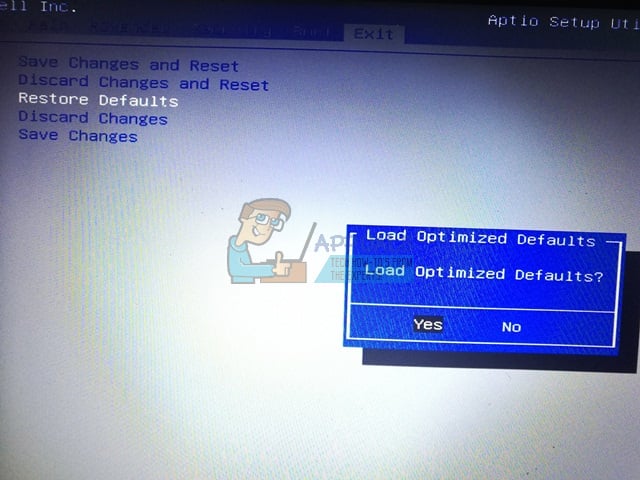
- Go to the “exit” tab and select “Restore Defaults.”
- Select “Yes” in the warning message and exit after saving changes
Method 5: Use a different SATA port
If you are using a desktop computer, try using a different SATA port and see if that helps at all. Sometimes they come with two different controllers.
Note: Sometimes, copying the Boot Folder from the Windows install Disk to the USB drive fixes this particular issue so you can have a go at that.
При установке Windows не видит жесткий диск
 Всем доброго времени!
При переустановке Windows нередко приходится сталкиваться с самыми разными ошибками, о которых сложно заранее предугадать .
Сегодня хочу остановится на одной из таких проблем: когда инсталлятор ОС не видит ни один диск, на который можно установить Windows.
Вообще, подобная проблема чаще встречалась на «старых» ОС Windows XP, 7 (c новой Windows 10 — такое происходит всё же реже. ). И тем не менее.
Кстати, многие решают переустановить ОС из-за того, что она не загружается. Попробуйте воспользоваться рекомендациями из одной моей прошлой статьи, возможно вы восстановите работу своей Windows — https://ocomp.info/ne-zagruzhaetsya-windows.html

Что можно сделать, если Windows не видит диск
Проверьте, определяется ли ваш диск в BIOS
И так, первое с чего порекомендую начать разбираться в проблеме — это проверить, виден ли ваш диск в BIOS/UEFI, определяется ли он. Если с накопителем все в порядке — то в BIOS вы должны увидеть его модель, название, объем, серийный номер (обратите внимание на фото ниже).
Виден ли диск в UEFI (его модель, объем и др.). На скрине стрелкой показан жесткий диск (Storage) — его модель была определена, т.е. диск «определяется» (кликабельно)
Если с вашим диском все в порядке (т.е. он определяется) — можете переходить к следующему пункту статьи.
Если диск не определяется, то:
- выключите ПК/ноутбук и отсоедините диск. Проверьте его контакты (если диск старый — они могли «закислиться» и не обеспечивать должного соединения). Для чистки контактов, кстати, можно воспользоваться обычной канцелярской стеркой (ворсинки смахните кисточкой);
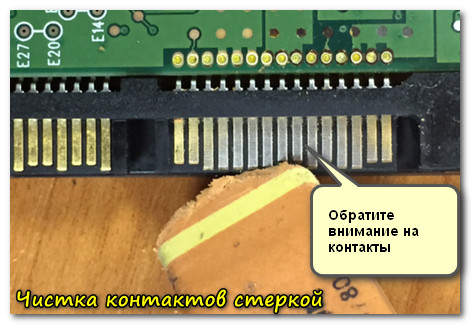
Чистка контактов стеркой
для тестирования диска очень желательно проверить его на другом ПК. Удобнее всего это сделать с помощь специального переходника или бокса («коробки», в которую вставляется диск и подключается к обычному порту USB) .

BOX для подключения диска к USB порту
Добавьте драйвер на установочную флешку
В зависимости от того, какой образ ISO для установки вы выбрали, зависит то, какие компоненты и драйвера в него включены. Например, нередко, что в установочном образе отсутствуют драйвера для SATA/RAID, Intel® Rapid Storage Technology контроллера.
Как итог: при установке Windows не знает как «работать» с этой системой хранения данных, и не видит эти накопители.
Как можно поступить:
1) Загрузить более новый установочный образ ISO с включенными драйверами и перезаписать инсталляционную флешку (официальный установочный ISO образ: https://ocomp.info/kak-skachat-win10-legalno.html);
2) Найти необходимый драйвер на официальном сайте вашей материнской платы (или вашего ноутбука). В названии драйвера, обычно, указывается «SATA. » или «RAID. «.
После загрузки драйвера, его необходимо извлечь из ZIP (RAR) архива и записать на установочную флешку. Далее при установке, дойдя до этапа выбора диска, щелкните по кнопке «Загрузка» и укажите расположение драйвера. После его установки — проблема будет решена.
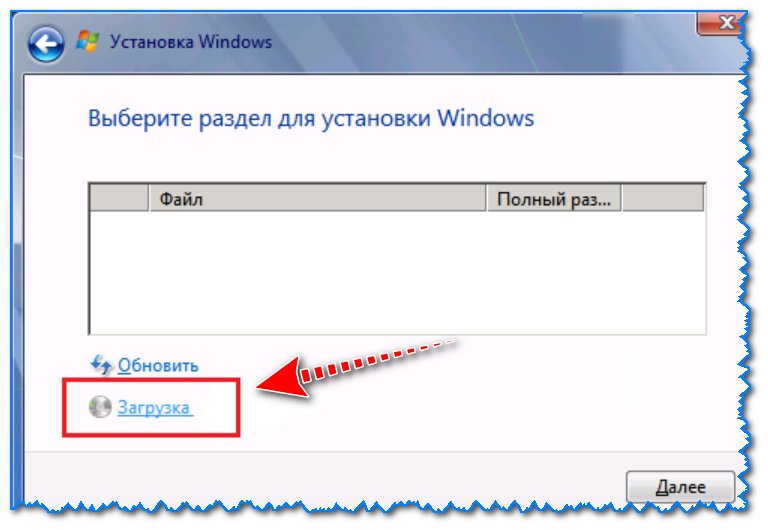
Загрузка (установка драйвера вручную)
Проверьте режимы ACHI, IDE в BIOS
В BIOS есть несколько параметров, отвечающие за режим работы жесткого диска (ACHI, IDE, более подробно о них тут). Чаще всего, при установке на компьютер «старой» ОС Windows — она просто не знает о существовании, скажем, ACHI и поэтому не видит накопитель.
Исправить проблему можно через настройки BIOS: нужно переключить режим работы с ACHI на IDE. Затем сохранить настройки (обычно, клавиша F10), перезагрузить ПК и запустить установку Windows заново. Как правило, Windows сразу же «увидит» диск.
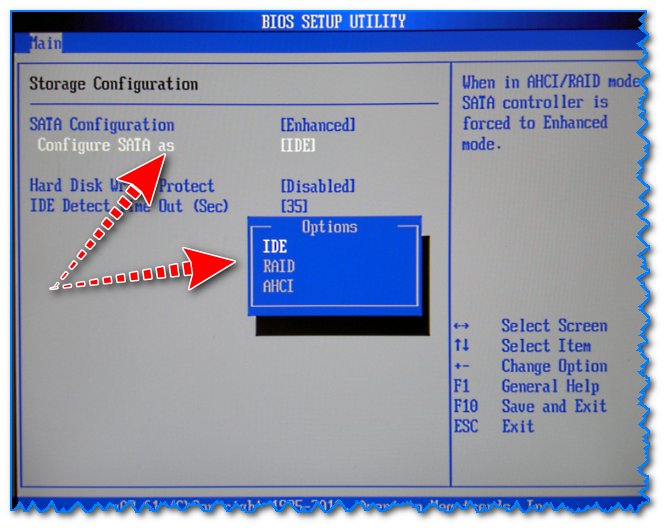
BIOS Setup Utility / В качестве примера
Кстати, в зависимости от версии BIOS, название параметра, отвечающего за режим работы, может быть отличным от примера выше, например:
- AHCI Mode: Disabled;
- SATA Operation: ATA;
- SATA Native Mode: Disable;
- SATA Controller Mode: Compatibility.


