- Get started using Node.js on Windows for beginners
- Prerequisites
- Types of Node.js applications
- Try using Node.js in VS Code
- Set up a basic web app framework by using Express
- Try using a Node.js module
- Get started with Node.js web frameworks on Windows
- Prerequisites
- Get started with Next.js
- Welcome to Next.js!
- This is my new Next.js app!
- This is my new Next.js app! . Save this change and notice that a «Failed to compile» error will display in your browser, and in your terminal, letting your know that a closing tag for
- is expected. Replace the
- Get started with Nuxt.js
- Get started with Gatsby.js
- Hi people
- Hi (Your Name)!
- Hi (Your Name)! . Save this change and notice that a «Failed to compile» error will display in your browser, and in your terminal, letting your know that a closing tag for
Get started using Node.js on Windows for beginners
If you’re brand new to using Node.js, this guide will help you to get started with some basics.
Prerequisites
This guide assumes that you’ve already completed the steps to set up your Node.js development environment on native Windows, including:
- Install a Node.js version manager.
- Install Visual Studio Code.
Installing Node.js directly on Windows is the most straightforward way to get started performing basic Node.js operations with a minimal amount of set up.
Once you are ready to use Node.js to develop applications for production, which typically involves deploying to a Linux server, we recommend that you set up your Node.js development environment with WSL2. Though it’s possible to deploy web apps on Windows servers, it is much more common to use Linux servers to host your Node.js apps.
Types of Node.js applications
Node.js is a JavaScript runtime primarily used for creating web applications. Put another way, it’s a server-side implementation of JavaScript used for writing the backend of an application. (Though many Node.js frameworks can also handle the frontend.) Here are a few examples of what you might create with Node.js.
- Single-page apps (SPAs): These are web apps that work inside a browser and don’t need to reload a page every time you use it to get new data. Some example SPAs include social networking apps, email or map apps, online text or drawing tools, etc.
- Real-time apps (RTAs): These are web apps that enable users to receive information as soon as it’s published by an author, rather than requiring that the user (or software) check a source periodically for updates. Some example RTAs include instant messaging apps or chat rooms, online multiplayer games that can be played in the browser, online collaboration docs, community storage, video conference apps, etc.
- Data streaming apps: These are apps (or services) that send data/content as it arrives (or is created) while keeping the connection open to continue downloading further data, content, or components as needed. Some examples include video- and audio-streaming apps.
- REST APIs: These are interfaces that provide data for someone else’s web app to interact with. For example, a Calendar API service could provide dates and times for a concert venue that could be used by someone else’s local events website.
- Server-side rendered apps (SSRs): These web apps can run on both the client (in your browser / the front-end) and the server (the back-end) allowing pages that are dynamic to display (generate HTML for) whatever content is known and quickly grab content that is not known as it’s available. These are often referred to as “isomorphic” or “universal” applications. SSRs utilize SPA methods in that they don’t need to reload every time you use it. SSRs, however, offer a few benefits that may or may not be important to you, like making content on your site appear in Google search results and providing a preview image when links to your app are shared on social media like Twitter or Facebook. The potential drawback being that they require a Node.js server constantly running. In terms of examples, a social networking app that supports events that users will want to appear in search results and social media may benefit from SSR, while an email app may be fine as an SPA. You can also run server-rendered no-SPA apps, which my be something like a WordPress blog. As you can see, things can get complicated, you just need to decide what’s important.
- Command line tools: These allow you to automate repetitive tasks and then distribute your tool across the vast Node.js ecosystem. An example of a command line tool is cURL, which stand for client URL and is used to download content from an internet URL. cURL is often used to install things like Node.js or, in our case, a Node.js version manager.
- Hardware programming: While not quite as popular as web apps, Node.js is growing in popularity for IoT uses, such as collecting data from sensors, beacons, transmitters, motors, or anything that generates large amounts of data. Node.js can enable data collection, analyzing that data, communicating back and forth between a device and server, and taking action based on the analysis. NPM contains more than 80 packages for Arduino controllers, raspberry pi, Intel IoT Edison, various sensors, and Bluetooth devices.
Try using Node.js in VS Code
Open your command line (Command prompt, PowerShell, or whatever you prefer) and create a new directory: mkdir HelloNode , then enter the directory: cd HelloNode
Create a JavaScript file named «app.js» with a variable named «msg» inside: echo var msg > app.js
Open the directory and your app.js file in VS Code: : code .
Add a simple string variable («Hello World»), then send the contents of the string to your console by entering this in your «app.js» file:
To run your «app.js» file with Node.js. Open your terminal right inside VS Code by selecting View > Terminal (or select Ctrl+`, using the backtick character). If you need to change the default terminal, select the dropdown menu and choose Select Default Shell.
In the terminal, enter: node app.js . You should see the output: «Hello World».
Notice that when you type console in your ‘app.js’ file, VS Code displays supported options related to the console object for you to choose from using IntelliSense. Try experimenting with Intellisense using other JavaScript objects.
Try the new Windows terminal if you plan to use multiple command lines (Ubuntu, PowerShell, Windows Command Prompt, etc) or if you want to customize your terminal, including text, background colors, key bindings, multiple window panes, etc.
Set up a basic web app framework by using Express
Express is a minimal, flexible, and streamlined Node.js framework that makes it easier to develop a web app that can handle multiple types of requests, like GET, PUT, POST, and DELETE. Express comes with an application generator that will automatically create a file architecture for your app.
To create a project with Express.js:
- Open your command line (Command Prompt, Powershell, or whatever you prefer).
- Create a new project folder: mkdir ExpressProjects and enter that directory: cd ExpressProjects
- Use Express to create a HelloWorld project template: npx express-generator HelloWorld —view=pug
We are using the npx command here to execute the Express.js Node package without actually installing it (or by temporarily installing it depending on how you want to think of it). If you try to use the express command or check the version of Express installed using: express —version , you will receive a response that Express cannot be found. If you want to globally install Express to use over and over again, use: npm install -g express-generator . You can view a list of the packages that have been installed by npm using npm list . They’ll be listed by depth (the number of nested directories deep). Packages that you installed will be at depth 0. That package’s dependencies will be at depth 1, further dependencies at depth 2, and so on. To learn more, see Difference between npx and npm? on Stackoverflow.
Examine the files and folders that Express included by opening the project in VS Code, with: code .
The files that Express generates will create a web app that uses an architecture that can appear a little overwhelming at first. You’ll see in your VS Code Explorer window (Ctrl+Shift+E to view) that the following files and folders have been generated:
- bin . Contains the executable file that starts your app. It fires up a server (on port 3000 if no alternative is supplied) and sets up basic error handling.
- public . Contains all the publicly accessed files, including JavaScript files, CSS stylesheets, font files, images, and any other assets that people need when they connect to your website.
- routes . Contains all the route handlers for the application. Two files, index.js and users.js , are automatically generated in this folder to serve as examples of how to separate out your application’s route configuration.
- views . Contains the files used by your template engine. Express is configured to look here for a matching view when the render method is called. The default template engine is Jade, but Jade has been deprecated in favor of Pug, so we used the —view flag to change the view (template) engine. You can see the —view flag options, and others, by using express —help .
- app.js . The starting point of your app. It loads everything and begins serving user requests. It’s basically the glue that holds all the parts together.
- package.json . Contains the project description, scripts manager, and app manifest. Its main purpose is to track your app’s dependencies and their respective versions.
You now need to install the dependencies that Express uses in order to build and run your HelloWorld Express app (the packages used for tasks like running the server, as defined in the package.json file). Inside VS Code, open your terminal by selecting View > Terminal (or select Ctrl+`, using the backtick character), be sure that you’re still in the ‘HelloWorld’ project directory. Install the Express package dependencies with:
- At this point you have the framework set up for a multiple-page web app that has access to a large variety of APIs and HTTP utility methods and middleware, making it easier to create a robust API. Start the Express app on a virtual server by entering:
The DEBUG=myapp:* part of the command above means you are telling Node.js that you want to turn on logging for debugging purposes. Remember to replace ‘myapp’ with your app name. You can find your app name in the package.json file under the «name» property. Using npx cross-env sets the DEBUG environment variable in any terminal, but you can also set it with your terminal specific way. The npm start command is telling npm to run the scripts in your package.json file.
You can now view the running app by opening a web browser and going to: localhost:3000
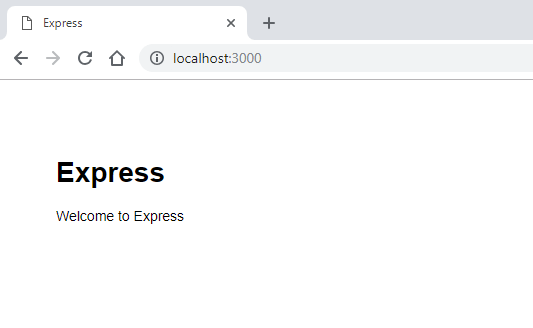
Now that your HelloWorld Express app is running locally in your browser, try making a change by opening the ‘views’ folder in your project directory and selecting the ‘index.pug’ file. Once open, change h1= title to h1= «Hello World!» and selecting Save (Ctrl+S). View your change by refreshing the localhost:3000 URL on your web browser.
To stop running your Express app, in your terminal, enter: Ctrl+C
Try using a Node.js module
Node.js has tools to help you develop server-side web apps, some built in and many more available via npm. These modules can help with many tasks:
| Tool | Used for |
|---|---|
| gm, sharp | Image manipulation, including editing, resizing, compression, and so on, directly in your JavaScript code |
| PDFKit | PDF generation |
| validator.js | String validation |
| imagemin, UglifyJS2 | Minification |
| spritesmith | Sprite sheet generation |
| winston | Logging |
| commander.js | Creating command-line applications |
Let’s use the built-in OS module to get some information about your computer’s operating system:
Get started with Node.js web frameworks on Windows
A step-by-step guide to help you get started using Node.js web frameworks on Windows, including Next.js, Nuxt.js, and Gatsby.
Prerequisites
This guide assumes that you’ve already completed the steps to set up your Node.js development environment with WSL 2, including:
- Install Windows 10 Insider Preview build 18932 or later.
- Enable the WSL 2 feature on Windows.
- Install a Linux distribution (Ubuntu 18.04 for our examples). You can check this with: wsl lsb_release -a
- Ensure your Ubuntu 18.04 distribution is running in WSL 2 mode. (WSL can run distributions in both v1 or v2 mode.) You can check this by opening PowerShell and entering: wsl -l -v
- Using PowerShell, set Ubuntu 18.04 as your default distribution, with: wsl -s ubuntu 18.04
Get started with Next.js
Next.js is a framework for creating server-rendered JavaScript apps based on React.js, Node.js, Webpack and Babel.js. It is basically a project boilerplate for React, crafted with attention to best practices, that allows you to create «universal» web apps in a simple, consistent way, with hardly any configuration. These «universal» server-rendered web apps are also sometimes called “isomorphic”, meaning that code is shared between the client and server.
To create a Next.js project, which includes installing next, react, and react-dom:
Open your WSL terminal (ie. Ubuntu 18.04).
Create a new project folder: mkdir NextProjects and enter that directory: cd NextProjects .
Install Next.js and create a project (replacing ‘my-next-app’ with whatever you’d like to call your app): npm create next-app my-next-app .
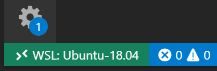
Once the package has been installed, change directories into your new app folder, cd my-next-app , then use code . to open your Next.js project in VS Code. This will allow you to look at the Next.js framework that has been created for your app. Notice that VS Code opened your app in a WSL-Remote environment (as indicated in the green tab on the bottom-left of your VS Code window). This means that while you are using VS Code for editing on the Windows OS, it is still running your app on the Linux OS.
There are 3 commands you need to know once Next.js is installed:
- npm run dev for running a development instance with hot-reloading, file watching and task re-running.
- npm run build for compiling your project.
- npm start for starting your app in production mode.
Open the WSL terminal integrated in VS Code (View > Terminal). Make sure that the terminal path is pointed to your project directory (ie.
/NextProjects/my-next-app$ ). Then try running a development instance of your new Next.js app using: npm run dev
The local development server will start and once your project pages are done building, your terminal will display «compiled successfully — ready on http://localhost:3000». Select this localhost link to open your new Next.js app in a web browser.

Open the pages/index.js file in your VS Code editor. Find the page title
Welcome to Next.js!
This is my new Next.js app!
Let’s see how Next.js handles errors. Remove the
This is my new Next.js app! . Save this change and notice that a «Failed to compile» error will display in your browser, and in your terminal, letting your know that a closing tag for
is expected. Replace the
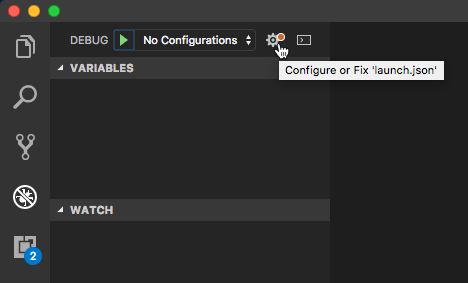
You can use VS Code’s debugger with your Next.js app by selecting the F5 key, or by going to View > Debug (Ctrl+Shift+D) and View > Debug Console (Ctrl+Shift+Y) in the menu bar. If you select the gear icon in the Debug window, a launch configuration ( launch.json ) file will be created for you to save debugging setup details. To learn more, see VS Code Debugging.
To learn more about Next.js, see the Next.js docs.
Get started with Nuxt.js
Nuxt.js is a framework for creating server-rendered JavaScript apps based on Vue.js, Node.js, Webpack and Babel.js. It was inspired by Next.js. It is basically a project boilerplate for Vue. Just like Next.js, it is crafted with attention to best practices and allows you to create «universal» web apps in a simple, consistent way, with hardly any configuration. These «universal» server-rendered web apps are also sometimes called “isomorphic”, meaning that code is shared between the client and server.
To create a Nuxt.js project, which will include answering a series of questions about what sort of integrated server-side framework, UI framework, testing framework, mode, modules, and linter you would like to install:
Open your WSL terminal (ie. Ubuntu 18.04).
Create a new project folder: mkdir NuxtProjects and enter that directory: cd NuxtProjects .
Install Nuxt.js and create a project (replacing ‘my-nuxt-app’ with whatever you’d like to call your app): npm create nuxt-app my-nuxt-app
The Nuxt.js installer will now ask you the following questions:
- Project Name: my-nuxtjs-app
- Project description: Description of my Nuxt.js app.
- Author name: I use my GitHub alias.
- Choose the package manager: Yarn or Npm — we use NPM for our examples.
- Choose UI framework: None, Ant Design Vue, Bootstrap Vue, etc. Let’s choose Vuetify for this example, but the Vue Community created a nice summary comparing these UI frameworks to help you choose the best fit for your project.
- Choose custom server frameworks: None, AdonisJs, Express, Fastify, etc. Let’s choose None for this example, but you can find a 2019-2020 server framework comparison on the Dev.to site.
- Choose Nuxt.js modules (use spacebar to select modules or just enter if you don’t want any): Axios (for simplifying HTTP requests) or PWA support (for adding a service-worker, manifest.json file, etc). Let’s not add a module for this example.
- Choose linting tools: ESLint, Prettier, Lint staged files. Let’s choose ESLint (a tool for analyzing your code and warning you of potential errors).
- Choose a test framework: None, Jest, AVA. Let’s choose None as we won’t cover testing in this quickstart.
- Choose rendering mode: Universal (SSR) or Single Page App (SPA). Let’s choose Universal (SSR) for our example, but the Nuxt.js docs point out some of the differences — SSR requiring a Node.js server running to server-render your app and SPA for static hosting.
- Choose development tools: jsconfig.json (recommended for VS Code so Intellisense code completion works)
Once your project is created, cd my-nuxtjs-app to enter your Nuxt.js project directory, then enter code . to open the project in the VS Code WSL-Remote environment.
There are 3 commands you need to know once Nuxt.js is installed:
- npm run dev for running a development instance with hot-reloading, file watching and task re-running.
- npm run build for compiling your project.
- npm start for starting your app in production mode.
Open the WSL terminal integrated in VS Code (View > Terminal). Make sure that the terminal path is pointed to your project directory (ie.
/NuxtProjects/my-nuxt-app$ ). Then try running a development instance of your new Nuxt.js app using: npm run dev
The local development server will start (displaying some kind of cool progress bars for the client and server compiles). Once your project is done building, your terminal will display «Compiled successfully» along with how much time it took to compile. Point your web browser to http://localhost:3000 to open your new Nuxt.js app.

Open the pages/index.vue file in your VS Code editor. Find the page title Welcome to the Vuetify + Nuxt.js template and change it to This is my new Nuxt.js app! . With your web browser still open to localhost:3000, save your change and notice the hot-reloading feature automatically compile and update your change in the browser.
Let’s see how Nuxt.js handles errors. Remove the closing tag so that your title code now looks like this: This is my new Nuxt.js app! . Save this change and notice that a compiling error will display in your browser, and in your terminal, letting your know that a closing tag for is missing, along with the line numbers where the error can be found in your code. Replace the closing tag, save, and the page will reload.
You can use VS Code’s debugger with your Nuxt.js app by selecting the F5 key, or by going to View > Debug (Ctrl+Shift+D) and View > Debug Console (Ctrl+Shift+Y) in the menu bar. If you select the gear icon in the Debug window, a launch configuration ( launch.json ) file will be created for you to save debugging setup details. To learn more, see VS Code Debugging.
To learn more about Nuxt.js, see the Nuxt.js guide.
Get started with Gatsby.js
Gatsby.js is a static site generator framework based on React.js, as opposed to being server-rendered like Next.js and Nuxt.js. A static site generator generates static HTML on build time. It doesn’t require a server. Next.js and Nuxt.js generate HTML on runtime (each time a new request comes in). They do require a server to run. Gatsby also dictates how to handle data in your app (with GraphQL), whereas Next.js and Nuxt.js leave that decision up to you.
To create a Gatsby.js project:
Open your WSL terminal (ie. Ubuntu 18.04).
Create a new project folder: mkdir GatsbyProjects and enter that directory: cd GatsbyProjects
Use npm to install the Gatsby CLI: npm install -g gatsby-cli . Once installed, check the version with gatsby —version .
Create your Gatsby.js project: gatsby new my-gatsby-app
Once the package has been installed, change directories into your new app folder, cd my-gatsby-app , then use code . to open your Gatsby project in VS Code. This will allow you to look at the Gatsby.js framework that has been created for your app using VS Code’s File Explorer. Notice that VS Code opened your app in a WSL-Remote environment (as indicated in the green tab on the bottom-left of your VS Code window). This means that while you are using VS Code for editing on the Windows OS, it is still running your app on the Linux OS.
There are 3 commands you need to know once Gatsby is installed:
- gatsby develop for running a development instance with hot-reloading.
- gatsby build for creating a production build.
- gatsby serve for starting your app in production mode.
Open the WSL terminal integrated in VS Code (View > Terminal). Make sure that the terminal path is pointed to your project directory (ie.
/GatsbyProjects/my-gatsby-app$ ). Then try running a development instance of your new app using: gatsby develop
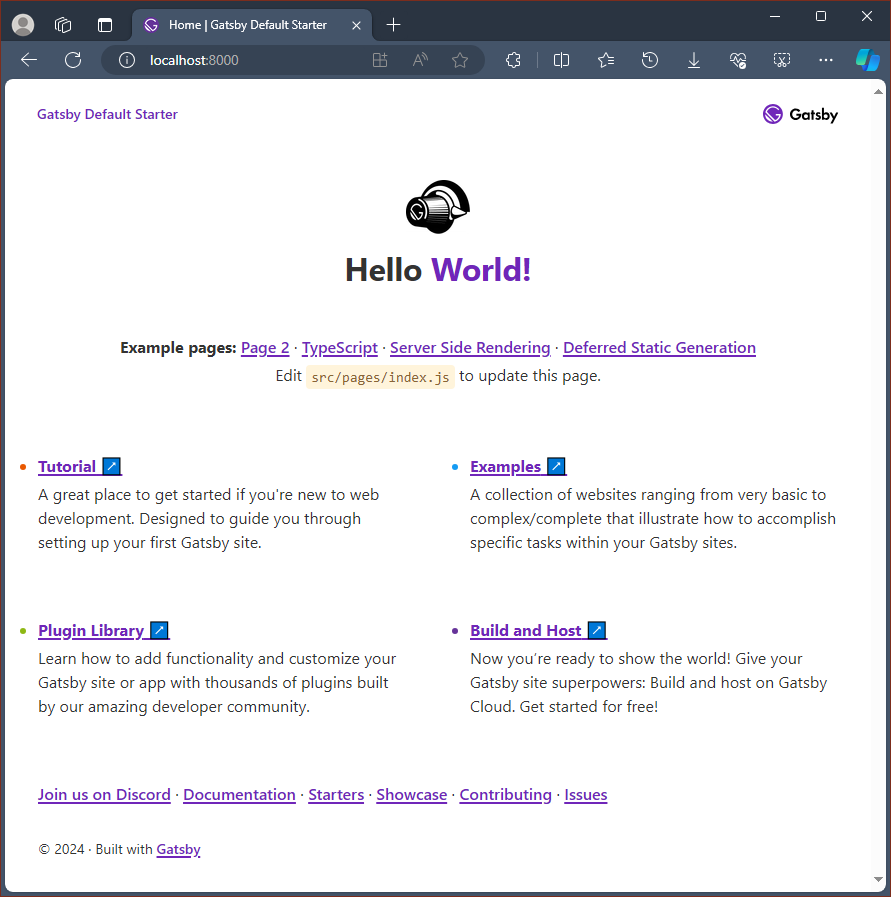
Once your new Gatsby project finishes compiling, your terminal will display that «You can now view gatsby-starter-default in the browser. http://localhost:8000/.» Select this localhost link to view your new project built in a web browser.
You’ll notice that your terminal output also let’s you know that you can «View GraphiQL, an in-browser IDE, to explore your site’s data and schema: http://localhost:8000/___graphql.» GraphQL consolidates your APIs into a self-documenting IDE (GraphiQL) built into Gatsby. In addition to exploring your site’s data and schema, you can perform GraphQL operations such as queries, mutations, and subscriptions. For more info, see Introducing GraphiQL.
Open the src/pages/index.js file in your VS Code editor. Find the page title
Hi people
Hi (Your Name)!
Let’s see how Next.js handles errors. Remove the


