- Краткое руководство. Создание первого приложения Node.js с помощью Visual Studio Quickstart: Use Visual Studio to create your first Node.js app
- Предварительные требования Prerequisites
- Создание проекта Create a project
- Изучение интегрированной среды разработки Explore the IDE
- Запуск приложения Run the application
- Node.js tutorial in Visual Studio Code
- Hello World
- Running Hello World
- Integrated Terminal
- Debugging Hello World
- An Express application
- Great code editing
- Debug your Express app
- Deploy your application
- Next steps
Краткое руководство. Создание первого приложения Node.js с помощью Visual Studio Quickstart: Use Visual Studio to create your first Node.js app
В рамках этого краткого (на 5–10 минут) знакомства с возможностями интегрированной среды разработки (IDE) Visual Studio вы создадите простое веб-приложение Node.js. In this 5-10 minute introduction to the Visual Studio integrated development environment (IDE), you’ll create a simple Node.js web application.
Предварительные требования Prerequisites
У вас должна быть установлена среда Visual Studio и должна иметься рабочая нагрузка «Разработка Node.js». You must have Visual Studio installed and the Node.js development workload.
Установите Visual Studio 2019 бесплатно со страницы скачиваемых материалов Visual Studio, если еще не сделали этого. If you haven’t already installed Visual Studio 2019, go to the Visual Studio downloads page to install it for free.
Установите Visual Studio 2017 бесплатно со страницы скачиваемых материалов Visual Studio, если еще не сделали этого. If you haven’t already installed Visual Studio 2017, go to the Visual Studio downloads page to install it for free.
Если вам нужно установить рабочую нагрузку, но вы уже используете Visual Studio, выберите пункт Средства > Получить средства и компоненты. , после чего запустится Visual Studio Installer. If you need to install the workload but already have Visual Studio, go to Tools > Get Tools and Features. , which opens the Visual Studio Installer. Выберите рабочую нагрузку Разработка Node.js, а затем элемент Изменить. Choose the Node.js development workload, then choose Modify.

У вас должна быть установлена среда выполнения Node.js. You must have the Node.js runtime installed.
Если он не установлен, мы рекомендуем установить версию LTS с веб-сайта Node.js для обеспечения лучшей совместимости с внешними платформами и библиотеками. If you don’t have it installed, we recommend you install the LTS version from the Node.js website for best compatibility with outside frameworks and libraries. Node.js построен для 32-разрядных и 64-разрядных архитектур. Node.js is built for 32-bit and 64-bit architectures. Средства Node.js в Visual Studio, включенные в рабочую нагрузку Node.js, поддерживают обе версии. The Node.js tools in Visual Studio, included in the Node.js workload, support both versions. Однако требуется только одна, поскольку программа установки Node.js поддерживает только одну установку за раз. Only one is required and the Node.js installer only supports one being installed at a time.
Как правило, Visual Studio автоматически обнаруживает установленную среду выполнения Node.js. In general, Visual Studio automatically detects the installed Node.js runtime. Если установленная среда выполнения не обнаружена, вы можете настроить проект так, чтобы он ссылался на установленную среду выполнения, на странице свойств (после создания проекта щелкните его узел правой кнопкой мыши, выберите пункт Свойства и укажите путь Node.exe). If it does not detect an installed runtime, you can configure your project to reference the installed runtime in the properties page (after you create a project, right-click the project node, choose Properties, and set the Node.exe path). Можно использовать глобальную установку Node.js или указать путь к локальному интерпретатору в каждом из проектов Node.js. You can use a global installation of Node.js or you can specify the path to a local interpreter in each of your Node.js projects.
Создание проекта Create a project
Сначала вы создадите проект веб-приложения Node.js. First, you’ll create an Node.js web application project.
Если у вас не установлена среда выполнения Node.js, установите версию LTS с веб-сайта Node.js. If you don’t have the Node.js runtime already installed, install the LTS version from the Node.js website.
Дополнительные сведения см. в необходимых условиях. For more information, see the prerequisites.
Запустите Visual Studio. Open Visual Studio.
Создайте новый проект. Create a new project.
Нажмите клавишу ESC, чтобы закрыть окно запуска. Press Esc to close the start window. Нажмите CTRL+Q, чтобы открыть поле поиска, введите Node.js и выберите Create new Blank Node.js Web application project (Создать проект: пустое веб-приложение Node.js) (JavaScript). Type Ctrl + Q to open the search box, type Node.js, then choose Create new Blank Node.js Web application project (JavaScript). В появившемся диалоговом окне выберите Создать. In the dialog box that appears, choose Create.
В верхней строке меню последовательно выберите Файл > Создать > Проект. From the top menu bar, choose File > New > Project. В левой области диалогового окна Новый проект разверните узел JavaScript и выберите Node.js. In the left pane of the New Project dialog box, expand JavaScript, then choose Node.js. В средней области выберите Пустое веб-приложение Node.js и нажмите кнопку ОК. In the middle pane, choose Blank Node.js Web application, then choose OK.
Если шаблон проекта Пустое веб-приложение Node.js отсутствует, необходимо добавить рабочую нагрузку Разработка Node.js. If you don’t see the Blank Node.js Web application project template, you must add the Node.js development workload. Подробные инструкции см. в разделе с предварительными требованиями. For detailed instructions, see the Prerequisites.
Visual Studio создаст решение и откроет проект. Visual Studio creates and the new solution and opens the project. Файл server.js откроется в редакторе в левой области. server.js opens in the editor in the left pane.
Изучение интегрированной среды разработки Explore the IDE
Посмотрите на обозреватель решений в правой области. Take a look at Solution Explorer in the right pane.

Полужирным шрифтом выделен ваш проект, имя которого вы указали в окне Новый проект. Highlighted in bold is your project, using the name you gave in the New Project dialog box. На диске этот проект представлен файлом NJSPROJ в папке проекта. On disk, this project is represented by a .njsproj file in your project folder.
На верхнем уровне находится решение, имя которого по умолчанию совпадает с именем проекта. At the top level is a solution, which by default has the same name as your project. Решение, представленное на диске файлом SLN, является контейнером для одного или нескольких связанных проектов. A solution, represented by a .sln file on disk, is a container for one or more related projects.
В узле npm представлены все установленные пакеты npm. The npm node shows any installed npm packages. Вы можете щелкнуть узел npm правой кнопкой мыши, чтобы найти и установить пакеты npm с помощью диалогового окна. You can right-click the npm node to search for and install npm packages using a dialog box.
Чтобы установить пакеты npm или команды Node.js из командной строки, щелкните узел проекта правой кнопкой мыши и выберите пункт Открыть командную строку здесь. If you want to install npm packages or Node.js commands from a command prompt, right-click the project node and choose Open Command Prompt Here.

В редакторе, в котором открыт файл server.js, выберите http.createServer и нажмите клавишу F12 или выберите пункт Перейти к определению в контекстном меню. In the server.js file in the editor (left pane), choose http.createServer and then press F12 or choose Go To Definition from the context (right-click) menu. Эта команда выполняет переход к определению функции createServer в index.d.ts. This command takes you to the definition of the createServer function in index.d.ts.

Вернитесь к файлу server.js, установите курсор в конце строки кода res.end(‘Hello World\n’); и измените ее следующим образом: Got back to server.js, then put your cursor at the end of the string in this line of code, res.end(‘Hello World\n’); , and modify it so that it looks like this:
res.end(‘Hello World\n’ + res.connection.
При вводе connection. технология IntelliSense предлагает варианты автозавершения. Where you type connection. , IntelliSense provides options to auto-complete the code entry.

Выберите localPort, а затем введите ); , чтобы завершить оператор. Он должен выглядеть следующим образом: Choose localPort, and then type ); to complete the statement so that it looks like this:
res.end(‘Hello World\n’ + res.connection.localPort);
Запуск приложения Run the application
Чтобы запустить приложение, нажмите клавиши CTRL+F5 (или последовательно выберите Отладка > Запуск без отладки). Press Ctrl+F5 (or Debug > Start Without Debugging) to run the application. Приложение откроется в браузере. The app opens in a browser.
В окне браузера вы увидите надпись «Hello World» и номер локального порта. In the browser window, you will see «Hello World» plus the local port number.
Закройте веб-браузер. Close the web browser.
Node.js tutorial in Visual Studio Code
Node.js is a platform for building fast and scalable server applications using JavaScript. Node.js is the runtime and npm is the Package Manager for Node.js modules.
Visual Studio Code has support for the JavaScript and TypeScript languages out-of-the-box as well as Node.js debugging. However, to run a Node.js application, you will need to install the Node.js runtime on your machine.
To get started in this walkthrough, install Node.js for your platform. The Node Package Manager is included in the Node.js distribution. You’ll need to open a new terminal (command prompt) for the node and npm command-line tools to be on your PATH.
Linux: There are specific Node.js packages available for the various flavors of Linux. See Installing Node.js via package manager to find the Node.js package and installation instructions tailored to your version of Linux.
Tip: To test that you’ve got Node.js correctly installed on your computer, open a new terminal and type node —help and you should see the usage documentation.
Hello World
Let’s get started by creating the simplest Node.js application, «Hello World».
Create an empty folder called «hello», navigate into and open VS Code:
Tip: You can open files or folders directly from the command line. The period ‘.’ refers to the current folder, therefore VS Code will start and open the Hello folder.
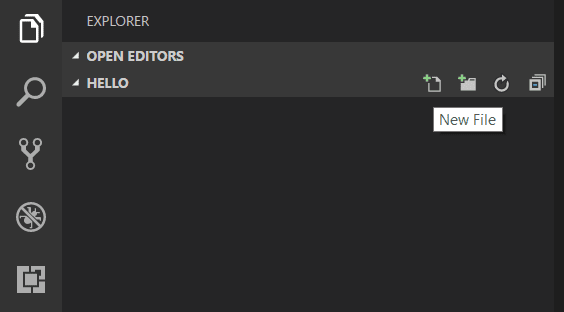
From the File Explorer toolbar, press the New File button:
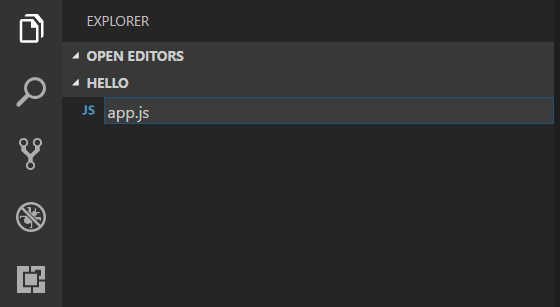
and name the file app.js :
By using the .js file extension, VS Code interprets this file as JavaScript and will evaluate the contents with the JavaScript language service. Refer to the VS Code JavaScript language topic to learn more about JavaScript support.
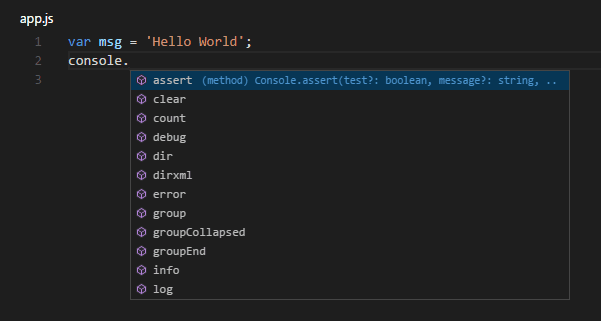
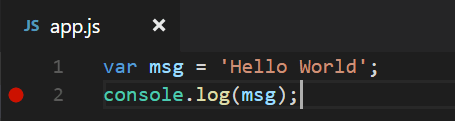
Create a simple string variable in app.js and send the contents of the string to the console:
Note that when you typed console. IntelliSense on the console object was automatically presented to you.
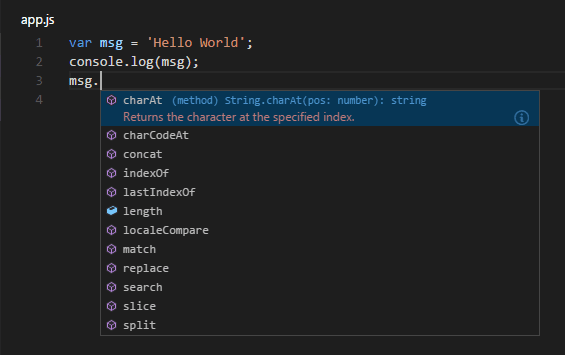
Also notice that VS Code knows that msg is a string based on the initialization to ‘Hello World’ . If you type msg. you’ll see IntelliSense showing all of the string functions available on msg .
After experimenting with IntelliSense, revert any extra changes from the source code example above and save the file ( ⌘S (Windows, Linux Ctrl+S ) ).
Running Hello World
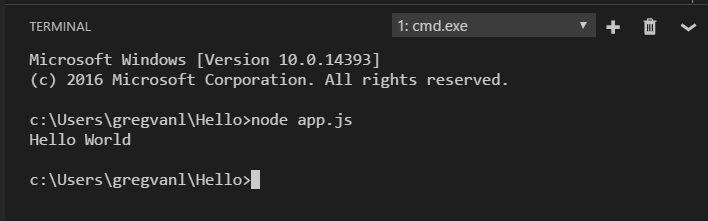
It’s simple to run app.js with Node.js. From a terminal, just type:
You should see «Hello World» output to the terminal and then Node.js returns.
Integrated Terminal
VS Code has an integrated terminal which you can use to run shell commands. You can run Node.js directly from there and avoid switching out of VS Code while running command-line tools.
View > Terminal ( ⌃` (Windows, Linux Ctrl+` ) with the backtick character) will open the integrated terminal and you can run node app.js there:
For this walkthrough, you can use either an external terminal or the VS Code integrated terminal for running the command-line tools.
Debugging Hello World
As mentioned in the introduction, VS Code ships with a debugger for Node.js applications. Let’s try debugging our simple Hello World application.
To set a breakpoint in app.js , put the editor cursor on the first line and press F9 or click in the editor left gutter next to the line numbers. A red circle will appear in the gutter.
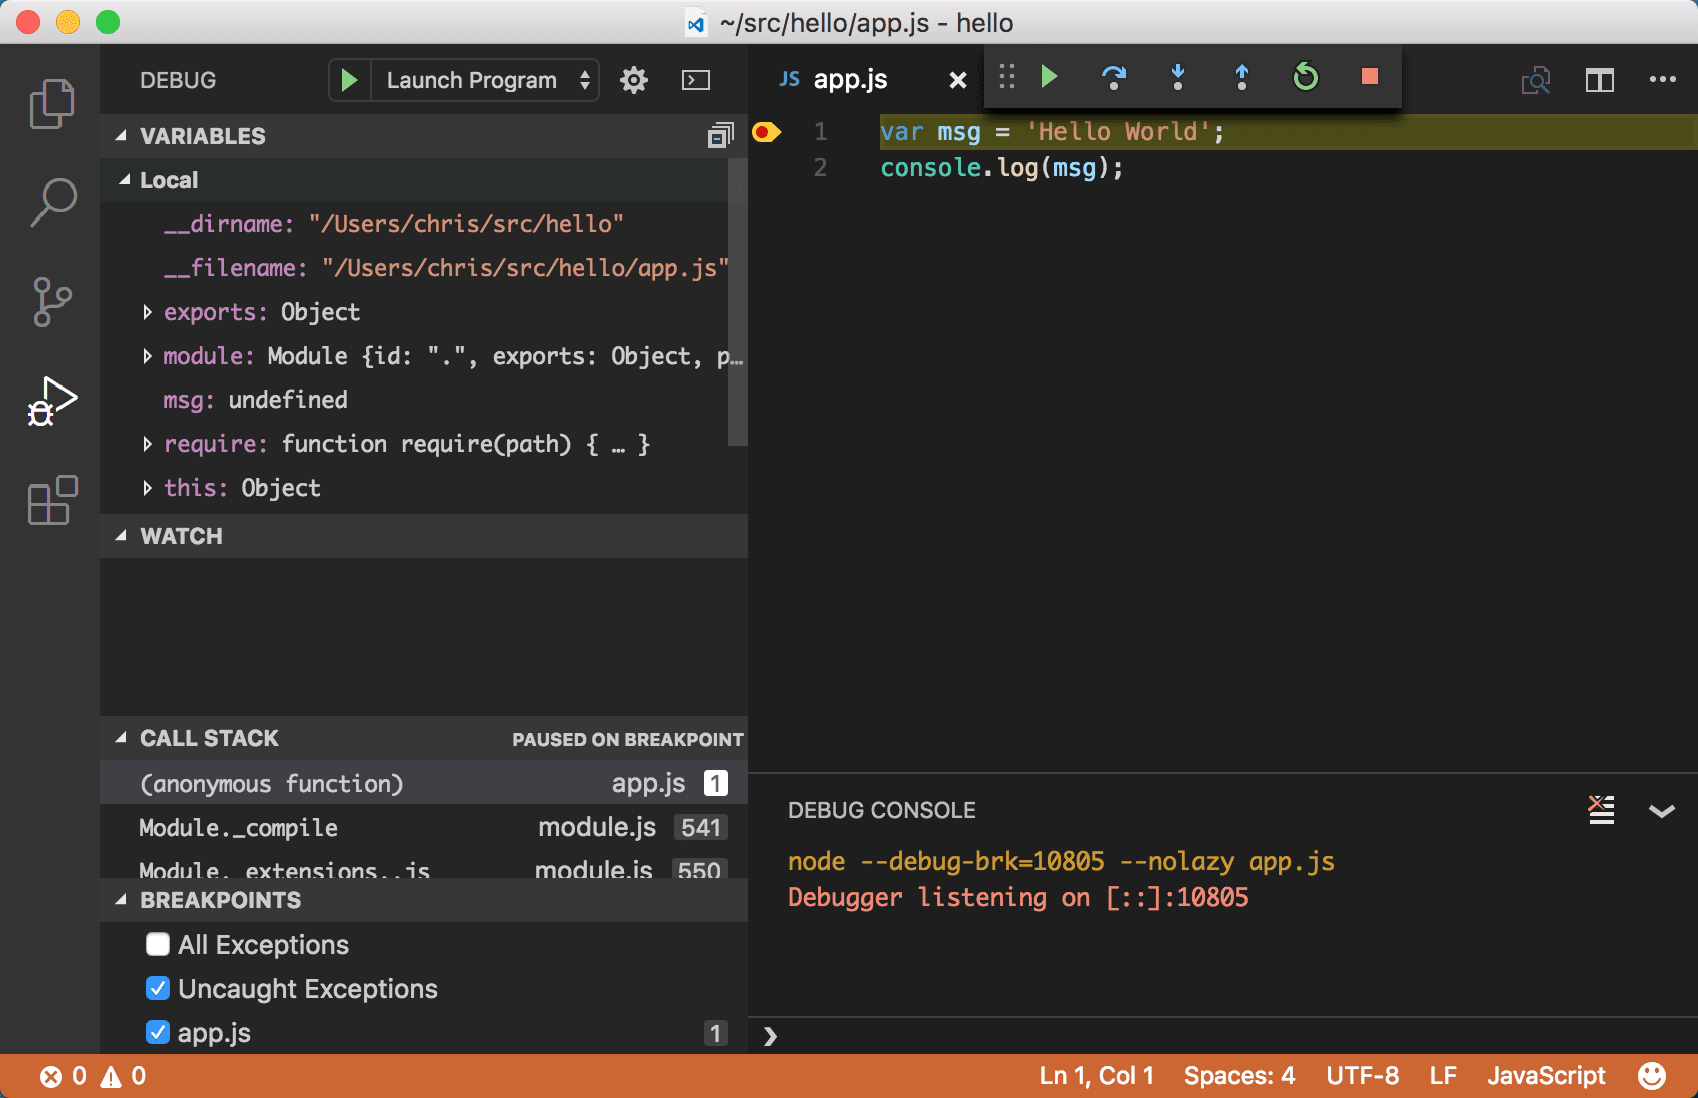
To start debugging, select the Run View in the Activity Bar:
You can now click Debug toolbar green arrow or press F5 to launch and debug «Hello World». Your breakpoint will be hit and you can view and step through the simple application. Notice that VS Code displays a different colored Status Bar to indicate it is in Debug mode and the DEBUG CONSOLE is displayed.
Now that you’ve seen VS Code in action with «Hello World», the next section shows using VS Code with a full-stack Node.js web app.
Note: We’re done with the «Hello World» example so navigate out of that folder before you create an Express app. You can delete the «Hello» folder if you wish as it is not required for the rest of the walkthrough.
An Express application
Express is a very popular application framework for building and running Node.js applications. You can scaffold (create) a new Express application using the Express Generator tool. The Express Generator is shipped as an npm module and installed by using the npm command-line tool npm .
Tip: To test that you’ve got npm correctly installed on your computer, type npm —help from a terminal and you should see the usage documentation.
Install the Express Generator by running the following from a terminal:
The -g switch installs the Express Generator globally on your machine so you can run it from anywhere.
We can now scaffold a new Express application called myExpressApp by running:
This creates a new folder called myExpressApp with the contents of your application. The —view pug parameters tell the generator to use the pug template engine.
To install all of the application’s dependencies (again shipped as npm modules), go to the new folder and execute npm install :
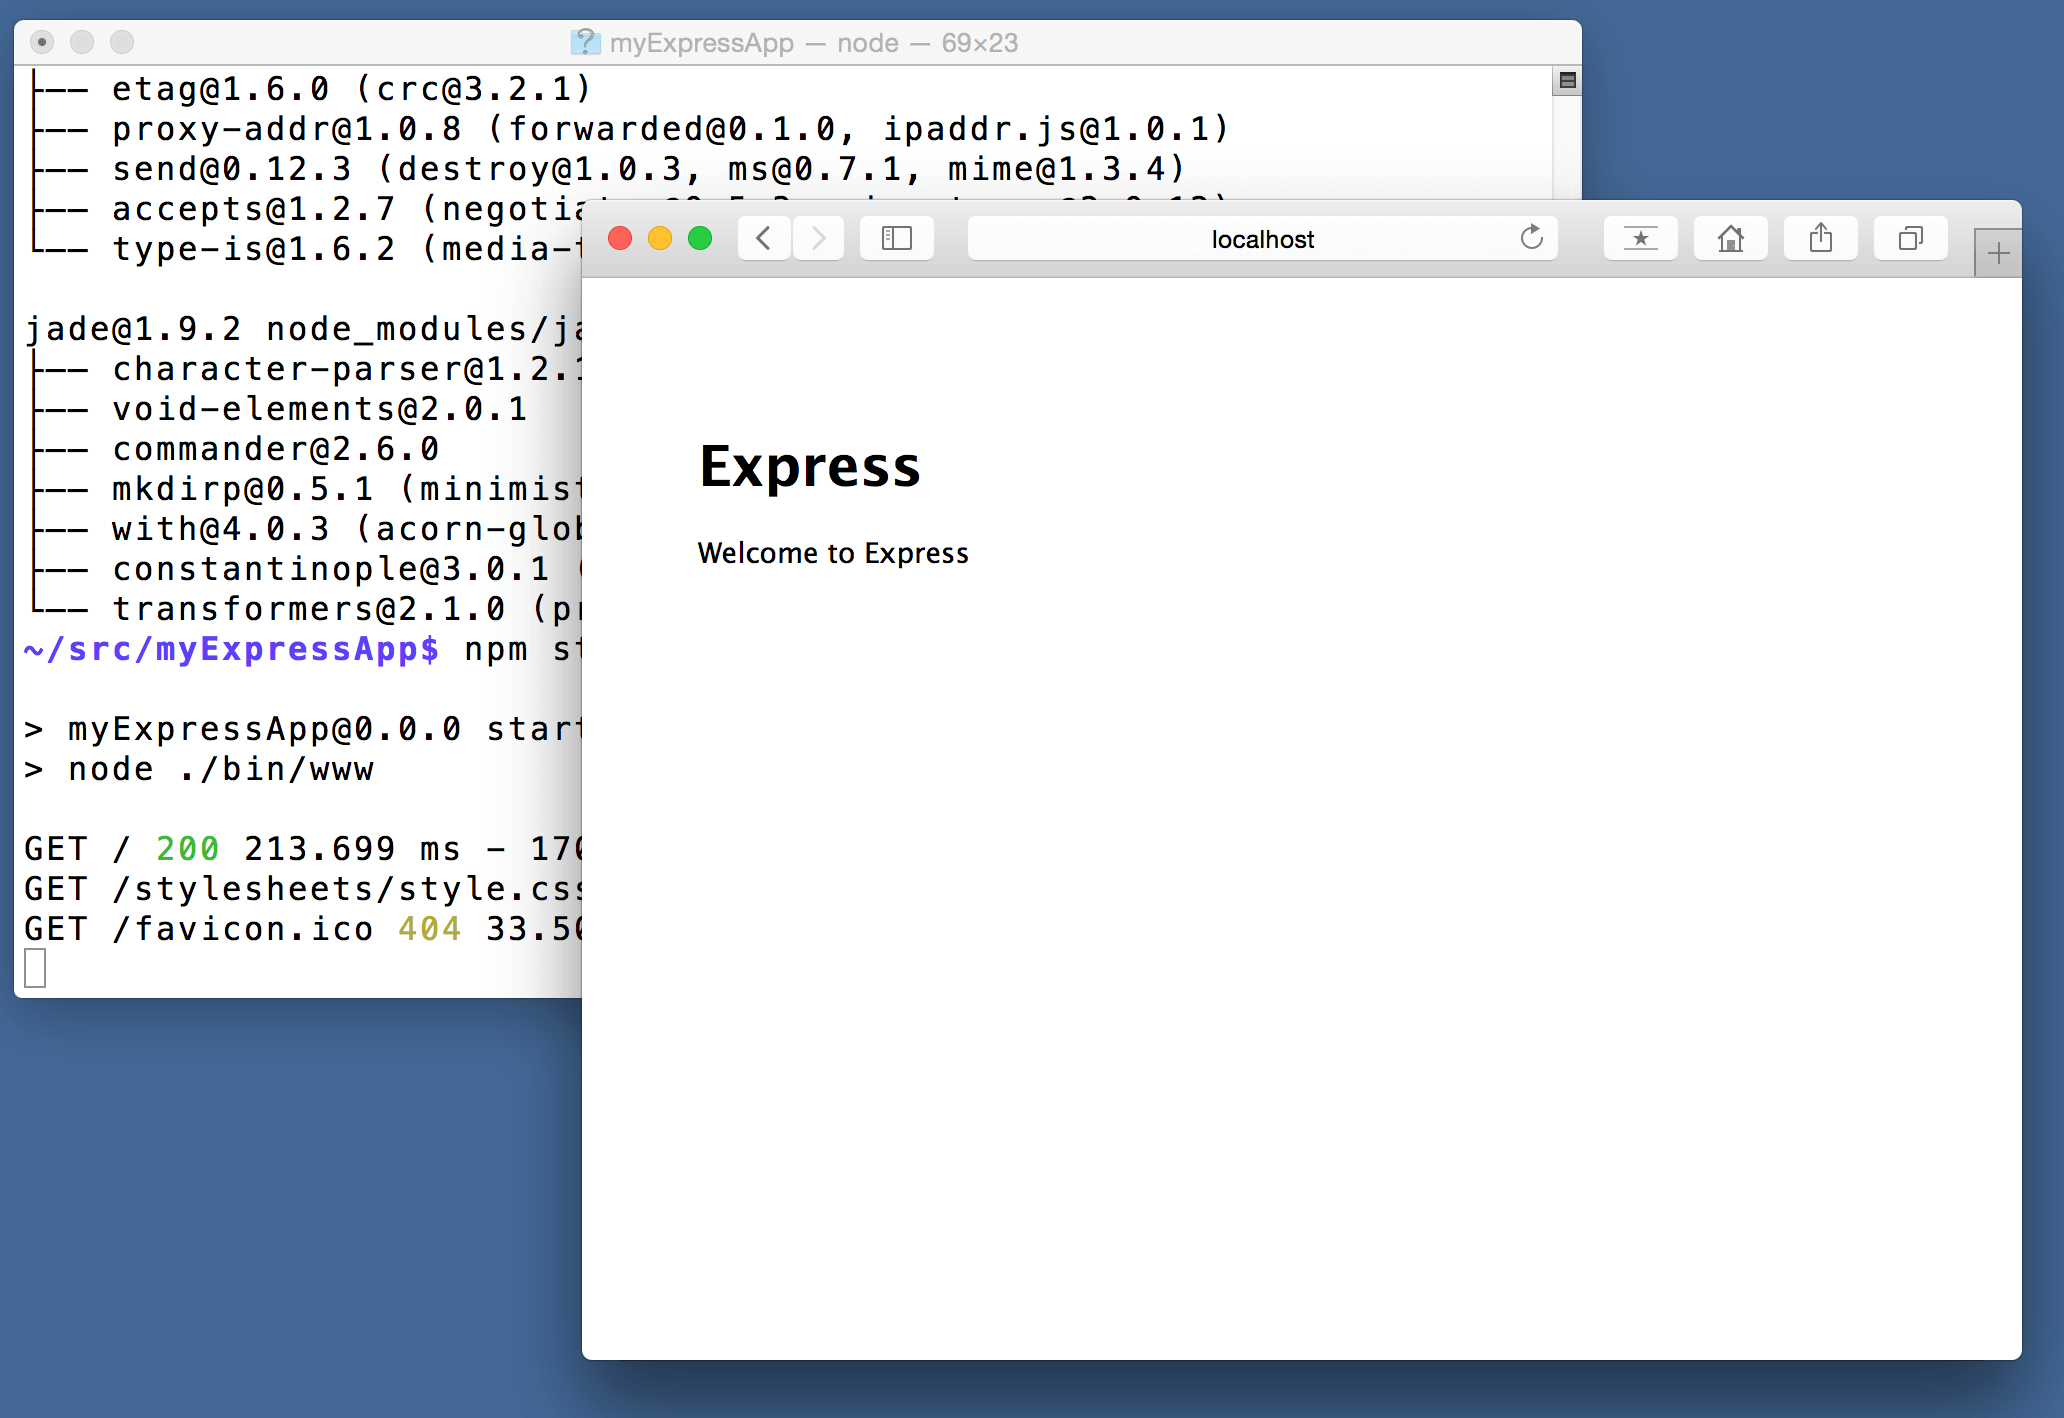
At this point, we should test that our application runs. The generated Express application has a package.json file which includes a start script to run node ./bin/www . This will start the Node.js application running.
From a terminal in the Express application folder, run:
The Node.js web server will start and you can browse to http://localhost:3000 to see the running application.
Great code editing
Close the browser and from a terminal in the myExpressApp folder, stop the Node.js server by pressing CTRL+C .
Now launch VS Code:
Note: If you’ve been using the VS Code integrated terminal to install the Express generator and scaffold the app, you can open the myExpressApp folder from your running VS Code instance with the File > Open Folder command.
The Node.js and Express documentation does a great job explaining how to build rich applications using the platform and framework. Visual Studio Code will make you more productive in developing these types of applications by providing great code editing and navigation experiences.
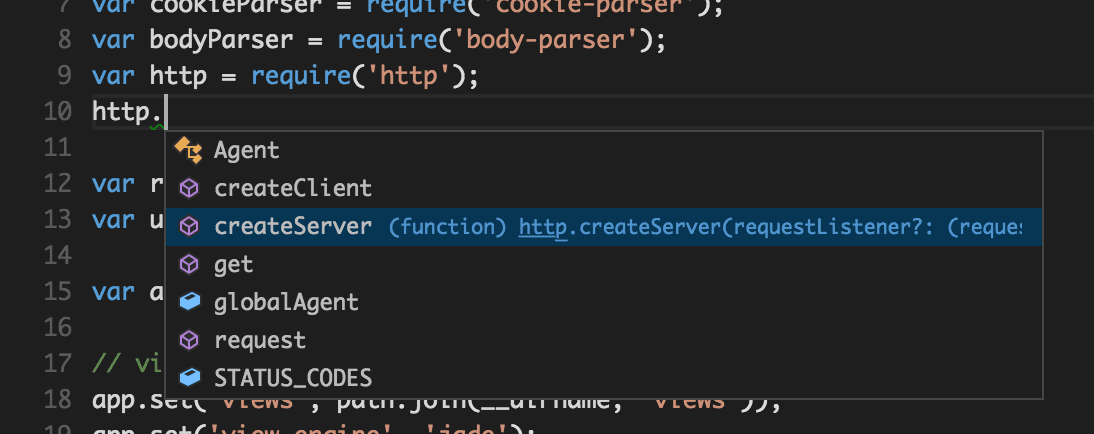
Open the file app.js and hover over the Node.js global object __dirname . Notice how VS Code understands that __dirname is a string. Even more interesting, you can get full IntelliSense against the Node.js framework. For example, you can require http and get full IntelliSense against the http class as you type in Visual Studio Code.
VS Code uses TypeScript type declaration (typings) files (for example node.d.ts ) to provide metadata to VS Code about the JavaScript based frameworks you are consuming in your application. Type declaration files are written in TypeScript so they can express the data types of parameters and functions, allowing VS Code to provide a rich IntelliSense experience. Thanks to a feature called Automatic Type Acquisition , you do not have to worry about downloading these type declaration files, VS Code will install them automatically for you.
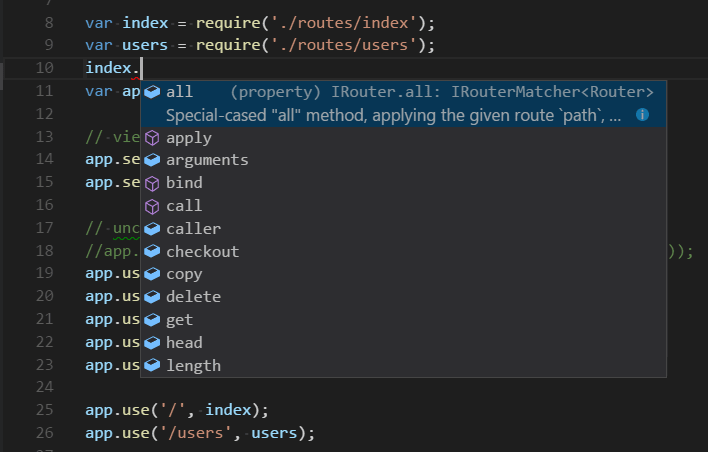
You can also write code that references modules in other files. For example, in app.js we require the ./routes/index module, which exports an Express.Router class. If you bring up IntelliSense on index , you can see the shape of the Router class.
Debug your Express app
You will need to create a debugger configuration file launch.json for your Express application. Click on the Run icon in the Activity Bar and then the Configure gear icon at the top of the Run view to create a default launch.json file. Select the Node.js environment by ensuring that the type property in configurations is set to «node» . When the file is first created, VS Code will look in package.json for a start script and will use that value as the program (which in this case is «$
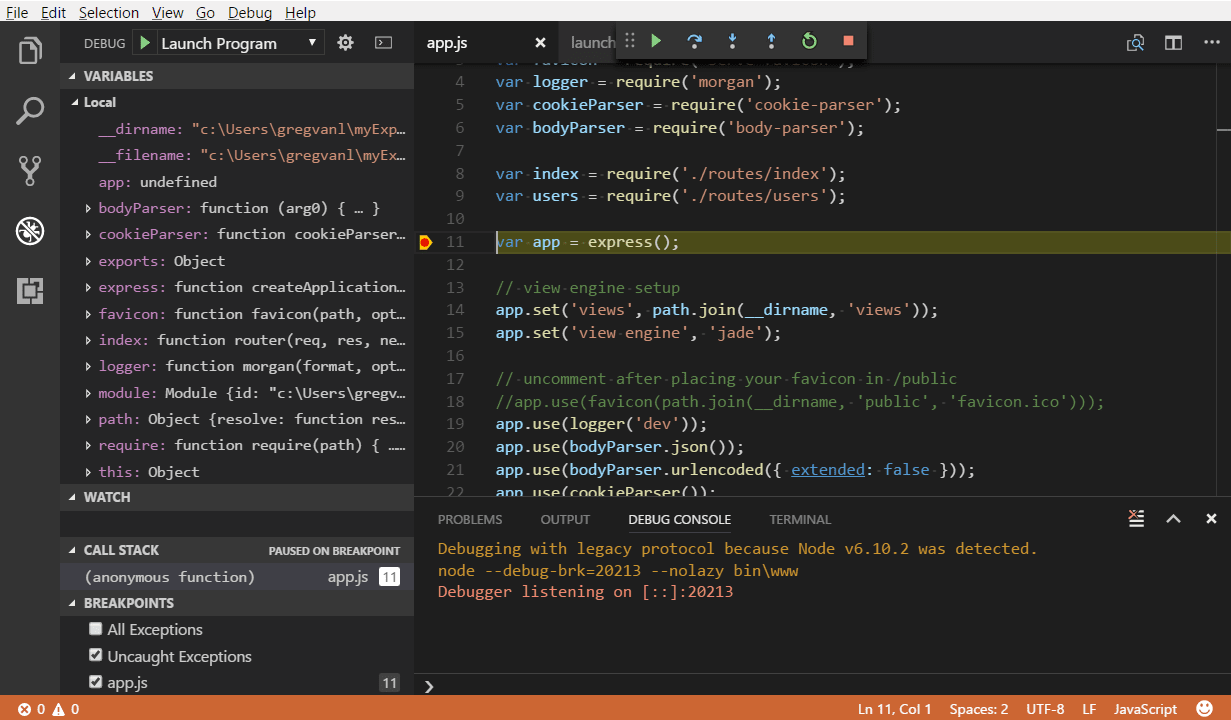
Save the new file and make sure Launch Program is selected in the configuration dropdown at the top of the Run view. Open app.js and set a breakpoint near the top of the file where the Express app object is created by clicking in the gutter to the left of the line number. Press F5 to start debugging the application. VS Code will start the server in a new terminal and hit the breakpoint we set. From there you can inspect variables, create watches, and step through your code.
Deploy your application
If you’d like to learn how to deploy your web application, check out the Deploying Applications to Azure tutorials where we show how to run your website in Azure.
Next steps
There is much more to explore with Visual Studio Code, please try the following topics:


