- Как установить node.js на windows: подробная инструкция
- Установка
- Запуск приложения на Node.js в браузере
- Установка пакетов модулей через npm
- Installing and Running Node-RED on a Windows PC
- 1. Introduction
- 2. Software & Equipment Requirements
- 3. Installing Node-RED
- 3.1 Node.js
- 3.2 Install Node-RED
- 4. Additional packages you will need
- 4.1 Node-RED-dashboard
- 4.2 node-red-contrib-modbus
- 5 Running Node-RED
- 6. An Overview of Node-RED
- 6.1. Palette
- 6.2. Workspace
- 6.3. Sidebar
- 6.4. Header
- Running Node-RED locally
- Prerequisites
- Installing with npm
- Installing with docker
- Installing with snap
- Running
- Command-line Usage
- Override individual settings
- Passing arguments to the underlying Node.js process
- Upgrading Node-RED
- Next steps
Как установить node.js на windows: подробная инструкция

В наше время много open source проектов зависят от node. Поэтому нам задают много вопросов о том «Как установить node.js?».Что же нам делать если мы хотим разработать и протестировать node приложение на нашем компьютере c Windows, прежде чем залить его на сервер?
Настроить node.js на PC очень просто, в этой статье мы разберем:
- Установку
- Запуск приложения в браузере
- Установка пакетов модулей через npm
- Удаление
Установка
На официальном сайте есть инсталляторы для Windows и Mac OS, так же есть бинарники для Linux пользователей. Мы опишем установку на Windows, но общий процесс одинаков для других ОС.
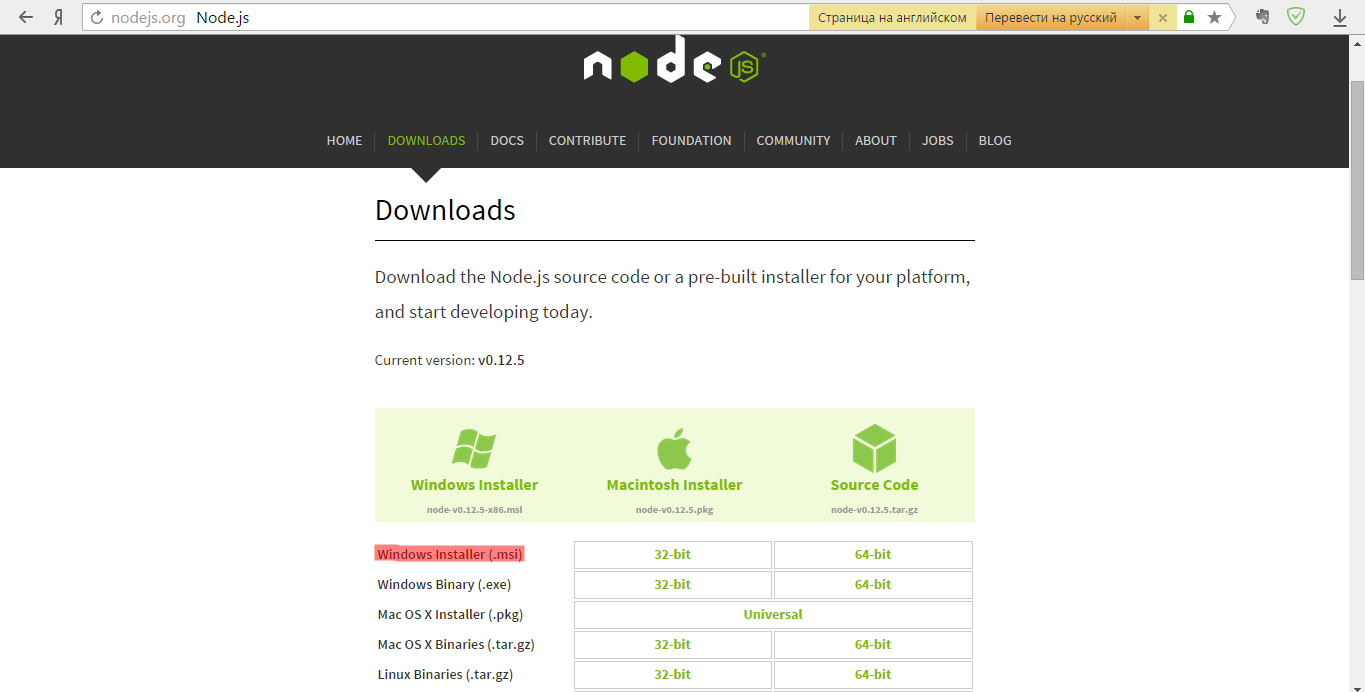
Для того чтобы начать зайдите на страницу загрузки Node.js. Выберите установщик который вы хотите скачать и установить. Мы будем использовать 64-bit Windows Installer. Вам следует использовать пакет исходя от вашей конфигурации.
После загрузки файла, кликаем по нему и запускаем мастер установки.
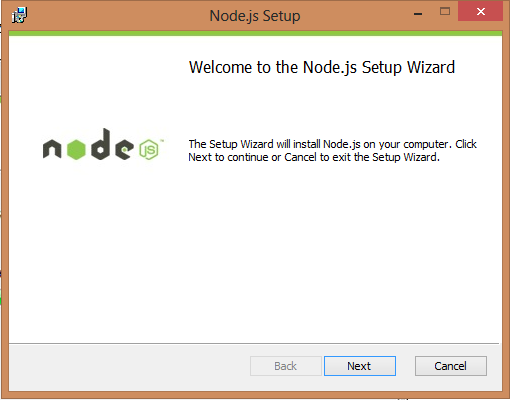
Проходим по шагам и ждем пока мастер завершит установку.

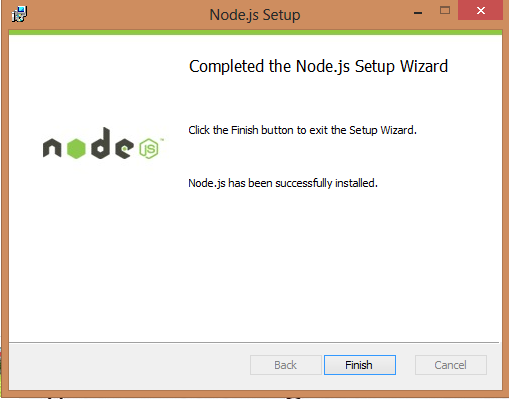
Вот и все. Рекомендуется оставлять стандартные настройки во время инсталляции.
Запуск приложения на Node.js в браузере
После установки node.js платформы, следующий шаг который следует сделать, это запустить node приложение с вашего компьютера. Мы создадим простое приложение для демонстрации.
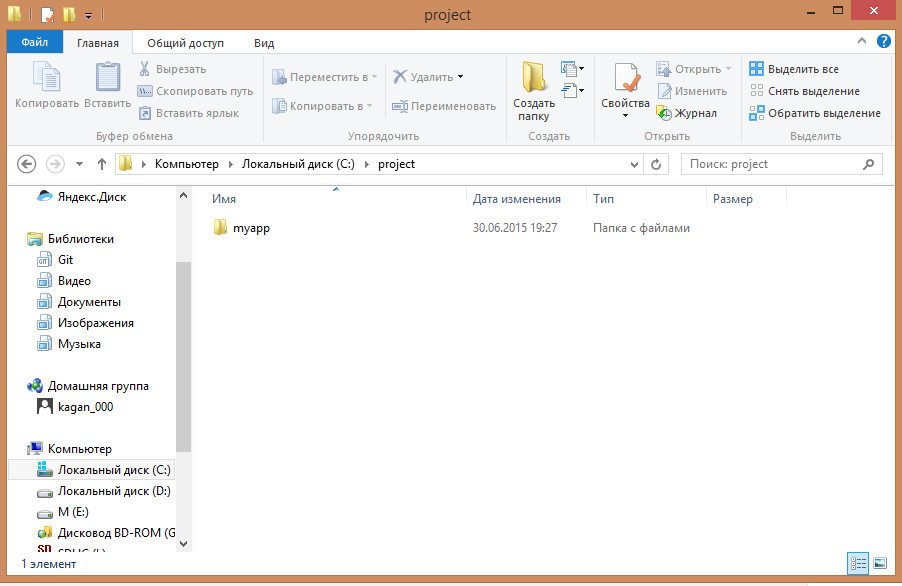
Создайте папку для вашего приложения. Я создал папку project на диске C:/ внутри которой создал еще каталог myapp.
Внутри каталога myapp создайте файл hello.js и напишите в нем следующий код:
Представленный выше код слегка модифицированная версия кода с официального сайта node, который создает HTTP web server на вашем компьютере.
Теперь мы готовы запустить наше первое Node.js приложение.
Откройте Node.js командную строку она находится в меню Пуск Windows, или воспользуйтесь поиском. 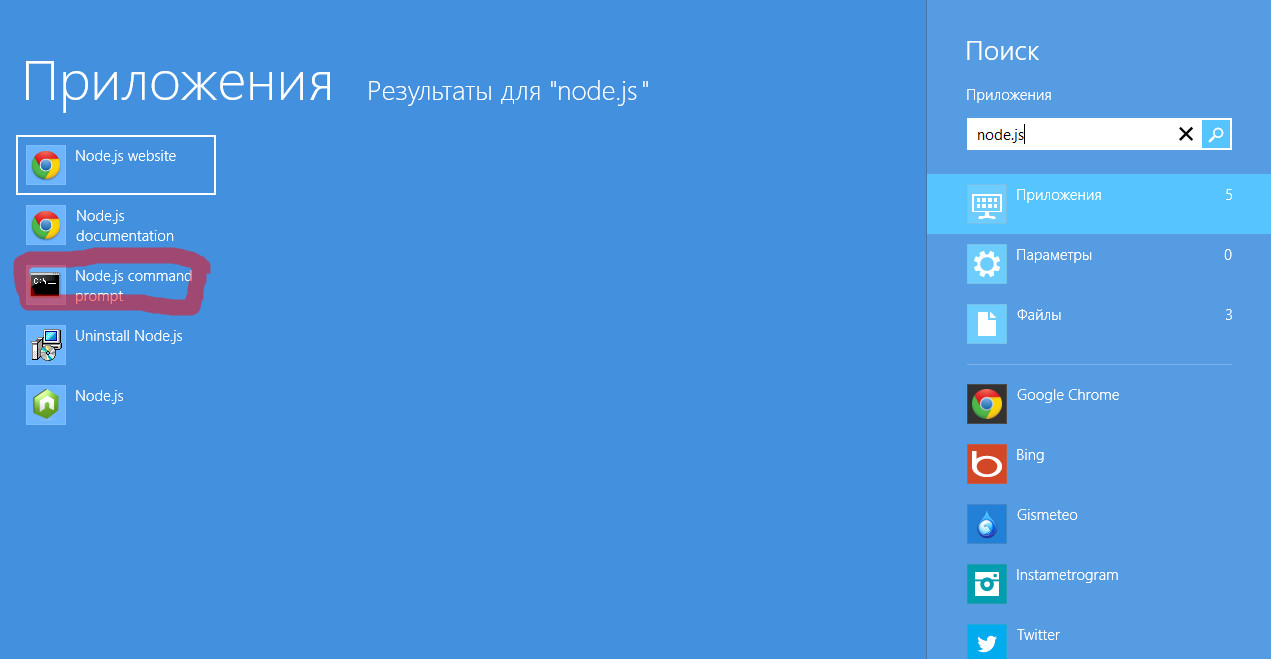
Командная строка node использует интерфейс (CLI). С помощью командной строки войдите в каталог myapp
Далее давайте запустим файл hello.js. Пишем команду
Если все прошло отлично, вы увидите следующее сообщение в командной строке. 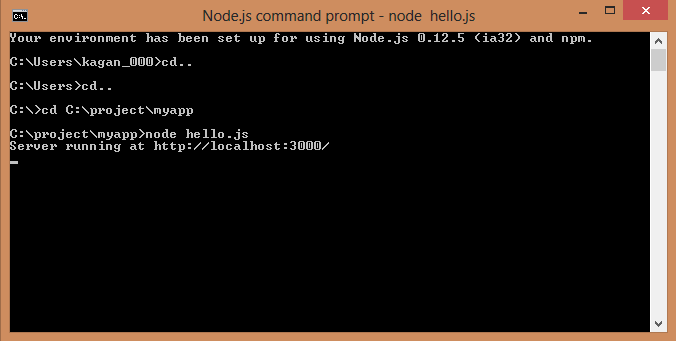
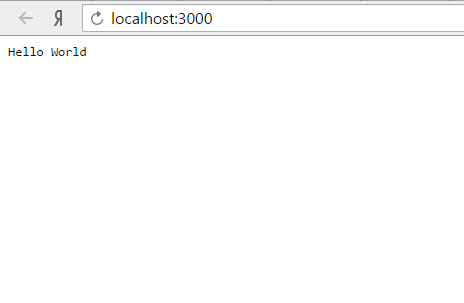
В своем любимом браузере введите URl:
Вы должны увидеть сообщение Hello word в окне браузера, которое означает что все работает отлично.
 Установка пакетов модулей через npm
 Установка пакетов модулей через npm
Пакетные модули делают Node.js более мощной средой для разработки приложений. Npm это стандартный пакетный менеджер, он автоматически устанавливается с ноде по умолчанию.
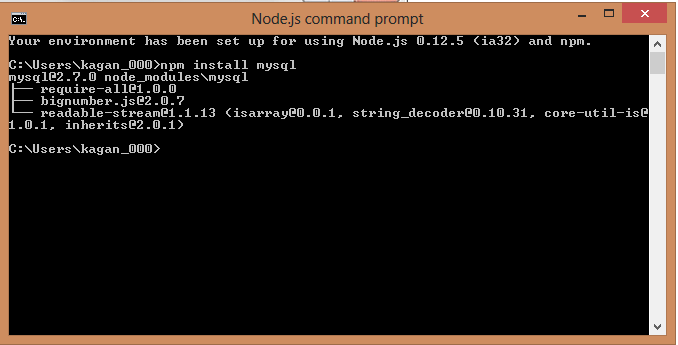
Допустим мы хотим использовать базу данных для нашего приложения, давайте установим Mysql. Введем следующую команду в командной строке node.js:
Приведенная выше команда скачает и установит пакет mysql из npm. После установки вы должны увидеть следующее.
Остальной список модулей вы можете посмотреть на сайте npm
Installing and Running Node-RED on a Windows PC
1. Introduction
Node-RED is a visual programming tool aimed at connecting hardware devices, APIs and online services in alternative ways, without the need for traditional programming experience. The software provides a browser-based editor that makes it easy to wire together flows using the wide range of nodes in the palette that can be deployed to its run-time in a single-click. Although the concept of flows, nodes & palettes may sound unfamiliar, Node-RED makes programming simple by using a visual representation of code in blocks with lines between them.
Some examples of the many functions available are:
- REST clients to query data on other servers
- Modbus TCP client to talk to Brainboxes Remote IO devices
- JavaScript functions can be created within the rich text editor
- A built-in library allows you to save useful functions, templates or flows for re-use
- The flows created in Node-RED are stored using JSON which can be easily imported and exported for sharing with others
- An online flow library allows you to share your best flows with the world.
2. Software & Equipment Requirements
- A Brainboxes supplied Ethernet I/O device
- Any Windows PC/laptop
- Network connection
3. Installing Node-RED
The following are instructions on how to install Node-RED on a Windows based operating system. All required download links can be found on the official Node-RED and NodeJS websites.
3.1 Node.js
Node-RED uses a runtime engine called Node.js. Node.js is a JavaScript based programming language and must be installed before Node-RED. Node.js can be downloaded from the official Node.js website. When installing Node.js for use with Node-RED it is recommended that you install the 10.XX.X. LTS variant.

Once the installation is complete, open up a Windows command prompt, you can open a command prompt by using the keyboard shortcut (Windows key + r) type cmd and then once the command prompt has opened, input the following:
This command checks if both Node.js and NPM are correctly installed, and if so it will return a version number. The output should look something like this:

NPM is a package manager for the JavaScript programming language, this is needed for installing additional Node-RED packages which we will need later. NPM should be installed by default when installing Node.js.
3.2 Install Node-RED
Now we can begin to install Node-RED, navigate to CMD and input the command:
Please note if the module does not install and throws up error messages regarding permissions, you will need to run CMD in Administrator mode. If you are having trouble with this please contact your System Administrator. Once this command is ran Node-RED will begin to install. Please note this can take some time to complete.

Once complete, the output should look like this:

4. Additional packages you will need
There are some additional packages you will need to install when following this guide.
4.1 Node-RED-dashboard
The first package you will need to install is the Node-RED dashboard, this module adds nodes which allow us to easily create a live data dashboard.
To install this module simply open up a command prompt and input:
Please allow a few minutes for this to package install.

Please note if the module does not install and throws up error messages regarding permissions, you will need to run CMD in Administrator mode. If you are having trouble with this please contact your System Administrator.
When the module is successfully installed the response should look something like this:

4.2 node-red-contrib-modbus
The next package you will need to install is contrib-modbus, this module adds nodes that allow us to communicate in ModbusTCP
To install this module simply open up a command prompt and input:
Again, please allow a few minutes for this to install.

Please remember you may need to run this command on an elevated command prompt.
When the module is successfully installed the response should look something like this:

5 Running Node-RED
Once everything has been successfully installed you can now begin to run your Node-RED webserver. You can do this by navigating to a command prompt and typing in the following command:
As we installed Node-RED as a global NPM module it adds the command node-red to your system path which you can then input into a command prompt to start Node-RED

Once the server has booted up successfully the command prompt will let us know that the server is now running, and what IP address it is on.

Take note of the Node-RED webserver’s IP address and input it into your web browser

You have now successfully installed, booted up, and accessed your Node-RED webserver. You can now begin to create your own flows.
6. An Overview of Node-RED
So how do we get started? Below is an overview of the Node-RED interface, with a brief description of each section.
6.1. Palette
The palette on the left contains all the different nodes available for use. From injecting different types of information (strings, Booleans, numbers, etc.), executing Linux command lines and the ability to make different types of connections, to recording simple debug traces, sending emails notifications and displaying information on a text box.

6.2. Workspace
The workspace in the middle is where your flows will be created. As you follow through this simple guide, you will learn how the flows connect and work together in an easy to use, programmable way.
6.3. Sidebar
The sidebar on the right provides additional settings and debug information. Using the debug node available from the palette will show the user what information is being sent, or the information which is being received from the node it is attached to.
6.4. Header
The header at the top, contains the deploy button, which is used for deploying your current workspace. Deploying it will make it available for execution, or it will immediately start running, depending on how you have it set up. You will also find the main menu which allows you to import/export workspaces, or change several configurations regarding your Node-RED project.
Running Node-RED locally
Prerequisites
To install Node-RED locally you will need a supported version of Node.js.
Installing with npm
To install Node-RED you can use the npm command that comes with node.js:
If you are using Windows, do not start the command with sudo .
That command will install Node-RED as a global module along with its dependencies.
You can confirm it has succeeded if the end of the command output looks similar to:
Installing with docker
To run in Docker in its simplest form just run:
For more detailed information see our docker guide.
Installing with snap
If your OS supports Snap you can install Node-RED with:
When installed as a Snap package, it will run in a secure container that does not have access to some extra facilities that may be needed for you to use, such as:
- access to main system storage. Can only read/write to local home directories.
- gcc — needed to compile any binary components of nodes you want to install
- git — needed if you want to use the Projects feature
- direct access to gpio hardware
- access to any external commands your flows want to use with the Exec node (for example).
You can run it in “classic” mode which reduces the container security but then does provide wider access.
Running
Once installed as a global module you can use the node-red command to start Node-RED in your terminal. You can use Ctrl-C or close the terminal window to stop Node-RED.
You can then access the Node-RED editor by pointing your browser at http://localhost:1880.
The log output provides you various pieces of information:
- The versions of Node-RED and Node.js
- Any errors hit when it tried to load the palette nodes
- The location of your Settings file and User Directory
- The name of the flows file it is using.
Node-RED uses flows_ .json as the default flows file. You can change this by providing the flow file name as argument to the node-red command.
Command-line Usage
Node-RED can be started using the command node-red . This command can take various arguments:
| Option | Description |
|---|---|
| -p , —port PORT | Sets the TCP port the runtime listens on. Default: 1880 |
| —safe | Starts Node-RED without starting the flows. This allows you to open the flows in the editor and make changes without the flows running. When you deploy your changes, the flows are then started. |
| -s , —settings FILE | Sets the settings file to use. Default: settings.js in userDir |
| —title TITLE | Set process window title |
| -u , —userDir DIR | Sets the user directory to use. Default: |
/.node-red
Node-RED uses flows_ .json as the default flows file. If the computer you are running on may change its hostname, then you should ensure you provide a static file name; either as a command-line argument or using the flowsFile option in your settings file.
Override individual settings
Since Node-RED 1.1.0
You can override individual settings on the command-line using the -D (or —define ) option.
For example, to change the logging level you can use:
You can also provide the custom settings as a file:
The file should contain a list of the settings to override:
Passing arguments to the underlying Node.js process
There are occasions when it is necessary to pass arguments to the underlying Node.js process. For example, when running on devices like the Raspberry Pi or BeagleBone Black that have a constrained amount of memory.
To do this, you must use the node-red-pi start script in place of node-red . Note: this script is not available on Windows.
Alternatively, if are running Node-RED using the node command, you must provide arguments for the node process before specifying red.js and the arguments you want passed to Node-RED itself.
The following two commands show these two approaches:
Upgrading Node-RED
If you have installed Node-RED as a global npm package, you can upgrade to the latest version with the following command:
If you are using Windows, do not start the command with sudo .
Next steps
Node-RED: Low-code programming for event-driven applications.
Copyright OpenJS Foundation and Node-RED contributors. All rights reserved. The OpenJS Foundation has registered trademarks and uses trademarks. For a list of trademarks of the OpenJS Foundation, please see our Trademark Policy and Trademark List. Trademarks and logos not indicated on the list of OpenJS Foundation trademarks are trademarks™ or registered® trademarks of their respective holders. Use of them does not imply any affiliation with or endorsement by them.


