- Установка Node.js на Windows 7
- Решение
- Проверка работы Node.js и npm
- Set up your Node.js development environment directly on Windows
- Install nvm-windows, node.js, and npm
- Alternative version managers
- Install your favorite code editor
- Install Git (optional)
- Downloading and installing Node.js and npm
- Как установить Node.js и NPM на Windows
- Предисловие
- Описание установки
- Этапы установки
- Тестируем
- Как обновить Node.js?
- Как скачать и установить Node.js и NPM на Windows
Установка Node.js на Windows 7
Привет! Рассмотрим установку Node.js на Windows 7 и протестируем его работу.
При попытке установить на Windows 7 последнюю версию v14.15.4 LTS [ссылка], возникает ошибка о том, что приложение поддерживается на Windows 8.1. и выше:
Решение
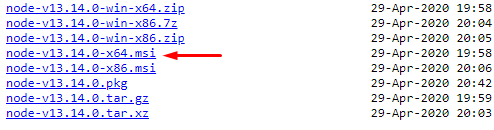
1. Находим более раннюю версию, которая подойдёт для Windows 7, перейдем по ссылке.
 Node.js v13.14.0
2. Скачиваем версию v13.14.0 [ссылка] для вашей операционной системы.
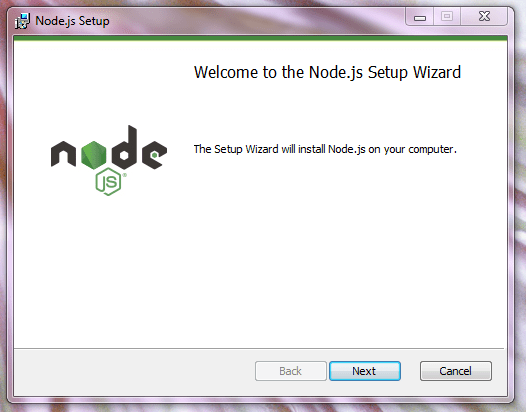
3. Нажимаем Next:
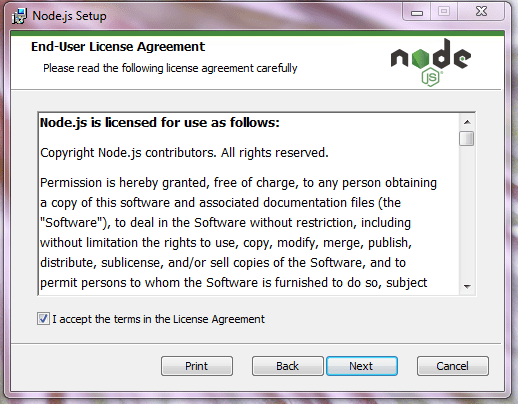
4. Соглашаемся с условиями лицензионного соглашения, ставим галочку и нажимаем Next:
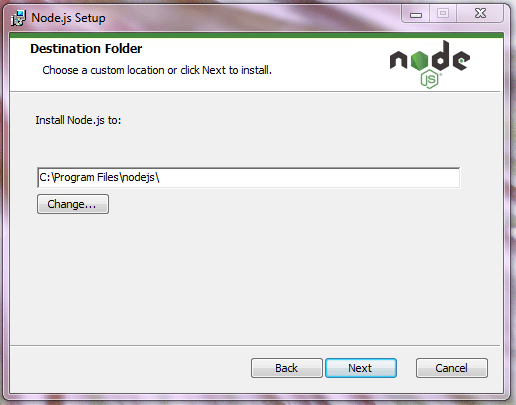
5. По умолчанию, установка Node.js происходит в папку C: \Program Files\nodejs\. Поменяйте, при необходимости, и нажимайте Next:
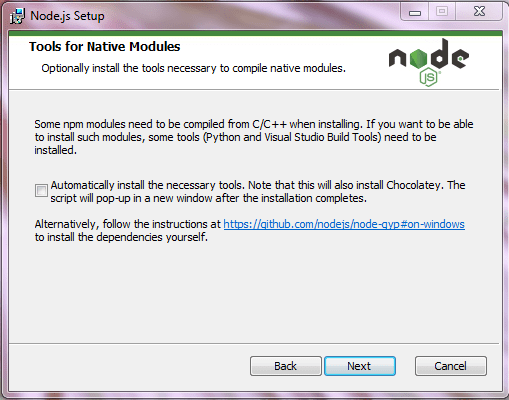
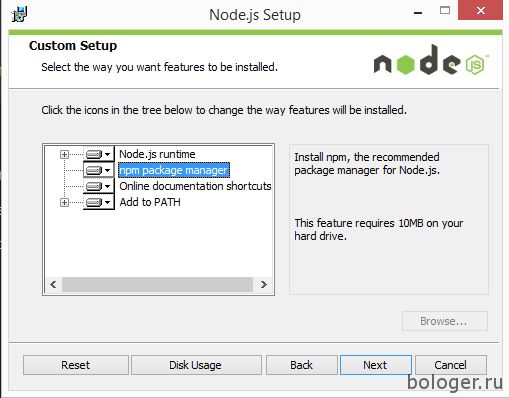
6. Далее идут пользовательские настройки и предлагается установить дополнительные инструменты. Оставляем по умолчанию и нажимаем кнопку Next:
7. Успешная установка, нажимаем Finish:
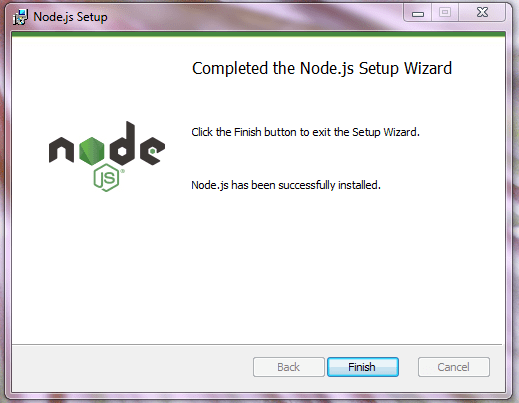
Мои поздравления 🙂 Node.js установлен.
Проверка работы Node.js и npm
Осталось проверить, для этого:
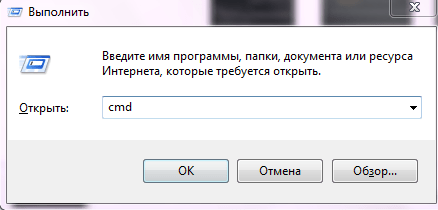
1. Запускаем консоль в стандартной программе Windows командой cmd:
2. Командой node -v (выводится v13.14.0) проверяем работу Node.js:
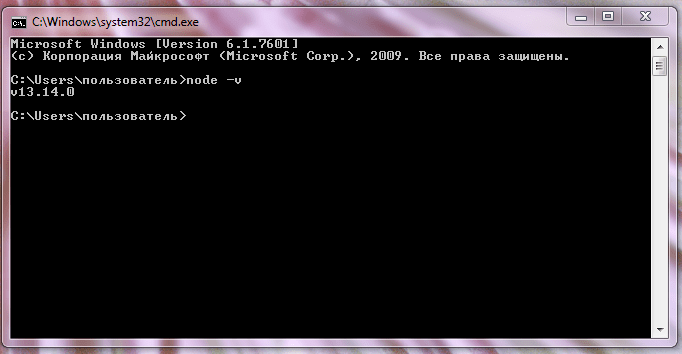
3. Командой npm -v проверяем npm и видим установленную версию 6.14.4
Set up your Node.js development environment directly on Windows
The following is a step-by-step guide to get you started using Node.js in a native Windows development environment.
Install nvm-windows, node.js, and npm
There are multiple ways to install Node.js. We recommend using a version manager as versions change very quickly. You will likely need to switch between multiple versions based on the needs of different projects you’re working on. Node Version Manager, more commonly called nvm, is the most popular way to install multiple versions of Node.js, but is only available for Mac/Linux and not supported on Windows. Instead, we will walk through the steps to install nvm-windows and then use it to install Node.js and Node Package Manager (npm). There are alternative version managers to consider as well covered in the next section.
It is always recommended to remove any existing installations of Node.js or npm from your operating system before installing a version manager as the different types of installation can lead to strange and confusing conflicts. This includes deleting any existing nodejs installation directories (e.g., «C:\Program Files\nodejs») that might remain. NVM’s generated symlink will not overwrite an existing (even empty) installation directory. For help with removing previous installations, see How to completely remove node.js from Windows.)
Open the windows-nvm repository in your internet browser and select the Download Now link.
Download the nvm-setup.zip file for the most recent release.
Once downloaded, open the zip file, then open the nvm-setup.exe file.
The Setup-NVM-for-Windows installation wizard will walk you through the setup steps, including choosing the directory where both nvm-windows and Node.js will be installed.

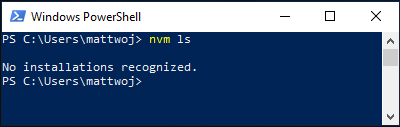
Once the installation is complete. Open PowerShell and try using windows-nvm to list which versions of Node are currently installed (should be none at this point): nvm ls
Install the current release of Node.js (for testing the newest feature improvements, but more likely to have issues than the LTS version): nvm install latest
Install the latest stable LTS release of Node.js (recommended) by first looking up what the current LTS version number is with: nvm list available , then installing the LTS version number with: nvm install (replacing with the number, ie: nvm install 12.14.0 ).
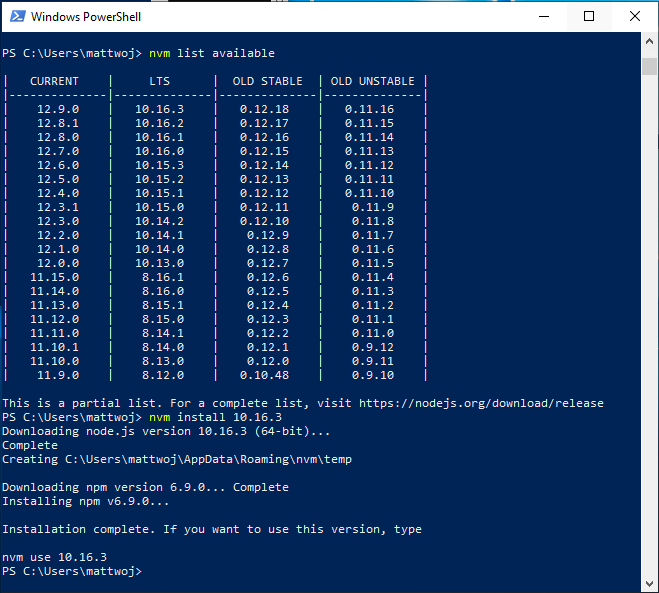
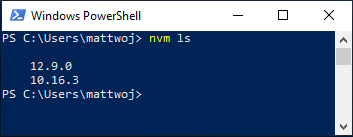
List what versions of Node are installed: nvm ls . now you should see the two versions that you just installed listed.
After installing the Node.js version numbers you need, select the version that you would like to use by entering: nvm use (replacing with the number, ie: nvm use 12.9.0 ).
To change the version of Node.js you would like to use for a project, create a new project directory mkdir NodeTest , and enter the directory cd NodeTest , then enter nvm use replacing with the version number you’d like to use (ie v10.16.3`).
Verify which version of npm is installed with: npm —version , this version number will automatically change to whichever npm version is associated with your current version of Node.js.
Alternative version managers
While windows-nvm is currently the most popular version manager for node, there are alternatives to consider:
nvs (Node Version Switcher) is a cross-platform nvm alternative with the ability to integrate with VS Code.
Volta is a new version manager from the LinkedIn team that claims improved speed and cross-platform support.
To install Volta as your version manager (rather than windows-nvm), go to the Windows Installation section of their Getting Started guide, then download and run their Windows installer, following the setup instructions.
You must ensure that Developer Mode is enabled on your Windows machine before installing Volta.
To learn more about using Volta to install multiple versions of Node.js on Windows, see the Volta Docs.
Install your favorite code editor
We recommend you install VS Code, as well as the Node.js Extension Pack, for developing with Node.js on Windows. Install them all or pick and choose which seem the most useful to you.
To install the Node.js extension pack:
- Open the Extensions window (Ctrl+Shift+X) in VS Code.
- In the search box at the top of the Extensions window, enter: «Node Extension Pack» (or the name of whatever extension you are looking for).
- Select Install. Once installed, your extension will appear in the «Enabled» folder of your Extensions window. You can disable, uninstall, or configure settings by selecting the gear icon next to the description of your new extension.
A few additional extensions you may want to consider include:
- Debugger for Chrome: Once you finish developing on the server side with Node.js, you’ll need to develop and test the client side. This extension integrates your VS Code editor with your Chrome browser debugging service, making things a bit more efficient.
- Keymaps from other editors: These extensions can help your environment feel right at home if you’re transitioning from another text editor (like Atom, Sublime, Vim, eMacs, Notepad++, etc).
- Settings Sync: Enables you to synchronize your VS Code settings across different installations using GitHub. If you work on different machines, this helps keep your environment consistent across them.
Install Git (optional)
If you plan to collaborate with others, or host your project on an open-source site (like GitHub), VS Code supports version control with Git. The Source Control tab in VS Code tracks all of your changes and has common Git commands (add, commit, push, pull) built right into the UI. You first need to install Git to power the Source Control panel.
Download and install Git for Windows from the git-scm website.
An Install Wizard is included that will ask you a series of questions about settings for your Git installation. We recommend using all of the default settings, unless you have a specific reason for changing something.
If you’ve never worked with Git before, GitHub Guides can help you get started.
Downloading and installing Node.js and npm
Table of contents
To publish and install packages to and from the public npm registry or your company’s npm Enterprise registry, you must install Node.js and the npm command line interface using either a Node version manager or a Node installer. We strongly recommend using a Node version manager like nvm to install Node.js and npm. We do not recommend using a Node installer, since the Node installation process installs npm in a directory with local permissions and can cause permissions errors when you run npm packages globally.
Note: npm Enterprise requires npm 4.4.x or greater. To download the latest version of npm, on the command line, run the following command:
Checking your version of npm and Node.js
To see if you already have Node.js and npm installed and check the installed version, run the following commands:
Using a Node version manager to install Node.js and npm
Node version managers allow you to install and switch between multiple versions of Node.js and npm on your system so you can test your applications on multiple versions of npm to ensure they work for users on different versions.
OSX or Linux Node version managers
Windows Node version managers
Using a Node installer to install Node.js and npm
If you are unable to use a Node version manager, you can use a Node installer to install both Node.js and npm on your system.
If you use Linux, we recommend that you use a NodeSource installer.
OS X or Windows Node installers
If you’re using OS X or Windows, use one of the installers from the Node.js download page. Be sure to install the version labeled LTS. Other versions have not yet been tested with npm.
Linux or other operating systems Node installers
If you’re using Linux or another operating system, use one of the following installers:
Or see this page to install npm for Linux in the way many Linux developers prefer.
Как установить Node.js и NPM на Windows
JavaScript все крепче и крепче закрепляет себя на позиции языка go-to типа для веб-разработчиков. Front-end разработчики используют JavaScript для того, чтобы добавить интерактивности пользователям, а так же напрямую общаться с back-end сервисами посредством AJAX.
JavaScript предоставляет огромное количество возможностей. Вы можете спокойно улучшать ваши навыки и при этом не волноваться, что не сможете разрабатывать полноценные веб-приложения. Ключевым компонентом Node.js является революция Сhrome версии V8 JavaScript, которая позволяет использовать JavaScript даже на серверной части.
Node.js так же может быть использован для написания desktop приложений, а так же для разработки инструментов, которые делают процесс разработки веб-приложений еще быстрее. Например, с помощью Node.js вы можете превратить CoffeeScript в JavaScript или SASS в CSS, а так же многое другое.
NPM помогает устанавливать удобным образом разные модули для Node.js.
Предисловие
Node — не является обычной desktop программой. Он не установится как Word или Photoshop и у вас не появится ярлыка на рабочем столе. Им можно воспользоваться только с помощью консольные инструкций (с которыми вы хотя бы чуть-чуть должны быть знакомы). В первое время вам будет казаться, что это не удобно, но в скором времени вы привыкните и все встанет на свои места.
Описание установки
Установка Node.js и NPM очень простая. Все что вам нужно сделать — это зайти на официальный сайт разработчика, скачать файл и установить его на своем компьютере.
Этапы установки
- Скачайте Windows установщик (.msi файл) с официального сайта Node.js.
- Запустите установщик (.msi файл, который был скачан в первом этапе).
- Следуйте всем инструкциям установщика.

- Перезапустите компьютер. Внимание! Без перезагрузки компьютера вы не сможете запустить Node.js.
Тестируем
Для того, чтобы убедиться что все было правильно установлено следуйте три простых этапа ниже.
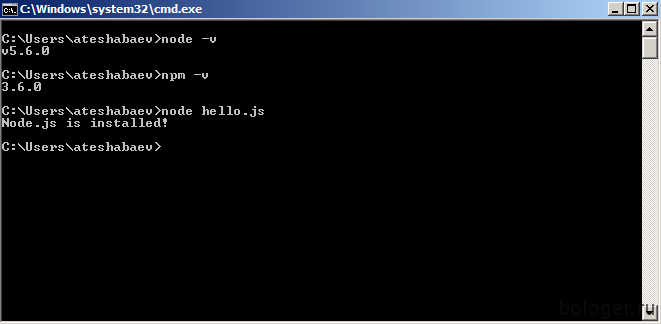
Тестируем Node.js. Откройте Windows консоль и введите node -v .
Тестируем NPM. Откройте Windows консоль и введите npm -v .
Создайте файл. Создайте любой файл, я назову его hello.js и введите console.log(«Node.js is installed»); , после чего с помощью node команды, я вызову файл hello.js: node hello.js — это должно вам вывести «Node.js is installed.».
Как обновить Node.js?
Чтобы его обновить, вам нужно снова скачать установщик и повторить весь процесс с самого начала.
Как скачать и установить Node.js и NPM на Windows
Node․js — это среда‚ которая включает в себя все необходимое для выполнения программы‚ написанной на JavaScript․ Он используется для запуска сценариев на сервере для отображения содержимого перед его доставкой в веб-браузер․
NPM означает Node Package Manager‚ который является приложением и хранилищем для разработки и совместного использования кода JavaScript․
Это руководство поможет вам установить и обновить Node․js и NPM в системе Windows и другие полезные команды Node․js․
Шаг 1 ։ Загрузите установщик Node․js
В веб–браузере перейдите по адресу https։//nodejs․org/en/download/․ Нажмите кнопку установщика Windows‚ чтобы загрузить последнюю версию по умолчанию․ На момент написания статьи последней версией была версия 12․14․1–x64․ Установщик Node․js включает в себя менеджер пакетов NPM․
Примечание․ Доступны и другие версии․ Если у вас более старая система‚ вам может потребоваться 32–разрядная версия․ Вы также можете использовать верхнюю ссылку для переключения со стабильной версии LTS на текущую версию․ Если вы новичок в Node․js или вам не нужна конкретная версия‚ выберите LTS․
Шаг 2։ Установите Node․js и NPM
1․ Как только установщик завершит загрузку‚ запустите его․ Откройте ссылку для загрузки в вашем браузере и щелкните файл․ Или перейдите в папку‚ в которой вы сохранили файл‚ и дважды щелкните его‚ чтобы запустить․
2․ Система спросит‚ хотите ли вы запустить программное обеспечение – нажмите « Выполнить»․
3․ Вас приветствует мастер установки Node․js – нажмите Далее․
4․ На следующем экране просмотрите лицензионное соглашение․ Нажмите Далее‚ если вы согласны с условиями и установите программное обеспечение․
5․ Программа установки предложит вам указать место установки․ Оставьте расположение по умолчанию‚ если у вас нет особой необходимости устанавливать его где–либо еще – затем нажмите Next․
6․ Мастер позволит вам выбрать компоненты для включения или удаления из установки․ Опять же‚ если у вас нет особой необходимости‚ примите значения по умолчанию‚ нажав Далее․
7․ Наконец‚ нажмите кнопку Install‚ чтобы запустить программу установки․ Когда он закончится‚ нажмите Готово․
Шаг 3 ։ Проверьте установку
Откройте командную строку ‟или PowerShell” и введите следующее։
Система должна отображать версию Node․js‚ установленную в вашей системе․ Вы можете сделать то же самое для NPM։
Как обновить Node․js и NPM в Windows
Самый простой способ обновить Node․js и NPM – это загрузить последнюю версию программного обеспечения․ На странице загрузки Node․js‚ прямо под ссылкой установщика Windows‚ будет отображаться последняя версия․ Вы можете сравнить это с версией‚ которую вы установили․
Для обновления скачайте установщик и запустите его․ Мастер установки перезапишет старую версию и заменит ее новой версией․
Как удалить Node․js и NPM в Windows
Вы можете удалить Node․js из панели управления в Windows․
Нажмите кнопку Пуск > Настройки ‟значок шестеренки”> Приложения․
Прокрутите вниз‚ чтобы найти Node․js и нажмите‚ чтобы выделить․
Выберите Удалить․ Это запускает мастер для удаления программного обеспечения․


