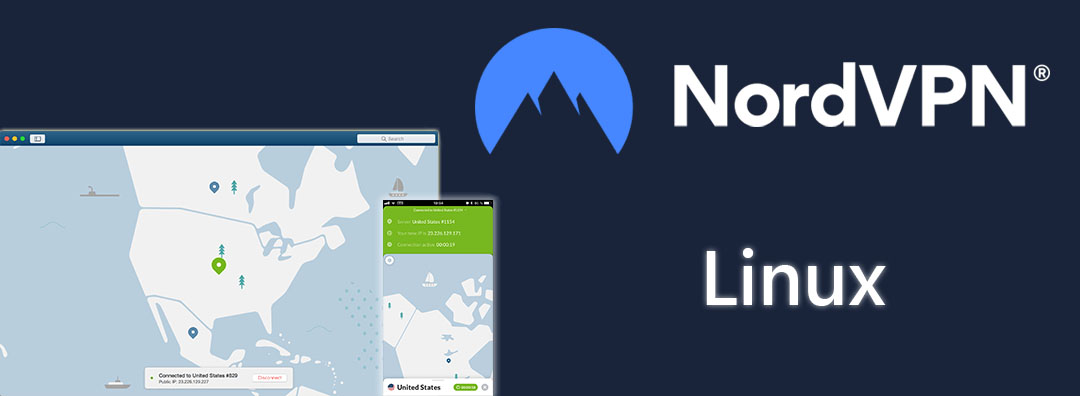
- NordVPN on Linux
- Installing NordVPN On Linux
- 1. Visit NordVPN and download the app from their downloads page
- 2. Open your Linux terminal and install the NordVPN repo:
- 3. Update the package list
- 4. Finally, install NordVPN and authenticate
- Accessing NordVPN On Linux Settings
- NordVPN On Linux Commands
- Why Use NordVPN With Linux?
- NordVPN
- Contents
- Create Account
- Installation
- Systemd service
- Configuration
- Login/Logout
- Enable NordLynx (Wireguard)
- Connect to VPN
- Settings
- Server List
- Alternative Method : connecting to NordVPN using NetworkManager
- Installation
- Configuration
- Avoid DNS leak
- Automatic connection to the VPN
- Disable ipv6
- Use a killswitch
- Test your configuration
- Troubleshooting
- No Internet after connection
- No Internet after disconnection
- Trouble connecting over terminal
- Random disconnect on terminal
- Installing NordVPN on Debian, Ubuntu, Raspberry Pi, Elementary OS & Linux Mint
- Downloading the VPN app
- Settings
NordVPN on Linux
Last Updated: June 24, 2019
NordVPN is finally available on Linux so it’s time to get it going. Let’s take a look at how you can do that.
In August 2018, NordVPN finally launched their native NordVPN Linux app. This now makes it easier than ever to install the top-tier NordVPN app on your Linux-based machine, regardless of whether you are using Ubuntu, Debian, or another distro.
Prior to this, those who wanted to install NordVPN on Linux had to go through a roundabout process of configuring NordVPN and OpenVPN independently. For those who aren’t particularly tech savvy—although most Linux users are quite tech savvy—this was an irritating and time-consuming process.
Now, it is easier than ever to get NordVPN on Linux with just a few clicks of a mouse and some command lines.
Installing NordVPN On Linux
For the best experience, it is recommended that you download NordVPN’s native app on your Linux device(s). With it, you will have access to the full suite of NordVPN features including CyberSec, an automatic kill switch, and the ability to switch servers and locations at will.
As a Linux user, you will probably know that installations are a little more involved, and NordVPN’s installation is no different.
Here’s how you do it.

1. Visit NordVPN and download the app from their downloads page
Alternatively, you can click this link for a direct download.
2. Open your Linux terminal and install the NordVPN repo:
Run the following command:
sudo apt-get install nordvpn-release_1.0.0_all.deb
When you do this, you will be asked to enter your machine’s root password. Once you have done this, wait for the package installation to finish and then update it.
3. Update the package list
You do this by running the command:
sudo apt-get update
4. Finally, install NordVPN and authenticate
Run the command:
sudo apt-get install nordvpn
and then log in to your NordVPN account using your authentication details—email address and password.
To connect to a NordVPN server, simply type:
in your Linux terminal.
Accessing NordVPN On Linux Settings
Because NordVPN on Linux is entirely terminal based (there is no graphical interface), you must run commands to access settings and other features.
Simply type nordvpn in your terminalto access NordVPN’s client settings. You can then run a whole range of different commands.
NordVPN On Linux Commands
This is the full list of commands available for NordVPN on Linux.
nordvpn login
nordvpn logout
nordvpn help—see the list of commands
nordvpn settings—view your current settings
nordvpn status—view current connection information
nordvpn countries—see the list of available countries
nordvpn cities-—see the list of available cities
nordvpn groups—see a list of available server groups
nordvpn c—connect to a random NordVPN server
nordvpn c —connect to a chosen NordVPN server
nordvpn d—disconnect from NordVPN
nordvpn s—set a configuration
nordvpn s cybersec on/off
nordvpn s killswitch on/off
nordvpn s autoconnect on/off
nordvpn s protocol tcp/udp
nordvpn s obfuscate on/off
nordvpn whitelist add port 22—open incoming port 22
nordvpn whitelist remove port 22-—close incoming port 22
Why Use NordVPN With Linux?
NordVPN provides a line of defense between you and the internet. We have written extensively on this topic and we highly recommend reading our comprehensive NordVPN review to find out not only how you can use NordVPN on Linux (and any other device or OS for that matter), but why NordVPN is the best choice.
As hackers get smarter, governments step up their monitoring, and attacks become harder to spot, having a VPN is no longer an option—it’s a necessity. You need to be using one for all your internet activities, especially on public networks if you value your privacy.
Источник
NordVPN
NordVPN is a personal virtual private network service provider. NordVPN is based in Panama. The country has no mandatory data retention laws and does not participate in the Five Eyes or Fourteen Eyes alliances. On Linux, Nordvpn operates through a command-line tool.
Contents
Create Account
In order to use NordVPN, you must create your own account on the official NordVPN website. https://nordvpn.com
There are different payment options to choose.
Installation
NordVPN can be installed with the package nordvpn-bin AUR .
Below is a bash command sequence that can be used to configure your environment for use with the package:
Systemd service
In order to use NordVPN. You must enable and start the nordvpnd system service.
Configuration
Here are many different commands to use NordVPN.
Login/Logout
Logs you in to your NordVPN Account.
Logs you out from your NordVPN Account.
Enable NordLynx (Wireguard)
NordVPN has introduced NordLynx technology which is based on WireGuard protocol. Compared to default OpenVPN technology, Wireguard provides lower latency, higher speeds and better connection stability. Due to the nature of Wireguard’s user identification, NordVPN has introduced NordLynx, which implements a double-NAT protocol on top of Wireguard to supplement increased privacy as well.
Enable it with the below command:
To see all available technologies:
Connect to VPN
Connect you to VPN.
Disconnect you from VPN.
Shows the connection status.
Settings
Sets the protocol.
Enables or disables Kill Switch. This security feature blocks your device from accessing the Internet outside the secure VPN tunnel, in case connection with a VPN server is lost.
Enables or disables CyberSec. When enabled, the CyberSec feature will automatically block suspicious websites so that no malware or other cyber threats can infect your device. Additionally, no flashy ads will come into your sight. More information on how it works: https://nordvpn.com/features/cybersec/.
Enables or disables auto connect. When enabled, this feature will automatically try to connect to VPN on operating system startup.
Sets DNS servers.
Adds or removes option from whitelist.
Shows the current settings.
Server List
Shows the country list.
Shows the city list.
Alternative Method : connecting to NordVPN using NetworkManager
Installation
2. Choose an appropriate server using the NordVPN servers page : https://nordvpn.com/servers/ Download the corresponding openvpn configuration file on the NordVPN site : https://nordvpn.com/ovpn/ Save the file to a place in your user home directory or elsewhere that is memorable for future access.
Configuration
1. Right click on the NetworkManager applet from your desktop environment, and click Edit Connections. Click the Plus sign in the bottom left corner of the Network Connections window that appears.
2. When you choose a connection type, click the drop down menu and scroll all the way down until you reach «Import a saved VPN configuration». Select that option. Now, click Create.
3. Navigate to the directory you extracted all of the openvpn files to earlier, then open one of the files from that folder. Generally speaking, you will want to open the file that is associated with the connection you specifically want.
4. After you have opened one of the openvpn files, the window that appears should be «Editing «. Type in your NordVPN Username and Password. There is an icon in the password box indicating user permission of the credentials; change the settings as you wish («Save for all users» if you do not want to enter your password every time you connect).
Avoid DNS leak
To prevent DNS leak you must :
1. click on the «ipv4 settings»
2. On method : choose «automatic adresses only (VPN)» and manually enter the NordVPN DNS adresses in «DNS servers» : «103.86.96.100, 103.86.99.100» (Separated by a coma)
3. Click Save at the bottom left of the «Editing » window.
Automatic connection to the VPN
1. Right click on the NetworkManager applet from your desktop environment, and click Edit Connections.
2. Double click on the ethernet or Wifi connection for whom you want to automatically connect to the VPN
3. On the «General» tab, click on «Automatically connect to VPN when using this connection» in every connection you want, and choosing the right configuration file.
4. Repeat the operation for the other connections you will use with the VPN.
Disable ipv6
NordVPN is not ipv6 compatible. You may want to completely disable it.
Or you can also :
1. Right click on the NetworkManager applet from your desktop environment, and click Edit Connections.
2. Double click on the ethernet or Wifi connection for whom you want to automatically connect to the VPN
3. On the «ipv6» tab, choose «ignore» in the method box.
Use a killswitch
The NordVPN killswitch will not work with this method, you will have to create your own using ufw or iptables.
Test your configuration
You can use these site :
Troubleshooting
No Internet after connection
If the network is blocking all the VPN protocols including the proxy connections, connection attempts might fail. Try changing the protocol (e. g. to TCP), using obfuscated servers or the NordLynx protocol.
Note that the list of countries where such servers are installed is much shorter.
Alternatively, there may be a conflict with your local network’s subnet, e.g.:
To deal with this, whitelist your network’s subnet using, e.g.:
No Internet after disconnection
After disconnecting via nordvpn d , there might no internet on the computer, but pinging (something like ping 8.8.8.8 ) would still be successful. It is most likely a DNS issue: upon connection to the servers, the local DNS is being overwritten with NordVPN’s DNS to ensure a secure connection to the server. After disconnecting, the DNS is removed, which might be causing problems.
Restarting the network manager should help:
Trouble connecting over terminal
If you are having trouble connecting over the terminal and get errors connecting you need to whitelist your subnet and open a port on NordVPN. Open a terminal and check what subnets you have.
The second subnet (10.0.0.0/8) is the subnet that we want to whitelist in NordVPN and you can do it with the following command :
If you wish to blacklist the subnet again just run the following command :
The port 22 is the port that is needed for NordVPN to work, you can open it with the following command :
If you wish to blacklist the port again just run the following command :
Random disconnect on terminal
If you get randomly disconnected from NordVPN on the terminal and it will not let you reconnect, just disable and re-enable the killswitch :
Most of the time it will not connect with the killswitch off, the linux app for NordVPN is very buggy currently.
Источник
Installing NordVPN on Debian, Ubuntu, Raspberry Pi, Elementary OS & Linux Mint
The NordVPN native application is the recommended option for connecting to NordVPN servers on your Linux device. We designed it with your experience in mind, giving easy access to features such as CyberSec, auto-connect, and automated Kill Switch.
This tutorial explains how to download and install the NordVPN app, log in, and connect to our servers. You can also find an explanation of various settings.
Downloading the VPN app
1. Download the NordVPN Linux client by opening the terminal, writing the command below, and following any on-screen instructions:
sh Note: If you do not have a curl package, evidenced by the fact that the above does not work, you can alternatively use this command:
sh https://downloads.nordcdn.com/apps/linux/install.sh)
Additionally, if you receive the following issue: Whoops! Permission denied accessing /run/nordvpn/nordvpnd.sock, all you need to do is write the following command: sudo usermod -aG nordvpn $USER and then reboot your device.
2. Log in to your NordVPN account:
nordvpn login
3. Connect to a NordVPN server:
nordvpn connect
Settings
To access the NordVPN client settings, type the nordvpn command in Terminal.
Here is the list of available commands:
nordvpn login — Log in.
nordvpn connect or nordvpn c — Connect to VPN. To connect to specific servers, use nordvpn connect (eg. nordvpn connect uk715)
nordvpn disconnect or nordvpn d — Disconnect from VPN.
nordvpn connect US -g double_vpn — Connect to a Double VPN server where the first hop is a specific country
nordvpn connect P2P — connect to a P2P server.
nordvpn connect The_Americas — connect to servers located in the Americas.
nordvpn connect Dedicated_IP — connect to a Dedicated IP server.
nordvpn set or nordvpn s — Set a configuration option.
Possible options:
nordvpn set cybersec on or off — Enable or disable CyberSec
nordvpn set killswitch on or off — Enable or disable Kill Switch
nordvpn set autoconnect on or off — Enable or disable auto-connect. You can set a specific server for automatic connection using nordvpn set autoconnect on country_code+server_number. Example: nordvpn set autoconnect on us2435.
nordvpn set notify on or off — Enable or disable notifications
nordvpn set dns 1.1.1.1 1.0.0.1 — Set custom DNS (you can set up a single DNS or two like shown in this command).
nordvpn set protocol udp or tcp — Switch between UDP and TCP protocols
nordvpn set obfuscate on or off — Enable or disable Obfuscated Servers.
nordvpn set technology — Set connection technology (OpenVPN or NordLynx)
nordvpn whitelist add port 22 — Add a rule to whitelist a specified incoming port. You can also whitelist multiple ports — just separate their numbers with a space.
nordvpn whitelist remove port 22 — Remove the rule to whitelist a specified port.
nordvpn whitelist add subnet 192.168.0.0/16 — Add a rule to whitelist a specified subnet.
nordvpn whitelist remove subnet 192.168.0.0/16 — Remove the rule to whitelist a specified subnet.
nordvpn account — See account information
nordvpn register — Register a new user account
nordvpn rate — Rate your last connection quality (1-5)
nordvpn settings — See the current settings.
nordvpn status — See the connection status.
nordvpn countries — See the country list.
nordvpn cities— See the city list. E.g.: nordvpn cities united_states
nordvpn groups — See a list of available server groups.
nordvpn logout — Log out.
nordvpn help or nordvpn h — See the list of available commands or help for a specific command.
You can get an extensive explanation of all commands by using the man nordvpn command in Terminal.
Tip: Your VPN connection safety depends on your account password too. Don’t forget to use a strong password on your account, as it will help you to avoid credential stuffing attacks and will keep your connections safe and uninterrupted.
As generating and remembering strong and secure passwords is not an easy task, we recommend downloading our free password manager — NordPass. It generates secure passwords for you and stores them safely, letting you avoid time-wasting password resets in the future.
Источник


