Как создать файл ответов для автоматической установки Windows 10 с помощью программы NTLite
Как максимально ускорить установку Windows, чтобы сократить время этого процесса и минимизировать свои действия в диалоговых окнах мастера установки? Если мы переустанавливаем операционную систему на своём компьютере, если на нём будет создаваться наша учётная запись Windows, можем сделать процесс установки максимально коротким, не отвлекающим нас на выборы действий на установочных этапах.
Процесс будет практически полностью проходить в автоматическом режиме. Всё, что от нас потребуется – это указать место установки Windows и отформатировать загрузочный и системный разделы. Ну или переразметить жёсткий диск, если этого требует ситуация. Такое возможно при условии помещения на установочный носитель некого файла ответов. А создать его можно, в частности, с помощью программы NTLite. Собственно, об этом всём и будет речь идти ниже: рассмотрим, как создать файл ответов для упрощённой установки системы на примере её актуальной версии Windows 10.
Файл ответов и программа NTLite
Файл ответов – это файл «autounattend.xml» , в нём содержится сценарий наших пользовательских выборов, которые мы должны сделать в процессе установки Windows. Этот файл создаётся специальными программными средствами, предназначенными для работы с дистрибутивом Windows, в нём программируются все наши выборы. Затем этот файл помещается на загрузочный носитель, в корень установочной флешки Windows. Собственно, чем файл ответов и примечателен: мы можем поместить его на флешку, и это будет адаптированный под нас автоматический процесс установки, а можем не использовать, удалив файл с флешки, и это будет обычный процесс установки со всеми его этапами и настройками.
Файл ответов создаётся, как упоминалось, программными средствами для редактирования дистрибутива Windows, в частности, программой NTLite. Это программа с большими возможностями, она позволяет тонко настроить под свои предпочтения системный образ для развёртывания – включить или отключить системные компоненты и службы, внести правки в реестр, добавить обновления и драйверы, программы для постинсталляции. И она позволяет создать и интегрировать в дистрибутив файл ответов. Не все из возможностей NTLite доступны бесплатно, но вот как-то так сложилось, что именно для создания максимально упрощённого процесса установки Windows с помощью файла ответов всё необходимое нам предлагается совершенно бесплатно. С помощью бесплатной версии NTLite установку Windows можно довести до практически полной автоматизации, оставив для интерактива только указание места установки. Такой процесс установки сам пройдёт начальные этапы.
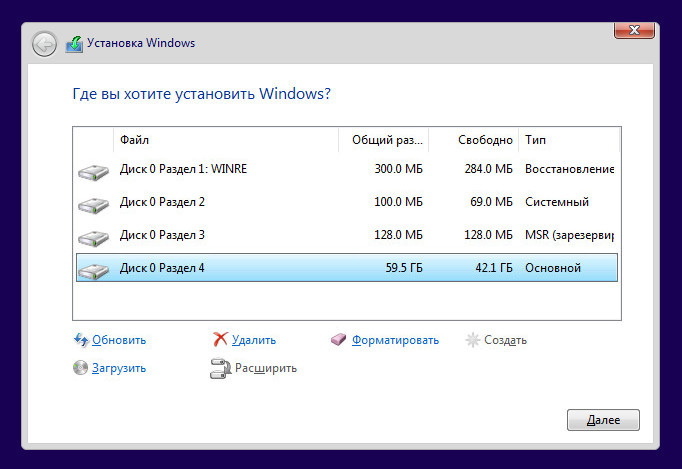
Затем предложит нам этап выбора места установки Windows.
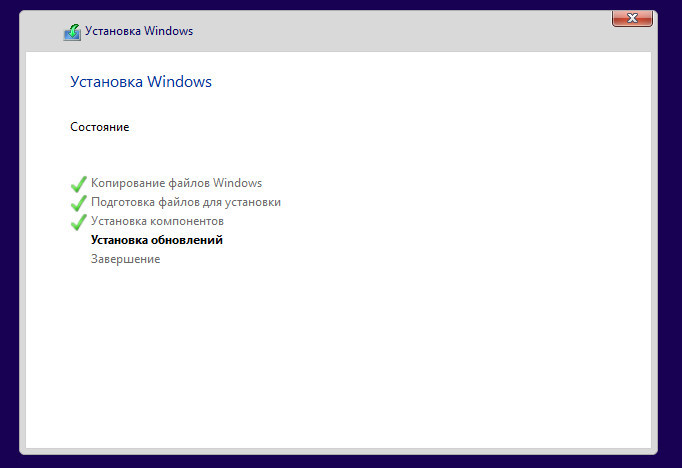
Далее пойдёт процесс копирования файлов Windows.
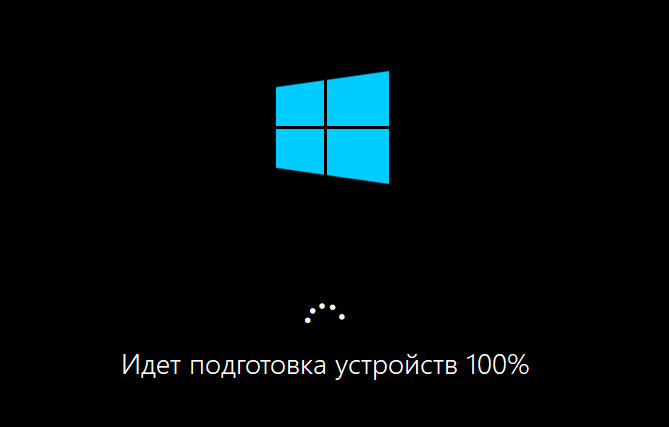
После него в процессе перезагрузки компьютера можем извлечь установочную флешку и отправиться куда-то ненадолго по своим делам. Настройка переустановленной Windows будет происходить полностью в автоматическом режиме. Пройдёт этап подготовки устройств компьютера.
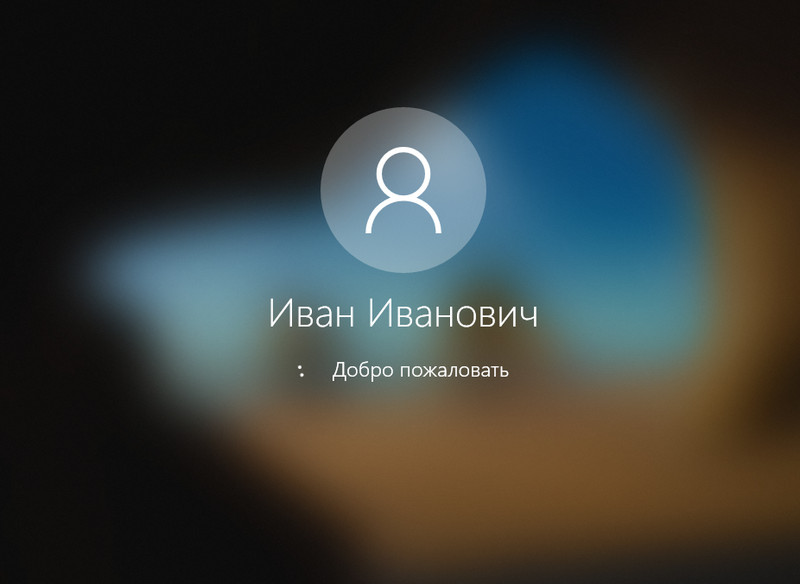
Автоматически выполнится вход в системный профиль.
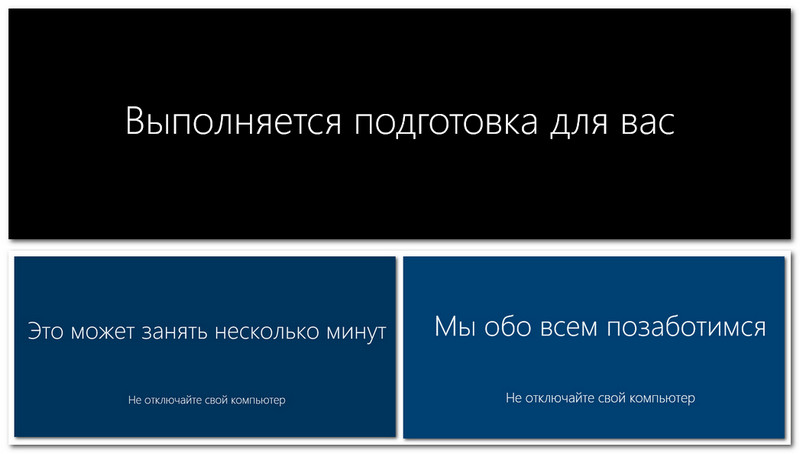
Будет, соответственно, настроен этот профиль.
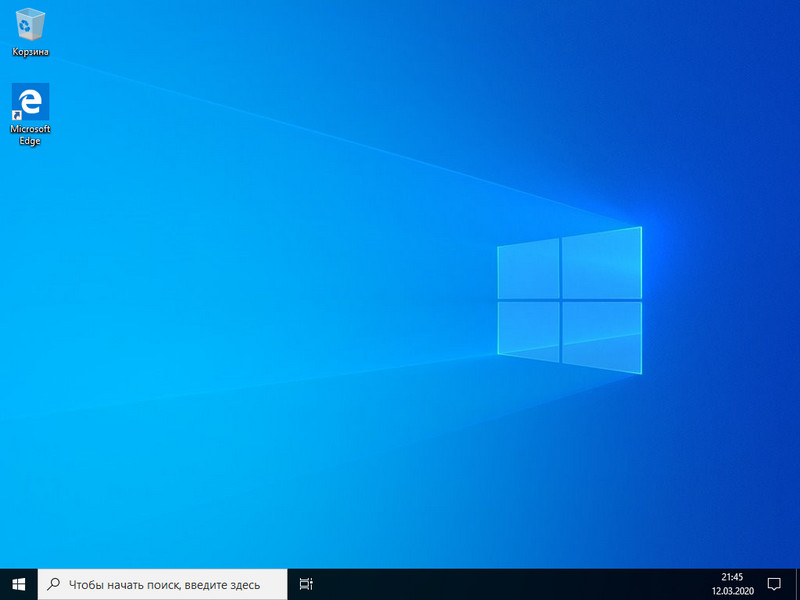
И всё: по итогу на экране появится рабочий стол новой Windows.
У нас будет не просто автоматизированный процесс установки системы, но процесс ускоренный, лишённый её рутинных этапов выбора региональных параметров, выбора редакции системы, принятия лицензии, пропуска активации, указания настроек конфиденциальности и типа локальной сети, подключения аккаунта Microsoft и т.п. Все эти этапы мы настроим заранее в файле ответов, как и заранее в этом файле создадим системный профиль – свою локальную учётную запись Windows.
Подготовительные действия
Для создания файла ответов нам потребуется дистрибутив Windows, он должен быть тем же, что и будет использоваться для установки системы – той же её версии, включающий ту же её редакцию. Как упоминалось в начале, мы будем создавать файл ответов для установки Windows 10. И это будет её редакция Pro .
Также нам нужна программа NTLite , скачиваем её на официальном сайте:
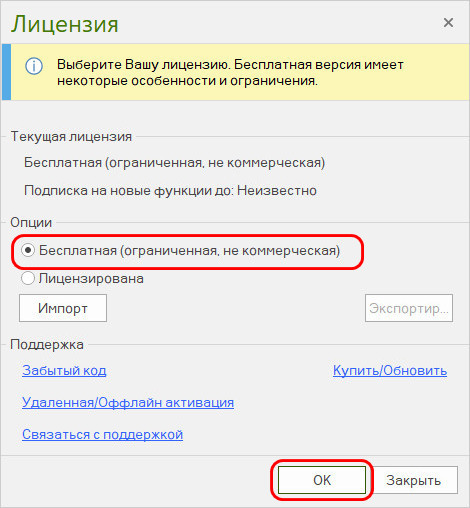
При запуске программы выбираем бесплатную некоммерческую лицензию.
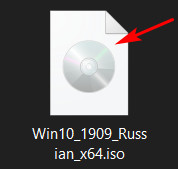
В качестве дистрибутива можем использовать как записанный на флешку установочный процесс, так и установочный ISO -файл. Последний подключаем для отображения в проводнике – в Windows 8.1 и 10 просто делаем по нему двойной клик, в Windows 7 монтируем сторонними программами.
Извлечение образа WIM/ESD
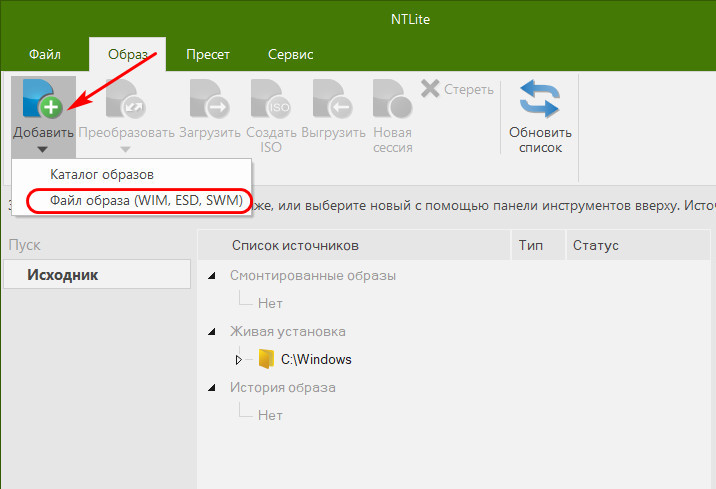
Нам нужно извлечь из дистрибутива непосредственно образ установки «Десятки» – файл «install» в формате WIM или ESD . В программе NTLite жмём кнопку «Добавить» и кликаем добавление файла образа.
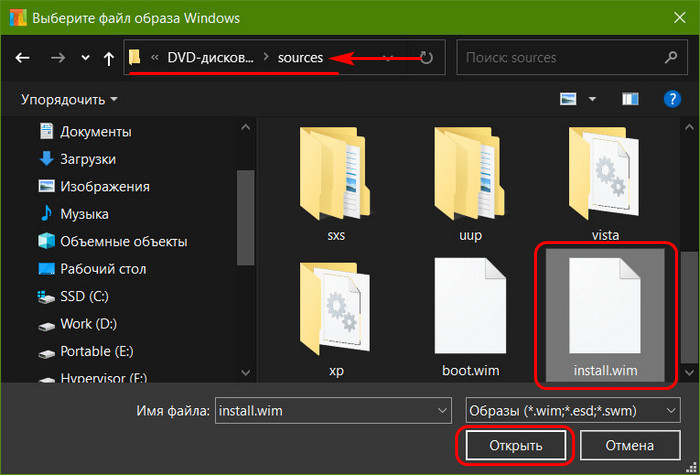
В окошке проводника указываем путь к хранящемуся на установочной флешке или внутри смонтированного ISO -образа файлу «install.wim» или «install.esd» . Этот файл находится в папке «sources» .
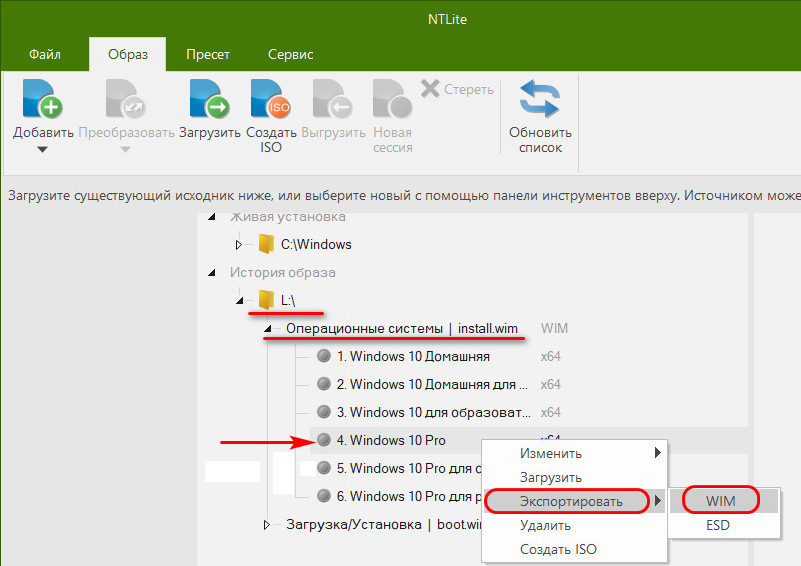
В окне NTLite увидим содержимое добавленного образа «install», выбираем нужную нам редакцию, вызываем на ней контекстное меню, выбираем «Экспортировать», затем указываем формат – WIM или ESD . В нашем случае это первый.
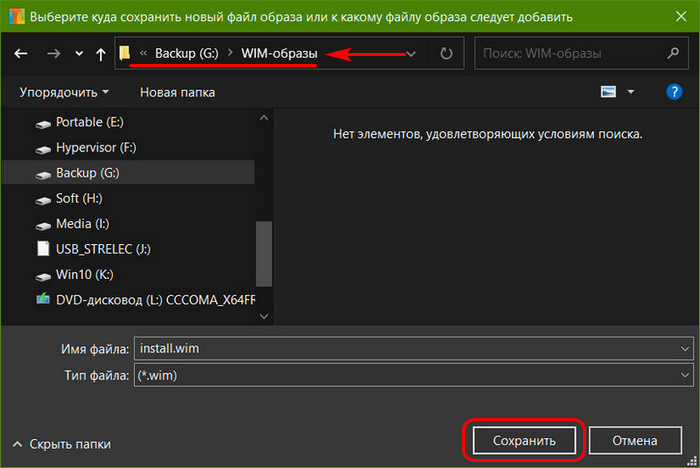
Дальше нужно указать программе, куда она должна экспортировать образ. Для этого создаём в любом месте папку с любым названием и указываем её. В нашем случае это папка с названием «WIM-образы» .
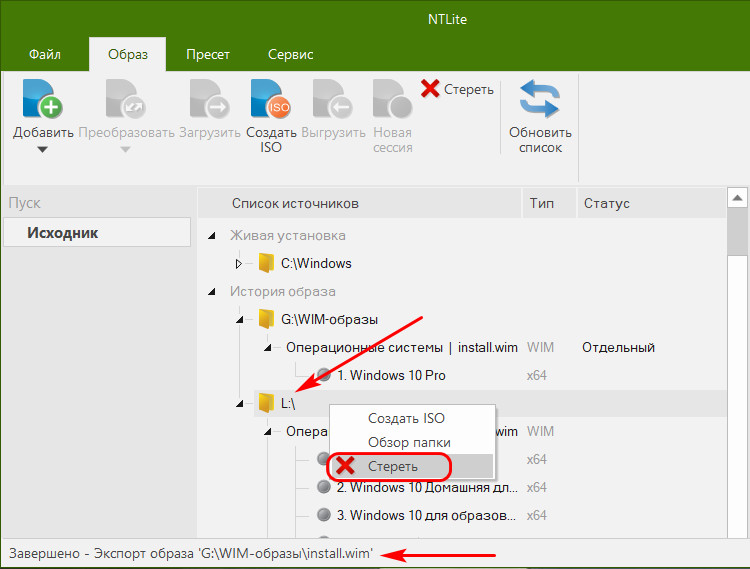
После того, как программа завершит экспорт образа, можем убрать добавленный файл «install» из интерфейса программы, чтобы он не мешал. На его букве жмём контекстное меню и выбираем «Стереть».
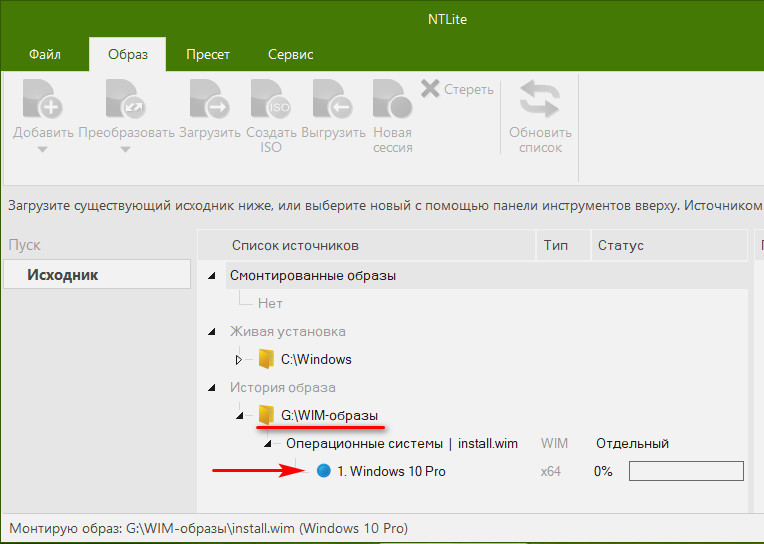
Теперь мы будем работать только с экспортированным образом конкретной редакции Windows, в нашем случае это Windows 10 Pro. Дважды кликаем по образу редакции для его загрузки.
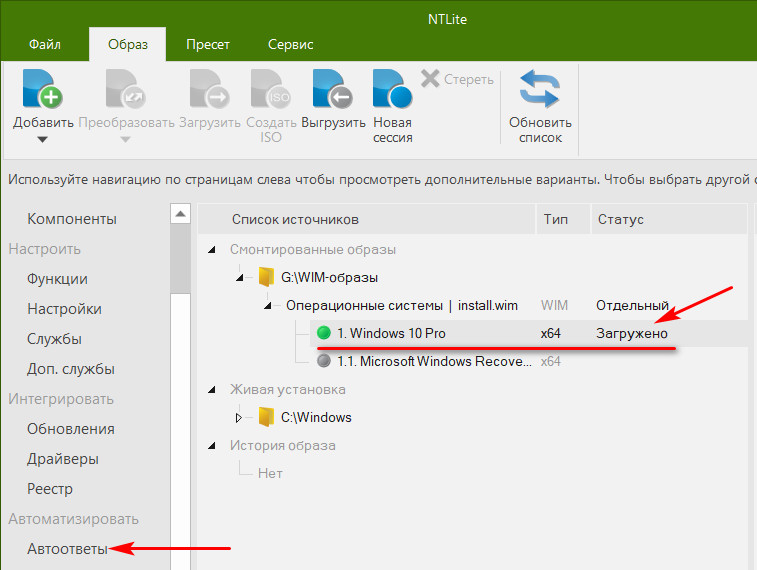
Когда загрузка завершится, а об этом будет свидетельствовать статус образа, зелёный маркер, и у нас появится слева панель с рабочими разделами, переключаемся на один из разделов этой панели – «Автоответы».
Далее будем работать уже только с этим разделом – в нем, собственно, и создаётся файл ответов.
Создание файла ответов
Для подготовки файла ответов нам нужно настроить ответы на запрашиваемые в установочном процессе Windows 10 действия и отключить отдельные этапы этого процесса. Напомним, наша цель – создание максимально автоматизированного установочного процесса. Тем не менее, каждый здесь может сам для себя решить, какие из этапов он хочет автоматизировать, а какие – нет. Наш пример – лишь образцово-показательный в рамках поставленной задачи.
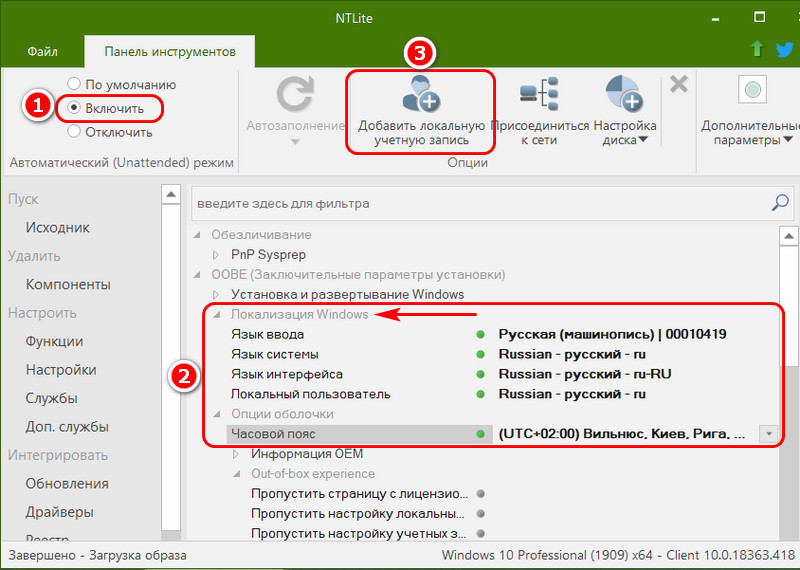
Переключившись на раздел «Автоответы», вверху, на панели инструментов жмём «Включить», чтобы нам стали доступны операции этого раздела. Далее заполняем блок параметров «Локализация Windows»: везде, где показано на скриншоте, выставляем русский (или иной) язык, а также указываем часовой пояс. Для активации параметра и пролистывания его возможных значений по кругу используем либо двойной клик, либо нажатие пробела. Выбор языка (из-за того, что языков много) лучше делать мышью из выпадающего перечня в конце строки каждого из параметров. Далее жмём на панели инструментов кнопку добавления локальной учётной записи.
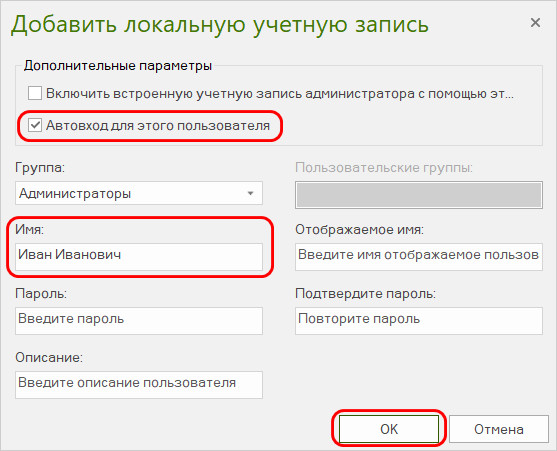
В этом окошке нам нужно подготовить нашу учётную запись. Её принадлежность к типу администраторов назначена по умолчанию. Всё, что нам нужно сделать здесь – это ввести имя пользователя и установить галочку автовхода. Пароль, если он нужен, мы создадим потом, уже в переустановленной Windows. На первых порах после новой установки пароль не нужен, ведь систему придётся часто перезагружать после установки драйверов, отдельного стороннего ПО, проведения некоторых системных настроек.
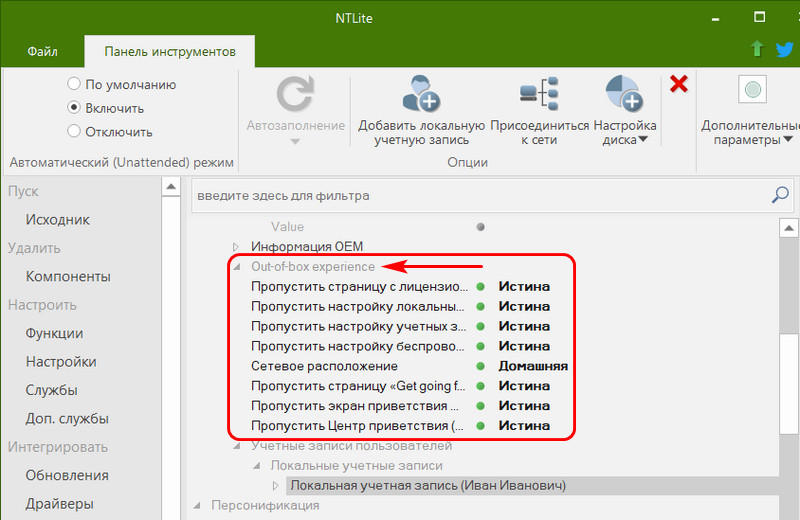
Далее заполняем блок параметров «Out-of-box experience». Это блок пропуска различных этапов установки Windows и настройки локальной сети. Здесь везде ставим значение «Истина», только в графе «Сетевое расположение» указываем тип локальной сети, в нашем случае это стандартно домашняя сеть.
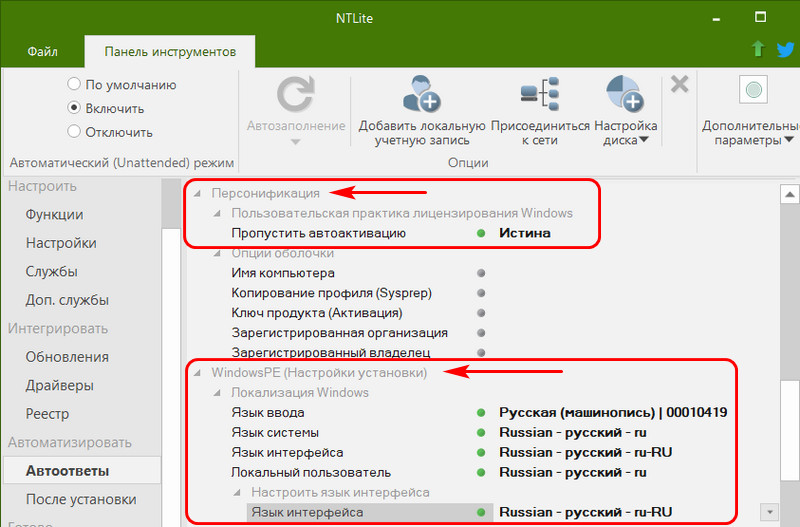
Следующий блок параметров – «Персонификация». Здесь ставим значение «Истина» для параметра пропуска активации. Затем опускаемся ниже к блоку параметров «WindowsPE (Настройка установки) » и здесь выставляем русский (или другой) язык в параметрах выбора языка и раскладки. Это региональные и языковые параметры, которые мы обычно вводим на первом этапе установки Windows.
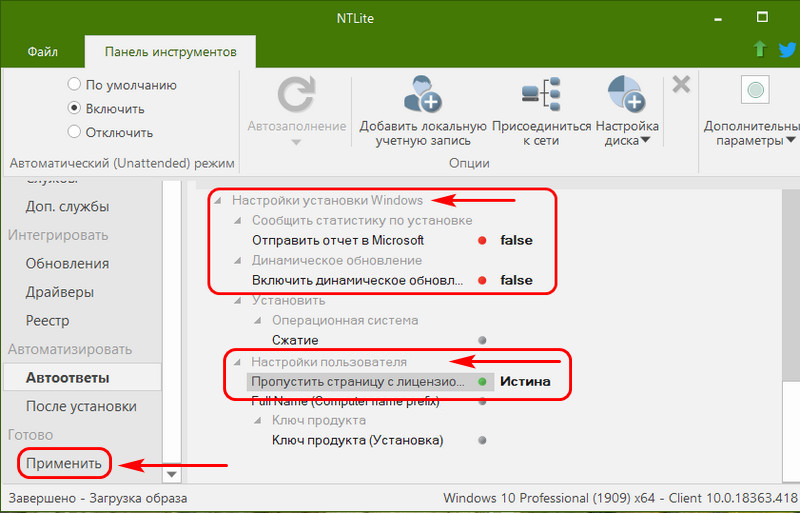
Далее в блоке «Настройки установки Windows» ставим значение «False» для параметров отправки отчёта статистики в Microsoft и включения динамического обновления. И последний блок — «Настройки пользователя», здесь ставим значение «Истина» для параметра пропуска лицензии. И жмём внизу на левой панели «Применить».
Сохранение файла ответов
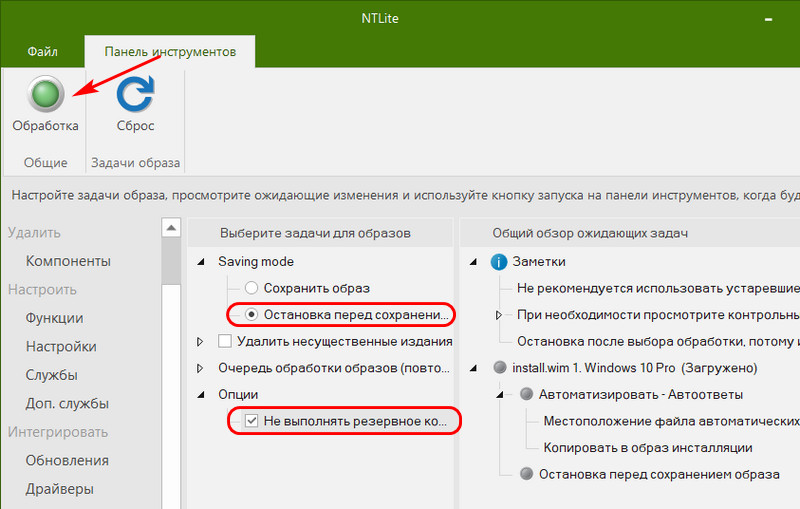
Все необходимые параметры файла ответов настроены, теперь сохраним его. После того, как мы нажали «Применить», жмём вверху зелёную кнопку «Обработка». В области задач для образа указываем «Остановка перед сохранением» и «Не выполнять резервное копирование».
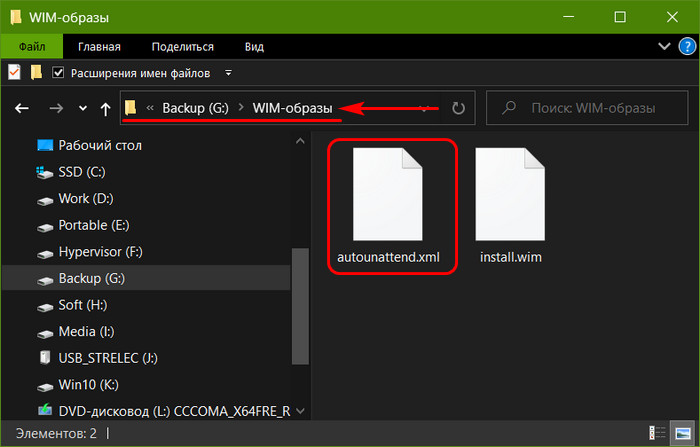
После того, как процесс обработки завершится, ищем файл ответов (напомним, это файл « autounattend.xml ») в той папке, куда мы извлекли образ WIM/ESD . В нашем случае это была папка «WIM-образы» .
Теперь осталось только скопировать этот файл в корень установочной флешки с Windows 10.
Documentation
Start
After starting the program*, first page to open is the Start – Source page.
This page contains a Source list on the left and a Preset list on the right.
Also accessible is the Tools tab in the toolbar, more info below.
Alternatively, certain operations are available for automation via the command-line as well, more info on that by running “ntlite.exe /?”.
Source list
Contains a list of images, which are either mounted, installed or just previously added.
To add an image to the list either use the toolbar – Image – Add button or drag and drop the folder or a file from the File Explorer directly.
Double-click, or select and choose Load from the toolbar, on the desired image edition to load it.
After an image is loaded, more pages will be available on the left, details in the sections below.
Mounted images
For an image to be editable, it first needs to be mounted. This is done automatically on loading the image.
It consists of temporary virtual extraction of the image in the temporary folder.
This will not take space on the disk as normal files, these are just links.
Only after changing or integrating something to the image, does this take more space accordingly.
To unmount the image and clean the temporary folder, either Apply changes (explained in the section at the end), or right-click the mounted image and choose Unload.
Live install
Tool can also edit the already installed Windows (C:\Windows). Same applies as with images, read the popup warnings carefully, as this applies directly to your currently installed operating system.
Extra info
The two image sizes right of images, for example 12000 | 8000, show the NTFS hard-linked on the left and disk/real size on the right.
Preset list
Contains a list of presets, XML files containing previous choices for a given session.
Last saved preset will be named “Auto-saved session” and usually on top of the list, copy in the root of the configured ISO/folder.
To use these files, first load an image. After loading an image, if there is a previously associated preset, it will be automatically loaded – this can be disabled in File – Settings.
To load a preset, same as with images, either double-click or select one and choose Load from the toolbar.
Load-Overwrite sets all the page choices to what is found on the loaded preset, while Load-Append loads one on top of another, without resetting to image defaults before loading a preset.
Multiple presets can also be loaded by selecting more than one preset at once using the CTRL+ method, then clicking on Load. This can be useful when combining multiple sessions at once.
Tools
Contained in the Source page toolbar, these are tool’s special case automations used to achieve a certain function faster. It is recommended to first get accustomed to the rest of the tool’s functionality.
Install Updates
This wizard helps you quickly install updates to your current installation, and just that in this mode. It uses the Updates page, described in the section below.
Host Refresh
This wizard helps you prepare and execute the Windows refresh feature, a migration to either the same or a different version of Windows.
It is useful when it comes to reinstalling Windows, but don’t want to reinstall all your apps and reconfigure the settings, so Windows will on its own migrate your existing data.
For example this can be used to virtually return a removed component, fix broken installations, update lite OS without Windows Update, reapply lite OS with the latest tool fixes for a certain removal and so on.
In the wizard, make sure to provide the full, unedited ISO content of the targeted Windows version.
Optionally select your previous preset for auto-loading.
Once you press OK it will auto-load the selected image for editing.
Optionally add the latest updates and select changes as with any other image.
The Process button on the Apply page will be replaced with the Continue button, use that when ready to process and migrate.
Remove Reinstalls
Due to Windows 10 1903 changes, installing cumulative updates returns updated parts of removed components.
This wizard automates cleanup of those reinstalled component parts. Works only if the original component was removed by the build 6962 or newer.
Use Host Refresh to upgrade older lite installs to support this kind of cleanup.
Works with the free version as well, just run it on the machine you want to clean.
Cleanup can be started from the UI, or by using the tool parameter:
ntlite.exe /cleancu
*Windows 7 SP1 requires the SHA2 update (KB4474419) for NTLite to start.
Windows 8.1 and 10 do not need anything extra installed.
Remove
Components
This page contains a list of detected removable Windows components for the loaded image.
To queue a component for removal, uncheck the checkbox on the left.
Compatibility
Opened from the toolbar, these options help you protect the needed components from the removal, for a given feature set.
Enable those that you want protected, that will automatically lock the tied components from removal.
Configure
Features
This page contains a list of configurable Windows features for the loaded image, same as would be in the Optional Features of your current installation’s Settings or Control Panel.
Green titles are already enabled on the image, simplifying the pending state change overview. State of each feature can also be read on the right.
Settings
This page contains a list of various settings, tweaks and policies.
Change the option by either double-clicking it, or selecting the value from the drop-down on the right for a given row, or press the first letter of the value.
Services
This page contains a list of services, same as would be in Computer Management – Services.
Tied component for a selected service can be seen in the service description on the bottom.
If a tied component is queued for removal, or a service is known to break installation if misconfigured, the given service row will be disabled.
Extra Services
This page contains a list of driver and hidden services, these are not normally listed in Windows UI and should not be changed unless you know exactly what you’re doing.
It’s here mostly for completion and a general overview of driver payloads.
Integrate
Updates
This page integrates updates to an image, or installs updates to the currently installed system, depending what was loaded as the target on the Source page.
On the right is a list of existing packages in the target, those can be Updates, Language packs and Features.
Make sure to use the Analyze option from the toolbar after queuing all the updates, for any known missing dependencies or compatibility issues.
For EXE installers like .NET Framework or C++, use the Automate – Post Setup page instead, Updates page is just for truly integrate-able packages, extensions like MSU or CAB. Some EXE exceptions are Win7 SP1, WUAgent and IE11, those are supported by the Updates page.
Clean update backup
An option in the toolbar, used to remove the obsolete files, replaced by their updated versions.
It can be useful to significantly reduce the size of the updated target, to fit an image to the FAT32 4GB limit or to simply reduce the size of the installation. It removes the ability to uninstall current updates.
There are 3 modes of operation:
– DISM (Compatible) – in this mode it is using the Windows built-in function to clean updates. While it is the maximum compatible method, in terms of it having the least chances of breaking a future package installation, it can be quite slow and picky on its environment. If it denies to work in your particular target, try the Custom mode (not as compatible with future updates). DISM modes do not support Windows 7.
– DISM (ResetBase) – same as above, plus removes a bit more, with a higher risk of breaking updatability and Windows Reset of Win10 1903 and newer.
– Custom (Complete) – uses the custom engine for cleaning the old versions, while retaining the update compatibility in almost all of the cases. Report any issues and update with Host Refresh tool if stuck.
Note: if future package installation breaks for any reason, on Win10 see Start – Wizard – Host Refresh on how to easily fix it.
Drivers
This page integrates drivers to an image, and can be used to check if all the needed drivers are covered for the loaded target.
Supported drivers are in the INF format, with the accompanying files in the folder as they came originally in the package.
You can import drivers from the host, or download from the internet.
If the driver is only available in the EXE format, extract it first – the method depends on the driver, sometimes just a switch, if you cannot find how, contact us.
Hardware list
Contained in an XML file which can be exported from any machine running the tool and using the File – Export Hardware List option.
To add another machine’s hardware list, use the Import button on the toolbar of the Drivers page, then select that machine from the drop-down.
This machine list is also reflected on the Components page, Compatibility list, to easily protect needed drivers for the targeted machine if removing components.
Reuse driver cache
An option in the toolbar, used to reduce the effective Windows size, utilizing NTFS links between identical driver files in cache and where deployed (e.g. System32). Most space saved when used on Live deployments with installed drivers.
Registry
This page applies registry (.reg) file content directly to an image, and provides an easy way to manually edit registry hives on the image.
It will automatically translate registry key paths to an appropriate location, just use it as a normal reg file.
HKEY_CURRENT_USER subkeys will be applied to all users.
Automate
Unattended
This page automates setup choices for an image, so that the installation can be fully or partially automated.
First enable the page on the upper-left, check the extra options in the toolbar, then set the remaining options on the main list.
All options are queued to be executed on deployment of the loaded image.
Autofill
Set and overwrite available entries with the host machine data, where available, speeding up the process of setting up full automation.
All – fills the entire page and prompts for the first user creation
Windows PE – fills just the boot portion of the setup, leaving the OOBE prompts as set
Reset – resets the whole page back to defaults
Add local account
Create a local user account. Also has the option to enable the built-in Administrator account, and to auto-logon a user.
Join network
Join a network domain or a workgroup.
Configure disk
Easily setup disk partition layout with the recommended BIOS and UEFI presets, or setup individual disk partitions.
When wiping the entire disk, it is recommended to use the disk templates.
To format, or only automatically install to a particular partition without wiping the entire drive, it is possible with the ‘Individual partition’ option.
Make sure ‘Wipe disk’ is unchecked, set Partition mode to ‘Modify’ instead of ‘Create’.
Under ‘Format’ choose if you want to format it, and check ‘Install to this partition’ if you want to deploy to that one.
One partition has to be selected as the deployment target, or the setup will prompt for partition selection and automation will be lost.
Double check the main Unattended screen by typing in the filter ‘Wipe’, all of those should be set to ‘false’ already.
To restart the disk configuration, select the “Disk Configuration” element and choose Remove from the toolbar.
Be very careful when configuring formatting or wiping, that the disk and partition IDs are correct, maybe even pre-test in a virtual machine configured with the same disk layout.
OEM SetupComplete
When using an OEM product key in Windows 8 and newer, SetupComplete.cmd is normally not executed. Enable this option to include SetupComplete.cmd in the Unattended-RunSynchronous commands to be executed at the end of setup.
This cmd file is also used by the Post-Setup functionality, described below.
Copy to install image
Copy the answer file directly to the final image location (%WINDIR%\Panther\unattend.xml). Use only if directly deploying an image to a partition, without Windows setup.
Copy to boot image
Copy the answer file directly to the setup boot image. Can help machines which otherwise do not apply Unattended settings on booting up this image.
Dual architecture
If using a 64-bit image, this also saves the 32-bit automation entries, and vice-versa. This is helpful when building multiple-architecture, All-In-One images, otherwise not necessary.
This also enables prompting the list of all editions on the image during the setup boot-up, otherwise setup will automatically pick the last configured edition.
Computer Name
Type or select ‘[Prompt]’ to enable changing the computer name through a prompt during Windows setup. Note that this option needs to be applied to each edition on the image, in case you are not installing the loaded/configured one.
Post-Setup
This page automates execution of apps and scripts at the end of an image installation, or directly after processing if used live.
Use the Add drop-down in the toolbar to add files, commands or see existing templates.
A file can be an installer, or a passive file, type of each can be seen in the Type column.
Installers will be automatically copied and executed during deployment, then deleted from the temporary location.
Make sure all the installers have their correct silent switches set in the Parameters box, otherwise the installation will hang at the login screen.
Passive files will not be executed, just copied and deleted after all the installers are done.
You can use passive files in the installer parameters, syntax listed on the passive file’s Parameters box as read-only ready for copying.
Finish
Apply
This page contains the final image processing options, the full list of pending changes, and the Process button to start applying all the queued changes to the loaded target.
Before actually pressing the Process button, review the pending changes on the right, and do some final choices on this page.
Saving mode
Choose between:
– Save the image, just saves the changes to the loaded edition, keeps the other ones.
– Save the image and trim editions, saves the changes and deletes other editions on the image, this can save a lot of space on the actual image if you don’t need other editions.
– Stop before saving the image, this applies the changes to the mount directory only, changes will not be saved to the actual image until you unload and tick save changes, or reapply in another session.
This is useful when doing multiple sessions to not need to wait for saving and remounting each time.
Remove non-essential editions
Provides the ability to manually select which editions to remove. You can also manually remove editions on the Source page directly by right-clicking it and choosing Delete.
Image format
When saving an image, choose the format.
Image process queue
With this option, selected current tasks can be multiplied to the other editions on the loaded image, not needing to manually do so for each edition.
For example you can select to integrate a driver to install.wim and also to boot.wim, or the same updates for Home and Pro edition, in one session.
Options
Create ISO option automates ISO creation at the end of the process. By ticking the checkbox you will be asked for a file destination.

