- Нужно ли при установке создавать /boot и /swap в 2019?
- Нужен ли swap для linux manjaro
- Creating and Enabling a Swap Partition
- Creating and Enabling a Static Swapfile
- Swapfiles on BTRFS
- Swapfiles on ZFS
- Installing and Configuring systemd-swap
- Remove Other Swap
- Using zswap with systemd-swap
- Файл подкачки и раздел подкачки в Arch Linux: что выбрать и как добавить Swap
- Что такое Swap
- В чём разница между разделом подкачки и файлом подкачки
- Раздел подкачки
- Файл подкачки
- Как в Linux вывести информацию о файле подкачки
- Как создать файл подкачки в Arch Linux
- Удаление файла подкачки
Нужно ли при установке создавать /boot и /swap в 2019?
Смотрю и читаю инструкции по установке. У каждого свой подход. Кто-то создает /boot, кто-то нет. Кто-то делает все разделы логическими, включая /, а кто-то делает совершенно все разделы первичными. Кто-то кроме / и /home вообще ничего не создает.
Так собственно как правильно установить Линукс? Некоторые пишут, что /boot нужен только при LVM, а при Grub он якобы не упёрлся. Где собственно правда? Какой инструкции следовать в 2019 при MBR? Следует создавать /boot, /swap? Может отзывы какие, помогает ли это всё или нет.

Не создавай, оставь только EFI и /, свапайся в небольшой файл. Поймешь, что хотел не этого — поймешь и почему. Не поймешь — значит и не надо было.

swap нужен всегда, хоть в виде раздела, хоть в виде файла. /boot нужен только для LVM. /home как отдельный раздел упрощает смену дистрибутива или полную переустановку.

Какой инструкции следовать в 2019 при MBR?
(написано по памяти, могут быть опечатки)
- swap, при необходимости — файлом.
- LVM тебе не нужен.
- Отдельный хомяк тоже.
- Расшифровать раздел для загрузки ядра умеет grub.
Источник
Нужен ли swap для linux manjaro
Swap space is used to extend the amount of memory(RAM) available for running programs.
- Without swap space, if you run out of memory, applications will be terminated up to and including the entire system crashing.
- With swap space available to the system, the kernel can take less frequently accessed memory pages from inactive applications / services and write them to disk («swapping» them), allowing more actual RAM to be available for active applications.
There are three different ways in which swap can be managed in Manjaro:
- A swap partition
- A swap file
- zswap
This article tries to be as comprehensive as possible but even more information can be found in the articles linked below
That is a question that cannot be answered without having a look at your configuration and even with plenty of available memory, it is often used as a safety net or even sometimes due to specific application requirements so have a look at the following non-exhaustive list:
- If you use hibernation: yes, you need swap!
- If you have services that are not always active, but are still running all the time: yes, you need swap!
- If you have an application that allocates virtual memory directly for temporary storage instead of RAM: yes, you need swap!
- If you have an application that has a memory leak: yes, you need swap!
- If you have a server with 1TB of RAM that you’re using as a desktop without applications allocating virtual memory or having memory leaks: No, you don’t need swap!
The amount of swap you need is highly variable based on your specific applications and workload. There is no universal formula on swap size without monitoring usage over a period of time. A reasonable place to start would be:
- For less then 4GB of physical memory (RAM), it’s highly recommended that the swap space should, as a base minimum, be equal to the amount of RAM. Also, it’s recommended that the swap space is maximum twice the amount of RAM depending upon the amount of disk space available for the system because of diminishing returns.
- For more modern systems (>4GB), your swap space should be at a minimum be ROUNDUP(SQRT(RAM)) I.E. the square root of your RAM size rounded up to the next GB. However, if you use hibernation, you need a minimum of physical memory (RAM) size plus ROUNDUP(SQRT(RAM)). The maximum, is again twice the amount of RAM, again because of diminishing returns.
- The only downside to having more swap space than you will actually use, is the disk space you will be reserving for it cannot be used for application or system data.
The «diminishing returns» means that if you need more swap space than twice your RAM size, you would be better off adding more RAM as Hard Disk Drive (HDD) access is about 10³ slower then RAM access, so something that would take 1 second, suddenly takes more then 15 minutes! And on a Solid State Drive (SSD) the same operation that took 1 second in RAM will still take about 1 minute on that SSD!
Taking into account all of the above, this brings us to the following table: (last 3 columns denote swap space)
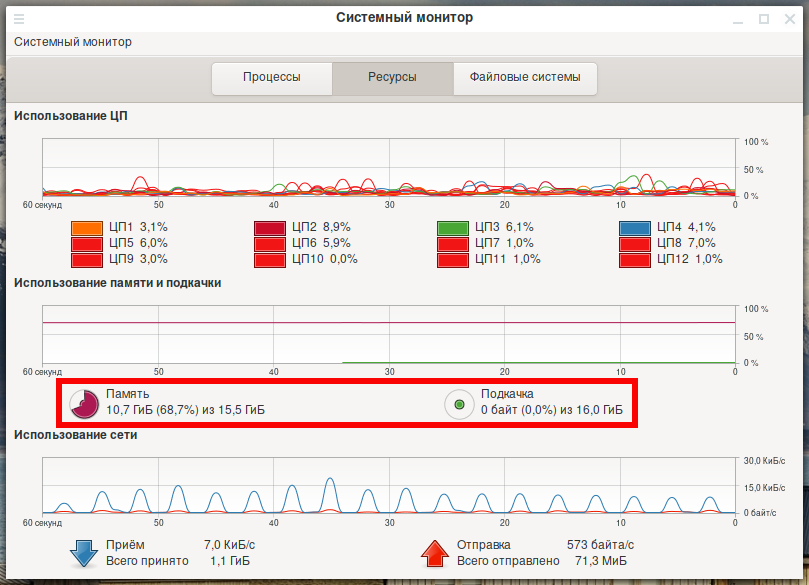
The command swapon will display your current swap information. For example:
The following script will:
- show whether zswap is active or not and if active, give zswap parameters if run with the sudo command
- display a list of all applications / services that take up swap and how much they take up in descending order
A swap partition is the traditional way of managing swap. In this scenario, a dedicated partition (or partitions) are created for holding swap.
Creating and Enabling a Swap Partition
To create a swap partition, you need enough unallocated disk space to create an additional partition. If you do not have enough space, skip to the next section #Using_a_swap_file. A swap partition can be created in any disk management / partition management tool and should be set as type linuxswap .
Once you have a swap partition you will need to initialize the swap partition with mkswap . For example, if your swap partition is /dev/sda3 , you could use the command:
Next we need to enable the swap partition with the swapon command. Following our example above this could be done with:
In order to ensure that the swap is enabled at boot we can add an entry to /etc/fstab . It is best to use the UUID instead of the device name for this purpose. You can add the line to fstab manually or using the command:
If you would like to have more than one swap partition, simply repeat the steps above for any additional partitions.
Using a swap partition has one major disadvantage: Changing the size of swap or adding swap requires repartitioning the disk. In current Linux kernels, it is possible to use a swap file instead of a dedicated partition and as from kernel 2.6 onwards there is no performance difference any more between the two.
Creating and Enabling a Static Swapfile
First create and intialize the file to hold the swap. For example, to create a 4GB swapfile, you could use the command:
Set the appropriate permissions on the file. It should be readable and writable only by root . This can be done with the command:
Next we need to format and enable the swapfile:
In order to ensure that the swap is enabled at boot we can add an entry to /etc/fstab . You can add the line to fstab manually or using the command:
Swapfiles on BTRFS
As of kernel 5.0 and higher, swapfiles are supported on btfrs. They still require some special handling in addition to the above steps.
Prior to running the fallocate step above, you should run these commands:
These commands create an empty swapfile, disable COW for that file and ensure that compression is disabled.
Just replace /swapfile with /@swapfile/swapfile.
Swapfiles on ZFS
zfs doesn’t support swapfiles, however you can achieve a similar benefit using a zvol as a swap volume.
Detailed instructions on how to accomplish this can be found in this ZoL guide.
It is possible to automatically manage the size of your swapfile using systemd-swap . It can create swap files dynamically based on memory needs. It is also an easy way to enable/manage zswap
Installing and Configuring systemd-swap
First, install and enable systemd-swap :
Next enable dynamic swap management by creating a file /etc/systemd/swap.conf.d/myswap.conf with the following parameters:
If you would prefer a single command to create this file you could use:
Remove Other Swap
In order for systemd-swap to be effective you need to remove any traditional swap devices you have.
To display your current swap devices you can use the command swapon . For example, my test machine displays the following:
In this example there are two swap devices. A swapfile and a swap partition. To turn them off we can use the command swapoff .
Next we need to remove them. The swap partition will need to be deleted using your favorite partitioning tool. You can remove the swapfile by simply deleting it.
We need to also remove any lines related to swap from /etc/fstab . Edit the file with an appropriate text editor and remove or comment out the lines for the swap space. In the example above, we would remove these lines:
Next reboot. After the reboot, when running swapon you should see something similiar to the following:
systemd-swap will add and remove swapfiles as your memory usage dictates.
Using zswap with systemd-swap
zswap is compressed swap kept in RAM. zswap keeps the most frequently used pages in RAM and writes less frequently used pages to the swap space on disk. In many workloads, this will result in increased swap performance and less wear and tear on SSDs.
To enable zswap with systemd-swap, simply alter the instructions above and set Linux Kernel parameter zswap_enabled=1
Although swap seems like a great way to expand memory, excessive swap use will cause severe performance degradation, as mentioned before.
There are couple of parameters that can be used to tune swap utilization. These are swappiness and vfs_cache_pressure. To see your current settings for these you can use the following commands:
swappiness controls how likely a page is to be transferred to swap. This value represents the percentage of the free memory before activating swap. The lower the value, the less swapping is used and the more memory pages are kept in physical memory where:
- 0 disables swap
- 60 is the default value which is ideal for a server that is memory-starved and running a lot of services
- 100 is very aggressive swapping.
For most desktop computers the recommended value is 10: Theoretically, this means to only start swapping when RAM usage reaches around 90 percent.
vfs_cache_pressure used to be a percentage value that controls the tendency of the kernel to reclaim the memory which is used for caching of directory and inode objects with a default value of 100 on Kernels =5.4 can be increased beyond 100. Increasing this value will increase the rate in which these objects are removed from the RAM cache. Decreasing it will allow these objects to be cached in memory longer, consuming additional RAM over time. Depending on your specific workload, increasing or decreasing this value too far can have significant negative impacts on system performance. Experimentation is needed to find the appropriate balance and the default value is reasonable. In general, it is more common to optimize swappiness before experimenting with vfs_cache_pressure.
To set these values you can use the command sysctl . For example, to set the swappiness value to 10 you could use:
There is no preset defined answer on the optimal values for these parameters. Experimentation is needed to find the optimum configuration for your specific hardware and workload.
Источник
Файл подкачки и раздел подкачки в Arch Linux: что выбрать и как добавить Swap
Оперативная память, наравне с центральным процессором, является определяющей в производительности компьютера. Причём не так даже важная скорость (частота) оперативной памяти, сколько важно её количество — объём ОЗУ.
Компьютер начинает работать намного медленнее, если ему не хватает оперативной памяти. Причём если у него есть раздел подкачки, то он может скопировать на него часть информации из оперативной памяти и затем прочесть её — это уменьшает быстродействие, но хотя бы не приводит к сбросу запущенных задач и зависанию компьютера.
Итак, если производительность вашего компьютера падает из-за недостатка оперативной памяти, то я рекомендовал бы в первую очередь апгрейдить железо, то есть докупить ещё планки оперативной памяти. Но это бывает не всегда возможно. Либо, в дополнении к покупке аппаратной ОЗУ, можно добавить ещё раздел подкачки.
Что такое Swap
Swap, иногда пишут Своп — это то, что в Windows называют разделом подкачки — то есть это место в постоянном хранилище (жёсткий диск, SSD, USB хранилище) на которое временно сбрасывается часть оперативной памяти, которая:
а) в данный момент не используется в вычислениях
б) не умещается в физической оперативной памяти.
В чём разница между разделом подкачки и файлом подкачки
Итак, мы определились, что раздел подкачки и файл подкачки в Linux называется Swap.
Теперь рассмотрим два доступных варианта: раздел и файл подкачки.
Раздел подкачки
Раздел подкачки — это выделенное место на диске, отдельный том, который создаётся при разметке диска во время установки операционной системы.
Если вы захотите создать раздел подкачки уже после установки операционной системы, например, следующим образом: уменьшить объём одного из разделов, а на высвободившемся месте создать Swap раздел, то скорее всего, вы не сможете это сделать «на горячую», то есть во время работы этой самой операционной системы. Вам придётся загрузиться с USB носителя или оптического диска и с него выполнить необходимые операции.
Файл подкачки
Файл подкачки выполняет те же функции, что и раздел, но является более удобным в использовании.
Удобства использования файла подкачки выражаются в следующем:
а) файл подкачки создаётся как обычный файл, то есть не нужно делать разметку диска
б) для подключения файла подкачки не нужно перезагружать операционную систему
в) для изменения размера файла подкачки не нужно перезагружать операционную систему
г) для отключения и удаления файла подкачки не нужно перезагружать компьютер
То есть, вполне реальна ситуация, когда вам нужен файл подкачки на короткое время — например, на час. Вы можете его создать, подключить, выполнить задачу, которая требует значительный объёмов оперативной памяти, а поле завершения работы отключить и удалить его. Это особенно актуально, если у вас, например, быстрый, но не большой по объёму SSD накопитель — и мы не хотите постоянно держать файл подкачки, особенно если он не особенно нужен большую часть времени.
Ещё вариант с файлом подкачки удобен на VPS хостинге, когда не нужны лишние простои сервера из-за обслуживания, и невозможность физического доступа требует обращения в службу поддержки.
Как в Linux вывести информацию о файле подкачки
Чтобы проверить, присутствует ли файл подкачки, какой его размер и насколько он используется, выполните команду:
Как создать файл подкачки в Arch Linux
Все последующие команды нужно выполнять с привилегиями root пользователя.
Чтобы создать файл подкачки (Swap файл) выполните команду fallocate, вместе с которой нужно указать размер создаваемого файла подкачки. Можно использовать сокращения (M = мегабайты, G = гигабайты). Например, для создания файла подкачки размером 16 Гигабайт, размещённого по пути /swapfile нужно выполнить команду:
Команда fallocate может вызвать проблемы с некоторыми файловыми системами, такими как F2FS или XFS. В качестве альтернативы более надёжно, хотя и более медленно, это использование команды dd (в этом примере будет создат файл размером 512 Мегабайт):
Установите права доступа на файл (доступный всем для чтения swap это огромная локальная уязвимость):
Отформатируйте файл в swap:
Активируйте файл подкачки:
Обратите внимание, что уже на этом этапе файл подкачки начинает использоваться — перезагрузка системы не требуется!
Для того, чтобы файл подкачки использовался после каждой перезагрузки откройте файл /etc/fstab.
В графическом интерфейсе:
В интерфейсе командной строки:
И добавьте в этот файл строку:
Внимание: файл подкачки должен быть указан по его расположению в файловой системе, а не по его UUID или LABEL.
Удаление файла подкачки
Для удаления файла swap его нужно в начале отключить, а затем он может быть удалён:
Наконец удалите соответствующие строку из файла /etc/fstab.
Источник


