Nvidia cooler control linux
Автоматическое управление вентиляторами видеокарт Nvidia для linux в том числе HiveOS
Функционал контроля температуры:
- Задается коридор температур (по умолчанию 58-60) в котором скрипт будет пытаться держать карты.
- При снижении температуры ниже нижнего порога — происходит плавное снижение оборотов кулера.
- При достижении верхнего порога — плавное увеличение оборотов.
- При достижении второго порога (по умолчанию 65)- сразу включается турборежим кулера (по умолчанию 70), и после этого плавное увеличение вплоть до максимальных оборотов, пока температура не снизится.
- При снижении оборотов ниже минимальных (по умолчанию 35) — происходит переключение на автоматическое управление кулерами. Полезно при зимнем балконном майнинге, чтобы не крутить вентиля, когда картам и так холодно. (на многих картах вентиля просто отключаются ниже определенной температуры)
Функционал WatchDog (можно отключить):
- Считываются значения загрузки карт.
- В случае ошибки получения данных (отвал карты). Или в случае снижения загрузки карты ниже установленного порога (не работает майнер), начинается обратный отсчет. Если по прошествии заданного количества циклов — загрузка карт не восстанавливается — происходит перезагрузка с одновременной записью даты ребута и его причины в
Входные переменные для настройки вынесены в отдельный файл fan.conf. Этот файл должен находиться в одной директории со скриптом. В файле есть описание переменных.
Переменные можно изменять на лету без перезапуска скрипта. Скрипт считывает переменные из конфигурационного файла на каждом цикле.
Запускать желательно в отдельном окне терминала или в screen
Использование в HiveOS
- скачать архив в домашнюю директорию /home/user
- присвоить скриптам права на исполнение
- скопировать файлы в домашнюю директорию
- при неообходимости отредактировать файл конфигурации fan.conf
- перезагрузить риг или запустить скрипт без перезагрузки выполнив команду:
После этого скрипт будет запускаться при старте рига в фоновом режиме в screen.
Восстановить окно скрипта и понаблюдать за его работой можно с помощью команды
Отключиться от окна скрипта:
Фикс зацикливания при ошибке получения данных (спасибо bimkripto)
Изменение оборотов кулеров теперь производится одной командой один раз за цикл. В связи с этим скрипт отрабатывает очень быстро, независимо от количества карт в риге.
Настройки вынесены во внешний файл конфигурации. Их можно менять на лету, не перезапуская скрипт.
Скрипт кардинально переработан. Получение данных с карт теперь происходит одним запросом на все карты. Добавлен блок предотвращения возможных конфликтов при сборе данных с карт со стороны HiveOS. Достигнуто значительное увеличение скорости работы и стабильности.
Источник
Управление кулером Linux
Читаете, вы, сейчас эти строки и слышите равномерный, в меру громкий шум кулера. Однозначно слышите, иначе вас бы не заинтересовала эта статья. На самом деле громкая работа кулера в Linux довольно частая проблема недавно перешедших с Windows-пользователей. А ведь он не должен так шуметь.
В Windows, обороты вентилятора и многие другие параметры управляются автоматически в зависимости от нагрузки на систему и следовательно температуры оборудования, здесь же из коробки вентилятор всегда крутится на полную мощность, независимо от того, играете вы тяжелую игру, компилируете программу или просто просматриваете интернет страницы. Это нужно исправлять. В этой инструкции мы рассмотрим управление кулером Linux и настройку автоматической регуляции оборотов в зависимости от температуры.
Подготовка системы
Чтобы правильно управлять и ничего не спалить, ну на самом деле и ничего не сгорит, компьютер просто уйдет в перезагрузку, но все же… нам нужно знать температуру оборудования в данный момент. Для снятия показаний со всяких датчиков на материнской плате используется набор программ lm_sensors. Сначала настроим lm_sensors затем управление кулером linux.
Установка lm_sensors
Это, можно сказать, системный компонент, поэтому он есть в репозиториях всех дистрибутивов.
Для Ubuntu или Debian команда установки выглядит следующим образом:
sudo apt install lm-sensors
Для Fedora и RHEL:
sudo yum installlm-sensors
sudo emerge -av lm-sensors
Также для Gentoo в ядре необходимо будет включить следующие функции:
Device Drivers —>
-*- I2C support —>
I2C device interface
Hardware Monitoring support —>
//вообще говоря, лучше включить все драйвера оборудования а потом посмотреть какие загрузятся и отключить ненужные.
[M] Intel Core/Core2/Atom temperature sensor (coretemp)
Не забудьте пересобрать все пакеты с флагом lm_sensors
Настройка lm_sensors
Теперь нам нужно найти и записать информацию обо всех доступных сенсорах, для этого выполните:
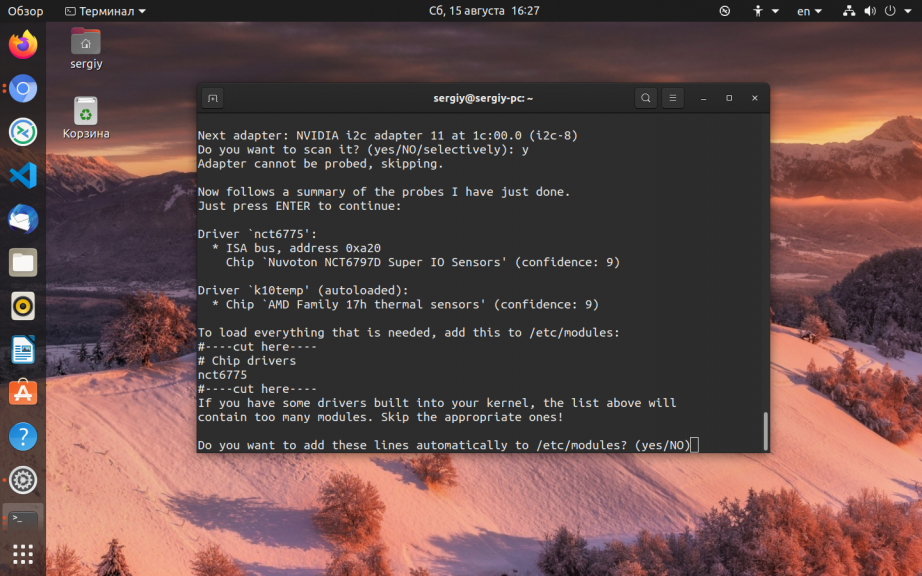
После запуска команды нужно будет последовательно нажимать y, чтобы подтвердить сканирование следующей группы устройств, затем Enter:
Now follows a summary of the probes I have just done.
Just press ENTER to continue:
А потом опять y для сохранения собранной конфигурации в файл:
Do you want to overwrite /etc/conf.d/lm_sensors? Enter s to specify other file name?
(yes/NO/s):
Далее, добавляем сервис в автозагрузку:
sudo systemctl enable lm-sensors
sudo systemctl start lm-sensors
Уже можем посмотреть показания сенсоров:
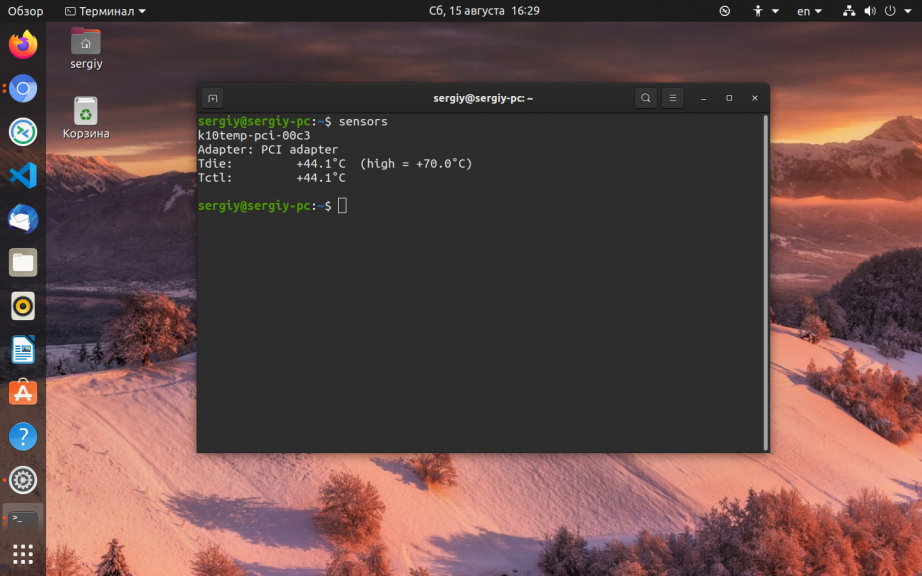
В зависимости от драйвера здесь показаны не только температура, но и обороты кулера, а также напряжение. Но это не главное, у нас есть информация и мы можем переходить к следующему пункту.
Управление кулером Linux
Управление оборотами вентилятора linux выполняется с помощью сервиса fancontrol. Для установки в Ubuntu:
sudo apt install fancontrol
sudo yum install fancontrol
После установки переходим к настройке автоматического регулирования оборотов кулера. Сначала нужно программно связать каждый кулер с соответствующим ему датчиком температуры, и настроить допустимый уровень температур. Для этого выполните:
pwmconfig revision 6166 (2013-05-01)
This program will search your sensors for pulse width modulation (pwm)
controls, and test each one to see if it controls a fan on
your motherboard. Note that many motherboards do not have pwm
circuitry installed, even if your sensor chip supports pwm.
We will attempt to briefly stop each fan using the pwm controls.
The program will attempt to restore each fan to full speed
after testing. However, it is ** very important ** that you
physically verify that the fans have been to full speed
after the program has completed.
Сначала программа покажет доступные драйверы вентиляторов:
Found the following fan sensors:
hwmon1/device/fan1_input current speed: 3292 RPM
hwmon1/device/fan2_input current speed: 0 … skipping!
hwmon1/device/fan3_input current speed: 0 … skipping!
Здесь вы видите предупреждение о том что вентиляторы linux будут отключены на некоторое время (5 секунд), как прочитаете нажмите Enter. Дальше будет выполнено тестирование доступных скоростей кулера:
Testing pwm control hwmon1/device/pwm1 …
hwmon1/device/fan1_input … speed was 3292 now 1051
It appears that fan hwmon1/device/fan1_input
is controlled by pwm hwmon1/device/pwm1
Would you like to generate a detailed correlation (y)? y
Note: If you had gnuplot installed, I could generate a graphical plot.
PWM 255 FAN 3276
PWM 240 FAN 3169
PWM 225 FAN 3026
…
Дальше настроим максимальную, минимальную и рабочую температуры, сначала выберите кулер, например 1:
Select fan output to configure, or other action:
1) hwmon1/device/pwm3 3) Change INTERVAL 5) Save and quit
2) hwmon1/device/pwm1 4) Just quit 6) Show configuration
Теперь выберите датчик температуры для этого кулера:
Devices:
hwmon0 is k10temp
hwmon1/device is it8712
Current temperature readings are as follows:
hwmon0/temp1_input 37
hwmon1/device/temp1_input 47
hwmon1/device/temp2_input 40
hwmon1/device/temp3_input -128
Select a temperature sensor as source for hwmon1/device/pwm3:
1) hwmon0/temp1_input
2) hwmon1/device/temp1_input
3) hwmon1/device/temp2_input
4) hwmon1/device/temp3_input
5) None (Do not affect this PWM output)
Теперь укажите температуру, при которой вентилятор linux будет вращаться на минимальной скорости:
Enter the low temperature (degree C)
below which the fan should spin at minimum speed (20): 45
Затем температуру, при которой нужно переходить на максимальные обороты:
Enter the high temperature (degree C)
over which the fan should spin at maximum speed (60): 60
Далее, нужно указать минимальное значение оборотов pwm, можно узнать нажав кнопку t
Enter the minimum PWM value (0-255)
at which the fan STOPS spinning (press t to test) (100):2
Какое значение pwm использовать если температура превышает минимальную, по сути, это рабочие обороты:
Enter the PWM value (0-2) to use when the temperature
is below the low temperature limit 100
Какое значение использовать при превышении максимальной температуры:
Enter the PWM value (2-255) to use when the temperature
is over the high temperature limit (255): 255
Готово теперь, остается настроить таким же образом другие кулеры, если у вас их несколько и можно сохранять:
Select fan output to configure, or other action:
1) hwmon1/device/pwm3 3) Change INTERVAL 5) Save and quit
2) hwmon1/device/pwm1 4) Just quit 6) Show configuration
select (1-n): 5
Сохранить и выйти под номером 5. Добавте fancontrol в автозагрузку:
sudo systemctl enable fancontrol
sudo systemctl start fancontrol
Чувствуете? тишина… теперь fancontrol управляет вашими кулерами и шума без надобности больше не будет.
Ручное управление оборотами кулера
Меня всегда интересовало, как вручную выключить кулер. Сразу забегая на перед скажу, что ничего не сгорит, температура просто будет плавно расти. Если запущен fancontrol останавливаем, чтобы не мешал:
sudo systemctl stop fancontrol
Смотрим доступные устройства:
ls /sys/class/hwmon/hwmon1/device/ | grep pwm
Здесь pwm1, pwm2.. это файлы кулеров. Разрешаем ручное управление вентилятором linux, например, для pwm1:
echo 1 >>/sys/class/hwmon/hwmon1/device/pwm1_enable
Включаем на полную:
echo 255 >> /sys/class/hwmon/hwmon1/device/pwm1
А теперь на минимум:
echo 0 >> /sys/class/hwmon/hwmon1/device/pwm1
Выводы
Теперь вы достаточно знаете и управление кулером не вызовет у вас проблем. Вы можете заставить свой компьютер или ноутбук не шуметь и не мешать вам спать ночью. В современных системах это вовсе может не понадобится, там кулером управляет UEFI и не допускает того чтобы он крутился быстрее, чем это необходимо. Если остались вопросы, пишите их в комментариях!
Источник
Nvidia cooler control linux
Nvfancontrol provides dynamic fan control for NVidia graphic cards on Linux and Windows.
Sometimes it is desirable to control the fan speed of the graphics card using a custom response curve instead of the automatic setting that is built into the card’s BIOS. Especially in newer GPUs the fan does not kick in below 60°C or a certain level of GPU utilization. This is a small toy project in Rust to achieve a more elaborate control over this using either XNVCtrl in Linux or NVAPI in Windows. It is a work in progress so proceed with caution!
The minimum supported driver version is 352.09. For GPUs with multiple independent cooler control nvfancontrol will autodetect and apply the provided response curve to each of the available fans separately.
Pre-built binaries for the latest release are provided however if you want to build the project from source read along.
Prerequisites for Linux
- the Rust compiler toolchain, stable >=1.34 or nightly (build)
- XNVCtrl; static (build only) or dynamic (build and runtime)
- Xlib (build and runtime)
- Xext (build and runtime)
Since XNVCtrl supports FreeBSD in addition to Linux these instructions should also work for FreeBSD without further modifications. However nvfancontrol is completely untested on FreeBSD (bug reports are welcome).
Prerequisites for Windows
- the Rust compiler toolchain, stable >=1.15 or nightly. Be adviced that you need the MSVC ABI version of the toolchain not GNU. In order to target the MSVC ABI for Rust you will also need the Visual C++ build tools package or any recent version of Visual Studio (2015+). If you are using rustup (which you should) you will be warned about this (build only)
- the NVAPI libraries (build only). Depending on which version you are building (x86, x64 or both) place nvapi.lib , nvapi64.lib or both in the root of the repository. As nvapi is linked statically there are no runtime dependencies apart from the NVidia driver.
For both platforms run cargo build —release . Upon successful compilation the executable can be found in target/release/nvfancontrol . On Linux the build tool expects the libraries installed in /usr/lib or /usr/local/lib . In case you have libraries installed in different locations export them using the LIBRARY_PATH environment variable (colon separated paths). By default libXNVCtrl will be linked statically. If a static version of libXNVCtrl is not available or you explicitly want it to be linked dynamically add —features=dynamic-xnvctrl to the cargo incantation.
Enable Coolbits (Linux only)
For Linux ensure that Coolbits is enabled from your X11 server settings. To do so create a file named 20-nvidia.conf within /etc/X11/xorg.conf.d/ or /usr/share/X11/xorg.conf.d/ (depends on distribution) containing the following
The important bit is the Coolbits option. Valid Coolbits values for dynamic fan control are 4 , 5 and 12 . A sample configuration file is provided.
Run X11 as root
As of version 465 NVIDIA decided that is a security risk for non-root users to have access to cooler control and overclocking capabilities. So you will have to start X11 as root despite almost no distributions and desktop environment doing so for the past years because it is a massive. security risk. Trading one security risk for another! To start X11 as root you will have to add this to your /etc/X11/Xwrapper.config (create the file if it doesn’t exist).
Depending on how your distribution packages X11 you might have to setuid /usr/lib/Xorg.wrap as well. You can do so by running
Use and configure
To run the program just execute the nvfancontrol binary. Add the -d or —debug argument for more output. To add a custom curve you can provide a custom configuration file. On Linux create a file named nvfancontrol.conf under the XDG configuration directory (
/.config or /etc/xdg for per-user and system-wide basis respectively). On Windows create the file in C:\Users\[USERNAME]\AppData\Roaming instead. The configuration file should contain pairs of whitespace delimited parameters (Temperature degrees Celsius, Fan Speed %). For example
Lines starting with # are ignored. You need at least two pairs of values.
Bear in mind that for most GPUs the fan speed can’t be below 20% or above 80% when in manual control, even if you use greater values. However, since these limits are arbitrary and vary among different VGA BIOS you can override it using the -l , or —limits option. For example to change the limits to 10% and 90% pass -l 10,90 . To disable the limits effectively enabling the whole range just pass -l 0 . In addition note that the program by default will not use the custom curve if the fan is already spinning in automatic control. This is the most conservative configuration for GPUs that turn their fans off below a certain temperature threshold. If you want to always use the custom curve pass the additional -f or —force argument. To terminate nvfancontrol send a SIGINT or SIGTERM on Linux or hit Ctrl-C in the console window on Windows.
Although presently nvfancontrol is limited to a single GPU, users can select the card to modulate the fan operation using the -g or —gpu switch. GPUs are indexed from 0 . To help with that option -p or —print-coolers will list all available GPUs with their respective coolers. On Windows coolers are indexed from 0 for each GPU. On Linux each available cooler on the system is assigned a unique id.
Third party interfacing
nvfancontrol offers two ways to dump the output of the program for integration with third party programs. Using the -j option a JSON represantation of the current data is printed to stdout . As all other messages are printed to stderr the data can be parsed by reading new-line delimited data from the program’s stdout . If this is not desirable a builtin TCP server is also provided which can be enabled using the -t option. This option can optionally be followed by a port number (default port is 12125). The server prints the JSON data through the socket and immediately closes the connection. The message is always terminated with a new-line character.
Fan flicker prevention
Due to firmware issues in several RTX series GPUs fans will tend to rapidly turn on and off at low speeds (fan flickering). To counter this nvfancontrol includes a workaround which is accessible using the -r or —fanflicker switch (config. option fanflicker = [min, max] ). Fan flicker prevention will attempt to gradually lower or increase the fan speed within a user-specified range (the flickering zone). When the fan speed drops below the min flickering prevention will kick in. As an example for min = 11 and max = 38 curve changes are applied gradually. Above 38% behaviour is normal and arbitrary jumps are again allowed.
Bugs and known issues
Although nvfancontrol should work with most Fermi or newer NVidia cards it has been tested with only a handful of GPUs. So it is quite possible that bugs or unexpected behaviour might surface. In that case please open an issue in the bug tracker including the complete program output (use the —debug option).
RPM reporting for GPUs with multiple fans on Windows is incorrect or totally wrong because the provided function NvAPI_GPU_GetTachReading is limited to a single fan. There is nothing in the public NVAPI to suggest otherwise. However, speed in % should work as expected. In any case multiple cooler support on Windows is not thoroughly tested so bug reports are always welcome!
As mentioned before, nvfancontrol is limited to a single (but selectable) GPU. The underlying code does support multiple GPUs but exposing this support to the user-facing program will require possibly breaking alterations to the configuration file. It will be added eventually.
This project is licensed under the GPLv3 or any newer.
Источник


