- Обновление powershell windows server 2016
- Что дает обновление версии PowerShell ?
- Алгоритм обновления версии PowerShell
- Установка Windows Management Framework and PowerShell 5.1.14409.20180811 через репозиторий choco
- Обновление версии PowerShell в Windows
- Обновление Windows PowerShell до 5.1
- Установка/обновление PowerShell Core 7.0
- Upgrade and conversion options for Windows Server 2016
- Upgrading previous retail versions of Windows Server to Windows Server 2016
- Per-server-role considerations for upgrading
- Converting a current evaluation version to a current retail version
- Converting a current retail edition to a different current retail edition
- Converting a current retail version to a current volume-licensed version
Обновление powershell windows server 2016
Добрый день! Уважаемые читатели и гости IT блога Pyatilistnik.org. В прошлый раз мы с вами научились определять версию PowerShell, которая установлена в вашей операционной системе. У вас она могла быть устаревшей, и я вам обещал, это исправить. В сегодняшней заметке, я вам покажу быстрый процесс, как обновить PowerShell версию в любой из операционных систем ,семейства Windows. Данные методы займут у вас не более нескольких минут. Как сказал Гагарин, поехали.
Что дает обновление версии PowerShell ?
Компания Microsoft вкладывает огромные силы для развития и поддержки своего продукта по управлению всем, что только можно в мире Windows. Поэтому, чтобы иметь возможность делать работу по автоматизации быстрее, лучше и профессиональнее, необходимо всегда следить за последними версиями командлетов и их ключами, так как от этого зависит их функционал. Каждый новый релиз PowerShell, это по сути как переход с одной операционной системы на другую, более продвинутую и лучшую. С каждой новой версией появляются десятки, а то и сотни новых командлетов для различных сценариев.
Алгоритм обновления версии PowerShell
Хочу отметить, что алгоритм обновления будет одинаков для всех версий Windows начиная с 7 SP1, если у вас ниже, то установите сервисный пакет Service Pack 1 на семерку и двигайтесь дальше.
- Определяете свою версию PowerShell
- Проверяете наличие у вас пакета Microsoft .NET Framework 4.7, если нет, то устанавливаете его
- Скачиваете пакет PowerShell 5.1
- Устанавливаете пакет PowerShell 5.1
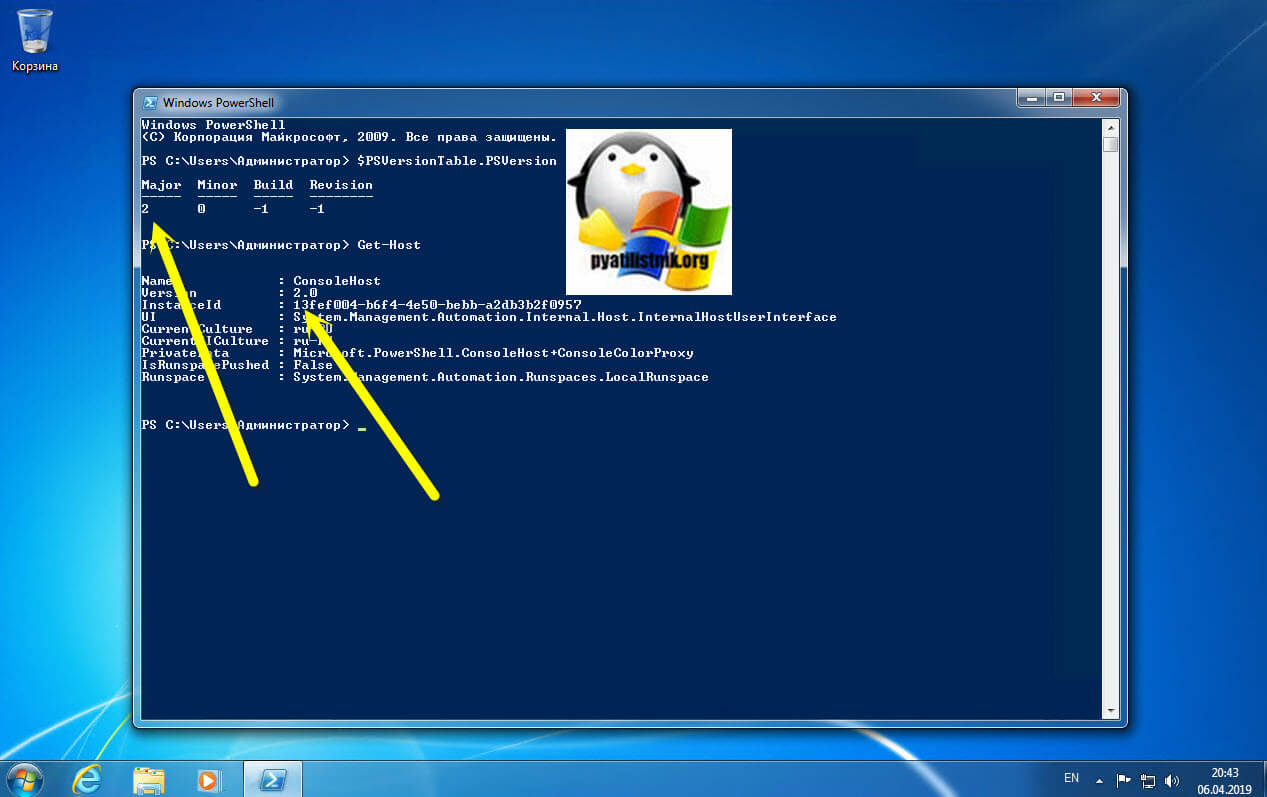
В моем примере я буду обновлять PowerShell в Windows 7 SP1. Моя текущая версия 2.0.
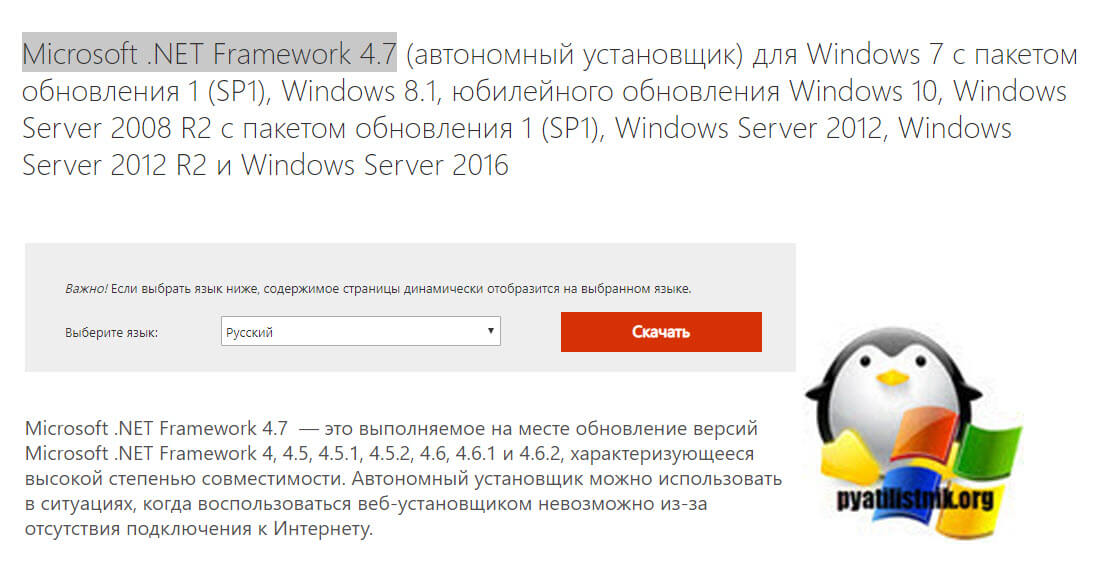
Далее я вам рассказывал, как проверить версию Microsoft .NET Framework 4.7. Если она у вас не установлена, то сделать, это можно по ссылке:
Данный пакет подойдет:
- Windows 7 с пакетом обновления 1 (SP1) (x86 и x64)
- Windows 8.1 (x86 и x64)
- Юбилейное обновление Windows 10 (x86 и x64)
- Windows Server 2008 R2 с пакетом обновления 1 (SP1) (x64)
- Windows Server 2012 (x64)
- Windows Server 2012 R2 (x64)
- Windows Server 2016 (x64)
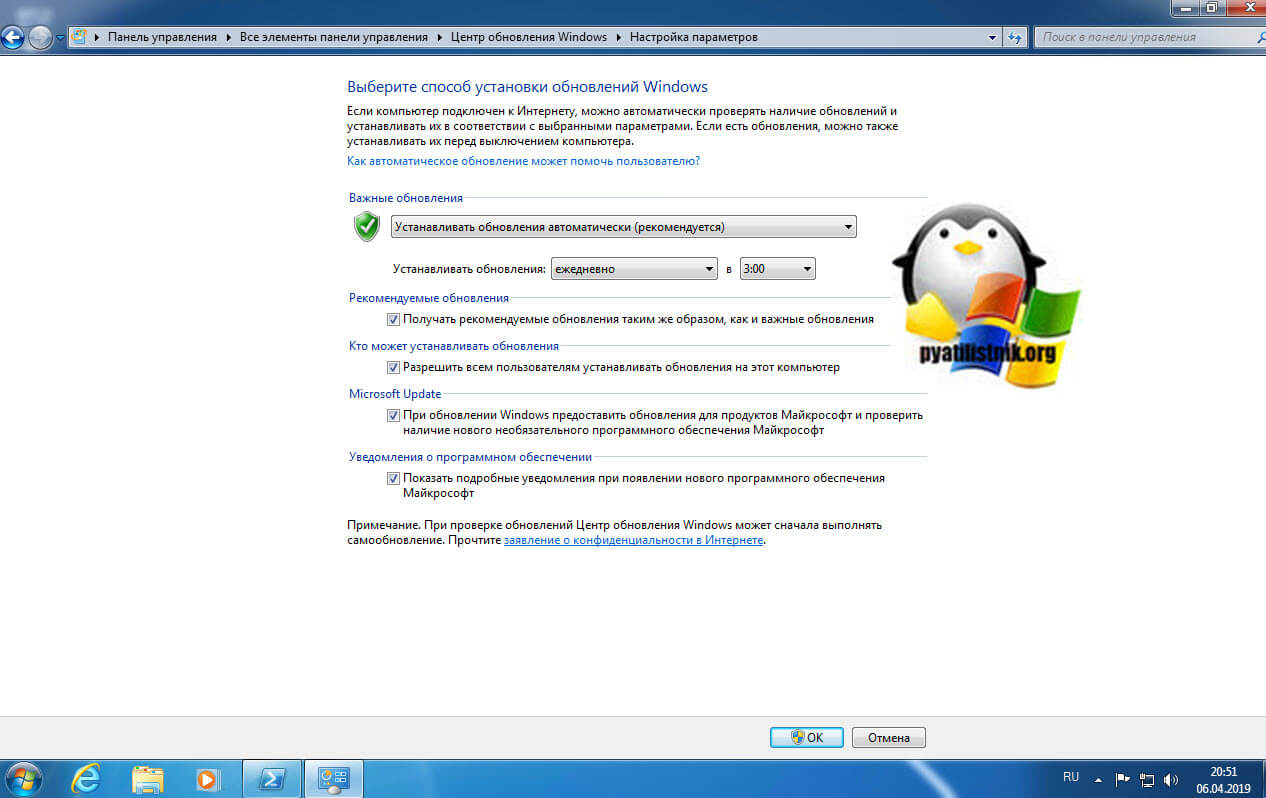
Так же советую вам произвести установку всех доступных обновлений, которые есть у вас в операционной системе, а так же убедиться, что вы получаете и дополнительные обновления. Для этого в перейдите по пути «Панель управления\Все элементы панели управления\Центр обновления Windows\Настройка параметров». Убедитесь, что у вас установлены галки:
- Получать рекомендуемые обновления таким же образом, как и важные обновления
- При обновлении Windows предоставлять обновления для других продуктов Майкрософт и проверить наличие нового необязательного программного обеспечения Майкрософт. Сюда и попадут Microsoft .NET Framework 4.7.
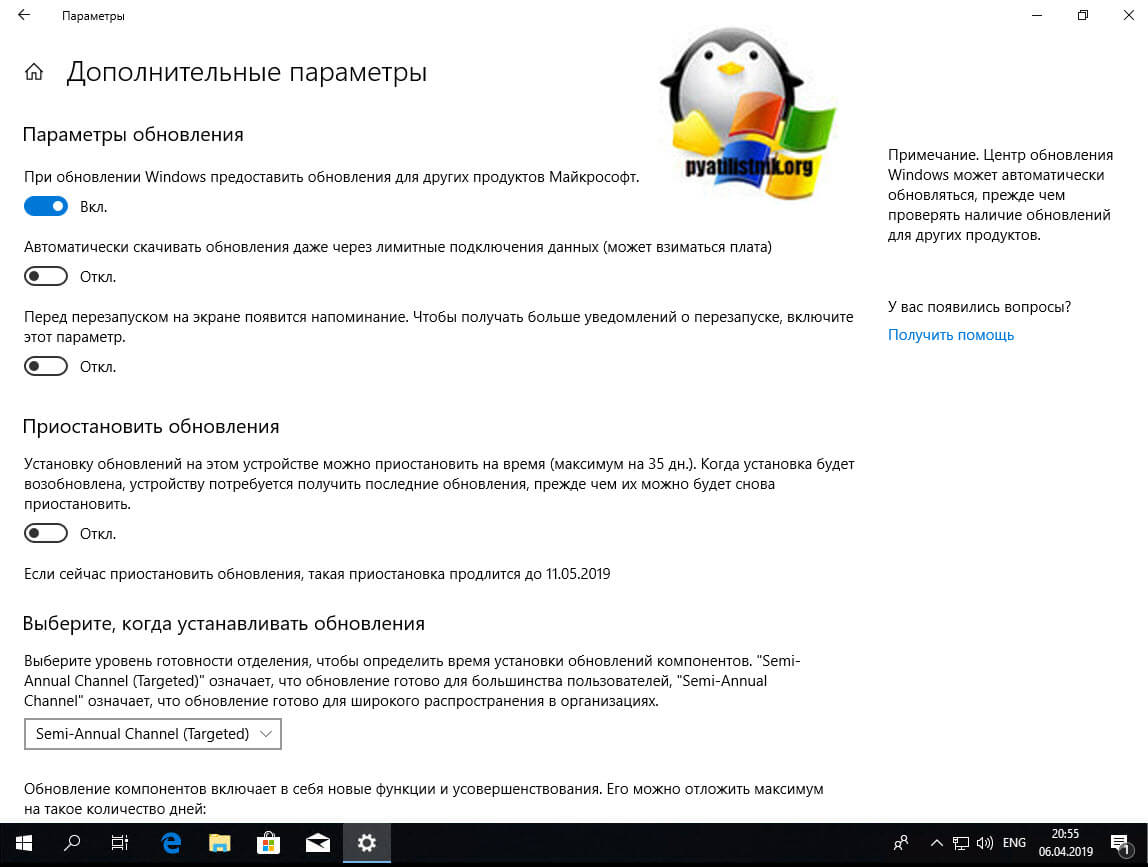
В Windows 10, данный пункт можно найти по пути «Параметры Windows — Обновление и безопасность — Центр обновления Windows — Дополнительные параметры»
Далее, когда все обновления у вас установлены, вы можете скачивать автономный пакет PowerShell 5.1, пройдите по ссылке:
Нажимаем кнопку «Download».
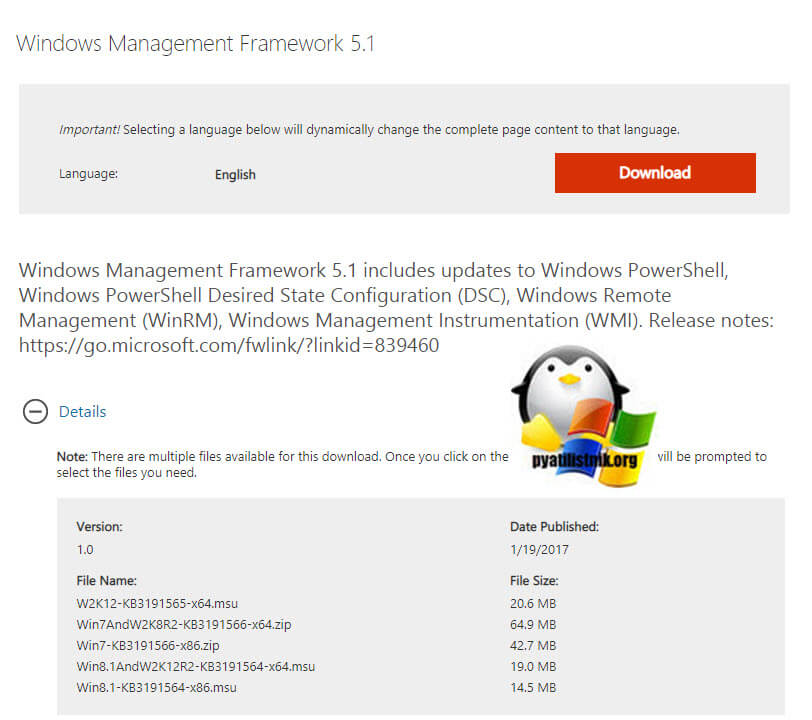
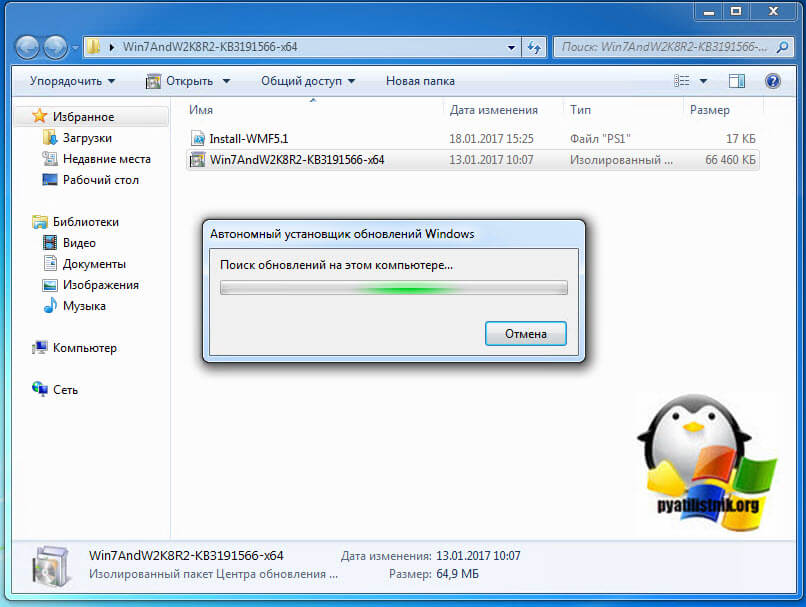
У вас появится всплывающее окно, где вас попросят выбрать для какой операционной системы вы хотите скачать пакет, по первому названию цифр понятно, для какой версии пакет, так же обратите внимание на разрядность x86 и x64. В моем случае Windows 7 64-х битная. Для обновления версии PowerShell запускаем соответствующий автономный пакет обновления Windows. У меня это Win7AndW2K8R2-KB3191566-x64.zip, единственное вам нужно его распаковать. Запустив пакет, он проверит нет ли уже данного обновления или более свежего.
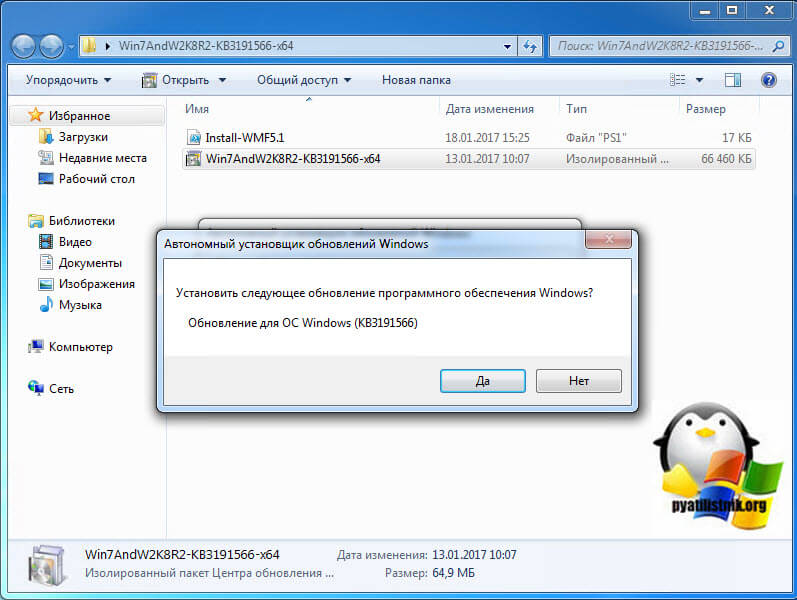
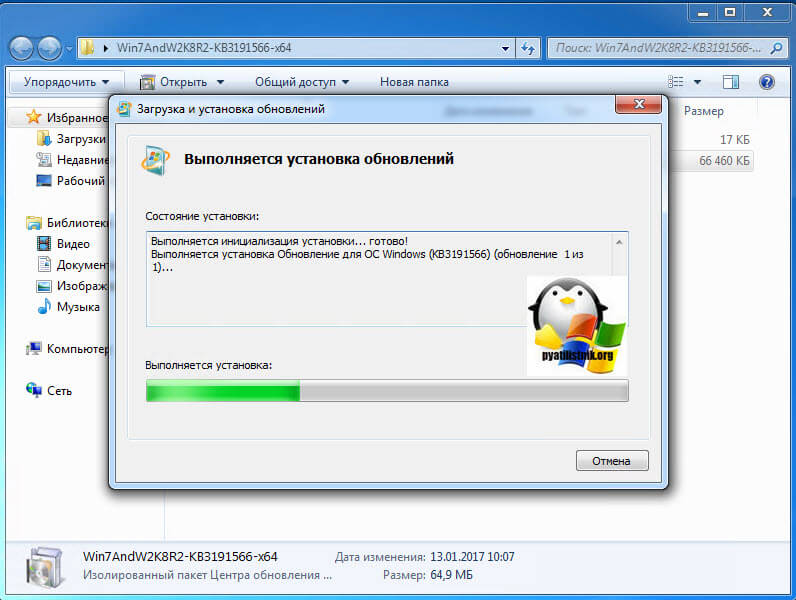
Так как пакета в Windows 7 не оказалось, то вам предлагают установить KB3191566, соглашаемся.
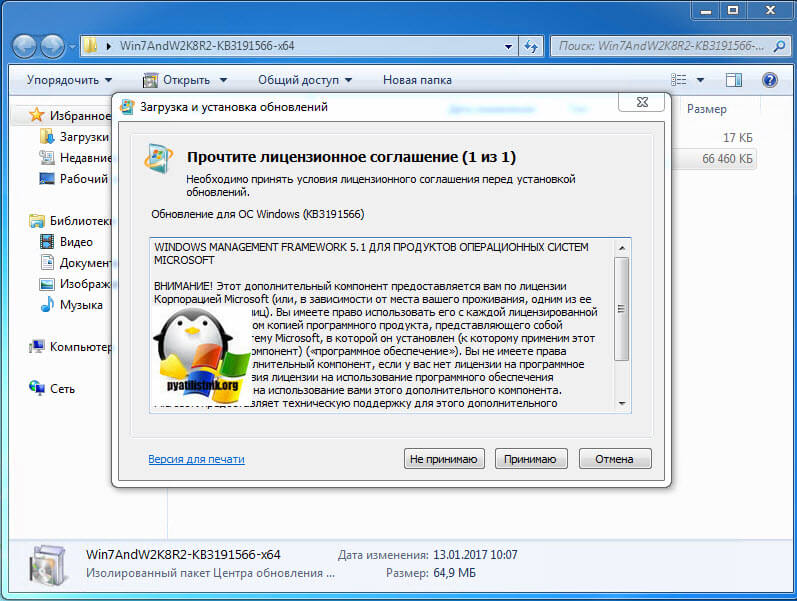
Принимаем лицензионное соглашение.
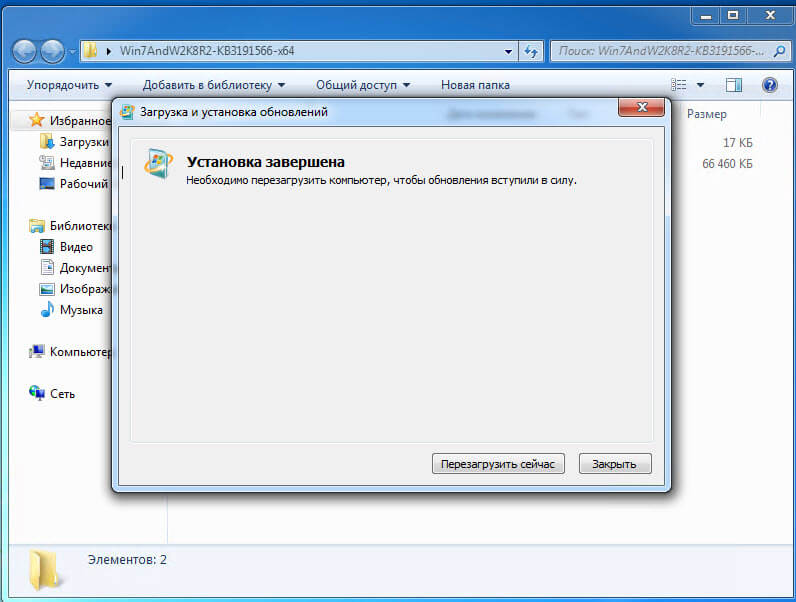
Установка пакета с PowerShell 5.1 занимает пару минут.
После чего потребуется обязательная перезагрузка вашей системы.
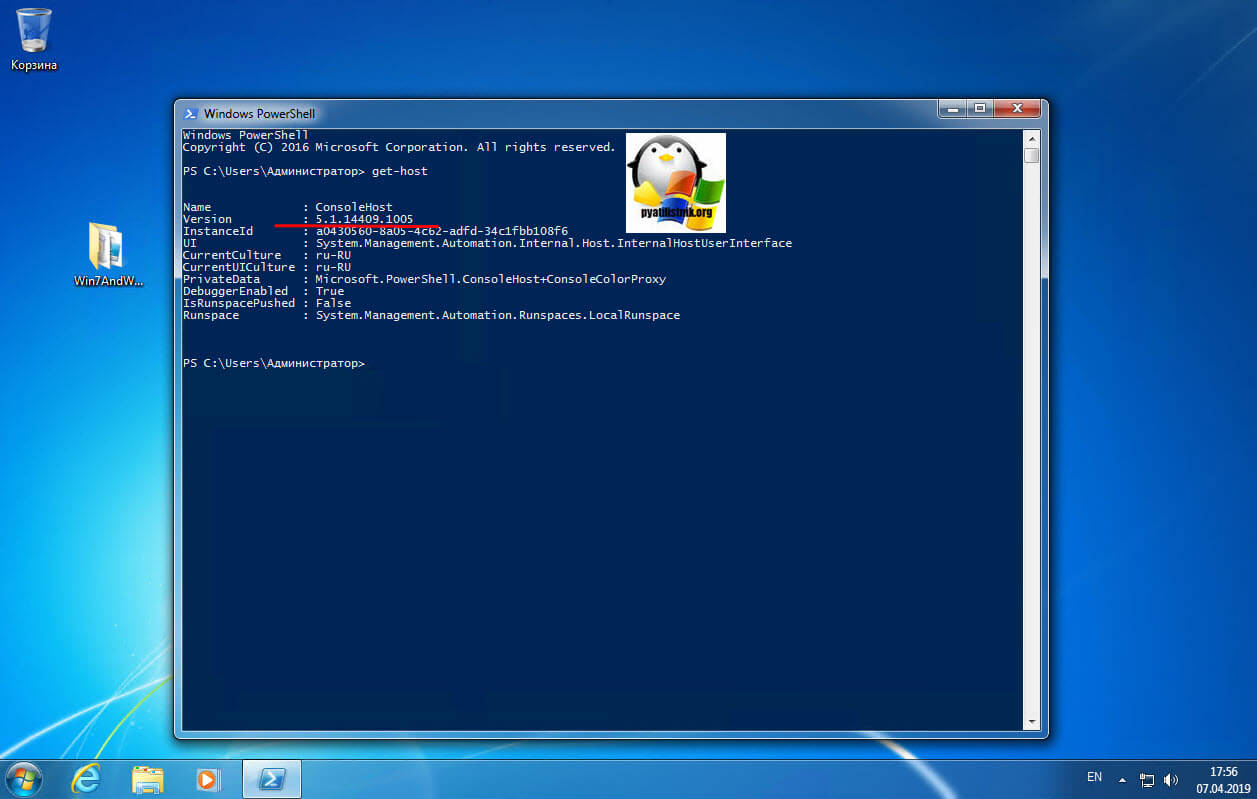
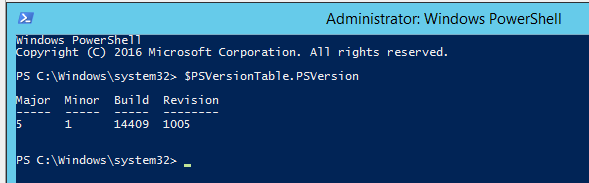
После перезагрузки, открыв оболочку PowerShell и выполнив команду Get-Host вы видите, что версия PowerShell 2 превратилась в 5.1.14409.1005
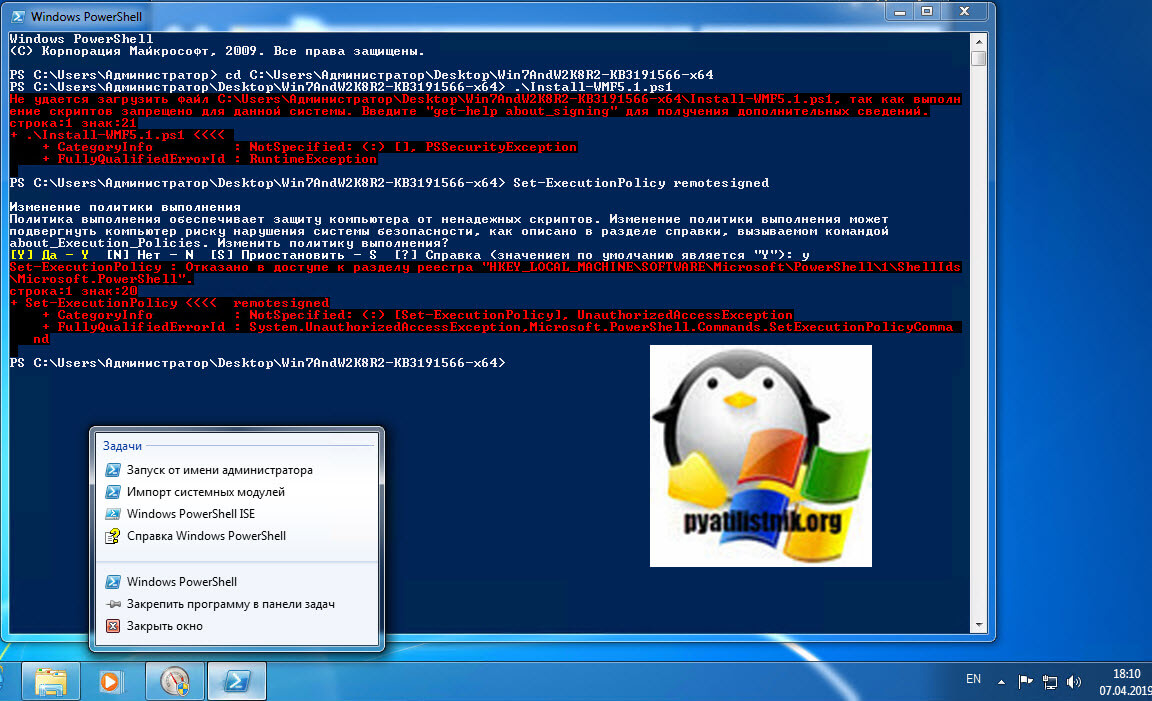
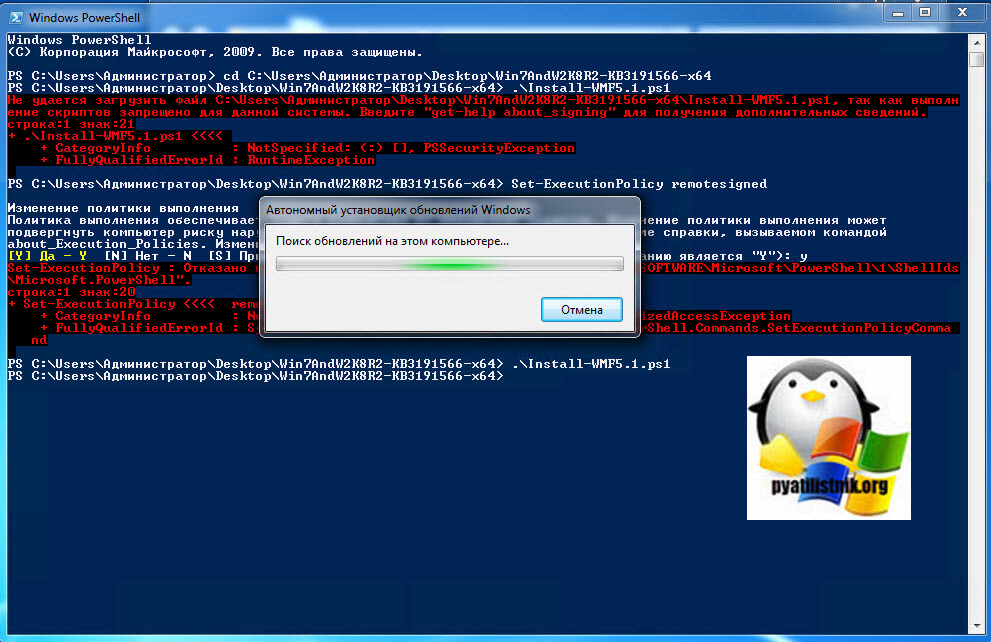
Так же вы наверняка обратили внимание, что совместно с пакетом обновления в архиве лежит скрипт Install-WMF5.1.ps1. В задачи данного скрипта входит проверка вашей текущей версии и поиск зависимостей в виде пакетов .NET Framework. Если их не будет, то вас об этом уведомят. Так, что можете смело щелкать правым кликом по скрипту и так же выполнять его. Если у вас в системе не разрешено выполнение неподписанных цифровой подписью сценариев, то вы увидите ошибку «Выполнение скриптов запрещено», как это обходить посмотрите по ссылке, там я приводил команду Set-ExecutionPolicy remotesigned.
Так же может выскочить уведомление, что запрещено изменять раздел реестра, это из-за того, что оболочка PowerShell запущена не из под админана. Запустите ее в режиме администратора.
После чего скрипт у вас успешно отработает.
Установка Windows Management Framework and PowerShell 5.1.14409.20180811 через репозиторий choco
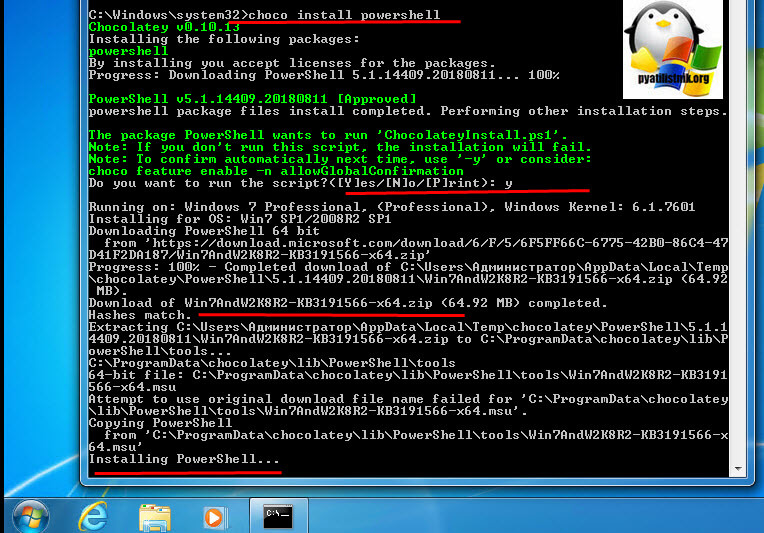
Есть такой офигенный репозиторий choco, который позволяет одной командой всегда иметь самые последние официальные версии продуктов и утилит, и PowerShell тут не исключение. Как подключать в Windows репозиторий choco я рассказывал, можете посмотреть. Когда он у вас есть вы открываете командную строку cmd , обязательно от имени администратора и вводите команду:
Вот так вот просто. В итоге запуститься удаленный скрипт из репозитория, вам покажут какая версия PowerShell самая последняя и спросят, хотите ли вы ее установить, нажимаете Y и тут начинается магия автоматической установки со всеми зависимостями и пакетами KB обновлений.
Осталось перезагрузить вашу систему и проверить новую, установленную версию PowerShell.
Обновление версии PowerShell в Windows
В этой статье мы рассмотрим, как обновить версию Windows PowerShell до актуальной 5.1 и установить (обновить) PowerShell Core 7.0. В предыдущей статье мы рассказывали, что на данный момент есть две ветки PowerShell: старая версия Windows PowerShell (максимальная версия 5.1, которая более не развивается) и новая платформа PowerShell Core (сейчас доступна версия 7.0). Несмотря на то, что нумерация версий PowerShell продолжается с 5.1 (6.0, 6.1, 7.0 и т.д.), это две разные платформы. Соответственно мы рассмотрим отдельно как обновить Windows PowerShell и PowerShell Core.
Обновление Windows PowerShell до 5.1
Попробуем обновить версию Windows PowerShell в Windows Server 2012 R2 до версии 5.1.
По-умолчанию Windows Server 2012 R2 (Windows 8.1) устанавливается с версией 4.0.
Сначала проверим текущую версию PowerShell (на скриншоте видно, что это PowerShell 4.0):

Чтобы обновить вашу версию PowerShell до 5.1, нужно установить пакет Windows Management Framework 5.1, который в свою очередь требует наличия .NET Framework 4.5.2 (или более поздней версии). Убедитесь, что у вас установлена версий .NET 4.5.2 или выше командой:
(Get-ItemProperty ‘HKLM:\SOFTWARE\Microsoft\NET Framework Setup\NDP\v4\Full’ -Name Release).Release

В моем случае код 378675 говорит о том, что установлена версия .NET 4.5.1. Поэтому мне нужно скачать и установить более новую .NET Framework 4.8 (ссылка на офлайн установщик https://go.microsoft.com/fwlink/?linkid=2088631 — ndp48-x86-x64-allos-enu.exe).
Установите .NET 4.8 (потребуется перезагрузка).

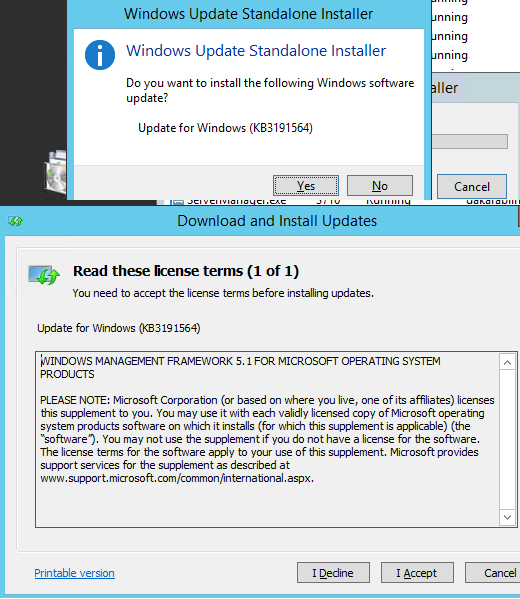
Скачайте WMF 5.1 для Windows Server 2012 R2 — Win8.1AndW2K12R2-KB3191564-x64.msu (https://go.microsoft.com/fwlink/?linkid=839516).
Установите Windows Management Framework 5.1.
После перезагрузки сервера, запустите консоль PS и убедитесь, что версия была обновлена до PowerShell 5.1.
Установка/обновление PowerShell Core 7.0
Обратите внимание, что последняя версия Windows PowerShell, устанавливаемая в Windows 10 и Windows Server 2019 — PowerShell 5.1. Вместо нее Microsoft начала разрабатывать кроссплатформенную версию PowerShell Core. На данный момент доступны версии PowerShell Core 6.0, 6.1, 6.2 и 7.0. По сути PowerShell Core это новая платформа, которая устанавливается в системе вместе с Windows PowerShell. Т.е. нельзя обновить PowerShell 5.1 до PowerShell Core 7.0. PowerShell 7 устанавливается на компьютере отдельно от Windows PowerShell 5.1.
Если у вас уже установлен PowerShell Core 6.0, вы можете обновить версию PowerShell на своем компьютере до последней версии PowerShell 7.0 Core (либо можно установиь PowerShell Core 7.0 рядом с Windows PowerShell 5.1). В этом примере мы попробуем обновить версию PowerShell Core в Windows 10 1909. Есть два способа обновления:
- Можно вручную скачать msi установщик PowerShell Core на GitHub
- Можно скачать и запустить установку (обновление) непосредственно из консоли PowerShell
Если вы хотите установаить PowerShell Core с помощью MSI пакета, перейдите на старицу проекта https://github.com/PowerShell/PowerShell, найдите последний релиз (на момент написания статьи это v7.0.0 Release of PowerShell от 4 марта, доступны также более новые v7.1.0-preview Release of PowerShell, но лучше пока не ставить их до выхода стабильной версии). Разверните список Assets и найдите пакет для вашей версии Windows (PowerShell-7.0.0-win-x64.msi или PowerShell-7.0.0-win-x86.msi).

Скачайте msi файл и установите его.

msiexec.exe /package PowerShell-7.0.0-win-x64.msi /quiet ADD_EXPLORER_CONTEXT_MENU_OPENPOWERSHELL=1 ENABLE_PSREMOTING=1 REGISTER_MANIFEST=1
Вы можете обновить PowerShell непосредственно из консоли.
Обновим (установим) последнюю версию PoSh Core с помощью команды:
- -Destination – каталог установки PowerShell Core
- -Preview – установка Preview версии
- -Quiet – тихая установка
- -AddToPath – добавить путь к каталогу установки PowerShell Core в переменные окружения

Данная команда загружает установочный MSI файл PowerShell 7.0 с GitHub и запускает установку, затем запускается установка через MSI Installer.
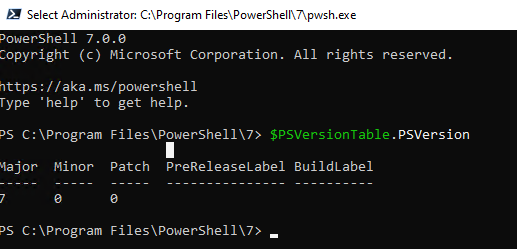
После окончания установки открывается окно PowerShell Core (pwsh.exe), проверьте версию PowerShell и убедитесь, что теперь это PoSh 7.0.0.
Если у вас установлен менеджер пакетов Chocolatey, вы можете установить или обновить версию PowerShell командами:
choco install powershell -y
choco upgrade powershell -y
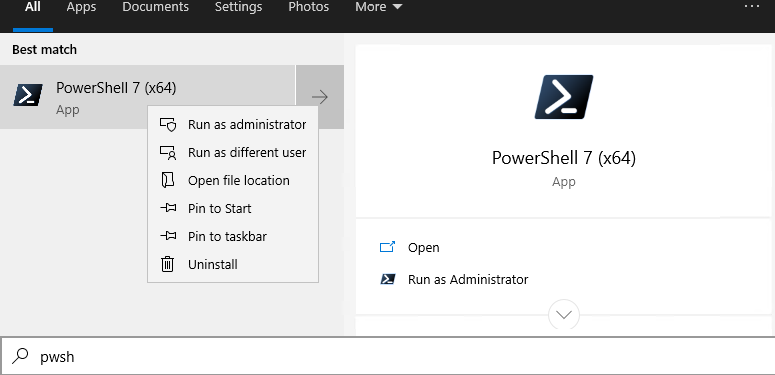
Обратите внимание, что имя исполняемого файла среды PowerShell изменился. Теперь это c:\Program Files\PowerShell\7\pwsh.exe . У него собственная иконка в меню Start.
- Для запуска Windows PowerShell, основанного на .NET Framework используется команда powershell.exe
- Для запуска PowerShell Core, основанного на .NET Core, нужно использовать команду pwsh.exe
Т.е. теперь на этом компьютере есть две версии: Windows PowerShell 5.1 и PowerShell Core 7.0
Upgrade and conversion options for Windows Server 2016
Applies To: Windows Server 2019, Windows Server 2016
This topic includes information about upgrading to Windows ServerВ® 2016 from a variety of previous operating systems using a variety of methods.
The process of moving to Windows Server 2016 might vary greatly depending on which operating system you are starting with and the pathway you take. We use the following terms to distinguish among different actions, any of which could be involved in a new Windows Server 2016 deployment.
Installation is the basic concept of getting the new operating system on your hardware. Specifically, a clean installation requires deleting the previous operating system. For information about installing Windows Server 2016, see System Requirements and Installation Information for Windows Server 2016. For information about installing other versions of Windows Server, see Windows Server Installation and Upgrade.
Migration means moving from your existing operating system to Windows Server 2016 by transferring to a different set of hardware or virtual machine. Migration, which might vary considerably depending on the server roles you have installed, is discussed in detail at Windows Server Installation, Upgrade, and Migration.
Cluster OS Rolling Upgrade is a new feature in Windows Server 2016 that enables an administrator to upgrade the operating system of the cluster nodes from Windows Server 2012 R2 to Windows Server 2016 without stopping the Hyper-V or the Scale-Out File Server workloads. This feature allows you to avoid downtime which could impact Service Level Agreements. This new feature is discussed in more detail at Cluster operating system rolling upgrade.
License conversion In some operating system releases, you can convert a particular edition of the release to another edition of the same release in a single step with a simple command and the appropriate license key. We call this license conversion. For example, if you are running Windows Server 2016 Standard, you can convert it to Windows Server 2016 Datacenter.
Upgrade means moving from your existing operating system release to a more recent release while staying on the same hardware. (This is sometimes called in-place upgrade.) For example, if your server is running Windows Server 2012, or Windows Server 2012 R2, you can upgrade it to Windows Server 2016. You can upgrade from an evaluation version of the operating system to a retail version, from an older retail version to a newer version, or, in some cases, from a volume-licensed edition of the operating system to an ordinary retail edition.
Upgrade works best in virtual machines where specific OEM hardware drivers are not needed for a successful upgrade.
For releases of Windows Server 2016 prior to 14393.0.161119-1705.RS1_REFRESH, you can only perform conversion from evaluation to retail with Windows Server 2016 that has been installed by using the Desktop Experience option (not the Server Core option). Starting with version 14393.0.161119-1705.RS1_REFRESH and later releases, you can convert evaluation editions to retail regardless of the installation option used.
If your server uses NIC Teaming, disable NIC Teaming prior to upgrade, and then re-enable it after upgrade is complete. See NIC Teaming Overview for details.
Upgrading previous retail versions of Windows Server to Windows Server 2016
The table below briefly summarizes which already licensed (that is, not evaluation) Windows operating systems can be upgraded to which editions of Windows Server 2016.
Note the following general guidelines for supported paths:
- Upgrades from 32-bit to 64-bit architectures are not supported. All editions of Windows Server 2016 are 64-bit only.
- Upgrades from one language to another are not supported.
- If the server is a domain controller, see Upgrade Domain Controllers to Windows Server 2012 R2 and Windows Server 2012 for important information.
- Upgrades from pre-release versions (previews) of Windows Server 2016 are not supported. Perform a clean installation to Windows Server 2016.
- Upgrades that switch from a Server Core installation to a Server with a Desktop installation (or vice versa) are not supported.
- Upgrades from a previous Windows Server installation to an evaluation copy of Windows Server are not supported. Evaluation versions should be installed as a clean installation.
If you do not see your current version in the left column, upgrading to this release of Windows Server 2016 is not supported.
If you see more than one edition in the right column, upgrading to either edition from the same starting version is supported.
| If you are running this edition: | You can upgrade to these editions: |
|---|---|
| Windows Server 2012 Standard | Windows Server 2016 Standard or Datacenter |
| Windows Server 2012 Datacenter | Windows Server 2016 Datacenter |
| Windows Server 2012 R2 Standard | Windows Server 2016 Standard or Datacenter |
| Windows Server 2012 R2 Datacenter | Windows Server 2016 Datacenter |
| Windows Server 2012 R2 Essentials | Windows Server 2016 Essentials |
| Windows Storage Server 2012 Standard | Windows Storage Server 2016 Standard |
| Windows Storage Server 2012 Workgroup | Windows Storage Server 2016 Workgroup |
| Windows Storage Server 2012 R2 Standard | Windows Storage Server 2016 Standard |
| Windows Storage Server 2012 R2 Workgroup | Windows Storage Server 2016 Workgroup |
Per-server-role considerations for upgrading
Even in supported upgrade paths from previous retail versions to Windows Server 2016, certain server roles that are already installed might require additional preparation or actions for the role to continue functioning after the upgrade. Consult the specific TechNet Library topics for each server role you intend to upgrade for details of additional steps that might be required.
Converting a current evaluation version to a current retail version
You can convert the evaluation version of Windows Server 2016 Standard to either Windows Server 2016 Standard (retail) or Datacenter (retail). Similarly, you can convert the evaluation version of Windows Server 2016 Datacenter to the retail version.
For releases of Windows Server 2016 prior to 14393.0.161119-1705.RS1_REFRESH, you can only perform this conversion from evaluation to retail with Windows Server 2016 that has been installed by using the Desktop Experience option (not the Server Core option). Starting with version 14393.0.161119-1705.RS1_REFRESH and later releases, you can convert evaluation editions to retail regardless of the installation option used.
Before you attempt to convert from evaluation to retail, verify that your server is actually running an evaluation version. To do this, do either of the following:
From an elevated command prompt, run slmgr.vbs /dlv; evaluation versions will include EVAL in the output.
From the Start screen, open Control Panel. Open System and Security, and then System. View Windows activation status in the Windows activation area of the System page. Click View details in Windows activation for more information about your Windows activation status.
If you have already activated Windows, the Desktop shows the time remaining in the evaluation period.
If the server is running a retail version instead of an evaluation version, see the Upgrading previous retail versions of Windows Server to Windows Server 2016 section of this topic for instructions to upgrade to Windows Server 2016.
For Windows Server 2016 Essentials: You can convert to the full retail version by entering a retail, volume license, or OEM key in the command slmgr.vbs.
If the server is running an evaluation version of Windows Server 2016 Standard or Windows Server 2016 Datacenter, you can convert it to a retail version as follows:
- If the server is a domain controller, you cannot convert it to a retail version. In this case, install an additional domain controller on a server that runs a retail version and remove AD DS from the domain controller that runs on the evaluation version. For more information, see Upgrade Domain Controllers to Windows Server 2012 R2 and Windows Server 2012.
- Read the license terms.
- From an elevated command prompt, determine the current edition name with the command DISM /online /Get-CurrentEdition. Make note of the edition ID, an abbreviated form of the edition name. Then run DISM /online /Set-Edition: /ProductKey:XXXXX-XXXXX-XXXXX-XXXXX-XXXXX /AcceptEula, providing the edition ID and a retail product key. The server will restart twice.
For the evaluation version of Windows Server 2016 Standard, you can also convert to the retail version of Windows Server 2016 Datacenter in one step using this same command and the appropriate product key.
For more information about Dism.exe, see DISM Command-line options.
Converting a current retail edition to a different current retail edition
At any time after installing Windows Server 2016, you can run Setup to repair the installation (sometimes called repair in place) or, in certain cases, to convert to a different edition. You can run Setup to perform a repair in place on any edition of Windows Server 2016; the result will be the same edition you started with.
For Windows Server 2016 Standard, you can convert the system to Windows Server 2016 Datacenter as follows: From an elevated command prompt, determine the current edition name with the command DISM /online /Get-CurrentEdition. For Windows Server 2016 Standard this will be ServerStandard . Run the command DISM /online /Get-TargetEditions to get the ID of the edition you can upgrade to. Make note of this edition ID, an abbreviated form of the edition name. Then run DISM /online /Set-Edition: /ProductKey:XXXXX-XXXXX-XXXXX-XXXXX-XXXXX /AcceptEula, providing the edition ID of your target and its retail product key. The server will restart twice.
Converting a current retail version to a current volume-licensed version
At any time after installing Windows Server 2016, you can freely convert it between a retail version, a volume-licensed version, or an OEM version. The edition remains the same during this conversion. If you are starting with an evaluation version, convert it to the retail version first, and then you can inter-convert as described here.
To do this, from an elevated command prompt, run: slmgr /ipk
Where is the appropriate volume-license, retail, or OEM product key.


