- Installing and Configuring an ODBC Driver on Linux (DEB / RPM)
- What is an ODBC Driver?
- Prerequisites
- Which ODBC Driver Manager to Choose on Linux?
- Debian-Specific Prerequisites
- RPM-Specific Prerequisites
- Installing and Configuring an ODBC Driver on Ubuntu
- Installing and Configuring an ODBC Driver on CentOS
- Step-by-Step ODBC Data Source Setup on Linux
- Testing the ODBC Connection
- Example Connection String with DSN
- Example Connection Strings without DSN
- Drillbit Connections
- ZooKeeper Connections
- Kerberos Authentication Connections
- Plain Authentication Connections
- Testing the ODBC Connection
- Testing the ODBC Connection on Linux
- Example of a Test on Linux
- Testing the ODBC Connection on Mac OS X
- Testing the ODBC Connection on Windows
Installing and Configuring an ODBC Driver on Linux (DEB / RPM)
This article explains how to install, configure, and test Devart ODBC drivers on Debian-based or RPM-based Linux distributions.
What is an ODBC Driver?
Open Database Connectivity (ODBC) is an industry-standard application programming interface for database access. It is based on call-level specifications for database APIs and uses SQL as its database access language.
An ODBC driver uses the ODBC interface to access data in database management systems. It allows an ODBC-compliant application to gain access to one or more data sources.
ODBC drivers work under the control of an ODBC driver manager, which is a library that manages communication between the ODBC-aware application and ODBC drivers. The driver manager carries out a number of tasks, such as resolving data source names, loading and unloading of the driver, processing and passing ODBC function calls to the driver, mapping function calls and data types between different versions of the ODBC standard, e.g. between version 3.x and 2.x.
On Linux systems, you can choose between the unixODBC and iODBC driver manager. We recommend using the unixODBC driver manager as it is more popular among Linux users and our drivers are fully compatible with it. If you would like to use iODBC with our drivers on Linux, you would have to manually modify the configuration files of the driver manager; note though that full compatibility with iODBC and stable operation of the drivers is not guaranteed in this event.
You can choose to install the ODBC driver using the DEB or RPM package, depending on your Linux distribution. Both DEB and RPM packages of Devart ODBC drivers require unixODBC as the driver manager.
Prerequisites
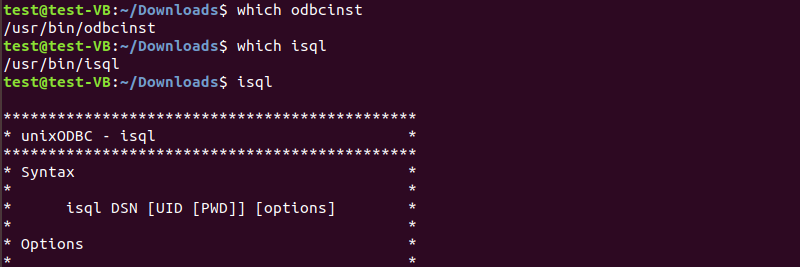
1. Prior to installing an ODBC driver on Linux, you need to install the unixODBC driver manager and its dependencies. To verify whether unixODBC is installed in the system, you can run the commands which odbcinst and which isql, which should return the path to the corresponding tools, or just run isql, which should print the syntax and available options for the isql utility.
2. Verify that the bitness of the driver that you are going to install matches the bitness of your Linux system and the unixODBC driver manager. The bitness of the driver is indicated on the download page of our website; also can you find out the bitness of the driver by looking at the .deb filename — a 32-bit driver contains i386 in its filename, whereas a 64-bit driver contains amd64.
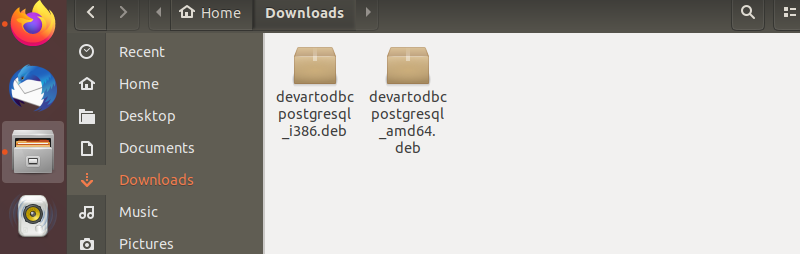
To learn about the bitness of your Linux system, run the command uname -m, which should print x86_64 on a 64-bit system and anything else like i386 / i486 / i586 / i686 on a 32-bit system.

Which ODBC Driver Manager to Choose on Linux?
Sometimes, our users ask, which ODBC driver manager they should choose on a Linux system, unixODBC or iODBC. Both of them are open-source implementations of the ODBC standard, which enable non-Windows systems to communicate with databases via ODBC. We recommend using the unixODBC driver manager with our ODBC drivers on Linux, mainly because it is more stable than iODBC.
Advantages of unixODBC include support by many ODBC applications by default, availability of a cursor library, thread safety (including flags to protect handles at different levels), support for the latest ODBC 3.8 standard, and others. Historically, iODBC has been used mostly on macOS.
Debian-Specific Prerequisites
For a Debian derivative, such as Ubuntu, the following packages are required:
- odbcinst1debian2 – this package contains the libodbcinst library from unixODBC, a library used by ODBC drivers for reading their configuration settings from /etc/odbc.ini and
/.odbc.ini;
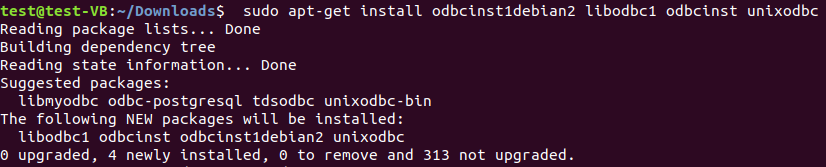
These packages depend on each other, so if you try to install them separately, you will most likely get an error saying that one package depends on another package from the list, and you will keep going round in circles. The solution is to install the packages with a single command: sudo apt-get install odbcinst1debian2 libodbc1 odbcinst unixodbc
RPM-Specific Prerequisites
To retrieve a list of available RPM packages of the unixODBC driver manager, run sudo yum search unixODBC.
To install the 64-bit version of the unixODBC driver manager and all of its dependencies on a RHEL-derivative such as CentOS, run the command: sudo yum install -y unixODBC.x86_64 in the terminal.
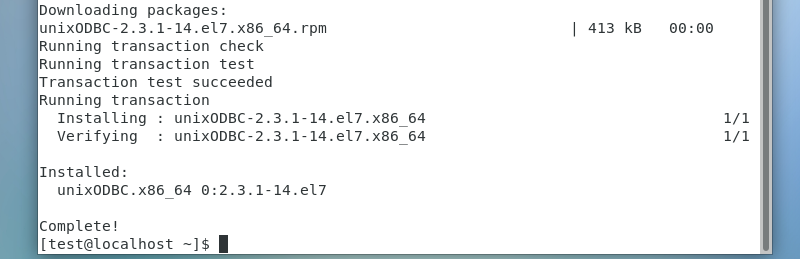
The above command installs all programs and libraries in the unixODBC package, such as isql, odbcinst, libodbcinst, libodbc.
Installing and Configuring an ODBC Driver on Ubuntu
Let’s see how to install an ODBC driver on Ubuntu, which is a popular open-source Linux distribution based on Debian. For the sake of this tutorial, we will install Devart ODBC Driver for PostgreSQL, but the following steps are true for other Devart ODBC drivers as well.
There are two ways to install the driver on Ubuntu: using the Ubuntu Software Center (a discontinued high-level graphical front end for the APT/dpkg package management system) or using the dpkg manager for Debian packages.
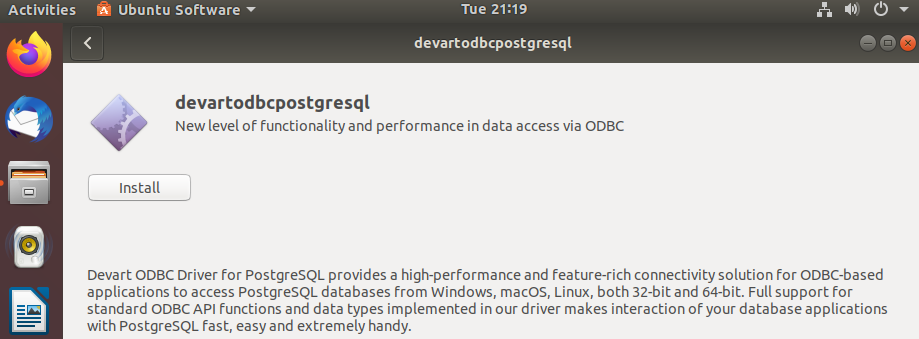
1. To install the driver with Software Center, navigate to the directory with the .deb package of the ODBC driver and double click on the file. This will launch Software Center, where you only need to click on the Install button.
2. To install the driver using the command line, open a terminal window and navigate to the directory with the .deb package using the cd command, e.g. cd
/Downloads. Run the command sudo dpkg -i devartodbcpostgresql_amd64.deb in the terminal.

Note that the devartodbcpostgresql part of the filename is driver-specific, it will be different for other drivers. Once the installation has been successfully completed, we can configure a DSN to test connection to our database server.
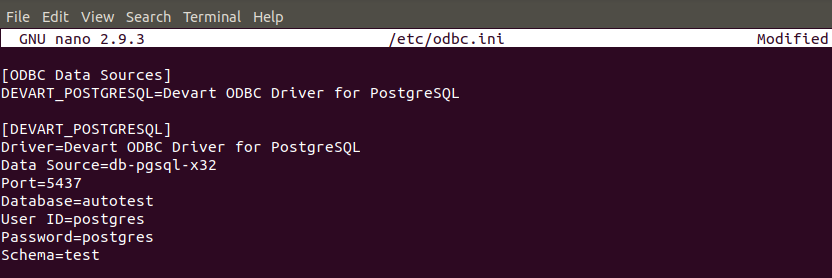
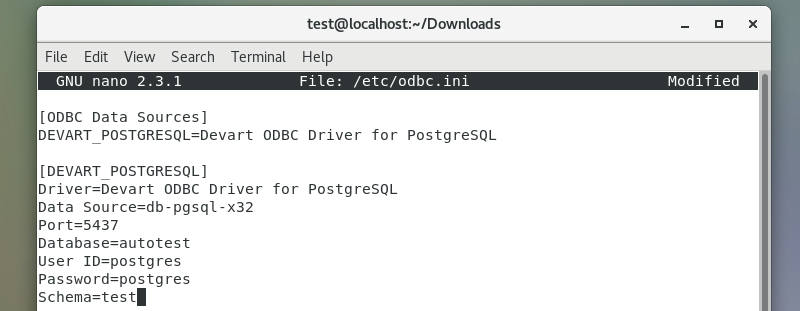
During installation, a sample system DSN is created by the driver in odbc.ini, which is a registry and configuration file for ODBC Data Source Names. To configure the connection parameters, open the file in any text editor – for example, nano, and specify connection information.
You can either navigate to the folder /etc and double click on the odbc.ini file or run the command sudo nano /etc/odbc.ini in the terminal to open the file and start editing it. After entering the connection information, save the changes.
If you prefer to configure a user DSN, run sudo nano
/.odbc.ini in the terminal.
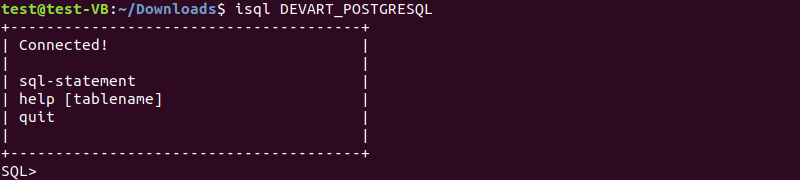
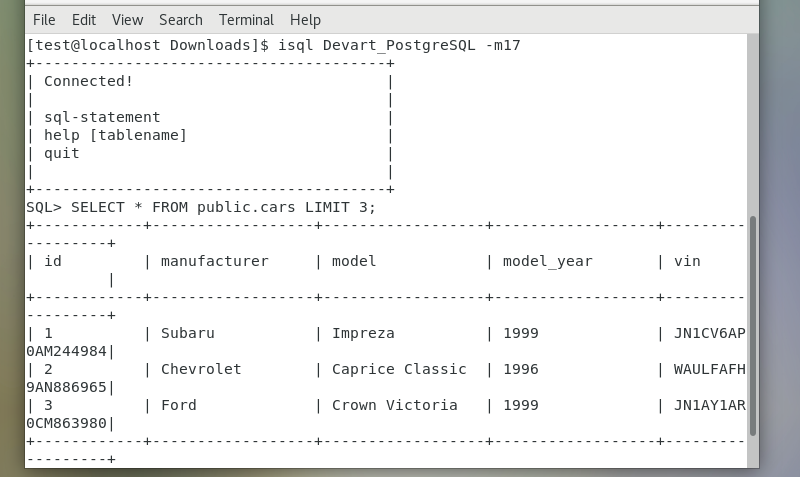
Now it is time to test our DSN for its connectivity to the database server and execute a few SQL statements using the interactive command-line tool isql. In the terminal, run the isql command followed by the name of the data source, e.g. isql Devart_PostgreSQL. If an ODBC connection has been successfully established, you should see the appropriate message printed.
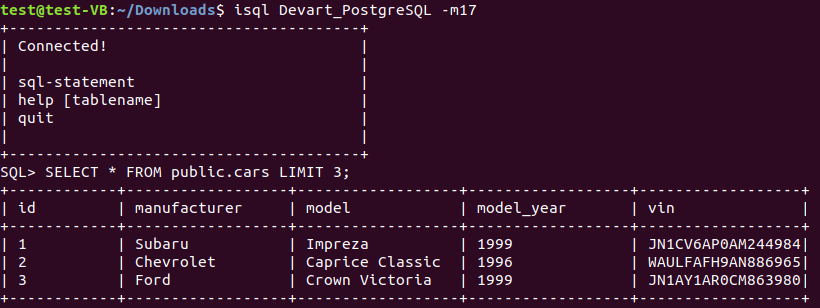
Let’s try and execute an SQL statement to retrieve all fields from the table ‘cars’. Note that in order to remove extra white space from the isql output, we had to reconnect to the database system to add the -mNUM option, which limits the column display width to NUM characters.
Installing and Configuring an ODBC Driver on CentOS
Among the RPM-based distributions, we have chosen CentOS to install the RPM file of the ODBC driver.
Navigate to the directory with the RPM file and run the command sudo rpm -ivh devart-odbc-postgresql.x86_64.rpm to install the ODBC driver for Linux (64-bit version). Once the installation has been successfully completed, you can configure the DSN that is created during installation, or you can create a new one.
Navigate to the folder /etc and double click on the odbc.ini file or simply run the command sudo nano /etc/odbc.ini in the terminal to open the file for editing. After configuring the DSN parameters, save the changes to the odbc.ini file.
Now you can connect to the data source by issuing the command isql Devart_PostgreSQL, and then execute a query against the database to fetch data.
Step-by-Step ODBC Data Source Setup on Linux
- Run isql to verify whether unixODBC is installed.
- If not, install unixODBC: run sudo apt-get install odbcinst1debian2 libodbc1 odbcinst unixodbc for DEB or sudo yum install -y unixODBC.x86_64 for RPM.
- Run uname -m to verify that the installer matches the bitness of your system and unixODBC.
- To install the driver, run sudo dpkg -i drivername_amd64.deb for the .deb package or sudo rpm -ivh drivername.x86_64.rpm for the .rpm package.
- Run sudo nano /etc/odbc.ini to add entries to the odbc.ini file. Configure a DSN and save the changes.
- Run isql dsn_name to connect to the data source.
By following the instructions in this article, you can easily install and configure an ODBC driver on Linux and execute SQL statements to access or modify data in the database.
Источник
Testing the ODBC Connection
You can use DSN connection strings and DSN-less connection strings for your connections.
Example Connection String with DSN
The following is an example of a connection string for a connection that uses a DSN:
[DataSourceName] is the DSN that you are using for the connection.
You can set additional configuration options by appending key-value pairs to the connection string. Configuration options that are passed in using a connection string take precedence over configuration options that are set in the DSN.
Example Connection Strings without DSN
Some applications provide support for connecting to a data source using a driver without a DSN. To connect to a data source without using a DSN, use a connection string instead. The placeholders in the examples are defined as follows, in alphabetical order:
- [ClusterName] is the name of the ZooKeeper cluster to which you are connecting.
- [DomainName] is the fully qualified domain name of the Drill server host.
- [PortNumber] is the number of the TCP port that the Drill server uses to listen for client connections.
- [Server] is the IP address or host name of the Drill server to which you are connecting.
- [ServiceName] is the Kerberos service principal name of the Drill server.
- [YourPassword] is the password corresponding to your user name.
- [YourUserName] is the user name that you use to access the Drill server.
Drillbit Connections
The following is the format of a DSN-less connection string for a Drillbit that does not require authentication:
ZooKeeper Connections
The following is the format of a DSN-less connection string for a ZooKeeper cluster that does not require authentication:
Kerberos Authentication Connections
The following is the format of a DSN-less connection string for a Drillbit that requires Kerberos authentication:
Plain Authentication Connections
The following is the format of a DSN-less connection string for a Drillbit that requires Plain authentication:
Testing the ODBC Connection
The procedure for testing the ODBC connection differs depending on your platform, as described in the following sections:
Testing the ODBC Connection on Linux
To test the ODBC connection on Linux use the test utilities in the samples directory of the driver manager installation: iodbctest and iodbctestw . Use iodbctest to test how your driver works with an ANSI application. Use iodbctestw to test how your driver works with a Unicode application.
There are 32-bit and 64-bit installations of the iODBC driver manager available. If you have only one or the other installed, then the appropriate version of iodbctest (or iodbctestw) is available. However, if you have both 32- and 64-bit versions installed, then you need to be careful that you are running the version from the correct installation directory.
See http://www.iodbc.org for further details on using the iODBC driver manager.
Example of a Test on Linux
To test the ODBC connection on a Linux cluster, follow these steps:
Start Drill. For example, to start Drill in local mode on a Linux cluster:
In the samples directory of the driver manager installation, run iodbctest or iodbctestw .
The prompt for an ODBC connection string appears.
Type ? to see the DSN name. The output is:
To test the connection if the DSN was previously configured in the .odbc.ini , type the following connection string:
However, if you are connecting directly to a Drillbit and the DSN was not previously configured in the .odbc.ini, type an ODBC connection string using the following format:
If you are connecting to a ZooKeeper cluster, type an ODBC connection string using the following format:
The output of a successful test is:
Driver: 1.3.8. (MapR Drill ODBC Driver) SQL>
After the SQL> prompt appears, type quit; . Go to the Drill shell to run commands. Do not attempt to run SQL commands from this prompt.
Example: Connection String for a Direct Connection
Example: Connection String for a ZooKeeper Cluster Connection
Testing the ODBC Connection on Mac OS X
To test the ODBC connection on Mac OS X:
Start the iODBC Data Source Administrator app in /Applications . The iODBC Data Source Administrator dialog appears.
On the ODBC DSN tab, select MapR Drill.

Click Test. The MapR Drill login dialog appears.

If you configured Plain (or Basic Authentication) in the .odbc.ini file, enter the user name and password you also configured. Otherwise, click OK. The success message displays.

Testing the ODBC Connection on Windows
To test the ODBC connection on Windows, follow these steps:
Follow instructions to configure the ODBC connection on Windows. The MapR Drill ODBC Driver DSN Setup dialog is displayed.
Click Test. A Test Results popup will display that states you have successfully connected to the data source.

Copyright В© 2012-2020 The Apache Software Foundation, licensed under the Apache License, Version 2.0.
Apache and the Apache feather logo are trademarks of The Apache Software Foundation. Other names appearing on the site may be trademarks of their respective owners.
Источник


