- Save disk space with OneDrive Files On-Demand for Windows 10
- Productivity apps, 1 TB of OneDrive, and advanced security.
- Save space with OneDrive
- Turn on Files On-Demand
- Mark a file or folder for offline use or as online-only
- Choose a folder to hide on your device
- Files On-Demand and deleting files
- Can I move online-only files within my OneDrive folder?
- What happens if I delete a file or move it to the trash?
- Does changing a file to online-only delete the file from my OneDrive?
- Why don’t I see the Files On-Demand options in OneDrive settings?
- Learn more
- Need more help?
- Change the spaces between text
- Change the spacing between characters
- Expand or condense the space evenly between all the selected characters
- Kern the characters that are above a particular size
- Stretch or scale the text horizontally
- Change the line spacing
- See also
Save disk space with OneDrive Files On-Demand for Windows 10
Productivity apps, 1 TB of OneDrive, and advanced security.
OneDrive Files On-Demand helps you access all your cloud storage in OneDrive without having to download all of them and use file storage space on your Windows device. This article is about Windows, but you can use Files On-Demand on Mac, too.
When you turn on Files On-Demand, you’ll see all your files in File Explorer and get new information about each file. New files created online or on another device appear as online-only files, which don’t take up space on your device. When you’re connected to the Internet, you’ll be able to use the files like every other file on your device.
You’ll know that Files On-Demand is turned on if you see the status icons next to your files in File Explorer. OneDrive Files On-Demand requires Windows 10 Fall Creators Update (version 1709 or later) or Windows Server 2019 and OneDrive build 17.3.7064.1005 or later.
Files On-Demand might not be compatible with some third-party antivirus solutions.

Save space with OneDrive
With OneDrive Files On-Demand, you can:
Save space on your device by making files online only
Set files and folders to be always available locally on your device
See important information about files, such as whether they are shared
See thumbnails of over 300 different file types even if you don’t have the required application installed to open it
Your files will have these statuses in File Explorer:
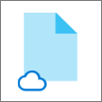
A blue cloud icon next to a OneDrive file or folder indicates that the file is only available online. Online-only files don’t take up space on your computer. You see a cloud icon for each online-only file in File Explorer, but the file doesn’t download to your device until you open it. You can’t open online-only files when your device isn’t connected to the Internet.

When you open an online-only file, it downloads to your device and becomes a locally available file. You can open a locally available file anytime, even without Internet access. If you need more space, you can change the file back to online only. Just right-click the file and select “Free up space.”
With Storage Sense turned on, these files will become online-only files after the time period you’ve selected.
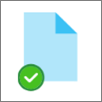
Only files that you mark as «Always keep on this device» have the green circle with the white check mark. These always available files download to your device and take up space, but they’re always there for you even when you’re offline.
Turn on Files On-Demand
Files On-Demand works with all the apps you use today, including Windows desktop apps and apps from the Windows Store. Furthermore, Files On-Demand works with all your personal and work files from OneDrive, SharePoint in Microsoft 365, and SharePoint Server 2019 team sites.
Make sure you’re signed in to OneDrive on your device.
Select the white or blue OneDrive cloud icon in the Windows taskbar notification area.

(You might need to click the Show hidden icons arrow  next to the notification area to see the OneDrive icon. If the icon doesn’t appear in the notification area, OneDrive might not be running. Select Start, type OneDrive in the search box, and then select OneDrive in the search results.)
Select  Help & Settings > Settings.
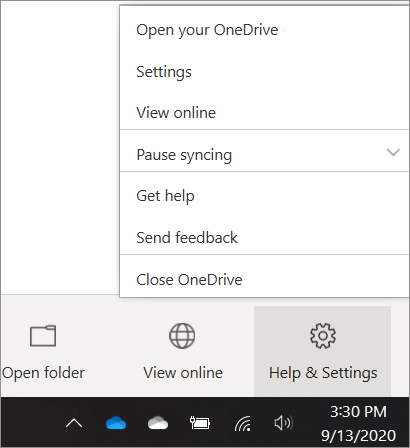
On the Settings tab, select the Save space and download files as you use them box.
Files On-Demand settings are unique to each device, so make sure you turn it on for each device where you want to use it.
To learn how an admin can turn on Files On-Demand, see OneDrive Files On-Demand for the Enterprise.
Mark a file or folder for offline use or as online-only
Right-click a file or folder.
Select Always keep on this device or Free up space.
New files or folders created online or on another device appear as online-only to save maximum space. However, if you mark a folder as «Always keep on this device,» new files in that folder download to your device as always available files.
If a folder is online-only, you can still mark individual files within that folder as always available.
Desktop search can search for online-only files by name, but it cannot search the contents within online-only files because they aren’t stored on the device.
Choose a folder to hide on your device
Sometimes you might want to make sure a folder doesn’t show up on a device for privacy reasons. For example, you might want to hide a personal folder on a work computer. Here’s how you do that.
Select the white or blue OneDrive cloud icon in the Windows taskbar notification area.
(You might need to click the Show hidden icons arrow next to the notification area to see the OneDrive icon. If the icon doesn’t appear in the notification area, OneDrive might not be running. Click Start, type OneDrive in the search box, and then click OneDrive in the search results.)
Select Help & Settings > Settings.
Next to the location where you want to choose folders, select Choose folders.
Clear the check box next to the folder you want to keep off this device.
Important: Files On-Demand settings are unique to each device, so you may need to do this on each device where you want to keep a folder hidden.
Files On-Demand and deleting files
Can I move online-only files within my OneDrive folder?
Yes, you can move online-only files within your OneDrive folder for that OneDrive account. When you move files outside that OneDrive folder, the files download to the new folder and are removed from your OneDrive.
With your files and folders in the OneDrive cloud backup, if you accidentally delete something, you can restore them from your OneDrive recycle bin.
What happens if I delete a file or move it to the trash?
When you delete an online-only file from your device, you delete it from your OneDrive on all devices and online. You can restore deleted files and folders from your OneDrive recycle bin on the web for up to 30 days for items stored in OneDrive personal (when you’re signed in with a Microsoft account), or for up to 93 days for items stored in OneDrive for work or school or SharePoint in Microsoft 365 (when you’re signed in with a work or school account). If you delete a locally available file, it also appears in your device recycle bin.
If you want to hide a folder on your device, see Choose a folder to hide on your device.
Does changing a file to online-only delete the file from my OneDrive?
No, changing a file to online-only doesn’t delete it from your OneDrive. The file no longer takes up space on your device, and you will still be able to see the file from OneDrive mobile apps or on the website.
Why don’t I see the Files On-Demand options in OneDrive settings?
First, make sure you don’t have Windows Information Protection (WIP), previously known as enterprise data protection (EDP) configured on your computer. Files On-Demand is not yet supported when WIP is enabled.
If you aren’t seeing the Files On-Demand options, the latest version of OneDrive hasn’t rolled out to you yet. Here’s how to get the latest version of OneDrive.
Make sure you’re running Windows 10 Fall Creators Update (version 16299.15 or later).
Download and install the latest version of OneDrive that’s rolling out with the Windows 10 Fall Creators Update.
Restart your computer.
After your computer restarts, select the Start button, search for “OneDrive”, and then select the OneDrive desktop app.
When OneDrive Setup starts, enter your personal account, or your work or school account, and then select Sign in.

Follow the instructions to Turn on Files On-Demand.
Learn more
To learn more about notifications when Windows automatically downloads online-only files for your apps, see Automatic file download notifications in Windows 10.
Need more help?

Get online help
See more support pages for OneDrive and OneDrive for work or school.
For the OneDrive mobile app, see Troubleshoot OneDrive mobile app problems.

Contact Support
If you still need help, contact support through your browser or shake your mobile device while you’re in the OneDrive app.

Got feedback?
OneDrive UserVoice is your place to suggest the features you’d like to see us add to OneDrive. While we can’t guarantee any specific features or timelines, we will respond to every suggestion that gets at least 500 votes.
Change the spaces between text
You can change the spacing between characters of text for selected text or for particular characters. In addition, you can stretch or compress an entire paragraph to make it fit and look the way that you want it to.
Change the spacing between characters
Selecting Expanded or Condensed alters the spacing between all selected letters by the same amount. Kerning alters the spacing between particular pairs of letters — in some cases reducing and in other cases expanding the space depending upon the letters.
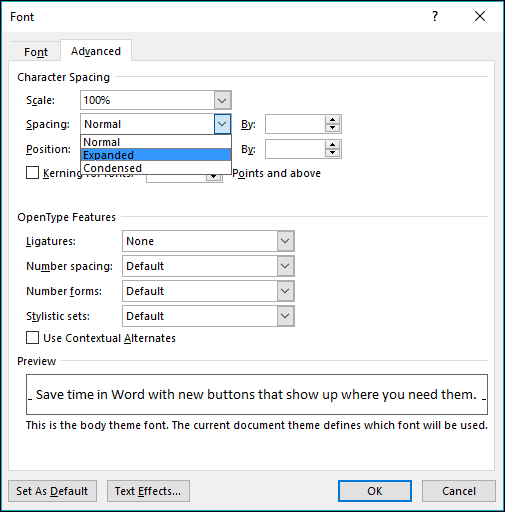
Expand or condense the space evenly between all the selected characters
Select the text that you want to change.
On the Home tab, click the Font Dialog Box Launcher, and then click the Advanced tab.
Note: If you’re using Word 2007 the tab is called Character Spacing.
In the Spacing box, click Expanded or Condensed, and then specify how much space you want in the By box.
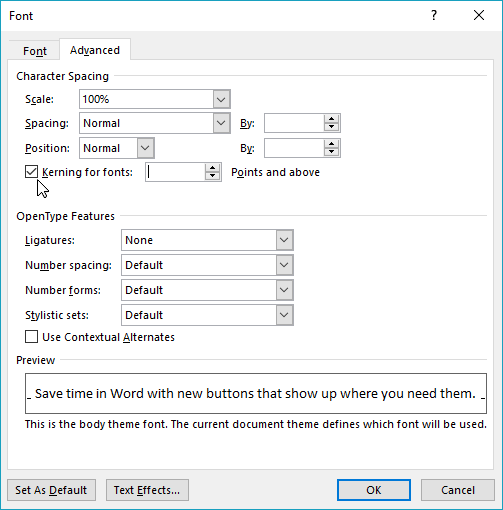
Kern the characters that are above a particular size
Kerning refers to the way spacing between two specific characters is adjusted. The idea is to give a better looking result by reducing the spacing between characters that fit together nicely (such as «A» and «V») and increasing the spacing between characters that don’t.
Select the text that you want to change.
On the Home tab, click the Font Dialog Box Launcher, and then click the Advanced tab.
Note: If you’re using Word 2007 the tab is called Character Spacing.
Select the Kerning for fonts check box, and then enter the point size in the Points and above box.
Stretch or scale the text horizontally
When you scale the text, you change the shapes of the characters by percentages. You can scale text by stretching it or by compressing it.
Select the text that you want to stretch or compress.
On the Home tab, click the Font Dialog Box Launcher, and then click the Advanced tab.
Note: If you’re using Word 2007 the tab is called Character Spacing.
In the Scale box, enter the percentage that you want.
Percentages above 100 percent stretch the text. Percentages below 100 percent compress the text.
Change the line spacing
To increase or decrease the amount of vertical space between lines of text within a paragraph, the best method is to modify the style the paragraph uses.
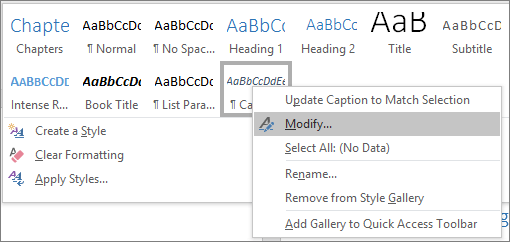
Find the style you’re using in the Styles gallery on the Home tab.
Right-click the style you want to change and select Modify.
Near the center of the dialog box you’ll find the line spacing buttons that let you select single, 1.5x or double spaced. Choose the spacing you want to apply and click OK.
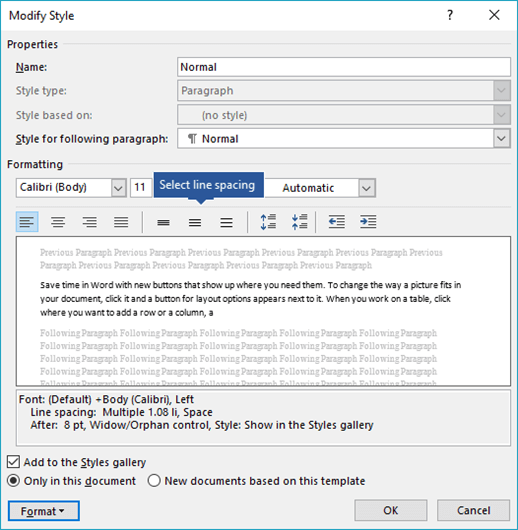
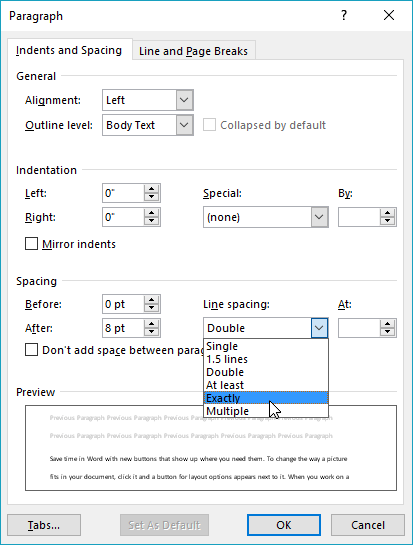
If you’d like to apply more specific line spacing to the style, clickthe Format button at the bottom left corner of the Modify Style dialog box and select Paragraph. The Line spacing drop-down lets you select or set more specific line spacing.
For more information on modifying styles in Word, see: Customize styles in Word.
See also
Using Styles in Word — a free, 10-minute video training course.


