- Open Any File 4+
- Rocky Sand Studio Ltd.
- Screenshots
- Description
- What’s New
- Ratings and Reviews
- AV Software Indigestion
- Annoying and Aggravating So Far
- Confusion at first
- App Privacy
- No Details Provided
- Project Viewer 365 4+
- Housatonic.com
- Снимки экрана
- Описание
- 2 Ways to Change the Default Application to Open Files With in Mac OS X
- 1: How to Set the Default Application for a Specific File in Mac OS
- 2: How to Set Default Applications to Open All Files of a Format Type in Mac OS X
- 12 Ways to Open Files on a Mac
- 1. Double-click to Open Files
- 2. Drag and Drop to Open Files
- 3. Open Files from the Keyboard
- 4. Open any File from an Open Dialog
- 5. Re-Open a File from the Open Recent Menu
- 6. Open Files from a Dock Icon
- 7. Open Files from the Recent Items Menu
- 8. Use Spotlight to Open Files
- 9. Open Files from the Dock
- 10. Use Quick Look to Open Files
- 11. Right-Click to Open Files
- 12. From the Command Line You Can Open Files
- Bonus Tip: How to Associate a File Type with an Application
- How can I learn more?
- Share this:
- About Kirk McElhearn
- Popular Stories
- Follow Intego
- Recommended
- Subscribe
Open Any File 4+
Rocky Sand Studio Ltd.
Screenshots
![]()
Description
Open Any File shows compatible apps installed on your Mac and helps you to search on the web with the click of a button
Open Any File also shows advanced information about your files:
— Checksums: SHA1, SHA256, MD2, MD5
— HEX Dump: raw file content
— General information
Features:
— Shows the list of installed apps that can open a file
— Finder Integration: easy access from Finder’s control-click menu and Services menu
— Drag and Drop files to the Dock Icon
We’d like to know how to improve Open Any File, contact us at Rocky Sand Studio http://www.rockysandstudio.com
What’s New
[fixed] Minor compatibility issues
Ratings and Reviews
AV Software Indigestion
Its frustrating that I have to disable parts of my ”protection” in order to install & use this software! Even though it came from the Apple App Store and in system preferences I have marked that it is OK to trust downloads from the App Store! I am tempted to go back to PCs — Windows gets hit much more often with ‘Malware’ but I have a geat deal more control. Personally I am willing to put in the extra effort to regain control. (I may have to once again have a small LAN with both Apple & MicroSoft OS)
Annoying and Aggravating So Far
I installed this maybe a month or more ago and it has some cool features, such as showing you what apps are compatible w/certain file formats. But ultimately it’s become more a hindrance and an impairment to my MacOS, seemingly acting like a go-between for any file I open (mostly video file formats). Oftentimes, I simply want to double-click to open any file I want, and have it open using whatever file I want anytime I want, with whatever is configured as the default app to open it. Instead, I just get a stupid Open Any File Window with no way to view the media I’m trying to open. It’s like slapping me in the face with a dead fish and exclaiming, «Hey! Here is one or more apps that can open that type of file», and then it stops there. Nothing else to do, no option to open the Media you double-clicked on, UNLESSSSSSS you’re willing to let it open using an app you haven’t yet downloaded instead of the app you already have, that you previously and still have listed as default!! Aggravating. Will likely uninstall soon.
Confusion at first
It works, and does more than I expected! That’s the good news, and more than enough to get it to three stars. The problem I ran into was that the opening screen asked me to sign up for their news letter. I could find no way to click it away without subscribing! . however. I selected the window underneath—they had opened it before overlaying it with the ad for their newsletter—and the window came up just fine. After that the ad disappeared. It also didn’t show up after that first opening. So. It works just fine after you defeat the ad.
App Privacy
The developer, Rocky Sand Studio Ltd. , has not provided details about its privacy practices and handling of data to Apple. For more information, see the developer’s privacy policy.
No Details Provided
The developer will be required to provide privacy details when they submit their next app update.
Источник
Project Viewer 365 4+
Housatonic.com
-
- 3,1 • Оценок: 11
-
- Бесплатно
- Включает встроенные покупки
Снимки экрана
![]()
![]()
![]()
![]()
![]()
Описание
Project Viewer 365 for Mac allows project team members to open MS Project MPP Plans from cloud locations like Google Drive. Dropbox, OneDrive, SharePoint Online, Box, Basecamp, URL Links and email attachments.
Project Viewer 365 for Mac is compatible with Microsoft Project (MPP file format) 2016, 2013, 2010, 2007, 2003 and earlier versions. The interface is intuitive making Project Viewer simple for the end users.
Free view-only MS Project views like Gantt chart, Task Sheet and Resource Sheet are available along with basic project plan sorting, filters, zooming and time scale viewing capabilities.
Additional features can be enabled by subscribing to in-app-purchase packages:
In-App Option 1: Advanced View Only
Enable advanced sorting capabilities, apply additional filter options and customize time scale
Access additional project views like Calendar View, Resource and Task Usage, View Network Diagram
View Multiple Project Reports and Print Project Info to PDF or Paper.
This in-app purchase option is offered on a yearly (1 year) basis for a price of $19.99 USD per year and works on any supported platform and devices. Purchase subscription once, use on all supported devices and platforms.
In-App Option 2: Full Editor
Create new Gantt charts and modify existing project schedules in the same intuitive way as MS Project. Save and Share your plans (MPP files) from any storage or cloud location on any Mac device with Yosemite or higher. Works with, or as an alternative to Microsoft Project.
This in-app purchase option is offered on a yearly (1 year) basis for a price of $129.99 USD per year and works on any supported platform and devices. Purchase subscription once, use on all supported devices and platforms.
Payment will be charged to iTunes Account at confirmation of purchase
Subscription automatically renews unless auto-renew is turned off at least 24-hours before the end of the current period
Account will be charged for renewal within 24-hours prior to the end of the current period, and identify the cost of the renewal
Subscriptions may be managed by the user and auto-renewal may be turned off by going to the user’s Account Settings after purchase
No cancellation of the current subscription is allowed during active subscription period
Источник
2 Ways to Change the Default Application to Open Files With in Mac OS X

Each file type has a default application that is associated with it on the Mac. This means that when you double-click a file from the Finder it will open a specific application, for example on a fresh Mac OS installation, all image files (png, jpg, gif, pdf, etc) will default to opening in Preview, and all text documents (txt, rtf, etc) will open in TextEdit.
Over time, the default applications and file associations can change as you install more applications, which sometimes set themselves as the new default app to open a file format with.
If you want to change these default file format associations and have files open in other applications of your choosing, you’ll find there are two simple ways to do this: the first method defines the default application to launch for a specific single file, and the second method will change the application associated with all files of a given format type.
1: How to Set the Default Application for a Specific File in Mac OS
This provides file-specific control over default applications, meaning you can have a document or two that open in one app, while the overall general file type defaults to open in another application. For example, you could set one single PSD file to always open exclusively in Pixelmator, while all other PSD formatted documents continue to open in Adobe Photoshop.
- From the Mac Finder, right-click (or Control+Click) on the file to change the default app for and hold down the OPTION key so that the “Open With” menu becomes “Always Open With”
- Continue to hold OPTION and select the application you want to set as the default for this file
The file will open in the application you selected, and that file will now associate the chosen application as it’s new default to always open within.
By the way, if you’re setting a file type this way and notice duplicate entries in that Open With menu, you can remove those duplicate entries with this quick trick to clean up the Open With contextual menu.
Again, this is specific to the file you chose, and this method will not apply to all files sharing that same file format. If you want to set the default application universally for a file type, that’s what the next tip is for.
2: How to Set Default Applications to Open All Files of a Format Type in Mac OS X
This approach will change the default application universally for all files of a specific format. For example, you could use this to set all files of the type PNG to open within Skitch, all TXT files to open with TextWrangler, and all ZIP files to open with The Unarchiver.
- From the Mac file system, select a file of the general format type you wish to change the default application for
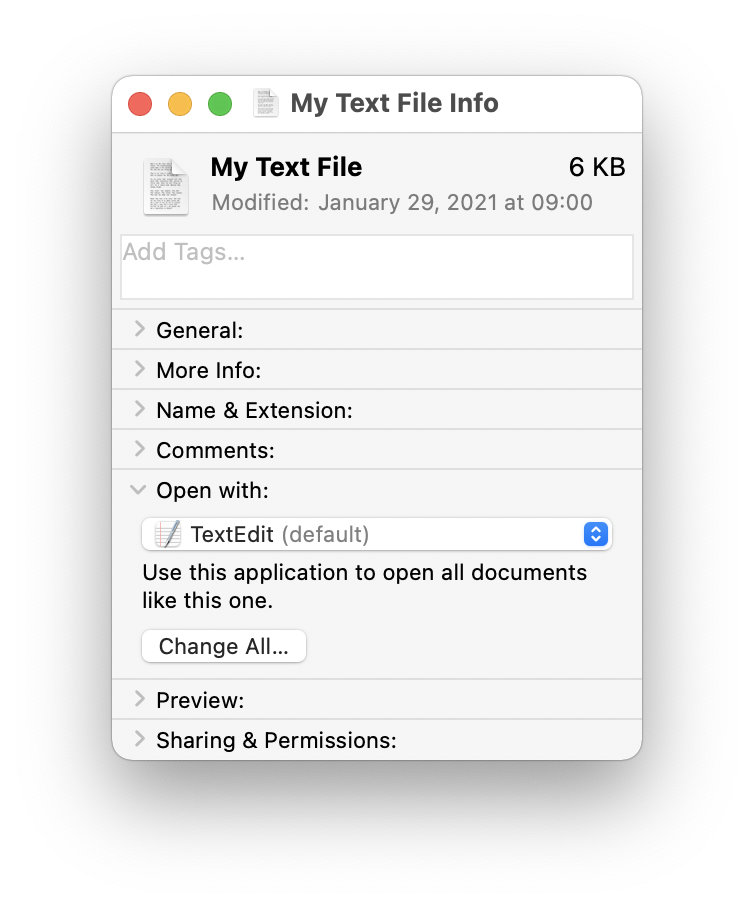
- Pull down the “File” menu and choose “Get Info” (or hit Command+i) to access the Get Info window
- Click the “Open with:” sub menu, then click on the contextual menu and select the new application to associate all files of this format type with
Click the “Change All” button and confirm the change when requested
(Note: if the Change All button is greyed out and unclickable it’s because you have not set an application that is different than the currently set default app. Use the pulldown menu to choose the new application for the Change All button to be usable and to apply the adjustment to all files of the file format type)
This change carries throughout all files of that format used within Mac OS for the active user account, and the filetype-to-application association will stay in place until it has been changed again through the same “Get Info” trick, or until a third party application claims the file format and associates with it directly.
You’ll find this one particularly useful if a newly installed application has assumed control over a file format, like what often happens with Adobe Reader claiming all PDF documents. This ‘Change All‘ trick will allow you to quickly reclaim PDF file types to reopen again in Preview (or your app of choice), which is typically much faster than launching such files in more resource heavy apps like Reader.
The video below demonstrates the latter trick, changing the default application for all files of a given type:
Note these tricks work to set the default application for files in all versions of macOS, Mac OS X, and OS X, including Big Sur, Catalina, Mojave, High Sierra, Sierra, Yosemite, El Capitan, Snow Leopard, Lion, Mountain lion, Tiger, and earlier releases too. Therefore it does not matter which version of Mac system software you are running, you can always changes the default application that opens with a file or file type.
Have any other tips or suggestions for changing application file associations on the Mac? Share in the comments!
Источник
12 Ways to Open Files on a Mac
Posted on March 16th, 2021 by Kirk McElhearn
You open files every time you work on your Mac, most often, probably, by double-clicking them. But did you know that there are lots of different ways to open files? You can use your mouse, your trackpad, or even your keyboard. You can open files in windows, from menus, and from dialogs. Here are a dozen ways you can open files on a Mac.
1. Double-click to Open Files
The basic way to open a file on the Mac — and on Windows as well — is to double-click a file. By default, it opens with the application that is assigned to work with its file type; so, if you have Microsoft Office on your Mac, a .doc file opens in Word, and an .xls file opens in Excel. Only one app can open each file type when you double-click it, but as you’ll see below, you can open files with other apps, and you can change the default app that opens a given file type.
If you receive a file as an attachment to an email, you can open it by double-clicking it, as you would a file in the Finder.
2. Drag and Drop to Open Files
You can open a file by dragging it onto an app icon, either in a Finder window, or in the Dock. If that app can open the file, the icon will highlight, and when you drop the file the app will launch (if it’s not already running) and display the file.
3. Open Files from the Keyboard
You can also open a file from the keyboard. Select a file in a Finder window or on the Desktop, and press Command-down-arrow. As with double-clicking, the file opens with the app its file type is associated with.
You can also press Command-O to open a selected file.
4. Open any File from an Open Dialog
As discussed in a recent article on The Mac Security Blog about using the Open and Save dialogs, you can open any file from an app’s Open dialog (if that app supports the file type). Just press Command-O in your app, navigate to the file, select it, and click Open or press Return.
If you want to view a file when you’re in an Open dialog, you can select and it press the space bar to view it in Quick Look.
5. Re-Open a File from the Open Recent Menu
If you’ve worked on a file in a specific app, you can re-open it from that app’s Open Recent menu. Choose File > Open Recent, then select the file. Note that this menu only stores a limited number of files. You can adjust this number in System Preferences > General, by selecting the Recent Items menu at the bottom of the pane and choosing a number from none to 50.

6. Open Files from a Dock Icon
If you click and hold an app icon in your Mac’s Dock, you’ll see that there’s a menu showing recent items, if the app can open files. Select a file to open it with that app. As above, this menu only contains a limited number of files.
7. Open Files from the Recent Items Menu
If you choose the Apple menu, then Recent Items, you’ll see a list of recent apps, documents, and servers. Select a file from the Documents section, and it opens in its assigned app. As above, you can control how many items display in this menu in the General preferences. The difference between this and the Open Recent menu in apps is that this menu shows recently opened files from all apps, whereas each app also has its own Open Recent menu that only shows its own files.
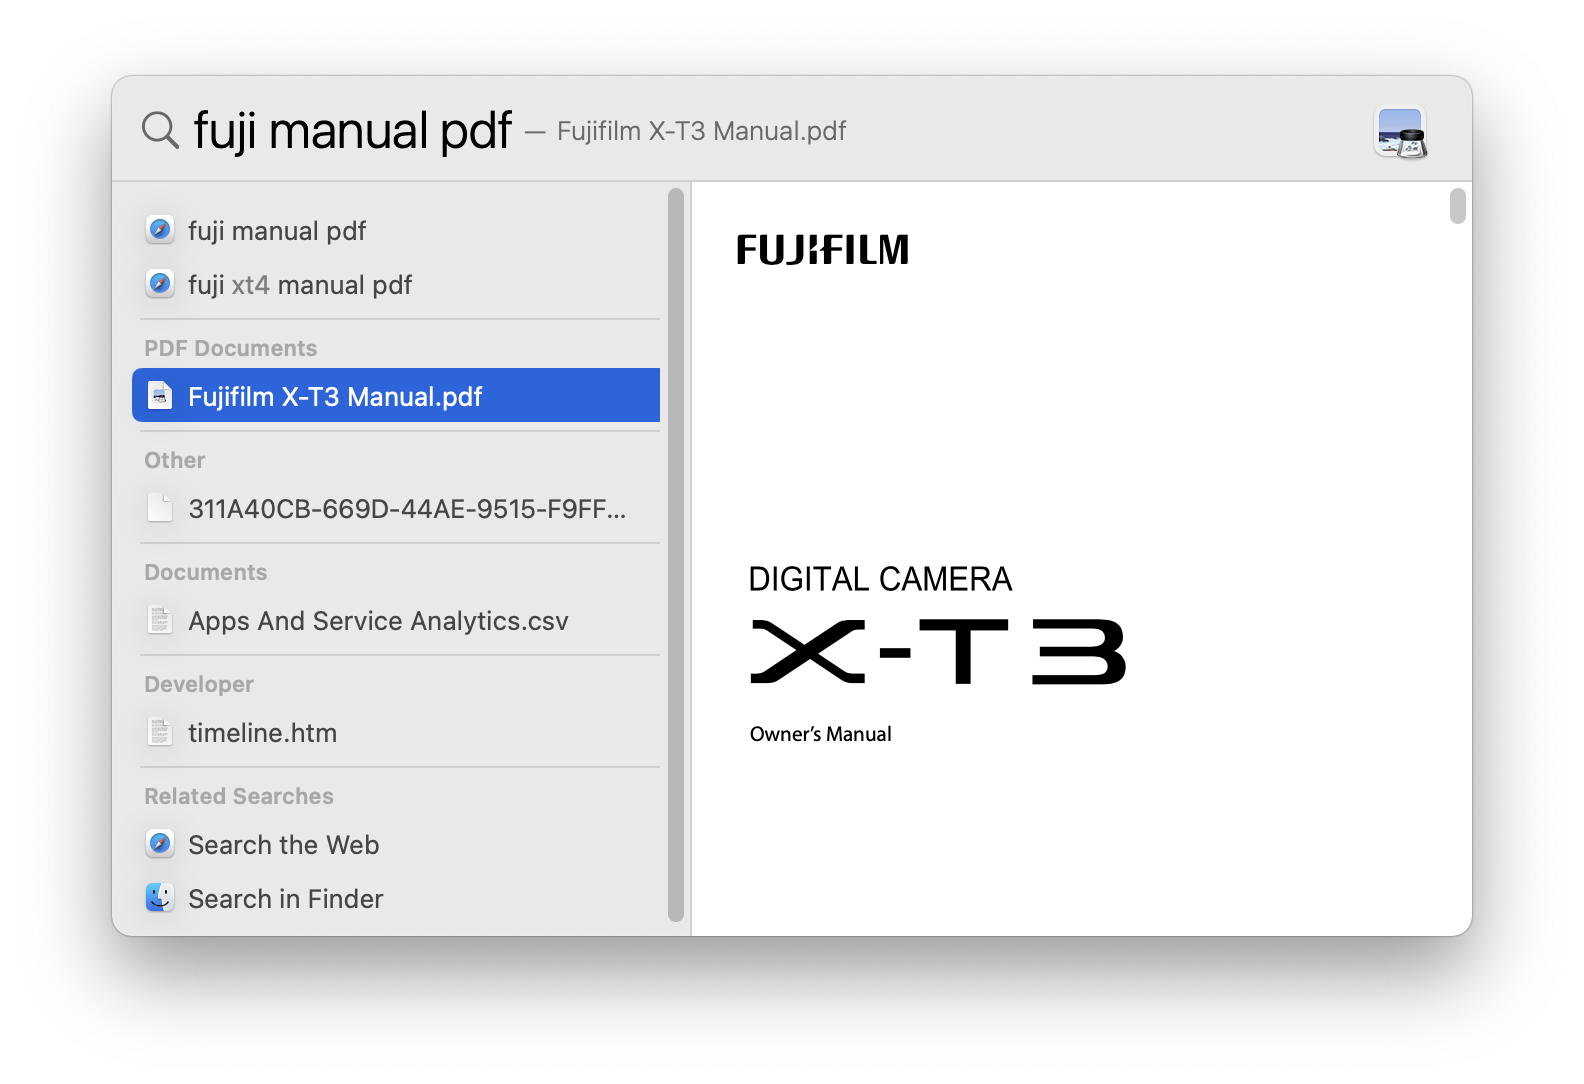
8. Use Spotlight to Open Files
You can use Spotlight to search for files — by their name, or even by keywords in their content — and open them from the results. Just use the arrow keys to select a file and press Return, or double-click it.
If you want to display a file you’ve found in Spotlight, press Command-Return, and a new Finder window opens with that file highlighted.
9. Open Files from the Dock
If you have added files to [the right-hand section of the Dock](https://www.intego.com/mac-security-blog/get-to-know-your-macs-dock/) (or the bottom, if you position the Dock on either side of your screen), a single click will open that file.
And if you have folders in that part of the Dock, click and hold a folder icon to see a list of the files it contains. Select one to open it.
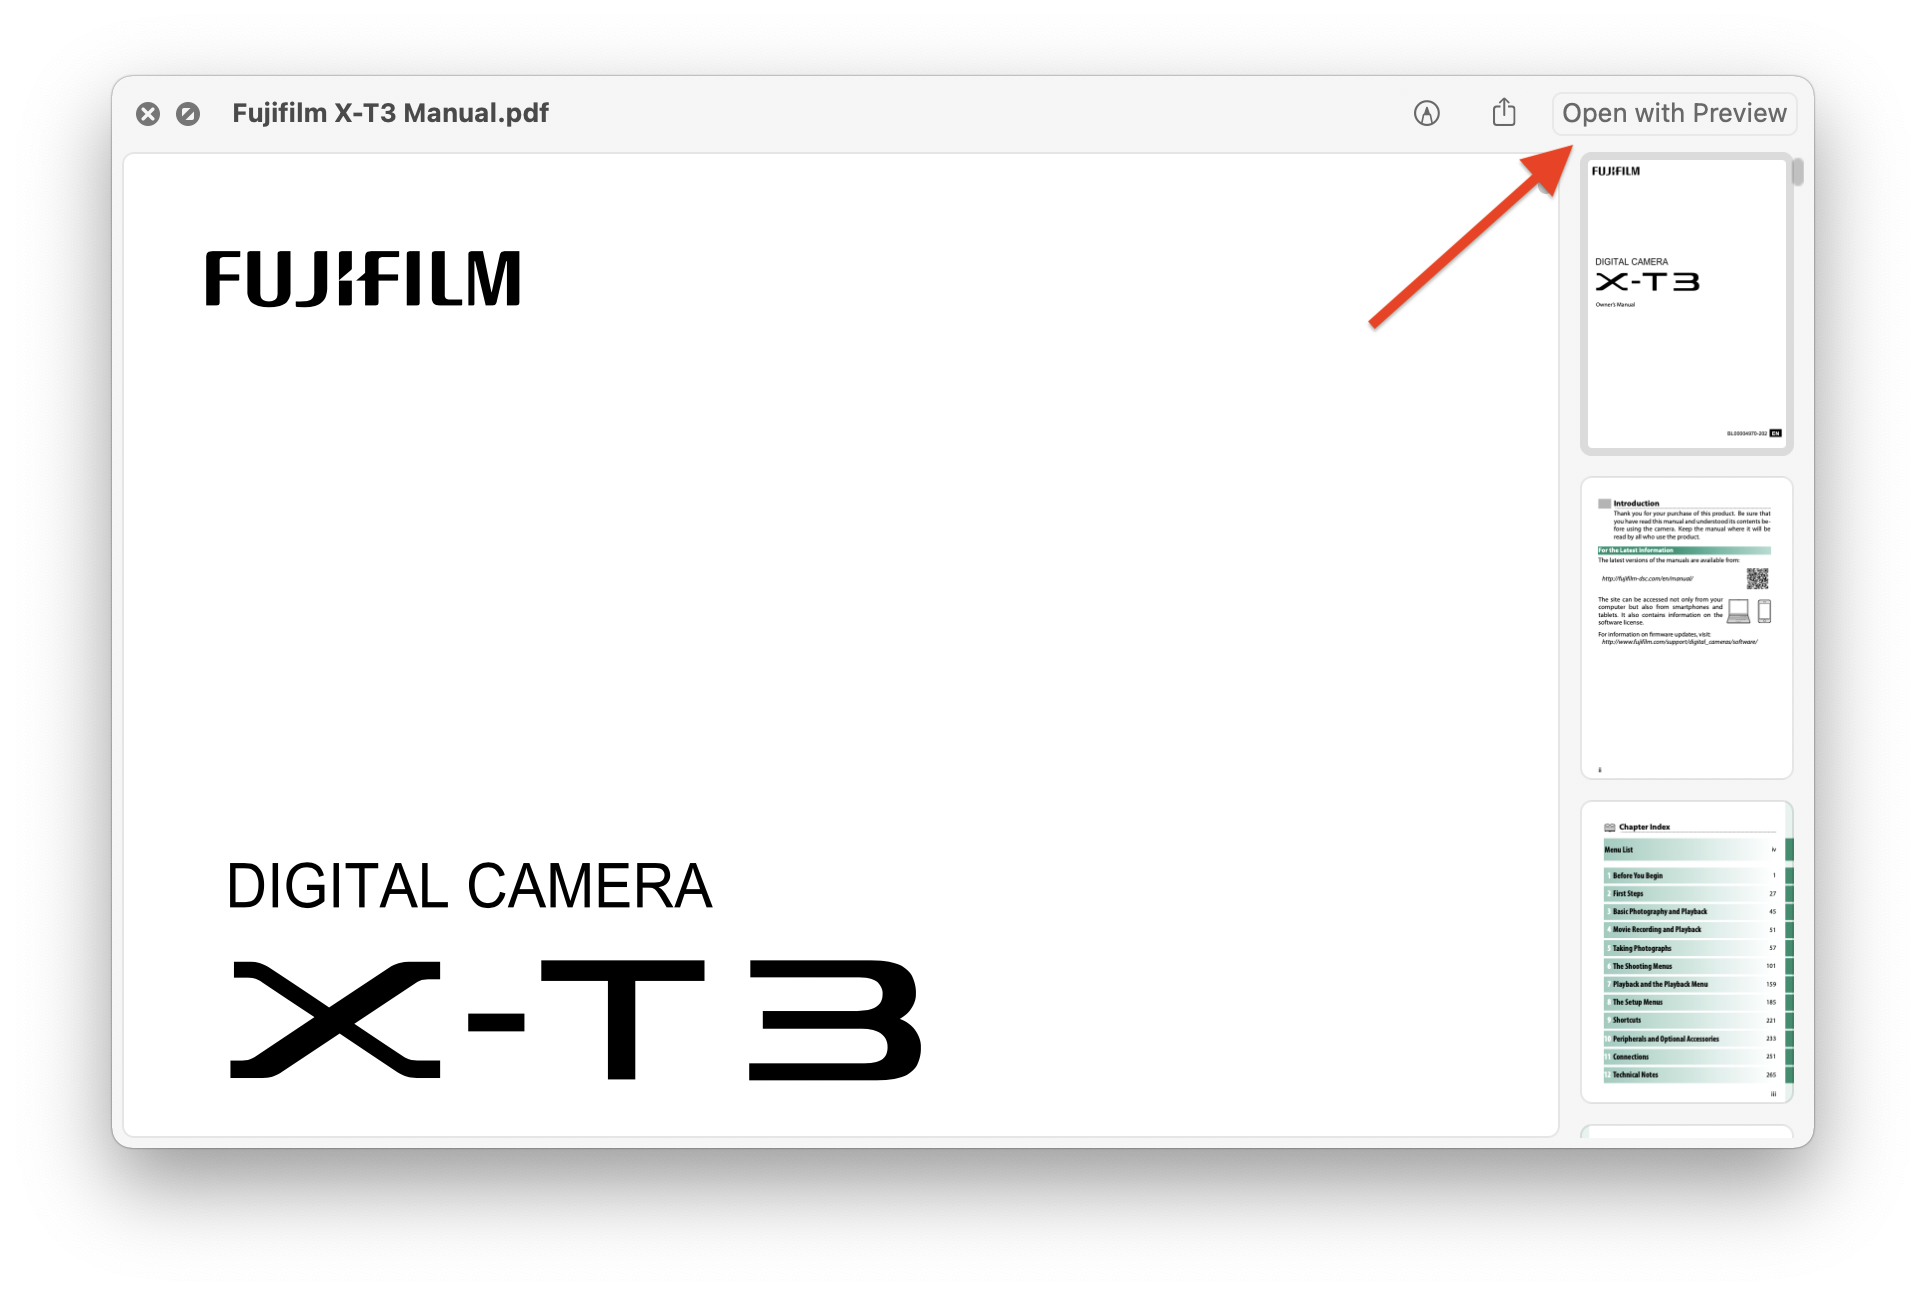
10. Use Quick Look to Open Files
If you select a file in the Finder then press the Space bar, you’ll see a preview of the file. If you then want to open the file, you can click the Open With… button at the top of the preview window. This will show the name of the app that is assigned to open that file type, and it will say, for example, Open With Preview.
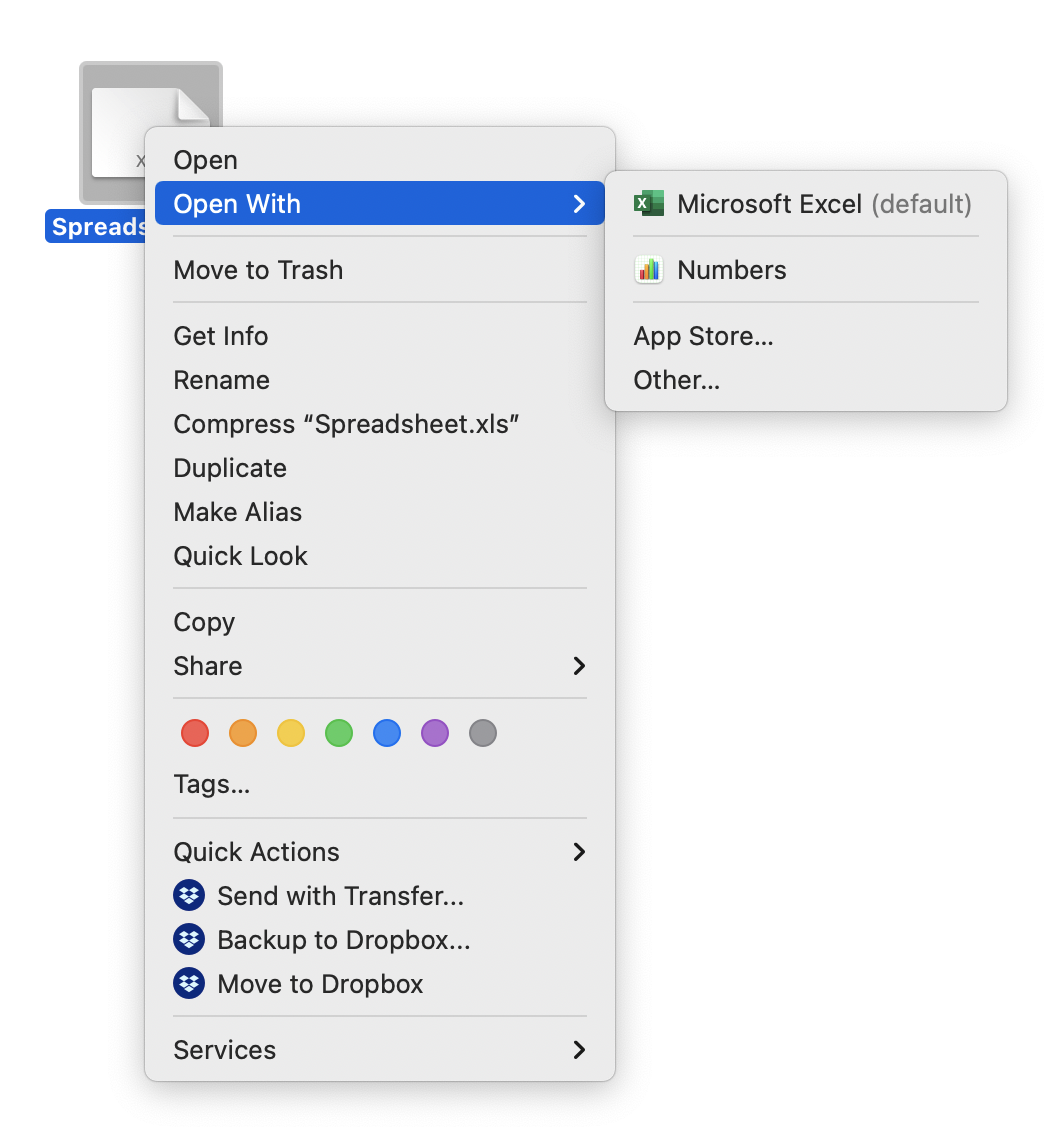
11. Right-Click to Open Files
If you right-click a file in the Finder, you’ll see two menu items: Open and Open With. The former lets you open the file with the app associated with its file type, and the latter displays a sub-menu containing all the apps that can open that file. This is the best way to open a file with an app other than the one that opens its file type by default.
You can also select a file and choose File > Open With to access the same sub-menu.
12. From the Command Line You Can Open Files
If you use the command line, you probably already know that you can open files in the Terminal app. Just type the open command, followed by a space then the full path to the file, then press Return. Your command should look like this:
There’s a quicker way to do this, if you can see the file in the Finder. Type open, then a space, then drag the file onto the Terminal window. This copies its file path. Press Return to open the file with its associated app.
Bonus Tip: How to Associate a File Type with an Application
I mentioned above that file types are associated with applications. For each file type — such as .doc, .xls, .txt — there is one and only one app on your Mac that will open the files automatically, such as when you double-click files. But you can change this.
Take as an example .txt files. By default, they open with Apple’s TextEdit. But you may have a preferred text editor and want all these files to open with this app.
Select any .txt file in the Finder, then press Command-I. In the Open With section, you’ll see a menu showing that TextEdit is the default app. Click the menu and select your preferred text editor, then click Change All. The Mac will remember to open all .txt files in your selected app.
Note that you will still be able to open these files with other apps, by dragging onto app icons, from the Open With contextual menu, and so on. Give these tips a try and you’ll soon discover how they will make you more productive!
How can I learn more?
 Each week on the Intego Mac Podcast, Intego’s Mac security experts discuss the latest Apple news, security and privacy stories, and offer practical advice on getting the most out of your Apple devices. Be sure to follow the podcast to make sure you don’t miss any episodes.
You can also subscribe to our e-mail newsletter and keep an eye here on Mac Security Blog for the latest Apple security and privacy news. And don’t forget to follow Intego on your favorite social media channels: Facebook, Instagram, Twitter, and YouTube.
Share this:
About Kirk McElhearn
Popular Stories


Follow Intego
Recommended
Subscribe
Sign up for a Free Mac Security Newsletter to stay updated.
Источник


