- 3 ways to view your shared folders in Windows (all versions)
- 1. View your shared folders using File Explorer or Windows Explorer (in all Windows versions)
- 2. View your shared folders using Computer Management (in all Windows versions)
- 3. View your shared folders using Command Prompt or PowerShell (in all Windows versions)
- How do you prefer to view shared folders in Windows?
- All Ways to Open Folder Options in Windows 10
- Open Folder Options from the File Explorer Ribbon
- Open Folder Options from the Control Panel
- Open Folder Options with Rundll32
- About Sergey Tkachenko
- 15 ways to improve File Explorer or Windows Explorer in Windows (all versions)
- First, open Folder Options in File Explorer or Windows Explorer
- 1. Change the folder opened by File Explorer when you start it (Windows 10 only)
- 2. Open each folder in a separate window (all Windows versions)
- 3. Open files and folders with a single click instead of a double-click (all Windows versions)
- 4. Stop File Explorer from showing recently used files, and frequently used folders (Windows 10 and Windows 8.1)
- 5. Set File Explorer to always show icons, never thumbnails (all Windows versions)
- 6. Set File Explorer to always show the full path of folders in the title bar (all Windows versions)
- 7. See hidden files, folders, and drives, in Windows (all Windows versions)
- 8. Show empty drives like USB memory sticks or external hard disks (all Windows versions)
- 9. Set Windows to show extensions for known file types (all Windows versions)
- 10. Set Windows to launch folder windows in a separate process (all Windows versions)
- 11. Set Windows to reopen the previous folder when you log in (all Windows versions)
- 12. Use check boxes to select items in File Explorer (all Windows versions)
- 13. Bring back the Libraries in File Explorer (Windows 10 and Windows 8.1)
- 14. Show more folders and drives on the left side of File Explorer/Windows Explorer (all Windows versions)
- 15. Set File Explorer to expand the folder that you have opened (all Windows versions)
- Do not forget to press OK or Apply to save your changes
3 ways to view your shared folders in Windows (all versions)
Are you looking for an answer to the question: “Where can I see all the folders shared on my Windows computer or device?” We thought it was a really good question and we decided to answer it. We have three different alternatives to discuss: one using File or Windows Explorer, one using Computer Management, and one using Command Prompt or PowerShell. All these methods work in all modern versions of Windows. So, if you want to learn how to find the shared folders on your Windows computer or how to find the path of a shared folder, read on:
1. View your shared folders using File Explorer or Windows Explorer (in all Windows versions)
The simplest method for viewing the folders that you have shared in Windows is from File Explorer if you’re using Windows 10 or 8.1, or Windows Explorer if you’re using Windows 7. Open it, and then expand the Network section from the left side of the window, and click or tap on the name of your Windows PC. This shows you the list of folders shared by your computer or device with the network.
The problem with this view is that it does not show hidden shares and doesn’t give too much information about how each folder is shared. However, you can right-click or press and hold on each folder and then press Properties, or hit ALT + Enter on your keyboard.
This opens the Properties window of the selected shared folder. You can use it to access more information about how the folder is shared, the security settings it has and so on.
Even though this method works, it is not an elegant way to see your shared folders or to manage them. There are better alternatives.
2. View your shared folders using Computer Management (in all Windows versions)
The best tool for getting the full list of folders that you’re sharing on your PC is Computer Management. Open Computer Management and, on the left side of the window, browse “System Tools -> Shared Folders -> Shares.”
The central panel from Computer Management loads the complete list of all the folders and partitions that are shared by your Windows computer or device. You see both the folders you shared and the default shares of Windows, such as C$ and D$ (which are the partitions on your PC), as well as the default remote administration shares created by Windows, like ADMIN$.
For each shared folder or partition, you see the official share name (as it is viewed by others on the network, if not hidden), the exact folder path, the type of share, the number of connections made from the network to that folder and a short description (if available).
If you double-click or double-tap on a shared folder, its Properties window opens. There you can manage the different sharing parameters such as the share name, description, and the maximum number of users that are allowed to connect to the shared folder simultaneously.
If you go to the Share Permissions tab from the Properties window, you can view and set which users and user groups have access to the shared folder and the type of access that each of them has.
Going back to the Computer Management window, if you click or tap the Sessions link from the left side column, you can see the list of users who are currently connected to your network shares. For each user, you can see the device from where the connection is made, how many files he or she has opened, the time since the connection was initiated, and so on.
In the same column, the Open Files link shows all the files and folders that are accessed by the users who are connected to your network shares.
All this is really useful information, isn’t it?
3. View your shared folders using Command Prompt or PowerShell (in all Windows versions)
You can also get the complete list of the folders that you’re sharing with the network, from the Command Prompt or PowerShell. Open the tool you prefer and type net share. Then press Enter on your keyboard, and the list with shared folders is instantly generated.
Furthermore, if you want to find the path of a shared folder, it’s easy because the net share command also outputs this information in the Resource column.
Neat, right? Obviously, the same command can be run in PowerShell too.
How do you prefer to view shared folders in Windows?
As always with Windows operating systems, there is more than one way of doing something. Try the methods that we have showed you in this guide and then tell us which one works best for you, in the comments below.
All Ways to Open Folder Options in Windows 10
Folder Options is a special dialog that allows changing settings and preferences for the built-in file manager of Windows 10. The dialog includes three tabs General, View, and Search. The changes you made here can be applied to all folders.
File Explorer is the default file management app which is bundled with Windows starting with Windows 95. Besides file management operations, Explorer.exe also implements the shell — the Desktop, taskbar, desktop icons and also the Start menu are parts of the Explorer app. Note: In Windows 10, the Start menu is a special UWP app, which is integrated into the shell. Starting with Windows 8, File Explorer got the Ribbon user interface and the quick access toolbar.
File Explorer can be customized in several ways. The user can change the folder template, switch between different file views, assign a custom icon to a folder, and place any Ribbon command to the quick access toolbar. With the help of Registry tweaks, it is possible to customize its context menu. Also, it is possible to disable the Ribbon, or customize the Navigation pane.
To customize the appearance and behavior of File Explorer, you can use the Folder Options dialog.
To open Folder Options of File Explorer in Windows 10, do the following.
- Open This PC in File Explorer.
- In the Ribbon user interface of Explorer, click File -> Change folder and search options.

- The Folder Options dialog will open.

Alternatively, you can open the same dialog from the Ribbon.
Open Folder Options from the File Explorer Ribbon
- Open File Explorer.
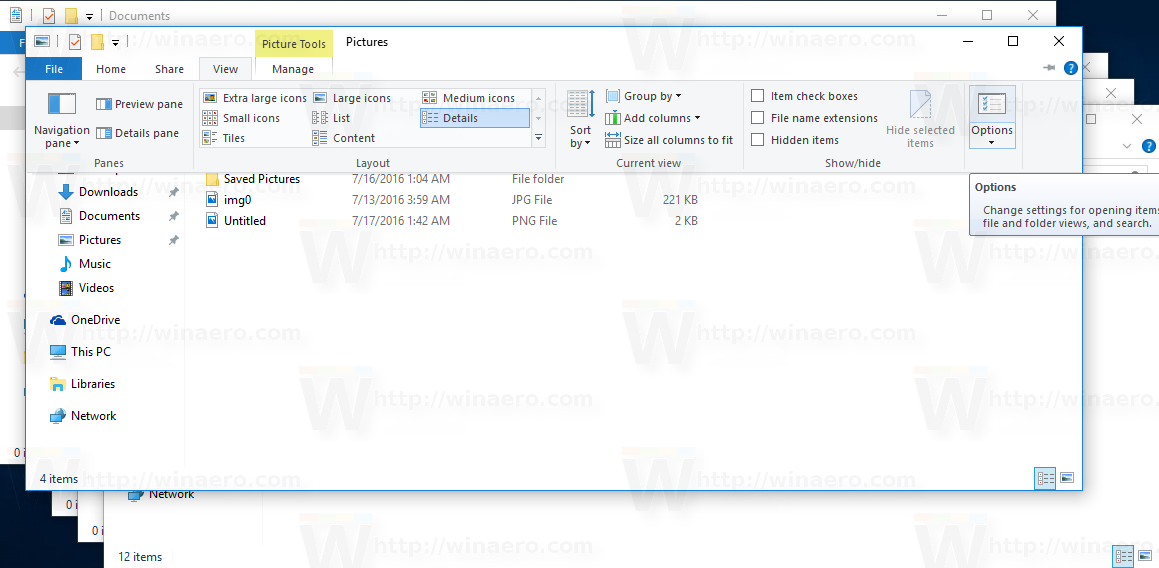
- Go to the View tab of the Ribbon.
- Click on the Options command.
Tip: you can add the Folder Options button to Quick Access Toolbar. See the following article: How to add any ribbon command to the Quick Access toolbar of File Explorer.
Note: If you disabled the Ribbon, press Alt+T on your keyboard to open the Tools menu and then open File Explorer Options. Alternatively, press F10 -> click Tools menu — Folder Options.
Also, you can find Folder Options in the Control Panel.
Open Folder Options from the Control Panel
- Open the classic Control Panel.
- Go to Control Panel\Appearance and Personalization.
- Click on the File Explorer Options icon.
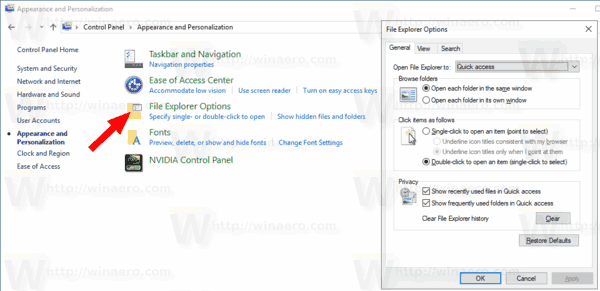
This will open the Folder Options dialog.
Finally, you can use a special rundll32 command.
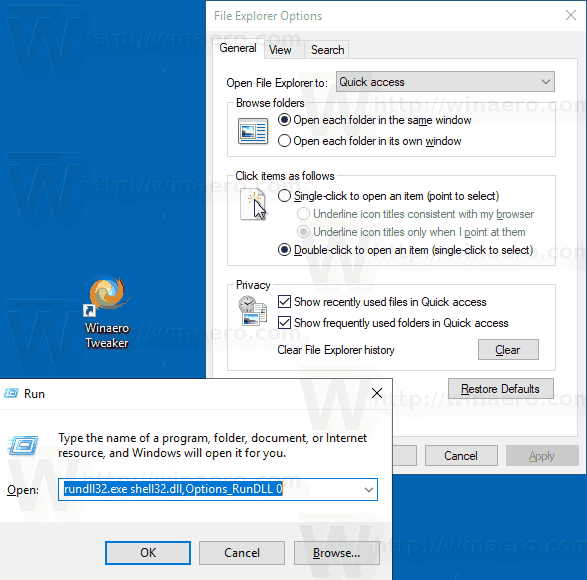
Open Folder Options with Rundll32
- Press Win + R on the keyboard to open the Run dialog.
- Type the following command into the Run box: rundll32.exe shell32.dll,Options_RunDLL 0
- Hit the Enter key. This will open the Folder Options dialog.
You can create a shortcut to this command, then pin it to taskbar or to Start, add to All apps or add to Quick Launch (see how to enable Quick Launch). You can also assign a global hotkey to your shortcut.
Winaero greatly relies on your support. You can help the site keep bringing you interesting and useful content and software by using these options:
Share this post
About Sergey Tkachenko
Sergey Tkachenko is a software developer from Russia who started Winaero back in 2011. On this blog, Sergey is writing about everything connected to Microsoft, Windows and popular software. Follow him on Telegram, Twitter, and YouTube.
15 ways to improve File Explorer or Windows Explorer in Windows (all versions)
When you want to browse your files and work with them in Windows, most people fire up File Explorer (in Windows 10 and Windows 8) or Windows Explorer (in Windows 7). While these apps are good-enough file managers, for most people, they can be improved and tweaked to work even better. To improve your user experience, we have compiled a list of fifteen tips that you can apply, so that File Explorer or Windows Explorer work the way you want to:
NOTE: This guide covers Windows 10, Windows 7, and Windows 8.1. Some methods work in all three versions of Windows, others just in one or two. For each method, we mention the Windows version in which it works. If you do not know the version of Windows that you have, read this tutorial: What version of Windows do I have installed?
First, open Folder Options in File Explorer or Windows Explorer
Before making improvements to how File Explorer works in Windows 10 or Windows 8.1, and how Windows Explorer works in Windows 7, you need to open the Folder Options window. To learn how this is done, follow the instructions from this tutorial: 8 ways to open the Folder Options window, in Windows (all versions).
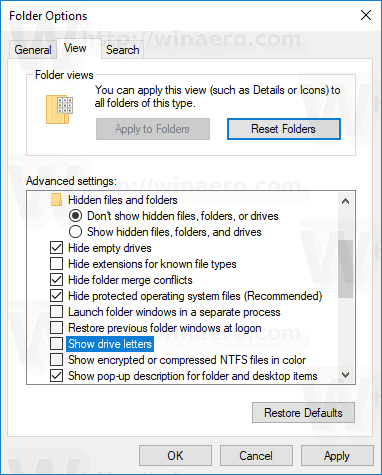
A few interesting configuration options are found in the General tab of the Folder Options window, but many are hidden in the View tab.
Continue reading this guide, as we take each tab one by one, and share the most interesting aspects that can be improved about File Explorer and Windows Explorer.
1. Change the folder opened by File Explorer when you start it (Windows 10 only)
When you open File Explorer, it starts in the Quick Access view that lists the most recently used files, as well as your more frequently used folders. If you do not consider this view useful, you can set File Explorer to open the This PC view that lists all your partitions, libraries and user folders. We consider it more useful. To make this change, in the Folder Options window, see the “Open File Explorer” drop-down list in the General tab. Click on it, and choose This PC.
If you want File Explorer to start using a different folder from your computer than the two options given to you, read this guide: How to make Windows 10’s File Explorer start in any folder you want. If you use Windows 7, read this guide instead: Set Windows Explorer to open OneDrive or Dropbox (or any other folder) when starting.
2. Open each folder in a separate window (all Windows versions)
In the Folder Options window, in the General tab, look for the Browser Folders section on the top. There, you can enable a setting that says: “Open each folder in its own window.”
This setting does what its name says and, if you open three folders on your Windows computer, you get three different File Explorer windows, one for each folder.
3. Open files and folders with a single click instead of a double-click (all Windows versions)
To open files and folders in Windows, you have to double-click on them. If you prefer a single click, in the General tab of the Folder Options window, choose “Single-click to open an item (point to select).“
Beneath this setting, you also choose how Windows underlines icon titles: consistent with your web browser or only when you point at them. To give you a perspective on how this change looks, see the screenshot below.
All the files and folders are underlined and open with a single click.
4. Stop File Explorer from showing recently used files, and frequently used folders (Windows 10 and Windows 8.1)
You may share your computer with other people, and you do not want Windows and File Explorer to always show the most recently used files and the frequently used folders. You might want to keep this information private. If that is the case, in the General tab of the Folder Options window, you have settings to stop this behavior. You can find more details in this tutorial: How To Stop Windows 10’s File Explorer From Showing Recent Files & Folders.
Now it is time to move to the View tab of the Folder Options window.
5. Set File Explorer to always show icons, never thumbnails (all Windows versions)
By default, Windows displays the thumbnails of the files that you browse. Most users like this. However, if you are working with a large number of files and folders, Windows becomes slow at loading thumbnails. If that is the case, you can make it faster by setting it to show icons instead of thumbnails. The icons always load faster than thumbnails. In the File Explorer window, go to the View tab. There, in the list of Advanced settings, check the box that says: “Always show icons, never thumbnails.”
6. Set File Explorer to always show the full path of folders in the title bar (all Windows versions)
When you use File Explorer, its default behavior is to show the name of the folder that you have opened in the title bar. In the View tab of the Folder Options window, there is a setting that says: “Display the full path in the title bar.”
When you enable it, File Explorer always shows the full path to the folder that you are browsing.
You may find this information useful.
7. See hidden files, folders, and drives, in Windows (all Windows versions)
By default, File Explorer does not display the files, folders, and drives set as hidden. To change this, in the View tab of the Folder Options window, check the box that says: “Show hidden files, folders, and drives.”
8. Show empty drives like USB memory sticks or external hard disks (all Windows versions)
One annoying feature of File Explorer is that it does not show empty removable drives that you plug into your Windows computer, in the This PC list from the left side of the window. They must have some data on them to become visible. You can disable this behavior in the View tab of the Folder Options window. Find a setting that says “Hide empty drives” and uncheck it.
In Windows 7, this setting is named “Hide empty drives in the Computer folder.”
9. Set Windows to show extensions for known file types (all Windows versions)
By default, Windows does not show the extensions of files that have “known” file types like .png, .jpeg, .avi, .exe, and so on. This is a problem because some malware can use this “feature” to trick you into opening an “image” with kittens in its name that is actually an executable that infects your computer with nasty ransomware. You should always uncheck the setting that says “Hide extensions for known file types” in the View tab of the Folder Options window.
When you disable this “feature,” and someone sends you malware named something like report.doc.exe, you see the real file extension, and you realize that something is not right. If this “feature” is enabled, you only see report.doc, and you might open the file and get infected.
10. Set Windows to launch folder windows in a separate process (all Windows versions)
When you use File Explorer to navigate multiple folders, in multiple windows, Windows uses the same explorer.exe process for all windows. Therefore, if one File Explorer window crashes, you have to force close all of them, to be able to restart File Explorer, and use it again. If you enable the “Launch folder windows in a separate process” setting, each File Explorer window gets a separate explorer.exe process. Therefore, if a File Explorer window crashes, it does not negatively affect the others, and you can keep using them.
11. Set Windows to reopen the previous folder when you log in (all Windows versions)
You can set Windows so that, when you log on, it automatically opens in File Explorer the last folder that you have opened, before restarting your PC, or signing out of your account. In the View tab of the Folder Options window, enable the setting that says: “Restore previous folder windows at logon.”
12. Use check boxes to select items in File Explorer (all Windows versions)
By default, to select items like a file or folder in File Explorer without opening them, you need to press and hold the CTRL key on your keyboard and click on those items. If you prefer to see a checkbox and use that instead, in the View tab of the Folder Options window, check “Use check boxes to select items.”
After you enable this setting, you see a checkbox near the name of each file or folder, when you hover your mouse over it. You can see it in the screenshot below.
13. Bring back the Libraries in File Explorer (Windows 10 and Windows 8.1)
The Libraries section is no longer shown by default in File Explorer. If you like this feature of Windows, and you want to use it, check the setting that says “Show libraries.”
Learn more about bringing back the Libraries section, in this guide: How to enable the Libraries in Windows 10 and Windows 8.1.
14. Show more folders and drives on the left side of File Explorer/Windows Explorer (all Windows versions)
On the left side of the File Explorer window, you see a standard list of folders that includes things like Quick Access, OneDrive, This PC, and Network. If you enable a setting named “Show all folders,” you get to see more folders on the left side.
See below a comparison. When you set Windows to show all folders, you see more folders like your user folder, the partitions on your computer, a link to the Control Panel, the Recycle Bin, and more.
In Windows 10, this setting is found in the View tab of the Folder Options window, and it is named “Show all folders.”
In Windows 7 and Windows 8, the same setting is found in the General tab of the Folder Options window.
15. Set File Explorer to expand the folder that you have opened (all Windows versions)
By default, when you open folders in File Explorer, nothing changes in the panel on the left side of the window. You see just the standard folders, at all times. However, you can set it to expand to the current folder that you are browsing, like in the screenshot below.
To enable this behavior, check the “Expand to open folder” setting. In Windows 10, it is found in the View tab of the Folder Options window.
In Windows 7 and Windows 8, the setting is found in the General tab of the Folder Options window, and it is named “Automatically expand to current folder.”
Do not forget to press OK or Apply to save your changes
When you are done making all the changes you want to File Explorer or Windows Explorer, do not forget to click OK or Apply in the Folder Options window. Otherwise, your changes are not applied. Also, before closing this tutorial, share with us the changes you made. What features did you enable or disable for File Explorer? Comment below and let’s discuss.


