- Find Open Ports in Kali Linux with Netstat Utility
- Открытие портов в Linux
- Открываем порты в Linux
- Шаг 1: Установка Iptables и просмотр правил
- Шаг 2: Разрешение обмена данными
- Шаг 3: Открытие необходимых портов
- Open Port Scanning and OS Detection with Nmap in Kali Linux
- Open Port Scanning and OS Detection
- Nmap Open Port Scanning and OS Detection Video Tutorial
- Nmap options summary
Find Open Ports in Kali Linux with Netstat Utility
A port scan sends client requests to a server port addresses on a host for finding an active port. The design and operation of the Internet is based on TCP/IP. A port can have some behavior like below:
- Open or Accepted: The host sent a reply indicating that a service is listening on the port.
- Closed or Denied or Not Listening: The host sent a reply indicating that connections will be denied to the port.
- Filtered, Dropped or Blocked: There was no reply from the host.
This is often used by administrators to verify security policies of their networks and can be used by an attacker to identify running services on a host with the view to compromise it.
To find all open/listening ports in your Kali Linux machine, we’ll use Netstat tool which is an open source tool and is already installed in Kali Linux OS. Netstat prints information about the Linux networking subsystem.
According to Wikipedia – Netstat (network statistics) is a command-line network utility tool that displays network connections for the Transmission Control Protocol (both incoming and outgoing), routing tables, and a number of network interface (network interface controller or software-defined network interface) and network protocol statistics.
It is available on Unix-like operating systems including macOS, Linux, Solaris, and BSD, and is available on Windows NT-based operating systems including Windows XP, Windows Vista, Windows 7, Windows 8 and Windows 10.
To find open ports, type the below command in your machine terminal.
Command: sudo netstat -plntu

Where, -p = display PID/Program name for sockets,
-l = display listening server sockets,
-n = don’t resolve names,
-t = tcp ports,
-u = udp ports
As you can see in above screenshot, the port numbers 5432, 5433, 80 and 68 ports are open in which Port 80 is associated with Apache Service and Port 68 is associated with Dhclient Service, and rest all other ports are linked with Postgres service.
Источник
Открытие портов в Linux

Безопасное соединение узлов сети и обмен информацией между ними напрямую связан с открытыми портами. Подключение и передача трафика производится именно через определенный порт, а если в системе он закрыт, выполнить такой процесс не представится возможным. Из-за этого некоторые пользователи заинтересованы в пробросе одного или нескольких номеров для наладки взаимодействия устройств. Сегодня мы покажем, как выполняется поставленная задача в операционных системах, основанных на ядре Linux.
Открываем порты в Linux
Хоть во многих дистрибутивах по умолчанию присутствует встроенный инструмент по управлению сетями, все же такие решения часто не позволяют в полной мере осуществить настройку открытия портов. Инструкции данной статьи будут основаны на дополнительном приложении под названием Iptables — решение для редактирования параметров межсетевого экрана с использованием прав суперпользователя. Во всех сборках ОС на Линуксе она работает одинаково, разве что отличается команда для установки, но об этом мы поговорим ниже.
Если вы хотите узнать, какие из портов уже открыты на компьютере, вы можете воспользоваться встроенной или дополнительной утилитой консоли. Детальные инструкции по поиску необходимой информации вы найдете в другой нашей статье, перейдя по следующей ссылке, а мы же приступаем к пошаговому разбору открытия портов.
Шаг 1: Установка Iptables и просмотр правил
Утилита Iptables изначально не входит в состав операционной системы, из-за чего ее нужно самостоятельно инсталлировать из официального репозитория, а уже потом работать с правилами и всячески изменять их. Установка не занимает много времени и выполняется через стандартную консоль.
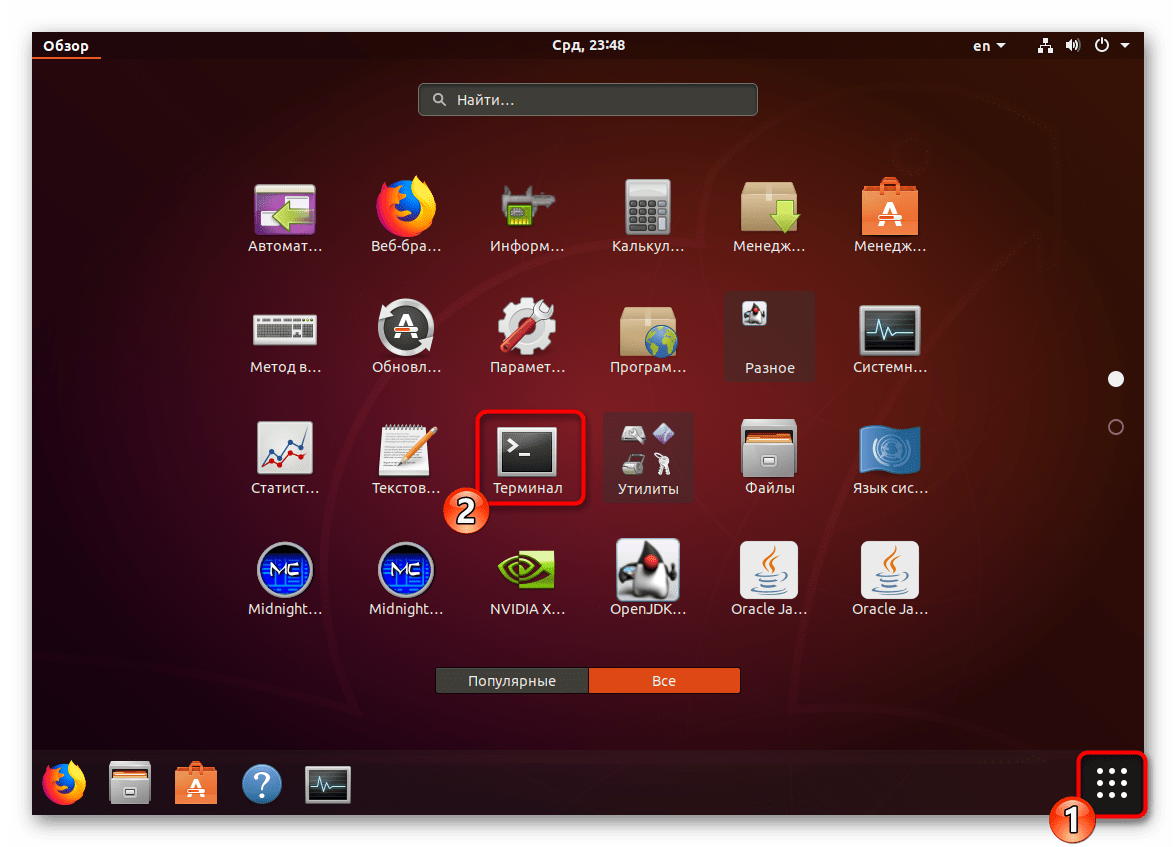
- Откройте меню и запустите «Терминал». Сделать это также можно, используя стандартную горячую клавишу Ctrl + Alt + T.

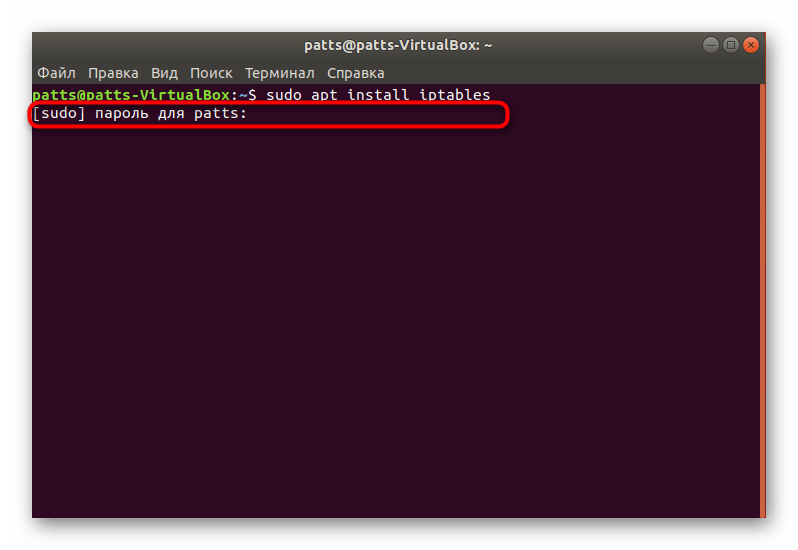
Активируйте права суперпользователя, написав пароль от своей учетной записи. Обратите внимание, что символы во время ввода не отображаются, сделано это для обеспечения безопасности.
Ожидайте завершения инсталляции и можете убедиться в активности работы инструмента, просмотрев стандартный список правил, задействовав sudo iptables -L .
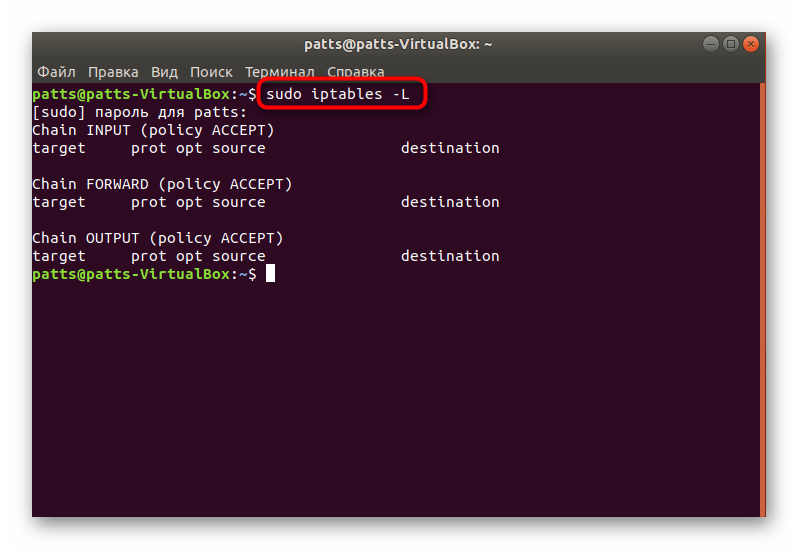
Как видите, в дистрибутиве теперь появилась команда iptables , отвечающая за управление одноименной утилитой. Еще раз напомним, что работает этот инструмент от прав суперпользователя, поэтому в строке обязательно должна содержаться приставка sudo , а уже потом остальные значения и аргументы.
Шаг 2: Разрешение обмена данными
Никакие порты не будут нормально функционировать, если утилита запрещает обмен информацией на уровне собственных правил межсетевого экрана. Кроме всего, отсутствие необходимых правил в дальнейшем может вызывать появление различных ошибок при пробросе, поэтому мы настоятельно советуем выполнить следующие действия:
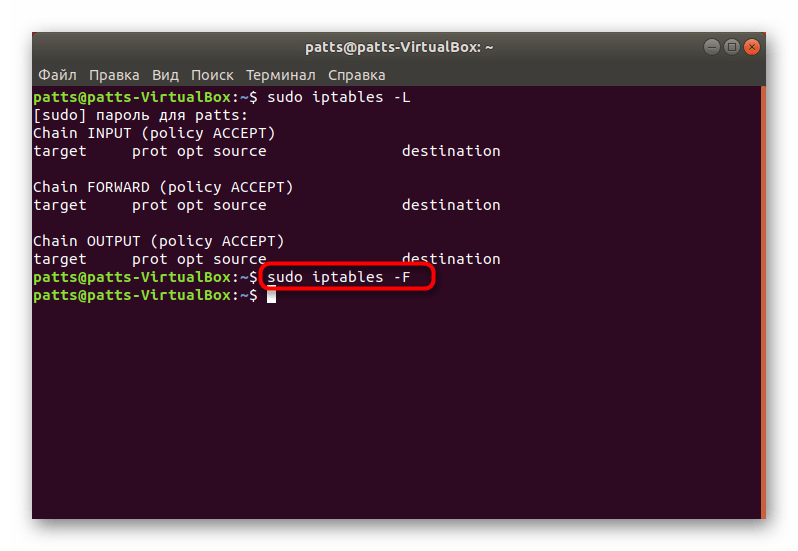
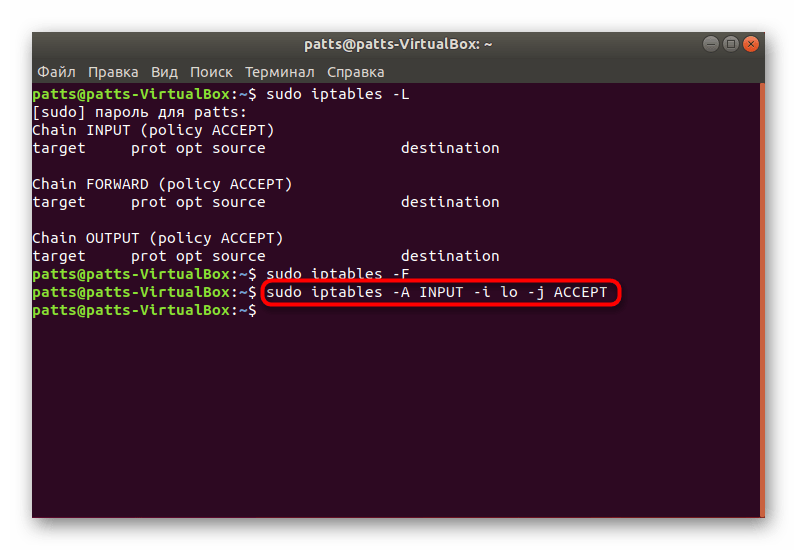
- Убедитесь, что в конфигурационном файле отсутствуют какие-либо правила. Лучше сразу же прописать команду для их удаления, а выглядит она так: sudo iptables -F .
Теперь добавляем правило для вводимых данных на локальном компьютере, вставив строку sudo iptables -A INPUT -i lo -j ACCEPT .
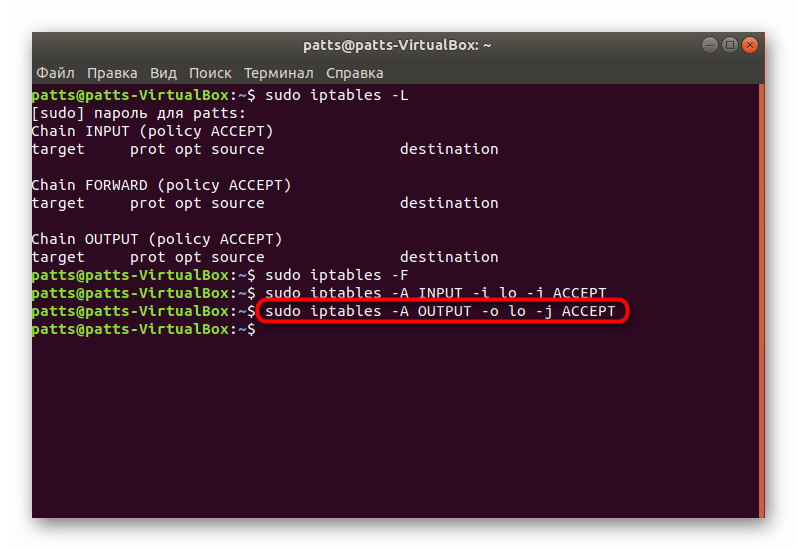
Примерно такая же команда — sudo iptables -A OUTPUT -o lo -j ACCEPT — отвечает за новое правило для отправки информации.
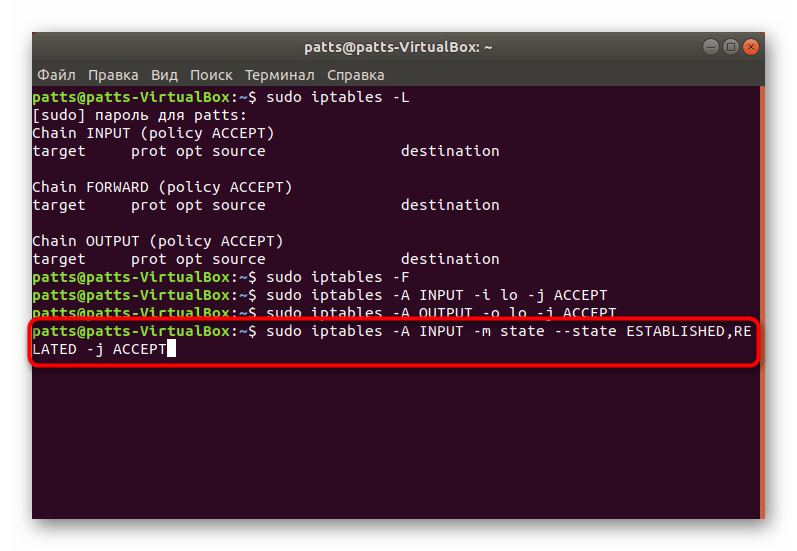
Осталось только обеспечить нормальное взаимодействие указанных выше правил, чтобы сервер смог отправлять обратно пакеты. Для этого нужно запретить новые соединения, а старые — разрешить. Производится это через sudo iptables -A INPUT -m state —state ESTABLISHED,RELATED -j ACCEPT .
Благодаря указанным выше параметрам вы обеспечили корректную отправку и прием данных, что позволит без проблем взаимодействовать с сервером или другим компьютером. Осталось только открыть порты, через которые и будет осуществляться то самое взаимодействие.
Шаг 3: Открытие необходимых портов
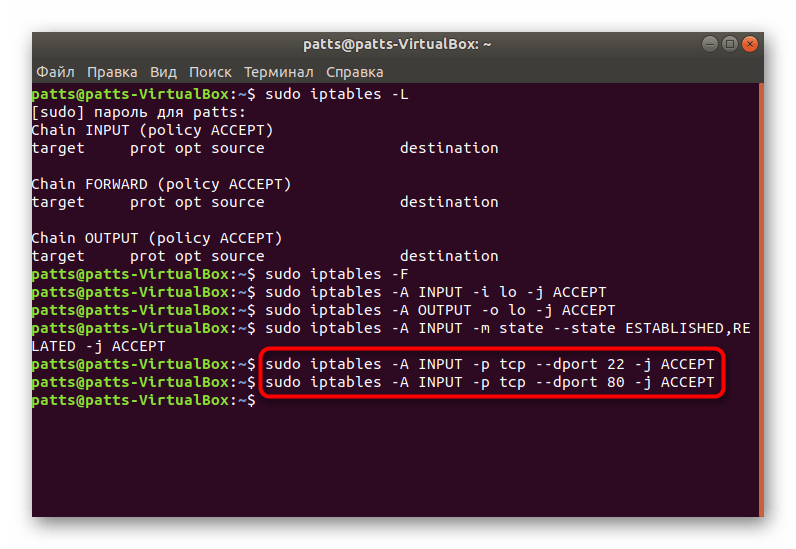
Вы уже ознакомлены с тем, по какому принципу добавляются новые правила в конфигурацию Iptables. Существуют и несколько аргументов, позволяющих открыть определенные порты. Давайте разберем эту процедуру на примере популярных портов под номерами 22 и 80.
- Запустите консоль и введите туда две следующие команды поочередно:
sudo iptables -A INPUT -p tcp —dport 22 -j ACCEPT
sudo iptables -A INPUT -p tcp —dport 80 -j ACCEPT .
Теперь проверьте список правил, чтобы убедиться в том, что порты были успешно проброшены. Используется для этого уже знакомая команда sudo iptables -L .
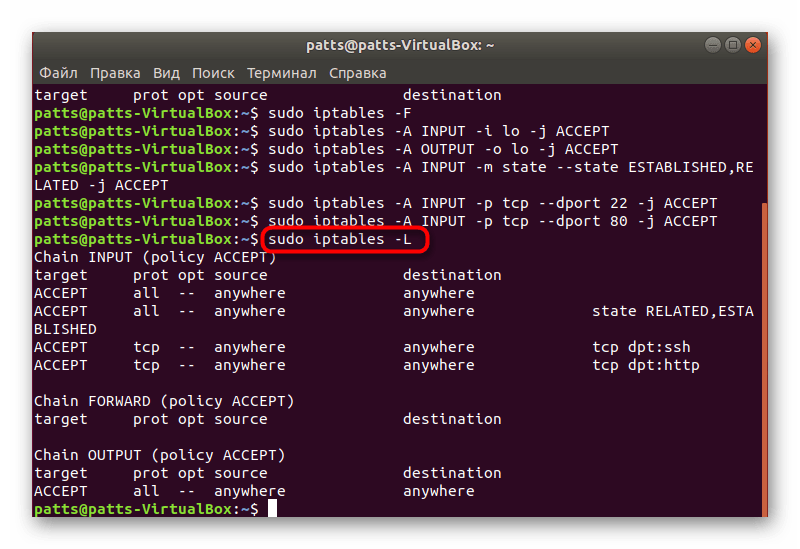
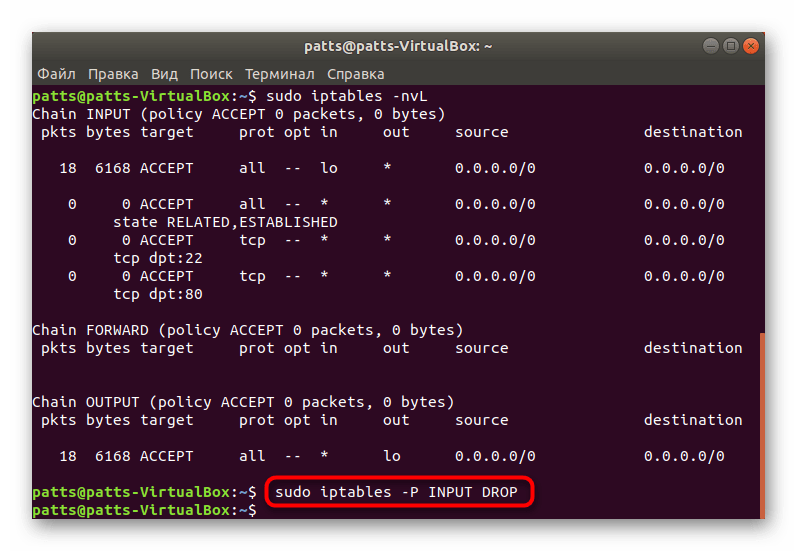
Придать ей читабельный вид и вывести все детали можно с помощью дополнительного аргумента, тогда строка будет такой: sudo iptables -nvL .

Поменяйте политику на стандартную через sudo iptables -P INPUT DROP и можете смело приступать к работе между узлами.
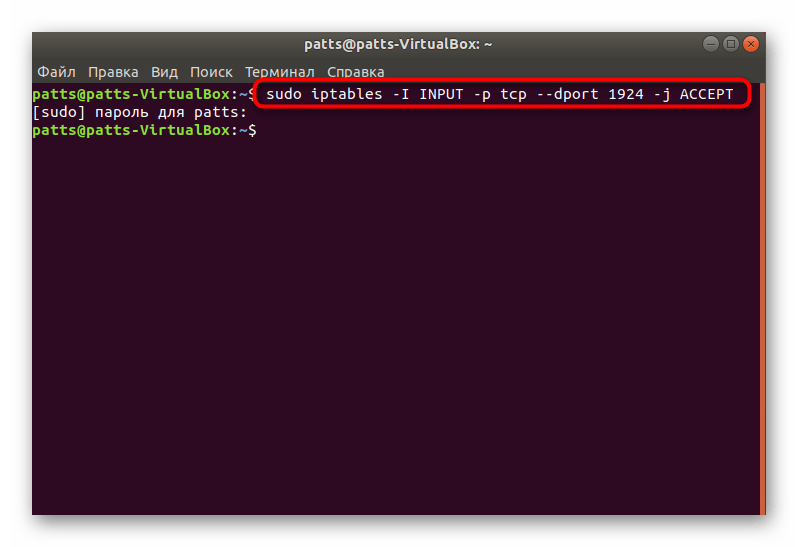
В случае когда уже администратор компьютера внес свои правила в инструмент, организовал сброс пакетов при подходе к точке, например, через sudo iptables -A INPUT -j DROP , вам нужно использовать другую команду sudo iptables: -I INPUT -p tcp —dport 1924 -j ACCEPT , где 1924 — номер порта. Она добавляет необходимый порт в начало цепи, и тогда пакеты не сбрасываются.
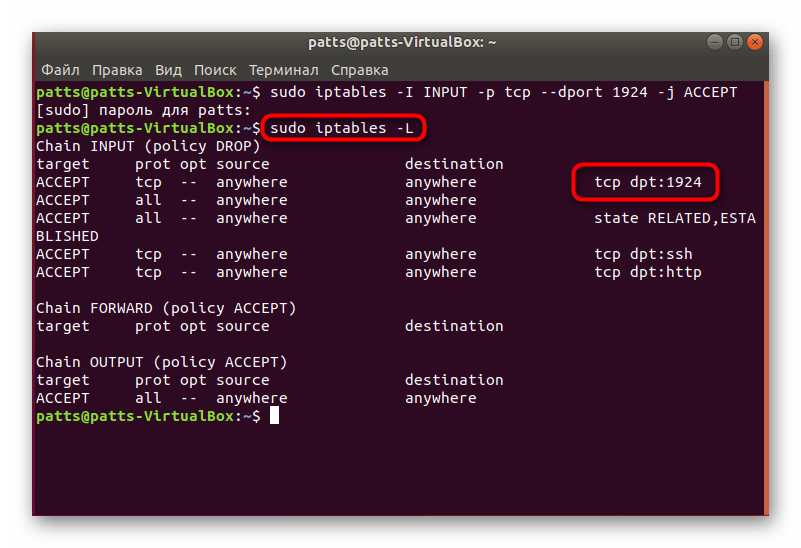
Далее вы можете прописать все ту же строку sudo iptables -L и убедиться в том, что все настроено корректно.
Теперь вы знаете, как пробрасываются порты в операционных системах Linux на примере дополнительной утилиты Iptables. Советуем обязательно следить за появляющимися строками в консоли при вводе команд, это поможет вовремя обнаружить какие-либо ошибки и оперативно устранить их.
Помимо этой статьи, на сайте еще 12315 инструкций.
Добавьте сайт Lumpics.ru в закладки (CTRL+D) и мы точно еще пригодимся вам.
Отблагодарите автора, поделитесь статьей в социальных сетях.
Источник
Open Port Scanning and OS Detection with Nmap in Kali Linux
In this tutorial we are going to use Nmap in Kali Linux to scan for open ports scan and we will be using OS detection. Nmap stands for Network Mapper and is an open source tool for network exploration and security auditing which comes standard with Kali Linux but is also available for Windows, OSX and many other UNIX platforms. Nmap also has a graphical user interface called Zenmap.
First I want to start off with a little warning: Please be careful using the more aggressive functions of Nmap against hosts you do not own or do not have permission to scan. It may be against your ISP’s terms to use some Nmap features.
Open Port Scanning and OS Detection
Let’s start with a ping scan on an IP range to determine live hosts using the following command:
nmap -sP 192.168.0.0-100
Next we will start a SYN scan with OS detection on one of the live hosts using the following command:
nmap -sS [ip address]-O

Now we will start an open port scan with version detection using the following command:
nmap -sV 192.168.0.1 -A
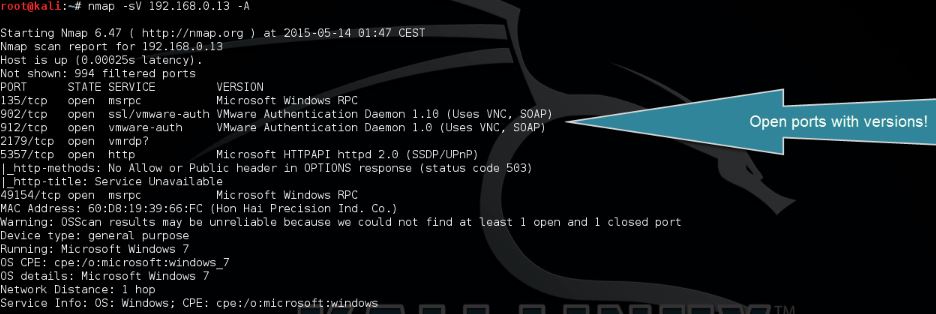
When we add -v to the command we can increase the verbosity :
nmap -sV 192.168.0.13 -A -v
Nmap Open Port Scanning and OS Detection Video Tutorial
Thanks for watching and please subscribe to my YouTube channel 🙂
Nmap options summary
Usage: nmap [Scan Type(s)] [Options]
TARGET SPECIFICATION:
Can pass hostnames, IP addresses, networks, etc.
Ex: scanme.nmap.org, microsoft.com/24, 192.168.0.1; 10.0.0-255.1-254
-iL : Input from list of hosts/networks
-iR : Choose random targets
–exclude : Exclude hosts/networks
–excludefile : Exclude list from file
HOST DISCOVERY:
-sL: List Scan – simply list targets to scan
-sn: Ping Scan – disable port scan
-Pn: Treat all hosts as online — skip host discovery
-PS/PA/PU/PY[portlist]: TCP SYN/ACK, UDP or SCTP discovery to given ports
-PE/PP/PM: ICMP echo, timestamp, and netmask request discovery probes
-PO[protocol list]: IP Protocol Ping
-n/-R: Never do DNS resolution/Always resolve [default: sometimes]
–dns-servers : Specify custom DNS servers
–system-dns: Use OS’s DNS resolver
–traceroute: Trace hop path to each host
SCAN TECHNIQUES:
-sS/sT/sA/sW/sM: TCP SYN/Connect()/ACK/Window/Maimon scans
-sU: UDP Scan
-sN/sF/sX: TCP Null, FIN, and Xmas scans
–scanflags : Customize TCP scan flags
-sI : Idle scan
-sY/sZ: SCTP INIT/COOKIE-ECHO scans
-sO: IP protocol scan
-b : FTP bounce scan
PORT SPECIFICATION AND SCAN ORDER:
-p
: Only scan specified ports
Ex: -p22; -p1-65535; -p U:53,111,137,T:21-25,80,139,8080,S:9
–exclude-ports
: Exclude the specified ports from scanning
-F: Fast mode – Scan fewer ports than the default scan
-r: Scan ports consecutively – don’t randomize
–top-ports : Scan most common ports
–port-ratio : Scan ports more common than
SERVICE/VERSION DETECTION:
-sV: Probe open ports to determine service/version info
–version-intensity : Set from 0 (light) to 9 (try all probes)
–version-light: Limit to most likely probes (intensity 2)
–version-all: Try every single probe (intensity 9)
–version-trace: Show detailed version scan activity (for debugging)
SCRIPT SCAN:
-sC: equivalent to –script=default
–script= : is a comma separated list of
directories, script-files or script-categories
–script-args= : provide arguments to scripts
–script-args-file=filename: provide NSE script args in a file
–script-trace: Show all data sent and received
–script-updatedb: Update the script database.
–script-help= : Show help about scripts.
is a comma-separated list of script-files or
script-categories.
OS DETECTION:
-O: Enable OS detection
–osscan-limit: Limit OS detection to promising targets
–osscan-guess: Guess OS more aggressively
TIMING AND PERFORMANCE:
Options which take are in seconds, or append ‘ms’ (milliseconds),
‘s’ (seconds), ‘m’ (minutes), or ‘h’ (hours) to the value (e.g. 30m).
-T : Set timing template (higher is faster)
–min-hostgroup/max-hostgroup : Parallel host scan group sizes
–min-parallelism/max-parallelism : Probe parallelization
–min-rtt-timeout/max-rtt-timeout/initial-rtt-timeout : Specifies
probe round trip time.
–max-retries
–host-timeout : Give up on target after this long
–scan-delay/–max-scan-delay : Adjust delay between probes
–min-rate : Send packets no slower than per second
–max-rate : Send packets no faster than per second
FIREWALL/IDS EVASION AND SPOOFING:
-f; –mtu : fragment packets (optionally w/given MTU)
-D : Cloak a scan with decoys
-S : Spoof source address
-e : Use specified interface
-g/–source-port
: Use given port number
–proxies : Relay connections through HTTP/SOCKS4 proxies
–data : Append a custom payload to sent packets
–data-string : Append a custom ASCII string to sent packets
–data-length : Append random data to sent packets
–ip-options : Send packets with specified ip options
–ttl : Set IP time-to-live field
–spoof-mac : Spoof your MAC address
–badsum: Send packets with a bogus TCP/UDP/SCTP checksum
OUTPUT:
-oN/-oX/-oS/-oG : Output scan in normal, XML, s| : Output in the three major formats at once
-v: Increase verbosity level (use -vv or more for greater effect)
-d: Increase debugging level (use -dd or more for greater effect)
–reason: Display the reason a port is in a particular state
–open: Only show open (or possibly open) ports
–packet-trace: Show all packets sent and received
–iflist: Print host interfaces and routes (for debugging)
–log-errors: Log errors/warnings to the normal-format output file
–append-output: Append to rather than clobber specified output files
–resume : Resume an aborted scan
–stylesheet
: XSL stylesheet to transform XML output to HTML
–webxml: Reference stylesheet from Nmap.Org for more portable XML
–no-stylesheet: Prevent associating of XSL stylesheet w/XML output
MISC:
-6: Enable IPv6 scanning
-A: Enable OS detection, version detection, script scanning, and traceroute
–datadir : Specify custom Nmap data file location
–send-eth/–send-ip: Send using raw ethernet frames or IP packets
–privileged: Assume that the user is fully privileged
–unprivileged: Assume the user lacks raw socket privileges
-V: Print version number
-h: Print this help summary page
Источник


