- How to see what programs are running in Windows 10
- Applies to All Windows 10 Versions
- 6 ways to open the Run command window in Windows
- 1. Open the Run command window with a keyboard shortcut
- 2. Use Search to open the Run command window
- 3. Open the Run command window from the Start Menu
- 4. Use the Command Prompt (CMD) to open the Run window
- 5. Open the Run command window with PowerShell
- 6. Use the WinX power user menu to open the Run window in Windows 10
- What do you want to access using the Run window?
- How to Stop Programs from Running at Startup on Windows 7
- Method 1: Deleting the program’s shortcut from the Startup folder
- Method 2: Disable the startup item in System Configuration
- Method 3: Prevent the offending program from launching at startup using the Registry
- Method 4: Adjusting in MSConfig
- Method 5: Delete Registry Startup
- Method 6: Disable Startup Programs Using CCleaner
- Method 7: Check Application Settings
- Method 8: Using Selective Startup
- Method 9: Disable Startup Programs Using iSumSoft System Refixer
- Method 10: Disable Startup Application Using Shift Key
How to see what programs are running in Windows 10
James Walker | February 24, 2021 October 16, 2019 | How-To
To view running programs in Windows 10, use the Task Manager app, accessible by searching in the Start menu.
- Launch it from the Start menu or with the Ctrl+Shift+Esc keyboard shortcut
- Sort apps by memory use, CPU use, etc.
- Get more details or «End Task» if needed
Applies to All Windows 10 Versions
When your computer is running sluggishly, it can be helpful to cull the number of programs you have open. This includes cutting down on background processes which run invisibly, sometimes without your knowledge.
The best place to start when monitoring apps is the Task Manager. Launch it from the Start menu or with the Ctrl+Shift+Esc keyboard shortcut. You’ll land on the Processes screen.

At the top of the table, you’ll see a list of all the apps which are running on your desktop. These are generally programs which you have started yourself. You should recognise them as apps which you’re currently using.
The next section, «Background processes,» details programs which probably aren’t visible on your desktop. These include processes installed by other programs, such as self-update utilities, Windows components and «suspended» Windows Store apps.
At the bottom of the list, you’ll find «Windows processes.» These are individual components of the Windows operating system. You won’t generally need to interact with any of these. They should be left on their own to keep your system running.
You can click the column headings to sort the table by the available fields. This helps you quickly identify apps which are using a lot of RAM, or those which are consuming processor time. Right-clicking a column header allows you to add further fields to the table, such as estimates of power consumption or the complete command which was used to launch the process.
If you need more detailed information, switch over to the «Details» pane. This provides technical details for each process. Again, you can add extra fields and change the sorting using the column headers at the top of the screen.
You can right-click a process to change its attributes. Terminate a process by selecting «End task» – this should work even if the program is unresponsive and you can’t use the regular «Close» button.
Finally, we should note that Task Manager only shows apps running on your own desktop. If there are multiple users logged in, you can view their processes by switching to the «Users» tab. This enables you to see if one of their open programs is consuming all the resources of the machine. You’ll need to be logged in as an administrator in order to see this information, due to the inherent privacy and security implications of viewing another user’s processes.
6 ways to open the Run command window in Windows
The Run command window allows you to launch programs, open files and folders, and access internet resources in Windows. Just type a path or a quick command into the Windows Run box, and then click OK or press Enter to use a Run command. Although the Run shortcut is not as easy to find in recent Windows versions, the tool still exists, and there are plenty of ways to access it. This tutorial illustrates how to open Run in Windows 10 and Windows 7:
1. Open the Run command window with a keyboard shortcut
The fastest way to access the Run command window is to use the keyboard shortcut Windows + R. On top of being very easy to remember, this method is universal for all versions of Windows. Hold down the Windows key and then press R on your keyboard.
The Run window is immediately displayed in the lower-left corner of the screen.
2. Use Search to open the Run command window
As always in Windows, Search is a great idea to find just about anything. If you are using Windows 10, first type the word “run” inside the Search bar.
Then, click or tap on the relevant search result or press Open from the pane on the right.
In Windows 7, click the Start button and type the word “run” in the Start Menu Search box. Then, click the appropriate result to launch the Run command window.
3. Open the Run command window from the Start Menu
The Start Menu is a reliable way to access features on your Windows computer or device, including the Run window. In Windows 10, access the Start Menu by clicking or tapping on the Windows logo in the lower-left corner or by pressing the Windows button on your keyboard. Then, scroll down to the letter W, open the Windows System folder, and press Run.
In Windows 7, open the Start Menu and then access “All Programs -> Accessories -> Run” to launch the window.
Alternatively, you can also customize your Windows 7 Start Menu to permanently display a Run shortcut in the right-hand pane. To learn how to do that, read The complete guide to the Windows 7 Start Menu.
4. Use the Command Prompt (CMD) to open the Run window
Some of my colleagues love the CMD, so we decided to put this in for other fans, even if it’s not as easy to remember as the other ways illustrated in this article. To open the Windows Run, you can also launch the Command Prompt and enter the following:
explorer.exe Shell.
This method works both in Windows 10 and Windows 7.
5. Open the Run command window with PowerShell
Wondering how to open Run from PowerShell in Windows 10 and Windows 7? First, start PowerShell. Then, copy/paste or type in the following command:
(New-Object -ComObject “Shell.Application”).FileRun()
Press Enter on your keyboard, and the Run command window is immediately opened in the bottom-left corner.
6. Use the WinX power user menu to open the Run window in Windows 10
Windows 10 has a hidden power user menu that includes a shortcut for the Run command window. There are many ways to access this menu, the easiest being to use the Windows + X keyboard shortcut. Then, click or tap on Run or press R on your keyboard to open the Run box in Windows 10.
If the WinX power user menu interests you, you can learn more by reading: What is the WinX menu and how to open it.
What do you want to access using the Run window?
The Run command window was first introduced by Microsoft in Windows 95 and has been with us ever since. Some of us access it pretty often, but plenty of people don’t realize its potential and usefulness yet. We’re happy this feature caught your eye, but we are curious what brought you here. Are you looking for new ways to open the Windows Run command window or are you trying something new on your computer? Let us know in the comments.
How to Stop Programs from Running at Startup on Windows 7
After a Windows computer starts up, each member of a specific group of programs on the computer is launched as soon as the user logs in to Windows. These “startup items” range from third-party programs installed by the user that are configured to launch at startup to built-in Windows programs that the system needs to be running when it boots up. Windows is an Operating System that hands over complete control of a computer to its user. That being the case, Windows users also have authority over what programs start running at startup and which ones do not.
Windows users sometimes need to stop certain programs from running at startup for a wide variety of reasons (from the target program being malicious or otherwise dangerous to the target program eating up a lot of computer resources after it is launched at startup to everything in between). Thankfully, preventing a program from running at startup on a computer running on Windows 7 is fairly easy. However, there are three different methods a Windows 7 user can go about preventing a program or application on their computer from running at startup.
These three methods are also to be used in succession until one of these methods manages to fulfill the objective. For example, if the first method doesn’t work, only then should you move on to the second method and then the third method until you successfully prevent the target program from running at startup. The following are the three methods being talked about:
Method 1: Deleting the program’s shortcut from the Startup folder
Most third-party programs that are configured to launch at startup have a shortcut in the Startup folder of a Windows computer. Deleting this shortcut from the Startup folder results in Windows not launching the program at boot. On Windows 7, here’s what you need to do in order to delete a program’s shortcut from the Startup folder to prevent it from running at startup:
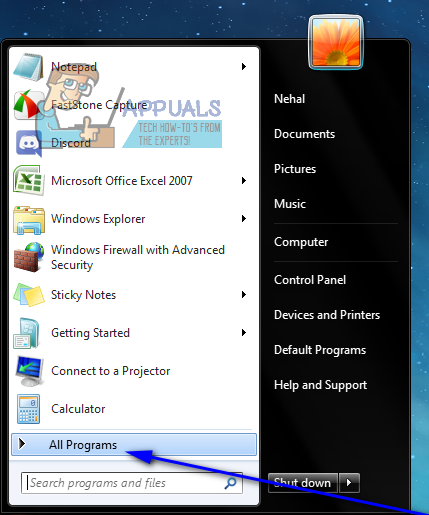
- Open the Start Menu.

- Click on All Programs.
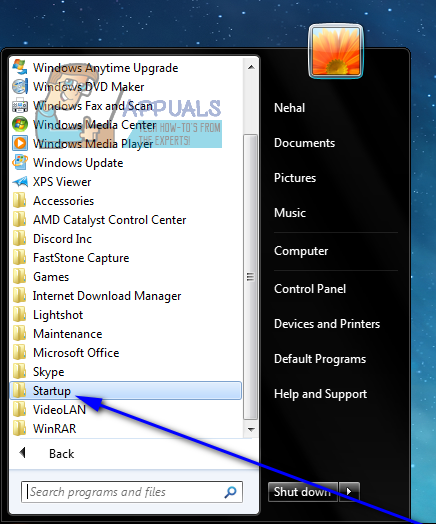
- Locate and click on the Startup folder to expand it.
- Look for a shortcut to your target program or application under the Startup folder. Once you locate the shortcut, right-click on it and click on Delete.
- Confirm the action in the resulting popup.
- Restart your computer and check to make sure the program doesn’t launch when the computer boots up.

Method 2: Disable the startup item in System Configuration
If deleting the target program’s shortcut from the Startup folder doesn’t work or if you find that a shortcut for the target program doesn’t even exist in your computer’s Startup folder, fear not – it is still entirely possible for you to disable the target program or “startup item” from System Configuration. System Configuration is a Windows utility designed to allow users to configure how their computer starts up and shuts down, among an array of other things. To disable the target “startup item” in System Configuration to prevent the target program from being launched at startup, you need to:
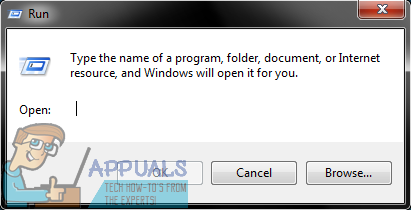
- Press the Windows Logo key + R to open a Run dialog.
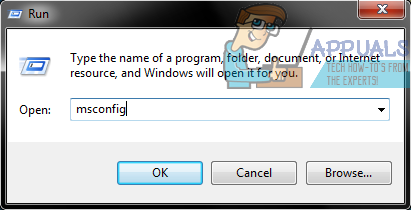
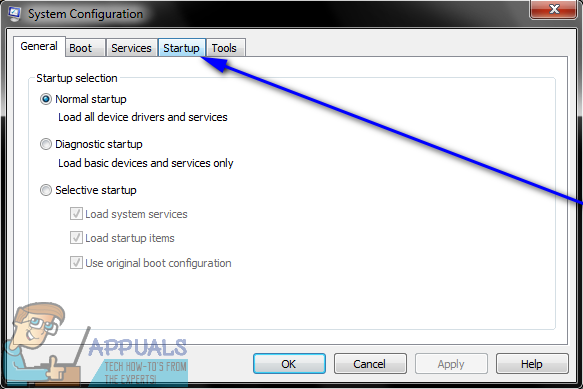
- Type msconfig into the Run dialog and press Enter to launch the System Configuration utility.
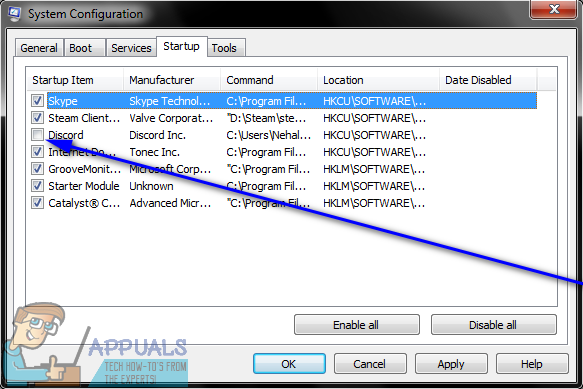
- Navigate to the Startup tab of the System Configuration utility.
- Locate the program Windows from launching when your computer starts up, and disable it by unchecking the checkbox located directly next to it.
- Click on Apply and then on OK.
- Click on Restart in the resulting dialog box.
- When the computer boots up, check to make sure Windows doesn’t launch the program you just disabled in System Configuration.
Method 3: Prevent the offending program from launching at startup using the Registry
Apart from the Startup folder on your computer and System Configuration, the Registry also has the ability to get Windows to launch certain programs at the startup. That being the case, you can only prevent some programs from launching at startup if you do so via the Registry on your computer. Make sure to back up your Registry before trying to edit it in case something goes wrong. To prevent a program from being launched at startup using the Registry, simply:
- Start the registry editor.
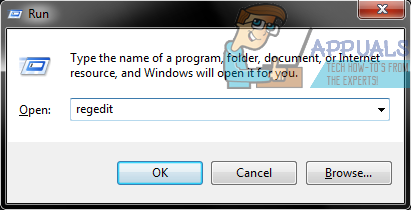
- Press the Windows Logo key + R to open a Run dialog.
- Type regedit into the Run dialog and press Enter to launch the Registry Editor.
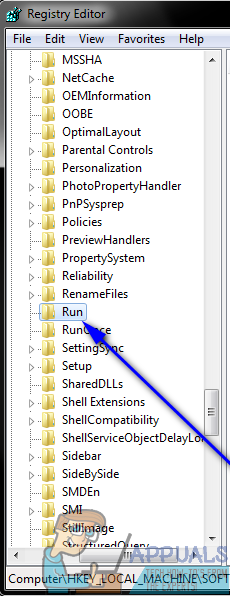
- In the left pane of the Registry Editor, navigate to the following directory:
- In the left pane of the Registry Editor, click on the Run sub-key under the CurrentVersion key to have its contents displayed in the right pane.
- In the right pane of the Registry Editor, you are going to see listings for all of the programs on your computer that are configured to be launched at startup through the Registry. Locate the listing for the program you want to prevent Windows from launching at startup, right-click on it and click on Delete.
- Confirm the action in the resulting popup.
- Close the Registry Editor.
- Restart your computer. At startup, check to ensure that Windows does not automatically launch the program you just disabled from being launched at startup.
Note: Deleting a program or application’s entry from the Run sub-key in the Registry Editor only prevents the program from being launched at startup – it does NOT uninstall the program from your computer.
Method 4: Adjusting in MSConfig
It is possible in some cases that the program that you are trying to stop from running or launching at your computer’s startup has also installed a service on your computer that automatically overrides any restrictions that you implement and allows the program to be launched at the startup. Therefore, in this step, we will be adjusting this in the MSConfig window. For that:
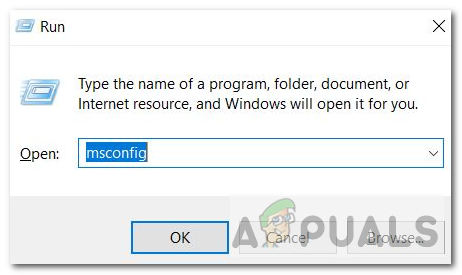
- Press “Windows” + “R” to open the Run prompt.
- Type in “MSConfig” and press “Enter” to open the Microsoft Configuration Window. msconfig
- In the Configuration Window, click on the “Services” panel and scroll through the list of mentioned services.
- From this, try to disable a service that seems relevant to the application that you are trying to disable.
- After doing so, hit the “Apply” button to confirm that the service is disabled.
- Check to see if the program still launches.
 msconfig
Method 5: Delete Registry Startup
In some isolated cases, there is another registry where the program that is launching at startup might have manifested its startup command. This registry entry can sometimes contain the command to launch a particular application at startup and in this step, we will be getting rid of the entry to make sure that the application isn’t launched. In order to do so, make sure to back up the registry beforehand in case something goes south.
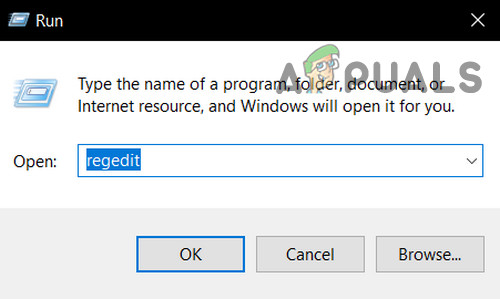
- Press “Windows” + ” “R” on your keyboard to open the Run prompt.
- Inside the Run prompt, type in “Regedit” and press “Enter” to launch the registry editor. Open Regedit
- In the Registry Editor, navigate to the below mentioned location.
- From here, on the right side, you should see a registry entry for any programs that are currently enabled to run on your computer’s startup.
- Right-click on their entries and select the “Delete” button to remove them from your computer.
- Check to see if doing so has fixed the issue.
 Open Regedit
Method 6: Disable Startup Programs Using CCleaner
Sometimes, your computer’s configurations might be so messed up that in spite of trying all the fixes above, you would not be able to disable the program that you want from launching at startup. Therefore, sometimes, you will have to go for a third-party solution to completely prevent any program from launching at your computer’s startup. In order to do so, follow the guide below.
- First of all, what you want to do is launch your favorite browser and download the CCleaner program from here.
- After downloading this tool, make sure to press the executable icon and follow through with the on-screen instructions to install it on your computer.
- After the installation process is completed, launch the application on your computer.
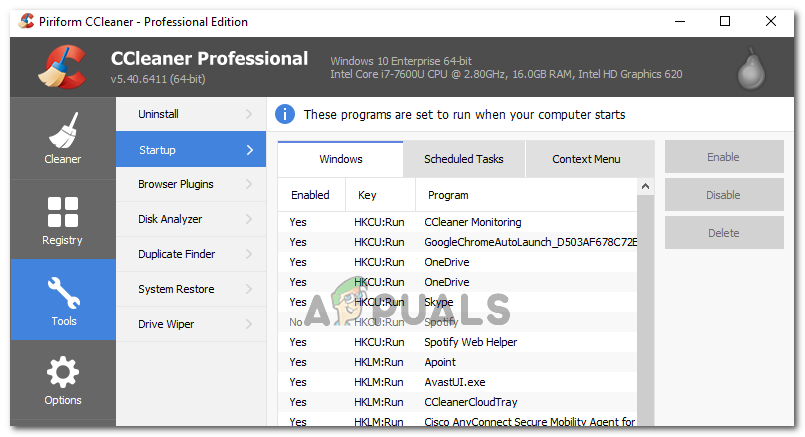
- After the application has been started, click on the “Tools” button at the left side of the dialogue box and select the “Startup” button after that.
- The “Enabled” column on the left should be listing the programs that are currently enabled to launch at your computer’s startup. Clicking on the enabled column
- Click on the program that you want to disable from the list and then click on the “Disable” button to prevent it from launching at startup.
- After disabling all the preferred programs, restart your computer to make sure that the change takes effect.
- Check to see if by doing so you have been able to disable the programs.
 Clicking on the enabled column
Method 7: Check Application Settings
In some cases, we have seen that the application in question is configured to launch at startup through its own settings. This option is usually presented when you first install the application and if you don’t change the default “Launch at Startup” option, the application becomes configured to launch at startup. Due to this, even though you are trying to prevent it from starting by changing the computer configurations, it will still override these settings to adjust to your preference. Therefore, a wise workaround to this would be to check your application settings in detail to disable any launch at startup setting.
Method 8: Using Selective Startup
Some users were going through the issue that their computer was unable to function and they were unable to move even the cursor when the computer was starting up because a particular application was breaking down the operating system and causing it to hang up. Therefore, in this step, we will be booting the computer into a selective startup mode and this way, you will be able to properly diagnose which application is causing this issue and then disable it from launching at startup. For that:
- Press “Windows’ + “R’ to open the Run prompt.
- Type in “msconfig” and press “enter” to launch the Microsoft Configuration panel. msconfig
- Inside this panel, click on the “Boot” option, and from here make sure to check the “Safe Boot” option and after that, select the “Minimal” button. Check Safe Mode in Boot Tab
- Click on the “Apply” button to save your changes and then click on the “OK” button to exit out of the window.
- Restart your computer to actually boot into the selective startup mode.
- This mode won’t allow any extra application to start up and you should be able to easily diagnose and fix your computer.
- Check to see if doing so has fixed your issue.
 Check Safe Mode in Boot Tab
Note: We don’t recommend leaving your computer in selective startup, because this can render portions of your security software or other applications unavailable. Once you have determined which program is causing the problem, you should check the program’s documentation or help site to see if the program can be configured to avoid the conflict.
Method 9: Disable Startup Programs Using iSumSoft System Refixer
Once again, if you are unable to perform any of the steps that we have mentioned below, a convenient and decent approach would be to use the iSumSoft System Refixer tool to actually go through this whole ordeal for you. In order to demonstrate this, we have listed the steps below.
- Launch your favorite browser and download the iSumsoft System Refixer on your computer from here.
- After the download is finished, click on the executable to launch its installer and follow the on-screen instructions to install it on your computer.
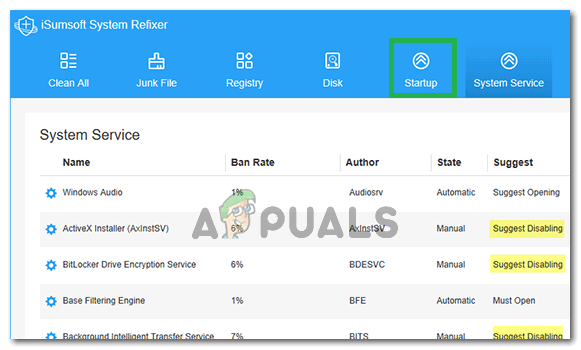
- Select the Startup option on the top of this tool and it will display a list of all the programs that have been configured to launch at startup on your computer. Clicking on the “Startup” tab
- Click the ‘Disable start’ button to disable your unwanted startup programs.
- Save your settings and check to see if doing so has gotten rid of your issue.
 Clicking on the “Startup” tab
Method 10: Disable Startup Application Using Shift Key
If you aren’t comfortable with any third-party applications and actually want to perform these steps conveniently at the press of a button, you can just press and hold the Shift key during the startup process of the computer. This will prevent any programs from being able to run after the startup.
On some computers, you need to press and hold the shift key while restarting your computer to actually launch it without having any startup programs enabled so make sure that you try both these methods and see which one works the best for you.
- %SystemDrive%\Users\username\AppData\Roaming\Microsoft\Windows\Start Menu\Programs\Startup
- %SystemDrive%\ProgramData\Microsoft\Windows\Start Menu\Programs\Startup
As we discussed above, the folders above contain the list of the programs that are to be launched at the startup of the computer and whenever the user cues the startup, the system goes into these locations to check for the list but when you press the Shift key, this process is skipped and you are able to bypass that list. In order to do this:
- Log off the computer and then log on again, Immediately press and hold down the Shift key as the computer starts.
- Continue to hold down the Shift key until the desktop icons appear.
- Next, you should use the System Configuration utility to temporarily disable applications one by one until you identify the cause of the problem.
- With the cause of the problem identified, you can fix the application or permanently remove it from your startup programs.
- Check to see if this method works and you are able to prevent the app from starting.


