- Configuring CMake to build OpenCV on Windows
- General procedure
- Configuration details
- BUILD group
- ENABLE group
- INSTALL group
- MATLAB group
- OPENCV group
- WITH group
- Intel TBB
- OpenCV C++ installation on Windows with MinGW
- Prerequisites
- Step 1
- Step 2
- Step 3
- Step 4
- Step 5
- Install OpenCV 3 on Windows
- Step 1: Install Visual Studio
- Step 2: Install CMake
- Step 3: Install Anaconda (a python distribution)
- Step 4: Download and extract opencv-3.3.1 and opencv_contrib-3.3.1
- Step 5: Generate Visual Studio project using CMake
- Step 5.1: Additional changes to CMake config
- Step 5.2 : Add Python paths for both Python2 and Python3 (optional)
- Step 5.3 : Generate build files
- Step 6: Compile OpenCV
- Step 6.1:Compile opencv in Release mode
- Step 6.2 : Compile opencv in Debug mode
- Step 7: Update System Environment Variables
- Step 7.1 : Update environment variable – PATH
- Step 7.2 : Update user environment variable – OPENCV_DIR
- Step 8: Testing C++ code
- Step 9: Testing Python code
- Step 9.1 : Quick check
- Step 9.2 : Testing redEyeRemover application
Configuring CMake to build OpenCV on Windows
General procedure
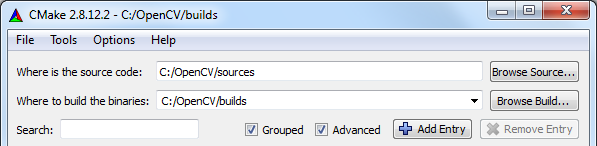
Start the GUI version of CMake (cmake-gui).
Select the folder C:\OpenCV\sources as the source directory.
Select the folder C:\OpenCV\builds as the build directory.
Enable the Grouped and Advanced checkboxes just below the build directory name. These will impact the way the packages information will be displayed in the CMake GUI in the following steps.
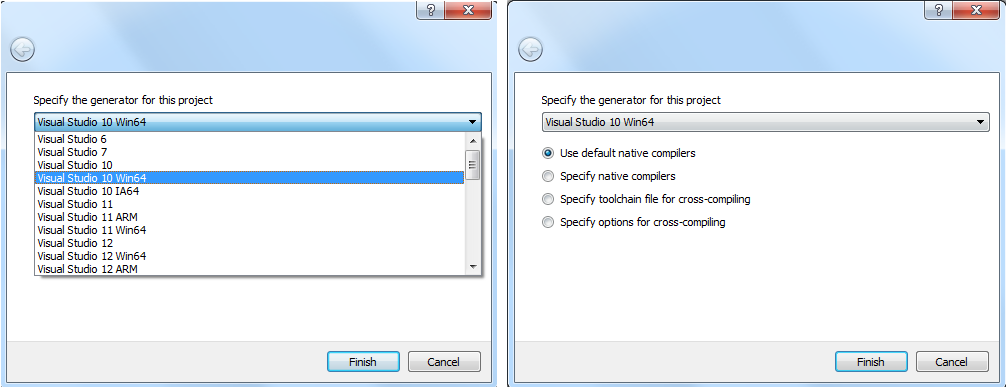
Press the “Configure” button. A window pops up, letting you specify the compiler (and IDE) you want to use. Pick Visual Studio 10, 32-bit or 64-bit according to your Matlab version. Select also “Use default native compilers” and click Finish.
In case you would like to redo all the steps from the beginning (if you made a mistake somewhere, for instance), you can clear CMake cache in the menu option “File > Delete Cache”.
CMake will start out and based on your system variables will try to automatically locate as many packages as possible. You can modify the packages to use for the build in the WITH > WITH_X menu points (where X is the package abbreviation).
Configure CMake until all the elements are found. Follow the instructions below.
If you don’t need it, you might want to deactivate the Python module both in 32-bit and 64-bit versions since it might not build correctly.
Once you are comfortable with your CMake configuration, press Generate and close CMake.
Here is an alternate version of those instructions, but it does not goes as deep in the details as this tutorial: http://seevisionc.blogspot.co.uk/2014/03/compiling-opencv-30-with-matlab-support.html.
Configuration details
BUILD group
Activate everything except:
- BUILD_CUDA_STUBS
- BUILD_DOCS
- BUILD_OPENEXR
- BUILD_TBB
- BUILD_WITH_DYNAMIC_IPP
- BUILD_opencv_apps
- BUILD_opencv_python2
- BUILD_opencv_python3
- BUILD_opencv_ts
- BUILD_opencv_world
For more info about what each OpenCV module does, please visit http://docs.opencv.org/.
To build the doc, Doxygen must be installed. This is why I disabled it, because the doc is easily accessible online anyway.
The Python interface does not build properly on my machine, this is why I have disabled both items about Python. However, feel free to enable the one corresponding to your Python installation (python2 or python3).
ENABLE group
Make sure to check ENABLE_SOLUTION_FOLDERS.
INSTALL group
Check INSTALL_C_EXAMPLES and INSTALL_TESTS.
MATLAB group
Make sure every field is populated here (should be the case automatically).
OPENCV group
Complete the entry OPENCV_EXTRA_MODULES_PATH with the path to the extra modules: C:\OpenCV\contrib\modules .
WITH group
Activate the following items (15 in total):
- WITH_DIRECTX
- WITH_DSHOW
- WITH_EIGEN
- WITH_FFMPEG
- WITH_IPP
- WITH_JASPER
- WITH_JPEG
- WITH_OPENCL
- WITH_OPENCLAMDBLAS
- WITH_OPENCLAMDFFT
- WITH_PNG
- WITH_TBB
- WITH_TIFF
- WITH_VFW
- WITH_WIN32UI
Intel TBB
From CMake, configure one time OpenCV (should already be done).
Be careful NOT enabling BUILD_TBB: the automatic downloading and building of OpenCV failed miserably for me despite many efforts. If you had previously enabled BUILD_TBB, my suggestion is to restart from the beginnning, clearing cmake cache.
Configure a second time OpenCV.
Then a new group should appear (in red), named “Ungrouped Entries”. If the TBB include directory is not found, this group will have the option “TBB_INCLUDE_DIRS” with the value “TBB_INCLUDE_DIRS-NOTFOUND”.
Click on the value and then on the tiny button ”. ” appearing on the right-side of the field. Provide the path to the TBB headers, which should be C:\OpenCV\tbb\include .
When done, press the “Configure” button again.
Now, CMake should have been able to locate the TBB headers (include dir). Therefore, a new group “TBB” should appear in the interface. If it is not the case, then retry to locate the TBB headers. They should lie in some include directory within the tbb folder.
In the “TBB” group, there are two new variables whose default values are correct. Note that the value of TBB_LIB_DIR depends on your compiler.
The “TBB” group is now complete. Here are the three variables it contains with their values:
OpenCV C++ installation on Windows with MinGW
These days getting OpenCV running inside python is quite easy given conda does handle the installing the binaries and bringing the opencv python bindings inside python path.
However getting the same to run in C++ , is a different story. C++ is all about bringing in the right interface (hpp/header files) and binaries (so/dll) in the context of the program being compiled by the “g++” compiler. I will show you how I was able to set my system up for the same. Most tutorials out there will consider using an IDE like Eclipse or Netbeans. For bringing in “g++” (GNU C++ compiler) , we will use MinGW64. Remember we must use the 64bit variant since Mingw32 does not supports posix threads properly in windows. The ming64 binaries are built with a posix implementation that gives native posix but when compiled on windows will be slower compared to something built on windows native API (win32)
Prerequisites
- Windows (10/8/7) system
- Mingw-w64 , you can download from here
- OpenCv 3+ , official github repo
- Cmake , download from here
- Editor and terminal, do not care what you use. You can use notepad 😥 if you wish.
Step 1
Download the OpenCV source from their official git repository. You can choose to download any one of them. In my case I went for this one
Step 2
Setup Mingw-w64. In case you had trouble finding the link. Look here . Go for the link that says Online Installer for MinGW-GW64. Direct link , may break in future.
- Install MinGW-GW64 with the following setting

Make sure posix is selected. Otherwise the OpenCV installation will fail with unable to find mutex error. Which is part of pthreads library and specs. Architecture can be x86(32/64 bit machin) or x86_64(64bit machine) based on your working system.
2. Click next configure path of installation and let the binaries install.
3. After installation make sure to include MinGW bin folder in your path. It should be inside “..basePath/x86_64–8.1.0-posix***/mingw64/bin”

After this just test the installation by opening a terminal and type command “g++ — version”. If it says command not found. It could not get the path ,path was not set right, restart terminal or the machine. It should work! Google for the same !
Step 3
Once done install Cmake. Open Cmake and do the following
- Choose a source code path and a binaries path. Make sure they are separate.

2. Once done click on configure.A dialogue box will appear select MinGW Makefiles. This will make sure that the OpenCV new makefiles are compatible to mingw.

3. Click Finish. Let it generate some stuff. At this stage you should have some list of options to tick on. I did not needed any special attention to any of those options. So go on and click on Generate. Match the output from below, it should say “Configuration done” and “Generating done”

Step 4
Remember we chose a binaries folder, keep that in mind. Now navigate to that folder and open a terminal. In my case the folder I will have to navigate is.
“ C:\Users\Asus\Desktop\opencv”. Open a terminal in this folder. I use git-bash and you can use too. hit command “mingw32-make install” and pray that it builds hopefully. Because if it does my tutorial was successful.

After it’s done it should look like this. Also C++ compilation process takes a lot of time, LOT OF TIME . There are conference discussion on the same !! So you understand how serious is this problem.

At this point a new folder install will be created in your targeted build folder. We are concerned with the contents of this folder. So let’s do one thing. Lets move our build folder to “C:” drive root path that contains the install folder also. Now we add the binary path. Refer from the above image. In the environment variable there is a second path that points at the bin folder add that to environment variable also. Path “ C:\opencv\install\x64\mingw\bin” must be included in environment variable. This was in our case. These paths are IMPORTANT . 😧 Make sure it is there. The bin folder consist of all the various compiled binaries that are required for our OpenCV C++ compiled application. So you can choose to ship your application but then you will require the dll inside the bin to be shipped with your application also. Also since they are dll you cannot statically link them. So “-static” does not works. At least I could not get it done.
Step 5
Write a program
Now once you have the code copied. It’s time to test the installation. Remember to change the image location to your target image. Make sure you do that otherwise empty Mat will be created.
Double check that the include ,lib and bin folder of the install folder are targeted by your g++ compilation command.
If your command worked with no error. If there are linker errors then would advice to check whether linked dll are existing in the folder included by the command.
So hopefully you got a similar out put of size of the image currently being used.
Hope this tutorial helps you start your journey into the rabbit hole of C++ and Computer Vision. For more such content to follow this blog and if you found this helpful maybe a few claps. 😄 ….
Hopefully in the next version we will try to support cuda for Opencv DNN module.
Install OpenCV 3 on Windows
In this post, we will provide step by step instructions on how to install OpenCV 3 (C++ and Python) on Windows.
If you want to install OpenCV 4 from source, please check out this tutorial: Install OpenCV from source on Windows
We have used Windows Power Shell to run commands. Alternatively, you can use the command prompt too.
Step 1: Install Visual Studio
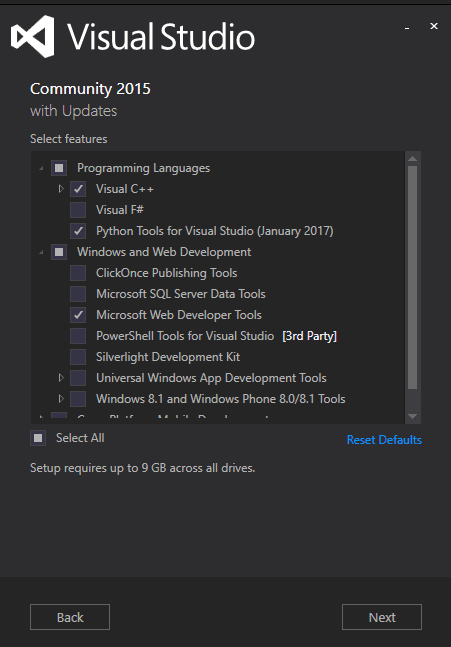
Download and install Visual Studio 2015 community edition from https://www.visualstudio.com/vs/older-downloads/. If you are finding it difficult to search for Visual Studio 2015, use this link. If you don’t have a Visual Studio Dev Essentials account, create account and login. Run installer, select “Custom” in “type of installation”.
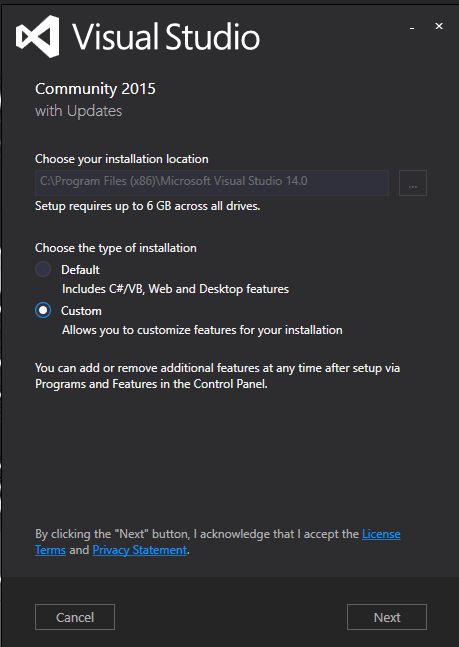
In next screen within Programming Languages, select Visual C++ and Python tools for Visual Studio. Click next.
Now click next. It will take some time to complete the installation.
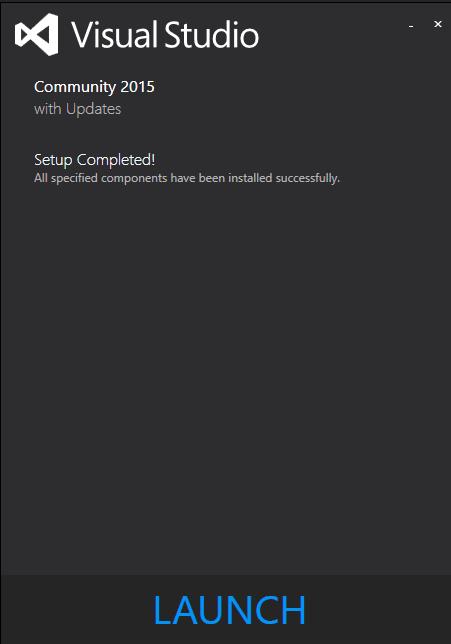
We have finished installation of Visual Studio 2015.
Note: Since Visual Studio 2017 fails to compile Dlib, we switched back to Visual Studio 2015.
Step 2: Install CMake
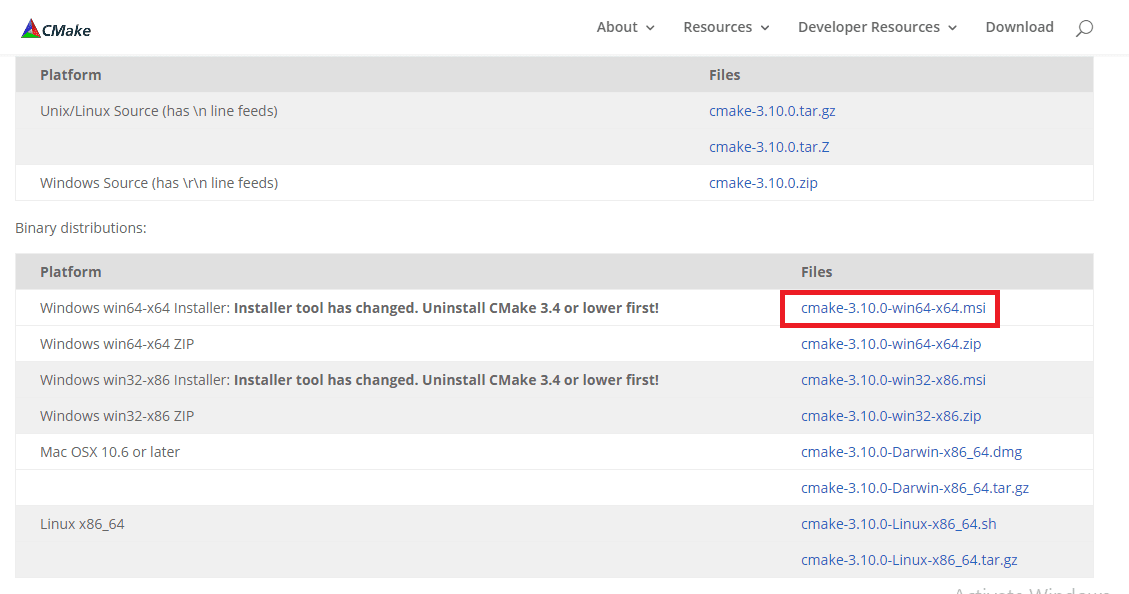
Download and install CMake v3.10.0 from https://cmake.org/download/.
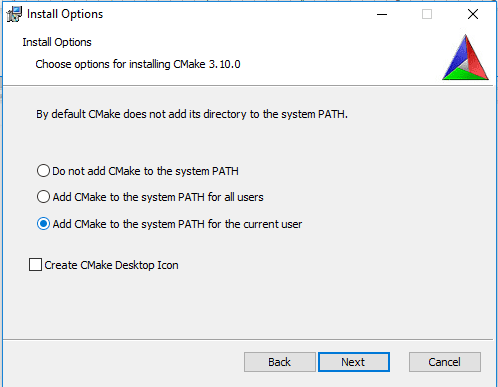
During installation select “Add CMake to system PATH”
Step 3: Install Anaconda (a python distribution)
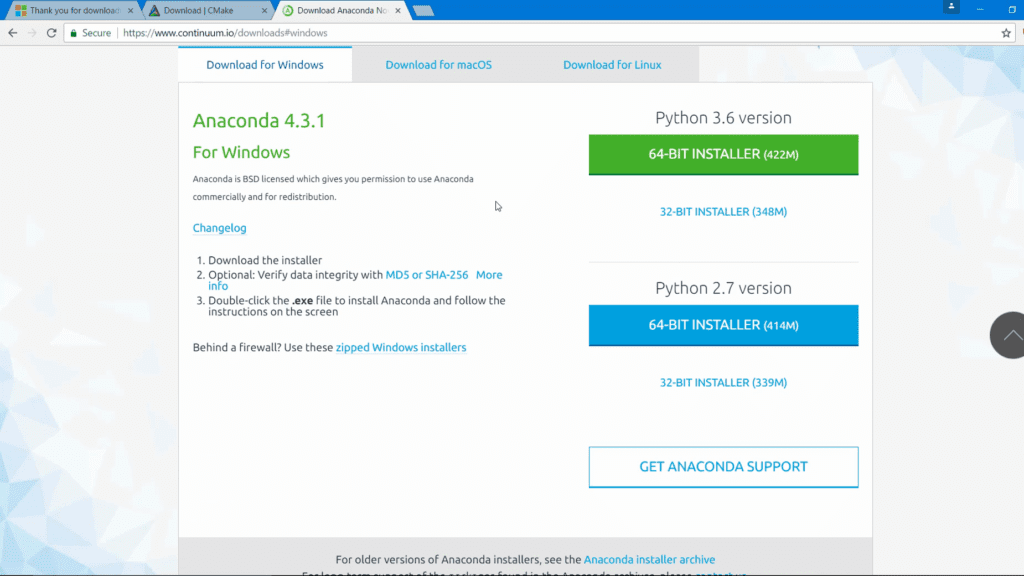
Download and install Anaconda 64-bit version from https://www.continuum.io/downloads.
Note: Dlib ships a prebuilt binary for Python 3 and not Python 2. Building Dlib’s Python bindings from source is a hassle as you have to build Boost.Python first.
So it is advised to install Anaconda 3. In case you want to build OpenCV’s Python bindings for Python 2, you can install Anaconda 2 as well but you won’t be able to use Dlib in Python 2.
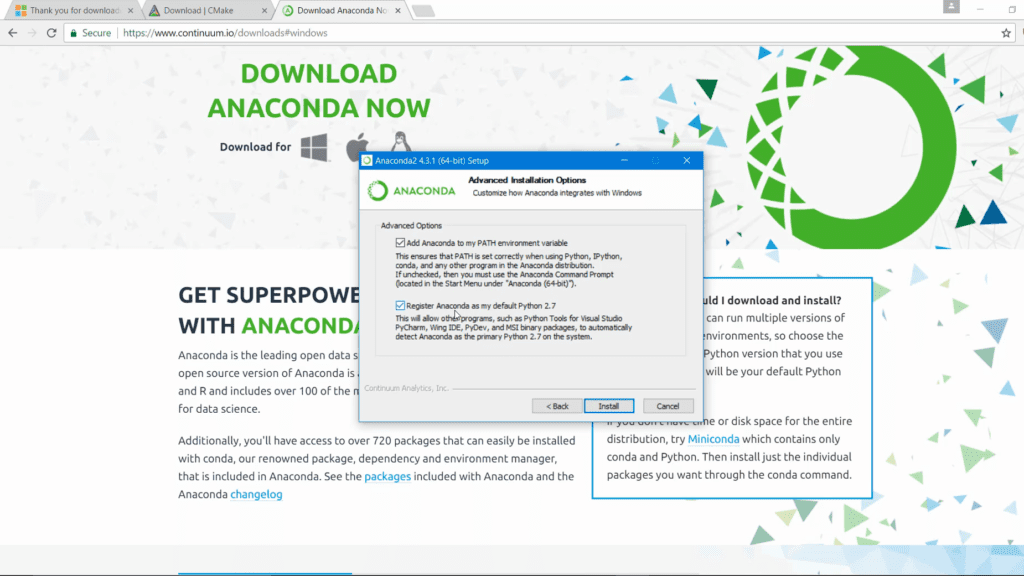
While installing Anaconda make sure that you check both options:
- Add Anaconda to my PATH environment variable
- Register Anaconda as my default Python
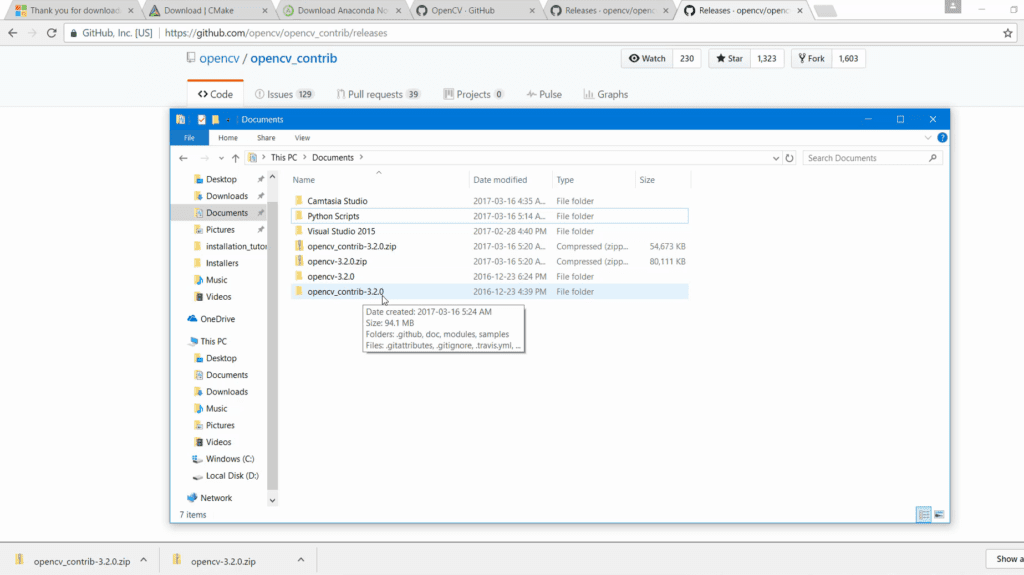
Step 4: Download and extract opencv-3.3.1 and opencv_contrib-3.3.1
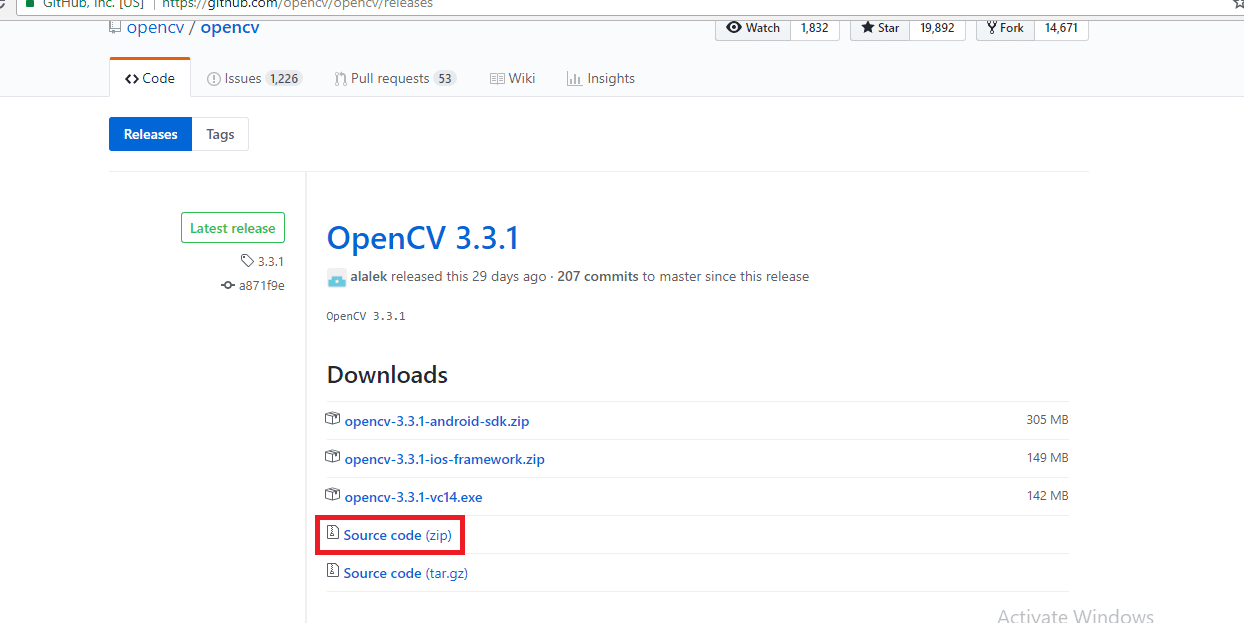
Go to https://github.com/opencv/opencv/releases and download opencv-3.3.1 source code zip
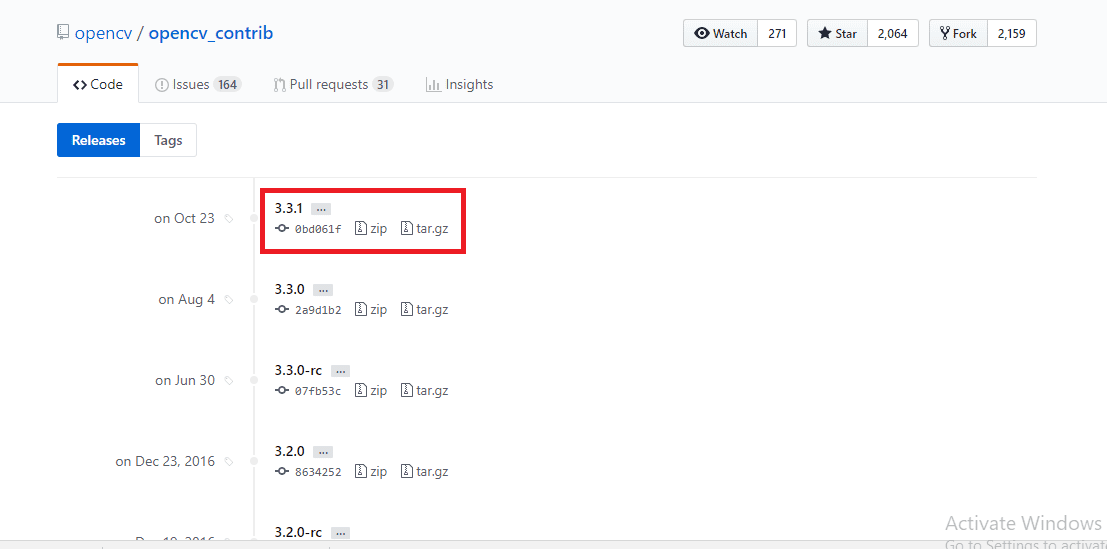
Go to https://github.com/opencv/opencv_contrib/releases and download opencv_contrib-3.3.1 source code zip
Extract both zip files. Although you can keep opencv and opencv_contrib folders anywhere, I suggest that you should keep both in the same directory. I have placed these two folders in “My Documents” directory.
NOTE : From hereon we will refer the path to opencv-3.3.1 folder as OPENCV_PATH. For example, in my case OPENCV_PATH is C:/Users/Vaibhaw Chandel/Documents/opencv-3.3.1
Depending upon where you have kept opencv-3.3.1 folder, this path would be different.
Step 5: Generate Visual Studio project using CMake
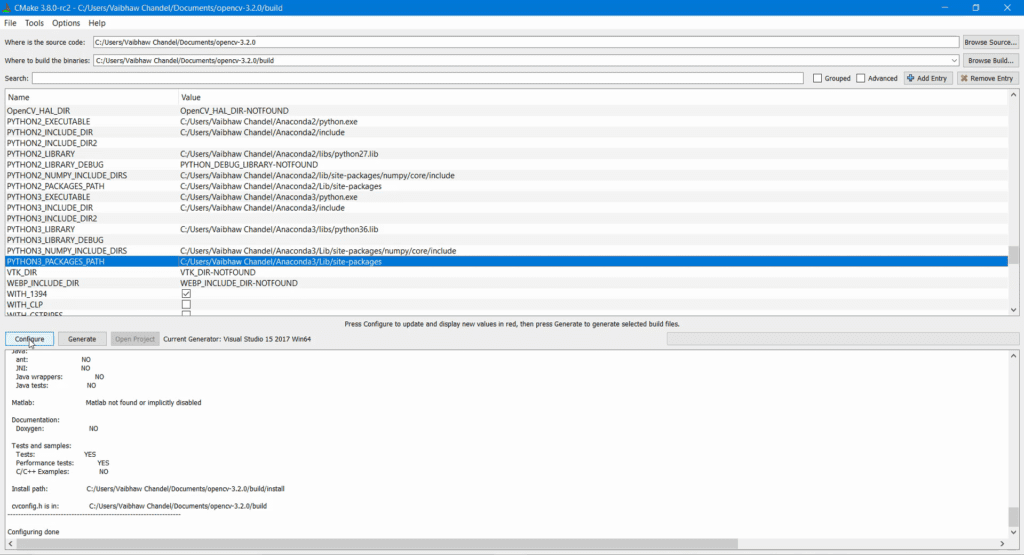
Run Cmake, in box “Where is the source code” write value of OPENCV_PATH (which is path to opencv-3.3.1 folder) and path to build directory. We will choose build directory as OPENCV_PATH/build
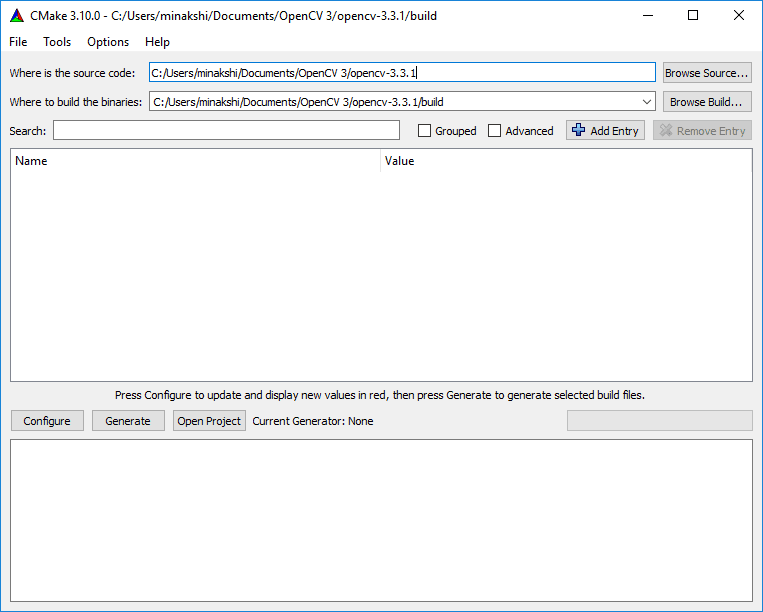
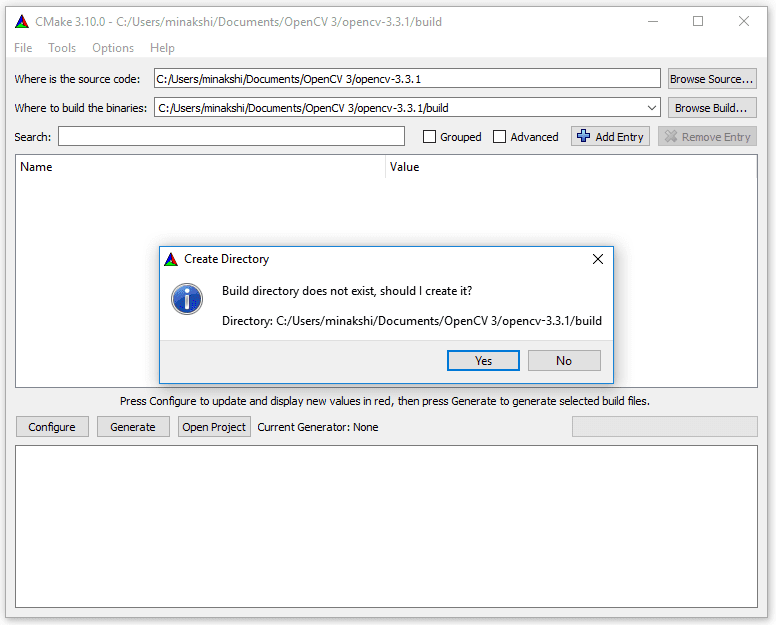
Now click configure.
You will be asked for permission to create the build folder. Click Yes.
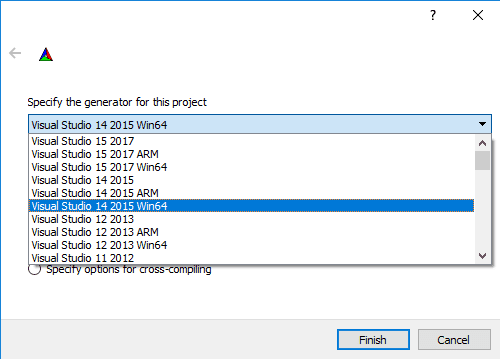
When prompted to select a compiler, select Visual Studio 14 2015 Win64.
Click finish and in the next window keep the default parameters checked.
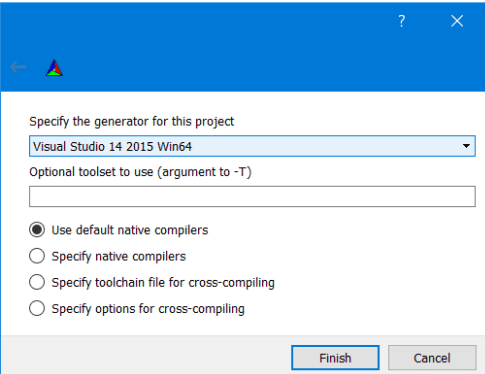
Click finish. Now CMake will look in the system directories and generate the makefiles.
Step 5.1: Additional changes to CMake config
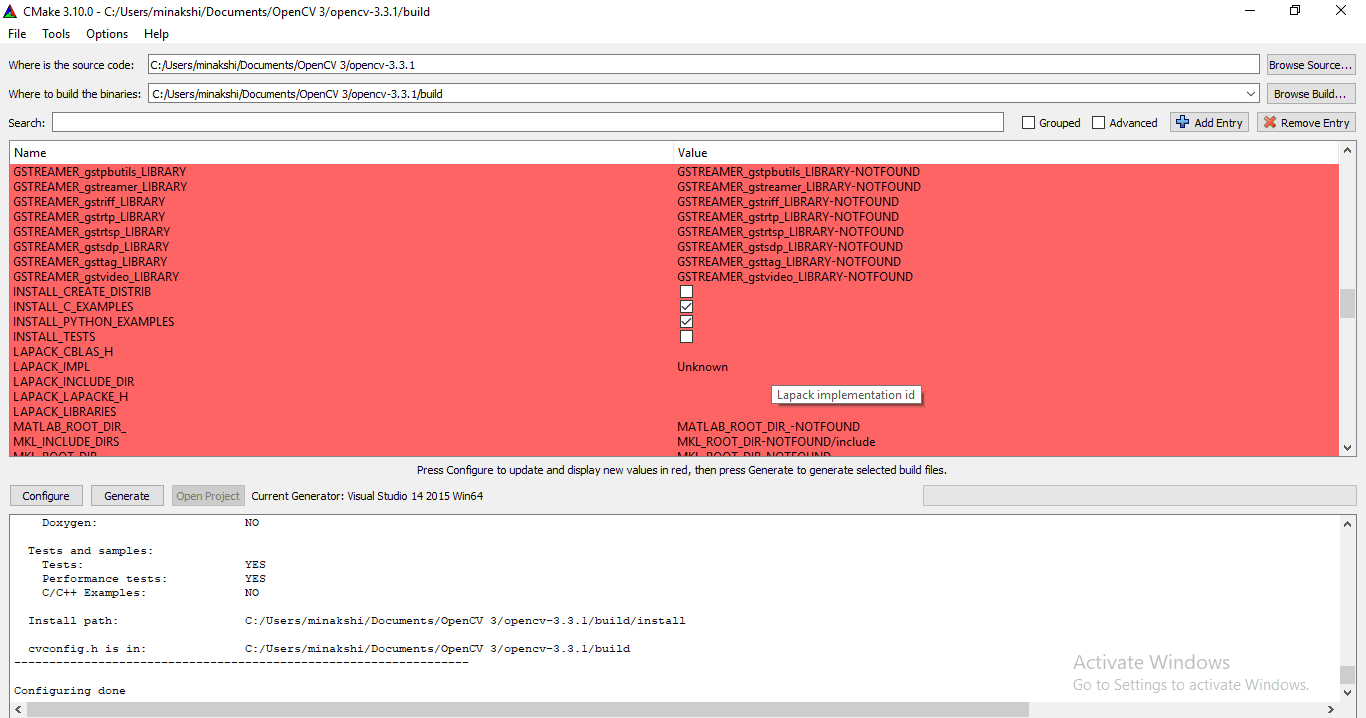
We will make few changes in the default configuration generated by CMake. Click on the images to see a larger version.
- Check “INSTALL_C_EXAMPLES” and “INSTALL_PYTHON_EXAMPLES”
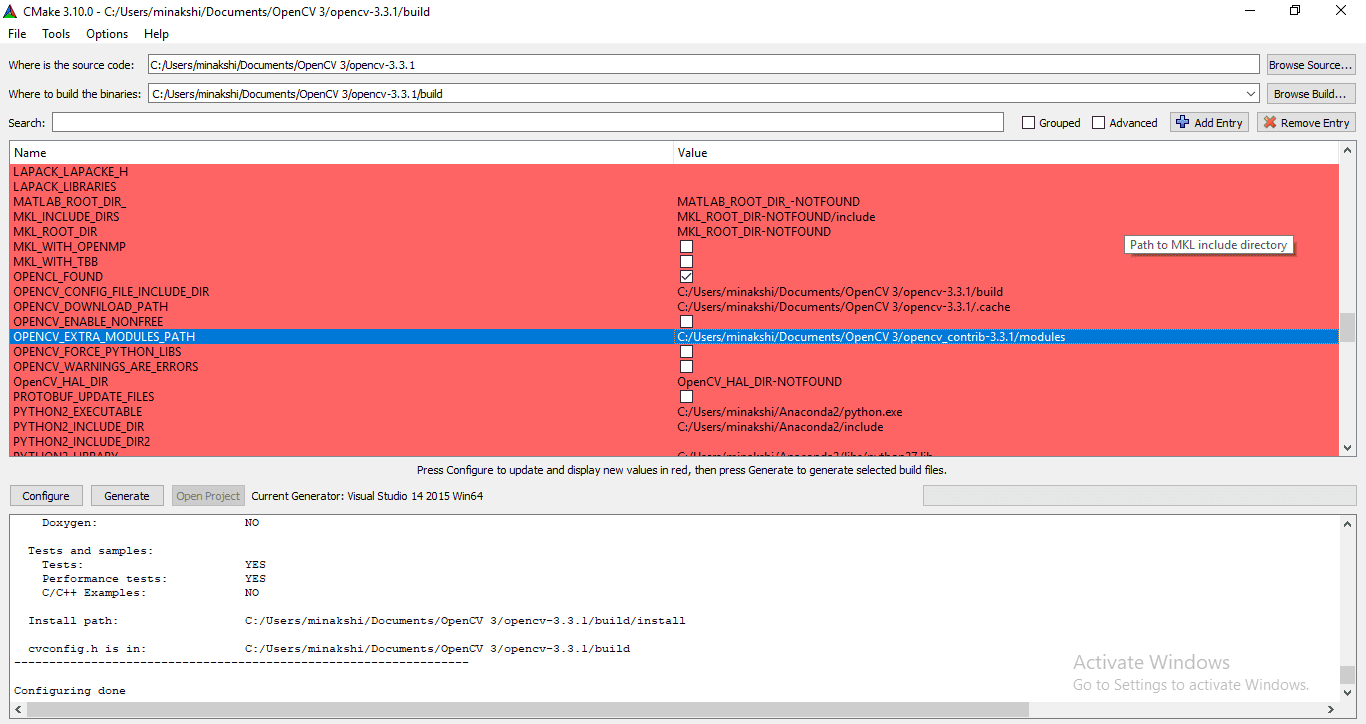
- In flag “OPENCV_EXTRA_MODULES_PATH”, give path of modules directory within opencv_contrib-3.3.1. In our case we have kept opencv_contrib-3.3.1 in Documents folder so path is “C:/Users/Vaibhaw Chandel/Documents/opencv_contrib-3.3.1/modules”
Now click configure to apply these changes.
- On Windows 10, opencv_saliency module fails to build. So we will disable it. Uncheck BUILD_opencv_saliency
Now click on configure again to include this change.
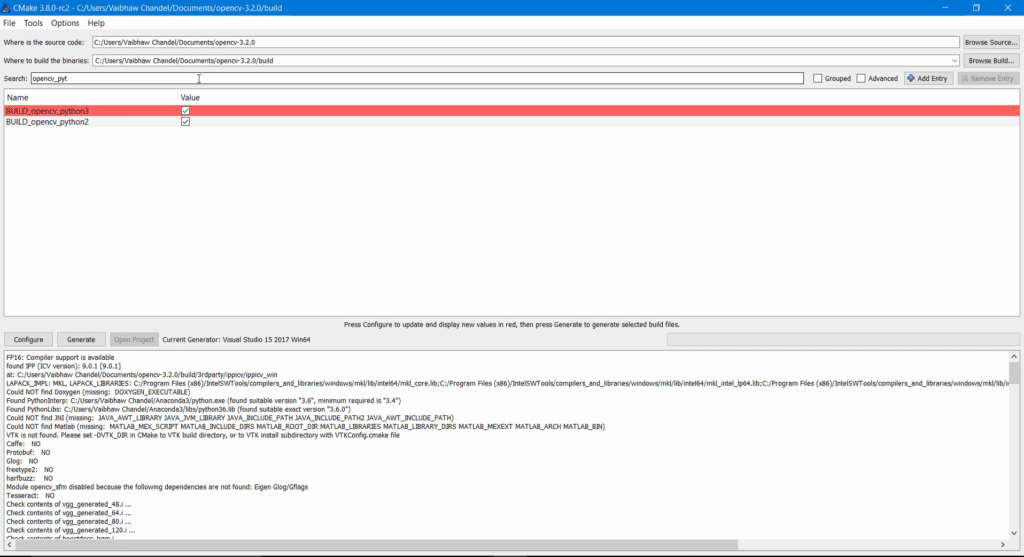
Step 5.2 : Add Python paths for both Python2 and Python3 (optional)
This section is only for people who want to generate OpenCV binary for both Python2 and Python 3. If you are going to use just one Python either 2 or 3, you should skip this section.
CMake was unable to find paths for my Python3 files.
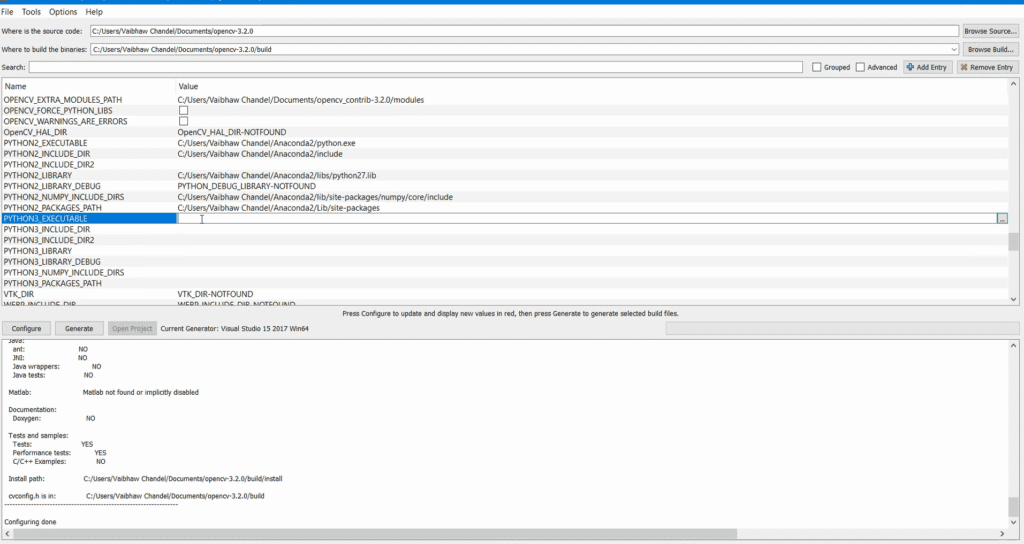
So I manually added paths for Python3.
Now click configure again. After configuring is done, search opencv_python in search bar, both BUILD_opencv_python2 and BUILD_opencv_python3 will be automatically checked. Now we are sure that OpenCV binaries for both Python2 and Python 3 will be generated after compilation.
Step 5.3 : Generate build files
If CMake is able to configure without any errors it should say “Configuring done”.
Click generate.
Note: Whenever you make any changes(check/uncheck boxes or change path) to configuration generated by CMake, always click configure and generate.
Step 6: Compile OpenCV
Step 6.1:Compile opencv in Release mode
Open Windows Command Prompt (cmd).
Go to OPENCV_PATH/build directory and run this command
Step 6.2 : Compile opencv in Debug mode
Open CMake GUI again as mentioned in Step 5.
- Search “python” in search box
- Uncheck INSTALL_PYTHON_EXAMPLES, BUILD_opencv_python3 and BUILD_opencv_python2
- Click configure
- Click generate
Now in windows command prompt
Go to OPENCV_PATH/build directory and run this command
Now that we have compiled OpenCV we will find out how to test a OpenCV project using CMake.
Step 7: Update System Environment Variables
Step 7.1 : Update environment variable – PATH
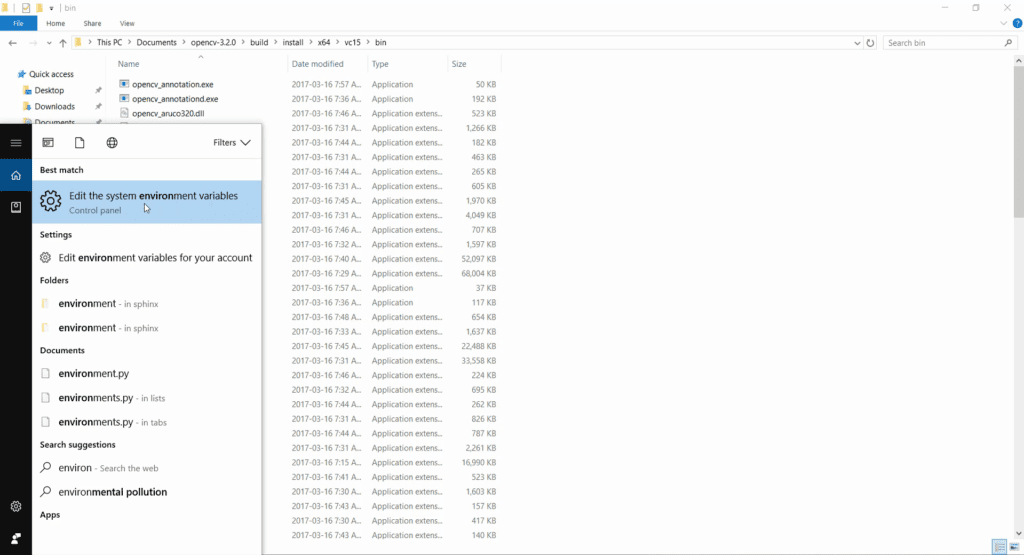
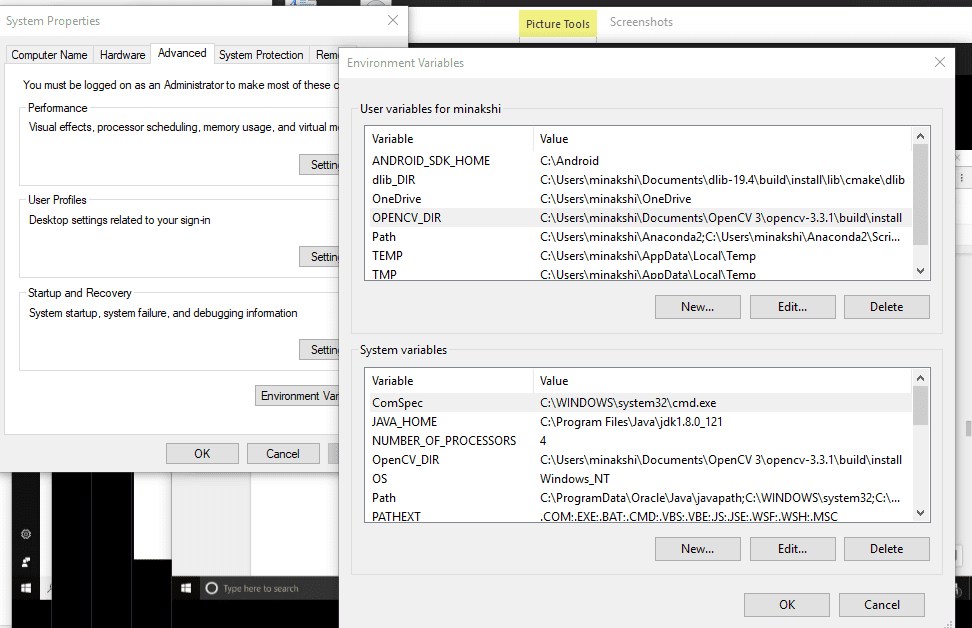
First of all we will add OpenCV dll files’ path to our system PATH. Press Windows Super key, search for “environment variables”
Click Environment Variables in System Properties window
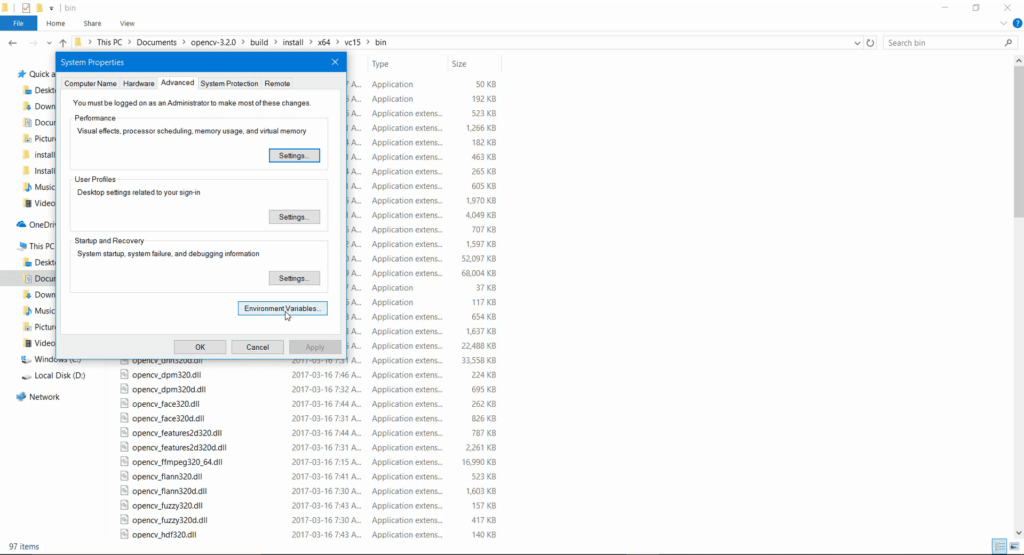
Under System Variables, Select Path and click edit
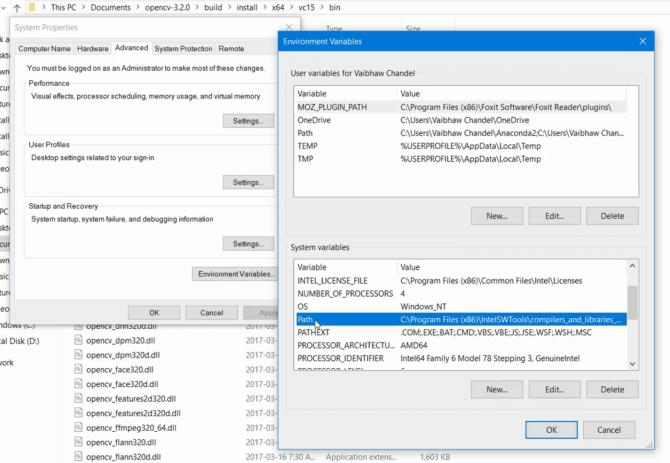
Click New, and give path to OPENCV_PATH\build\install\x64\vc14\bin and click Ok. Depending upon where you have kept opencv-3.3.1 folder and what version of Visual Studio you used to compile OpenCV, this path would be different. In my case full path is:
C:\Users\Vaibhaw Chandel\Documents\opencv-3.3.1\build\install\x64\vc14\bin
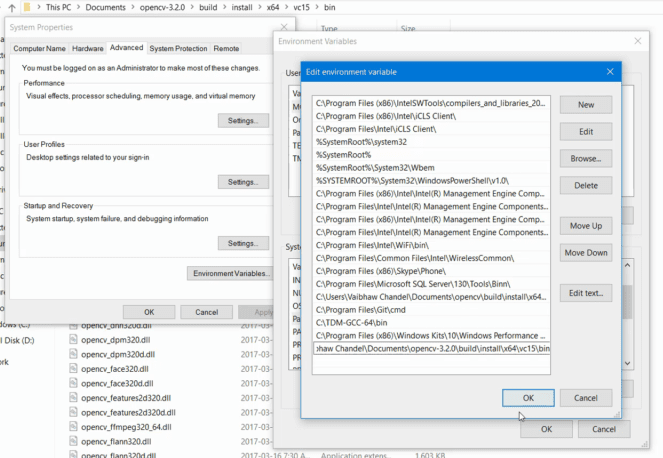
Now click Ok to save. Don’t close the Environment Variables window yet. We will update OPENCV_DIR variable in next step.
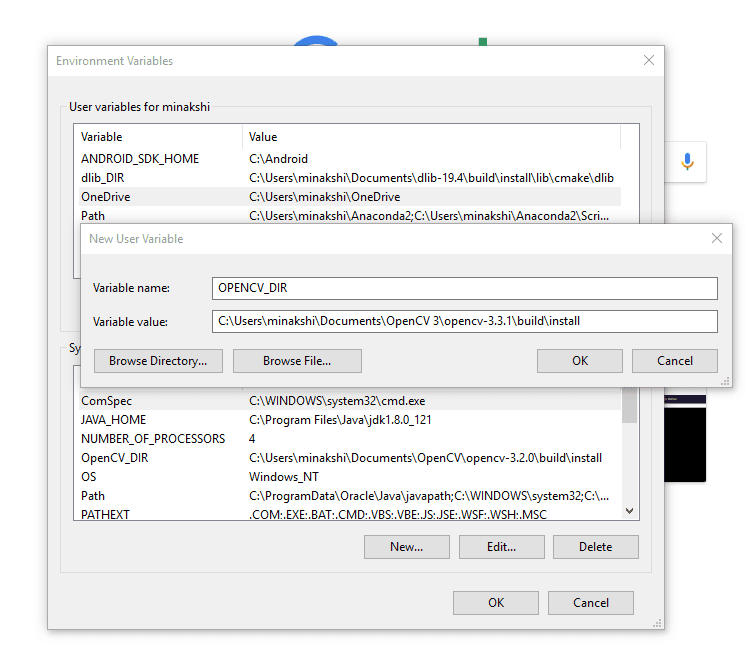
Step 7.2 : Update user environment variable – OPENCV_DIR
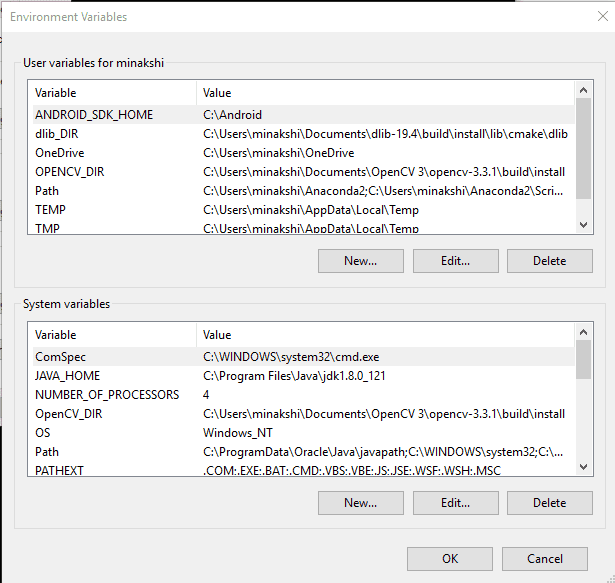
Click New in “User Variables” (upper half of right hand side window). Under variable name write OPENCV_DIR and under variable value write OPENCV_PATH\build\install.
As you can see in my case variable value is:
C:\Users\Vaibhaw Chandel\Documents\opencv-3.3.1\build\install
This directory contains file “OpenCVConfig.cmake”. This is used by CMake to configure OpenCV_LIBS and OpenCV_INCLUDE_DIRS variables to generate project files.
Now click ok to save and close environment variables window.
Note: If you have an open Command Prompt/Power Shell window before these values were updated, you have to close and open a new Command Prompt/Power Shell window again.
Step 8: Testing C++ code
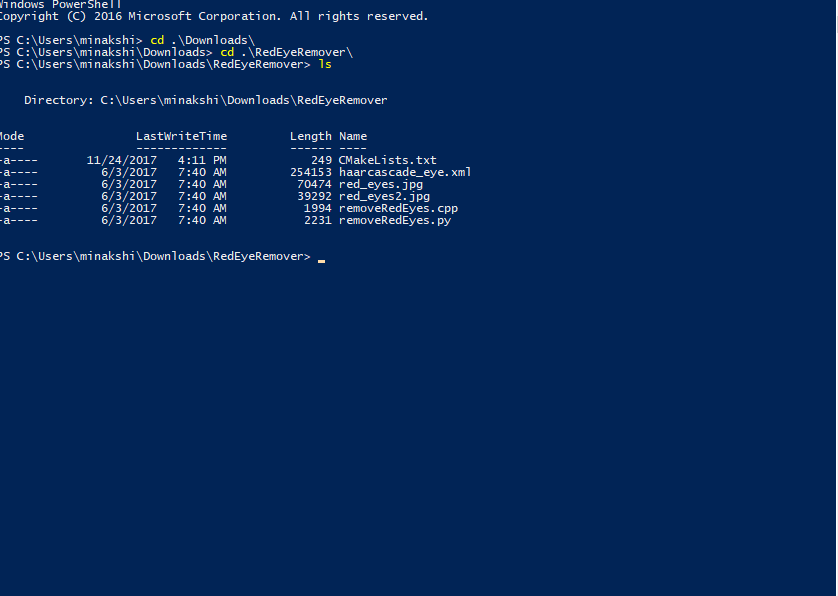
Download this redEyeRemover code and extract it into a folder.
Now open Windows Power Shell and navigate to this directory.
Create a file named CMakeLists.txt and put this code in this file.
This file has information about opencv’s include and library paths.
Now we will compile removeRedEyes.cpp and run it.
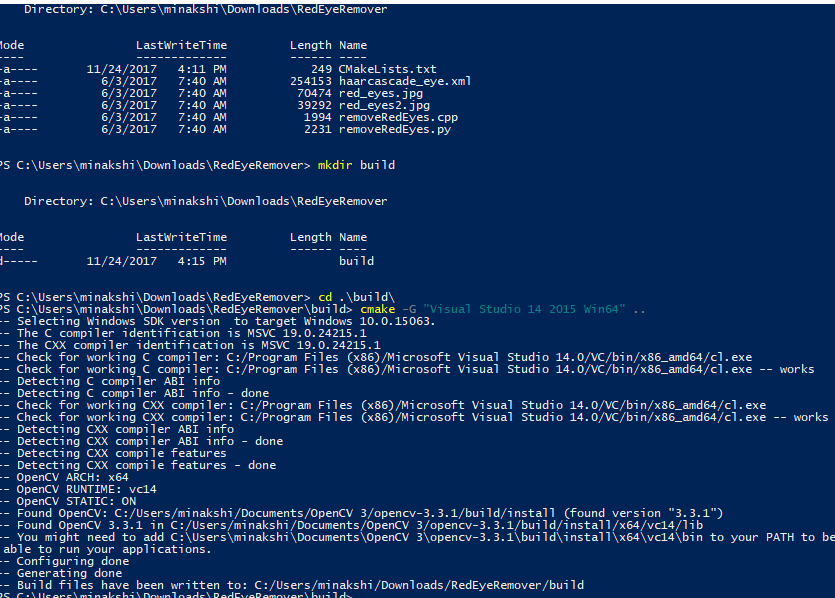
You can see in the screenshot below that CMake found the OpenCV on my machine.
Now we will build our application.
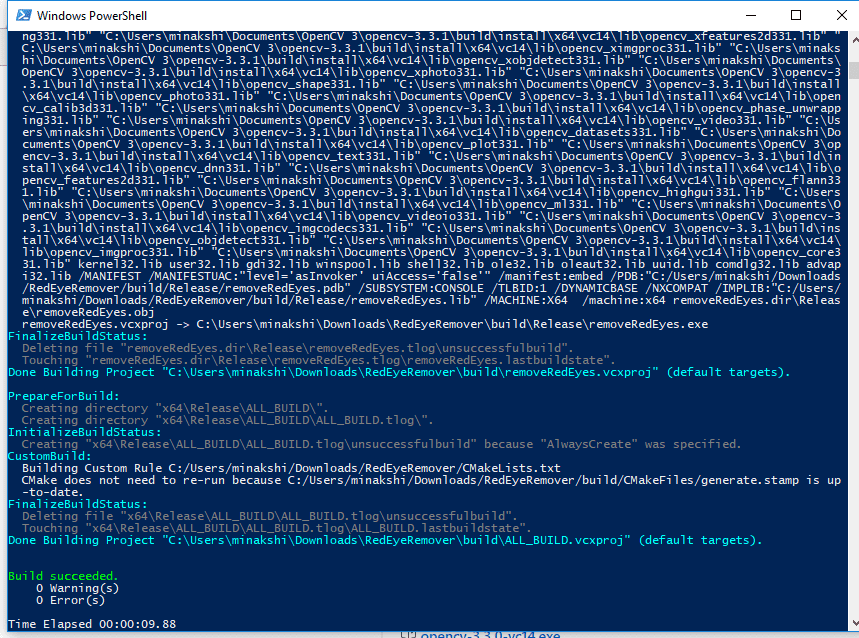
Since our C++ code assumes that jpg files are in the current directory, we will move to directory RedEyeRemover and run removeRedEyes.exe file from there.
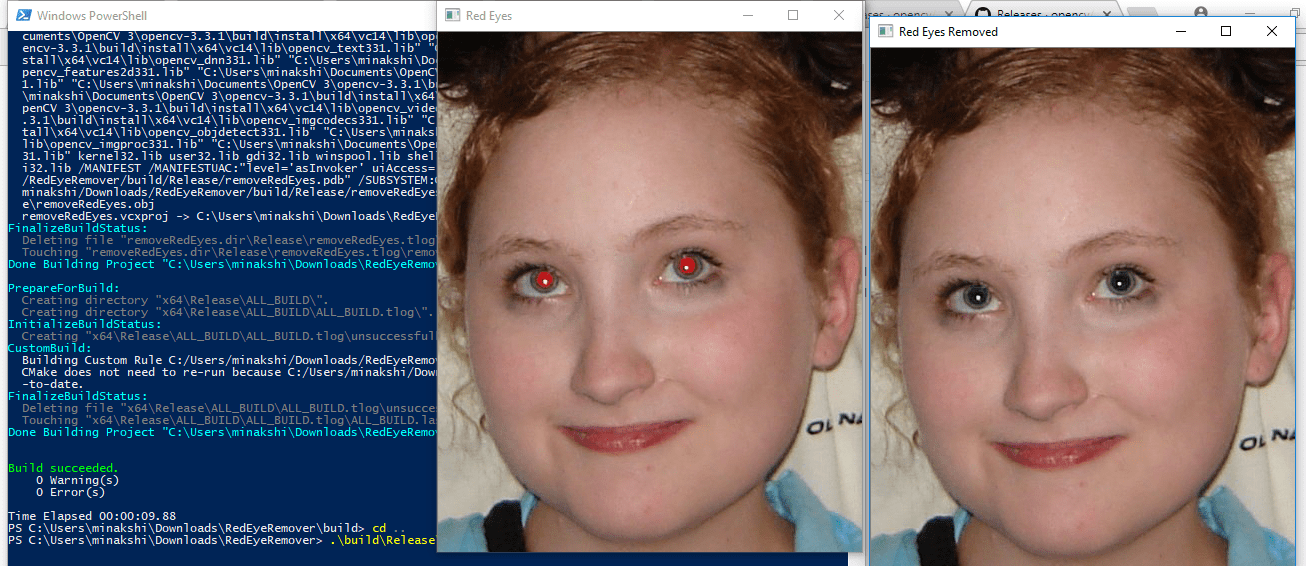
After running the application you will see two image windows, one with red eyes and another with black eyes.
Step 9: Testing Python code
Step 9.1 : Quick check
Quick way to check whether OpenCV for Python is installed correctly or not is to import cv2 in python interpreter.
Open command prompt in Windows, run python command. This will open Python interpreter. Run these two commands
Anaconda comes with a feature-rich Python interpreter called IPython. I tested these commands in IPython.
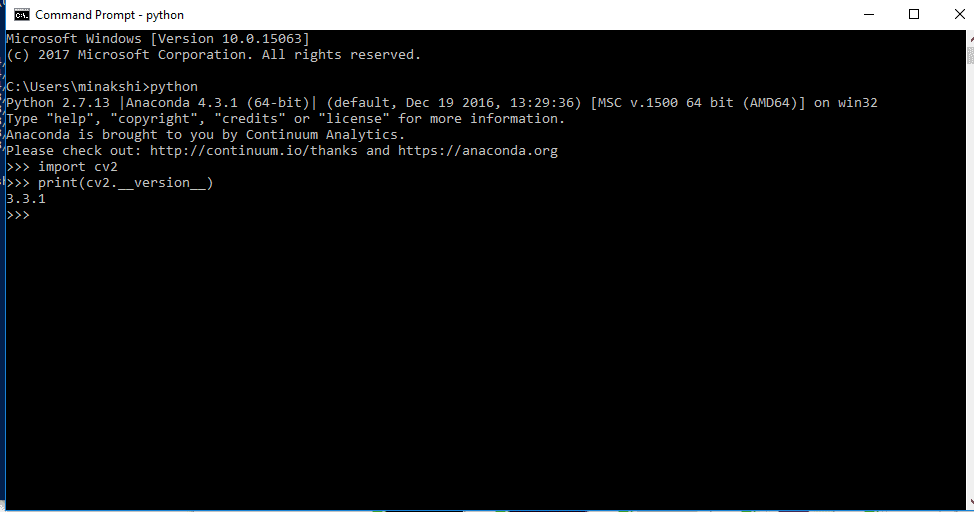
If OpenCV for Python is installed correctly, running command “import cv2” will give no errors. If any error comes up it means installation failed.
Step 9.2 : Testing redEyeRemover application
Open Windows Power Shell and navigate to directory where you have extracted RedEyeRemover.zip
Now run python code like this:
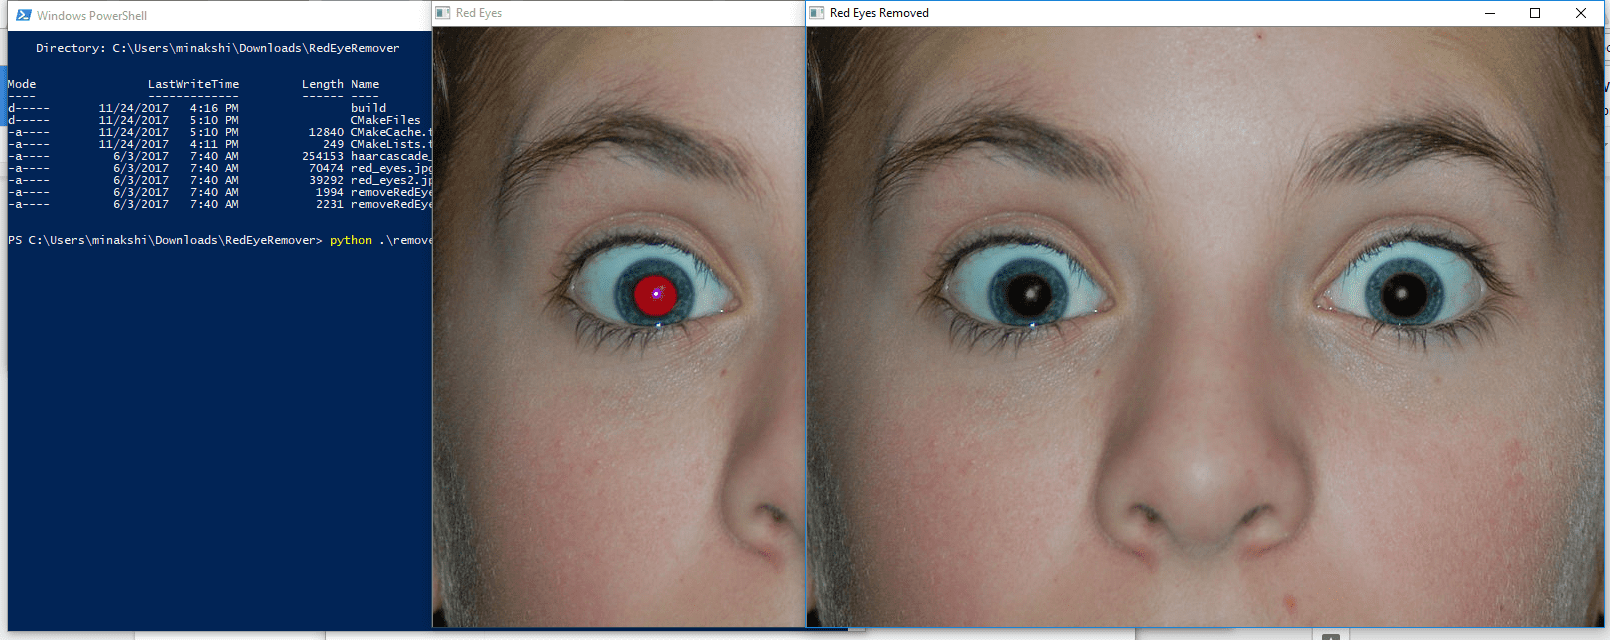
If the program runs successfully, you will see two image windows one with red-eyes other with black eyes.


