- Installation Guide
- Installation
- Windows
- Linux
- macOS
- Setup Overview
- Files in the Distribution
- Setup the Database
- Setup the Server
- Autosetup
- Admin Console
- Running Openfire on Windows
- Windows Service
- Custom Parameters
- Running Openfire in Linux/Unix
- Custom Parameters
- Plugins
- Installing Plugins
- Downloads
- Openfire 4.6.4
- Spark 2.9.4
- Smack 4.4.2
- Tinder 1.3.0
- Whack 2.0.1
- XIFF 3.1.0
- SparkWeb 0.9.0
- Community Snapshot
- Special Thank You!
- In your words
- Установка и настройка Openfire на Ubuntu Server
- Подготовка сервера
- 1. Системные требования
- 2. Безопасность
- Установка JAVA
- Загрузка и установка пакета для Openfire
- Настройка базы данных
- Установка MariaDB и коннектора для JAVA
- Создание и настройка базы для Openfire
- Установка Openfire
- Установка и подключение клиента
- Установка плагинов
- Интеграция с Active Directory
- Аутентификация на основе групп
- Смена домена
Installation Guide
Openfire is a powerful instant messaging (IM) and chat server that implements the XMPP protocol. This document will guide you through installing Openfire. For a full list of features and more information, please visit the Openfire website: http://www.igniterealtime.org/projects/openfire/
Installation
Windows
Select Openfire installer that is better suiting you (with or without Java JRE, x86 or x64). Run the installer. The application will be installed to C:\Program Files\Openfire by default.
Note: On Windows systems we suggest using a service to run Openfire (read the Windows Service section below). When using Openfire Launcher on Windows Vista or newer with UAC protection enabled, it has to be run with Run as administrator option, to be able to write changes to config and embedded database (if used) stored in C:\Program files\Openfire\ folder. If Openfire is running via launcher without Run as administrator option from Program files, it can’t get proper permissions to write changes. It shows errors (in red) when running the launcher and during the setup will require the current password for the administrator account (although this is a new installation and normally it doesn’t ask for it). This is an effect of missing permissions and Openfire not being able to initialize the database and other resources.
Since 4.1.5 Openfire installs and runs the service automatically (also opens the browser and loads the web setup page). The launcher (if one wants to use it) is also made to run in elevated mode, so one don’t need to run it as administrator manually. But you shouldn’t use the launcher, if the service is running. Because this will create a conflict.
Linux
Choose one of the provided installers (x86 or x64, with or without Java JRE, rpm, deb or tar.gz).
If using rpm, run it using your package manager to install Openfire to /opt/openfire:
rpm -ivh openfire_X_Y_Z.rpm
If using deb, run it to install Openfire to /usr/share/openfire:
dpkg -i openfire_X_Y_Z.deb
If using the tar.gz, extract the archive to /opt or /usr/bin:
tar -xzvf openfire_X_Y_Z.tar.gz
mv openfire /opt
macOS
Install Openfire using dmg installer. This should install Openfire into /usr/local/openfire. Then you can run it via cmd or with the launcher.
Note: some Openfire installers do not contain a bundled Java runtime (JRE). Therefore, you must have JDK or JRE installed on your system. Openfire 4.3 (also 4.2 and older versions) requires Java 8. Starting with 4.4 version Openfire also supports Java 11. You can check your java version by typing «java -version» at the command line. We suggest using OpenJDK, which is usually provided as a package on Linux or you can download it for various platforms from AdoptOpenJDK.
Setup Overview
To complete the installation of Openfire, you’ll need to perform each of the following steps:
- Database — if you choose to use an external database, you must prepare your database for Openfire.
- Setup — Use the built-in web-based setup tool to setup and verify the server configuration.
- Admin Console — use the web-based admin tool to manage the server.
This document also includes information on:
Files in the Distribution
The files in your distribution should be as follows (some sub-directories omitted for brevity):
- The conf directory is where Openfire stores configuration files.
- The bin directory contains the server executables. Depending on which distribution you installed, different executables will be available.
- The jre directory contains a Java runtime that is bundled with the Windows and RPM versions of Openfire.
- The lib directory contains libraries necessary for running Openfire.
- The plugins directory contains server plugins. By default, Openfire ships with a web-based admin console plugin.
- The resources/database directory contains SQL schema files to create new Openfire databases, as well as upgrade scripts for existing installations.
- The resources/security directory is where Openfire maintains keystores to support SSL connection security.
- The documentation directory contains server documentation.
Setup the Database
Openfire can store its data in an embedded database or you can choose to use an external database such as MySQL or Oracle. If you would like to use an external database, you must prepare it before proceeding with installation. View the database setup documentation for more information.
Setup the Server
A web-based, «wizard» driven setup and configuration tool is built into Openfire. Simply launch Openfire (platform-specific instructions below) and use a web browser to connect to the admin console. The default port for the web-based admin console is 9090. If you are on the same machine as Openfire, the following URL will usually work: http://127.0.0.1:9090. Initial setup and administration can also be done from a remote computer using LAN IP address instead or hostname if it is resolvable by the remote computer. Windows Server administrators should add http://127.0.0.1 address to Internet Explorer’s Trusted Sites list, if Enhanced Security configuration is enabled in Internet Explorer. Otherwise they will get a blank screen.
Autosetup
As an alternative to the web-based «wizard» driven setup described above, Openfire can be configured by provisioning it with a specially crafted openfire.xml file.
If true<>/setup> does not exist in openfire.xml (i.e. setup is not complete, and a block does exist called with a true property inside it, that looks like this:
Then setup will be run on first launch, and the section will be deleted from openfire.xml
Note that autosetup provides less options to setup Openfire as compared to using the setup wizard.
Admin Console
After completing the above steps, Openfire will be configured and you can use the web-based admin console to administer the server. The URL should be the same as you used to setup the server unless you changed the port during the setup.
Running Openfire on Windows
Since 4.1.5 version Openfire automatically installs and runs the service (and opens the browser with the web setup page). But you can also use the launcher, if you need to (service has to be stopped before running the launcher). If you used the Openfire installer, a shortcut for starting the graphical launcher is provided in your Start Menu. Otherwise, run openfire.exe in the bin/ directory of your Openfire installation. A button on the launcher allows you to automatically open your web browser to the correct URL to finish setting up the server:
Windows Service
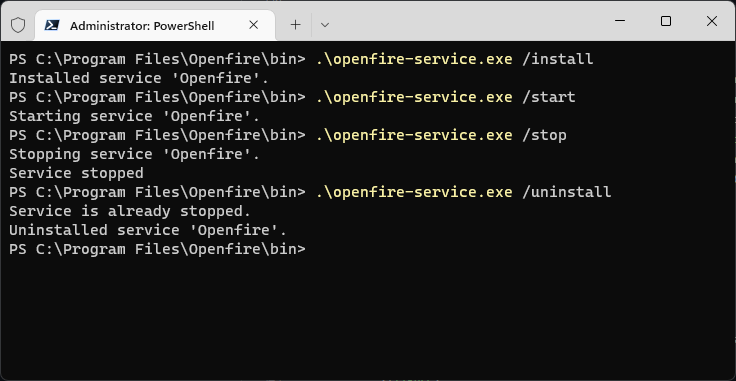
As of 4.1.5 Openfire installs the service automatically. But if you are using older version or want to reinstall the service, you can use the openfire-service.exe executable in the bin directory of the installation to install or uninstall the service.
From a console window, you can run the following commands:
- openfire-service /install -- installs the service.
- openfire-service /uninstall -- uninstalls the service.
- openfire-service /start -- starts the service
- openfire-service /stop -- stops the service.
You can also use the Services tool in the Windows Control Panel to start and stop the service.
Note: the graphical launcher is not compatible with the Windows service. If you install the service, you should use service controls as described above to control the server rather than the graphical launcher.
Upgrading Note: you should stop Openfire service before running the installer to upgrade to the newer version. Starting with 4.1.5 version Openfire will automatically stop and reinstall the service when upgrading with the installer.
Custom Parameters
Advanced users may wish to pass in parameters to the Java virtual machine (VM) to customize the runtime environment of Openfire. You can do this by creating openfire.vmoptions files in the bin/ directory of your Openfire installation. For the Windows service, you'd create a new text file called openfire-service.vmoptions. Each parameter to the VM should be on a new line of the file. For example, to set the minimum heap size to 512 MB and max VM heap size to 1024 MB, you'd use: To create parameters for the normal launcher, create a file called openfired.vmoptions (since the openfire.exe launcher invokes the openfired.exe executable to actually start the server).
Running Openfire in Linux/Unix
If you are running on a different Linux/Unix varient, and/or you have used the .tar.gz 'installer', you can start and stop Openfire using the bin/openfire script in your Openfire installation:
# ./openfire
Usage: ./openfire
# ./openfire start
Starting openfire
If you would like to install Openfire as a service, two scripts are provided in the bin/extra directory:
- redhat-postinstall.sh -- automatically installs Openfire as a service on Red Hat. It does so by creating a "jive" user and then copying the openfired script to your init.d directory. This script must be run as root. Please see the comments in the script for additional information.
- openfired -- script to run Openfire as a service. You must manually configure this script. See the comments in the script for additional details.
It is not recommended that you use either of these scripts if you installed via RPM. The RPM has already taken care of what these scripts take care of.
Custom Parameters
Advanced users may wish to pass in parameters to the Java virtual machine (VM) to customize the runtime environment of Openfire. If you installed via RPM, you can customize this by editing /etc/sysconfig/openfire and looking at the OPENFIRE_OPTS option. If you installed via .tar.gz, you will need to tweak your startup script to fit your needs.
Plugins
Installing Plugins
If you download a plugin from inside the Openfire administration console, it will automatically be installed. If you manually download the plugin (packaged as a .jar file), you can deploy it by copying the plugin file to the plugins/ directory of your Openfire installation. A plugin monitor will automatically extract the plugin into a directory and install the plugin in Openfire. You may also use the "upload plugin" feature in the admin console (under the Plugins tab) to load a plugin from your local file system to the server.
Note: For nearly all plugins, a restart of the Openfire server software is not required. You should be able to install and remove plugins on-demand without impacting Openfire.
Источник
Downloads

Openfire 4.6.4
Openfire (formerly Wildfire) is a cross-platform real-time collaboration server based on the XMPP protocol. Read about the name change
Choose your platform:

Spark 2.9.4
Cross-platform real-time collaboration client optimized for business and organizations.
Choose your platform:

Smack 4.4.2
Easy to use Java XMPP client library.
Choose your platform:

Tinder 1.3.0
A Java based XMPP library, providing an implementation for XMPP stanzas and components.
Choose your platform:

Whack 2.0.1
Easy to use Java XMPP component library.
Choose your platform:

XIFF 3.1.0
Flash XMPP client library (discontinued).
Choose your platform:

SparkWeb 0.9.0
Flash based real-time collaboration web client (discontinued).
Choose your platform:
Community Snapshot
Special Thank You!
Thank you EJ Technologies for an open source license provided to this project to help build installers to distribute.

In your words
Openfire is a fully featured XMPP server and its extensible plugin based architecture provides us with a valuable feature platform. Its active development team has created a community of users that we are happy to be a part of! John Atherton, CTO & Co-founder, Surevine
Источник
Установка и настройка Openfire на Ubuntu Server
Openfire — сервер на базе XMPP для организации чата, и позволяющий обмениваться мгновенными сообщениями. В данной инструкции разберем его установку на Linux. Инструкция протестирована на Ubuntu 18.04.
Подготовка сервера
1. Системные требования
Требования к программному продукту, в основном, программные:
| Компонент | Требования |
|---|---|
| Операционная система | Приложение является кроссплатформенным и его можно установить на различные операционные системы — Windows, Linux (CentOS, Ubuntu, Debian, Red Hat и так далее), FreeBSD, MacOS. |
| Программная платформа | Openfire разработан на базе JAVA, поэтому необходимо наличие соответствующей платформы. |
| СУБД | Поддерживаются MySQL/MariaDB, PostgreSQL, MS SQL Server, Oracle Database, IBM DB2, Adaptive Server Enterprise, HSQLDB (встраиваемая). |
| Аппаратная часть | Не критична — openfire не требует много ресурсов для своей работы. |
2. Безопасность
Если мы используем фаервол на Ubuntu, то необходимо открыть порты для Openfire (9090, 9091) и клиента xmpp (5222):
iptables -A INPUT -p udp --match multiport --dports 9090,9091 -j ACCEPT
iptables -A INPUT -p tcp --match multiport --dports 5222,9090,9091 -j ACCEPT
* где порт 5222 — подключение клиента к серверу; 9090 для соединения по HTTP, 9091 — HTTPS.
apt-get install iptables-persistent
Установка JAVA
Openfire написан на языке JAVA и для своей работы требует установки соответствующей платформы.
В Ubuntu данную установку можно выполнить из репозитория — для этого вводим команду:
apt-get install openjdk-8-jdk
После окончания установки можно ввести команду:
Она должна вернуть, примерно, следующее:
openjdk version "1.8.0_242"
OpenJDK Runtime Environment (build 1.8.0_242-8u242-b08-0ubuntu3
18.04-b08)
OpenJDK 64-Bit Server VM (build 25.242-b08, mixed mode)
Для корректной работы JAVA мы должны настроить переменные окружения — для этого смотрим путь до бинарника java:
update-alternatives --config java
Мы должны увидеть что-то на подобие:
There is only one alternative in link group java (providing /usr/bin/java): /usr/lib/jvm/java-8-openjdk-amd64/jre/bin/java
Nothing to configure.
В данном примере показан путь до исполняемого файла java (/usr/lib/jvm/java-8-openjdk-amd64/jre/bin/java). Открываем файл:
. и добавляем новой строкой:
После выполняем команду:
Проверяем, что переменная создалась:
Мы должны увидеть:
Загрузка и установка пакета для Openfire
Для установки XMPP-сервера необходимо загрузить пакет DEB — для этого переходим на официальную страницу загрузки Openfire. В открывшемся окне выбираем загрузку приложения для Linux и переходим по ссылке для загрузки deb:

На открывшейся странице копируем прямую ссылку на загрузку openfire:

Воспользовавшись ссылкой, загружаем установочный пакет:
wget -O openfire.x86_64.deb https://www.igniterealtime.org/downloadServlet?filename=openfire/openfire_4.5.1_all.deb
* в данном примере мы сохраним скачанный файл под именем openfire.x86_64.deb. На момент написания инструкции последняя версия была 4.5.1.
Устанавливаем скачанный пакет:
dpkg -i openfire.x86_64.deb
Разрешаем автозапуск сервиса:
systemctl enable openfire
Настройка базы данных
В качестве СУБД установим и настроим MariaDB.
Установка MariaDB и коннектора для JAVA
Для установки сервера баз данных вводим:
apt-get install mariadb-server
После переходим на страницу https://dev.mysql.com/downloads/connector/j/ — выбираем операционную систему и ее версию (в нашем примере, Ubuntu 18.04) - кликаем по Download:

На следующей странице копируем ссылку на скачивание коннектора:

С помощью скопированной ссылки загружаем на сервер пакет:
* в данном примере мы загружаем коннектор версии 8.0.19.
. и устанавливаем его:
dpkg -i mysql-connector-java_8.0.19-1ubuntu18.04_all.deb
Разрешаем автозапуск сервиса:
systemctl enable mariadb
Зададим пароль для mysql root-пользователя:
mysqladmin -u root password
* система дважды запросит пароль, который мы должны задать.
Создание и настройка базы для Openfire
Подключаемся к установленной базе:
* в качестве пароля вводим тот, что задали при установке.
Создаем базу данных:
> CREATE DATABASE openfire;
* мы создадим базу с именем openfire.
Создаем пользователя и дадим ему права на созданную базу:
> GRANT ALL PRIVILEGES ON openfire.* TO openfire@localhost IDENTIFIED BY 'openfirepass';
* в данном примере будет создан пользователь openfire, которому можно подключаться с локального компьютера (localhost); доступ пользователю будет предоставлен на базу openfire; пароль пользователя — openfirepass.
Подключимся к созданной базе:
. и загрузим в нее данные из файла openfire_mysql.sql (поставляется с Openfire):
Чтобы убедиться в загрузке данных, выполняем команду:
* мы должны увидеть список таблиц.
Отключаемся от СУБД:
Установка Openfire
Выполняем установку и конфигурирование Openfire через веб-интерфейс. Запускаем браузер и переходим по ссылке http:// :9090 — откроется страница установки.
Выбираем русский язык и нажимаем Continue:

В настройках задаем серверу имя домена и полное имя сервера:

. и кликаем по Продолжить.
Устанавливаем Стандартное подключение к базе данных — Продолжить:

Задаем настройки подключения к базе:

* в данном примере мы:
- Выбрали подключение к базе MySQL
- В строке jdbc:mysql://HOSTNAME:3306/DATABASENAME?rewriteBatchedStatements=true&characterEncoding=UTF-8&characterSetResults=UTF-8 заменили
- HOSTNAME — сервер MySQL. Задаем локальный адрес 127.0.0.1
- DATABASENAME — имя базы данных. Прописываем openfire.
- + добавили &useJDBCCompliantTimezoneShift=true&useLegacyDatetimeCode=false&serverTimezone=UTC — в противном случае сервер будет выдавать ошибку при попытке подключиться к базе.
- Итого:jdbc:mysql://127.0.0.1:3306/openfire?rewriteBatchedStatements=true&characterEncoding=UTF-8&characterSetResults=UTF-8&useJDBCCompliantTimezoneShift=true&useLegacyDatetimeCode=false&serverTimezone=UTC
- В настройках имени пользователя и пароль прописываем логин и пароль пользователя, который создавали для подключения к базе openfire (openfire/openfirepass).
После кликаем по Продолжить. На следующей странице задаем настройки профиля — просто оставляем положение по умолчанию и нажимаем Продолжить:

* если нам необходима интеграция с Active Directory, переключаемся на Сервер каталогов (LDAP) и выполняем настройку по инструкции ниже.
На последнем шаге создаем учетную запись администратора. Для этого вводим адрес почты и пароль:

. и нажимаем Продолжить.
Установка завершена — переходим в консоль, кликнув по Вход в консоль администратора:

Чтобы зайти в openfire используем логин admin и пароль, который задали после установки Openfire.
Установка и подключение клиента
Для примера, установим jabber-клиент Spark, который разработан тем же разработчиком, что и сам Openfire. Переходим на страницу загрузки Spark и скачиваем клиента, например, для Windows:

Дожидаемся загрузки файла и устанавливаем приложение, отвечая на вопросы мастера установки (можно оставить все по умолчанию).
После запускаем программу - кликаем по Дополнительно (1) - снимаем галочку Автоматически найти сервер и порт (2) и прописываем адрес сервера (3) - устанавливаем галочки для Accept all certificates. и Disable certificate hostname verification . (4) - OK (5):

Вводим данные для входа на сервер и нажимаем Войти:

. клиент должен подключиться к серверу.
Установка плагинов
Установка плагина может быть выполнена из панели управления Openfire. Для этого переходим в Плагины - Доступные плагины - выбираем плагин для установки, например Bookmarks (плагин для хранения URL и закладок группового чата):

Справа от плагина кликаем по кнопке установки плагина:

Система автоматически загрузит и установит плагин.
Интеграция с Active Directory
Интеграция с Active Directory должна настраиваться в момент веб-установки сервера. Если у нас уже установлен Openfire, и мы хотим переключиться на использование LDAP, открываем конфигурационный файл:
systemctl restart openfire
Ждем секунд 10 (приложение перезапускается долго).
Открываем в браузере адрес http:// :9090 — откроется мастер установки. Проходим снова по всем шагам до настройки профилей и выбираем Сервер каталогов (LDAP):

1) Откроется страница настройки профилей LDAP. Заполняем поля:

- Из списка Тип сервера выбираем Active Directory.
- Protocol выбираем либо ldap, либо ldaps (если наш Active Directory поддерживает запросы с шифрованием).
- В качестве хоста прописываем имя контроллера домена или целиком весь домен.
- База DN — корневая директория LDAP, откуда будет выполняться поиск объектов.
- Администратор DN — учетная запись в LDAP с минимальными правами (на чтение объектов AD). Правильнее всего создать отдельную запись и использовать ее.
Кликаем по Тестовые настройки — мы должны увидеть отчет об успешном прохождении тестирования:

2) Нажимаем Сохранить и продолжить — откроется страница с настройками полей и атрибутов. Данные атрибуты должны соответствовать атрибутам Active Directory. В моем случае пришлось заменить jpegPhoto на thumbnailPhoto и homePostalAddress на physicalDeliveryOfficeName. Правильные атрибуты можно посмотреть в оснастке Active Directory - пользователи и компьютеры (на вкладке Редактор атрибутов любого пользователя).
Нажимаем Тестовые настройки - откроется окно, в котором можно загрузить информацию от случайных профилей в AD и убедиться, что нужные нам данные загружаются корректно. После нажимаем Сохранить и продолжить.
3) На последнем шаге настройки интеграции с Active Directory оставляем предложенные настройки:

. и нажимаем Тестовые настройки — мы должны увидеть информацию о группах, которую сможет получить Openfire. Кликаем Сохранить и продолжить.
Конфигурирование LDAP завершено. Теперь добавим администраторов системы, которые смогут управлять сервером из панели управления:

Обратите внимание, что доступ к панели управления под встроенным администратором Openfire будет невозможен после смены профилей на использование LDAP. Обязательно добавляем хотя бы одного пользователя, у которого будут привилегии настройки.
Настройка завершена. Пробуем авторизоваться в панели управления под учетной записью администратора, которую мы добавили. После подключаемся клиентом под своей учетной записью в AD.
Аутентификация на основе групп
Если необходимо ограничить пользователей, которые могут подключаться к серверу, можно использовать группы Active Directory. Для этого открываем панель управления Openfire и переходим в раздел Сервер - Настройки сервера и кликаем по кнопке Изменить:

В открывшемся окне переходим к разделу 2. Отображение пользователей - кликаем по Расширенные настройки и добавляем Пользовательский фильтр:

* например, как на изображении выше, можно добавить фильтр (memberOf=cn=Domain Admins,cn=Users,dc=dmosk,dc=local) — это означает, что к серверу смогут подключиться только те пользователи, которые принадлежат группе Domain Admins.
Смена домена
Если появилась необходимость сменить домен в Openfire, выполняем настройку в 2 этапа.
Шаг 1. Настройка в панели управления.
Переходим на вкладку Сервер - Диспетчер сервера - Свойства системы - в поиске параметром находим xmpp.domain:

Справа от параметра кликаем по иконке редактирования:

Внизу появится форма для редактирования параметра — меняем домен на новый и сохраняем новое значение:

Шаг 2. Настройка системы в командной строке.
Открываем конфигурационный файл:
Находим строку с параметром fqdn и меняем в ней домен на новый, например:
Источник


