- How to mount an ISO image/file under Linux
- How to Mount ISO File on Linux
- More about loop devices on Linux
- Procedure to mount ISO file/images under Linux
- How do I unmount the ISO image on Linux?
- How to mount an ISO file using a GUI app on Linux
- How to install furiusisomount app
- Mounting ISO Files using Linux Gnome or KDE GUI
- Conclusion
- How to view images from Linux terminal
- 1) Viewing images from terminal using display command
- 1.a) How to Install ImageMagick?
- 1.b) Viewing images with display command
- 2) How to display images from the terminal using fim command
- 2.a) Installing fim in Ubuntu/Debain
- 2.b) Viewing images with fim
- Closing Notes
How to mount an ISO image/file under Linux
H ow do you mount ISO file on Linux using the CLI and GUI app? First, try to understand an ISO image. It is an archive file (disk image) of an optical disc using a conventional ISO (International Organization for Standardization) format. ISO image files typically have a file extension of .ISO. The name “ISO” comes from the ISO 9660 file system used with CD-ROM or DVD media, but an ISO image can also contain UDF file system because UDF is backward-compatible to ISO 9660. You can mount an ISO file or images via the loop device under Linux. It is possible to specify transfer functions (for encryption/decryption or other purposes) using loop device. This page explains how to mount ISO files on Linux.
How to Mount ISO File on Linux
- Create the mount point directory on Linux: sudo mkdir /mnt/iso
- Mount the ISO file on Linux: sudo mount -o loop /path/to/my-iso-image.iso /mnt/iso
- Verify it, run: mount OR df -H OR ls -l /mnt/iso/
- Unmount the ISO file using: sudo umount /mnt/iso/
More about loop devices on Linux
The loop device is a block device that maps its data blocks not to a physical device such as a hard disk or optical disk drive, but to the blocks of a regular file in a filesystem or to another block device. This can be useful for example to provide a block device for a filesystem image stored in a file, so that it can be mounted with the mount command.
A loop device is a pseudo-device that makes a file accessible as a block device. Loop devices are often used for CD ISO images and floppy disc images. Mounting a file containing a filesystem via such a loop mount makes the files within that filesystem accessible. They appear in the mount point directory using following Linux commands. So, how do you mount an ISO image file under Linux? You need to use the mount commandas follows:
Let us see all commands and examples in details.
Procedure to mount ISO file/images under Linux
First, you must login as a root user, if not root user then switch to root user using the su command:
$ su —
One can use the sudo command:
$ sudo -i
Next, create the directory i.e. mount point using the mkdir command, run:
# mkdir -p /mnt/disk
Finally, use the mount command as follows to mount iso file called disk1.iso:
# mount -o loop disk1.iso /mnt/disk
OR
# mount -o loop /path/to/disk1.iso /mnt/disk
Verify it with the df command or mount command:
# df -H
# mount
# ls -l /mnt/disk/
Change directory to list files stored inside an ISO image:
# cd /mnt/disk/
# ls -l
To copy files using the cp command:
$ cp file1 file2 /home/vivek/Downloads
Mounting ISO files on Linux using mount command
How do I unmount the ISO image on Linux?
Use the following command to unmount the ISO file/image on Linux:
$ sudo umount /mnt/disk/
OR
$ sudo umount /path/to/disk1.iso
Verify it:
$ df -H
$ mount
$ ls -l /mnt/disk/
How to mount an ISO file using a GUI app on Linux
Not a fan of the CLI? Try image management utility called furiusisomount:
Furius ISO Mount is a simple application for mounting ISO, IMG, BIN, MDF and NG image files even without burning them to disk. It provides the following features:
1. Automatically Mounts ISO, IMG, BIN, MDF and NRG image files.
2. Creates a mount point in your home directory.
3. Unmounts the Image files and mnd more.
How to install furiusisomount app
Type the following apt-get command/apt command on a Debian/Ubuntu/Mint Linux:
$ sudo apt install furiusisomount
Start furiusisomount:
$ furiusisomount &
Sample outputs:
Mount an ISO file on Linux using Furius ISO Mount GUI app
Just select an ISO image an click on the mount button. Open your file browser:
- No ads and tracking
- In-depth guides for developers and sysadmins at Opensourceflare✨
- Join my Patreon to support independent content creators and start reading latest guides:
- How to set up Redis sentinel cluster on Ubuntu or Debian Linux
- How To Set Up SSH Keys With YubiKey as two-factor authentication (U2F/FIDO2)
- How to set up Mariadb Galera cluster on Ubuntu or Debian Linux
- A podman tutorial for beginners – part I (run Linux containers without Docker and in daemonless mode)
- How to protect Linux against rogue USB devices using USBGuard
Join Patreon ➔
View mounted iso image in Ubuntu Linux file manager
Mounting ISO Files using Linux Gnome or KDE GUI
Conclusion
You learned how to use the mount, unmount command and GUI apps for mounting the ISO9660 images or files. For more information see:
| Category | List of Unix and Linux commands |
|---|---|
| Documentation | help • mandb • man • pinfo |
| Disk space analyzers | df • duf • ncdu • pydf |
| File Management | cat • cp • less • mkdir • more • tree |
| Firewall | Alpine Awall • CentOS 8 • OpenSUSE • RHEL 8 • Ubuntu 16.04 • Ubuntu 18.04 • Ubuntu 20.04 |
| Linux Desktop Apps | Skype • Spotify • VLC 3 |
| Modern utilities | bat • exa |
| Network Utilities | NetHogs • dig • host • ip • nmap |
| OpenVPN | CentOS 7 • CentOS 8 • Debian 10 • Debian 8/9 • Ubuntu 18.04 • Ubuntu 20.04 |
| Package Manager | apk • apt |
| Processes Management | bg • chroot • cron • disown • fg • glances • gtop • jobs • killall • kill • pidof • pstree • pwdx • time • vtop |
| Searching | ag • grep • whereis • which |
| Shell builtins | compgen • echo • printf |
| Text processing | cut • rev |
| User Information | groups • id • lastcomm • last • lid/libuser-lid • logname • members • users • whoami • who • w |
| WireGuard VPN | Alpine • CentOS 8 • Debian 10 • Firewall • Ubuntu 20.04 |
Comments on this entry are closed.
Cheers, worked like a charm 🙂
Quick comment:
You need the kernel module loop for it; people that get the error about it in mount should get the latest copy of the linux source and proceed to compile the correct module which is under block devices
Other than that it works 😉
Just what i needed, mahalo!
Thanks! This was very very easy to find and follow. I’m new to linux and this is the reason I made the swicth, the help that everyone give make learning linux easy and fun. Thank you for your time, thank you!
sweet! worked cleanly, no stupid paid software for windows needed to do such a simple task!
Looks like we cant mount it for RW. Bloody well then.
You’d have to finalize the RW disc so that it becomes an iso image. You can still erase the disc later.
I think he means mounting the iso file for reading and writing.
This tip was a great help! I only need to read the iso for installations so thanks a heap!
richard, to edit bootable ISO mount it as it’s described here, copy it’s contents to some directory, edit files you need and generate new ISO by command:
sudo mkisofs -o /tmp/new.iso -b isolinux/isolinux.bin -c isolinux/boot.cat -no-emul-boot -boot-load-size 4 -boot-info-table -J -R -V “new iso name” .
Works like a charm. It kept me from Burning a DVD for a computer that didn’t read DVDs. I did a Net Install of Linux over FTP. I copied the File to a Linux FTP Server, mounted the ISO and did an install. Sweet.
But what if I don’t have root? Or am too lazy to su or sudo?
Источник
How to view images from Linux terminal
Linux has many GUI applications for viewing images. But have you ever tried a CLI application to view them or do you know if one exists?
Fortunately, while working with the ImageMagick tool I stumbled upon a command to view an image from the terminal.
The command name is “display”, which is part of the ImageMagick tool. This is a great tool that allows NIX users to view images from the terminal.
Also, I got another great tool called FIM for this purpose. We will show you how to install and use it to view images from the Linux terminal.
These commands use the system’s framebuffer to display images directly from the command line.
1) Viewing images from terminal using display command
ImageMagick is a free and open source, feature-rich, command-line based image manipulation tool. It is used to create, edit, compose, or convert bitmap images.
It can read and write images in a variety of formats (over 200) including PNG, JPEG, GIF, PDF, SVG, etc.
It can resize, mirror, rotate, transform images, adjust image colors, apply various special effects, etc. It also supports batch process, which allow you to process several images at once.
1.a) How to Install ImageMagick?
The ImageMagick package is included in the official repository of most Linux distributions. Use the distribution package manager to install it.
Make a note: Make sure you already have “Development Tools” installed on your Linux system as a prerequisite for this.
For RHEL/CentOS 6/7 systems, use the yum command to install ImageMagick:
For RHEL/CentOS 8 and Fedora systems, use the dnf command to install ImageMagick:
For Debian/Ubuntu systems, use the apt command or apt-get command to install ImageMagick:
For openSUSE systems, use the zypper command to install ImageMagick:
1.b) Viewing images with display command
To view any image file, run the ‘display’ command as follows. You can close the image by pressing the «Esc/q» button.

If you want to open an image with the specified size of the window, use the «-geometry» flag:
You can also input position information of the image with the ‘display’ command. The below command opens your image ‘800’ pixels from the top and ‘800’ pixels from the top left corner of your desktop:
If you want to ‘resize’ the image with the display command, use the following format.
Alternatively, you can use ‘%’ to resize the image:
2) How to display images from the terminal using fim command
FIM is a lightweight global image viewer designed specifically for Linux. But it is not limited to Linux and can be configured to run on other OS such as MS-Windows.
It is highly customizable and scriptable image viewer for users who are familiar with software’s like the VIM text editor.
It displays the image in full screen and can be easily controlled using the keyboard shortcuts. It’s a lightweight tool as it only depends on a few libraries.
It can open many file formats and can display images in the following video modes:
- Graphically, with the Linux framebuffer device
- Graphically, under X/Xorg, using the SDL library
- Graphically, under X/Xorg, using the Imlib2 library
- Rendered as ASCII Art in any textual console, using the AAlib library
The right video mode gets auto-detected or selected at runtime, and may be opted in/out before build at configure time, if desired. FIM stands for Fbi IMproved, which is the fork of the Fbi Image viewer.
2.a) Installing fim in Ubuntu/Debain
FIM can be easily installed on Debian/Ubuntu based systems as the package is available in the distribution official repository. For other distributions, you may need to compile it from the source.
2.b) Viewing images with fim
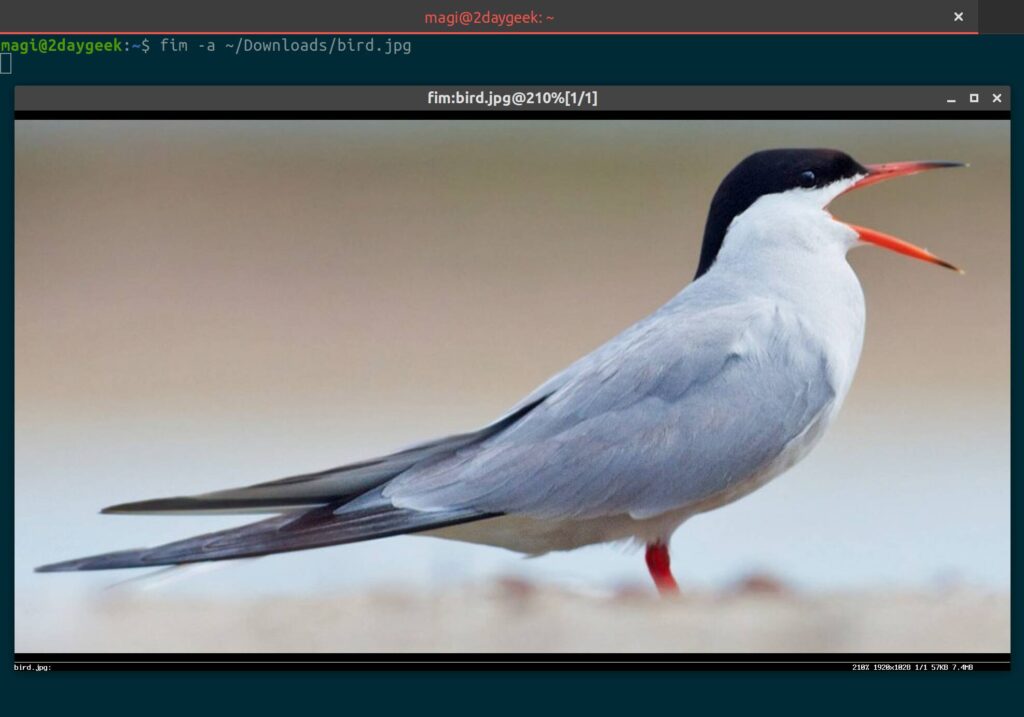
Once installed, you can display an image using the following command:
You can automatically zoom an image using the «-a» option:
If you want to open multiple image files in the current directory, use the wildcard to open them all. Use the “Pageup/Down” keyboard shortcuts to move to the next or previous image:
To view the image in ASCII format, you can use the “-t” flag:
The below keyboard shortcuts allow you to control the images:
- PageUp/Down : Prev/Next image
- +/- : Zoom in/out
- a : Autoscale
- w : Fit to width
- ESC/q : Quit
Closing Notes
In this article, we have explained various CLI commands that can be used to view images on a Linux terminal.
If you have any questions or feedback, feel free to comment below and we will get back to you as soon as we can. Happy Learning!
Источник


