- OpenVAS on Kali GNU/Linux Part 1: How to install OpenVAS
- Installation
- Update packages
- Make sure that haveged is running
- Install Openvas
- Redis
- Run gvm-setup
- Password
- Verify
- Keep your scapdata up-to-date
- Start the openvas services
- First login
- OpenVAS 8.0 Vulnerability Scanning
- Setting up Kali for Vulnerability Scanning
- Starting the OpenVAS services
- Connecting to the OpenVAS Web Interface
- Install OpenVAS (GVM) on Kali 2019
- Install
- Config
- OpenVAS Web Client (Green Security Assistant)
- Task Wizard
- Modify gsad to listen on all interfaces
- OpenVAS Command Line Client (omp or gvm-cli)
- Installing OpenVAS on Kali Linux
- Installing Openvas on Kali Linux
- Verify the Installation
- Password reset
- Starting and stopping OpenVAS
- Configuration for a new target
- Schedule the scanning process
- Creating a Task
- Scoping a New Target
- Assets
- Additional features
- Administration
OpenVAS on Kali GNU/Linux Part 1: How to install OpenVAS
February 28, 2021 6 minute read
OpenVAS is an opensource security scanner it started as a fork of Nessus which went from an opensource project to a closed source scanner.
I always prefer opensource software, for security tools, I even prefer it more… It nice to see/audit where the security data comes from, instead of the “magic” that is used by the close source software.
To scan for missing patches on your systems there are faster/better tools available that can be integrated into your build pipeline more easily. But OpenVAS is still a very nice network security scanner. Relying on one security tool is also not a “best security practice”.
Kali GNU/Linux has become the default Linux distribution for security auditing pen testing, it’s nice to have OpenVAS installed on your Kali GNU/Linux setup. If you just want to have OpenVAS available there is also a (virtual) appliance available from the OpenVAS developers ( Greenbone ).
You’ll find my journey to install OpenVAS on Kali GNU/Linux.
Installation
Update packages
It’s always a good idea to start with an update of your system.
Update the repository database with apt update .
Run apt upgrade to upgrade your packages.
Make sure that haveged is running
During the setup, OpenVAS will create an encryption key to create this key it’s important to have enough random data available. I had an issue (back in 2015) to create this key in the past. For this reason, I always verify that haveged daemon is running on my system when I install OpenVAS.
Install Openvas
Install OpenVAS with apt install openvas .
Redis
OpenVAS comes with its own redis service on Kali GNU/Linux. This redis service is configured to work with OpenVAS correctly.
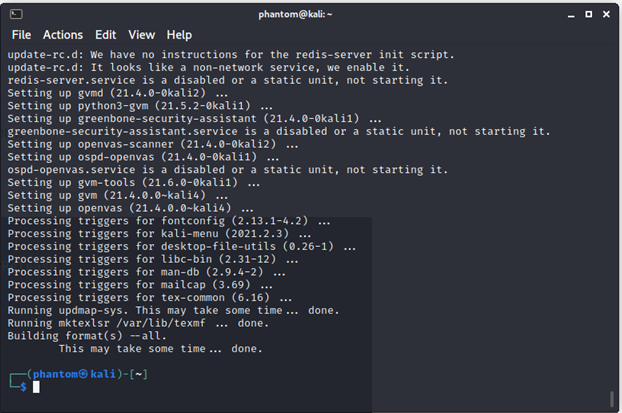
Run gvm-setup
The openvas-setup setup script has been renamed to gvm-setup . This for marketing reasons, GVM stands for Greenbone Vulnerability Manager. As long the software remains opensource I don’t care.
Gvm-setup will set the PostgreSQL database, create the admin user and download/import all the ScapData.
Password
The gvm-setup script will display the password for the admin at the end. If you forgot to write it down you can reset the admin password with the gvmd command as the _gvm . Unfortunately, you need to use the password as an argument. So it recommended to use a shell without a history or to clear the history (or both) after the password update.
Verify
You can verify your installation with gvm-check-setup .
Keep your scapdata up-to-date
It’s import for a security scanner to keep the security data up to date. A security scanner can only know which software packages have vulnerabilities or how to verify for network exploits when it gets the security data from somewhere. For this reason, vendors must publish security data with OVAL — Open Vulnerability and Assessment Language — for example. This way security scanners can use this data to verify system/network for security issues.
To sync the security feeds on OpenVAS you can use the gvm-feed-update command, this will fetch the security data from Greenbone.
Start the openvas services
There is a gvm-start script, this will start the required services and start the web browser to the openvas login url: https://127.0.0.1:9392. This script needs to be executed as root.
For this reason, I just enable/start the required systemd services.
First login
If you rebooted your system or just started the services, you might need a few minutes to let the services startup.
Источник
OpenVAS 8.0 Vulnerability Scanning
Vulnerability scanning is a crucial phase of a penetration test and having an updated vulnerability scanner in your security toolkit can often make a real difference by helping you discover overlooked vulnerable items. For this reason, we’ve manually packaged the latest and newly released OpenVAS 8.0 tool and libraries for Kali Linux. Although nothing major has changed in this release in terms of running the vulnerability scanner, we wanted to give a quick overview on how to get it up and running.
Setting up Kali for Vulnerability Scanning
If you haven’t already, make sure your Kali is up-to-date and install the latest OpenVAS. Once done, run the openvas-setup command to setup OpenVAS, download the latest rules, create an admin user, and start up the various services. Depending on your bandwidth and computer resources, this could take a while.
Once openvas-setup completes its process, the OpenVAS manager, scanner, and GSAD services should be listening:
Starting the OpenVAS services
If you have already configured OpenVAS, you can simply start all the necessary services by running openvas-start.
If you need to troubleshoot any issues, you can use openvas-check-setup to identity the problem.
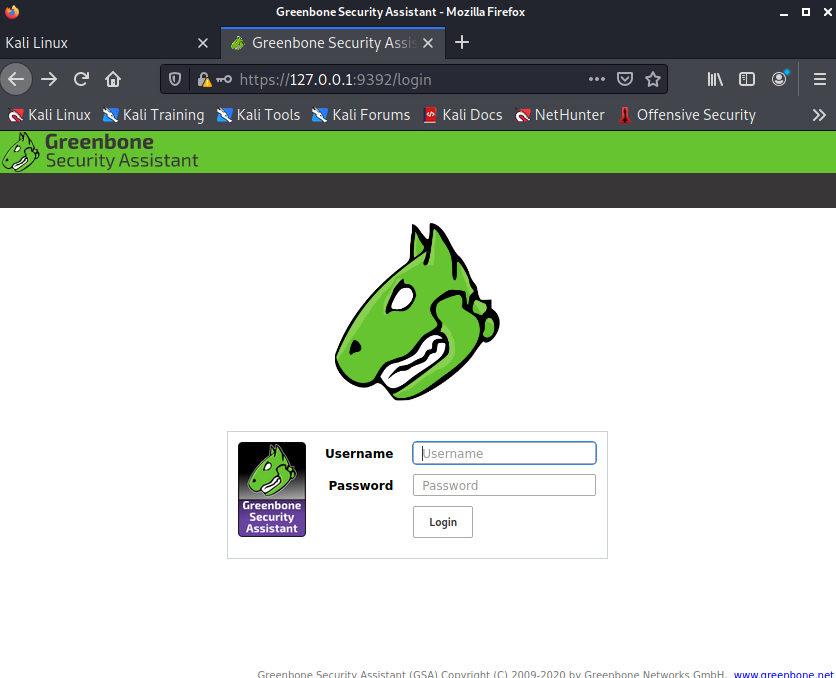
Connecting to the OpenVAS Web Interface
Point your browser to https://127.0.0.1:9392, accept the self signed SSL certificate and plugin the credentials for the admin user. The admin password was generated during the setup phase (look at the output above if you missed it).
That’s it! Now OpenVAS is ready for you to configure it and run a scan against a given IP or range. Happy vulnerability scanning!
Источник
Install OpenVAS (GVM) on Kali 2019
In this setup guide, we step through the process of getting OpenVAS (GVM) running on Kali 2019. Installing OpenVAS into a Kali-based system is made much easier by the inclusion of a quick setup script.
When using Kali Linux for OpenVAS scanning, resource usage should always be taken into account. Whether running Kali in a virtual machine or on bare metal, you will want to have sufficient memory and cpu available for the scanner to be optimised for speed (4 cores & 8GB should be a minimum). If you are hoping to run large numbers of parallel scans, then you will need more resources. Several performance tuning options are available in the OpenVAS scanner configuration file to better use the resources you have available. See our OpenVAS tutorial for details on modifying the configuration file.
Install
First step is to install the packages through apt install openvas .
Config
It is then a simple matter of running the configuration script to get OpenVAS configured with required services, user accounts and the latest NVT updates from the Greenbone Community Feed.
The output shown here is a bit daunting, however it is all automated. Assuming all goes well you should soon have a working and up to date OpenVAS installation. The actual time taken for this script will vary depending on download speeds as it is grabbing a fair amount of data for the signatures and CVE data.
By utilising the prebuilt configuration script we can get up and running with OpenVAS in a very short amount of time.
OpenVAS Web Client (Green Security Assistant)
Access the Greenbone Web Client using your web browser. Login with admin and the password in the script output and you will be launching a scan of your target systems within a few minutes.
Lets first check that gsad is running and listening.
Now browse to https://localhost:9392/. The Greenbone Security Assistant is a web portal front end to the GVM and OpenVAS scanner.
Task Wizard
The quickest way to fire off a scan is using the Task Wizard.
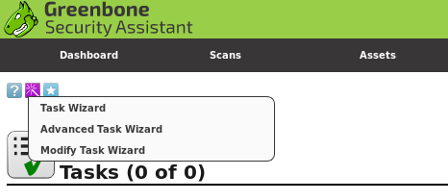
Enter the target and scan profile. Launch. Results are available under the reports option.
Modify gsad to listen on all interfaces
In the netstat output above, we can see that gsad is only listening on localhost . Here is how to change it so you can access the web interface over your local network.
Kali 2019 is using systemd for its services so we have to edit the following file to make the web interface listen on all interfaces.
Now change the 127.0.0.1 to 0.0.0.0 , we also need to add a new parameter to the ExecStart line. This allows remote hosts to connect to our IP address (or hostname). Otherwise, we will get the following error in the browser:
If your IP address is 192.168.1.100 then make the changes as shown below.
Now restart the service and check with netstat or ss .
Looks like we are up and running, now you can access the OpenVAS web interface from any system on your network.
OpenVAS Command Line Client (omp or gvm-cli)
Accessing OpenVAS from the command line is a powerful feature that gives you full control over scan tasks, reports and other management tasks. The current client in Kali is the omp client. Newer versions of GVM will use the gvm-cli command that is part of the gvm-tools package.
Both clients use XML to perform actions on the GVM server. The omp client has a number of command line switches, but the XML is where the real power lies.
# omp —help Usage: omp [OPTION…] — OpenVAS OMP Command Line Interface Help Options: -?, —help Show help options Application Options: -h, —host= Connect to manager on host -p, —port= Use port number -V, —version Print version. -v, —verbose Verbose messages (WARNING: may reveal passwords). —use-certs Use client certificates to authenticate. —client-cert= Client certificate. Default: /usr/var/lib/openvas/CA/clientcert.pem —client-key= Client key. Default: /usr/var/lib/openvas/private/CA/clientkey.pem —client-ca-cert= Client CA certificate. Default: /usr/var/lib/openvas/CA/cacert.pem -u, —username= OMP username -w, —password=
OMP password —config-file= Configuration file for connection parameters. -P, —prompt Prompt to exit. -O, —get-omp-version Print OMP version. -n, —name= Name for create-task. -C, —create-task Create a task. -m, —comment= Comment for create-task. -c, —config= Config for create-task. -t, —target= Target for create-task. -E, —delete-report Delete one or more reports. -D, —delete-task Delete one or more tasks. -R, —get-report Get report of one task. -F, —get-report-formats Get report formats. (OMP 2.0 only) -f, —format=
Источник
Installing OpenVAS on Kali Linux
OpenVAS, an endpoint scanning application and web application used to identify and detect vulnerabilities. It is widely used by companies as part of their risk mitigation solutions to quickly identify gaps in their production and even development servers or applications. This is not a complete solution, but it can help you fix common security vulnerabilities that may not be discovered.
The condition of Greenbone mode is open (APEVALV) from infected chemistry (GVM) of the quality of the storage and the GitHub area. it is used in the Greenbone Security Manager device and is a comprehensive scan. An engine that runs an advanced and constantly updated Network Vulnerability Test Package (NVT).
Installing Openvas on Kali Linux
To install Openvas and its dependencies on our Kali Linux system run the following command:

The next step is to run the installer, which will configure OpenVAS and download various network vulnerability tests (NVT) or signatures. Due to a large number of NVTs (50.000+), the setting process may take some time and consume a lot of data. In the test setup we used for this tutorial, the complete setup process took 10 minutes, which is not bad.
Run the following command to start the setup process:

After the configuration process is complete, all the necessary OpenVAS processes will start and the web interface will open automatically. The web interface is running locally on port 9392 and can be accessed through https://localhost:9392. OpenVAS will also set up an admin account and automatically generate a password for this account which is displayed in the last section of the setup output:
Verify the Installation
You can verify your installation with.


Password reset
Did you forget to note down the password? You can change the admin password using the following commands:
The next step is to accept the self-signed certificate warning and use the automatically generated admin credentials to login on to the web interface:


Starting and stopping OpenVAS
Before starting to install the virtual appliance, the last step I have to consider is to start and stop the OpenVAS service. OpenVAS services consume a lot of unnecessary resources, so it is recommended that you disable these services when you are not using OpenVAS.
Run the following command to start the services:


To stop the OpenVAS services again, run:

*Note: To create a new user :
To change the password of the existing user:
Configuration for a new target
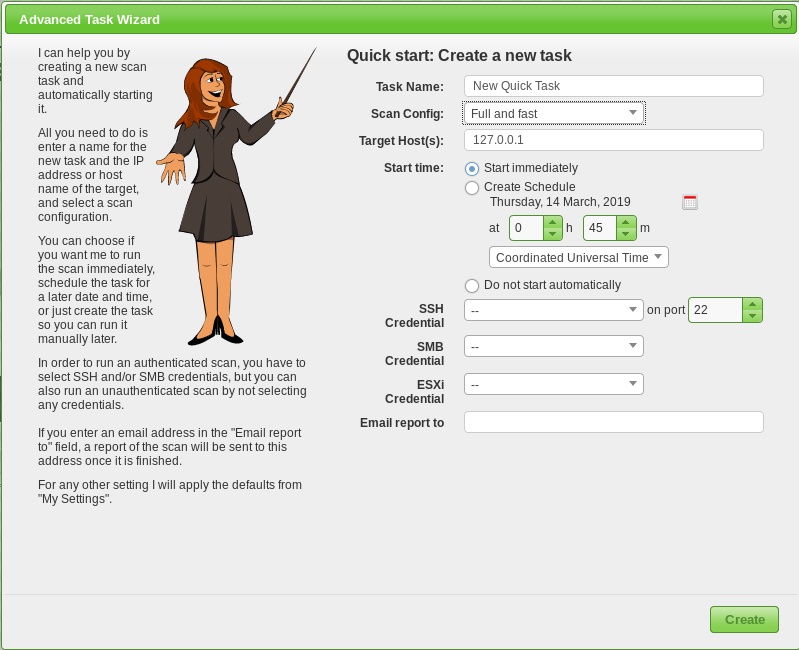
Begin by navigating to Scans > Tasks and clicking on the purple magic wand icon to begin the basic configuration wizard. After successfully navigating to the wizard, you should see a pop-up window similar to the one shown above. You can set up the initial scan of the local host here to make sure everything is set up correctly.
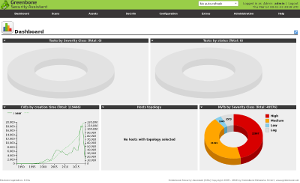
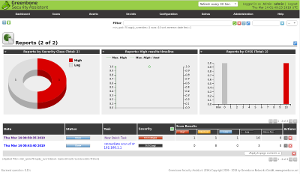
Scanning may take a while. Please allow OpenVAS enough time to complete the scan. You will then see a new dashboard for monitoring and analyzing your completed and ongoing scans, as shown below.
Schedule the scanning process
Now that we know everything is normal, we can take a closer look at OpenVAS and how it works. Expand the car to scan and> start the task of creating a scan task for the managed computer.
Creating a Task
To create a custom task, navigate to the star icon in the upper right corner of the taskbar and select New task.

After selecting ” New Task” from the drop-down menu, you will see a large pop-up window with many options. We will introduce each option part and its purpose.

For this task, we’ll be specializing only in the Name, Scan Targets, and Scanner Type, and Scan Config. In later tasks, we will be focusing on the opposite choices for additional advanced configuration and implementation/automation.
- Name: permits North American country to line the name the scan are going to be referred to as inside OpenVAS
- Scan Targets: The targets to scan, can embrace Hosts, Ports, and Credentials. to make a brand new target you may follow another pop-up, this can be lined later during this task.
- Scanner: The scanner to use by default will use the OpenVAS design but you’ll be able to set this to any scanner of your selecting within the settings menu.
- Scan Config: OpenVAS has seven totally different scan sorts you can choose from and can be used supported however you’re aggressive or what info you wish to gather from your scan.
Scoping a New Target
To scope a new target, navigate to the star icon next to Scan Targets.

Above is that the menu for configuring a replacement target. the 2 main choices you may have to be compelled to assemble are the Name and therefore the Hosts. This procedure is fairly uncomplicated and different options will solely be employed in advanced vulnerability management solutions. These are going to be lined in later tasks.

Now that we’ve got our target scoped we are able to still produce our task and start the scan. When the task is created, you’ll come to the scanning management panel, wherever you’ll track and execute the task. To run the task, navigate to the run icon within the operation.
Assets
It permits visualizing the vulnerability of the parts akin to hosts or in operation systems:

Additional features
Allow adding common parameters to OpenVAS:

Administration
As the name suggests, you can manage passwords, users, etc.:
Источник


