- Настройка VPN для Linux Mint 17.1 с помощью OpenVPN. Руководство по настройке VPN Trust.Zone
- Шаг 1
- Шаг 2
- Шаг 3
- Шаг 4
- Шаг 5
- Шаг 6
- Шаг 7
- Шаг 8
- Шаг 9
- Шаг 10
- Шаг 11
- Шаг 12
- Проверка подключения
- OpenVPN Configuration Guide for Linux Mint
- OpenVPN 3 Client for Linux
- Background
- Installation as Connector for OpenVPN Cloud
- Installation for Debian and Ubuntu
- Installation for Fedora, Red Hat Enterprise Linux, CentOS, or Scientific Linux
- Using .ovpn Profile
- Mandatory Commands
- Optional Commands
- Managing a Running Session
- Changing the OpenVPN Profile of an Autoloading VPN Session
Настройка VPN для Linux Mint 17.1 с помощью OpenVPN. Руководство по настройке VPN Trust.Zone
Шаг 1
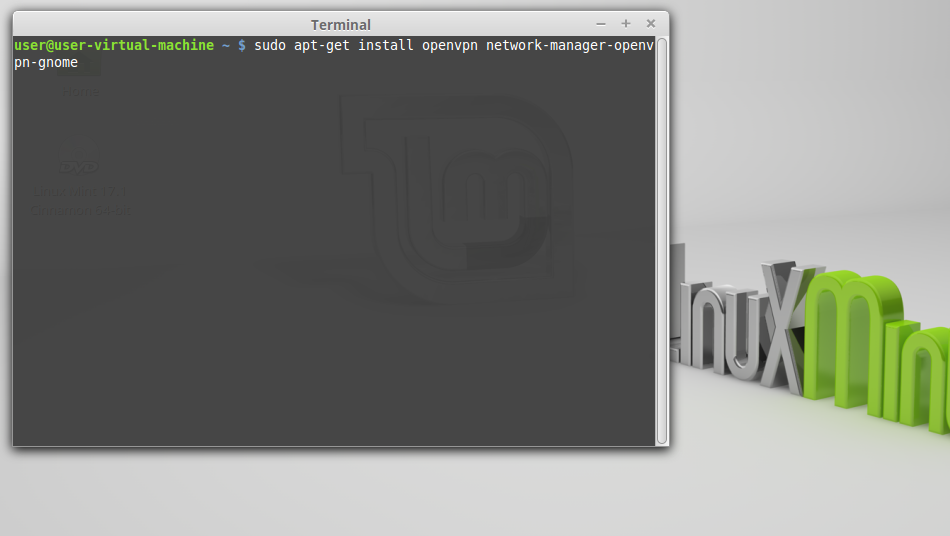
Запустите эмулятор терминала: Нажмите Alt+F2 и введите «x-terminal-emulator» и нажмите Enter.

Шаг 2
Установите OpenVPN с помощью следующей команды.
sudo apt-get install openvpn network-manager-openvpn-gnome
Для новых версий Linux Mint установите также network-manager-openvpn-gnome
sudo apt-get install network-manager-openvpn-gnome
Шаг 3
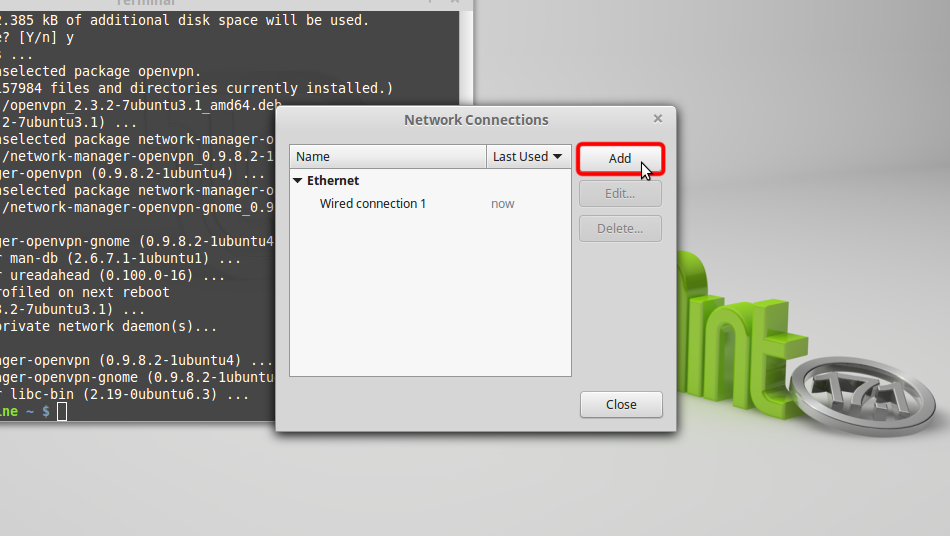
Нажмите иконку Подключения в трее затем перейти к «Network Connections»

Шаг 4
Нажмите кнопку «Add».
Шаг 5
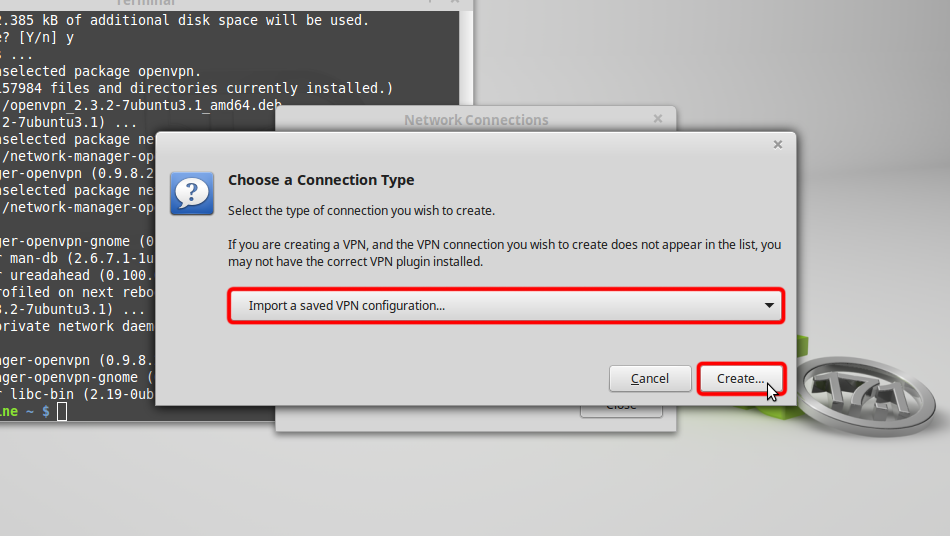
Выберите «Import a saved VPN configuration. » и нажмите «Create»
Шаг 6
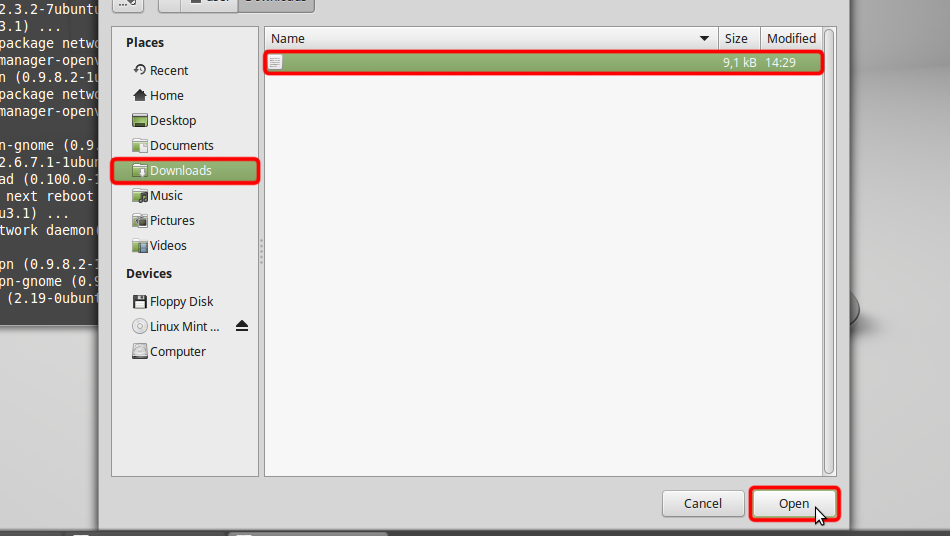
Download OpenVPN configuration file (.ovpn)
Выберите раздел «Downloads» и откройте файл Trust.Zone-VPN.ovpn, дважды щелкнув по нему.
 Trust.Zone-VPN.ovpn
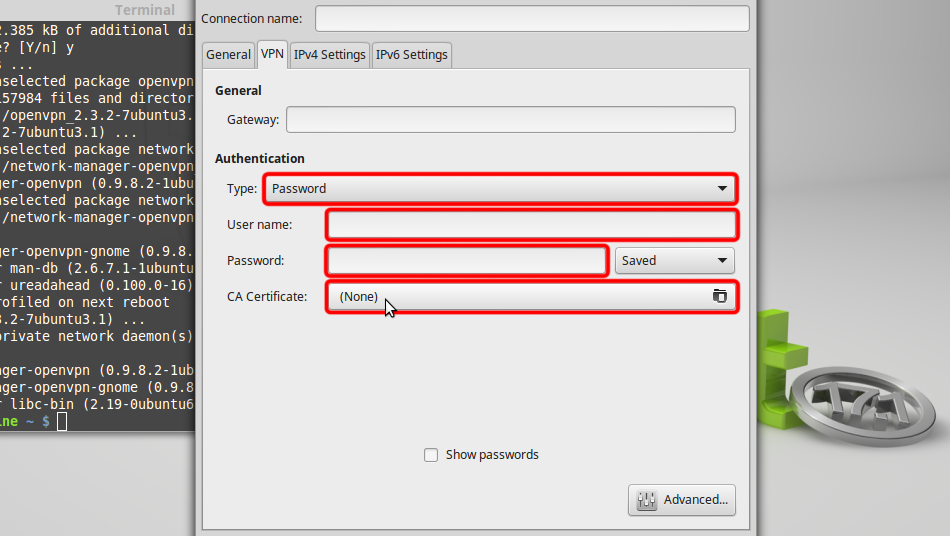
Шаг 7
Выберите «Password» из выпадающего меню «Type», введите ваши VPN имя пользователя и пароль.
Скачайте файл сертификата СКРЫТО. Войдите или Зарегистрируйтесь, чтобы увидеть. и нажмите «CA Certificate» для выбора файла сертификата.
 Trust.Zone-VPN vpn.trust.zone
Шаг 8
Перейдите в папку «Downloads» и дважды щелкните на имени сертификата, чтобы выбрать его.
 Trust.Zone-VPN.pem
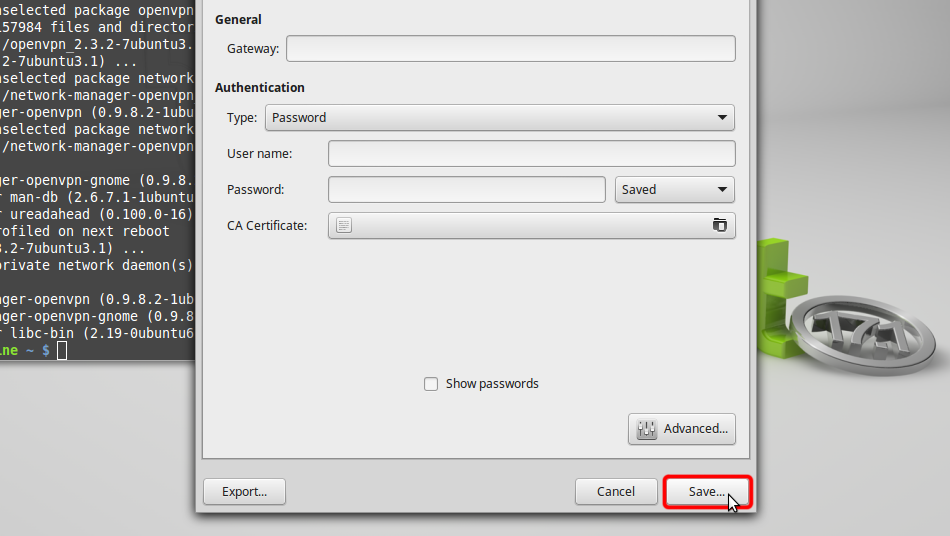
Шаг 9
Нажмите «Save. «, чтобы сохранить настройки VPN-соединения.
 vpn.trust.zone Trust.Zone-VPN.pem
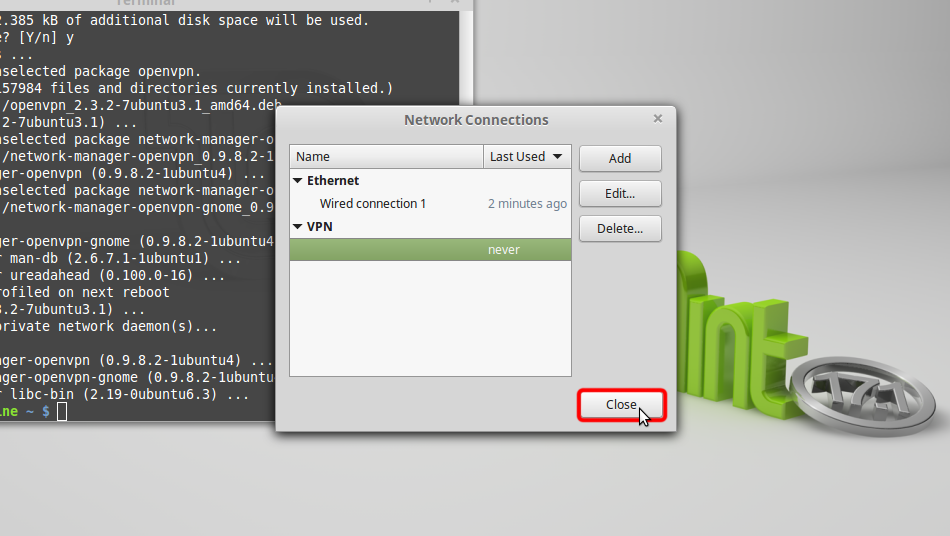
Шаг 10
Нажмите «Close» в следующем диалоговом окне.
 Trust.Zone-VPN
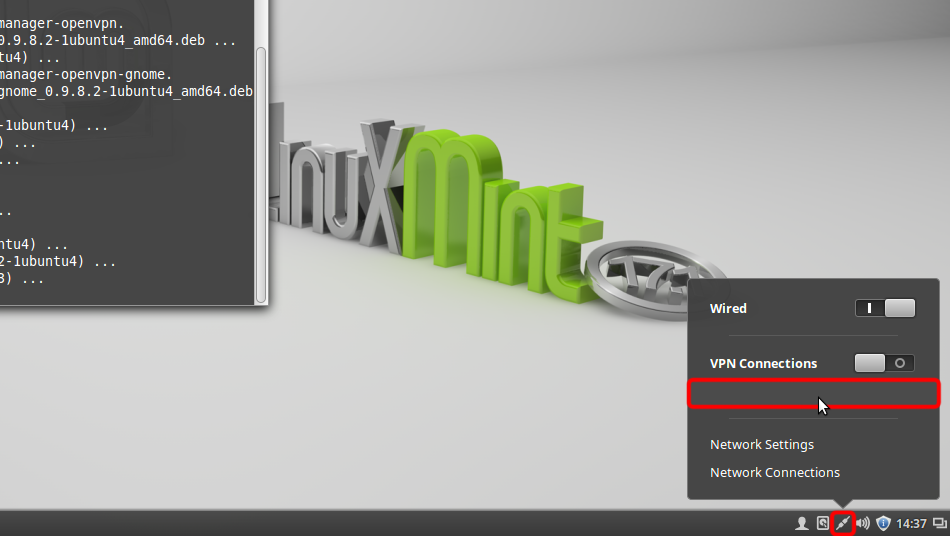
Шаг 11
Нажмите иконку сети, выберите «VPN Connections» и нажмите на созданном вами имени соединения, чтобы подключится к VPN.
 Trust.Zone-VPN
Шаг 12
Если соединение успешно установлено, появится небольшой замочек на иконке Сетевого подключения в системном трее.
Для того, чтобы управлять VPN-соединениями, нажмите на иконку Сетевые подключения в системном трее, затем нажмите кнопку «Network Connections».
Trust.Zone-VPN 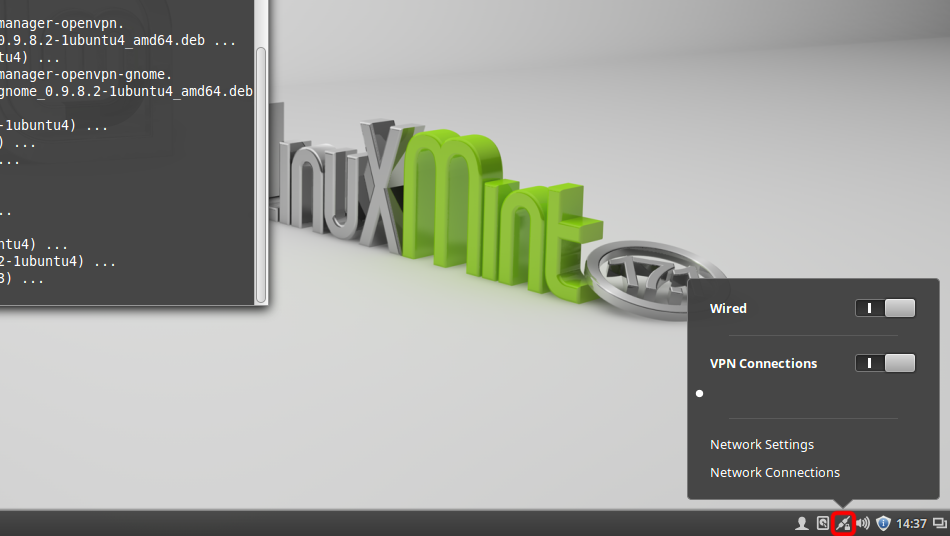
Проверка подключения
Чтобы проверить, правильно ли установлено соединение с VPN Trust.Zone, откройте Главную страницу или перезагрузите ее, если она уже открыта.
Вы также можете посетить Страницу проверки подключения.
 Ваш IP: x.x.x.x · США · Вы под защитой TRUST .ZONE ! Ваш IP адрес скрыт!
Источник
OpenVPN Configuration Guide for Linux Mint


Linux Mint is arguably the most convenient and elegant GNU/Linux desktop distribution. It’s very easy to use, but the best part is that the software is regularly updated.
Things to Consider:
Before you begin, please make sure that:
- A working internet connection
- Linux Mint Supported Device.
- Own a premium PureVPN account (If you do not already own one, you can buy a subscription from here.
Just follow the below mentioned steps to configure OpenVPN on Linux Mint:
1 Open Terminal. Insert command:
sudo apt-get install network-manager-openvpn
and hit enter. Provide your Mint password and hit enter again.

2 Type “Y” and enter to continue

3 Insert command:
sudo apt-get install network-manager-openvpn-gnome

4 Insert command:
sudo restart network-manager

5 Download and extract OpenVPN files from here

6 Click on “Network Connection” and select “Network Settings”

7 Click on “+“

8 Click “Create”

9 Select “OpenVPN” and click “Create”

10 Insert the following info:
- Insert Connection name: PureVPN OpenVPN
- Insert desired Gateway:Open .ovpn file from OpenVPN folder to get the server address
- Select Type: Password from drop down menu
- Insert Username provided by PureVPN
- Insert Password provided by PureVPN
- Click on folder icon from CA Certificate

11 Go to OpenVPN downloaded folder, select ca.crt and click “Open”

12 Click “Advanced.”

13 From General tab select following options:
- Check Use custom gateway port: For UDP insert 53 and For TCP insert 80
- Check Use LZO data compression
Note: For TCP connectoin select “Use a TCP connection“

14 From Security tab select following options:
- From Cipher: Select AES-256-CBC or desired encryption
- From HMAC Authentication: Select SHA-1

15 Form TLS Authentication tab:
- Select Use additional TLS authentication
- Click on folder icon next to Key File

16 Go to OpenVPN downloaded folder, select Wdc.key and click “Open”

17 Select “1” from Key Direction and Click “OK”

18 Click “Save…”
19 Click on “PureVPN OpenVPN” Connection and Click on switch to “Turn ON” VPN

20 You are connected now. Enjoy the FREEDOM!

To Disconnect VPN:
- Click “Network Connection Icon…” and click the switch to “Turn OFF” VPN.
Caution: To prevent IPv6 leaks, you’re better off disabling your IPv6. Here’s how to go about Disabling IPv6 on Linux Mint.
Please use the comment box for your suggestions & feedback. For additional help, please submit support ticket with errors and screen shots (if possible) OR Contact our 24/7 live chat.
Источник
OpenVPN 3 Client for Linux
Background
The OpenVPN 3 Linux project is a new client built on top of the OpenVPN 3 Core Library, which is also used in the various OpenVPN Connect clients and OpenVPN for Android (need to be enabled via the settings page in the app).
This client is built around a completely different architecture in regards to usage. It builds heavily on D-Bus and allows unprivileged users to start and manage their own VPN tunnels out-of-the-box. System administrators wanting more control can also control and restrict this access both by hardening the default OpenVPN 3 D-Bus policy or facilitating features in OpenVPN 3 Linux.
Even though the project name carries “Linux”, it doesn’t mean it is restricted to Linux only. Any platform which has D-Bus available should be capable of running this client in theory. But since D-Bus is most commonly used in Linux environments, this will naturally be the primary focus for the project.
The release notes are stored in git tags in the project git repository. They can also be viewed here: https://github.com/OpenVPN/openvpn3-linux/releases (expand the tag to see the full text)
Installation as Connector for OpenVPN Cloud
Installation of OpenVPN 3 client as a Connector for OpenVPN Cloud Host or Network has been simplified and documented here.
Installation for Debian and Ubuntu
Follow these steps in order to install OpenVPN 3 Client on Linux for Debian and Ubuntu:
Open the Terminal by pressing ctrl + alt + T
Type the following command into the Terminal: sudo apt install apt-transport-https . This is done to ensure that your apt supports the https transport. Enter the root password as prompted
Type the following command into the Terminal: sudo wget https://swupdate.openvpn.net/repos/openvpn-repo-pkg-key.pub . This will install the OpenVPN repository key used by the OpenVPN 3 Linux packages
Type the following command into the Terminal: sudo apt-key add openvpn-repo-pkg-key.pub
Type the following command into the Terminal: sudo wget -O /etc/apt/sources.list.d/openvpn3.list https://swupdate.openvpn.net/community/openvpn3/repos/openvpn3-$DISTRO.list . This will install the proper repository. Replace $DISTRO with the release name depending on your Debian/Ubuntu distribution (the table of release names for each distribution can be found below). In this case, focal is chosen since Ubuntu 20.04 is used
Type the following command into the Terminal: sudo apt update
Type the following command into the Terminal: sudo apt install openvpn3 . This will finally install the OpenVPN 3 package
| Distribution | Release | Release name ($DISTRO) |
|---|---|---|
| Debian | 9 | stretch |
| Debian | 10 | buster |
| Ubuntu | 16.04 | xenial |
| Ubuntu | 18.04 | bionic |
| Ubuntu | 19.10 | eoan |
| Ubuntu | 20.04 | focal |
Installation for Fedora, Red Hat Enterprise Linux, CentOS, or Scientific Linux
Packages for these distributions are provided via a Fedora Copr repository. Supported versions:
| Distribution | Release versions |
|---|---|
| Fedora | 30, 31, 32 |
| Red Hat Enterprise Linux / CentOS | 7, 8 |
In order to install the OpenVPN 3 Client for Fedora, Red Hat Enterprise Linux, CentOS, or Scientific Linux, follow the steps below:
- Open Terminal by typing terminal into the search bar
- If you are running Red Hat Enterprise Linux or its clones, you need to install the Fedora EPEL repository first. Here is the list of commands for each version:
(The original article on Fedora EPEL can be found here)
RHEL/CentOS 6: sudo yum install https://dl.fedoraproject.org/pub/epel/epel-release-latest-6.noarch.rpm
RHEL/CentOS 7: sudo yum install https://dl.fedoraproject.org/pub/epel/epel-release-latest-7.noarch.rpm
On RHEL 7 it is recommended to also enable the optional, extras, and HA repositories since EPEL packages may depend on packages from these repositories: sudo subscription-manager repos —enable «rhel-*-optional-rpms» —enable «rhel-*-extras-rpms» —enable «rhel-ha-for-rhel-*-server-rpms»
RHEL/CentOS 8: sudo yum install https://dl.fedoraproject.org/pub/epel/epel-release-latest-8.noarch.rpm
On RHEL 8 it is required to also enable the codeready-builder-for-rhel-8-$-rpms repository since EPEL packages may depend on packages from it: sudo ARCH=$( /bin/arch ) followed by sudo subscription-manager repos —enable «codeready-builder-for-rhel-8-$ -rpms»
On CentOS 8 it is recommended to also enable the PowerTools repository since EPEL packages may depend on packages from it: sudo dnf config-manager —set-enabled PowerTools - You need to install the yum copr module first by running the following command: sudo yum install yum-plugin-copr . Note: Fedora releases usually have the yum/dnf copr module preinstalled.
- With the Copr module available, it is time to enable the OpenVPN 3 Copr repository by running the following command: sudo yum copr enable dsommers/openvpn3
- Finally, the OpenVPN 3 Linux client can be installed by running the following command: sudo yum install openvpn3-client
Using .ovpn Profile
Please note that by this point you should have downloaded a .ovpn profile to your machine.
Mandatory Commands
In order to start a one-shot configuration profile, type the following command into the Terminal: openvpn3 session-start —config $
In order to import a configuration file for re-use and start a VPN session, type the following command into the Terminal: openvpn3 config-import —config $
In order to start a new VPN session from an imported configuration profile, run the following command: openvpn3 session-start —config $
Optional Commands
- To list all available configuration profiles, run this command: openvpn3 configs-list . Important: a configuration file typically contains generic options to be able to connect to a specific server, regardless of the device itself. OpenVPN 3 Linux also supports setting more host-specific settings on a configuration profile as well. This is handled via the `openvpn3 config-manage` interface. Any settings here will also be preserved across boots if the configuration profile was imported with the —persistent argument.
- Note that it is possible to use the D-Bus path to the configuration profile: openvpn3 session-start —config-path /net/openvpn/v3/configuration/. . Note: in either of these cases is it necessary to have access to the configuration profile on disk. As long as configuration profiles are available via openvpn3 configs-list , all needed to start a VPN session should be present.
Managing a Running Session
- Once a VPN session has started, it should be seen in the session list: openvpn3 sessions-list
- Using the openvpn3 session-manage there are a few things which can be done, but most typically it is the –disconnect or –restart alternatives which are most commonly used. openvpn3 session-manage —config $
—restart . This disconnects and re-connects to the server again, re-establishing the connection. The $ is the configuration name as displayed in openvpn3 sessions-list - It is also possible to use the D-Bus path to the session as well: openvpn3 session-manage —session-path /net/openvpn/v3/sessions/. —disconnect . This command above will disconnect a running session. Once this operation has completed, it will be removed from the openvpn3 sessions-list overview. Important: you will be able to start a new session with this or another OpenVPN profile only after you have disconnected from the current session using the command in this step
- It is also possible to retrieve real-time tunnel statistics from running sessions: openvpn3 session-stats —config $
or openvpn3 session-stats —session-path /net/openvpn/v3/sessions/. - And to retrieve real-time log events as they occur, run the following command: openvpn3 log —config $
. This might be quite silent, as it does not provide any log events from the past. Issue an openvpn3 session-manage –restart from a different terminal, and log events will occur. You may want to boost the log-level with –log-level 6. Valid log levels are from 0 to 6, where 6 is the most verbose. Note: VPN sessions are also owned by the user which started it. But the Session Manager also provides its own Access Control List feature via openvpn3 session-acl
Changing the OpenVPN Profile of an Autoloading VPN Session
Please note that every time you start a session, it will load automatically on the system start-up. In order to change the profile of an OpenVPN Session that is autoloaded, follow the steps below:
Источник


