- Installation guide for OpenVPN Connect Client on macOS
- Introduction
- Requirements
- Downloading and installing the OpenVPN Connect Client for macOS
- Download the official OpenVPN Connect client software developed and maintained by OpenVPN Inc.
- Frequently asked questions
- How do I connect to OpenVPN?
- How do I connect if the OpenVPN client is integrated into my router?
- OpenVPN для MacOS
- Создание конфигов
- auth.cfg
- zavod.ovpn
- Импорт конфига
- Как пользоваться
- Connecting to Access Server with macOS
- Installing a client application
- OpenVPN Connect with your Access Server
- Steps: Access your client UI
- OpenVPN Connect v3
- OpenVPN Connect v2
- Alternative OpenVPN open source client: Tunnelblick
- Alternative OpenVPN client: Viscosity
- Other client GUI projects
- Helpful Resources
- How to set up OVPN on macOS
- Easy to get started
- The VPN service when privacy matters
- Fast and user-friendly
- Privacy wherever you are
- Streaming services
- Fastest VPN server automatically
- Mac VPN
- Killswitch & DNS leaks
- User-friendly but powerful
- Automatic updates
Installation guide for OpenVPN Connect Client on macOS
Introduction
This guide is meant for users of the OpenVPN Access Server product that wish to connect their macOS computer using the official OpenVPN Connect Client software. In the steps outlined below we’ll take you through the process of obtaining the OpenVPN Connect Client from your Access Server’s web interface, and installing and using it on the macOS operating system. Aside from some minor differences due to different versions of software used this guide should be accurate and easy to follow. Each step can be clicked to show a screenshot for that particular step in the installation process. Each screenshot can be clicked to reveal an image gallery you can follow to go through all the steps.
Requirements
You will need to have a valid set of credentials, like user name and password, and of course the address of your OpenVPN Access Server. If you are not the administrator of the Access Server you are going to connect to, then you should contact the administrator of this server to obtain this information. We here at OpenVPN Inc. cannot provide this information, since we do not manage servers run by our customers. If you are the administrator of your Access Server, you can create new user accounts using the admin web interface of the Access Server or the external authentication backend you have configured, and then use those credentials to obtain and install the OpenVPN Connect Client on macOS.
The OpenVPN Connect Client for macOS, latest version, currently supports these operating systems:
- OS X 10.8 Mountain Lion
- OS X 10.9 Mavericks
- OS X 10.10 Yosemite
- OS X 10.11 El Capitan
- macOS 10.12 Sierra
- macOS 10.13 High Sierra
- macOS 10.14 Mojave
- macOS 10.15 Catalina
- macOS 11.0 Big Sur
Downloading and installing the OpenVPN Connect Client for macOS
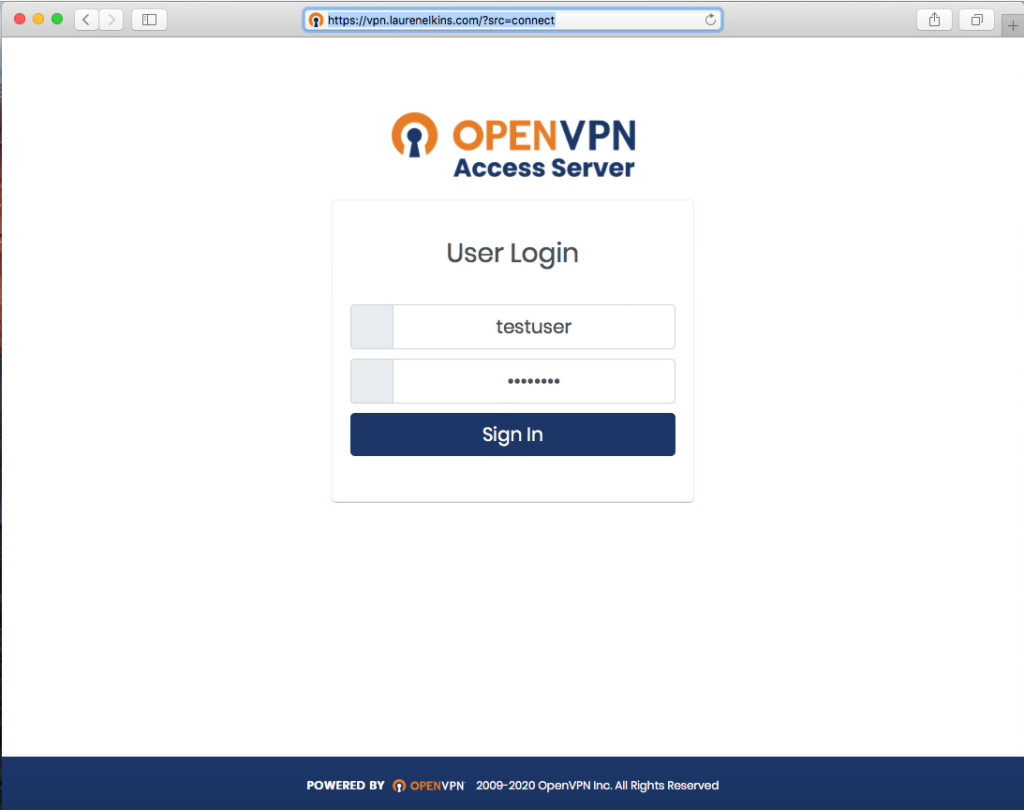
Navigate to the OpenVPN Access Server client web interface.
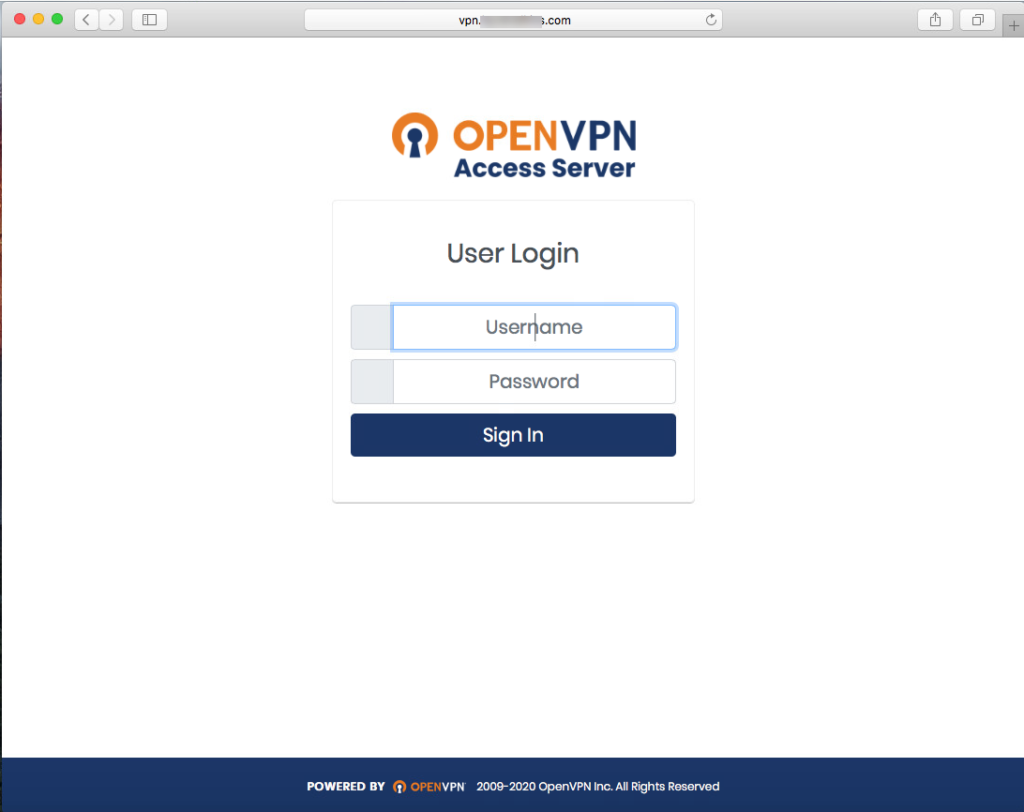
Login with your credentials.
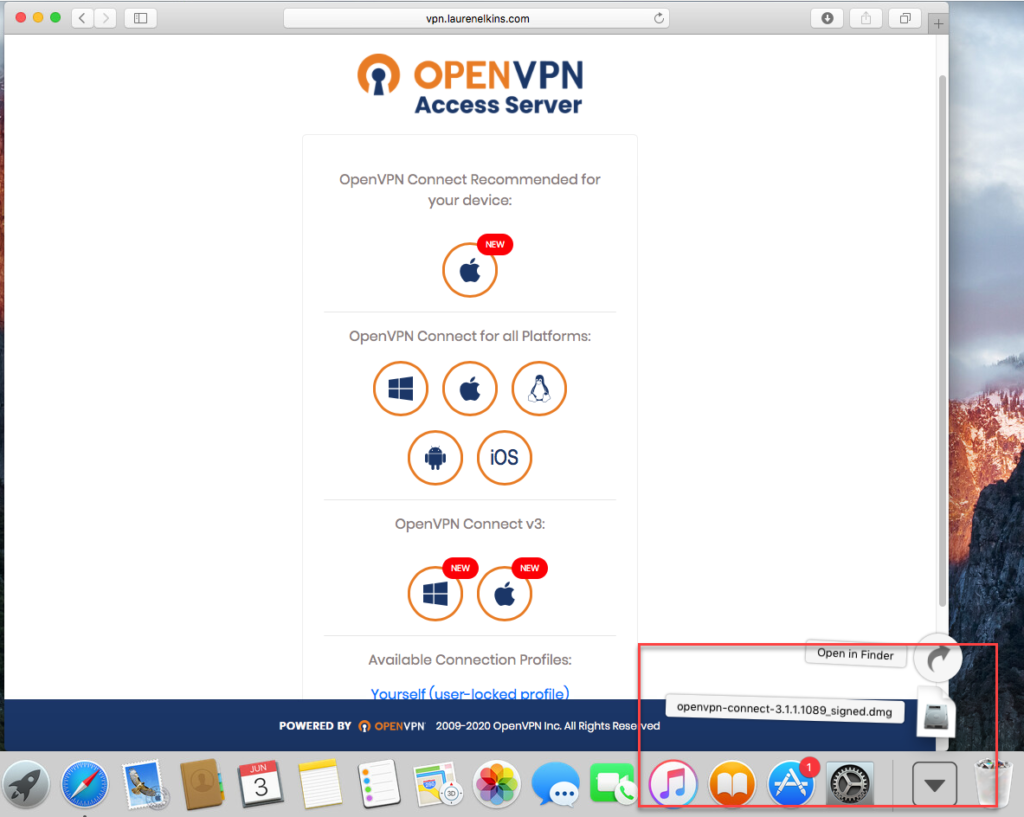
Click on the Mac icon to begin download.
Wait until the download completes, and then open it (the exact procedure varies a bit per browser).
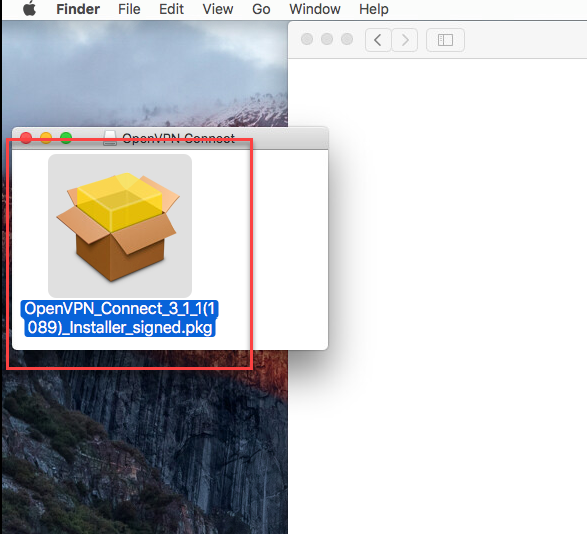
Open the ‘OpenVPN Connect installer’ to start the installation.
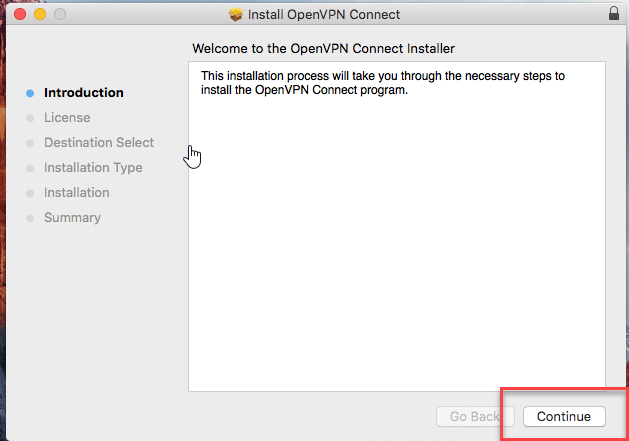
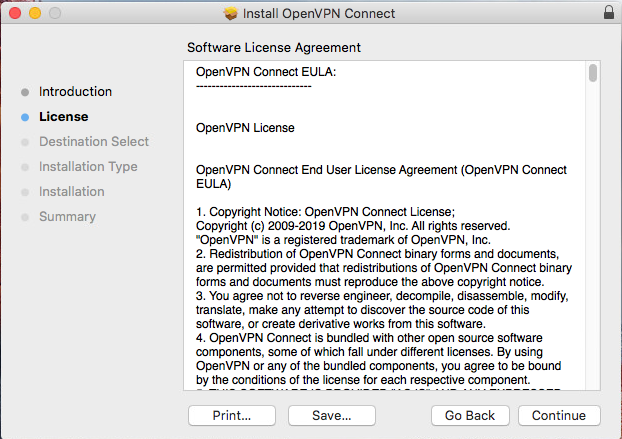
Please read the licensing terms. Then click ‘Continue’.
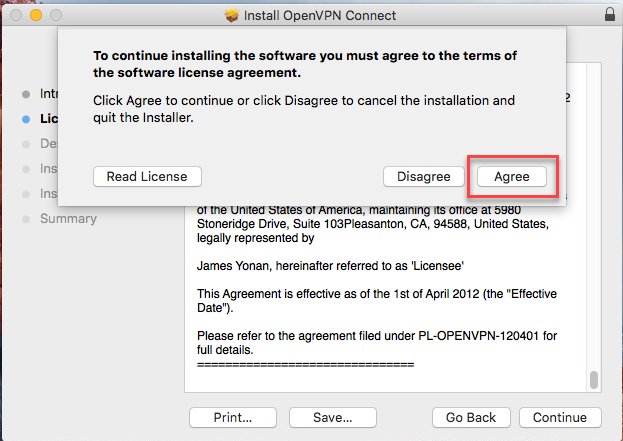
Click ‘Agree’ to accept the licensing terms.
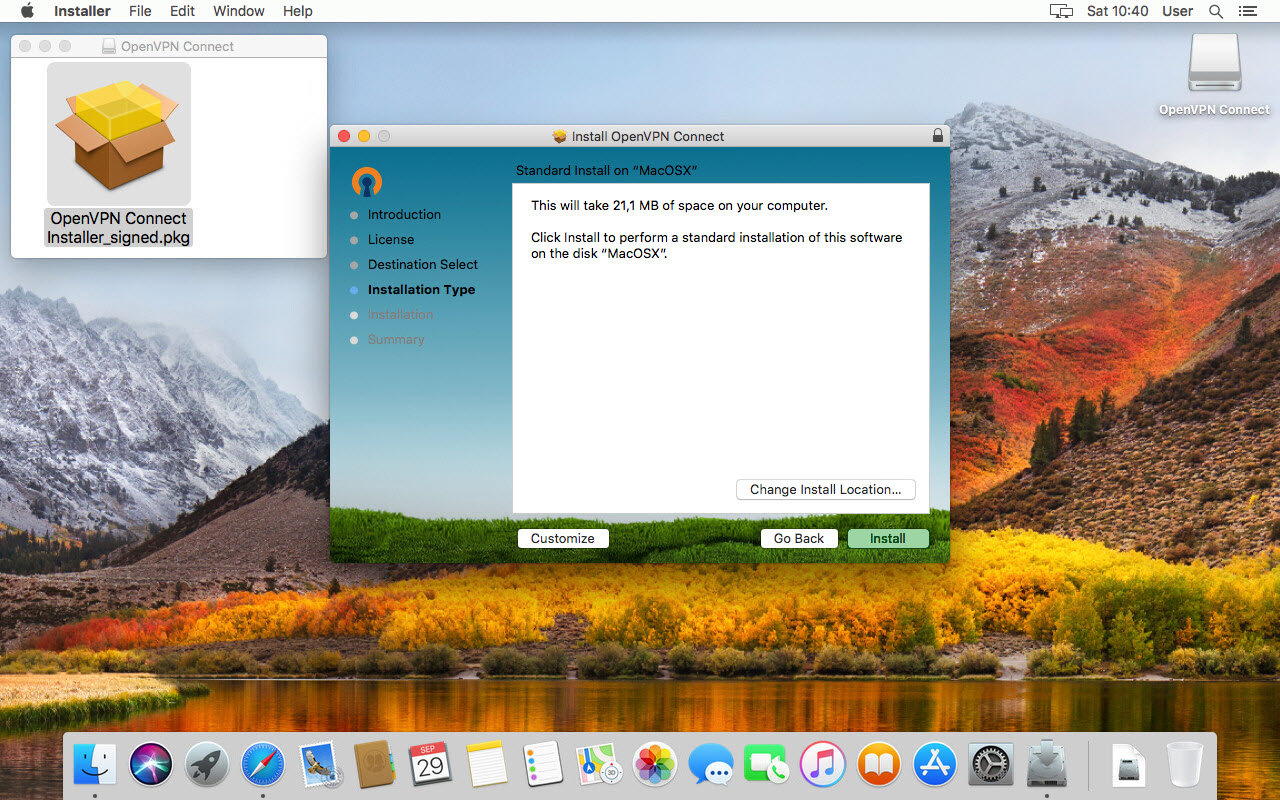
Click ‘Install’ to proceed.
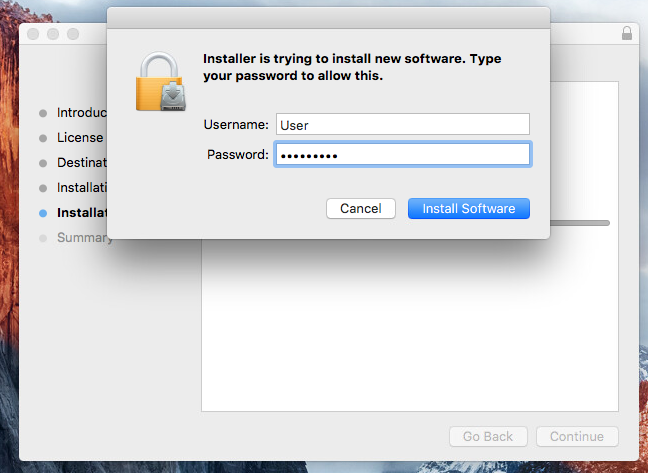
Enter your device password, if you have one configured, and click ‘Install Software’.
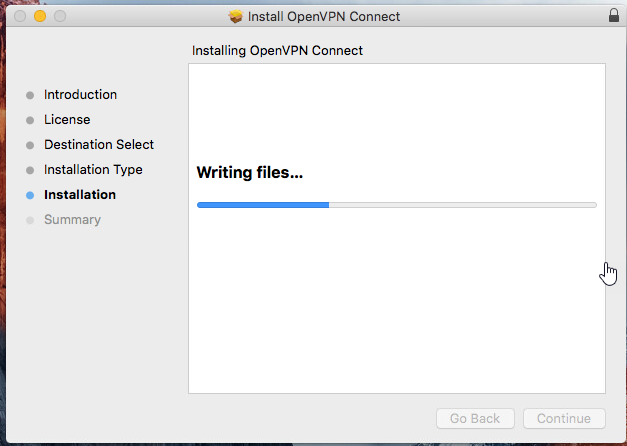
Wait for the installation process to complete.
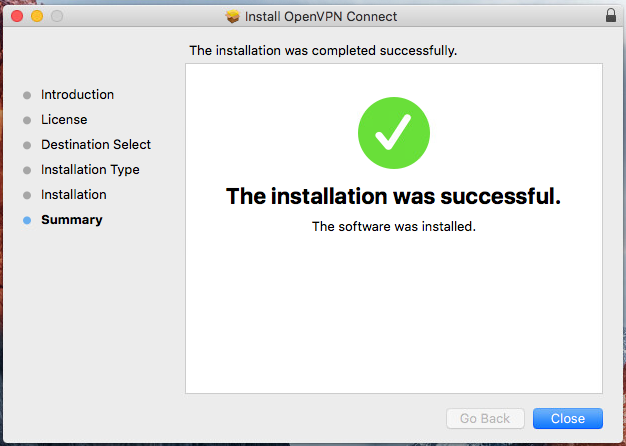
Click ‘Close’ to end the installation process.
If your device asks, click ‘Move to Trash’ to clean up the installer file.
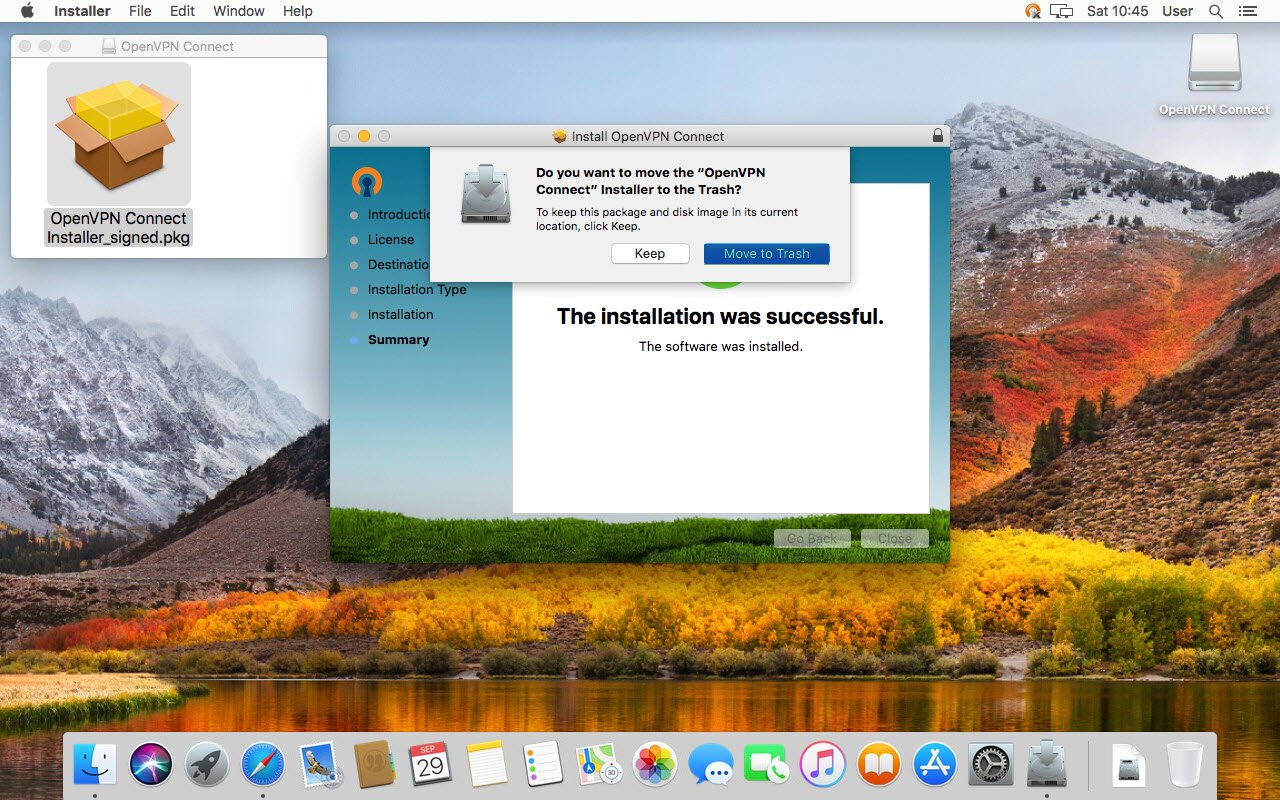
Rightclick (ctrl+click) ‘OpenVPN Connect’ and eject it.
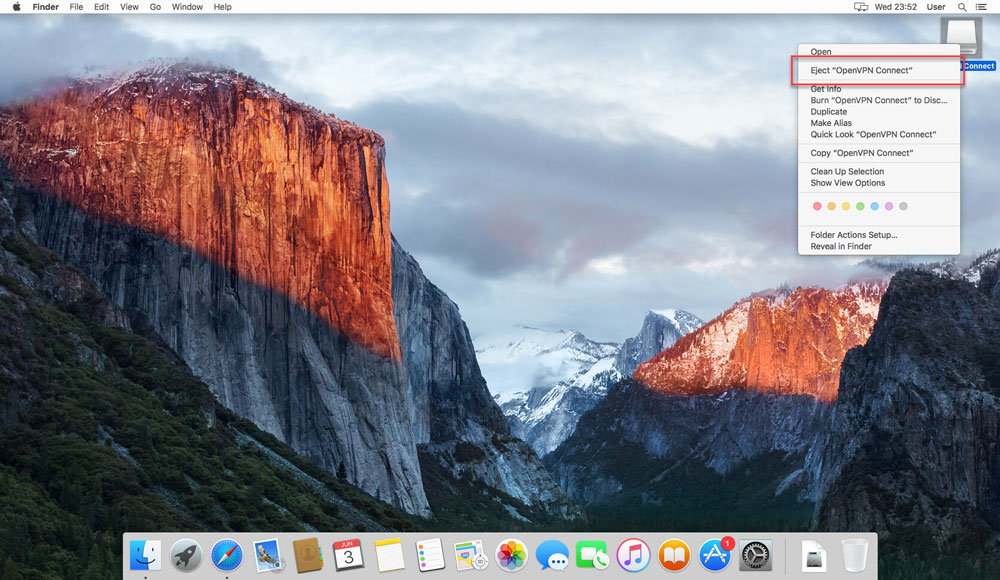
In Applications, OpenVPN Connect is now ready for use.
Источник
Download the official OpenVPN Connect client software developed and maintained by OpenVPN Inc.
Connect to any compatible server
Connect to Access Server, OpenVPN Cloud or any OpenVPN protocol-compatible server or service.
Supports 2FA and SAML authentication. Authenticate prior to profile download and connection.
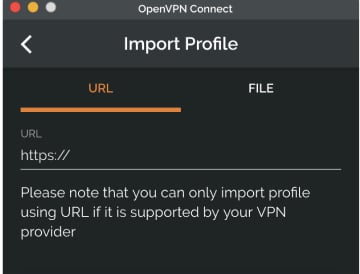
Easily import connection configuration by just opening a URL.
Frequently asked questions
How do I connect to OpenVPN?
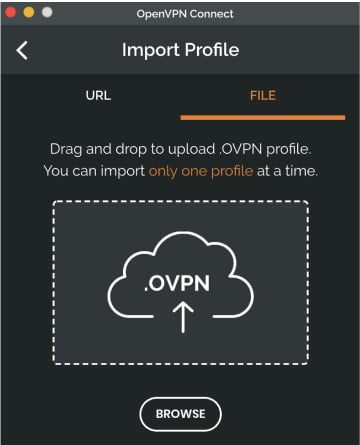
In order to connect to the VPN server or service, you need to obtain a file that contains the specifics needed for the connection. Such a configuration file is called a profile and has an .ovpn file extension.
If your business is using Access Server or OpenVPN Cloud and your IT department has provided you a URL, you can directly import the profile by entering the URL.
However, if you have received the profile as a file from your IT department or from some other OpenVPN compatible service, you can import the profile by selecting the file.
How do I connect if the OpenVPN client is integrated into my router?
In order to connect to the VPN server or service, you need to obtain a file that contains the specifics needed for the connection. Such a configuration file is called a profile and has an .ovpn file extension.
After receiving the .ovpn file from you IT department, you need to follow instructions specific to the router to extract specific information from the file and use it for configuration. We have made guides for some of the common firmware used in hardware routers and for pfSense:
Источник
OpenVPN для MacOS
OpenVPN — это «бронебойный» способ подключиться к локальной сети удаленно. В самой MacOS нет поддержки OpenVPN, её можно добавить только установив сторонний софт. Есть очень много клиентов openvpn для MacOS как платных, так и бесплатных. Среди них, наверное, самый продвинутый это – Tunnelblick.
Tunnelblick — это бесплатный OpenVPN-клиент для MacOS со всем нужным функционалом.
Скачать Tunnelblick можно с официального сайта здесь
Создание конфигов
В любом удобном месте создаем папку, в которой положим все необходимые файлы. В итоге должно получиться 3 файла:
- auth.cfg — текстовый файл с логин/паролем пользователя на OpenVPN-сервере;
- cert_export_user1.p12 — экспортированный клиентский сертификат;
- zavod.ovpn – обычный текстовый файл с конфигурационными настройками.
auth.cfg
В папке создаем новый текстовый файл с содержимым:
Где на первой строчке логин, а на второй пароль. Файл должен иметь название auth.cfg
zavod.ovpn
Создаем новый текстовый файл с любым названием и расширением .ovpn. В нашем случае это zavod.ovpn . Название нужно давать осмысленное, так как это название вы будете видеть в меню программы при подключении к серверу. Можно использовать русский язык.
- remote 92.189.141.111 1194 — IP-адрес сервера и порт;
- pkcs12 cert_export_user1.p12 — файл сертификатов;
- auth SHA1 — протокол авторизации;
- cipher AES -256- CBC — протокол шифрования;
- auth-user-pass auth.cfg — файл логин/пароля пользователя для аутентификации на сервере;
- route 192.168.0.0 255.255.255.0 192.168.0.1 — маршрутизация для доступа к ресурсам удаленной сети. Роутов может быть несколько. Каждый роут на новой строке. Если у Вас и у удаленной сети одинаковые подсети, то работать без доп. настроек или смены вашей подсети на другую вы не сможете.
Конфиг приведен для сертификата в формате pkcs12, где всего 1 файл. Если у вас 3 файла: user1.crt, user1.key и ca.crt, то нужно заменить:
Импорт конфига
Для того, чтобы импортировать наш конфиг в программу достаточно кликнуть на файле zavod.ovpn 2 раза. Программа запросит пароль и добавит все сама.
Как пользоваться
В трее выбираем нужное соединение из выпадающего списка. Программе нужно примерно 30 сек. для подключения. При повторном клике происходит отключение от удаленной сети.
Источник
Connecting to Access Server with macOS
Each macOS device needs a client application to connect with your OpenVPN Access Server. We recommend using OpenVPN Connect, which is pre-configured to connect with your Access Server. This document provides information on using OpenVPN Connect as well as alternative solutions.
Installing a client application
The OpenVPN protocol is not built into macOS. Therefore, you must install a client app to handle communication with Access Server. A client app is required to capture the traffic you want to send through the OpenVPN tunnel, encrypt it, pass it on to the server, and decrypt the return traffic.
OpenVPN Connect with your Access Server

Your installation of OpenVPN Access Server includes a copy of OpenVPN Connect, which is a separate package called openvpn-as-bundled-clients that is updated when new versions of OpenVPN Connect are released. OpenVPN Connect is our official client app and your users can download it directly from your client UI, pre-configured to connect with your server, or download it separately from our website and import a connection profile.
Steps: Access your client UI
- Open a browser and enter your Access Server IP address or the custom hostname if you have set that up (recommended).
- Enter your username and password.
- Once you have signed in, the recommended OpenVPN Connect app for your device displays at the top. Also shown are downloads for other platforms as well as connection profiles.
OpenVPN Connect only supports one active VPN tunnel at a time. It was purposely designed to not support connections to two or more servers simultaneously. Connecting to two servers at the same time requires two different adjustments to the routing table on the client computer. Therefore, it is very easy to make a mistake and break connectivity or cause traffic to flow to the wrong destination. Limiting connections to one server ensures connectivity and traffic flow. OpenVPN Connect can store many profiles for different servers, but you can only actively connect to one at a time.
OpenVPN Connect also supports client-side scripting, importing connection profiles directly from Access Server, and connecting with a server-locked profile. A server-locked profile enables you to authenticate any valid user on your Access Server without installing unique connection profiles for each user.
OpenVPN Connect v3
We recommend and support OpenVPN Connect v3 as the official app for OpenVPN Access Server and OpenVPN Cloud. The client software offers client connectivity across four major platforms: Windows, macOS, Android, and iOS. For Linux, we recommend the open source OpenVPN client.
We recommend downloading OpenVPN Connect v3 directly from your Access Server web client UI. You can also download the installation file for OpenVPN Connect v3 from the download page on our site or with the link below. The app installation from our site does not contain any connection settings, so you’ll need to take additional steps to configure the connection to your Access Server. If you are installing the below file on a computer that already has OpenVPN Connect v3 installed and configured, it simply updates it to the latest version and retains all settings.
OpenVPN Connect v2
This is the previous generation of OpenVPN Connect client software for OpenVPN Access Server. It is still supported but we recommend people to use OpenVPN Connect v3 instead.
Alternative OpenVPN open source client: Tunnelblick
The open source project also has a client for macOS called Tunnelblick. Tunnelblick supports the option to connect to multiple OpenVPN servers simultaneously, which can cause connection issues if not configured correctly. You must not implement conflicting routes and subnets. Unlike on Windows platform, however, you don’t need to add multiple virtual network adapters because they are provisioned automatically.
Tunnelblick also supports drag-and-drop for adding OpenVPN connection profiles, which can be .conf or .ovpn file extensions. For example, you can download a user-locked or auto-login profile from the OpenVPN Access Server web interface and drag-and-drop it on the Tunnelblick icon. The system tray menu then shows you the options for using the connection profile. Tunnelblick doesn’t support client-side scripting, importing connection profiles directly from an Access Server, or connecting with a server-locked profile.
Alternative OpenVPN client: Viscosity
Viscosity is a third-party OpenVPN client that is created by SparkLabs. Viscosity is available for Windows and macOS and is compatible with OpenVPN Access Server.
Other client GUI projects
There are many VPN clients built for the OpenVPN protocol that will also work with OpenVPN Access Server. Refer to the community website for the current list.
Helpful Resources
For further information on VPN configuration details, refer to this documentation:
Источник
How to set up OVPN on macOS
Our easy and secure VPN client is the best and fastest way to ensure your security online. The VPN client works on Big Sur, Catalina, Mojave, High Sierra, Sierra and El Capitan.
Quick and simple installation
Prevents DNS leaks
Optimizes your connectivity
Killswitch to prevent data leaks
Hassle-free 10-day money-back guarantee
Version 1.13.0 | File size: 44.1MB | Released 2021-09-27
Requires macOS 10.12 or later | Changelog
El Capitan (10.11) uses a legacy version of the desktop client.
You can also use Tunnelblick or Viscosity to connect to OVPN.
Easy to get started
1. Download the program
2. Double-click on OVPN.zip to extract the installer
3. Double-click on OVPN.app
4. Install the client
5. Run the client
6. Enter your credentials for OVPN
7. Connect
8. Verify that all leaks are fixed
The VPN service when privacy matters
Prevent hackers and governments from monitoring your online activities. OVPN ensure that you can browse anonymously, safely & quickly. We can guarantee a totally log-free VPN service through our transparent actions together with our solid physical and software security.
OpenVPN together with our premium networking partners enable OVPN to deliver high speeds and low latencies when connecting to our VPN on your macOS computer.
Our Mac VPN provides a significantly better user experience than Tunnelblick since the desktop client contains additional security improvements and is easier to use.
Fast and user-friendly
Privacy wherever you are
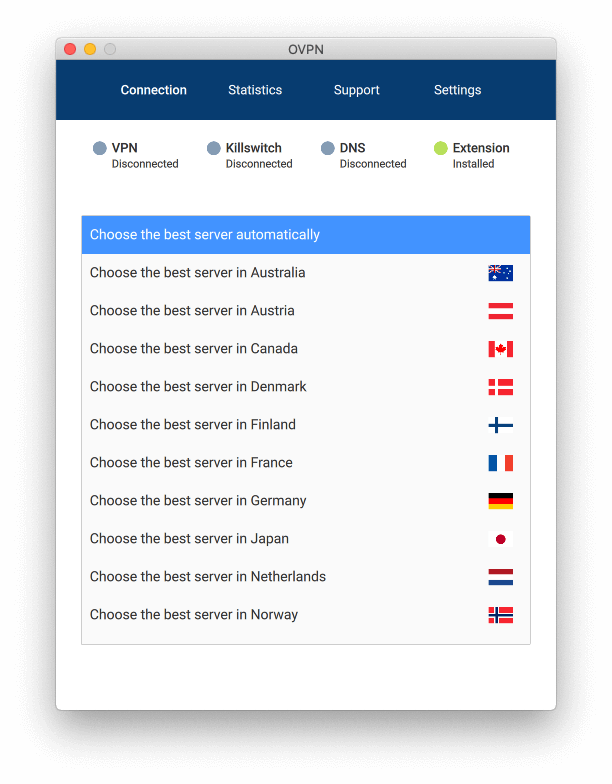
OVPN has VPN servers in 29 cities spread out in 19 different countries.
Streaming services
Access streaming services from anywhere by using OVPN.
Support is currently added for Netflix, Disney+, Hulu, Amazon Prime Video, HBO Nordic.
Fastest VPN server automatically
The VPN client chooses the fastest VPN server automatically. But you can also choose to connect to specific countries. All countries are displayed in the selection list, but you can also choose to connect to specific VPN servers.
Mac VPN
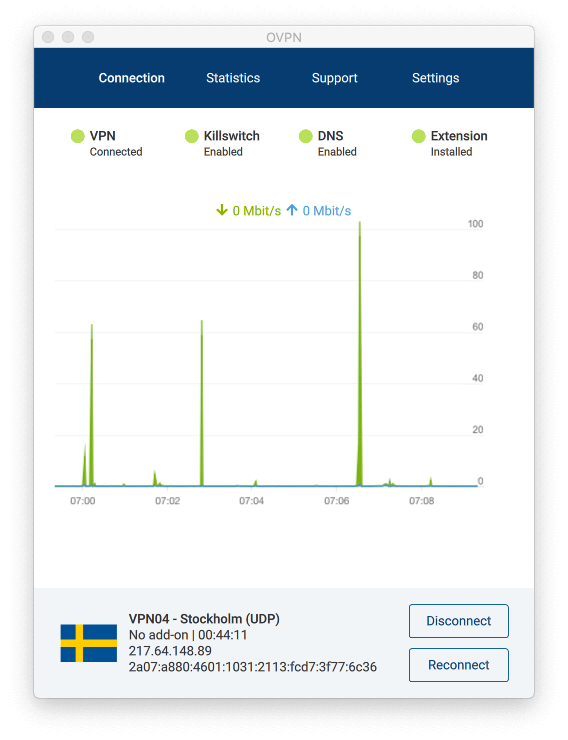
Killswitch & DNS leaks
To prevent traffic leaks, the macOS client has a built-in killswitch that automatically surpresses your internet connection in case your device loses the connection towards the VPN server.
The desktop client also ensures that your computer uses OVPN’s DNS servers to prevent DNS leaks. The VPN client monitors the DNS settings every second to block software from modifying the DNS servers.
User-friendly but powerful
The VPN client for macOS is very simple to use. No configuration files or manual configuration changes are required. A simple click is all that’s needed. Several settings are available if you want to customize the functionality.
Automatic updates
The client is updated automatically as soon as a new version is released.
Источник


