- Как отключить обновления в Опере
- Отключение автоматического обновления Opera
- Шаг 1: Отключение задания в Windows
- Шаг 2: Переименование файла обновления
- Шаг 3: Изменение свойств ярлыка
- Шаг 4: Редактирование файла hosts
- Шаг 5: Создание переменной среды в Windows
- Opera mac os disable autoupdate
- Opera mac os disable autoupdate
Как отключить обновления в Опере
Разработчик программы не предусмотрел функцию ручного отключения обновлений. Вы можете воспользоваться альтернативным методом установки обновлений. Для этого:
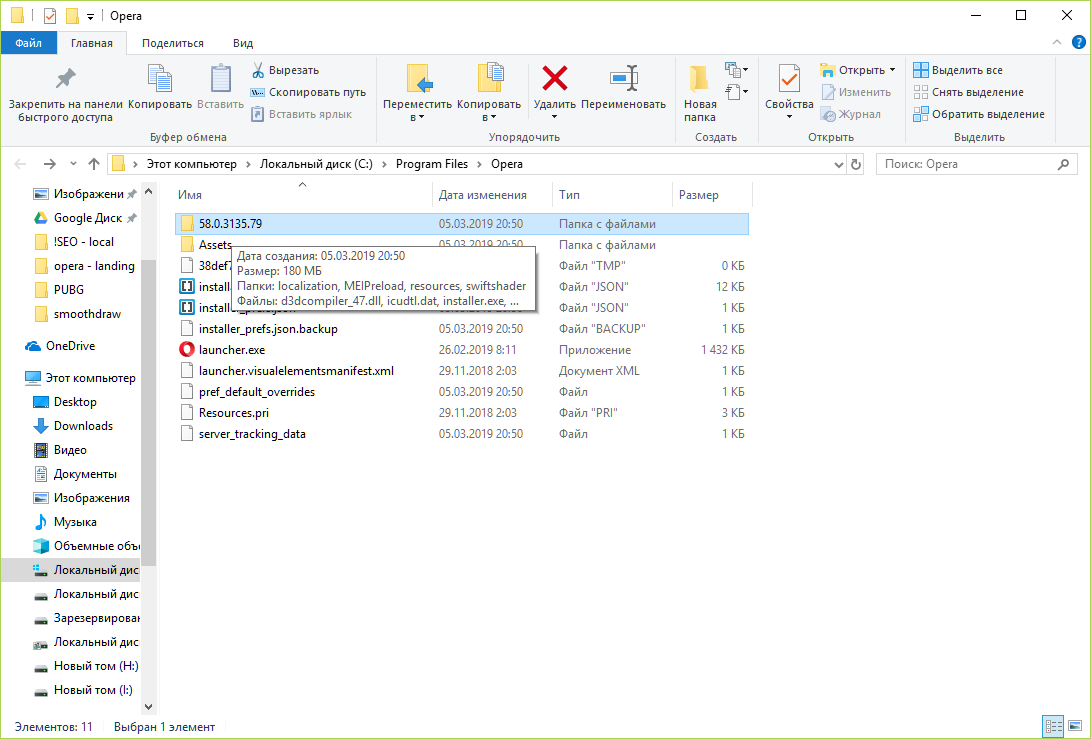
- В проводнике откройте папку с установленной программой (по умолчанию она расположена по пути C:\Program Files\Opera).

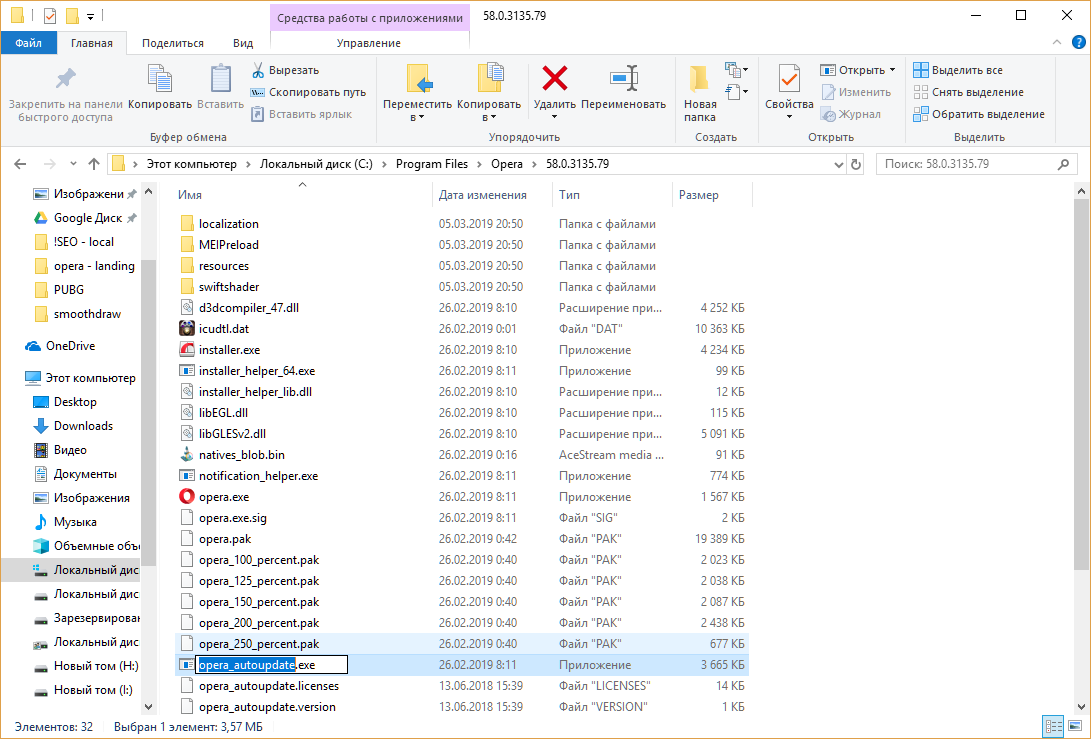
- Откройте папку с названием версии программы. Например, 58.0.3135.79. Найдите файл «opera_autoupdate.exe» и измените его имя. Например, на «opera_nodate.exe». Для переименования файла кликните по нему курсором мыши и нажмите клавишу «F2».
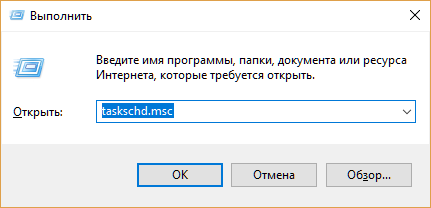
- Теперь нужно отключить запуск задачи в планировщике. Используйте сочетание клавиш «Windows» + «R».
- В появившейся строке наберите taskschd.msc и нажмите «OK».Откроется планировщик задач.
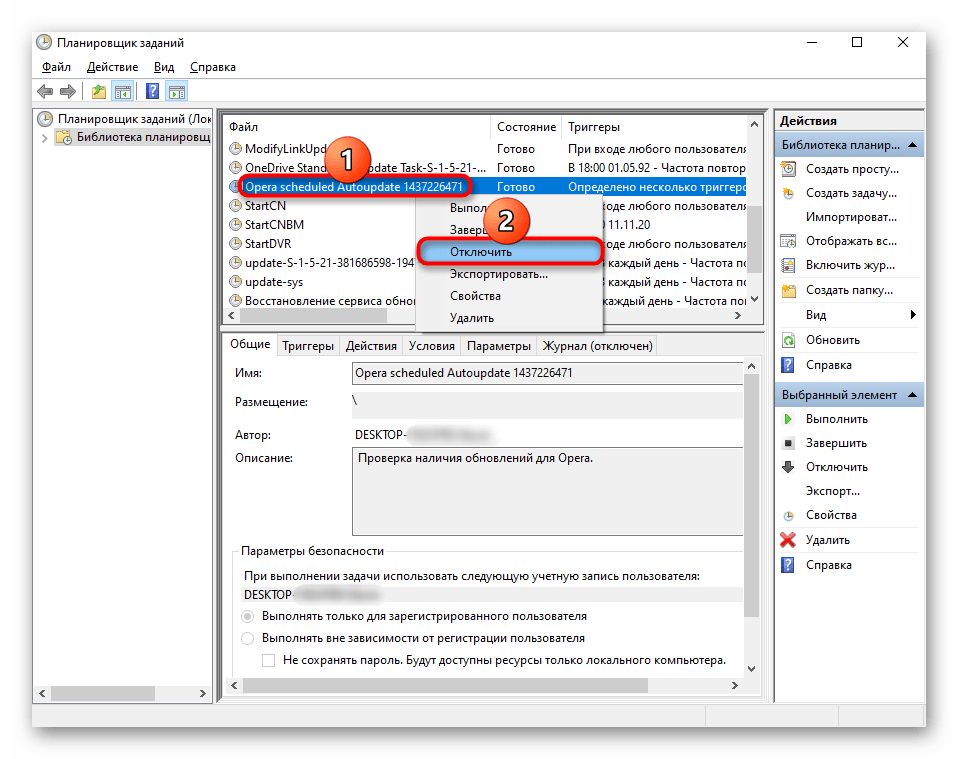
- В левом окне выберите папку «Библиотека планировщика заданий». В центральном – нажмите на надпись «Opera scheduled Autoupdate» в блоке «Файл». В блоке «Действия» кликните на надпись «Отключить».
 Откроется планировщик задач.
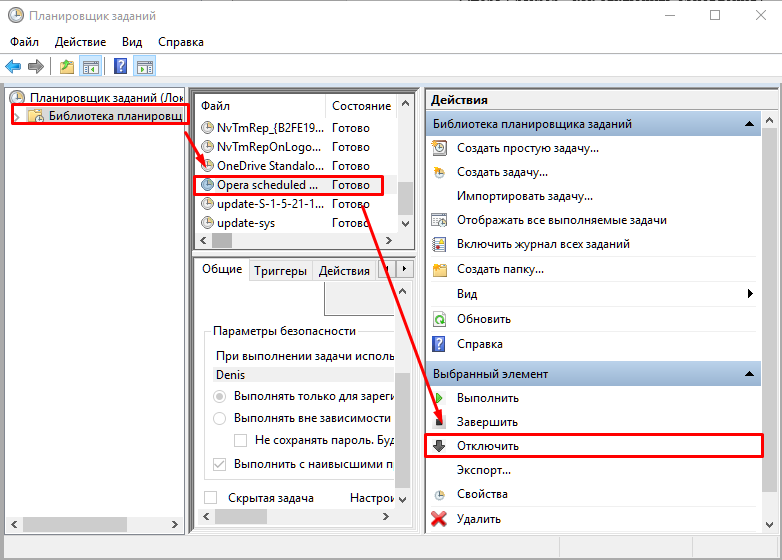
Обращаем внимание, что в некоторых случаях после такого отключения обновлений браузер может начать создавать служебные файлы в папке C:\Program Files\Opera\Номер версии.
Источник
Отключение автоматического обновления Opera

Для отключения обновлений браузера Opera рекомендуется выполнить сразу несколько из представленных далее рекомендаций на ваше усмотрение, чтобы у новой версии не было шансов скачаться и установиться. Если же веб-обозревателем уже была скачана последняя версия, требующая перезапуска Opera для установки, обязательно удалите ее, прибегнув к рекомендации из Шага 2 этой статьи.
Шаг 1: Отключение задания в Windows
Файл opera_autoupdate.exe создает в операционной системе задачу, которая по расписанию проверяет наличие обновлений браузера. Ее действие можно отключить либо удалить саму задачу целиком.
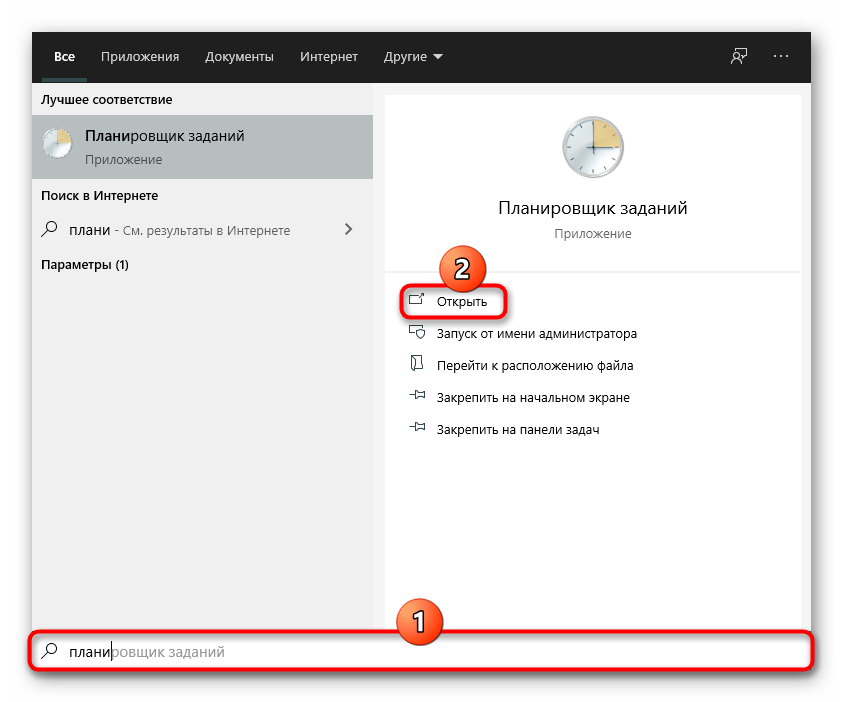
- Откройте «Пуск» и начните в нем набирать «Планировщик заданий». Запустите найденное приложение.
После этого достаточно закрыть окно и перейти к другим шагам, поскольку этот не решает проблему на 100%.
Шаг 2: Переименование файла обновления
Переименовав или удалив файл обновления из системной папки, вы также лишите браузер возможности выполнять проверку актуальности текущей версии.
- По умолчанию Opera установлена по пути C:\Users\ИМЯ_ПОЛЬЗОВАТЕЛЯ\AppData\Local\Programs , где ИМЯ_ПОЛЬЗОВАТЕЛЯ — название вашей учетной записи. Если вы меняли путь установки, например на диск D, перейдите уже туда и найдите папку с Opera. Пользователям не менявшим путь и не видящим папку «AppData», следует включить отображение скрытых файлов и папок в Windows. Сделать это можно при помощи одной из следующих инструкций.
Подробнее: Включение отображения скрытых файлов и папок в Windows 10 / Windows 7
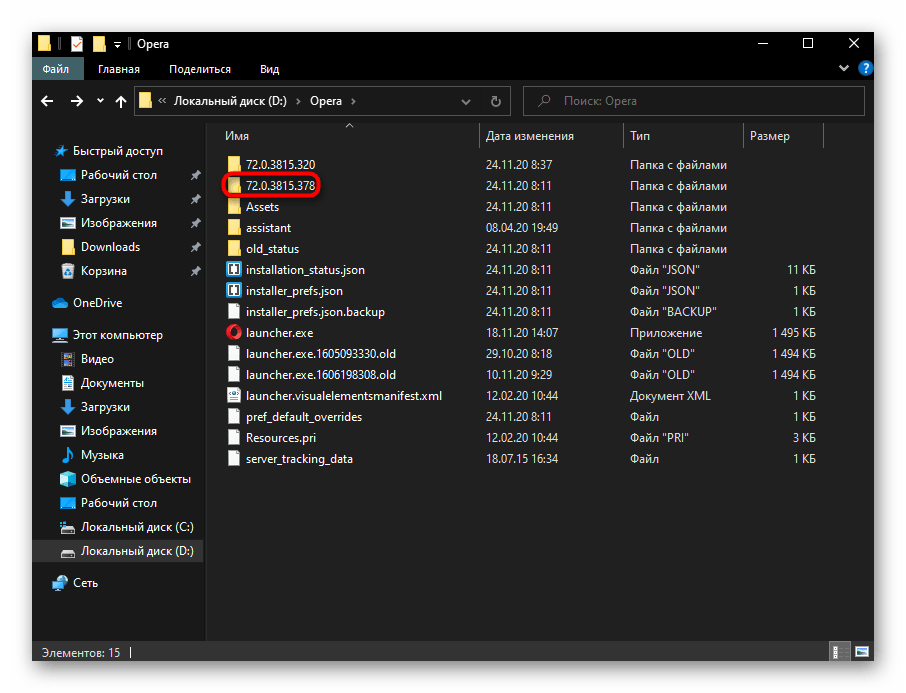
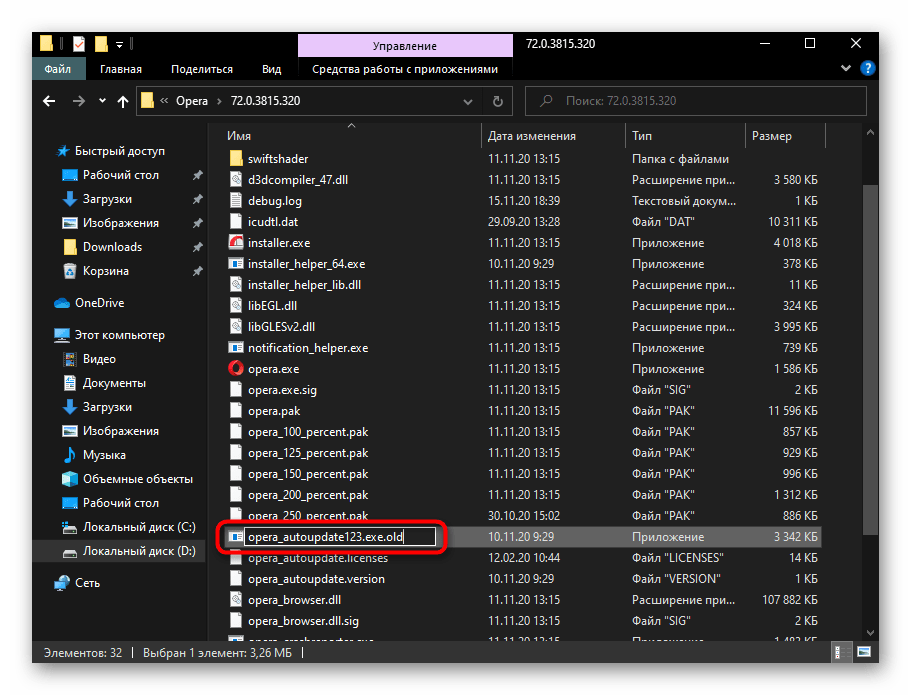
Внутри папки с Оперой может быть несколько папок с версиями. Ориентируясь на последние цифры, выберите наиболее актуальную (чем больше цифры, тем новее версия). Папку со старой версией можно удалить, так как в ней кроме ненужного файла формата LOG (журнал с некоторыми сведениями) ничего не содержится.

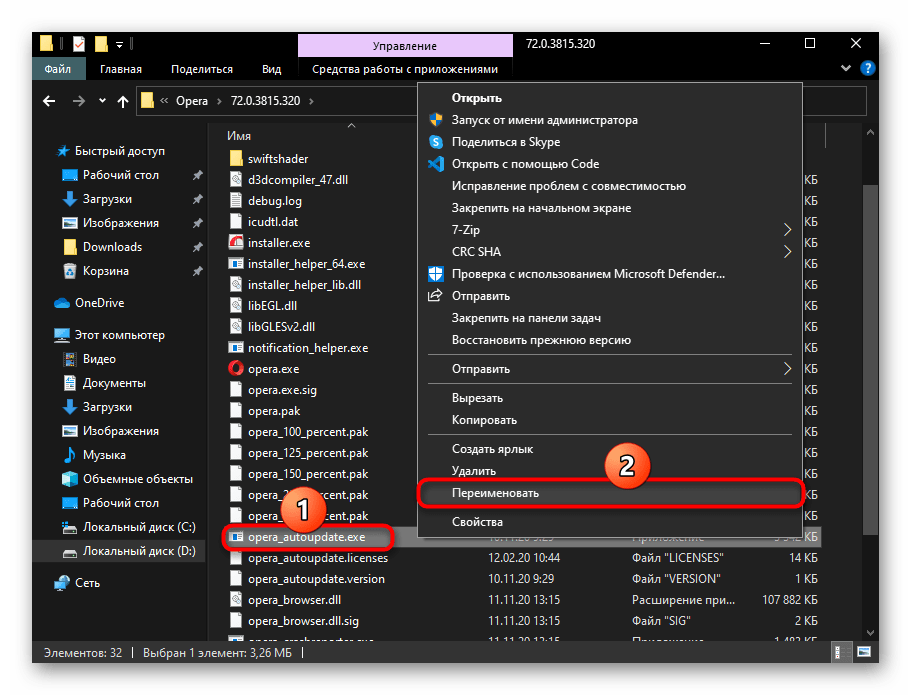
Внутри новой найдите файл «opera_autoupdate.exe» и переименуйте его. Изменить можно как имя, так и расширение. Смысл действия в том, что веб-обозреватель, не обнаружив файла с названием «opera_autoupdate.exe», не сможет инициировать поиск обновления. Если вы уверены в том, что вообще никогда не захотите устанавливать обновление, можете вообще удалить этот EXE.
Переименованный же файл всегда легко восстановить, тем самым обновившись тогда, когда возникнет необходимость.
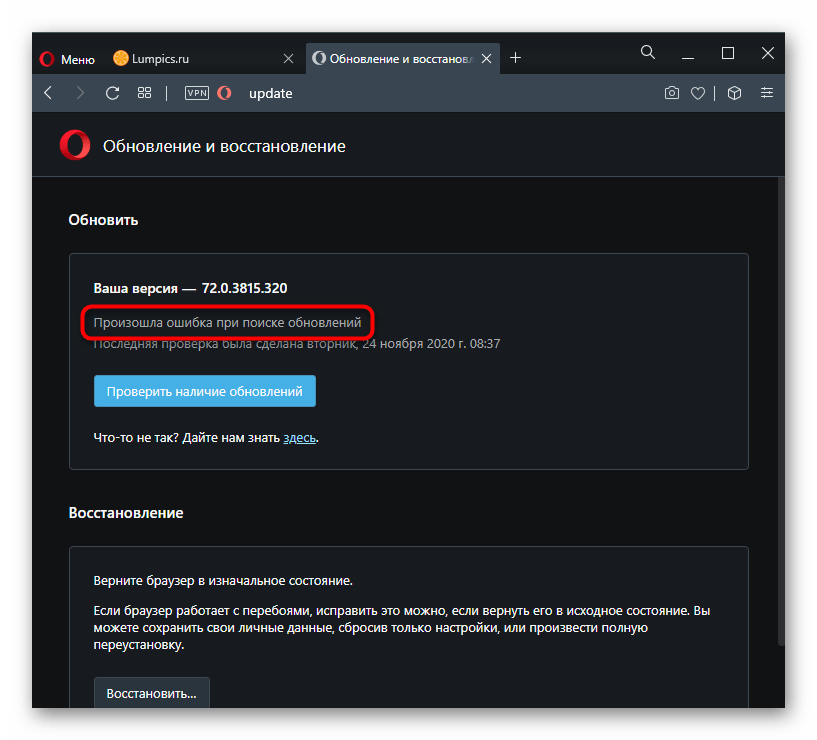
После этого при переходе в «Обновление и восстановление» в Opera можно увидеть, что браузер пытается начать поиск.
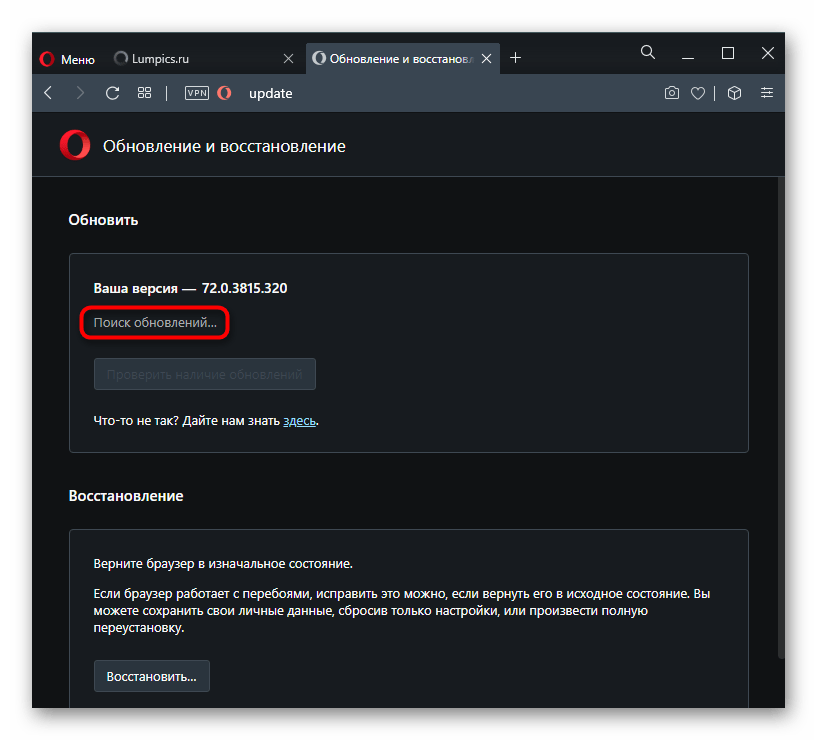
Однако это действие заканчивается найденной ошибкой.
Шаг 3: Изменение свойств ярлыка
Ярлыку, через который запускается Опера, также можно задать некоторые свойства, ограничивающие обновление. Однако при этом следует учитывать, что после удаления ярлыка или при использовании нескольких (к примеру, когда несколько профилей в браузере), все свойства понадобится прописывать еще раз.
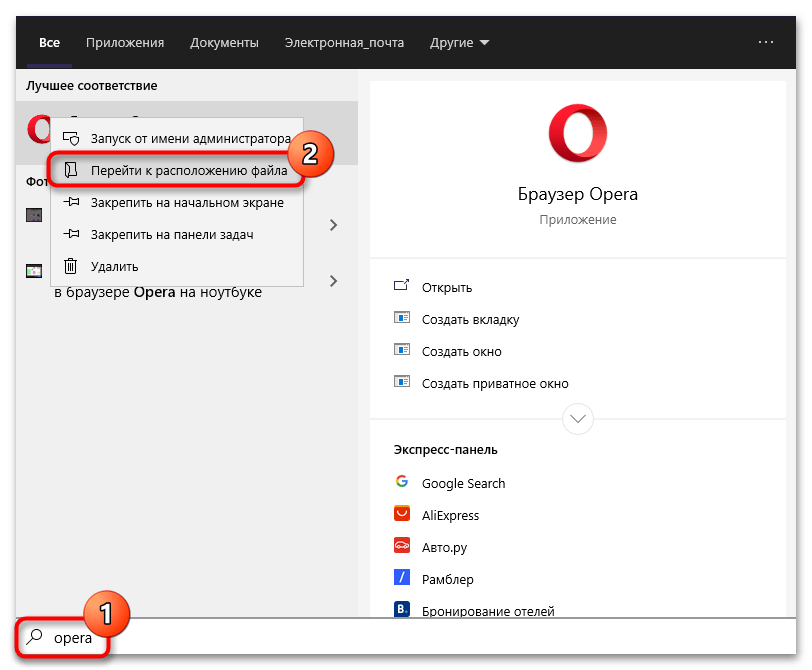
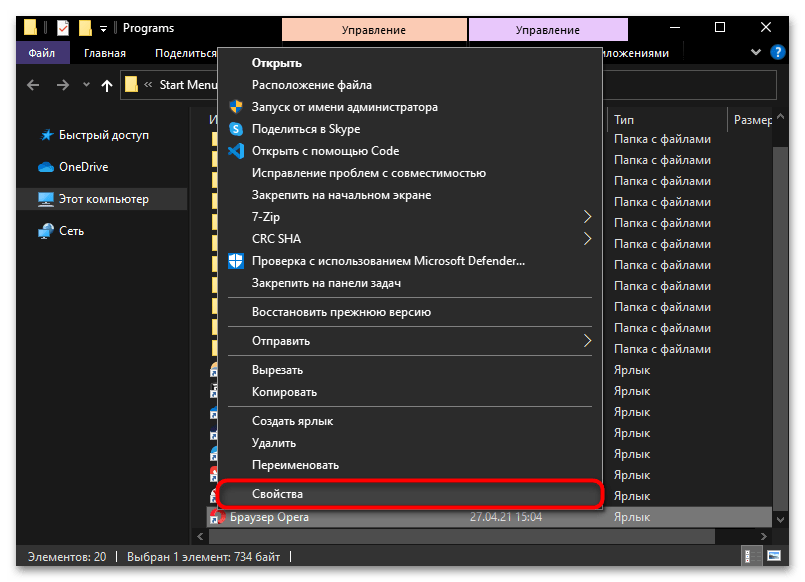
- Найдите ярлык на рабочем столе, а если запускаете веб-обозреватель через «Пуск», наберите там его название, кликните по найденному результату правой кнопкой мыши и воспользуйтесь пунктом «Перейти к расположению файла».
Правой кнопкой мыши вызовите контекстное меню ярлыка Opera и перейдите в «Свойства».
Находясь на вкладке «Ярлык», поставьте курсор в самый конец поля «Объект» и вставьте туда следующую команду: —disable-update . Альтернативная команда — —disable-background-networking — так же актуальна, однако она препятствует установке обновления расширений. Выбирайте подходящую команду, исходя из своей ситуации, и не забудьте сохранить внесенные изменения кнопкой «ОК».

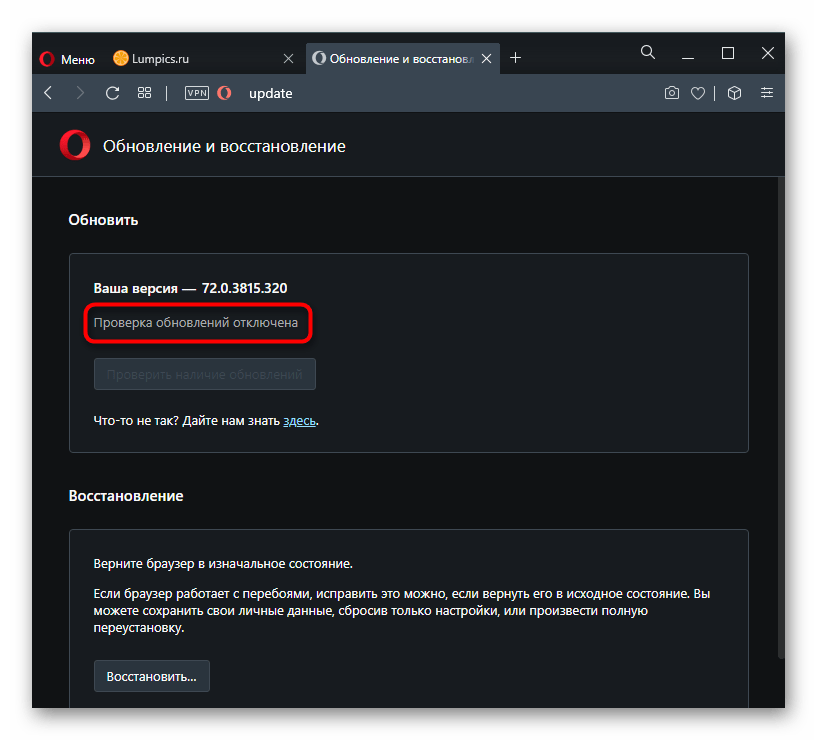
Если в запущенном браузере перейти в меню «Обновление и восстановление», вместо ошибки, как в предыдущем шаге, вы увидите, что поиск обновлений и вовсе отключен.
В целом этих шагов достаточно для того, чтобы поставленную задачу можно было считать успешно выполненной. Однако не лишним будет отредактировать еще и файл hosts, а также скрыть уведомление о необходимости установить обновление при помощи создания переменной среды, что по совместительству тоже можно считать одним из способов блокировки работы автообновления браузера.
Шаг 4: Редактирование файла hosts
Через системный файл hosts также можно управлять возможностью или невозможностью браузера обновиться. Для этого достаточно вписать туда лишь одну строчку.
- Разверните системный «Проводник» и перейдите по пути C:\Windows\System32\drivers\etc . В последней папке вам нужен файл «hosts».
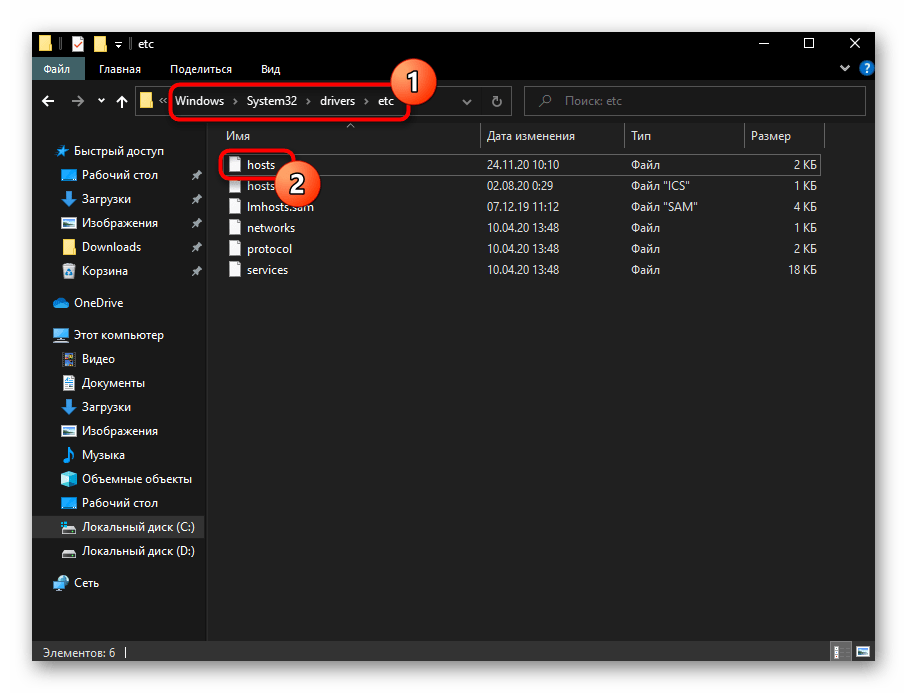
Откройте его при помощи встроенного в Windows приложения «Блокнот».

В самый конец документа допишите строку 127.0.0.1 autoupdate.geo.opera.com — этим самым вы заблокируете локальное доменное имя сервера обновлений Оперы. Сохраните документ горячей клавишей Ctrl + S или через меню «Файл» >«Сохранить».

Отметим, что если в документе есть строка 127.0.0.1 autoupdate.opera.com , удалять ее не обязательно.
Шаг 5: Создание переменной среды в Windows
Создание переменной для достоверной блокировки обновления и скрытия уведомления о надобности выполнить этот самый апдейт выполняется в пару кликов и актуально для всех вариантов запуска браузера.
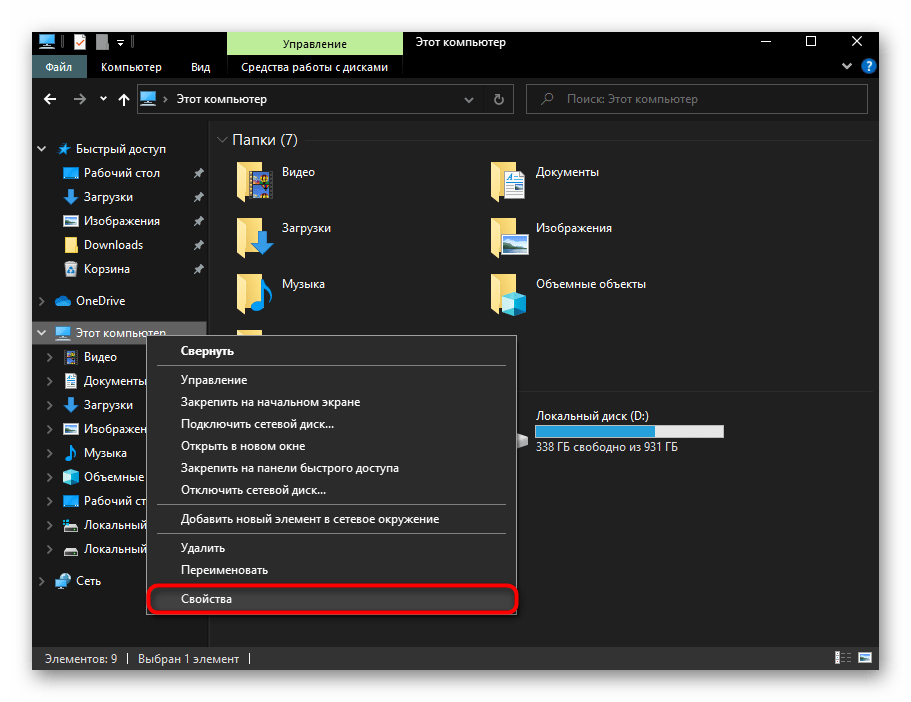
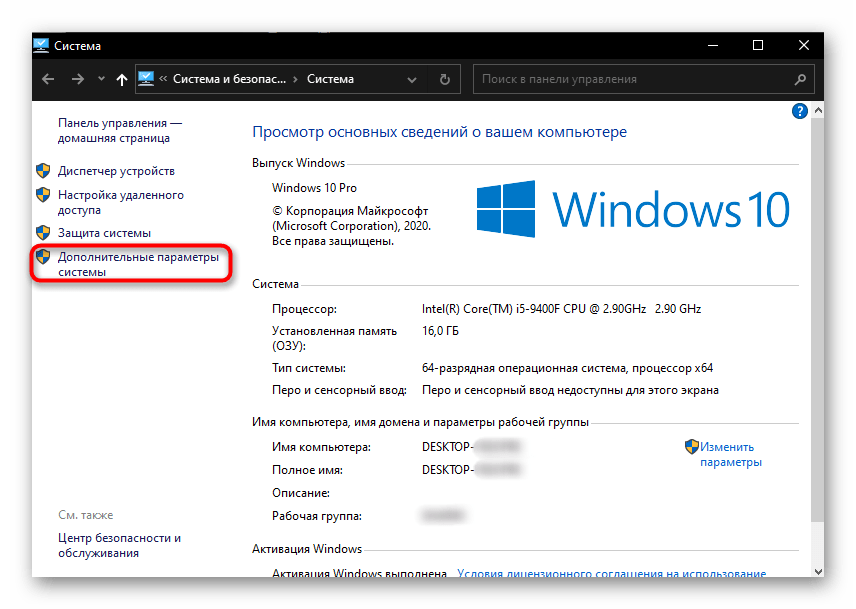
- Кликните по ярлыку «Этот компьютер» или «Мой компьютер» правой кнопкой мыши и вызовите его «Свойства».
Через левую панель зайдите в «Дополнительные параметры системы».
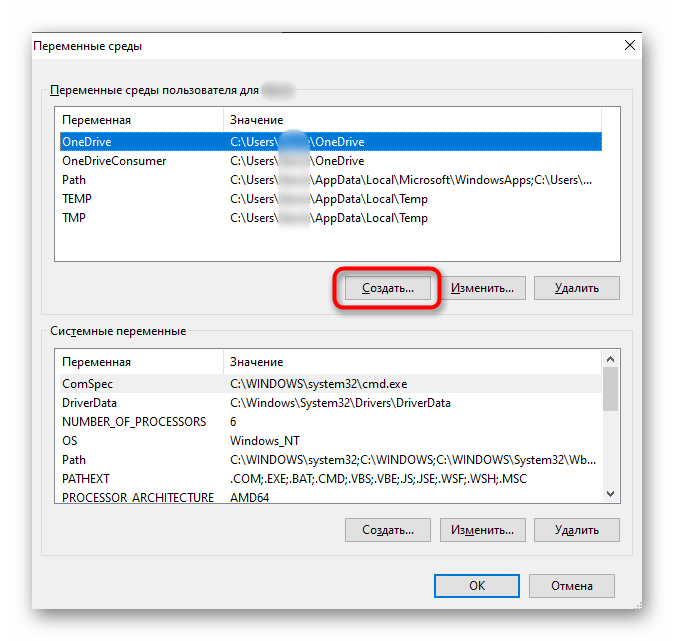
На вкладке «Дополнительно» найдите кнопку «Переменные среды».

В блоке «Переменные среды пользователя для ИМЯ_ПОЛЬЗОВАТЕЛЯ» нажмите «Создать».
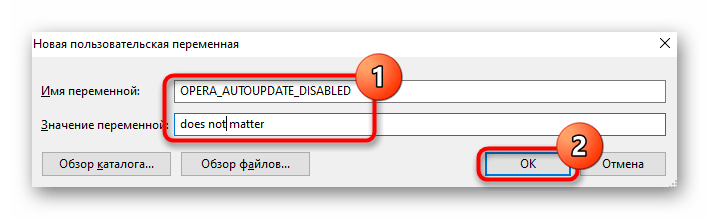
В поле «Имя переменной» впишите «OPERA_AUTOUPDATE_DISABLED», а в «Значение переменной» можете написать что угодно. Нажимайте «ОК», закрывая все окна последовательно.
Помимо этой статьи, на сайте еще 12315 инструкций.
Добавьте сайт Lumpics.ru в закладки (CTRL+D) и мы точно еще пригодимся вам.
Отблагодарите автора, поделитесь статьей в социальных сетях.
Источник
Opera mac os disable autoupdate
I refuse to allow software to update without my express permission, and so I have been forced to get creative since so many software companies feel the need to ignore my wishes on the matter. I have no interest in beta-testing features, nor do I want my personal space (my computer) invaded by rogue installers.
Since I was informed that my reply was to a Windows thread, I will post a new thread specifying MacOS for those like myself.
I found a way to disable the auto-update feature in the MacOS version of Opera.
If you wish to do so follow these steps:
1] Go to the Applications folder and click on the Opera.app while simultaneously pressing the «Control» key you will get a pop up menu. From that menu, select «Show Package Contents» which should be your second option.
2] Then a window opens with a folder that says «Contents.» Open that and then you will see a bunch of files and folders.
3] Open the folder that is labeled «MacOS.» Inside you should find a set of «exec» files. There is one called «opera_autoupdate»
4] Rename that to «opera_autoopdate,» (just one letter wrong so you can change it back if so needed) and then closed everything and launched Opera as usual.
When I opened the opera://about page the app said it was checking for updates for about 5 minutes then displayed «An error occurred while checking for updates.»
The app behaves normally in every other way.
So apparently I accidentally found the way to disable updates on the MacOS version of Opera. I was just fooling around and didn’t think it would work, but it does.
I am sharing this in the hope it will help others.
You can also set the environment variable OPERA_AUTOUPDATE_DISABLED . This works on all platforms.
For Opera 32 and newer, you can use a global Apple preference. From Terminal, enter one of these commands:
For stable:
defaults write com.operasoftware.Opera OPDisableAutoUpdate true
For beta:
defaults write com.operasoftware.OperaNext OPDisableAutoUpdate true
For developer:
defaults write com.operasoftware.OperaDeveloper OPDisableAutoUpdate true
pressing the «Control» key you will get a pop up menu. From that menu, select «Show Package Contents» which should be your second option.
Yeeeessss! Thank you. Looked just about everywhere else for the autoupdate thing. Incredibly annoying when you’re working on a mobile hotspot and it downloads the update, then asks for your password to install it. If you don’t give your password, guess what? It downloads again!
@avl
terminal command
defaults write com.operasoftware.Opera OPDisableAutoUpdate true
results in the about Opera tab in the ‘Update checker is disabled’
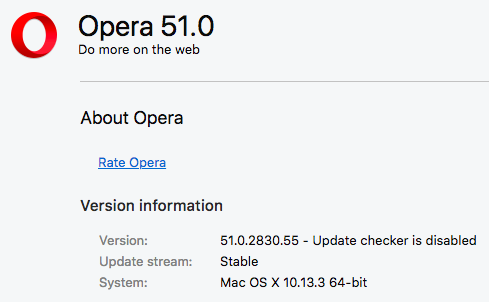 OperaAutoUpdateDisabled.png
Источник
Opera mac os disable autoupdate
I am really p****ed off today . I was trying hard not to use up what data I had left for the month. 3 days to go. and then along comes Opera and downloads an update. there goes my data allowance and cost me another $10 for 1 Gb which is charged automatically.
So my Question is how to stop Opera automatically downloading these updates except when I choose.
The solution often mentioned is to simply rename the «opera_autoupdate.exe». However, this file is created anew with each update and thus would have to be renamed each time anew.
I therefore think the following solution makes more sense:
- Run the installer with —launchopera=0
- Start Opera with —disable-update
With the billing method you mention, I would have assumed that your question relates to Opera for mobile (Android, iOS), but you posted in the Windows forum, and my solution relates to Windows.
Hi Yanta,
No my billing method is for Internet on my computer not Mobile Phone. so windows method is what I’m looking for.
So with the method you mention how do I do this. [not very tech savvy] do I have to uninstall the browser and reinstall or is there a way to do it whilst it is already installed. i.e in the menu somewhere. I have had a look and can’t find anything.
Thank you for your reply.
Sandy
Prevent automatic updates of an already installed version
- Create for Opera a desktop shortcut e.g. from the Windows Start Menu.
- Right-click on this shortcut, switch to the «Shortcut» tab.
- Add » —disable-update» (including the space character) to the existing entry in the «Target» field.
From now on use this shortcut to start Opera to avoid automatic updates.
Prevent an automatic update immediately after installation
If a new Opera version is available, download its offline installer. Since the installer would open Opera automatically at the end of the installation, which could also trigger untimely updates,
- create a shortcut to the installer, and
- add » —launchopera=0″ (including the space character) to the «Target» field.
Start the installation by double-clicking on this shortcut, not on the installer.
Please keep in mind that Opera will not be updated automatically this way anymore, which is a security risk sooner or later, unless you take care of the updates yourself.
@yanta thanks but I just don’t follow this, I don’t get an option to switch to the shortcut tab when I right click, and don’t know where to type «—disable-update» what is «Target field» ?
I think I will have to forget about this as it’s too technical for me.
Thank you for trying to help me.
Example 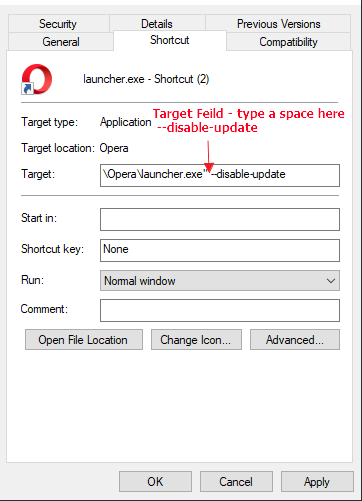
right click > click properties
at the end of launcher.exe» tap space bar then —disable-update
to make a short cut to installer
go to wherever the installer file is — right click it — then in contex menu — click the Send to Desktop (create shortcut
![]()
—disable-update appears to have no effect.
![]()
I’ve seen posts that recommend adding —disable-update to the command line, but this appears to have no effect. Any suggestions?
You can rename or delete «opera_autoupdate.exe», but from what I read online elsewhere, it’ll come back after you force an update.
Those same online comments indicated that, in Windows, you have to open Task Scheduler and disable the Opera Auto Update tasks you find there. I found two of them.
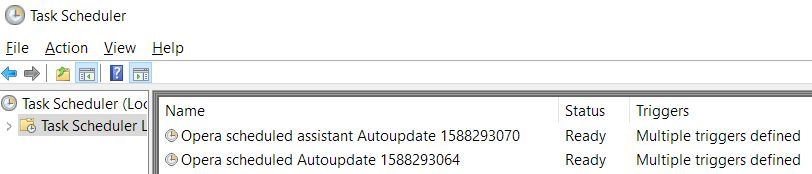
I was getting tired of cleaning up auto-update garbage Opera kept putting into my Windows Download folder so I disabled the aforementioned auto update tasks from within Windows Task Scheduler. I wouldn’t have been quite as annoyed had Opera put that garbage in my Windows Temp folder. To be fair, there is an option as to where to place downloads, but I don’t want to be placing normal downloads in my Windows Temp folder. In any case, I’d prefer to control when to update Opera.
Pretty shoddy that you can’t disable auto updates from the Opera settings window, eh?
Even more shoddy that it forces the permanent Auto Update setting on us without asking during installation.
I installed Opera because I read it was reportedly «lighter» than other browsers. Can’t say I’m too impressed with that. Looks like it invokes more processes at startup than Firefox, and just as many as Chrome. I even disabled non-used Opera features. Adding up the consumed memory, Opera takes more. Thing is, other than what’s installed by default, I don’t have any additional plugins (yet). Maybe this thing started out «light» in its infancy, but certainly not now. It, and as a matter of course, all browsers, should offer a single «button» that, while invoked (and perhaps after a necessary restart), allows the browser to consume the lightest memory and task footprint possible.
![]()
I was using that, but once you update, the Task is created again.
You could create a .Bat and run it, even as Task, to clean the Update Opera Task or delete AutoUpdate every X days.
Here’s an example: Clean Opera Footprints.
It allows the Update, not the Task.
Thank you. I suspected as much. Then I’ll just leave my Opera version as is and not update it. I only use it rarely as an occasional alternate. I do not use its additional features; my main browser already has most of them.
Given the amount of hassle encountered with Opera thus far, coupled with the dissatisfaction with it’s lack of «lightness», unless this forced auto-update is resolved via settings in a future release, I’ll likely end up uninstalling Opera altogether when a better alternative presents itself.
@wclusa After the update you should rename/delete the autoupdater for the new version.
Источник


