- Manual and Offline Installations
- Step 1: Installing Python
- Oracle Linux 7 and Oracle Linux 8
- Oracle Linux 6
- CentOS 7, CentOS 8
- Ubuntu 16, Ubuntu 18, and Ubuntu 20
- Step 2: Creating and Configuring a Virtual Environment
- Installing and Activating your Virtual Environment
- Step 3: Installing the Command Line Interface
- Installing Without a Virtual Environment
- Offline Installation
- Установка GCC в Ubuntu
- Набор компиляторов GCC
- Установка GCC в Ubuntu
- Использование GCC в Ubuntu
- Выводы
- Oracle linux install gcc
- Notices
- aarch64
- x86_64
- Preinstalled Components
- aarch64
- x86_64
- Yum Repositories Enabled by Default
- aarch64
- x86_64
- Creating an Oracle Linux Cloud Developer Instance
- Updating the Oracle Linux Cloud Developer Image
- References
- How do I install gcc on Oracle Enterprise Linux?
- Best Answer
- Answers
Manual and Offline Installations
Instead of using the installer script as described in the Quickstart, you can manually install the CLI and its dependencies. Before proceeding, be sure you meet the Requirements.
You can also download the CLI installation files and perform an offline installation.
Step 1: Installing Python
Python installation instructions vary for each operating system that the CLI supports.
Note
The CLI supports only the Python versions listed in the CLI Requirements.
Install a supported version of PythonВ from the Python Windows downloads page. During installation, choose to add Python to the PATH and/or environment variables (depending on the prompt).
Some versions of Oracle Linux come with incompatible versions of Python, and might require additional components to install the CLI. Before installing the CLI, run the following commands on a new Oracle Linux image.
Tip
Oracle Autonomous Linux 7 and Oracle Linux Cloud Developer 8 come with the CLI pre-installed.
Oracle Linux 7 and Oracle Linux 8
Oracle Linux 6
Before you install the CLI, run the following commands on a new CentOS image.
CentOS 7, CentOS 8
Before you install the CLI, run the following commands on a new Ubuntu image.
Ubuntu 16, Ubuntu 18, and Ubuntu 20
Mac OS X comes with Python pre-installed.
To install the latest version of Python on Mac OS X, see the official Python documentation.
Step 2: Creating and Configuring a Virtual Environment
The venv Python module is a virtual environment builder that lets you create isolated Python environments. We recommend installing the CLI in a virtual environment.
Installing and Activating your Virtual Environment
After Python is installed, set up a virtual environment for your operating system using the following steps.
- Navigate to the directory in which you would like to create the virtual environment.
- Create the virtual environment by running the following command:
- Navigate to the directory in which you would like to create the virtual environment.
- Create the virtual environment by running one of the following commands, depending on the version of Python installed:
Step 3: Installing the Command Line Interface
You can download the CLI from GitHub or install the package from Python Package Index (PyPI).
To install using the GitHub download:
- Download and unzip oci-cli.zip.
Run the following command.
To install using PyPI, run the following command:
For information on how to start a CLI session, see Using the CLI.
Installing Without a Virtual Environment
We do not recommend installing the CLI in your system-wide Python and suggest that instead you install the CLI using the installer or virtual environment.
In cases where you are trying to install the CLI in your system-wide Python using the latest pip version, you might encounter conflicts with some distutils installed packages. Following is an example error message when this occurs:
Another option is to install the CLI for the user using the following command, although this approach is not supported:
Offline Installation
If you have Python 3 installed, you can perform an offline installation of the OCI CLI.
For troubleshooting offline installs, see Common Issues or create an issue on GitHub.
Источник
Установка GCC в Ubuntu
Большинство программ в Linux написаны на C или С++, и если вы хотите собирать их из исходников, то вам обязательно понадобиться компилятор, также он понадобиться, если захотите начать писать свои программы на одном из этих языков.
Существует два основных компилятора в Linux — это GCC и Clang, они похожи по своим возможностям, но так сложилось, что первый считается стандартом для Ubuntu. GCC расшифровывается как GNU Compiler Collection. В этой статье мы рассмотрим, как выполняется установка GCC в Ubuntu, а также рассмотрим базовые приемы работы с этим набором программ в терминале.
Набор компиляторов GCC
Все программы представляют собой набор машинных команд, которые выполняются процессором. Эти команды — последовательность бит. Но писать программы наборами бит очень неудобно, поэтому были придуманы языки программирования высокого уровня. Код на языке программирования хорошо читаем и понятен для человека, а когда из него нужно сделать программу, компилятор ubuntu преобразует все в машинные команды.
В базовую поставку компилятора входят такие программы:
- libc6-dev — заголовочные файлы стандартной библиотеки Си;
- libstdc++6-dev — заголовочные файлы стандартной библиотеки С++;
- gcc — компилятор языка программирования Си;
- g++ — компилятор языка программирования C++;
- make — утилита для организации сборки нескольких файлов;
- dpkg-dev — инструменты сборки пакетов deb.
Все эти пакеты являются зависимостями пакета build-essential, поэтому для установки всего необходимого достаточно установить этот пакет.
Установка GCC в Ubuntu
Если вас устраивает текущая версия GCC, которая есть в официальных репозиториях дистрибутива, то вам достаточно установить пакет build-essential. Для этого выполните команду:
sudo apt -y install build-essential
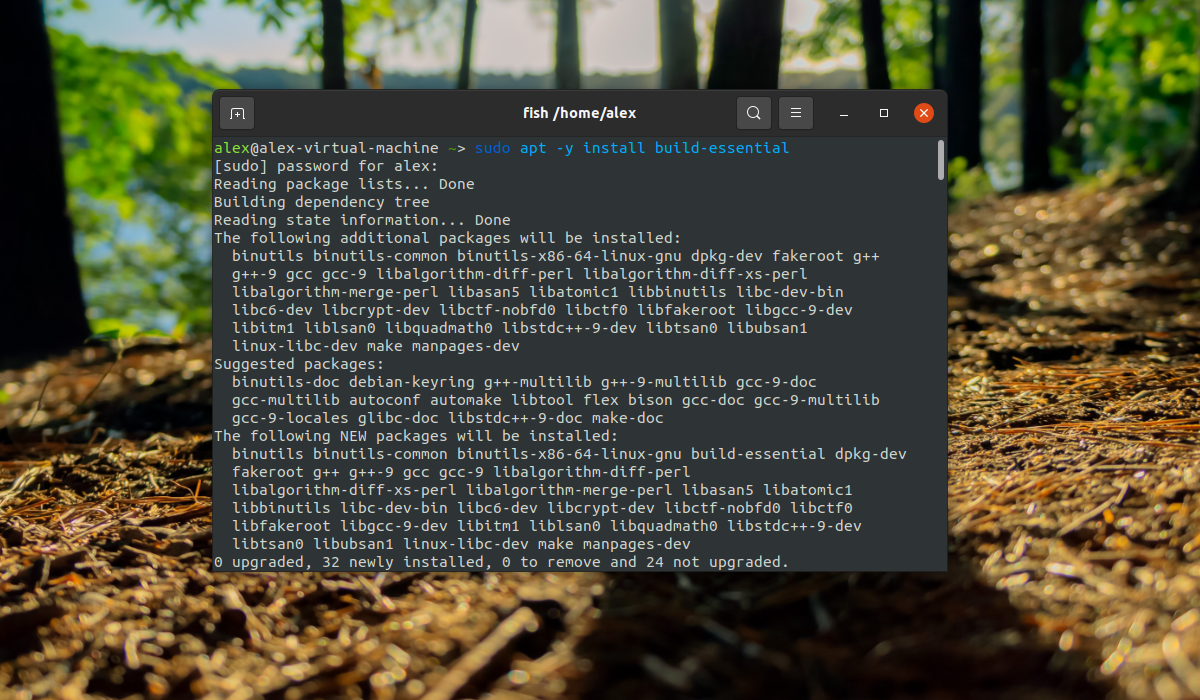
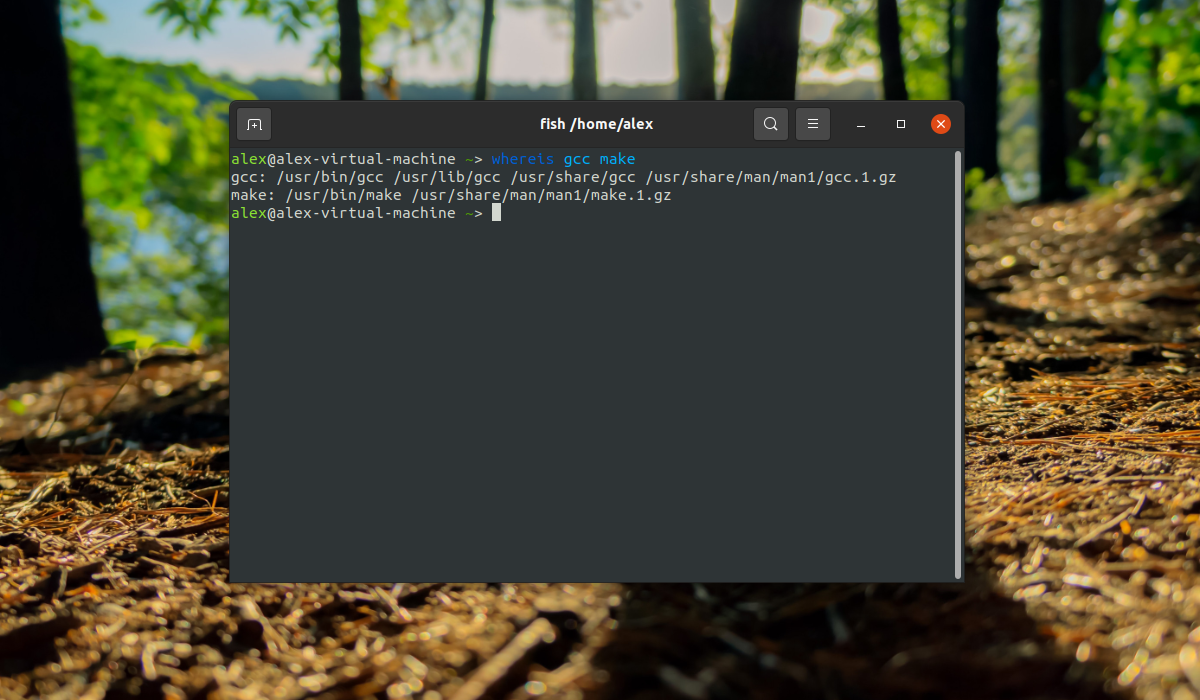
После завершения установки все необходимое для компиляции программ будет установлено. И вы сможете использовать компилятор. Рассмотрим версии и расположение файлов компилятора:
whereis gcc make
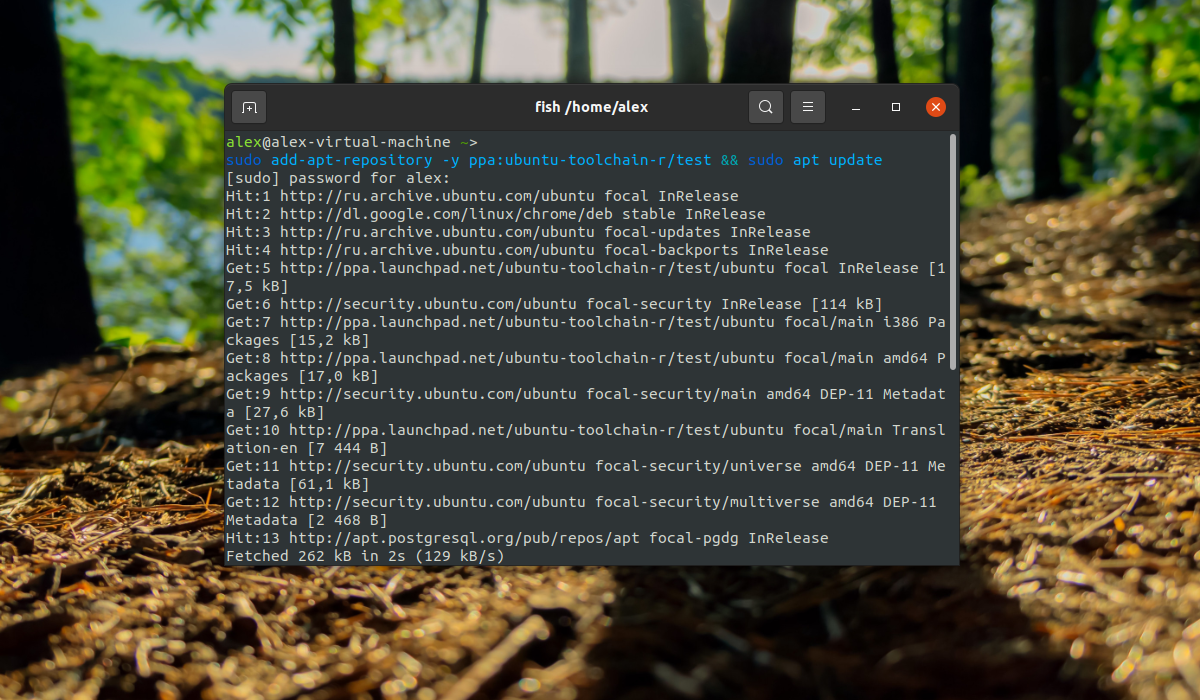
Если необходима более новая версия компилятора, например, на данный момент последняя версия — 11, то можно использовать PPA разработчиков с тестовыми сборками. Для добавления PPA в систему выполните команды:
sudo add-apt-repository -y ppa:ubuntu-toolchain-r/test && sudo apt update
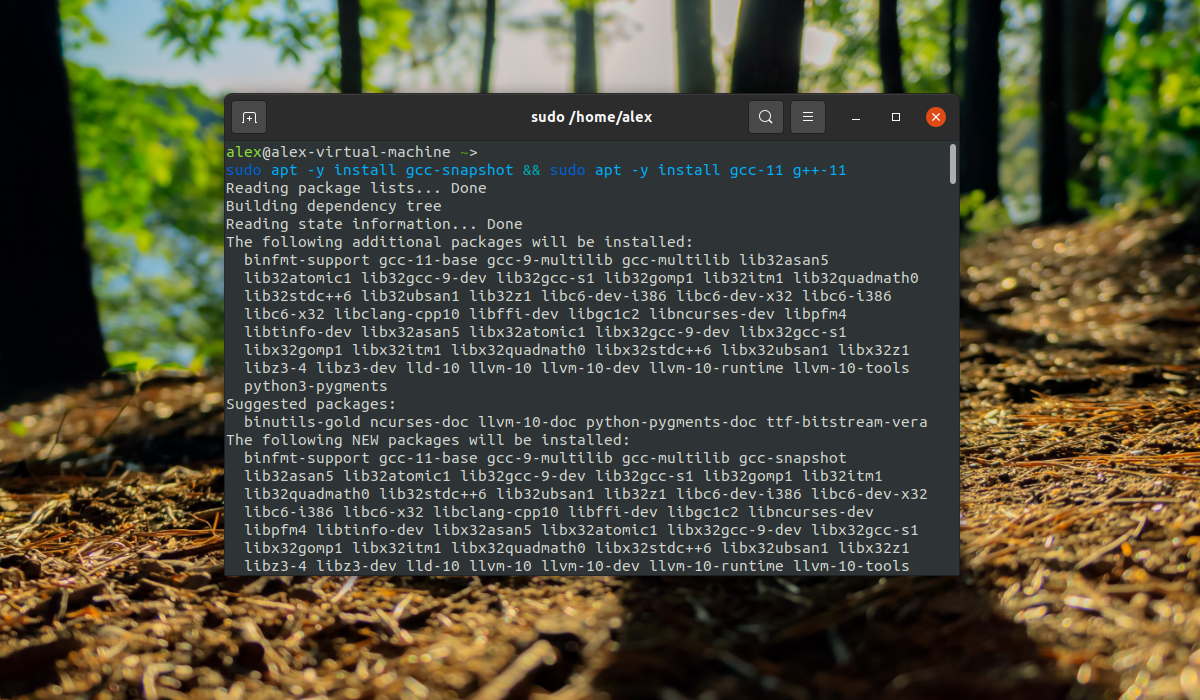
Далее установите сам компилятор:
sudo apt -y install gcc-snapshot && sudo apt -y install gcc-11g++-11
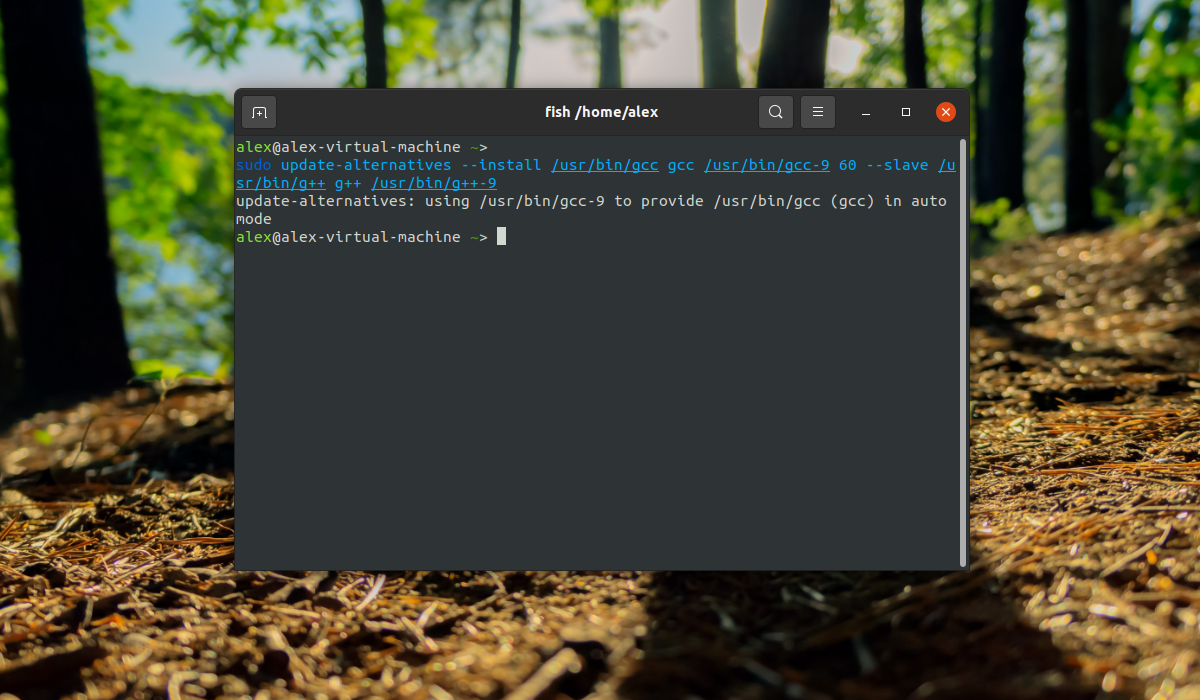
Это не заменит ваш текущий компилятор на новый. В системе просто появятся 2 версии компиляторов gcc-11 и g++11, которые вы можете использовать для своих программ. Это лучший вариант на данный момент, но если вы хотите все же сделать gcc-9 компилятором по умолчанию, выполните:
sudo update-alternatives —install /usr/bin/gcc gcc /usr/bin/gcc-9 60 —slave /usr/bin/g++ g++ /usr/bin/g++-9
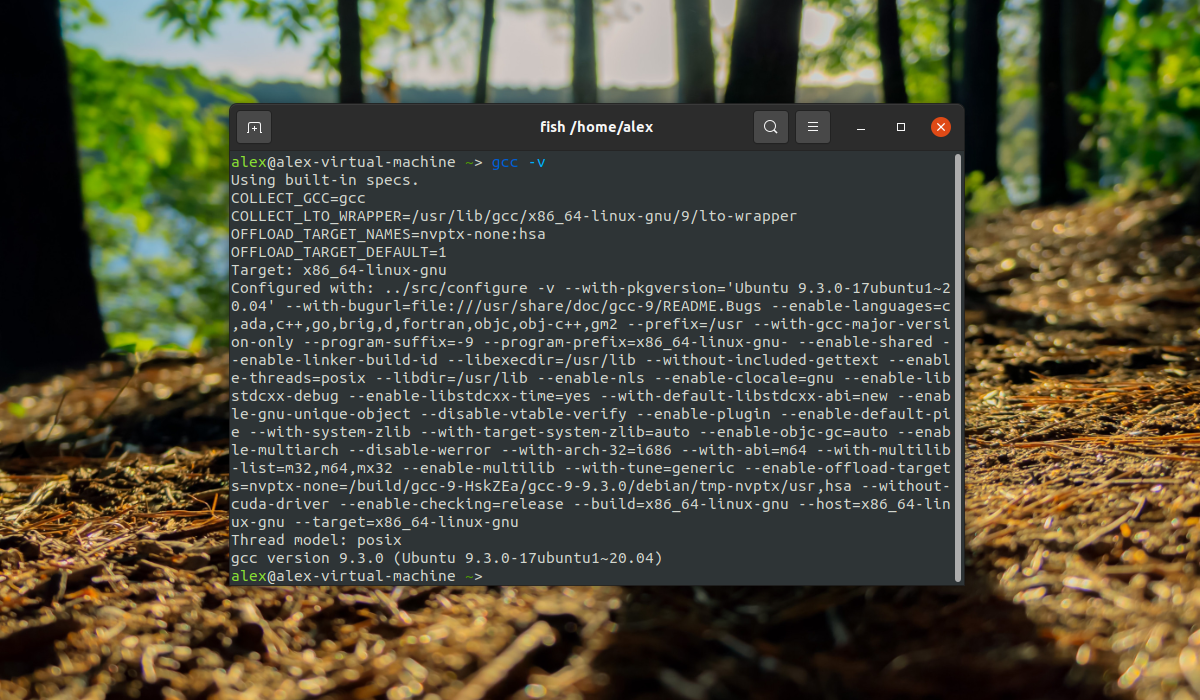
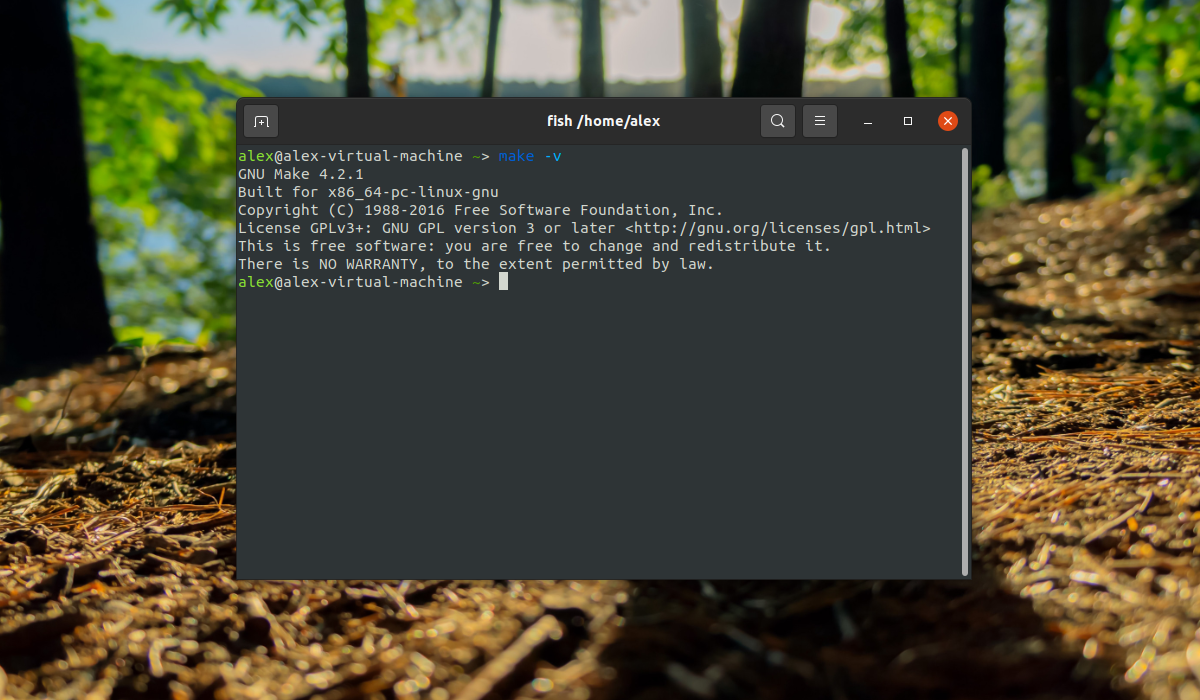
Готово, теперь вы можете проверить версию gcc-6:
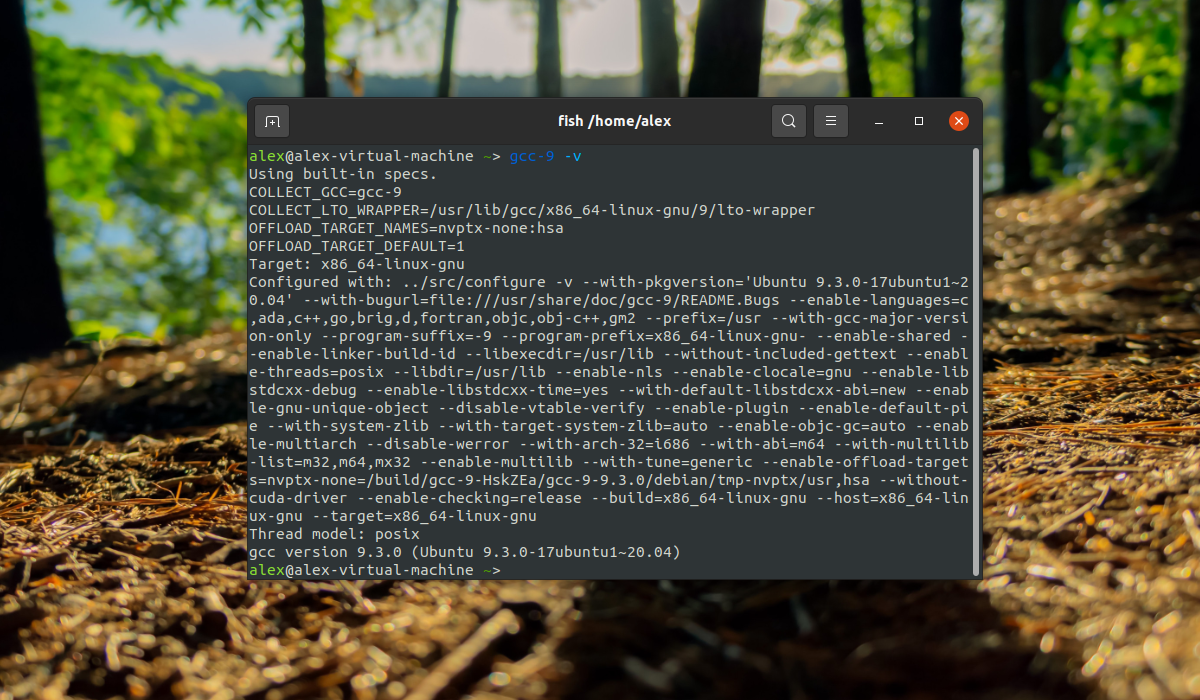
Установка GCC в Ubuntu завершена, и можно переходить к сборке программ. Для удаления компилятора достаточно удалить пакет build-essential при помощи команды:
sudo apt purge -y build-essential && sudo apt-y autoremove
Использование GCC в Ubuntu
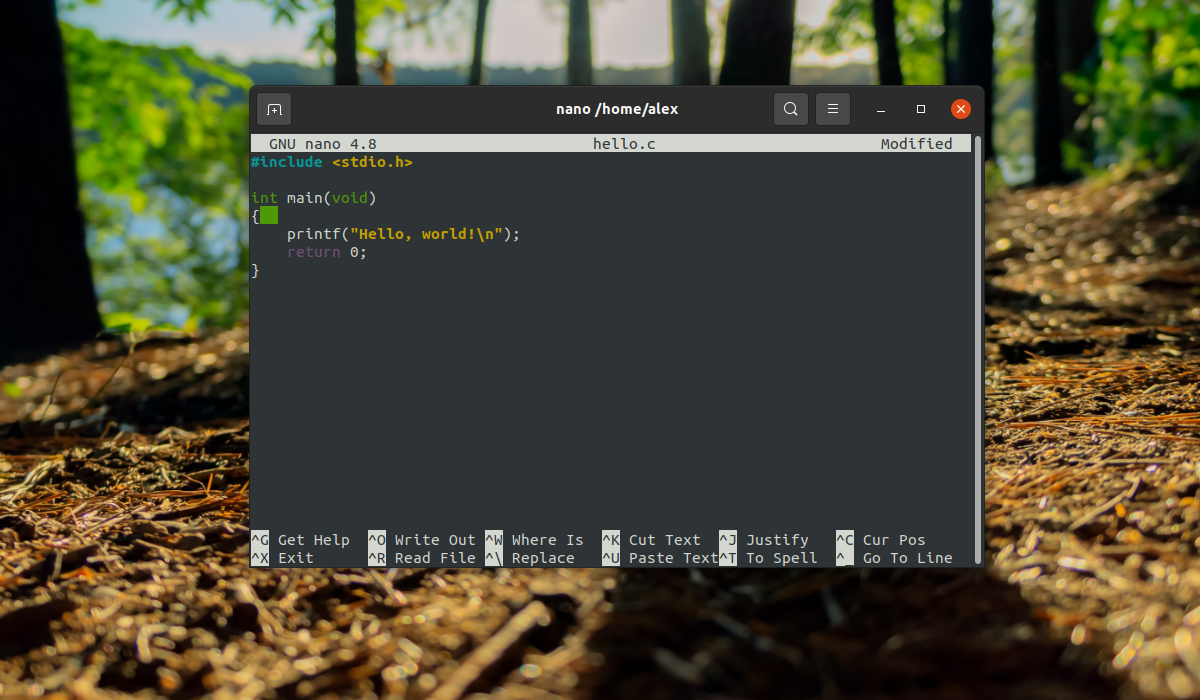
Рассмотрим пример компиляции минимальной программы hello.c для освоения работы с gcc. Вот код программы, откройте любой текстовый редактор и сохраните его в файле с названием hello.c:
#include
int main(void) <
printf(«Hello, world!\n»);
return 0;
>
Теперь запустим сборку программы:
Когда сборка программы будет завершена, на выходе появится файл с названием a.out. a.out –это имя исполняемого файла, которое по умолчанию, сгенерировано при помощи gcc. Далее можно запустить данный файл:
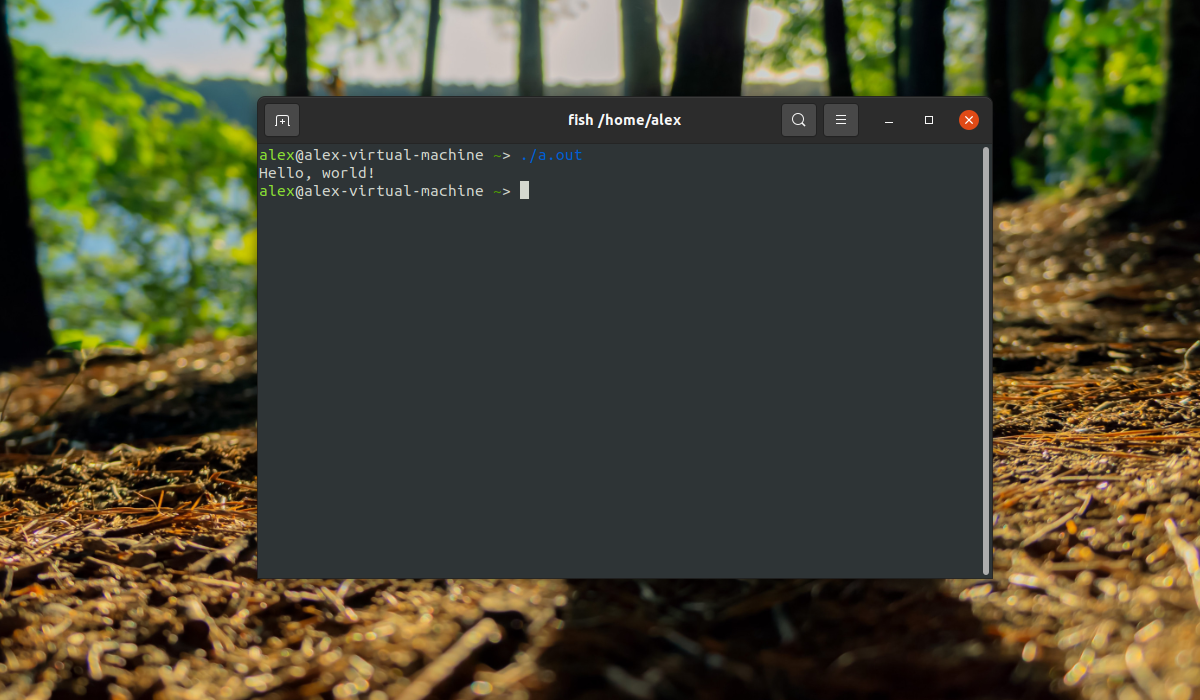
Готово, компилятор прекрасно работает в системе, и теперь можно писать свои программы или собирать чужие.
Выводы
В этой статье мы рассмотрели, как установить gcc в Ubuntu 20.04, это один из самых популярных компиляторов для этой операционной системы. И устанавливается он очень просто, если у вас остались вопросы, спрашивайте в комментариях!
На завершение видео с демонстрацией самого процесса:
Источник
Oracle linux install gcc
The Oracle LinuxВ CloudВ DeveloperВ image providesВ the latestВ developmentВ tools, languages, andВ Oracle CloudВ InfrastructureВ SoftwareВ Development KitsВ (SDKs)В toВ rapidly deploy aВ comprehensiveВ developmentВ environment.В You can use the command line and GUI tools to write, debug, and run code in various languages, and develop modern applications on Oracle Cloud Infrastructure.
The Oracle Linux Cloud Developer image is based on Oracle Linux 8 and is available on the following platforms:
- Arm (aarch64) platform that is available using the Oracle Cloud Infrastructure Ampere A1 Compute shapes.
- x86_64 platforms
For information about updates to the Oracle LinuxВ CloudВ Developer platform image, including feature enhancements, bug fixes, and new, modified, and updated packages, see Oracle Linux Cloud Developer 8 Release Notes.
Notices
aarch64
- GraalVM for aarch64 is available as Technology Preview with limited functionality. For more information, see the GraalVM 21.1.0 Release Notes and Oracle GraalVM Enterprise Edition 21 documentation.
Do not use GraalVM updater, gu , in this instance unless explicitly instructed to do so. Use yum or dnf instead.
x86_64
- GraalVM for x86_64 is supported.
- Because of the small memory allocated to the VM.Standard.E2.1.Micro shape, the following programs are not installed: Eclipse, TigerVNC, and Visual Studio Code.
- Because of limitations with managing application streams, the OS Management Service Agent plugin is disabled by default in the Oracle Linux Cloud Developer image. You cannot use the OS Management service to manage module-enabled streams in Oracle Linux 8 instances.
Preinstalled Components
aarch64
The Oracle Linux Cloud Developer image (aarch64) includes the following preinstalled components:
x86_64
The Oracle Linux Cloud Developer image (x86_64) includes the following preinstalled components:
Yum Repositories Enabled by Default
aarch64
The following yum repositories are enabled by default in the Oracle Linux Cloud Developer image (aarch64) image:
- ol8_MySQL80
- ol8_MySQL80_connectors_community
- ol8_MySQL80_tools_community
- ol8_appstream
- ol8_baseos_latest
- ol8_codeready_builder
- ol8_developer
- ol8_developer_EPEL
- ol8_ksplice
- ol8_oci_included
- ol8_oracle_instantclient
Packages found in the ol8_codeready_builder , ol8_developer , and ol8_developer_EPEL repositories are considered unsupported and are only entitled to basic installation support. Content from these repositories is not recommended for production environments and is intended for developer purposes only.
x86_64
The following yum repositories are enabled by default in the Oracle Linux Cloud Developer image (x86-64) image:
- ol8_MySQL80
- ol8_MySQL80_connectors_community
- ol8_MySQL80_tools_community
- ol8_UEKR6
- ol8_addons
- ol8_appstream
- ol8_baseos_latest
- ol8_codeready_builder
- ol8_developer
- ol8_developer_EPEL
- ol8_ksplice
- ol8_oci_included
- ol8_oracle_instantclient21
Packages found in the ol8_codeready_builder , ol8_developer , and ol8_developer_EPEL repositories are considered unsupported and are only entitled to basic installation support. Content from these repositories is not recommended for production environments and is intended for developer purposes only.
Creating an Oracle Linux Cloud Developer Instance
For information about creating an instance using the Oracle Linux Cloud Developer image, see Creating an Instance in the Oracle Cloud Infrastructure documentation.
The Oracle Linux Cloud Developer Image is supported on all Compute shapes, except the GPU shapes. A minimum of 8 GB of memory is required for this image for all standard and flexible shapes. The one exception is the VM.Standard.E2.1.Micro shape, which only has 1 GB of memory allocated to it. Because of the small memory size in the VM.Standard.E2.1.Micro shape, some graphical intensive programs are not installed in the image. For more information, see Notices.
Updating the Oracle Linux Cloud Developer Image
The Oracle Linux Cloud Developer image is based on Oracle Linux 8 and can be updated using standard Oracle Linux update tools, such as DNF and Ksplice.
- Updates can be managed using Yum or DNF command tools. For more information about using these update tools, see Oracle Linux 8 Managing Software on Oracle Linux
- Ksplice is installed on the image. For information about enabling and using Ksplice, see Installing and Running Oracle Ksplice and Oracle Linux Ksplice User’s Guide
References
Getting Started: Oracle Linux Cloud Developer Image
Copyright © 2021, OracleВ and/orВ itsВ affiliates.В
Learn how to use the Oracle Linux 8 Developer Image to get started developing
Источник
How do I install gcc on Oracle Enterprise Linux?
Best Answer
Answers
AS Frits says, you should use the packages provided in the CD/DVD. If you are in the command line you can install the package:
rpm -ivvh package.rpm
This represents the most verbose option, you could use -ivh to get less output. It the package already exists and want to update you can use:
rpm -Uvh package.rpm
Since you are new to Linux, and are installing RPM packages one at a time, let me be the first to welcome you to the fabulous world of RPM dependencies. Usually, one RPM package needs many other RPM packages to be installed first before you can even get to install the original RPM package you are interested in. This is called RPM dependency heck and can be supremely frustrating. Complex packages such as a compiler and all the tools and libraries they need can seem endless. Can you say «combinational explosion»?
Let me recommend that you get at least a network-level Unbreakable Linux Network (ULN) subscription for this machine. Once that is in place, you can install GCC using a single command:
# up2date —install gcc
and then sit back while ULN makes sure you have all the prerequisite RPM packages needed and installs them for you. Plus any RPM packages needed by them. Plus any RPM packages needed by them. Plus any RPM package.. oh, you get the idea.
Thank you all for your responses! I really appreciate it.
I downloaded the gcc package 4.3.3 from the gnu site. I extracted it but when I do a find . -name rpm I don’t get any file names returned.
I downloaded the following:
Thanks! I have signed up for a subscription. I guess I have to wait for the CDs to arrive. I was hoping I could download what I needed over the internet. I am waiting for my license key now and the CDs.
Here is a little background on what I am trying to do.
I am trying to learn RAC 10g. I have leased a couple of Virtual Servers from a company called Database By Design, LLC. I have had them install Oracle Enterprise Linux on both boxes. My virtual servers reside on Dell Power Edge Servers with ESXi 3.5 U.2. I have a public ipaddress on the main server (Series IV) where I will install the clusterware and I have private ipaddress on both servers. I can access the servers via either Secure CRT or VNC.
With that I am not sure if I needed two individual licenses for Unbreakable Linux. I have ordered one for now. I am doing this on my own nickel so I cannot afford a systems license.
Let me know if you have any further suggestions for me in this area.
Thank you for your response!
You can download the entire OEL distribution for free from http://linux.oracle.com and you do not need a license to use it. You can use it for any purpose, even run your business with it, without a license. As long as you use the RPM packages on the distribution media.
The distribution media will contain everything you need. Visit the http://linux.oracle.com web page to learn how to set up your own YUM repository. This will let you use «yum install gcc» and be able to install it and all its prerequisites automatically.
You DO need a support license to access any updated RPM packages from the Oracle Unbreakable Linux (ULN) network. Any server which uses these updated RPM packages must have at least a network-level ULN support license.
Hope this clarifies the issue for folk who have not yet spent any money 
Источник


