- Kerio VPN Client для Debian/Ubuntu Linux
- Настройка клиента VPN от Kerio на Linux Ubuntu
- Установка Kerio VPN Client
- Настройка Kerio VPN Client
- Working with the Kerio Connect Virtual Appliance (Debian Edition — Kerio Connect 7.3.x and later)
- Initial configuration
- Working with the console
- Enabling SSH
- Kerio Connect 7.4 and newer
- Kerio Connect 7.3 and older
- Changing the server time settings
- Kerio Connect 7.4 and newer
- Kerio Connect 7.3 and older
- Changing the firewall settings
- Using the Kerio IMAP Migration Tool
- Upgrading Kerio Connect manually
- Alternative method
- Setting up Kerberos user authentication against Active Directory
- Adding a new disk to the virtual appliance
- Moving the existing message store to a new disk
- Setting log rotation
- Adding system locales
- Kerio Connect 7.4 and newer
- Kerio Connect 7.3 and older
- Modifying system locales
- Installing Kerio Connect
- Windows
- Mac OS X
- Kerio Connect engine
- Linux RPM
- New installation
- Kerio Connect engine
- Linux DEB
- New installation
- Kerio Connect engine
Kerio VPN Client для Debian/Ubuntu Linux

Kerio VPN Client представляет собой инструмент для соединение с vpn сетью
работающей на шлюзе Kerio WinRoute Firewall. Не так давно появился клиент и под Linux.
Предлагаю небольшую инструкцию по установке и использованию Kerio VPN Client для Debian/Ubuntu Linux
Подготовка к установке
Поддерживаются 32-битные Debian / Ubuntu дистрибутивы:
Debian 5.0, Ubuntu 8.04, Ubuntu 8.10 и выше.
Перед тем как начать установку с Kerio VPN Client, убедитесь, что
‘Debconf «и» пакеты OpenSSL’ установлены на вашей системе.
# apt-get install debconf openssl
Для установки Kerio VPN Client, выполните следующие команды:
# dpkg -i kerio-kvc_###_i386.deb
Так же можно загрузить deb пакет с официального сайта www.kerio.ru/ru/firewall/download
Kerio VPN Client для Linux поддерживает одновременно только одно VPN соединение.
Во время установки пакета мастер конфигурации запускается автоматически.
Мастер запросит имя сервера / адрес, имя пользователя, пароль и предлагает автоматическое обнаружение сервера,
получение сертификата (для сервера проверки идентификации).
Кроме того, он может быть введён вручную.
Если вы хотите изменить конфигурацию позже, запустите мастер снова следующей командой:
Альтернативный вариант, править файл конфигурации:
После любых изменений потребуется перезапуск службы:
Kerio VPN Client будут автоматически запускаться после установки
и перезапуска после реконфигурации.
Вы можете запускать / останавливать его вручную, путем вызова команды:
Kerio VPN Client создает log файлы в директории
init.log — информация о старте или остановке демона
error.log — информация о критических ошибках
debug.log — детальная информация и статус соединения
Ну вот VPN сеть настроена, мной лично опробовано, работает стабильно.
Источник
Настройка клиента VPN от Kerio на Linux Ubuntu
Установка Kerio VPN Client
Переходим на страницу загрузки Kerio Control и копируем ссылку на соответствующую версию клиента:

* со стороны Kerio есть клиенты для Linux только для Debian/Ubuntu 32-bit или 64-bit.
Используя скопированную ссылку, загружаем клиент на Linux:
* в данном примере нами была скопирована 64-х битная версия клиента.
Устанавливаем необходимые для работы VPN-клиента компоненты:
apt-get install debconf openssl
И устанавливаем сам клиент:
dpkg -i kerio-control-vpnclient-linux-amd64.deb
Система в процессе установки сразу предложит диалоговые окна для настройки. В первом окне вводим адрес нашего сервера (Kerio VPN Server):

* для примера мы введи адрес внутренней сети, но чаще, будет необходимость в использовании внешнего адреса для сервера.
Разрешаем автоматически определить отпечаток для сертификата сервера:

После определения отпечатка, он будет выведен на экран, а нам нужно будет его принять:

Вводим имя пользователя для авторизации в сети VPN:

Вводим пароль для пользователя:

Система завершит установку.
Разрешим автозапуск сервиса и стартанем его:
systemctl enable kerio-kvc
systemctl start kerio-kvc
Настройка Kerio VPN Client
Настройку клиента мы выполнили в момент установки. Но если нам необходимо изменить конфигурацию или мы ошиблись, то изменения можно внести командой:
Источник
Working with the Kerio Connect Virtual Appliance (Debian Edition — Kerio Connect 7.3.x and later)
Learn how to use Kerio Connect VMware virtual appliance.
Please note that this information is provided ‘As Is’ and that Kerio Technical Support will not be able to help further if you have any problems.
- Run the Debian variant of Linux. If you see a blue Kerio screen after Kerio Connect is installed, this is out Debian version.
- If you use the CentOS version, or do not see the blue Kerio screen after the installation, refer to this topic.
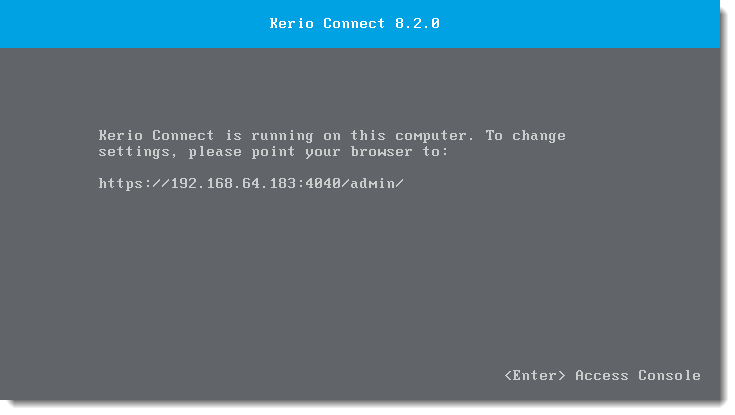
 Initial configuration
- The Kerio Connect Virtual Appliance Pre-configured Kerio Connect virtual machine image for VMware. is pre-installed with a standard Debian Linux 32-bit distribution.
- When you start the appliance for the first time, fill in the information regarding your Kerio setup in the configuration wizard .
Working with the console
- You can press Alt + F2 to switch the visible console to another terminal (tty) screen.
- You can Log in as root. The default password is kerio. Change the password after the first login. Forgotten password cannot be retrieved.
Enabling SSH
Kerio Connect 7.4 and newer
Kerio Connect 7.3 and older
SSH access is disabled by default. To enable remote SSH access, follow these steps:
- Log in to the system console.
- Configure the SSH daemon to start automatically on system startup using the following command: update-rc.d ssh defaults
- Start the SSH daemon using the following command: /etc/init.d/ssh start
Point your SSH client to the IP address An identifier assigned to devices connected to a TCP/IP network. of the server (TCP Transmission Control Protocol — ensures packet transmission. port 22). Log in as user root and the new root password you created.
Changing the server time settings
Kerio Connect 7.4 and newer
You cannot set the time settings in the Kerio Control console.
Kerio Connect 7.3 and older
The default system timezone is UTC (GMT +0). To change it, follow these steps:
- Log in to the system console.
- Configure the timezone using the following command: dpkg-reconfigure tzdata
- Reboot the server using the following command: reboot
Changing the firewall settings
- Access the system console.
- Edit the firewall configuration file /etc/ufw/kerio-connect.ufw using a text editor. For example: vi /etc/ufw/applications.d/kerio-connect.ufw
- In the ports= section, add ports you want to open. For example: ports=80|25|110|443
- Reload the firewall with the following command: ufw app update kerio-connect
If you’re changing firewall rules remotely over SSH, restart the firewall service with /etc/init.d/ufw restart . This will likely interrupt you current SSH session and you will need to reconnect if you have further work to do.
Using the Kerio IMAP Migration Tool
- Change the firewall settings to allow the IMAP Migration Tool to work (see section Changing the firewall settings).
- Access the system console.
- Run the following command: ufw allow 44337
Upgrading Kerio Connect manually
You must download two packages:
- Kerio Connect ( Kerio Connect — Linux (DEB)), and
- Kerio Connect virtual appliance console ( Kerio Connect VA Console — Linux (DEB)).
- Go to the Kerio downloads page and select the latest version of Kerio Connect .
- Copy the URLs of the two packages.
- Login to the system console and download the packages: wget http://download.kerio.com/dwn/kerio-xxxxxxxx.deb
- Install both files.
Alternative method
- Download the two files to your desktop.
- Use SFTP (see section Enabling SSH) to upload the files directly to your Kerio Connect server.
- Log in and place the files in the home directory.
- Install the two files. (For more information refer to Upgrading from versions older than Kerio Connect 8.0.0.)
Setting up Kerberos user authentication against Active Directory
- Log in to the system console.
- Install Kerberos An authentication protocol for client/server applications. 5 packages: apt-get update apt-get install krb5-config krb5-user
For Kerio Connect 8.5 and older, install the following packages: apt-get install krb5-clients krb5-config krb5-user
- In the Kerberos 5 configuration wizard, configure the Kerberos realm and domain server hostname.
- Add new computer to your Active Directory. Use the same hostname as defined in the appliance (run hostname -f to display the hostname). If you set up a wrong hostname, change the following configuration files: /etc/hostname and /etc/hosts .
- Add the Service Principal Name for the computer to the Kerberos database. Run the following command on your Windows Active Directory (master): setspn.exe -R hostname
- Verify that Kerberos works. Run the following command on your Kerio Connect console: kinit -S host/ @
- — the appliance hostname and corresponds to the computer name in the Active Directory
- — the Kerberos realm used in your Active Directory
For information on importing users from Active Directory, read this article.
Adding a new disk to the virtual appliance
Please run a backup first. Some of these commands are potentially destructive and may cause damage to your system if not carried out correctly.
To increase available disk space for the message store, you can add a second virtual hard disk to the appliance.
- Using your VM Hypervisor, add a new hard drive to your VM and start the appliance.
- Log in to the system console.
- To check whether Debian installed and picked up your new hard drive, run the following command: fdisk -l . The disk at /dev/sdb is picked up and there are no partitions.
- Create a new partition on your new drive: cfdisk /dev/sdb . The cfdisk controller will load up and here you can create a new partition on your drive. From the menus at the bottom select the following:
- New > Primary > Size in MB.
- Select Write.
- Select Quit. Your new partition is created at /dev/sdb1 .
- Format the new disk: mkfs.ext3 /dev/sdb1 . This commands formats the partition with the ext3 filesystem which should work fine for your Debian system.
- Mount the drive: mkdir /store (to create a directory for the drive), mount -t ext3 /dev/sdb1 /store (to mount the drive to this directory). Check the drive is mounted — ls -lsa /store.
Everything is now up and running. However, you must add the new drive to /etc/fstab so that it is mounted automatically when the server reboots.
- Open the fstab file: vi /etc/fstab
- Add the following line to the end of the file: /dev/sdb1 /store ext3 defaults,errors=remount-ro 0 1
- Save the file.
Moving the existing message store to a new disk
- Stop the Kerio Connect server by running the following command: sudo service kerio-connect stop
- Copy all data from the old message store: cp -R -p /opt/kerio/mailserver/store/* /store
- Change the message store directory path in the Kerio Connect configuration: sed -i -e «s/\/opt\/kerio\/mailserver\/store/\/store/» /opt/kerio/mailserver/mailserver.cfg
- Start Kerio Connect server with: sudo service kerio-connect start
Setting log rotation
Due to the limited disk size in the virtual appliance, set log rotation for log files by size with limited number of files.
Adding system locales
System locales are necessary for supporting WebMail clients in different languages (correct text sorting etc.).
Kerio Connect 7.4 and newer
System locales are added automatically as needed.
Kerio Connect 7.3 and older
By default, only en_US.UTF-8 is installed. To add additional locales, follow these steps:
- Log in to the system console.
- Run the configuration wizard for the locales: dpkg-reconfigure locales
- Select the locale you want to install.
- Select a default system locale.
- Confirm.
Always use the UTF-8 version (e.g. cs_CZ.UTF-8, de_DE.UTF-8 etc)
Modifying system locales
By default, the server uses the en_US.UTF-8 system locales for programs and services.
To change the system locales, follow these steps:
- Log in to the system console.
- To change the locale to, for example, German, run the following command: sudo update-locale LANG=de_DE.UTF-8 LC_MESSAGES=POSIX
To get a list of available locales, run locale -a in the system console.
Источник
Installing Kerio Connect
Kerio Connect is available as a standard installation package for Windows, Mac OS X, Linux RPM and Linux Debian.
Kerio Connect can also be downloaded as a virtual appliance for VMware products. VMware Virtual Appliance Pre-configured Kerio Connect virtual machine image for VMware. is a software appliance edition pre-installed on a virtual host for VMware. The virtual appliance is distributed as OVF and VMX. For more information refer to Kerio Connect VMware Virtual Appliance.
Windows
Refer to the product pages to know the prerequisites before installation. Once everything is set up, you can start with the installation process as explained below:
- Download the Kerio Connect installation file.
- Run the installer. Kerio Connect must be installed under the user with administration rights to the system.
- Follow the steps in the installation wizard.
- Click Finish to complete the installation. Kerio Connect engine starts (immediately or after restart) and runs as a service.
The Kerio Connect installation process is logged in a special file ( kerio-connect.setup.log ) located in the folder %TEMP% .
- Perform the initial configuration before you start using Kerio Connect . For more information refer to Performing initial configuration in Kerio Connect.
Mac OS X
Refer to the product pages to learn about the prerequisites before installation. Once everything is set up, you can start with the installation process as explained below:
- Download the Kerio Connect installation file.
- Run the installer. Kerio Connect must be installed under the user with administration rights to the system.
- Follow the steps in the installation wizard. Kerio Connect is installed in the /usr/local/kerio/mailserver folder.
- Click Finish to complete the installation. Kerio Connect engine starts upon the computer system start-up and runs as a service.
- Perform the initial configuration before you start using Kerio Connect . For more information refer to Performing initial configuration in Kerio Connect.
Kerio Connect engine
To run or restart the service, go to System Preferences > Other > Kerio Connect Monitor.
You can also stop, start or restart Kerio Connect through Terminal or a SSH Secure Socket Shell — A network protocol that provides administrators with a secure way to access a remote machines. client with the following commands with root access:
- Stopping Kerio Connect engine: sudo /usr/local/kerio/mailserver/KerioMailServer stop
- Running Kerio Connect engine: sudo /usr/local/kerio/mailserver/KerioMailServer start
- Restarting Kerio Connect engine: sudo /usr/local/kerio/mailserver/KerioMailServer restart
Do not delete the Kerio Connect installation package. It includes Kerio Connect Uninstaller.
Linux RPM
Refer to the product pages to learn about the prerequisites before installation. Once everything is set up, you can start with the installation process as explained below:
- Download the Kerio Connect installation file.
- Run the installer. Kerio Connect must be installed under the user with root rights.For installations, Kerio Connect uses the RPM application. All functions are available except the option of changing the Kerio Connect location.
- Follow the steps in the installation wizard. Kerio Connect is installed in the /opt/kerio/mailserver folder.
- Click Finish to complete the installation.
- Perform the initial configuration before you start using Kerio Connect . For more information refer to Performing initial configuration in Kerio Connect.
New installation
Start the installation using this command:
Example: # rpm -i kerio-connect-8.0.0-6333.linux.rpm
If problems with package dependencies occur and you cannot install Kerio Connect , download and install the compat-libstdc++ package.
We recommend you read the LINUX-README file carefully, immediately after installation (located in the installation directory in the folder doc ).
Kerio Connect engine
The script that provides automatic startup of the daemon (the Kerio Connect engine) on reboot of the operating system is located in /etc/init.d folder.
Use this script to start or stop the daemon manually. Kerio Connect must be run under the user root .
- Stopping Kerio Connect engine: /etc/init.d/kerio-connect stop
- Running Kerio Connect engine: /etc/init.d/kerio-connect start
- Restarting Kerio Connect engine: /etc/init.d/kerio-connect restart
If your distribution has systemd available, use these commands:
- Stopping Kerio Connect engine: systemctl stop kerio-connect.service
- Running Kerio Connect engine: systemctl start kerio-connect.service
Linux DEB
For system requirements go to the product pages.
- Download the Kerio Connect installation file.
- Run the installer. Kerio Connect must be installed under the user with root rights.
- Follow the steps in the installation wizard. Kerio Connect gets installed in the /opt/kerio/mailserver folder.
- Click Finish to complete the installation.
- Perform the initial configuration before you start using Kerio Connect . For more information refer to Performing initial configuration in Kerio Connect.
New installation
Start the installation using this command:
Example: # dpkg -i kerio-connect-8.0.0-1270.linux.i386.deb
If problems with package dependencies occur and you cannot install Kerio Connect , download and install the compat-libstdc++ package. We recommend you read the DEBIAN-README (located in the installation directory in folder doc ) file carefully and immediately after installation.
Kerio Connect engine
The script that provides automatic start-up of the daemon ( Kerio Connect engine) on system reboot is located in /etc/init.d folder.
Alternatively, use the following commands to start or stop the daemon manually. To run these commands, Kerio Connect must be run by a root user
- Stopping Kerio Connect engine: sudo service kerio-connect stop
- Running Kerio Connect engine: sudo service kerio-connect start
- Restarting Kerio Connect engine: sudo service kerio-connect restart
When installing on Debian with a graphical user interface, open the installation package with the gdebi . To do this, right-click the file and click Open with.
Источник


