- Create additional calendars in Outlook for Mac
- Share your calendar in Outlook for Mac
- Share a calendar with someone
- Permission levels defined
- Remove permissions from someone you no longer want to share your calendar with
- Sync your iCloud calendar with Outlook for Mac
- Совместное Outlook для Mac
- Предоставление доступа к календарю другому пользователю
- За определенные уровни разрешений
- Удаление разрешений пользователя, для которого вы хотите отменить доступ к календарю
- Создание дополнительных календарей в Outlook для Mac
Create additional calendars in Outlook for Mac
Outlook lets you create multiple calendars to help you organize your meetings and appointments. For example, you can create a calendar for personal events that you keep separate from your work calendar. You can customize the calendar as you desire with different colors, blocks, or views.
When you create an additional calendar, often referred to as a secondary calendar, you might add events to that calendar and expect those events to also impact your availability. However, when others view your availability using the Scheduling Assistant, the secondary calendar events aren’t shown. This behavior is by design. Only events on your primary calendar impact your availability.
Important: If you create a new calendar under your Exchange calendar, the new calendar will also sync with the Exchange server. However, if you create a meeting on the new Exchange calendar, responses to this meeting won’t be tallied.
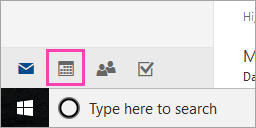
At the bottom of the navigation pane, click Calendar.
In the navigation pane, select the calendar under which the new calendar will be saved.
If you have multiple calendars, expand the My Calendars group, and then select a calendar. If you don’t see the calendar that you want, collapse the categories list.

On the Organize tab, click New Calendar.

In the navigation pane, type a name for the new calendar and press Return.
As an alternative to having multiple calendars, you can organize your events with categories. Not only are categorized events displayed in different colors in the calendar, category filters let you to show events only in the categories that you want.
You can hide all the events on a calendar by clearing the check box next to the calendar name in the navigation pane.
To delete a calendar that you created, click the calendar in the navigation pane, Ctrl+click or right-click the calendar name, and then click Delete.
Источник
Share your calendar in Outlook for Mac
You can share your calendars in Outlook for Mac with family, friends, and co-workers. Permissions you can set range from co-owner to view-only, and you can take away their permissions to see your calendar at any time.
Important: To share your calendar, both you and the person you want to share it with must have Microsoft Exchange accounts.
Share a calendar with someone
At the bottom of the navigation pane, select the Calendar icon.

Select the calendar you want to share.
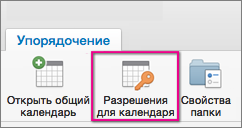
On the Organize tab, choose Calendar Permissions.
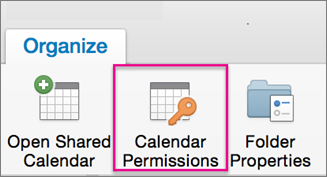
Note: If the Open Shared Calendar or Calendar Permissions buttons are unavailable, you might need to change one of your settings. See You cannot open a shared calendar in Outlook 2016 for Mac for instructions.
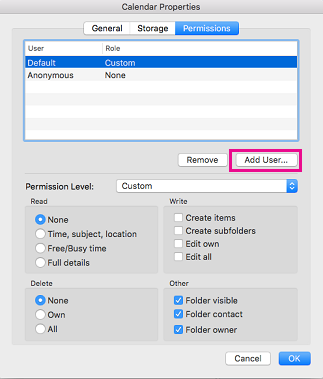
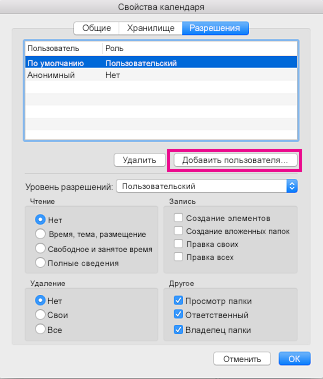
In the Calendar Properties box, choose Add User.
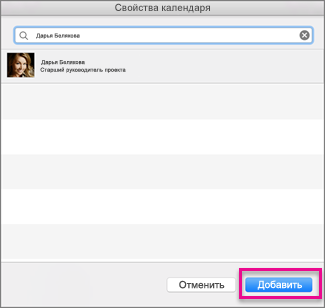
In the Search box, enter the name of the person you want to share your calendar with.
When you see their name appear in the list, select it and then choose Add.
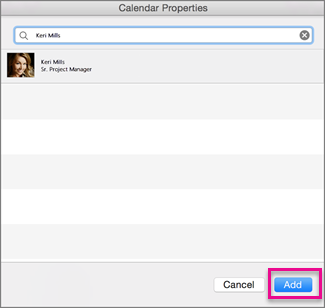
Tip: Their name will show up in the Calendar Properties box.
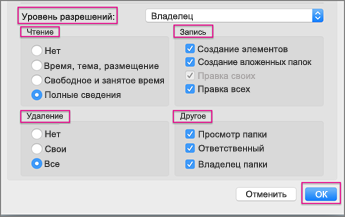
In the Calendar Properties box, select the Permission Level down arrow, and choose the permission level to assign to the person you added. Note that the settings for Read, Write, Delete, and Other options change based on the permission level you choose.

Check the boxes that apply in the Read, Write, Delete, and Other sections, and then select OK.
Permission levels defined
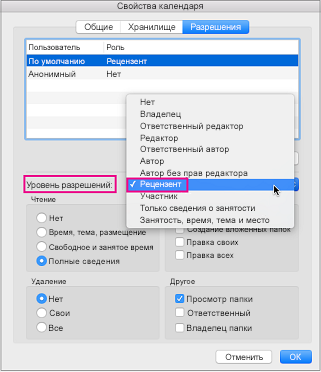
You can grant different permission levels to different individuals. The default is free/busy, which shows your free/busy status in the scheduling assistant. In order for Mac users to see your calendar, they’ll need to be assigned the Reviewer permission level.

This table explains the privileges that are associated with each permission level.
Recipient of shared calendar.
Is blocked from reading anything on the shared calendar
Time, subject, location
Can see the time, subject, and location of meetings and appointments on the shared calendar
Can see when you are free and busy but no other details
Can read everything on your calendar
Can create meetings and appointments on your calendar
Can create a folder under the shared calendar. This is a place where you can schedule appointments but not meetings.
Edit meetings and appointments they created but not those created by the person sharing the calendar
Edit all meetings, appointments, and folder contents regardless of who created them
Is blocked from deleting anything on the shared calendar
Can delete meetings and appointments they created but not those created by the person sharing the calendar
Delete all meetings, appointments, and folder contents regardless of who created them
View the folder (or sub-calendar).
Receive messages about a public folder and resolve duplication or overwrite issues.
Add, edit, and remove appointments.
Remove permissions from someone you no longer want to share your calendar with
At the bottom of the navigation pane, select the Calendar icon.
Select the calendar you want to remove their permissions from.
On the Organize tab, choose Calendar Permissions.
In the Calendar Properties box, choose Remove, then OK.
Источник
Sync your iCloud calendar with Outlook for Mac
Currently, Outlook for Mac doesn’t support the CalDAV or CardDAV Internet standards. This means Outlook for Mac does not sync your iCloud Calendar or contacts when you add your iCloud email account. That being said, there is a way to sync your iCloud calendar with Outlook for Mac—you can subscribe to your iCloud calendar to Outlook on the web (Outlook Web Access), and once you do that, the subscribed iCloud calendar automatically syncs with Outlook for Mac.
Open a browser window and sign in to your iCloud account.
In iCloud, click Calendar.
Click the Share Calendar icon next to the calendar you want to configure in Outlook, and make sure Public Calendar is enabled.
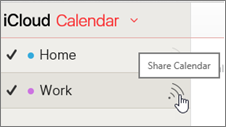
Note: If Public Calendar is enabled, you should see the Uniform Resource Locator (URL) of the calendar.

Click Copy Link.
At the bottom of the navigation pane, select Calendar.
On the toolbar, select Add calendar > From internet.
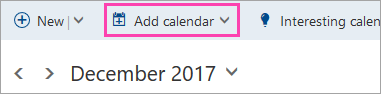
In the Calendar subscription dialog box, paste the link that you copied in step 4. Also, enter a unique name for the calendar such as «iCloud work Calendar», and click Save.
You should see the iCloud calendar listed under Other calendars in Outlook on the web.
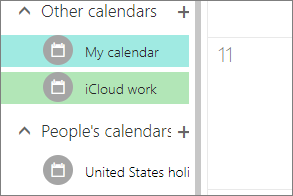
When you have the same account added on Outlook for Mac, this subscribed calendar will also appear in Outlook for Mac calendar.
Note: It may take a few minutes for the iCloud calendar in Outlook on the web to sync with Outlook for Mac. Please remember that you may have to restart Outlook for Mac in order for the synced calendar to appear.

The account signed in to Outlook on the web has to be also added to Outlook for Mac. The account can be your work or school account on Office 365 or Exchange or any Outlook account (such as @outlook.com, @hotmail.com).
For information on syncing iCloud email, see Add an email account to Outlook.
Источник
Совместное Outlook для Mac
Вы можете поделиться календарями в Outlook для Mac с семьей, друзьями и сотрудниками. Вы можете в любой момент уходить от совладельца к просмотру, а также отбирать у него разрешения на просмотр календаря.
Важно: Вы можете поделиться календарем с другим человеком только при условии, что и у вас, и у него есть учетная запись Microsoft Exchange.
Предоставление доступа к календарю другому пользователю
В нижней части области навигации выберите значок Календарь.

Выберите календарь, которым вы хотите поделиться.
На вкладке Упорядочить нажмите кнопку Разрешения для календаря.
Примечание: Если кнопки Открыть общий календарь или Разрешения календаря недоступны, может потребоваться изменить один из параметров. Инструкции см. в Outlook 2016 для Mac не удается открыть общий календарь в этой области.
В окне Свойства календаря выберите добавить пользователя.
В поле Поиск введите имя человека, с помощью которого вы хотите поделиться календарем.
Когда его имя появится в списке, выберите его и выберите добавить.
Совет: Это имя будет отображаться в окне Свойства календаря.
В окне Свойства календаря выберите стрелку вниз Уровень разрешений и выберите уровень разрешений, который нужно назначить добавленному вами человеку. Обратите внимание, что параметры Чтение, Запись, Удаление и Другие изменяются в зависимости от уровня разрешений, который вы выбрали.
Проверьте поля, которые применяются в разделах Чтение, Запись, Удалениеи Другие, а затем выберите ОК.
За определенные уровни разрешений
Вы можете предоставить разные уровни разрешений разным людям. Значение по умолчанию — «свободное/занятое», в котором в помощнике по планированию указывается ваше состояние занятости. Чтобы пользователи Mac могли видеть ваш календарь, им должен быть назначен уровень разрешений «Проверятель».
В этой таблице объясняется, какие привилегии связаны с каждым уровнем разрешений.
Получатель общего календаря.
Не может прочитать что-либо в общем календаре
Время, тема, место проведения
Просмотр времени, темы и расположения собраний и встреч в общем календаре
Свободное и занятое время
Может видеть, когда вы свободны и заняты, но не можете получить другие сведения
Может читать все, что есть в календаре
Создание собраний и встреч в календаре
Создание вложенных папок
Может создать папку под общим календарем. Здесь можно планировать встречи, но не собрания.
Редактирование созданных им собраний и встреч, но не созданных человеком, который совместно создает календарь
Редактирование всех собраний, встреч и содержимого папок независимо от того, кто их создал
Заблокировано удаление всех данных в общем календаре
Может удалять созданные им собрания и встречи, но не те, которые были созданы человеком, который делся календарем
Удаление всех собраний, встреч и содержимого папок независимо от того, кто их создал
Просмотр папки (или под календаря).
Получение сообщений об общедоступных папках и устранение проблем с дублированием или переописанием.
Добавление, изменение и удаление встреч.
Удаление разрешений пользователя, для которого вы хотите отменить доступ к календарю
В нижней части области навигации выберите значок Календарь.
Выберите календарь, для которого необходимо удалить разрешения.
На вкладке Упорядочить нажмите кнопку Разрешения для календаря.
В окне Свойства календаря выберите удалить, а затем ОК.
Источник
Создание дополнительных календарей в Outlook для Mac
В Outlook можно создать несколько календарей, чтобы упростить упорядочение собраний и встреч. Например можно создать календарь для личных событий, которые следует хранить отдельно от рабочего календаря. Вы можете настроить календарь по желанию с помощью различных цветов, блоков или представлений.
При создании дополнительного календаря, который часто называют дополнительным, вы можете добавлять события в этот календарь и ожидать, что они также влияют на вашу доступность. Однако когда другие люди просматривают вашу доступность с помощник по планированию, дополнительные события календаря не показываются. Такое поведение является стандартным, это не ошибка приложения. На доступность влияют только события в основном календаре.
Важно: Если календарь создается в календаре Exchange, он будет синхронизироваться с сервером Exchange Server. Однако при создании собрания в новом календаре Exchange ответы на приглашения на него не будут регистрироваться.
В нижней части область навигации щелкните Календарь.
В области навигации выберите календарь, в котором будет сохранен новый календарь.
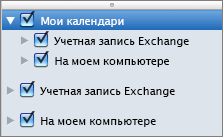
Если у вас несколько календарей, разверните группу Мои календари и выберите календарь. Если вы не видите нужный календарь, сверните список категорий.
На вкладке Упорядочить нажмите кнопку Создать календарь.

В области навигации введите название нового календаря и нажмите RETURN.
Вместо использования нескольких календарей события можно упорядочивать с помощью категорий. Помимо того, что категории событий представлены в календаре разными цветами, фильтры категорий позволяют отображать события только из нужных категорий.
Чтобы скрыть все события в календаре, снимите флажок рядом с его названием в области навигации.
Чтобы удалить созданный календарь, выберите его в области навигации, щелкните его имя, удерживая нажатой клавишу CTRL, или щелкните его правой кнопкой мыши, а затем выберите команду Удалить.
Источник


