- Установка ownCloud (инструкция)
- Download Server Packages
- Source packages
- Minimal server package
- Docker
- Linux Distribution Packages
- Tech Preview out now!
- Appliance
- ownCloud Appliance installation guide
- How to Install the Appliance
- Introduction
- Download the Appliance
- Launch the Appliance
- Configuration wizard
- Administer the Appliance
- Install ownCloud in a Windows Server
- Table of contents
- Prerequisites
- Installing IIS
- Installing PHP and MySQL
- Create MySQL Database
- Installing ownCloud
- Conclusion
Установка ownCloud (инструкция)
2.1. Распакуйте вашу копию ownCloud на ваш веб-сервер
tar -xjf path/to/downloaded/owncloud-x.x.x.tar.bz2cp -r owncloud /path/to/your/webserver (на Debian, был бы /var/www/owncloud)
2.2. Установить права для каталога
Владелец веб-сервера должен владеть следующими каталогами apps/, data/ и config/ для установки ownCloud. Вы можете сделать это, выполнив следующую команду для apps/, data/ и config/ каталогов: chown -R www-data:www-data /path/to/your/owncloud/install/data
2.3. Включение .htaccess и mod_rewrite, если используется Apach.
Если вы используете веб-сервер Apache, то рекомендуется включить .htaccess файлы. ownCloud использует их для повышения безопасности и позволяет использовать webfinger. Чтобы включить .htaccess файлы, вы должны убедиться, что «AllowOverride» установлен в «All» для каталога «/var/www/» в настройках вашего файла виртуального хоста. Это, как правило, в «/ etc/apache2/sites-enabled/000-default». Вы должны также запустить » a2enmod rewrite » и » a2enmod headers «. Затем перезагрузите Apache service apache2 restart (для Ubuntu систем).
2.4. Следуйте мастеру установки
Откройте веб-браузер и перейдите на ваш ownCloud. Если вы устанавливаете ownCloud на той же машине, вы получите доступ к мастер установки по URL: http://localhost/ (или http://localhost/owncloud). Для простой установки мы рекомендуем SQLite, его легко установить (ownCloud сделает это за вас). Для полной установки, вы должны использовать MySQL или PostgreSQL. Нажмите на Расширенные настройки, чтобы показать параметры конфигурации. Вы можете ввести учетные данные администратора и ownCloud создаст свою собственную базу данных пользователей или введите предварительно пользователей.
3. Готово!
Войдите и начните использовать ownCloud! Для получения дополнительной информации о настройке ownCloud, пожалуйста, посетите Центр поддержки.
Обновление.
Чтобы обновить ownCloud, просто замените старые файлы, новыми. Оставьте без изменений папку config/ и data/, чтобы сохранить свои данные. Обновление происходит автоматически, когда вы впервые войдете в систему.
Download
Server Packages
Source packages
The installation using the ownCloud zip or tarball is the most common option and is best for production environments. They contain all supported community and enterprise apps, so upgrading to Enterprise only requires a licence key. Aimed at experienced administrators, these packages offer the most customizable installation method.
Type
Version
Download
Security Hash
Minimal server package
Strictly the bare ownCloud server with required components. Great for updating the core without overwriting apps that you would like to keep in their current state. Install the complete bundle as shown above to get all available apps and extensions as well as an easy Enterprise trial.
Type
Version
Download
Security Hash
ZIP Archive (minimal)
Docker
If you already are “dockerized”, checkout the ownCloud Server Docker Image maintained by ownCloud. The image is aimed at experienced admins who want to benefit from the Docker environment.
Linux Distribution Packages
ownCloud provides ready-to-deploy packages for popular Linux distributions such as Debian, Ubuntu, Fedora, RedHat Enterprise Linux, CentOS and openSUSE.
Tech Preview out now!
The all–new ownCloud Infinite Scale, written in Go, using microservices, brings unparalleled scale and speed.
Appliance
The appliance is the easiest way to get ownCloud up and running and is best for non-technical users. It is built on UCS (“Univention Corporate Server”) and is fully set up and configured with a secure connection and the ownCloud Proxy app. You can install VirtualBox, download our OVA file and load it up.

ownCloud Appliance installation guide
Follow our step-by-step Appliance installation guide to get your ownCloud up and running fast. Fill out this form and get the installation guide directly delivered to your inbox:
By submitting this form I agree that I want to to receive notifications and services via email, phone or personalized ads. Therefore, I agree, that ownCloud stores and uses my contact data for further information and in order to optimize and adapt the offer to my individual interests. I can revoke my consent for the future at any time, either directly via the link in emails or by email to . For further information please also see the Privacy Statement.
How to Install the Appliance
Introduction
The installation process is a little involved, but not too much. To keep it succinct, you need to:
Download and Launch the appliance
Activate the configured appliance
After that, you can access the running instance of ownCloud and further configure it to suit your needs.
| It’s recommended to setup the appliance with a working DHCP Server and access to the internet. |
The appliance has to be activated with a license that you will receive from Univention via email. This license has to be imported into the appliance via the web interface.
Download the Appliance
First off, you need to download the ownCloud X Appliance from the ownCloud download page and click DOWNLOAD NOW. This will display a form, which you can see a sample of below, which you’ll need to fill out. It will ask you for the following details:
Download version (ESXi, VirtualBox, VMware, KVM)
Your first, last, and company names, and your country of origin
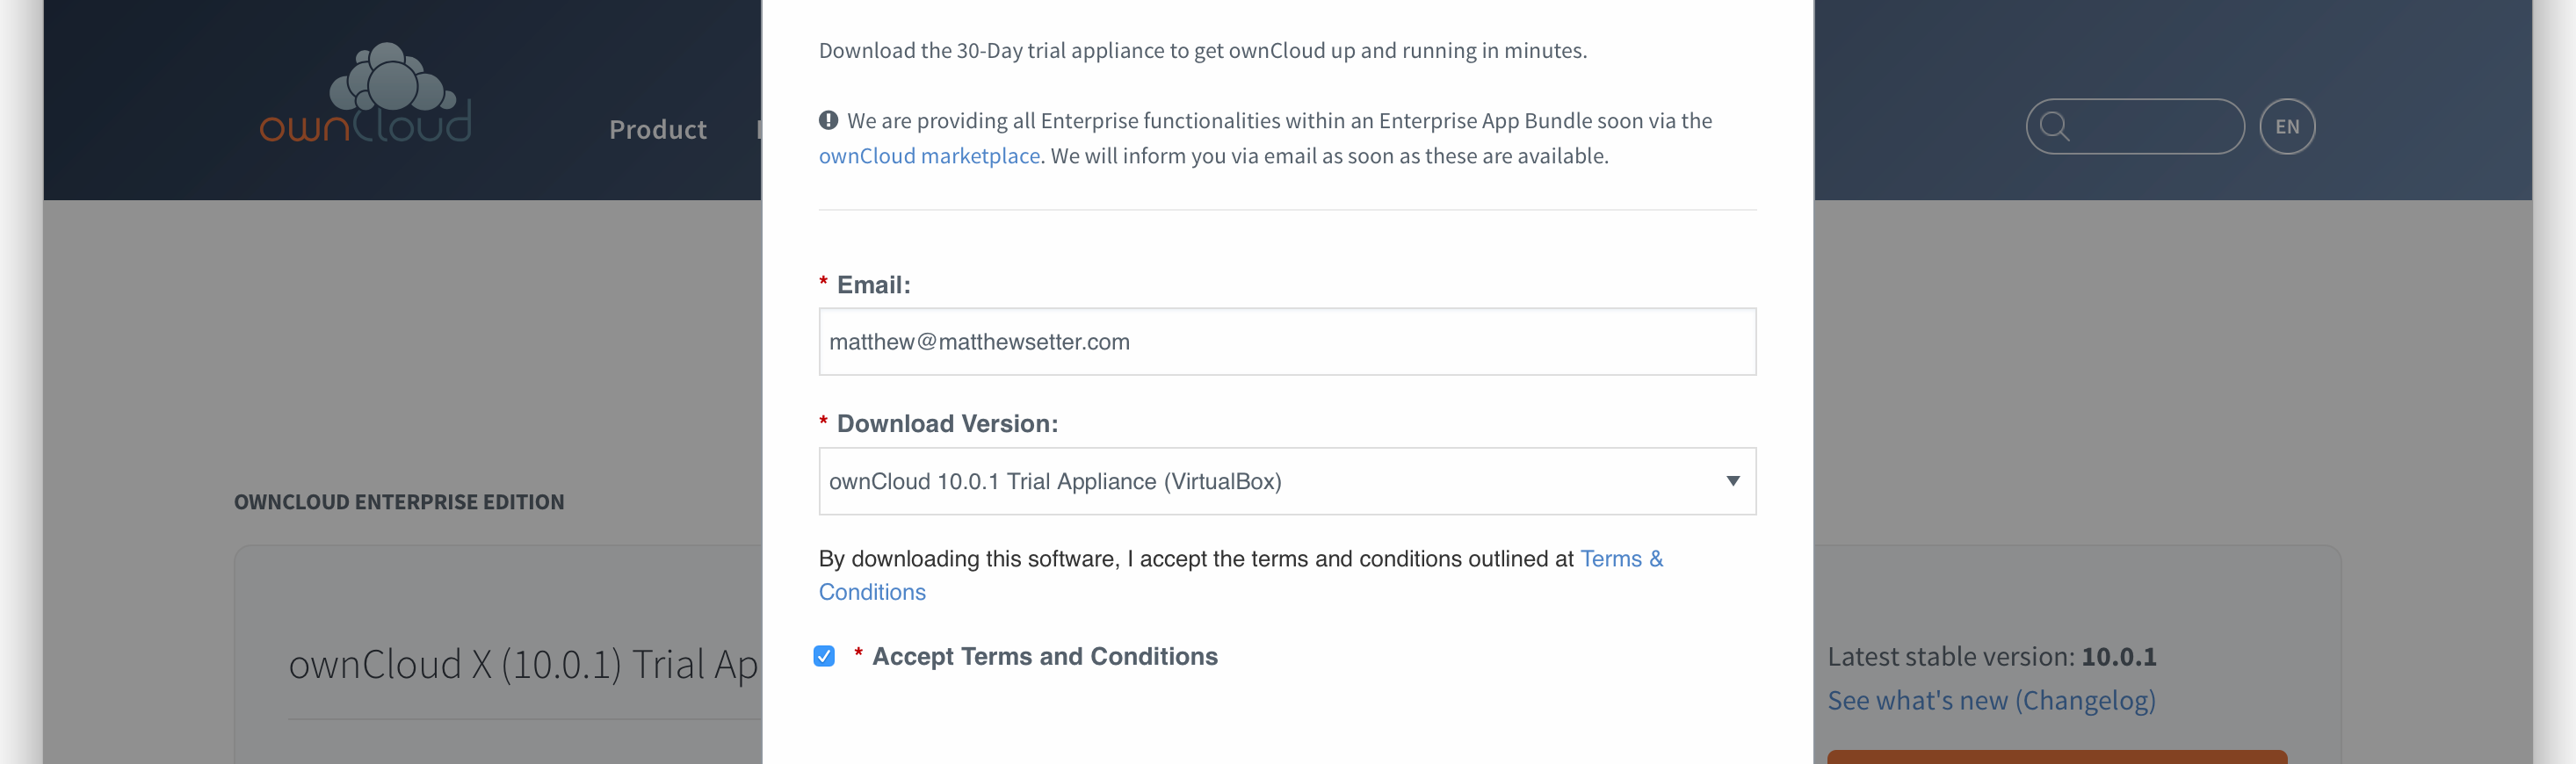
After you’ve filled out the form, click DOWNLOAD OWNCLOUD to begin the download of the virtual appliance.
The virtual appliance files are around 1.4GB in size, so may take some time, depending on your network bandwidth.
You can also download it from the owncloud.org page.
Launch the Appliance
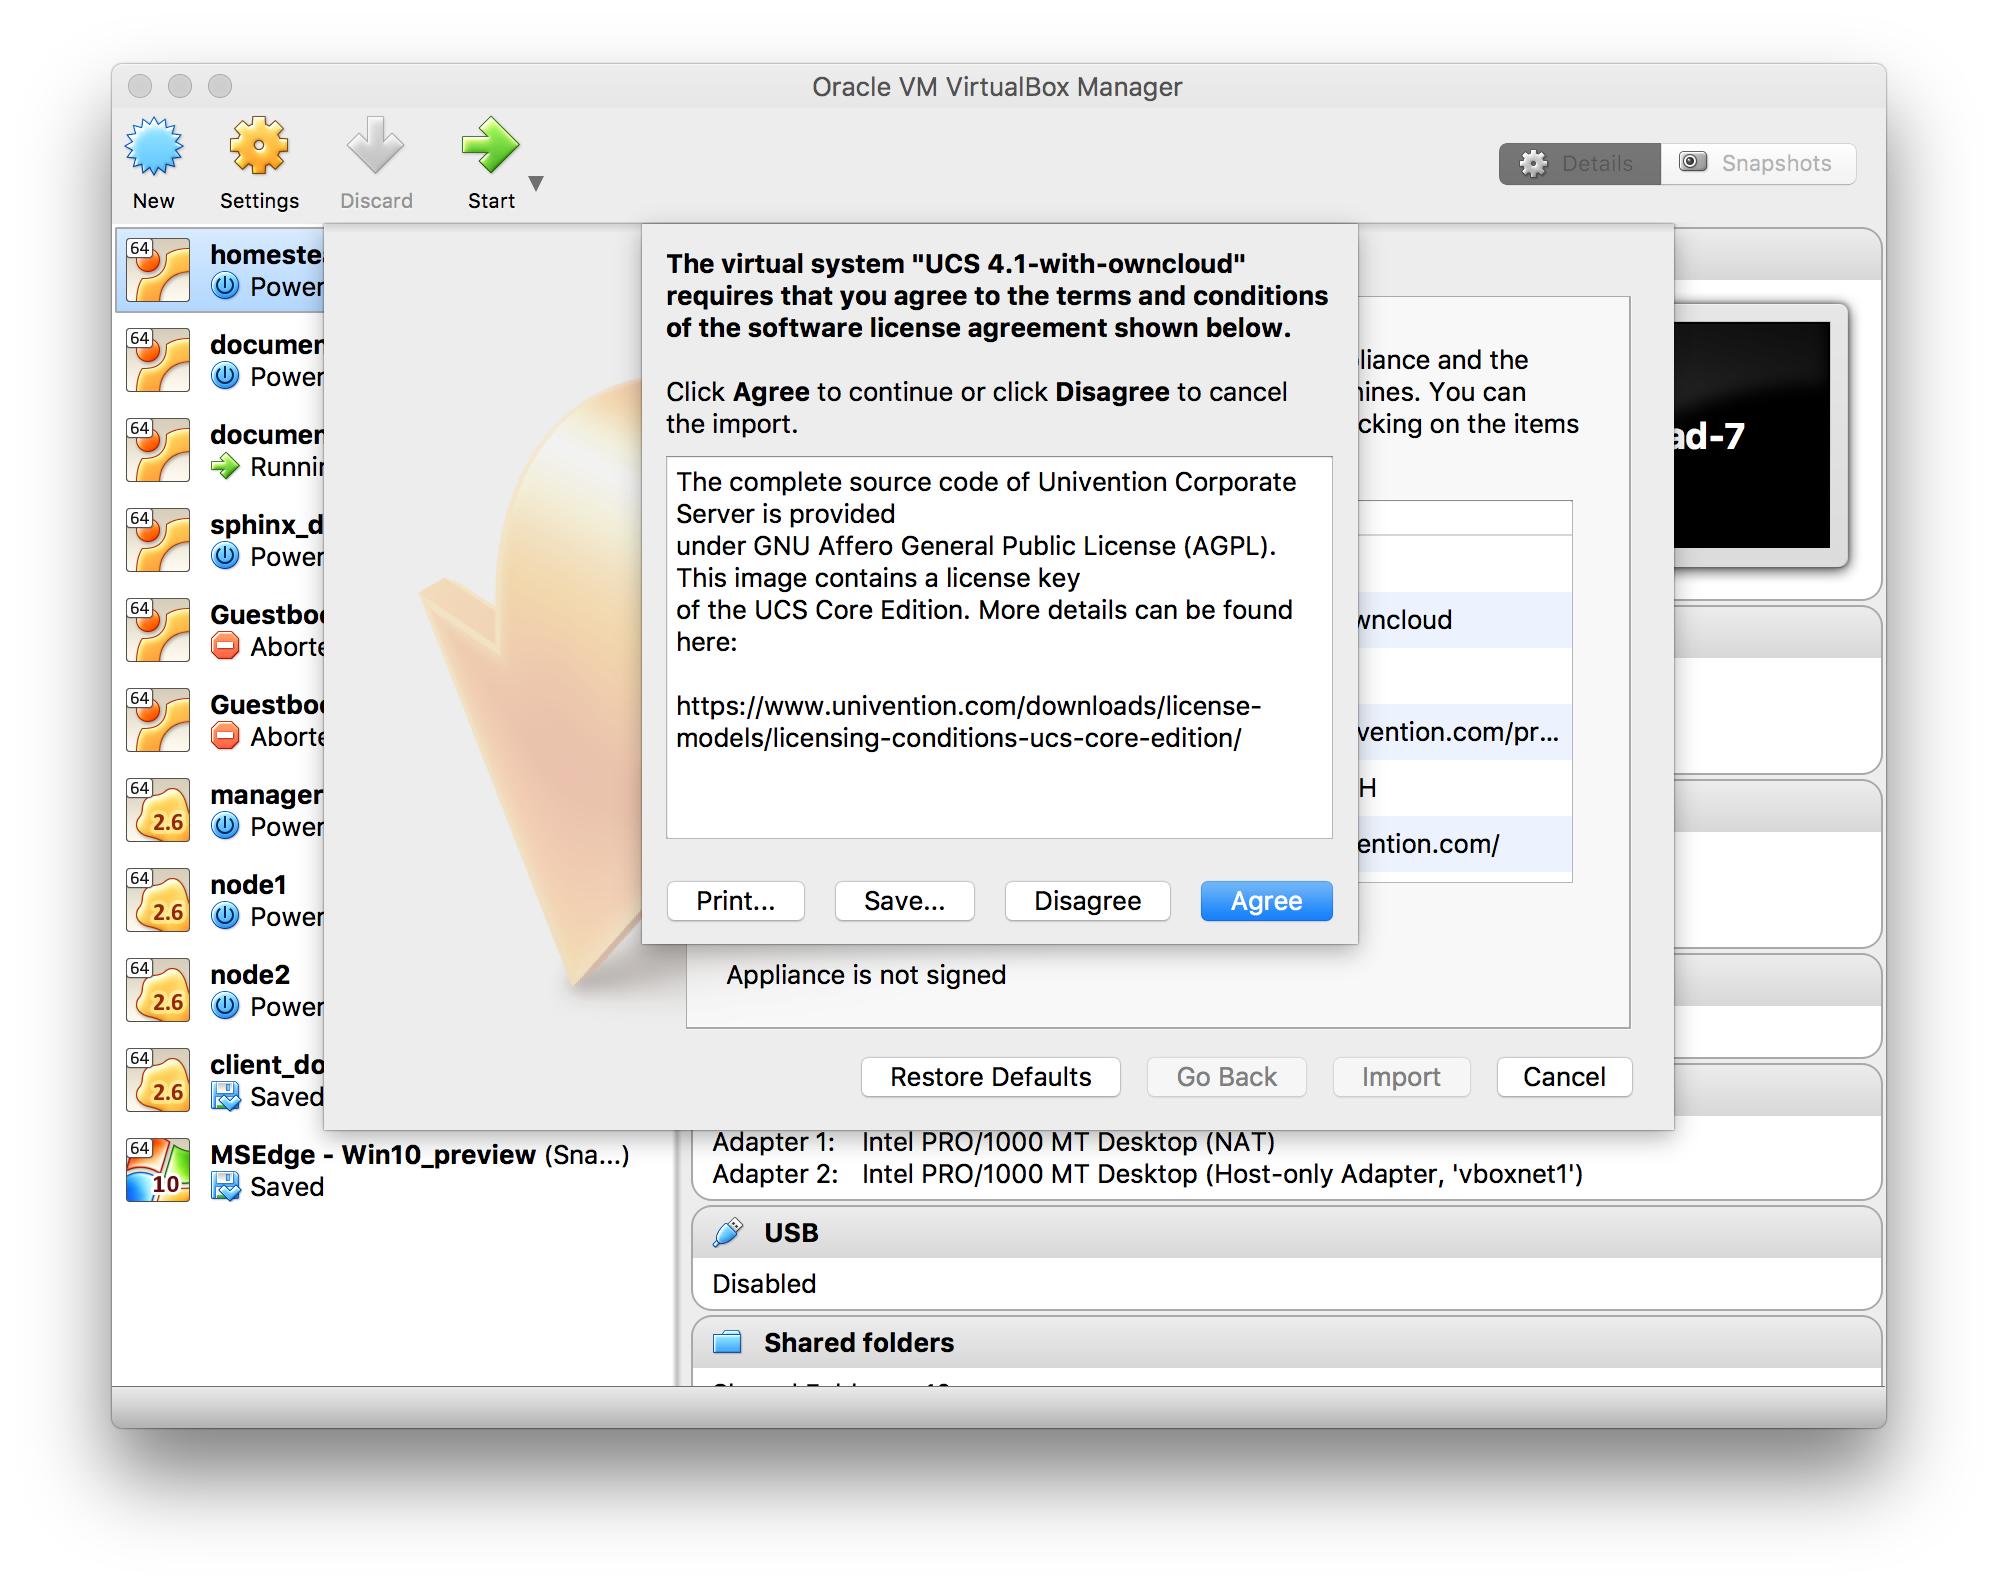
Once you’ve downloaded the virtual appliance file, import it into your virtualization software, accept the T’s & C’s of the license agreement, and launch it. The example below shows this being done using VirtualBox.
If you try to install an ownCloud appliance in your domain after removing an existing one, please remember to remove the original one from you DNS configuration.
Don’t Forget the IP Address and the Administrator Password. You will need them to use the Appliance.
Configuration wizard
Once imported, start the appliance. Doing so launches the installer wizard which helps you specify the core configuration.
Follow this screenshot guide to securely and easily configure your appliance.
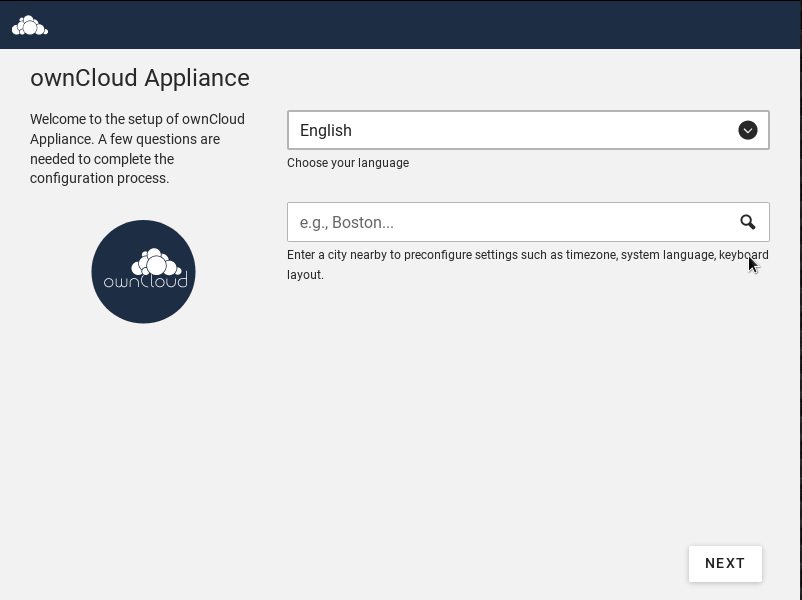
Here, you can choose your language. Currently there are 2 options: English and German. You can set your city, which will then automatically set the localization settings in the next screen.
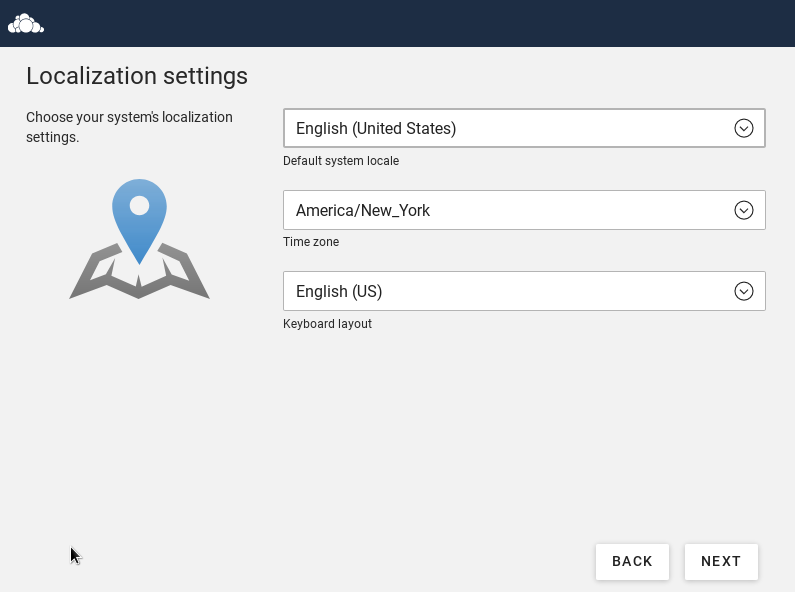
Here, you can set your default language, time zone and keyboard layout. This will be set automatically if you enter your City in the previous screen.
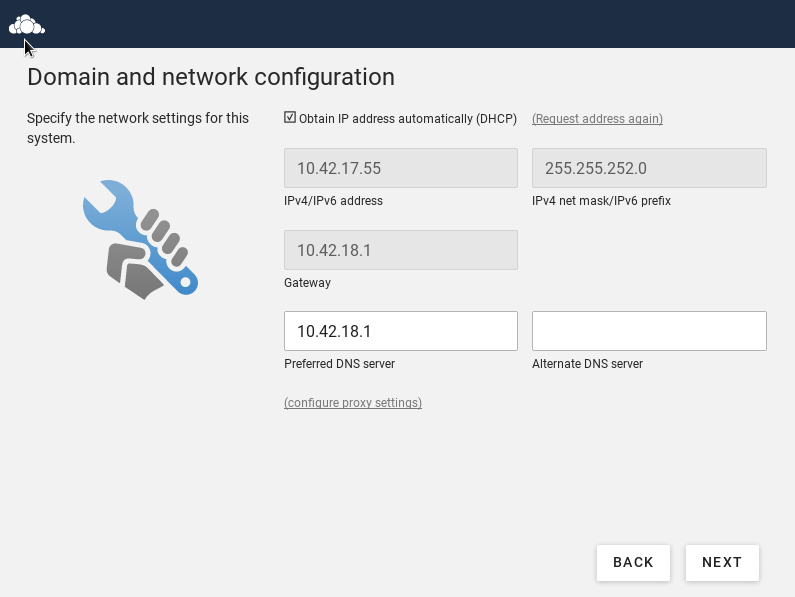
Here, you will see the automatically obtained network configuration if you have a DHCP server in your network. If not — you will have to set this yourself. You can also enter a alternate DNS server if you need one.
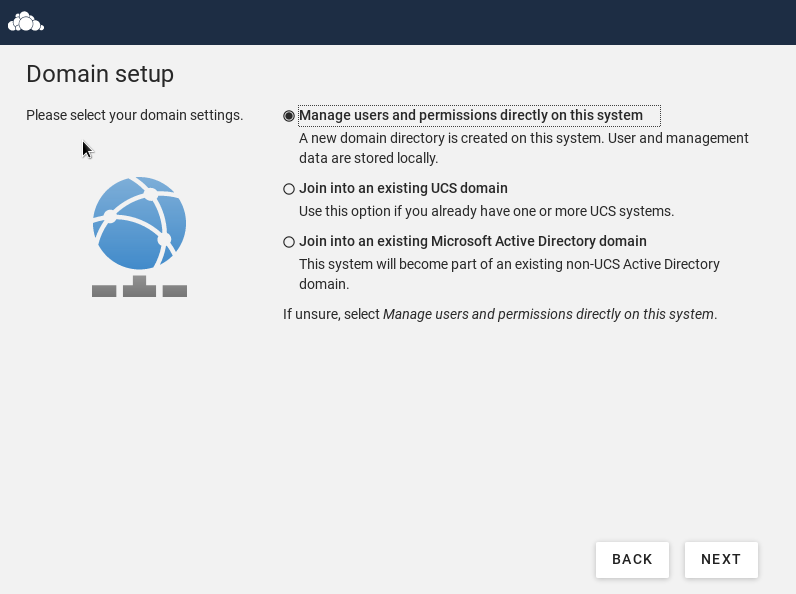
This is an important setting. Choose the default option if you don’t have deep knowledge about Microsoft Active directory and the univention system.
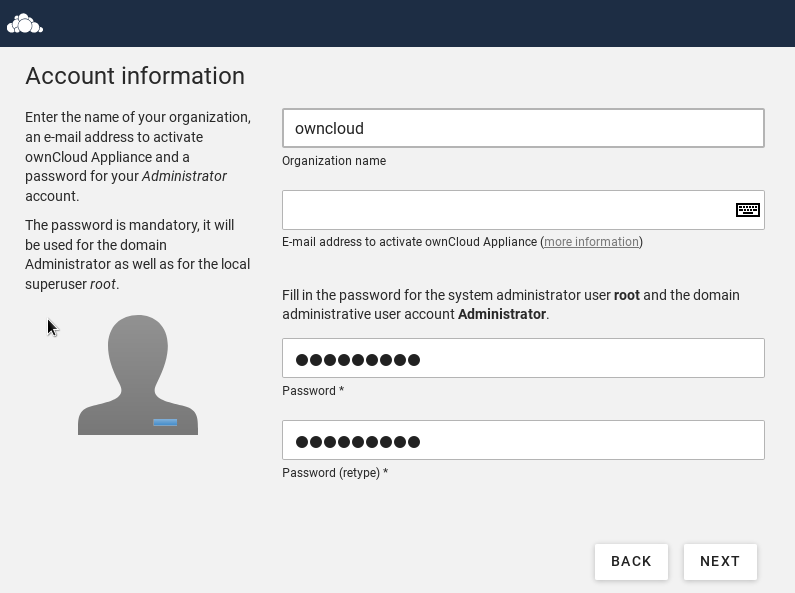
The second important setting during this setup: the Administrator password. You will need this to log in to your appliance and administer it. Please write this password down. Setting your email address here is optional, since you can set it later on.
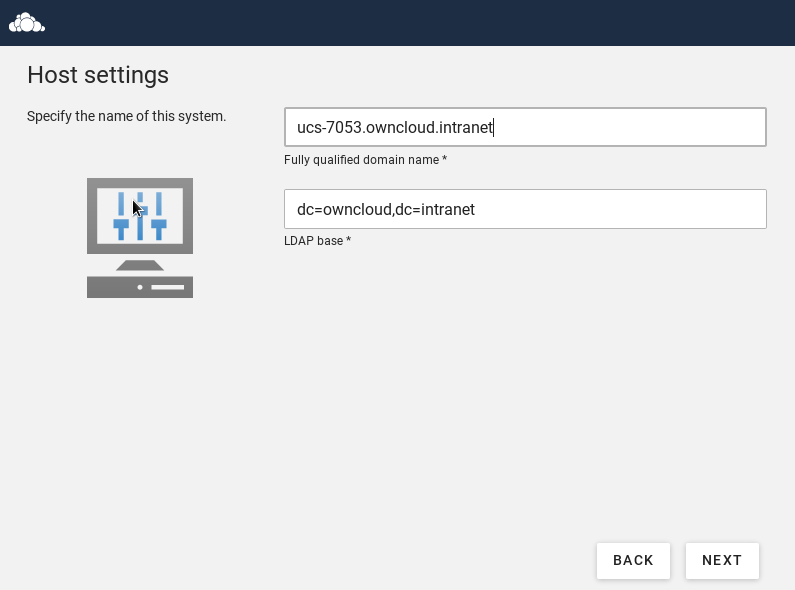
Here, you can set or change the FQDN to your custom address.
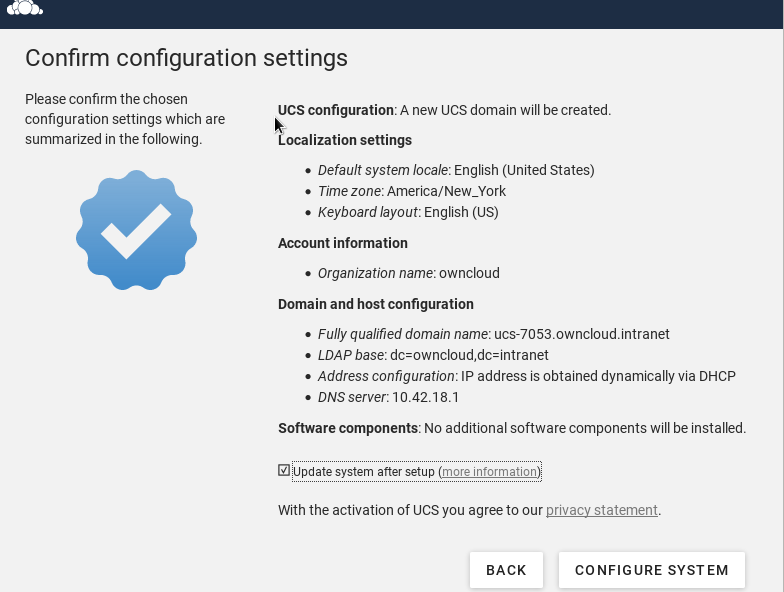
Here, you get a finalized confirmation screen of what you have entered / set and you can finish the process. Note that if you let the check box to update your system in — the installation will take considerably longer. Keep his in mind. You can apply the updates later on if you choose to skip it during the installation.
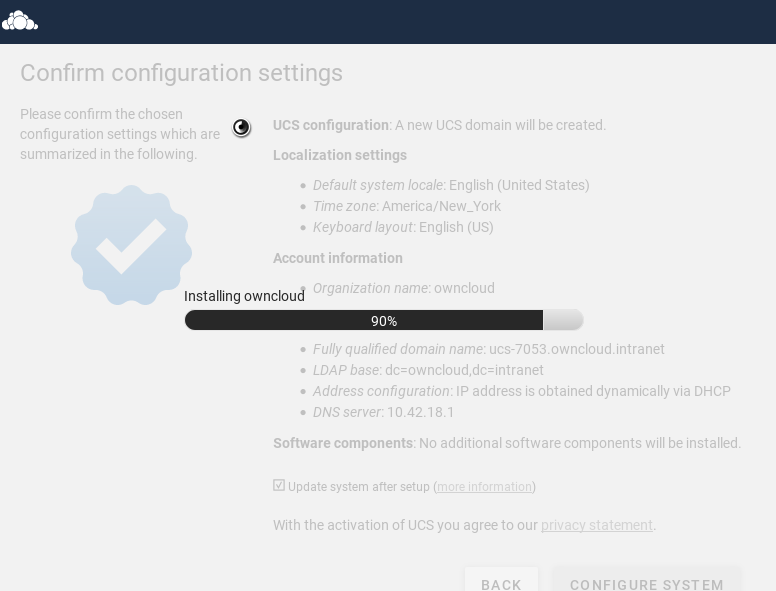
Wait until the setup is finished.
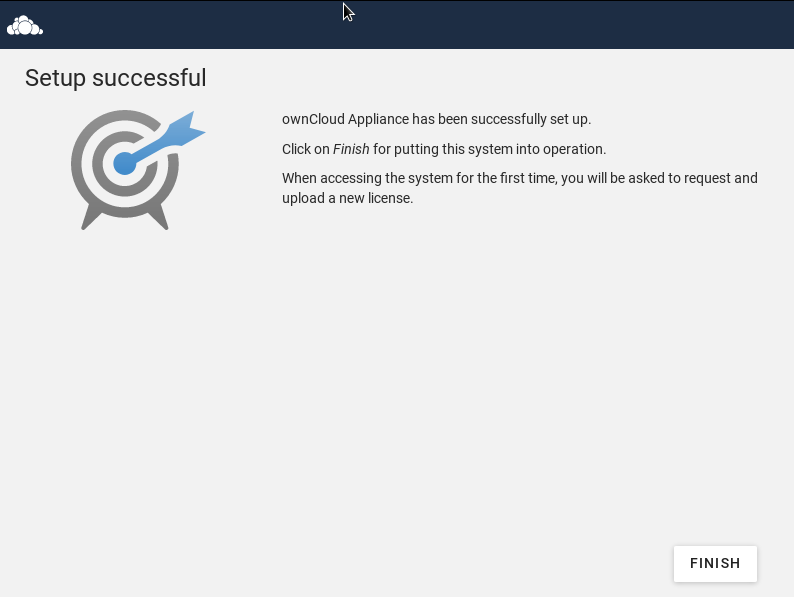
When the installation is complete, you will see this screen informing you that the installation was successful.
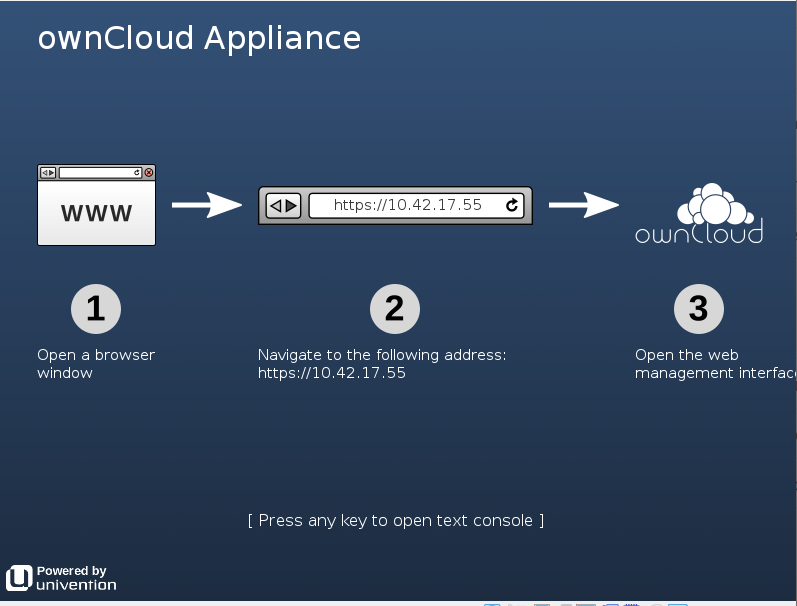
The VM will show you this screen, showing the ip address you have to navigate to in order to activate your appliance
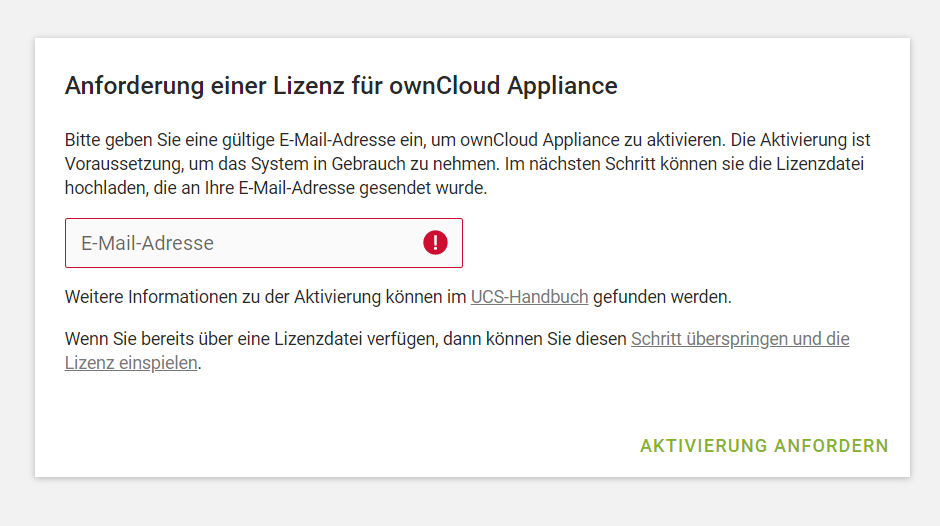
Enter your email-address to receive a license to activate your Appliance. Without activation you can not login in to the appliance.
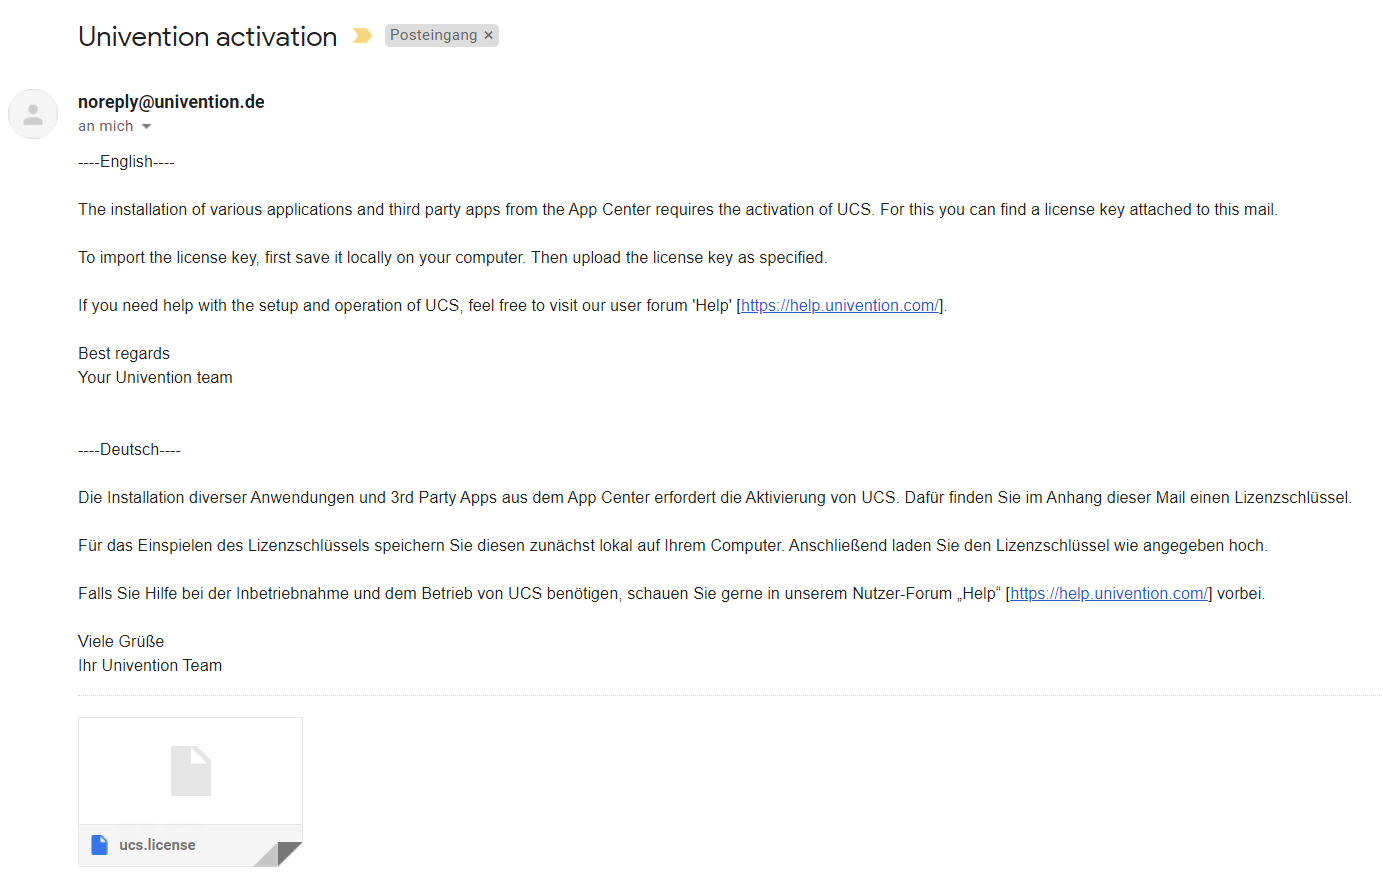
You will receive the email shortly. Download the license and import it in to the appliance.
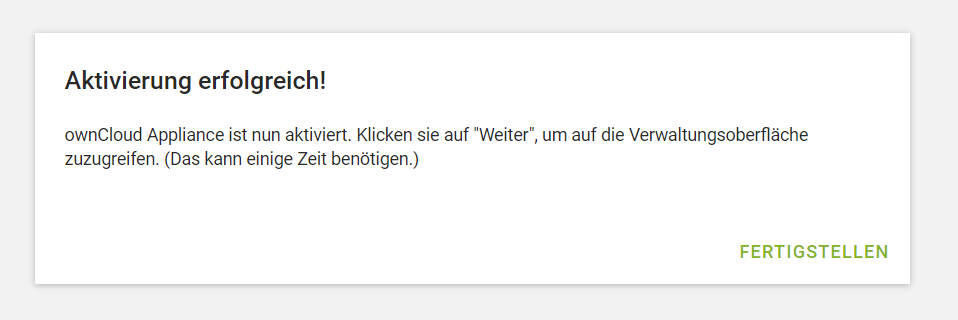
Once activated, you will see this screen, informing you that the appliance was successfully activated.
Administer the Appliance
Once activated, you should be redirected to the portal, which you can see below.
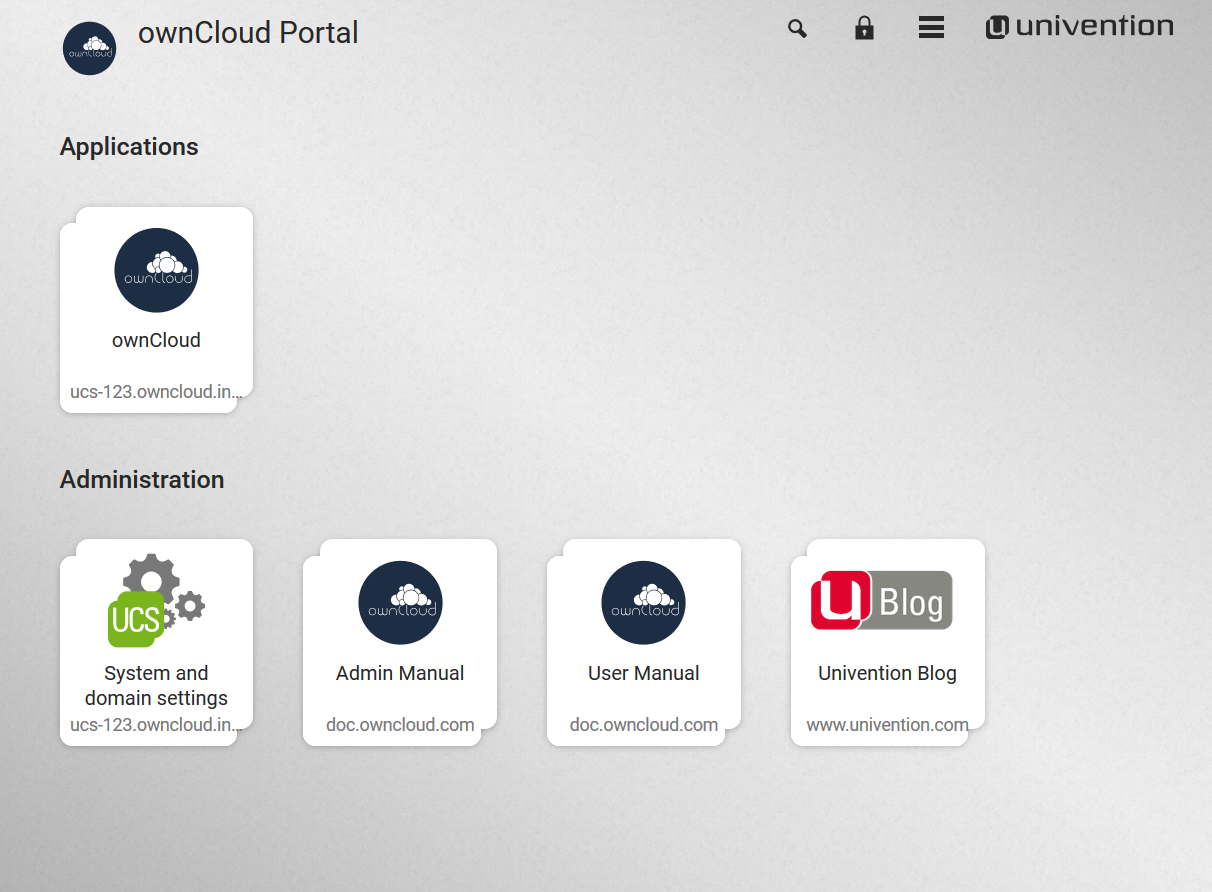
If you want to create new users and groups, or download apps from the Univention appcenter click on the System and domain settings. Login as the «Administrator» using the password that you supplied during the configuration wizard earlier.
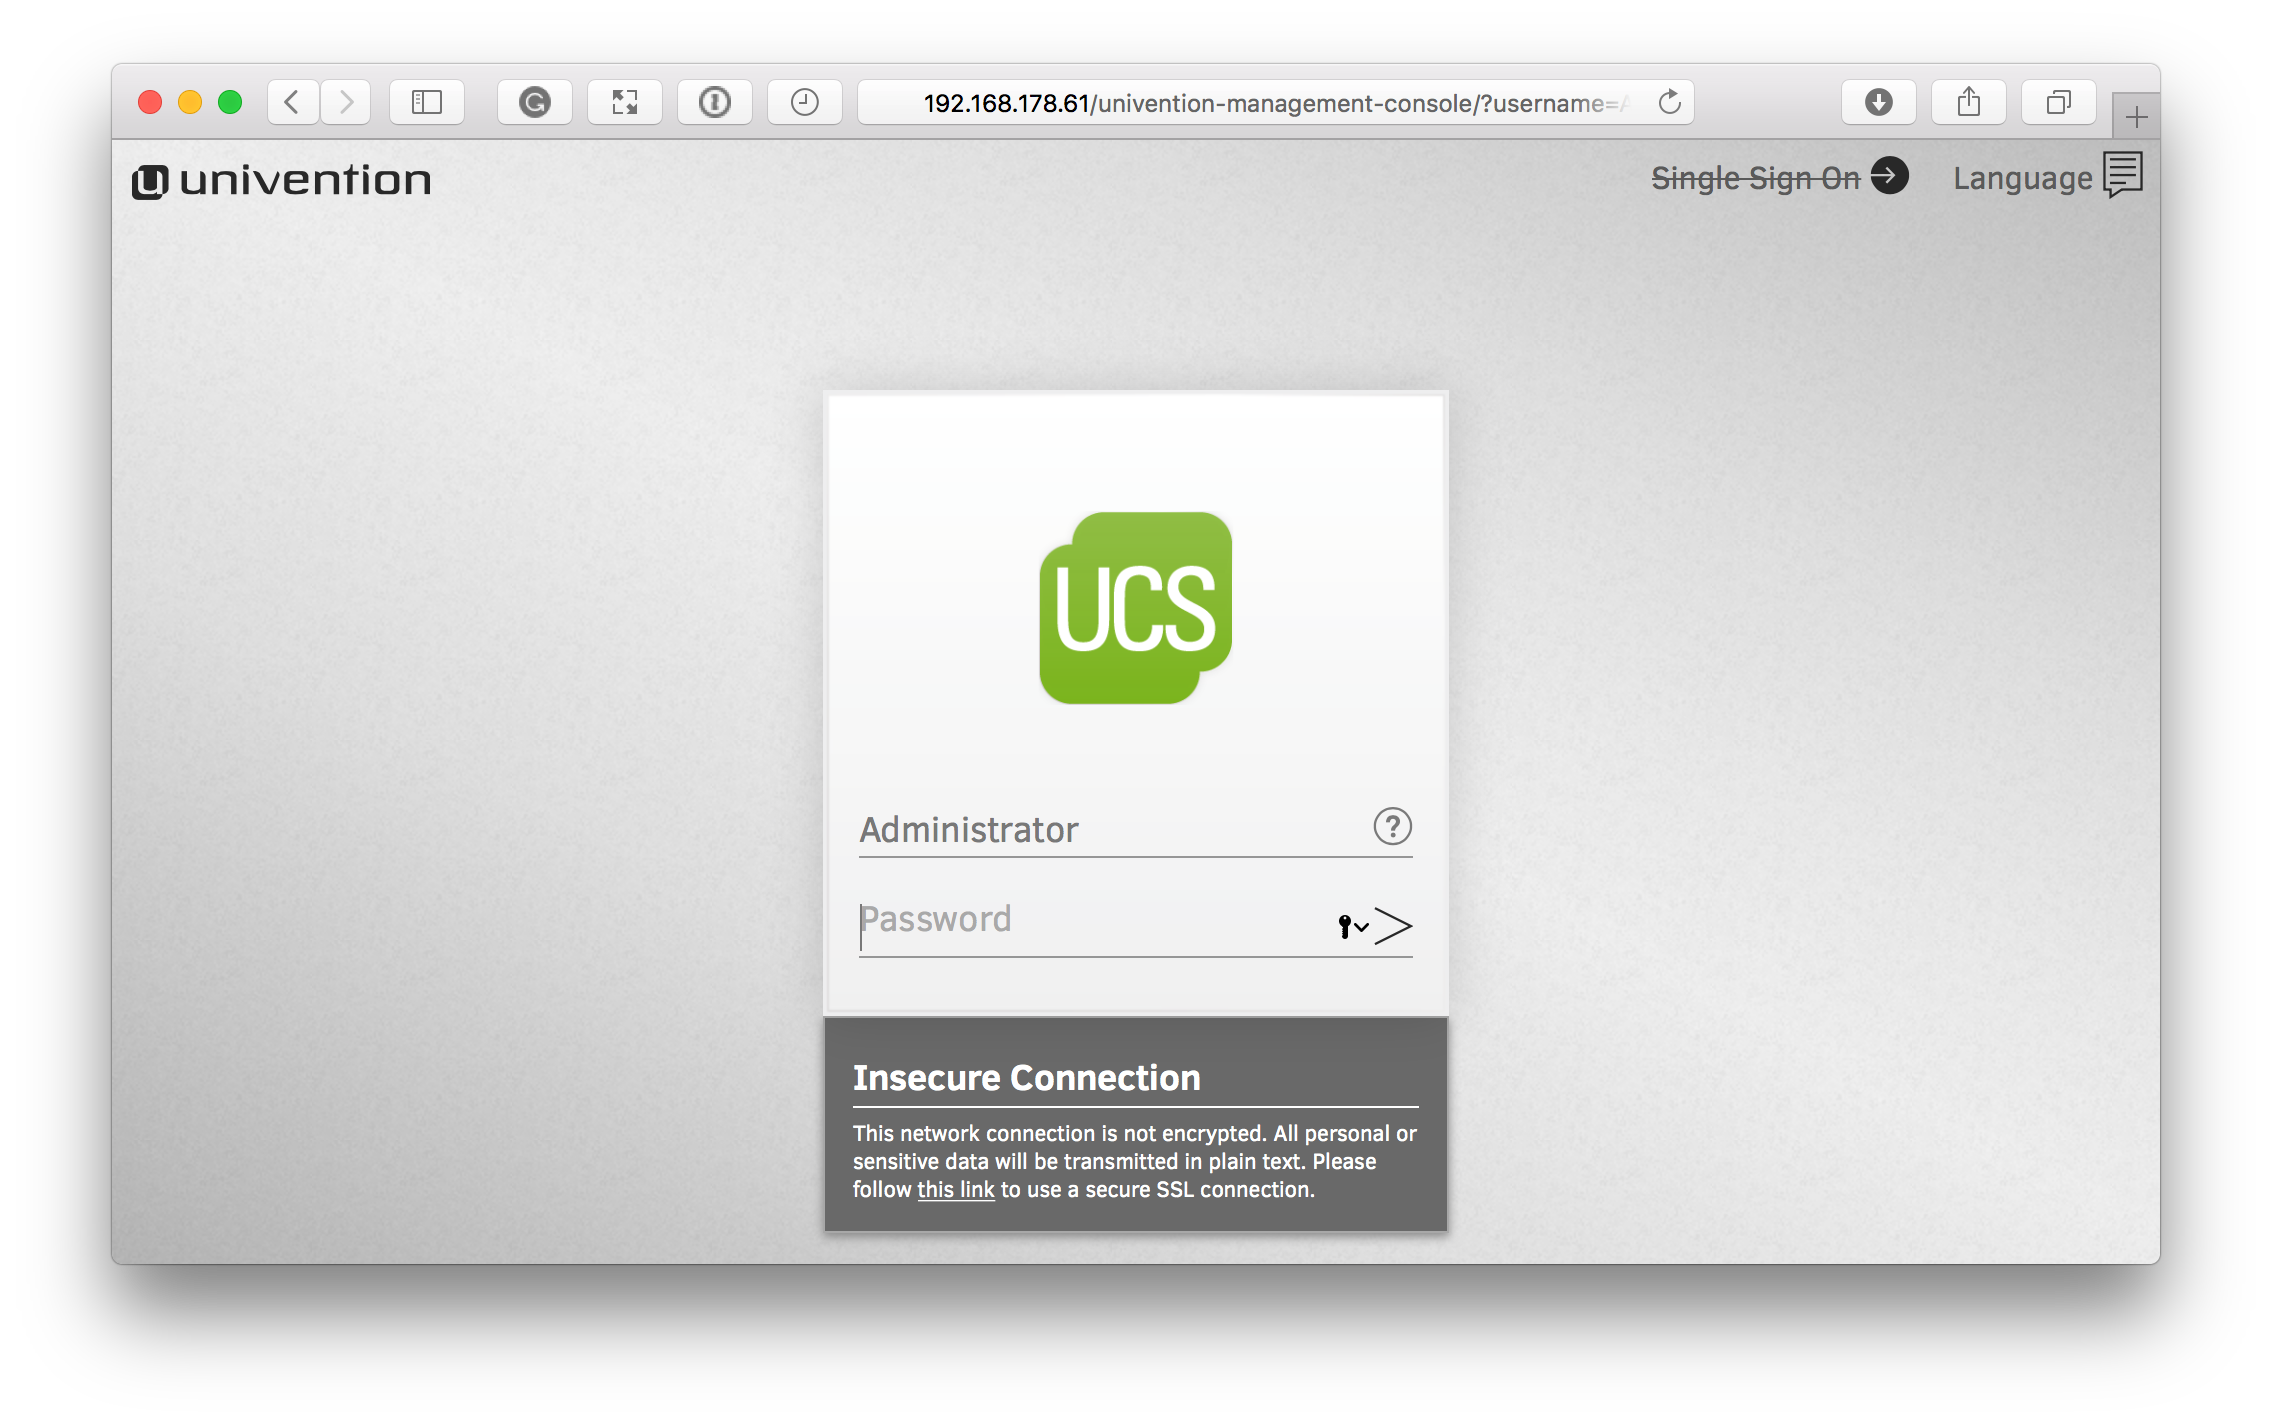
If you are not redirected to the appliance login page, you can open it using the following url: https:// /univention-management-console .
After you’ve done so, you will now be at the Univention management console, which you can see below.
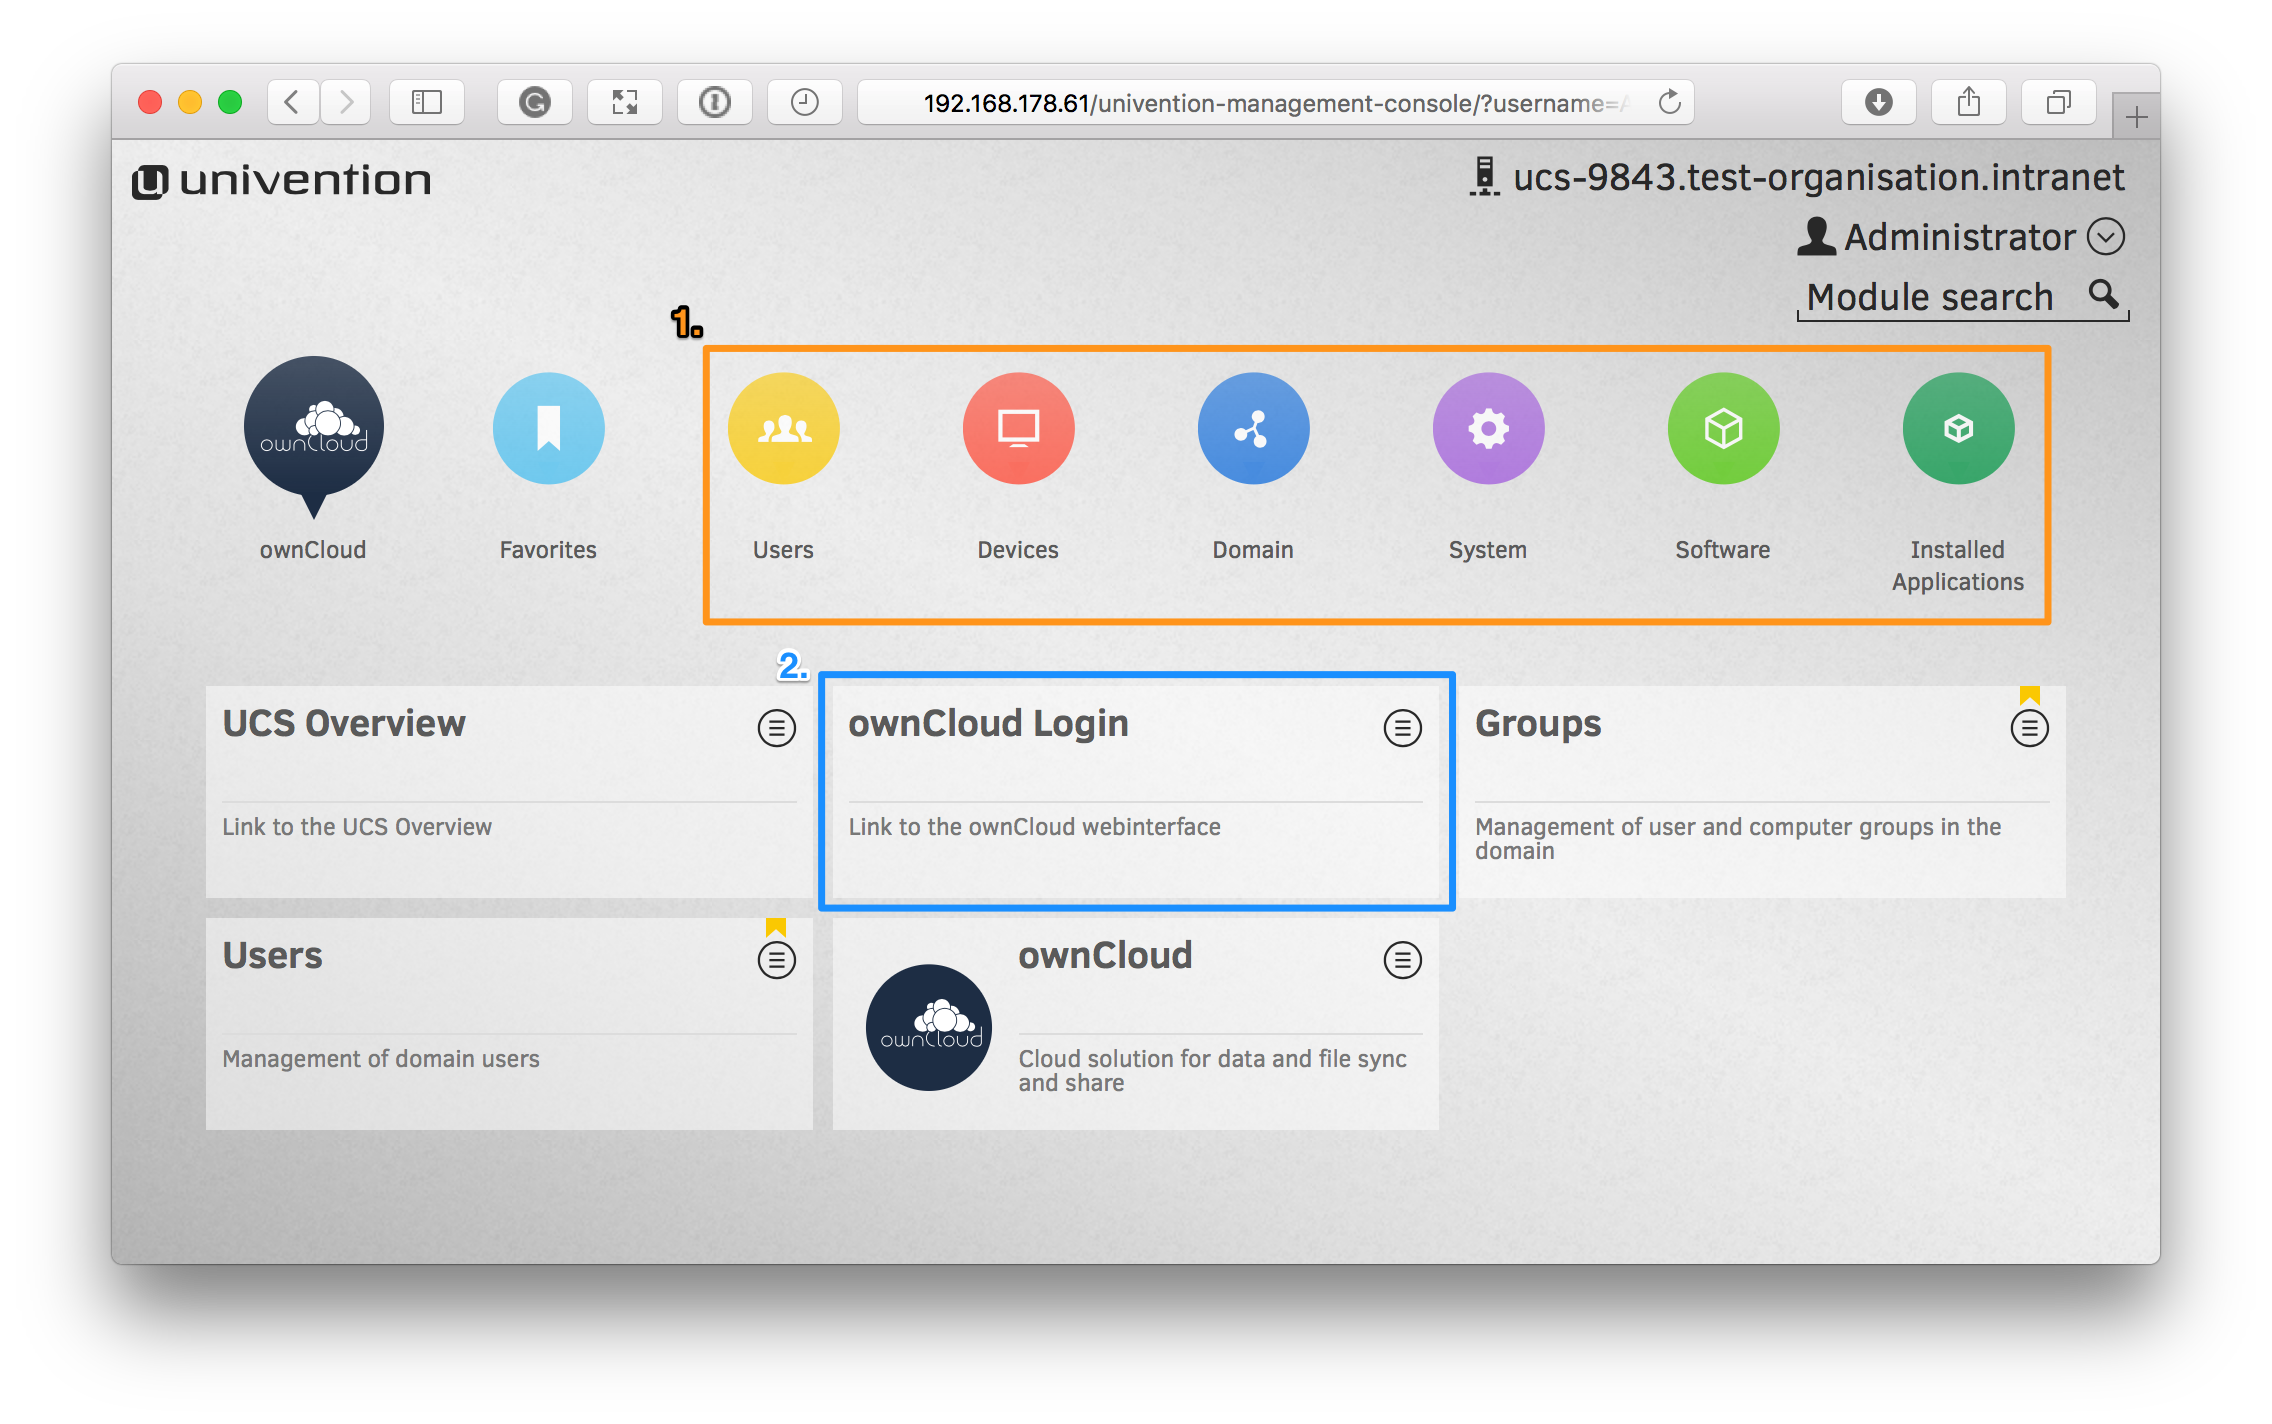
The management console allows you to manage the virtual appliance (1), covering such areas as: users, devices, domains, and software. You will also be able to access the ownCloud web interface (2).
The default username for the ownCloud is: owncloud and so is the password. The password is not the password you supplied during the configuration wizard.
For security reasons rpcbind should be disabled in the appliance. An open, from the internet accessable portmapper service like rpcbind can be used by an attacker to perform DDoS-Reflection-Attacks. Furthermore, the attacker can obtain information about your system, for example running rpc-services, or existing network shares. The German IT security agency «BSI» reported, that systems with an open rpcbind service were used to perform DDoS-Reflection-Attacks against other systems.
Install ownCloud in a Windows Server

ownCloud was developed with Linux and Unix based operating systems in mind so if you are looking to implement ownCloud in a production environment you probably should install it in a Linux server. But installing ownCloud in a Windows server is certainly possible now that PHP is supported in all Windows servers starting from Windows server 2008.In this tutorial we will install ownCloud in a Windows 2016 server.
Table of contents
Prerequisites
In order to finish this guide successfully you need the following:
- A Windows Server 2008 or later installed and fully updated
- IIS with CGI support enabled on the server
- MySQL
- PHP 5.4 or higher
Installing IIS
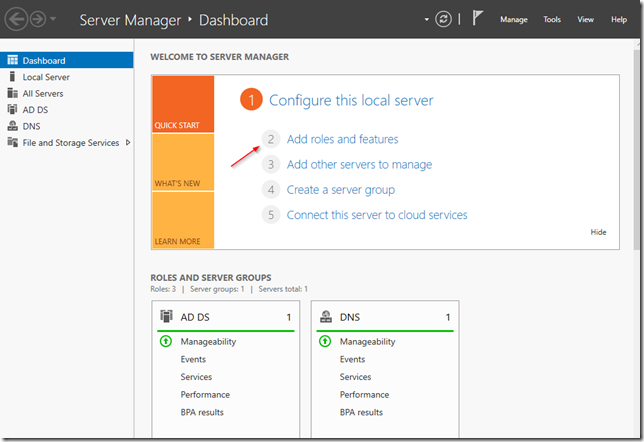
Login to your Windows server then click on Server Manager in your Start menu, and then click on Add roles and features:
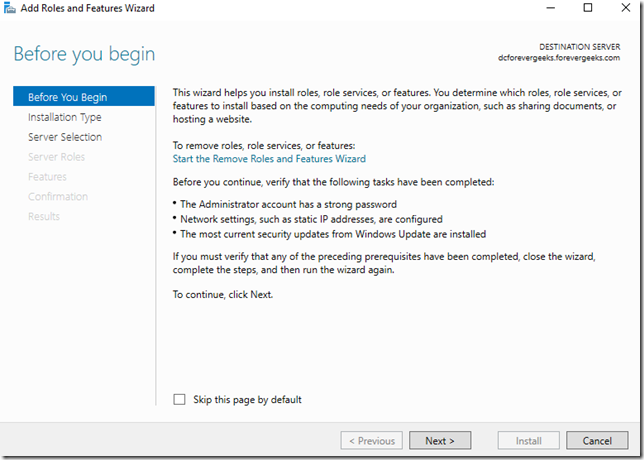
The Add roles and features wizard will come up. click on Next:
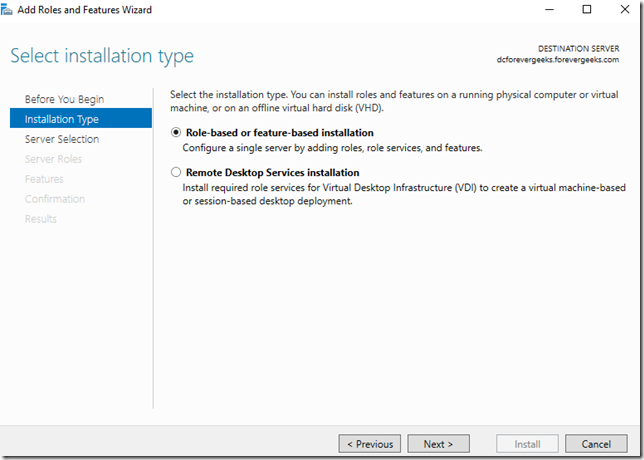
On the “Installation Type” Window choose “Role-based or feature-based installation:
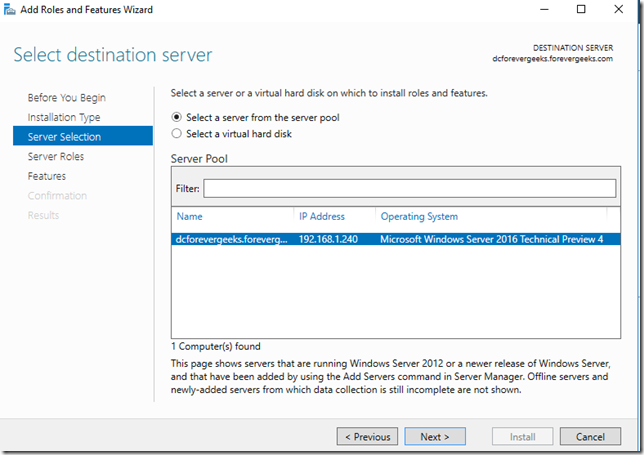
Click on Next. on the “Server Selection” screen choose your server from the server pool:
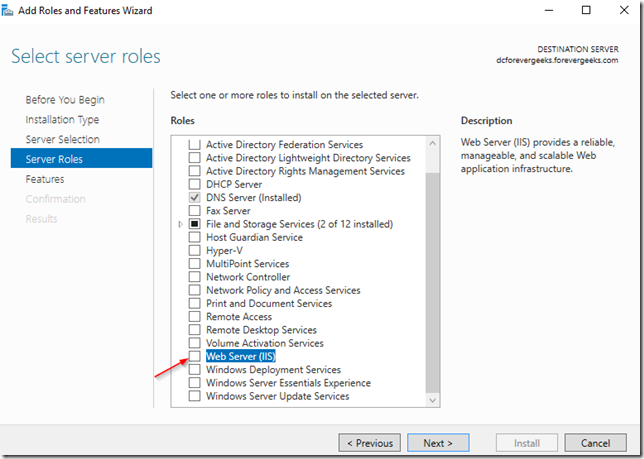
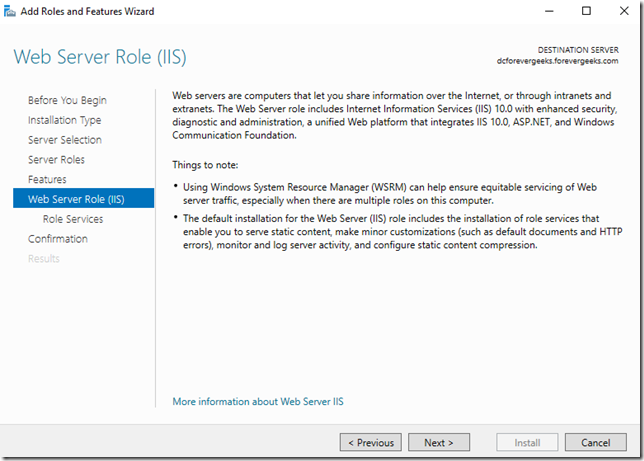
click on Next. on the “Select Server Role” window, check the Web Server (IIS ) role:
the Add roles and features window will pop-up:
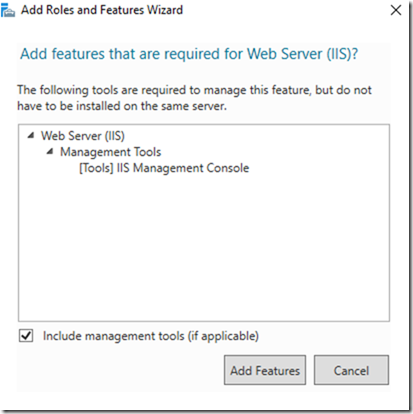
Click on Add Features then click Next.
Click Next .
click Next

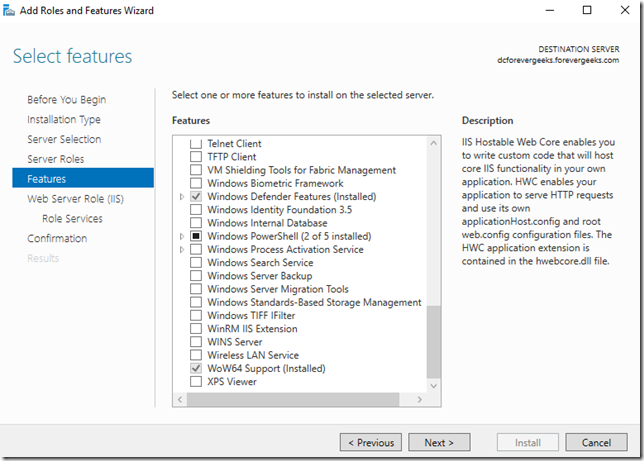
On the “Role services” window make sure CGI is check under the Application Development group. after you do that, click Next.
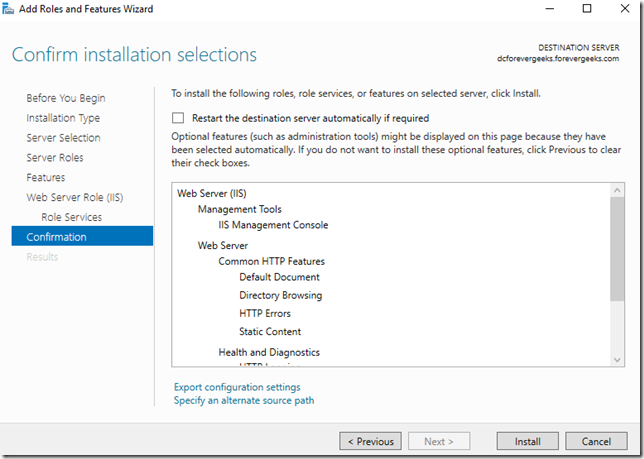
Click on Install in the confirmation window.

IIS with CGI support should be now installed in your server.
Installing PHP and MySQL
The easiest way to install PHP and MySQL at once in your Windows server is using the Microsoft Web Platform installer found in this URL https://www.microsoft.com/web/downloads/platform.aspx download and execute the wpiluancher.exe file . select the default settings during the installation until you get to this window:
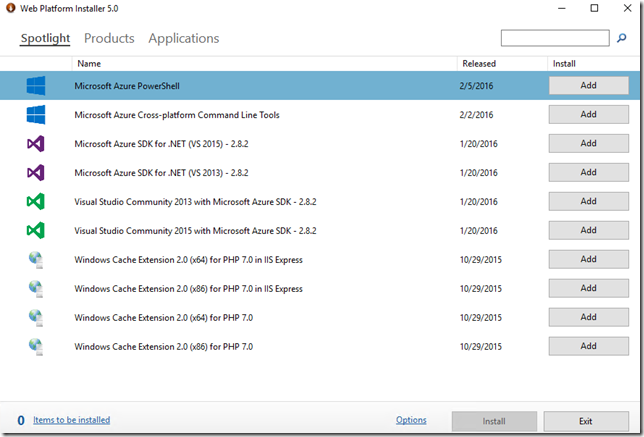
On that Window click on Products then Frameworks and choose the latest PHP version from the list. the latest PHP version at the time of this writing is version 7.0.
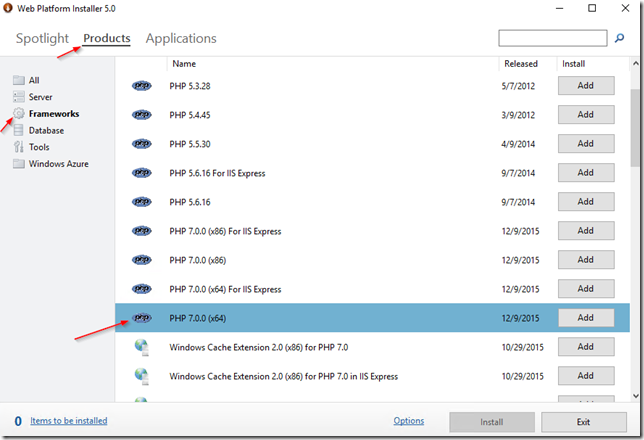
Click on Add then click on Database and add MySQL Windows as well:
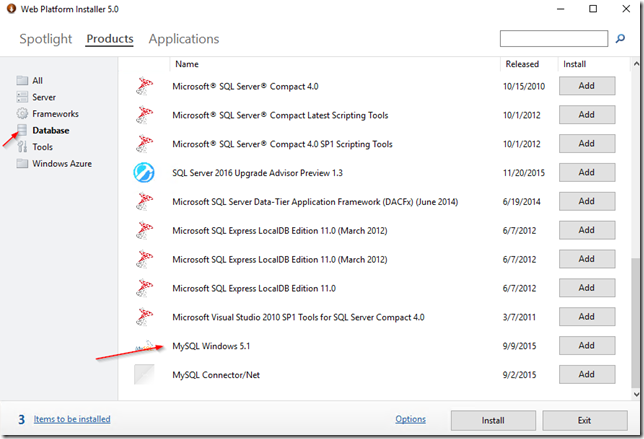
Click on Install after you have added both.
Select a password for your MySQL server:
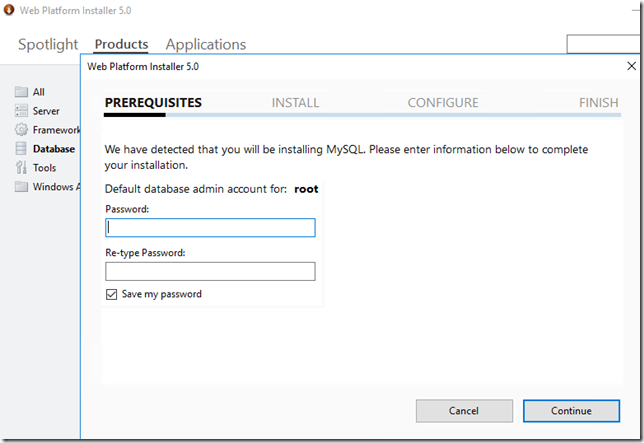
click on I Accept in the following window. and the installation will begin.
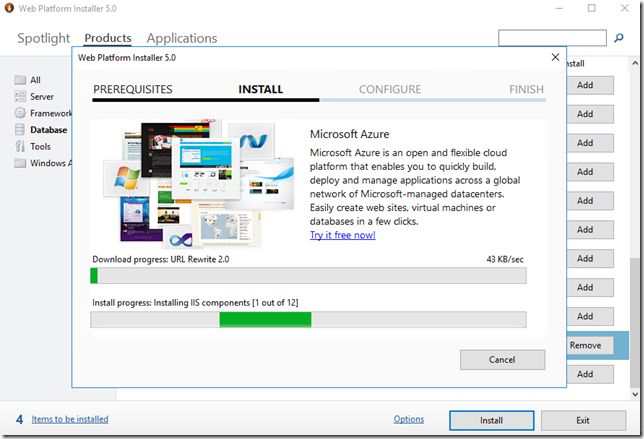
MySQL and PHP should be installed on your server now.
Note: if you get any error saying that PHP manager cannot be installed. make sure .NET 3.5 with HTTP Activation is installed on your server. somehow PHP manager needs that.
Create MySQL Database
Login to your MySQL server using CMD. open cmd on your server, and switch to this path cd “C:Program FilesMySQLMySQL Server 5.1bin” then login to your MySQL server
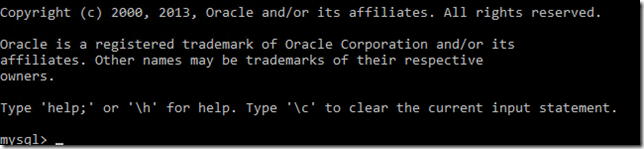
To create the ownCloud database type this:
create database owncloud ;
then type exit. you can also create create a different user to use with your ownCloud database if you don’t want to use the root account. see this section Create new user in MySQL if you want to do that.
Installing ownCloud
From your server download the latest ownCloud zip package from this URL https://owncloud.org/install unzip it and then move it to your C:inetpubwwwroot web directory. type in the name of your site (e.g. localhost/nameofyoursite ) or the IP address of your server in the browser, and the ownCloud installation wizard should come up:
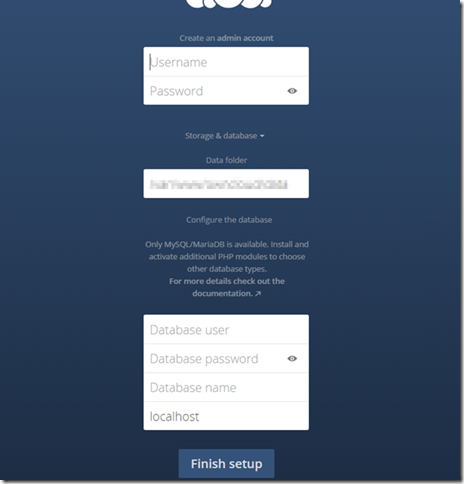
Enter the username, password, and the data folder location. click on Finish setup after you are done entering that information, and ownCloud should get installed on your Windows server!
Conclusion
Installing ownCloud in a Windows server is a lot more involved than installing it on a Linux server, but is not that hard. I hope you found this guide helpful, and please use the comments if you have any question.


