- Parallels Desktop
- Contents
- Installation of Arch as a guest
- Parallels Tools
- Overview
- Required Kernel & Xorg versions
- Configuring Xorg
- Preparing dependencies
- Installing Parallels tools
- Parallels tools with kernel v5.9+
- Systemd Configuration
- Using the Tools
- Sharing Folders
- Dynamic Display Resolution
- Future work
- Parallel desktop ��� linux
- Установка Windows 11 на ARM
- Установка Linux ARM
- Была ли эта статья полезной?
- Parallel desktop ��� linux
- Installation Procedures — CLI
- DEB Version
- RPM Version
- .TAR.BZ2 Version
- SSO (Single Sign On) Installation Procedures
- Manual installation procedure (RPM Required)
- Была ли эта статья полезной?
- Parallel desktop ��� linux
- Resolution
- Была ли эта статья полезной?
Parallels Desktop
![]() This article or section needs language, wiki syntax or style improvements. See Help:Style for reference.
This article or section needs language, wiki syntax or style improvements. See Help:Style for reference.![]()
Parallels Desktop is a hypervisor for macOS which allows users to install a variety of operating systems as «virtual machines» (guests) on the host system, reducing the need for managing multiple physical machines. A more complete description on virtualization can be found at Wikipedia.
Contents
Installation of Arch as a guest
Parallels Desktop supports Linux guests out of the box, but only offers support for a few Linux distributions — excluding Arch Linux. This means the installation of Parallels tools have not been tested by the vendor, and requires some manual intervention to work under Arch. If you do not wish to use Parallels tools, installation is as simple as choosing «other linux» when creating a new virtual machine and proceeding as you would on any real machine.
In addition to the instructions below, there is an installation guide for Arch Linux in Parallels Knowledgebase [1].
Parallels Tools
Overview
To improve interoperability between the host and the guest operating systems, Parallels provides a package called «Parallels tools» which contains kernel modules and userspace utilities. See Parallels Tools Overview for a list of its features.
This article assumes users want to make full use of the tools, including Xorg configuration. If you are running a headless server, you can skip over the sections relating to X.
When referring to the version of parallel tools the form is
. . For example: 9.0.24237.1028877 corresponds to Parallels version 9.0.24237 with tools version 1028877
Required Kernel & Xorg versions
The tools installer uses binaries which can sometimes be incompatible with the latest version of Xorg or kernels in the Arch repository.
Different versions have different software requirements:
- 9.0.24229.991745 needs 3.13.8 (or possibly a later 3.13.y) (3.14 is known to show a black screen and freeze the system) and Xorg 1.15.y or earlier
- 9.0.24237.1028877 works on Arch 3.14.15-1-lts (newer versions may work) and Xorg 1.15.y or earlier
- 11.0.0.31193 works on Arch 4.1.6-1 and Xorg 1.17.2-4
- 12.1.0.41489 works on Arch 4.8.7-1 and Xorg 1.18.4, after removing the PATH statement in the install script (cdrom//Parallels Tools//install), and adding «iomem=relaxed» to kernel boot parameters.
- 14.1.3.45485 works on Arch 5.1.16-1 and Xorg 1.20.5 when following this guide
- 15.0.0.46967 works on Arch 5.3.1-1 and Xorg 1.20.5 (Parallels 15)
And there are different ways to obtain them:
- linux 3.13.8 can be obtained from the Arch Linux Archive
- linux 3.14.15 is the current linux-lts, so just install that and regenerate your grub config.
Configuring Xorg
The Parallels tools installer will take care of configuring Xorg, so just follow the instructions at Xorg to install the relevant packages on your system. Install the xf86-video-vesa package to use the vesa driver.
Preparing dependencies
The installation script expects to find your init-scripts in /etc/init.d/ and will fail if it is not present. Since Arch uses systemd, create a symlink to the systemd scripts directory and set the def_sysconfdir variable:
The installation script also expects the file /etc/X11/xorg.conf . We can just create an empty file, as it will automatically be configured by the installer:
Then, you need to install standard build utilities, python2, and kernel headers: < depends on your Parallels version, you may have to install linux-lts-headers instead of linux-headers . Finally, create a temporary symbolic link to python 2. Remove this link after the installation process. Choose «install Parallels Tools» from the «Virtual Machine» menu. Parallels Tools are located on a cd-image, which will be connected to your virtual machine. You have to mount it first: Now you can proceed to install Parallels tools using the installation script as follows: Parallels tools currently requires to be patched to work with kernel v5.9 or newer. In case the installation step above failed, try and follow the instructions here: The Parallels tools daemon should be started at boot, so create a service file like the following: Enable the parallels-tools.service service. Reboot the system and Parallels tools should now be installed and working. You can specify which folders on your hosts system you would like to share with your guests under «virtual machine > configuration > sharing». Then you mount a shared folder like this: A very helpful tool is prlcc . It changes the resolution of the display (in the guest — not the host) automatically when your resize your window. If this tool is not running, the contents of the window gets stretched or shrunken. prlcc is usually started automatically and runs in the background. If not, run the following (or place it in a configuration file like /etc/X11/xinit/xinitrc.d/90-prlcc): In general, updating system packages like the linux kernel or Xorg can break Parallels tools and you will need to re-install them. In some cases, new packages will be incompatible with the tools and they will stop working — in that case you will need to roll back the newly installed packages and wait until Parallels releases a new product build before updating your guest (in the hope they have resolved any previous incompatibilities). Источник Parallels Desktop на Mac с чипом Apple M1 использует новый механизм виртуализации, который поддерживает в виртуальной машине запуск различных операционных систем на базе ARM. Подробнее об этом Вы можете узнать здесь. Скачать версию Parallels Desktop, совместимую с Мас на чипе Apple M1, Вы можете здесь. Чтобы установить новую виртуальную машину, вам необходимо использовать установочный образ поддерживаемой операционной системы на основе ARM. Для наглядного примера Вы можете посмотреть видео ниже (к сожалению, доступно только на английском языке):Installing Parallels tools
Parallels tools with kernel v5.9+
Systemd Configuration
Using the Tools
Sharing Folders
Dynamic Display Resolution
Future work
Parallel desktop ��� linux
Установка Windows 11 на ARM
Чтобы установить виртуальную машину Windows 11 на ARM Insider Preview на компьютерах Mac с чипом M1, требуется источник установки ARM (VHDX, ISO).
Примечание: пользователи, устанавливающие гостевые операционные системы на виртуальные машины Parallels Desktop, несут ответственность за соблюдение условий лицензионного соглашения с конечным пользователем каждой ОС (EULA).
2. Если Вы уже являетесь инсайдером, пожалуйста, войдите в систему, используя параметр «Войти» в правом верхнем углу страницы.

Если нет, перейдите по ссылке и нажмите «Зарегистрироваться», чтобы зарегистрироваться в программе предварительной оценки Windows.

3. После успешной регистрации в программе предварительной оценки Windows, пожалуйста, воспользуйтесь ссылкой из шага 1, чтобы вернуться на веб-страницу загрузок Windows Insider Preview.
4. Прокрутите страницу вниз и нажмите кнопку Windows Client Arm64 Insider Preview, чтобы загрузить образ VHDX:

5. После загрузки VHDX дважды щелкните файл VHDX, и Parallels Desktop откроет его на странице выбора профиля.
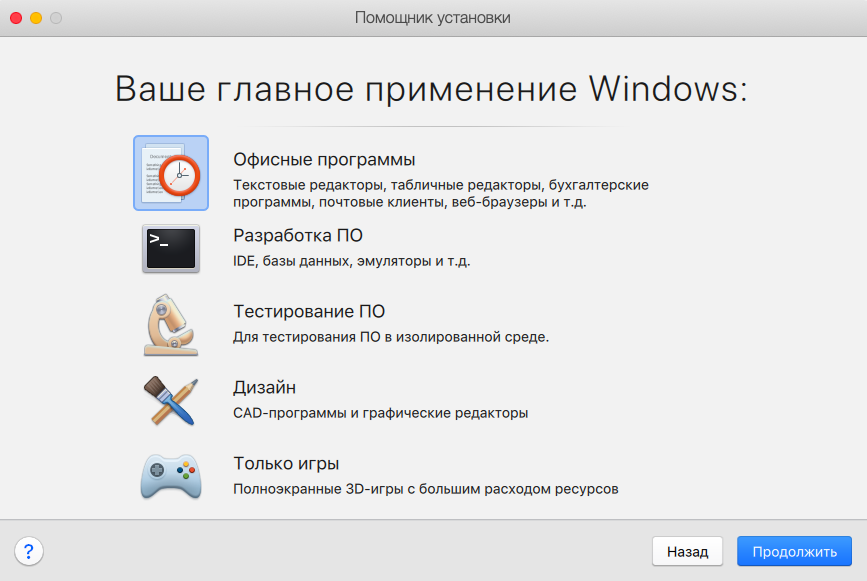
6. Выберите, как Вы хотите использовать Windows.
Выберите, как Вы хотите использовать Windows 11 ARM Insider Preview в Parallels Desktop для Mac Standard Edition:
- Офичные программы
- Только игры
А также в Parallels Desktop для Mac Pro и Business Edition:
- Разработка программного обеспечения
- Тестирование программного обеспечения
- Дизайн
Чтобы узнать больше о профилях виртуальных машин, пожалуйста, посетите KB 123878.
7. Выберите имя виртуальной машины и папку, где будет храниться виртуальная машина.
Имя: Вы можете указать любое имя для своей виртуальной машины.
Расположение: по умолчанию виртуальные машины Parallels Desktop размещаются в / Users / имя пользователя / Parallels /.
Если Вы хотите изменить настройки по умолчанию для виртуальных машин выберите «Настройка параметров» перед установкой. Эти настройки также можно легко изменить после установки.

8. Начало установки.
Нажмите «Продолжить», и установка начнется. Подождите, пока установка завершится, затем щелкните окно виртуальной машины и наслаждайтесь использованием Windows 11 ARM Insider Preview в Parallels Desktop:

Установка Linux ARM
В Parallels Desktop, в главном меню Помощника по установке, Вы можете загрузить набор готовых виртуальных машин Linux:

Для того, чтобы установить другой дистрибутив Linux ARM, пожалуйста, используйте загрузочный установочный образ ISO, но убедитесь, что это образ на основе ARM.
Была ли эта статья полезной?
Как, по вашему мнению, можно улучшить эту статью?
Источник
Parallel desktop ��� linux
Installation via GUI is only valid on DEB and RPM versions.
Download package from parallels.com/products/ras/download/links/ and store it locally.
Installation Procedures — CLI
DEB Version
Download the deb package from parallels.com/products/ras/download/links/ and store it locally.
Switch to the root user.
To install type:
Note — If the installation fails because of missing dependencies, try installing these dependencies using the following command :
Client for Linux binaries are now installed under:
Run the following command to launch Client:
You can also run the following commands to obtain a list of all usage parameters for Client session:
RPM Version
Download the rpm package from parallels.com/products/ras/download/links/ and store it locally.
Switch to the root user.
Input command as per below example depending on Client version you would like to install:
yum install RASClient-xx.xx.xxxx_x86_x64.rpm
Client for Linux binaries are now installed under:
Run the following command to launch Client:
You can also run the following commands to obtain a list of all usage parameters for Client session:
.TAR.BZ2 Version
Download the tar package from parallels.com/products/ras/download/links/ and store it locally.
Switch to the root user.
Switch to the directory containing Parallels Client, e.g.:
To install type:
Parallels Client for Linux binaries are now installed under:
It is recommended that the post install script is launched in order to register icons, mimetypes, url schema and databases configurations. This script is located under: /opt/2X/Client/scripts/install.sh
Run the following command to launch Client:
You can also run the following commands to obtain a list of all usage parameters for Client session:
Note: To unregister the components registered during installation it is recommended to launch the uninstall script located under: /opt/2X/Client/scripts/uninstall.sh
SSO (Single Sign On) Installation Procedures
Depending on the package used to install the Client, the SSO installation procedure may vary:
Already available with Client package:
- TAR package — Run script at location /opt/2X/Client/scripts/install.sh.
- RPM package — Manual installation is required.
Separate package to Client:
- Debian package — Requires Client pre-installed. Install package using the default package installer.
Manual installation procedure (RPM Required)
Install pam_2xclient.so module to have Single Sign On for Client.
Note — this file is located under /opt/2X/Client/lib/security/pam_2xclient.so no matter the package used.
The module always returns true and will use an authentication token that will be provided by a higher authentication module.
Note: When a higher authentication module has been configured to SUFFICIENT, it will return on success immediately and pam_2Xclient.so won’t be called. Please change SUFFICIENT TO REQUIRED.
To install Client PAM module, add two lines to your session manage service (eg. /etc/pam d/gdm):
Debug: Debug trace will be written to /tmp/pam_2xclient.log . If the file cannot be opened, then syslog will be used.
You can use debug argument with all module types. EG. Session optional pam_2xclient.so debug
The module will create an SSO cookie only for well known session services.
Была ли эта статья полезной?
Как, по вашему мнению, можно улучшить эту статью?
Источник
Parallel desktop ��� linux
This page provides instructions on installing Debian Linux on your Mac for the first time to use with Parallels Desktop.
Resolution
- Download the latest Debian .iso image file from debian.org.
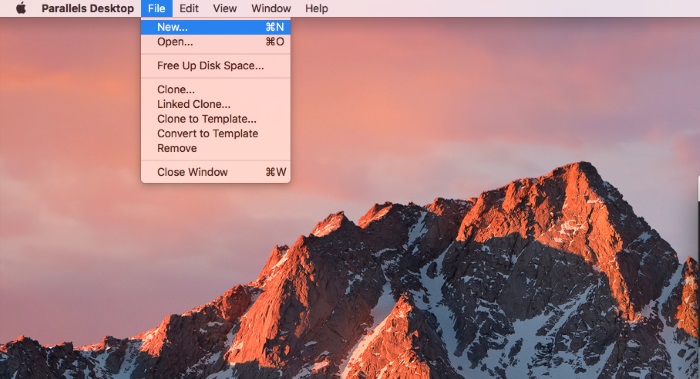
Start Parallels Desktop, then click File -> New.
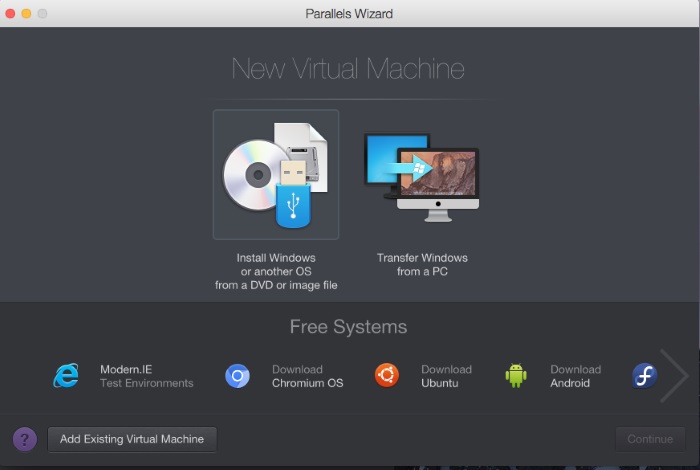
Choose «Install Windows or another OS from a DVD or and image file», then click Continue.
Choose Debian Linux from the list of the operating system sources found on your Mac, then click Continue.
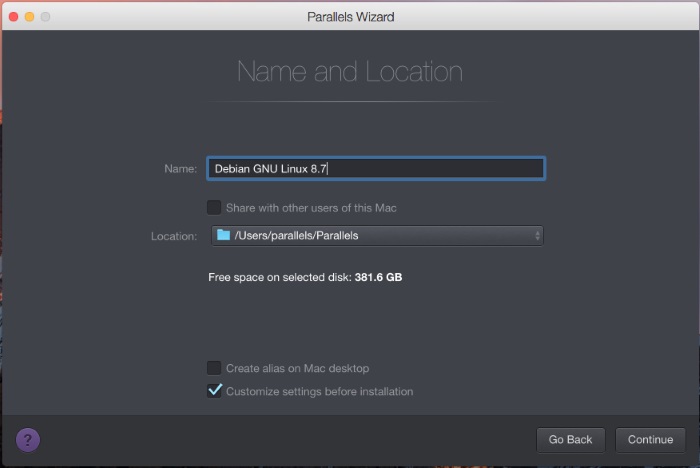
Specify the name and location of your virtual machine or leave the default settings, then click Continue.
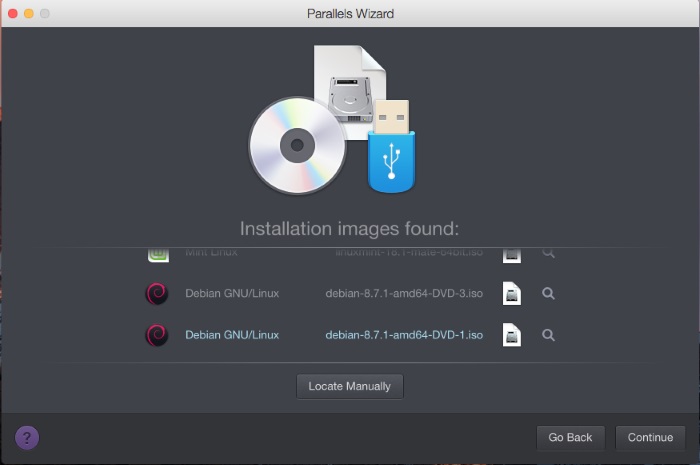
The Debian virtual machine will be created and Debian installation setup screen will appear.
Click inside the virtual machine screen, then select «Graphical Install».
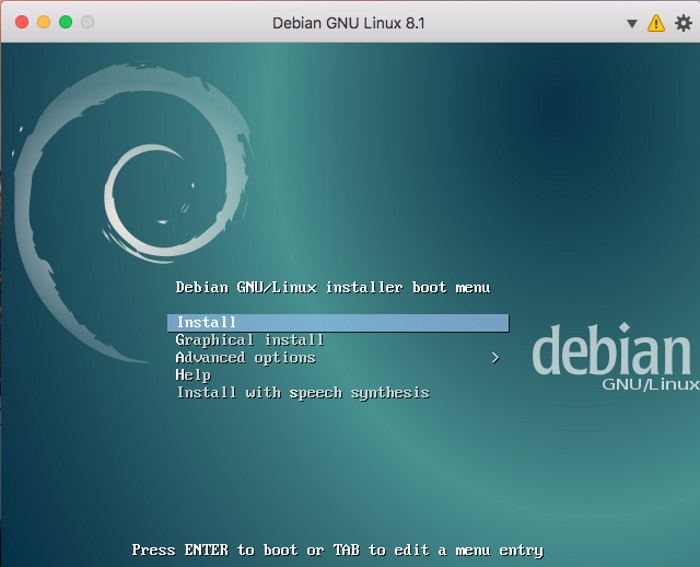
Go through the Debian installation wizard.
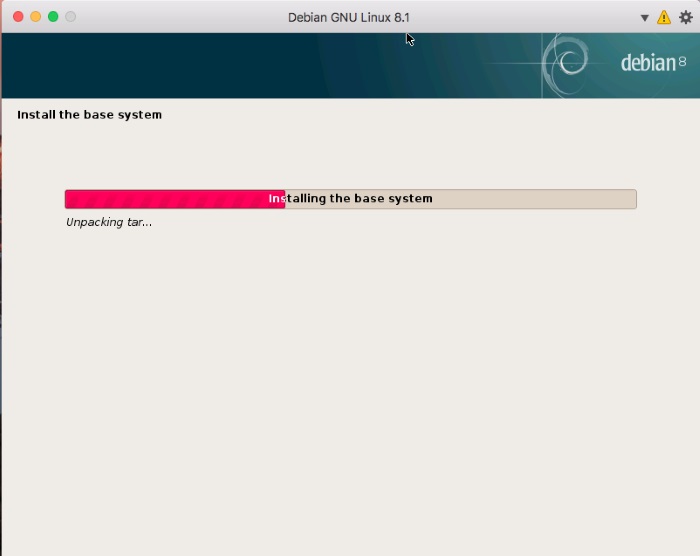
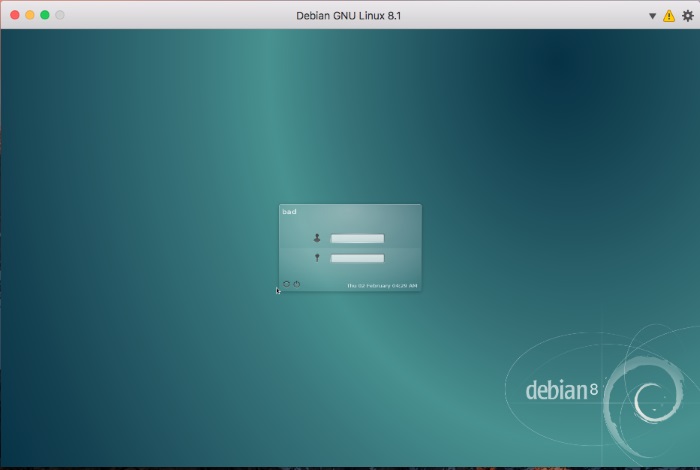
Wait till installation is complete, then reboot your virtual machine. Log into Debian VM
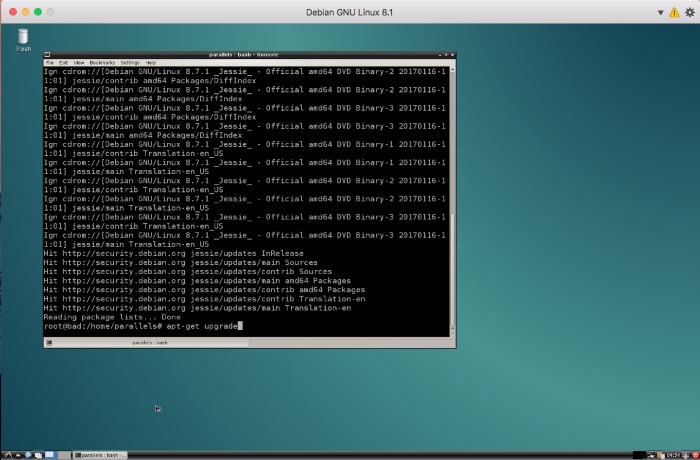
Update Debian environment to the latest version. Also make sure that essential packages are installed as well.
IMPORTANT: Before installing Parallels Tools and/or updating Debian VM we recommend to create a fresh snapshot for your Debian Virtual Machine (VM).
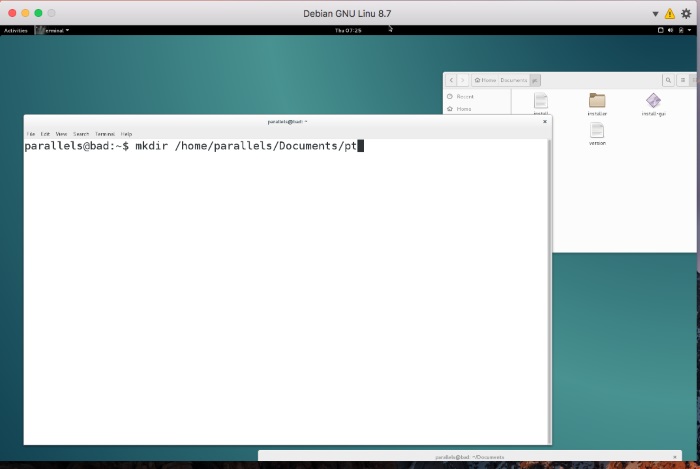
Launch Debian Konsole (Terminal)
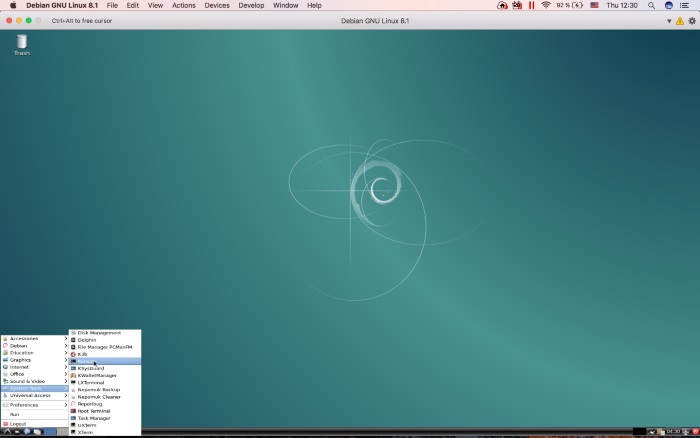
Copy and execute the following command:
(Prompt an administrator password)
Copy and execute the following commands one by one:


Restart Debian Linux VM.
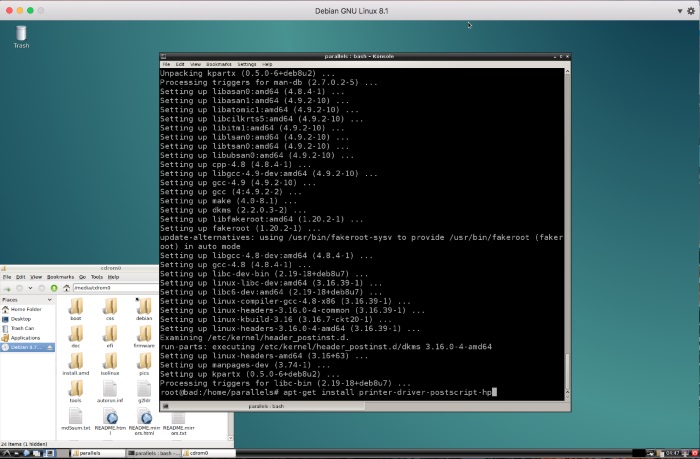
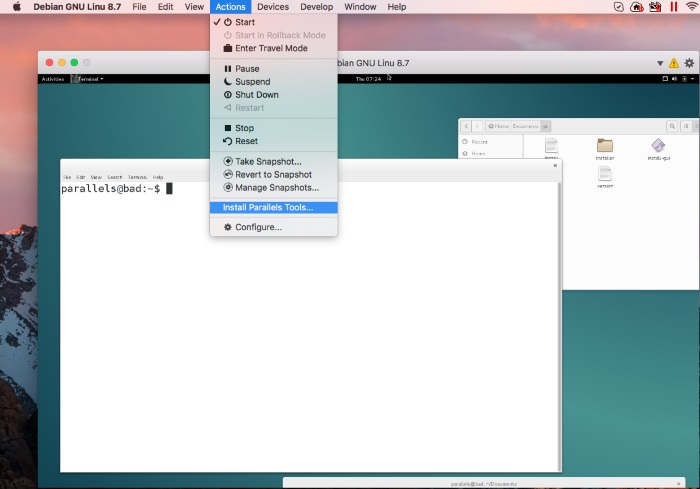
Install Parallel Tools by running the installer.
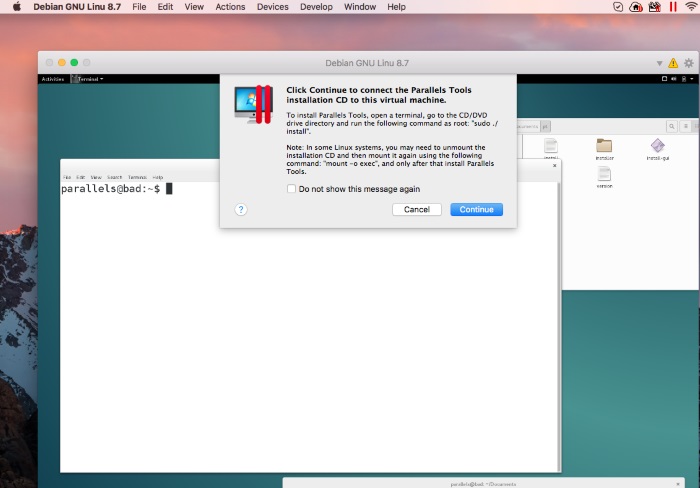

Execute following commands in Debian Terminal:
(Prompt an administrator password)


You will get an error message about missing printer driver, please ignore it and click OK
Once Parallels Tools installation is complete, restart Debian VM.
IMPORTANT: In order to be able to use Coherence view mode in Debian Linux VM, please check Disabling Desktop Visual Effects in Linux virtual machines
Была ли эта статья полезной?
Как, по вашему мнению, можно улучшить эту статью?
Источник


