- RDP Client
- Access Windows Applications, Desktops or Data on Any Device
- The RDP Client is an easy-to-install software that provides access to RDP infrastructures and Parallels ® RAS farms. Securely access digital workspaces from Windows, Mac, Linux, iOS, Android, Thin Client, Chromebook, and more.
- The Parallels ® Client is Available on All the Major Platforms
- Download Parallels Client
- RDP Capabilities
- Parallels Client Use Cases
- Seamless navigation
- Secure access
- Mobile printing
- Samsung DeX Support
- Client autoconfiguration
- Files and folders
- Maximized flexibility
- Bluetooth mouse and trackpad support
- Excellent mobile experience
- iPad Multitasking Support
- Parallels client ��� linux
- Installation Procedures — CLI
- DEB Version
- RPM Version
- .TAR.BZ2 Version
- SSO (Single Sign On) Installation Procedures
- Manual installation procedure (RPM Required)
- Была ли эта статья полезной?
- Parallels Client
- Access Windows Applications, Desktops, or Data on Any Device
- RDP-подключение из Ubuntu с помощью Parallels Client
- Устанавливаем Parallels Client из «Центра приложений Ubuntu»
- Настраиваем RDP-подключение
- Дополнительные параметры подключения
RDP Client
Access Windows Applications, Desktops or Data on Any Device
The RDP Client is an easy-to-install software that provides access to RDP infrastructures and Parallels ® RAS farms. Securely access digital workspaces from Windows, Mac, Linux, iOS, Android, Thin Client, Chromebook, and more.
The Parallels ® Client is Available on All the Major Platforms
Download Parallels Client
- Remote Application Server (RAS) Client (Windows) 32-bit Setup
- Remote Application Server (RAS) Client (Windows) 64-bit Setup
- Remote Application Server (RAS) Windows Client Basic 32-bit — zip
- Remote Application Server (RAS) Windows Client Basic 64-bit — zip
- Remote Application Server (RAS) Windows Client Basic 32-bit — self extracting
- Remote Application Server (RAS) Windows Client Basic 64-bit — self extracting
- Remote Application Server (RAS) Mac Client
- Remote Application Server (RAS) x86 Linux Client — DEB 32-bit
- Remote Application Server (RAS) x86 Linux Client — DEB 64-bit
- Remote Application Server (RAS) x86 Linux Client — SSO DEB 32-bit
- Remote Application Server (RAS) x86 Linux Client — SSO DEB 64-bit
- Remote Application Server (RAS) x86 Linux Client — RPM 32-bit
- Remote Application Server (RAS) x86 Linux Client — RPM 64-bit
- Remote Application Server (RAS) x86 Linux Client — SSO RPM 64-bit
- Remote Application Server (RAS) x86 Linux Client — tar.bz2 32-bit
- Remote Application Server (RAS) x86 Linux Client — tar.bz2 64-bit
- Remote Application Server (RAS) x86 Linux Client — SSO tar.bz2 64-bit
- Remote Application Server (RAS) Arm-71 Linux Client — ARM DEB
- Remote Application Server (RAS) Arm-71 Linux Client — ARM RPM
- Remote Application Server (RAS) Arm-71 Linux Client — ARM tar.bz2
- Remote Application Server (RAS) Arm-71 Linux Client — SSO ARM DEB
- Remote Application Server (RAS) Raspberry Pi Linux Client — ARM PI DEB
- Remote Application Server (RAS) Raspberry Pi Linux Client — ARM PI RPM
- Remote Application Server (RAS) Raspberry Pi Linux Client — ARM PI tar.bz2
- Remote Application Server (RAS) Raspberry Pi Linux Client — SSO ARM PI DEB
- Remote Application Server (RAS) iOS Client
- Remote Application Server (RAS) Android Client
- Remote Application Server (RAS) Chrome Client
RDP Capabilities
The Parallels Client leverages and enhances Remote Desktop Protocol (RDP) technology, enabling users to instantly connect to either Parallels RAS Farms or simple RDS infrastructures.
It’s an intuitive RDP client that makes it possible for users to work simultaneously on applications and desktops. Multiple connection settings may be stored and utilized so users can keep workspaces docked under the same application window (or undock them to work in another window).
Moreover, features not supported by the Microsoft RDP Client—such as drag and drop, multiscreen support, zoom and more—are implemented to provide a top-tier user experience.
The remote desktop for Android and iOS enables all native gestures, offering one of the best mobile experiences on the market. Touch ID and passcode capabilities are available during login to increase data security.
Parallels Client Use Cases
Client policies control which settings are available to configure on the user’s Parallels Client interface. With client policies, IT administrators can easily manage and restrict the settings available to users on the Parallels Client connection to a Parallels RAS Farm. Criteria can also be configured to distribute different policies depending on where the user is connecting from or even which device (MAC address) they are using.
Increase security access with multi-factor authentication (MFA), specifically when using RADIUS as an MFA provider. Users can choose their preferred security verification methods from a configurable list, including push notifications, phone callback, SMS and email.
Administrators can customize the one-time password (OTP) experience when using the Parallels Client. Different security verification methods can be assigned a priority level and configured to be automatically used.
Session prelaunch, initially only for Parallels Client for Windows, is now extended to other platform-specific clients, including macOS, Linux, iOS and Android. Session prelaunch can be configured to make use of Artificial intelligence (AI), which enables Parallels Client to analyze user login habits to prelaunch Parallels RAS sessions prior to the user’s manual request. This delivers a ready-to-connect virtual workspace, significantly reducing login time and dramatically improving UX.
Parallels RAS streamlines management of user identities from different organizations by supporting the Security Assertion Markup Language (SAML) 2.0 authentication mechanism. With SAML, IT can provide single sign-on (SSO) capabilities without sharing the local identity database. This allows federated SSO authentication and authorization processes for users while de-coupling the identity provider and service provider for simplified and centralized access of Parallels RAS hosted resources.
Seamless navigation
Use the touch mechanic gestures you know—swipe, drag, tap to click and zoom in—with any Windows application on your smartphone. With a Lock’n’Go Magnifying Glass it’s possible for users to select the exact content that’s needed.
Secure access
Parallels Client connects client devices to Parallels RAS applications and desktops via RDP protocol and SSL encryption for a secure and reliable connection. Employees may also further secure the Parallels Client by adding Touch ID or Passcode to open the application. Parallels RAS enhances mobile device security.
Mobile printing
Through the remarkable peripheral redirection technology built into the Parallels Client, iOS and Android devices can be used to print locally. Moreover, remote desktop printing with Parallels RAS Universal Printing enables users to print directly to their local printers without any extra configurations.
Samsung DeX Support
The Parallels RAS Android Client supports Samsung DeX. Samsung mobile users can work anywhere, anytime using one device. Improve multitasking and productivity with features like drag-and-drop and multiscreen.
Client autoconfiguration
Parallels Client may be configured automatically through an invitation email from the Remote Application Server console or accessed through a web portal. Configurations within the Parallels Client can also be preconfigured for users with a client group policy.
Files and folders
Access centralized files and folders from any device, through a secure connection that doesn’t expose your assets or intellectual property. If enabled by administrators, accelerated file retrieval enables users to quickly retrieve and enumerate local files and folders when using drive redirection. It’s possible to achieve a more than 90% increase in speed and stability over poor networks compared with standard RDP.
Maximized flexibility
Parallels RAS can be accessed directly from any HTML 5 web-browser, extending the user’s freedom to work from any device, anytime, anywhere.
Bluetooth mouse and trackpad support
The Parallels Client for iOS supports the use of a Bluetooth mouse or trackpad with iPads (iPadOS 13.4 or newer), providing greater precision. Moreover, when a mouse or trackpad is detected, the cursor transforms into a native cursor depending on the content available on the screen—for example, a pointer, I-beam or arrows. The “Dumbo” mouse mode enables a virtual mouse with two buttons and a pointer that appears on the screen to navigate effectively.
Excellent mobile experience
Select text or graphics with one finger, and easily drag and drop content for a seamless interactive experience. Create custom keypad shortcuts to work even more efficiently. Using native controls, copy and paste between remote applications—or even between remote applications and device apps.
iPad Multitasking Support
Parallels Client for iPadOS supports multitasking features—such as Slide Over and Split View—so users can manage apps simultaneously, boosting productivity. For example, users can work on a Parallels RAS published resource and FaceTime at the same time.
Источник
Parallels client ��� linux
Installation via GUI is only valid on DEB and RPM versions.
Download package from parallels.com/products/ras/download/links/ and store it locally.
Installation Procedures — CLI
DEB Version
Download the deb package from parallels.com/products/ras/download/links/ and store it locally.
Switch to the root user.
To install type:
Note — If the installation fails because of missing dependencies, try installing these dependencies using the following command :
Client for Linux binaries are now installed under:
Run the following command to launch Client:
You can also run the following commands to obtain a list of all usage parameters for Client session:
RPM Version
Download the rpm package from parallels.com/products/ras/download/links/ and store it locally.
Switch to the root user.
Input command as per below example depending on Client version you would like to install:
yum install RASClient-xx.xx.xxxx_x86_x64.rpm
Client for Linux binaries are now installed under:
Run the following command to launch Client:
You can also run the following commands to obtain a list of all usage parameters for Client session:
.TAR.BZ2 Version
Download the tar package from parallels.com/products/ras/download/links/ and store it locally.
Switch to the root user.
Switch to the directory containing Parallels Client, e.g.:
To install type:
Parallels Client for Linux binaries are now installed under:
It is recommended that the post install script is launched in order to register icons, mimetypes, url schema and databases configurations. This script is located under: /opt/2X/Client/scripts/install.sh
Run the following command to launch Client:
You can also run the following commands to obtain a list of all usage parameters for Client session:
Note: To unregister the components registered during installation it is recommended to launch the uninstall script located under: /opt/2X/Client/scripts/uninstall.sh
SSO (Single Sign On) Installation Procedures
Depending on the package used to install the Client, the SSO installation procedure may vary:
Already available with Client package:
- TAR package — Run script at location /opt/2X/Client/scripts/install.sh.
- RPM package — Manual installation is required.
Separate package to Client:
- Debian package — Requires Client pre-installed. Install package using the default package installer.
Manual installation procedure (RPM Required)
Install pam_2xclient.so module to have Single Sign On for Client.
Note — this file is located under /opt/2X/Client/lib/security/pam_2xclient.so no matter the package used.
The module always returns true and will use an authentication token that will be provided by a higher authentication module.
Note: When a higher authentication module has been configured to SUFFICIENT, it will return on success immediately and pam_2Xclient.so won’t be called. Please change SUFFICIENT TO REQUIRED.
To install Client PAM module, add two lines to your session manage service (eg. /etc/pam d/gdm):
Debug: Debug trace will be written to /tmp/pam_2xclient.log . If the file cannot be opened, then syslog will be used.
You can use debug argument with all module types. EG. Session optional pam_2xclient.so debug
The module will create an SSO cookie only for well known session services.
Была ли эта статья полезной?
Как, по вашему мнению, можно улучшить эту статью?
Источник
Parallels Client
Access Windows Applications, Desktops, or Data on Any Device
Parallels ® Client is a lightweight software that enables end-users to securely access virtual applications and desktops from Windows, Mac, Linux, iOS/iPadOS, Android, Google Chromebook and any HTML5 web browser.
Quickly enroll new users and enable access to published applications and desktops—all with a single click on the autoconfiguration link. Every Parallels Client setting, including printing, network, bandwidth, security and clipboard can be centrally configured on an individual or group level based on different criteria set within the Parallels RAS Client Policies.
The Parallels Client can be distributed to end point devices, such as knowledge worker devices, providing a seamless experience wherever they are, regardless of the connection or device. Improve applications’ performance with built-in Parallels Client policies such as compression and fast file retrieval. Parallels ® RAS incorporates RemoteFX graphical enhancements, delivering a superior graphics experience for employees.
Parallels Client provides a local workspace-like experience on any device, keeping employees’ productivity high no matter the device they use. Employees ‘on the go’ may use the native touch gestures they know—swipe, drag, tap to click, zoom in—with any Windows application on their mobile devices. And, with Session Pre-launch, Parallels ® artificial intelligence (AI) analyzes user login habits to pre-launch sessions, significantly reducing login times and improving UX.
Источник
RDP-подключение из Ubuntu с помощью Parallels Client
Сегодня мы опять будем настраивать RDP-подключение к Tucha с локальной машины под управлением Ubuntu 12.04 LTS. Но в этот раз мы будем использовать не Remmina, а сторонний RDP-клиент – Parallels Client. Итак, начнём.
В первую очередь нам необходимо установить Parallels Client. Это можно сделать двумя способами: самостоятельно, скачав установочный пакет с официального сайта Parallels Client (в этом случае рекомендуем официальную инструкцию) или воспользоваться «Центром приложений Ubuntu». Далее мы подробно рассмотрим второй способ установки RDP-клиента.
Устанавливаем Parallels Client из «Центра приложений Ubuntu»
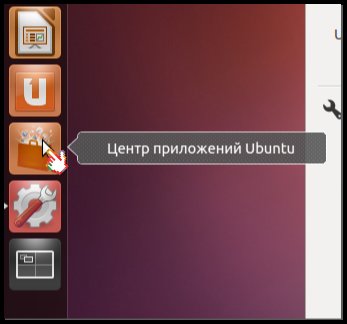
Чтобы запустить «Центр приложений Ubuntu», необходимо нажать на его ярлыке, который расположен на «Панели».
Примечание. Если вы ещё не имеете учётной записи в Ubuntu One, то следует пройти регистрацию, это позволит загружать и устанавливать приложения. Регистрация будет автоматически предложена вам во время запуска процесса установки.
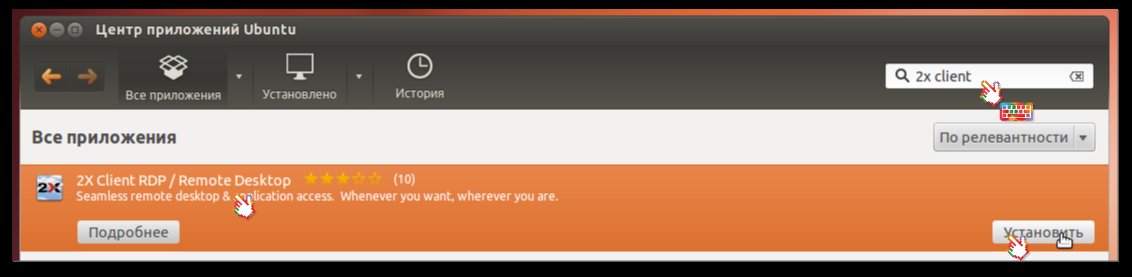
В строку поиска введите «Parallels Client». После того, как RDP-клиент будет найден, нажмите на ярлык Parallels Client, а далее — на кнопку «Установить».
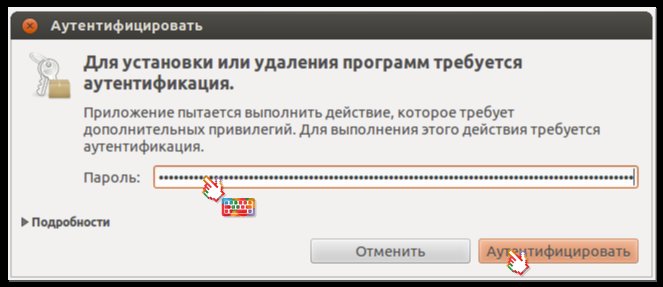
Введите пароль от своей учётной записи и нажмите кнопку «Аутентифицировать», чтобы начать установку Parallels Client.
Дождитесь завершения процесса установки.
Настраиваем RDP-подключение
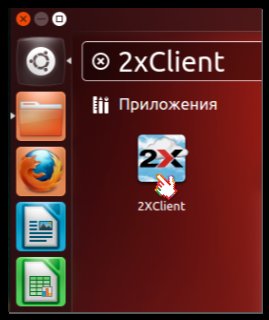
Чтобы запустить Parallels Client, необходимо открыть «Главное меню», в поле поиска необходимо начать вводить «2X». После того, как приложение будет найдено, следует запустить его.
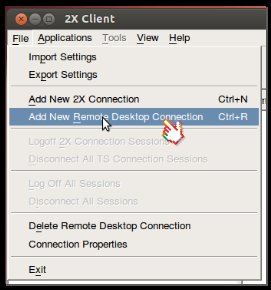
Для того, чтобы создать новое RDP-подключение, необходимо в открывшемся окне выбрать на панели управления пункт «File», далее – «Add New Remote Desktop Connection». Также можно воспользоваться сочетанием клавиш «Ctrl»+«R».
В открывшемся окне «Connection Properties – New Remote Desktop Connection» необходимо ввести реквизиты доступа к виртуальной машине.
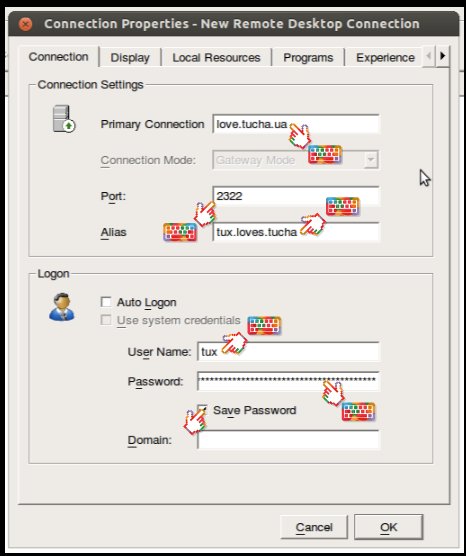
- В поле «Primary Connection» введите доменное имя виртуальной машины, к которой будет осуществляться подключение.
- В поле «Port» введите номер порта виртуальной машины.
- В поле «Alias» введите название подключения, которое будет отображаться в главном окне приложения.
- В поле «User Name» укажите имя пользователя, созданного на виртуальной машине.
- В поле «Password» введите пароль от учётной записи на удалённой машине.
Примечание 1. Если в настройках подключения активировать «Auto Logon», то оно будет автоматически запускаться при каждом запуске приложения.
Примечание 2. Если активировать «Save Password», то, соответственно, введённый ранее пароль будет сохранён.
Примечание 3. Поле «Domain» заполнять необходимо только в том случае, если на удалённом сервере есть несколько доменных зон.
После ввода реквизитов доступа нажмите кнопку «ОК», и вы автоматически будете подключены к вашей Tucha. Приятной работы!
Дополнительные параметры подключения
Теперь давайте рассмотри остальные вкладки, которые есть в окне «Connection Properties». Если во вкладке «Connection» мы вводили реквизиты доступа к виртуальной машине, то в оставшихся мы можем настроить дополнительные параметры подключения.
- Вкладка «Display». Здесь можно изменить глубину цвета, размер экрана (можно указать собственные размеры окна), настроить параметры отображения удалённого рабочего стола на двух мониторах.
- Вкладка «Local Resources». Позволяет определить устройства, которые будут подключаться к удалённой машине. Parallels Client позволяет пробрасывать накопители, принтеры, последовательные порты, токены или смарт-карты.
- Вкладка «Programs». Позволяет настроить приложение, которое будет доступно во время сеанса удалённого подключения. То есть, во время сеанса пользователю, который подключился, будет доступно только одно приложение. Например, бухгалтер может иметь доступ только к 1C, но не ко всему рабочему столу.
- Вкладка «Experience». Здесь можно указать параметры графического отображения удалённого рабочего стола: отображение фонового рисунка, сглаживание шрифтов, расположение элементов рабочего стола и т.д.
Примечание. Если используется медленное соединение с Интернетом, рекомендуется отключать все визуальные эффекты, чтобы сделать работу более комфортной.
Источник


