- How to Install Windows 10 in Parallels Desktop for Mac
- Scenario 1: You have just installed Parallels Desktop on your Mac.
- Scenario 2: You have Parallels Desktop on your Mac, and you want to add a Windows 10 VM.
- Scenario 3: You want to move Windows 10 from a physical PC into a Parallels Desktop VM.
- Pin an app window in Windows 10 with Parallels Toolbox one-click tool Window on Top
- Parallels tool windows 10
- Решение (установка вручную)
- Сценарий 1: простой
- Сценарий 2: более сложный
- Сценарий 3: самый сложный
- Была ли эта статья полезной?
- Parallels Toolbox for PC
How to Install Windows 10 in Parallels Desktop for Mac
Windows 10 is the most popular version of Windows. Installing it on Parallels Desktop® for Mac is easy to do—and does not require you to purchase Windows 10 beforehand.
There are four different scenarios you might find yourself in, with slightly different steps:
Scenario 1: You have just installed Parallels Desktop on your Mac.
Scenario 2: You have Parallels Desktop on your Mac, and you want to add a Windows 10 virtual machine (VM).
Scenario 3: You want to move Windows 10 from a physical PC into a Parallels Desktop VM.
Here are the individual steps for each:
Scenario 1: You have just installed Parallels Desktop on your Mac.
When you first launch Parallels Desktop on a Mac, it will detect that you have no virtual machines and will automatically offer to download and install Windows 10 for you. (See Figure 1.)
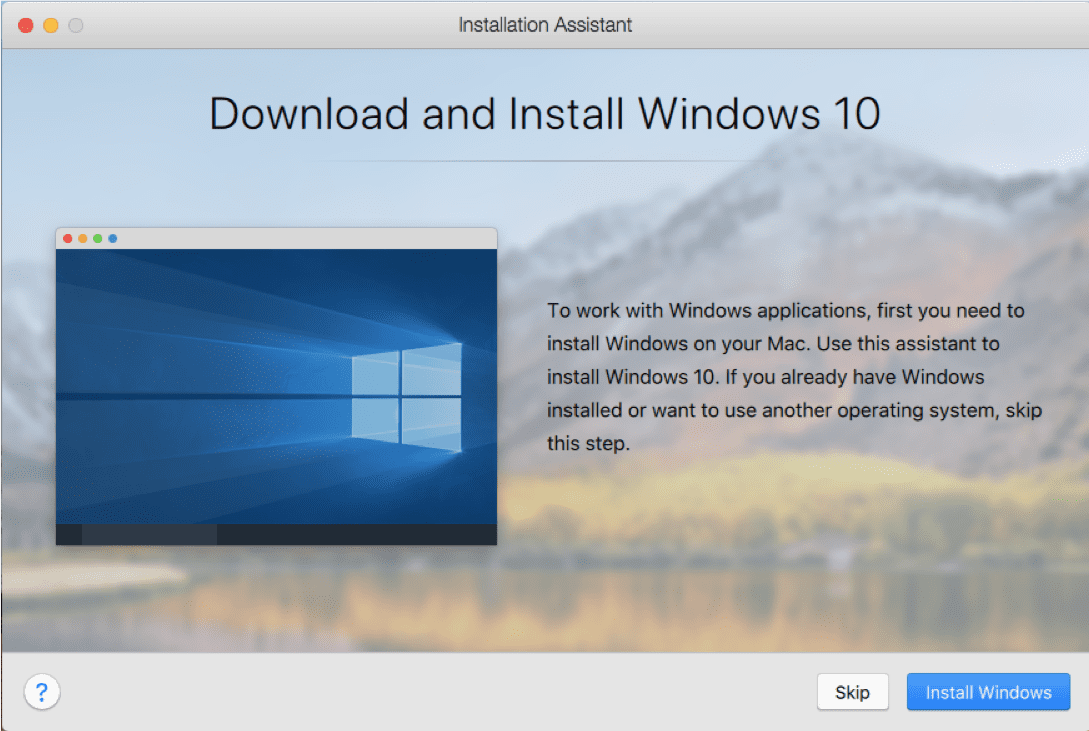
Figure 1_Download and install Windows 10
Once you click “Install Windows,” there is basically nothing else for you to do. The Windows 10 installation files will begin downloading (Figure 2).
Note: If you click on “Skip” instead, you will be directed to the Installation Assitant where you can purchase Windows 10 (see Figure 8).

Figure 2_Downloading Windows 10
Once the download finishes, the installation of Windows 10 into a new VM in Parallels Desktop will begin (Figure 3).
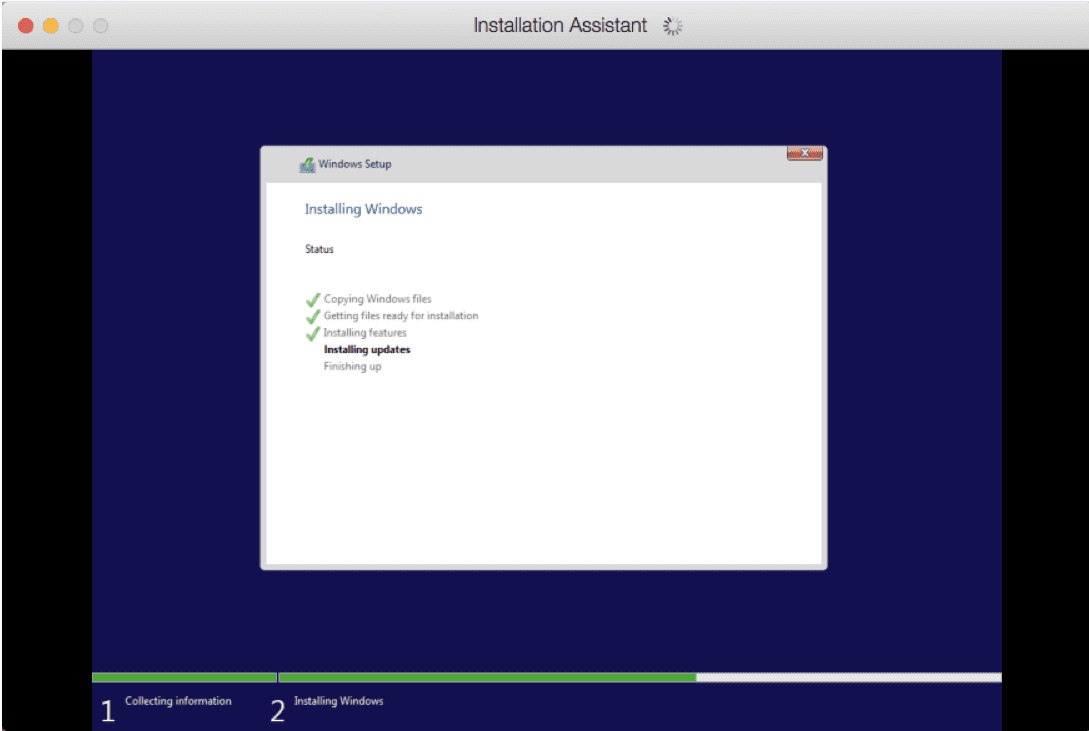
Figure 3_Installing Windows
You will be notified when it completes (Figure 4).
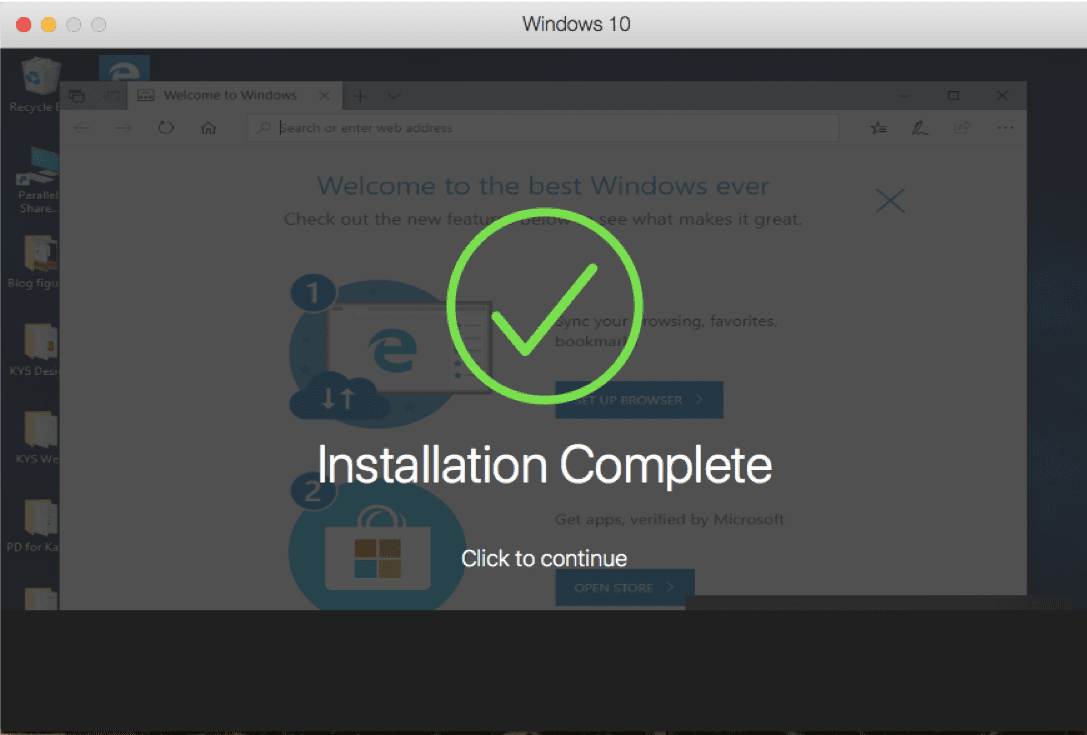
Figure 4_Windows 10 installation complete
How long this process takes depends on the speed of your Internet connection and Mac. For me, at home and on a new MacBook Air, this took about one hour and 40 minutes.
While Windows 10 is installing, you’ll see dialogs about the installation of Parallels® Toolbox, a separate Parallels product that’s bundled with Parallels Desktop (Figure 5).
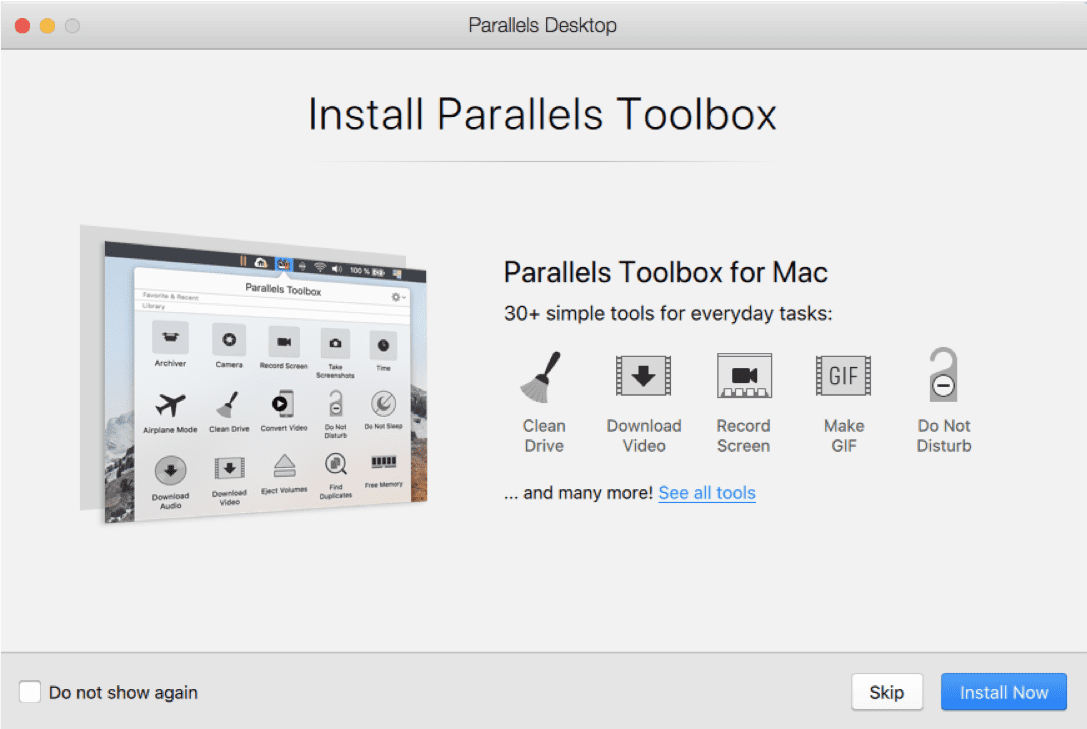
Figure 5_Parallels Toolbox, a product that is bundled with Parallels Desktop
Parallels Toolbox gives you 30+ single-purpose tools for common tasks. I encourage you to install Parallels Toolbox—I think you’ll find the tools very useful.
After Windows 10 is installed, you should get all of the available updates, and probably there will be several of them (Figure 6).
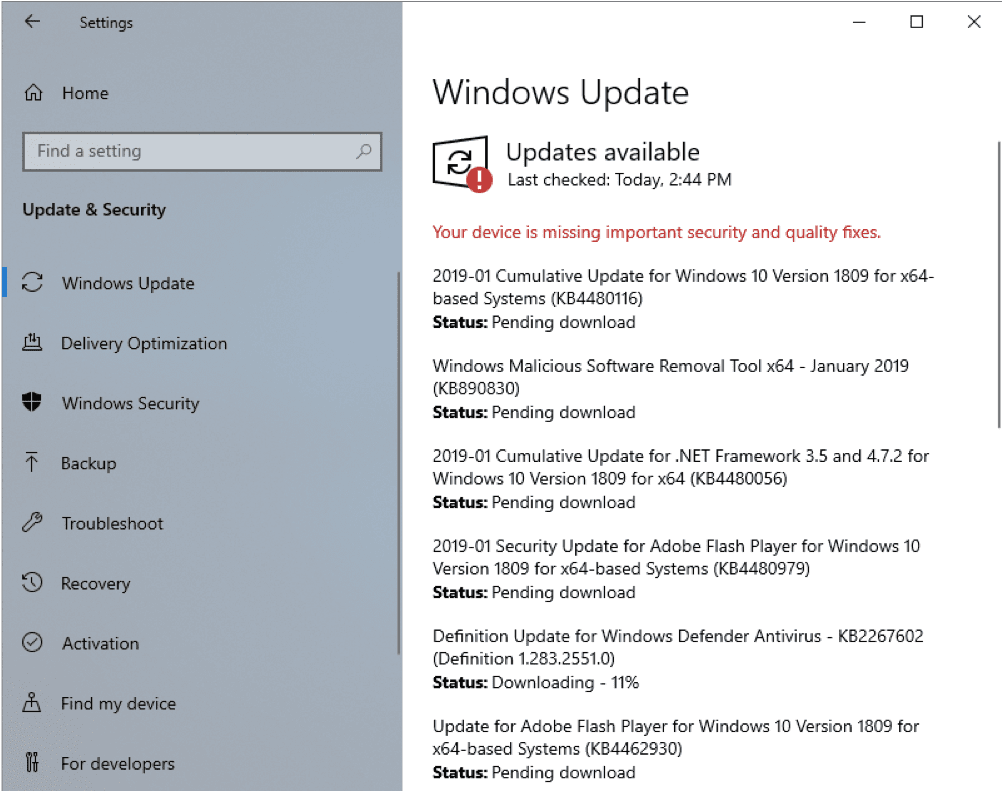
Figure 6_Get all of the available Windows updates
This may take a while but is very important.
At this point, you have a working installation of Windows 10 in a Parallels Desktop VM. You have not yet purchased Windows from Microsoft. A few features will be disabled until you do so. You can purchase and activate Windows from within your Windows VM, and the entire process takes only a few minutes (Figure 7).
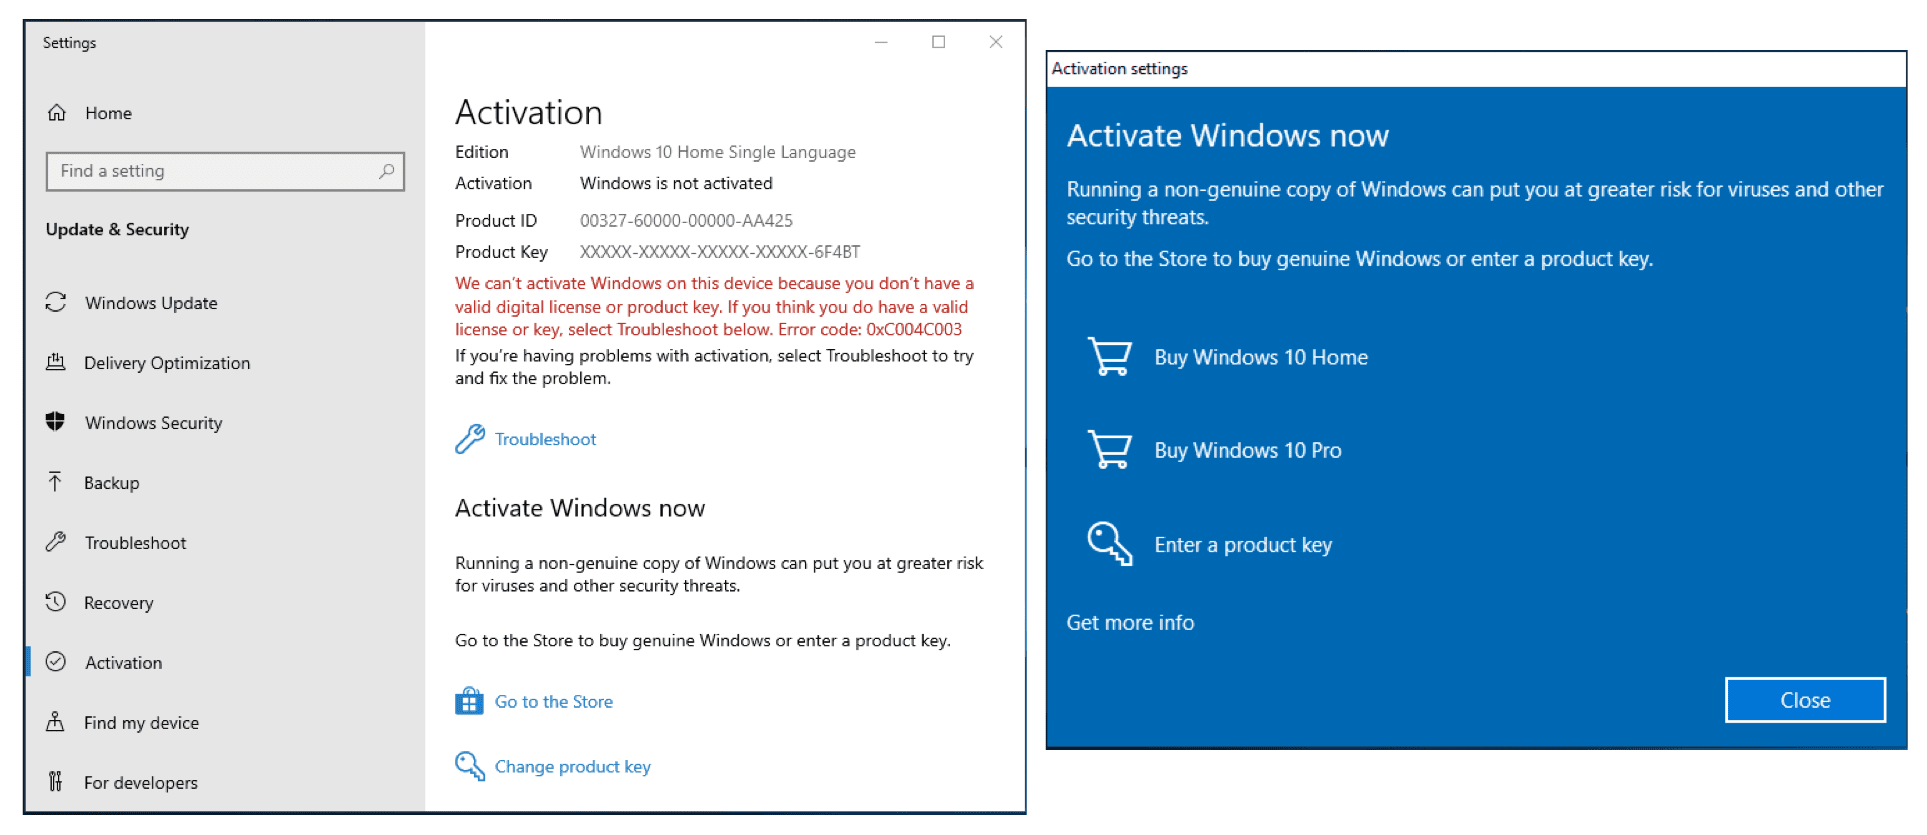
Figure 7_Purchasing and activating Windows 10
Scenario 2: You have Parallels Desktop on your Mac, and you want to add a Windows 10 VM.
Adding Windows 10 as an additional VM in Parallels Desktop is also easy.
To start the process, either choose “New…” in the File menu of Parallels Desktop, or click on the “+” sign in the top right corner of the Control Center window.
Assuming that you don’t have a Windows 10 installation DVD laying around, click on the “Get Windows 10 from Microsoft” button (Figure 8).
Figure 8_Get Windows 10 button in the Installation Assistant
Then choose to purchase Windows 10 Home or Windows 10 Pro in the next screen. If you want to install Windows 10 without making a purchase yet, choose to download it (Figure 9).
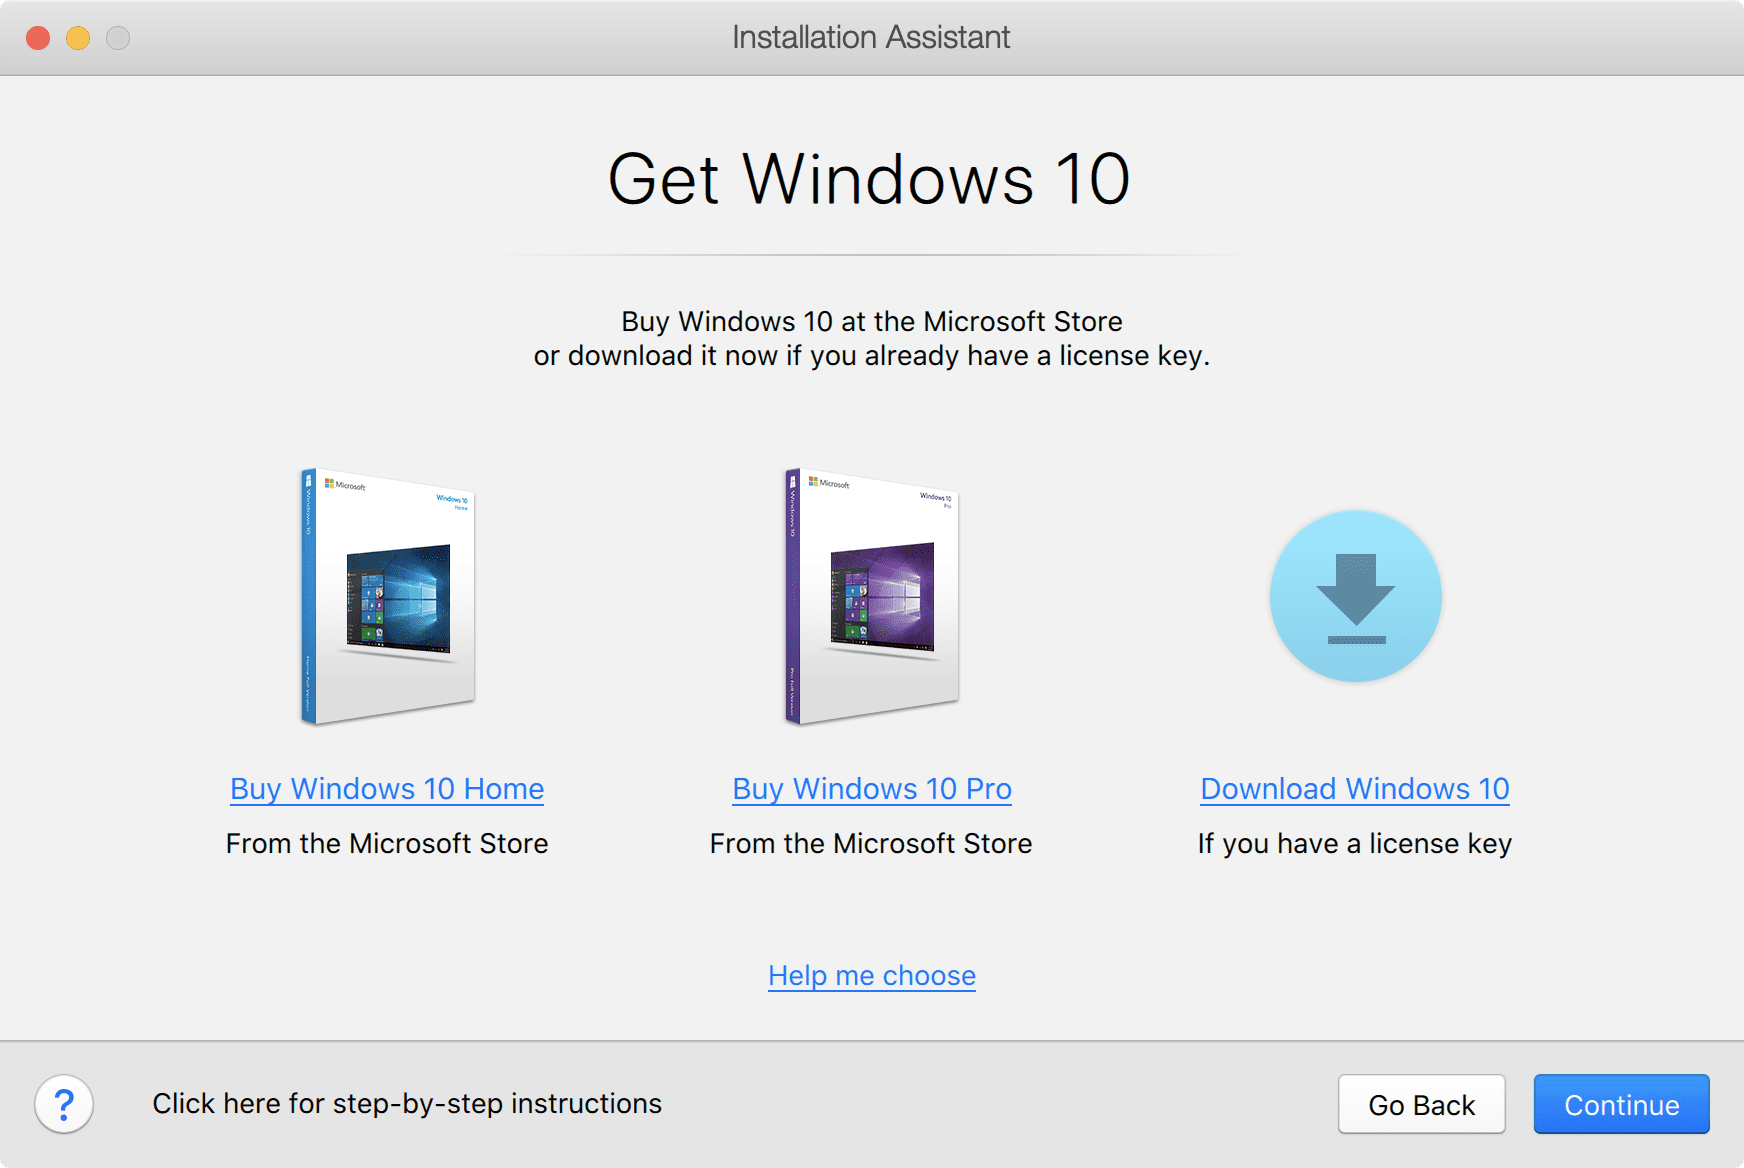
Figure 9_Choose which way to get Windows 10
Whichever path you choose, you will end up with a Windows 10 installation ISO file and a Windows 10 product key. After that, everything proceeds in the same manner as scenario 1. (See the previous Figure 2 as an example.) Don’t forget to install Parallels Toolbox and all the available Windows 10 updates!
Scenario 3: You want to move Windows 10 from a physical PC into a Parallels Desktop VM.
In this last scenario, you start out with the Installation Assistant dialog (see previous Figure 8) but choose “Transfer Windows from a PC.” You will then see the Transfer Windows dialog shown in Figure 14.
![]()
Figure 14_Transfer Your PC
This process will copy everything from a physical PC to a Parallels Desktop VM: apps, data files, and Windows itself. The physical PC will not be modified.
The most common way to transfer is via the network. The amount of time this will take depends on how much information is on the PC and how fast your network is.
There may be several Windows PCs on your network, so you need to indicate which PC you want to migrate into a VM. Do this by installing the Parallels Transfer Agent on the PC to be migrated.
There are two computers involved in this transfer: the Windows PC you are transferring from, and the Mac running Parallels Desktop which you are transferring to. Some of the actions you’ll take to set up this transfer occur on the PC and others on the Mac, so you will need to go back and forth between the two computers to set everything up. These tasks are not complicated, as shown in this video:
I hope you’ve seen how easy it is to install Windows 10 on Parallels Desktop. Feel free to download a free full-featured trial of Parallels Desktop and install Windows 10 like explained in scenario 1 right away at no extra cost.
Feel free to also check out our detailed video about How to install Windows on your Mac with Parallels Desktop – at no cost to you:
Let us know in the comments below, on Twitter or Facebook which way of installing Windows 10 on your Mac worked best for you.
Pin an app window in Windows 10 with Parallels Toolbox one-click tool Window on Top
When working between multiple programs or windows in Windows 10, you might want to pin a window on top and be able to continue working with other programs.
Some programs in Windows 10 have built-in intelligence to accomplish this. However, not all programs are created equal and most do not have this functionality.
It’s quite easy to force your desired window to float on top regardless of the program’s individual ability with the Parallels® Toolbox tool Window on Top.
Window on Top is a simple one-click solution to get around the pesky Windows 10 programs that don’t have a pin or float functionality. If you need a window to always be on top of other programs, start this tool and select the window you want. It will always be displayed above other windows for immediate access.
This tool is a better solution than remembering multiple keyboard commands or buying an individual third-party app to accomplish this.
Parallels Toolbox is a helpful suite of one-click tools that is here to help manage your productivity. Our engineers designed this all-in-one suite for creative individuals, students, small-business owners, chronic multitaskers, IT managers and everyone in between to ensure everyone can use their PC to its maximum potential.
Parallels Toolbox is our all-in-one solution with over 30 tools for macOS and Windows 10. With just one click, you can save space on your hard drive, create high-quality content, quickly optimize your computer for a presentation and so much more. Our economical suite of tools replaces the need for multiple applications and programs. Try a free 7-day trial of Parallels Toolbox for macOS or Windows 10 from the links below!
Parallels tool windows 10
Не удается установить Parallels Tools, используя меню виртуальной машины Mac: Действия (Виртуальная машина в прежних версиях) > Установить Parallels Tools.
Решение (установка вручную)
При создании новой виртуальной машины или обновлении Parallels Desktop до более новой сборки или версии всегда требуется установить или обновить Parallels Tools.
Также рекомендуется переустановить Parallels Tools при поиске и устранении проблем, связанных с интеграцией главной и гостевой ОС. Это могут быть проблемы с режимом Coherence, совместно используемыми приложениями, общими папками, операциями копирования и вставки между компьютером Mac и виртуальной машиной, а также проблемы с мышью и клавиатурой.
Если автоматическая установка не запускается как ожидается (например, при обновлении до последней сборки Parallels Desktop), или нужно установить Parallels Tools вручную, выполните указанные ниже действия.
Примечание. Все примеры приведены для виртуальных машин Windows.
Сценарий 1: простой
В меню компьютера Mac выберите Действия (в более ранних версиях это пункт Виртуальная машина) > Установить Parallels Tools (или «Переустановить / Обновить Parallels Tools» в зависимости от требуемого действия)

Если установка не запускается, в Windows нажмите кнопку Пуск > Компьютер > Найдите CD-диск с Parallels Tools. Дважды щелкните его, чтобы запустить установку Parallels Tools.
Сценарий 2: более сложный
Если файл образа диска Parallels Tools не подключен в виртуальной машине (т. е., CD-диск с Parallels Tools не отображается в проводнике в меню Компьютер), выполните указанные ниже действия:
Убедитесь, что виртуальная машина выполняется в режиме Window. Если она выполняется в режиме Coherence, выйдите из него.
В меню Mac выберите Устройства > CD/DVD > Подключить образ…
В окне Открыть выберите Программы > Parallels Desktop > Contents > Resources
В папке Resources откройте папку Tools и найдите файл prl-tools-win.iso. Щелкните этот файл, затем нажмите кнопку Открыть
Сценарий 3: самый сложный
Если невозможно подключить образ Parallels Tools в Windows, а описанные выше действия не дают результата (т. е., диск CD/DVD, подключенный к виртуальной машине, не распознается в Windows), выполните указанные ниже действия:
- Завершите работу виртуальной машины.
- Найдите виртуальную машину в Finder см. статью KB 117333.
Правой кнопкой мыши щелкните PVM-файл виртуальной машины, затем выберите «Открыть с помощью» > Parallels Mounter.
Жесткие диски вашей виртуальной машины будут подключены в Finder:
Найдите жесткий диск Windows с установленными файлами Windows. На этом диске есть папка Windows.
Найдите Parallels Desktop, щелкните ее правой кнопкой мыши и выберите пункт «Показать содержимое пакета»
Найдите файл prl-tools-win.tar.gz и извлеките его из архива. Папка prl-tools-win будет извлечена в папку «Tools» или в папку «Загрузки». Для поиска папки prl-tools-win, можно воспользоваться функцией Spotlight.
Скопируйте папку prl-tools-win на жесткий диск Windows, подключенный на шаге 5
Отсоедините жесткие диски Windows, подключенные в Finder
Запустите виртуальную машину Windows, откройте проводник Windows и перейдите к диску C:\
Откройте папку prl-tools-win и дважды щелкните файл setup.exe, чтобы запустить установку Parallels Tools.
В качестве альтернативного варианта можно перейти в папку «Data», открыть вложенную папку amd64 или i386, в зависимости от используемой архитектуры Windows (64-разрядная или 32-разрядная), и выполнить paralels-tools-amd64.exe или parallels-tools-i386.exe.
Была ли эта статья полезной?
Как, по вашему мнению, можно улучшить эту статью?
Parallels Toolbox for PC
Parallels Toolbox 4.5.0 Build 2888 LATEST
Windows XP / Vista / Windows 7 / Windows 8 / Windows 10
Parallels Toolbox for PC 2021 full offline installer setup for PC 32bit/64bit
Parallels Toolbox for Windows is easy to use and economical—a whole suite of tools for a fraction of the cost of individual apps, packaged in one simple interface. 30+ tools in a lightweight, powerful all-in-one application for Windows PC! Keep your focus on Presentation Mode. Instantly disable those embarrassing pop-ups or bouncing icons. Clean Drive keeps your computer’s storage optimized and free of unimportant data. Find Duplicates to free up extra space on your computer. Grab videos from the internet and watch offline using Download Video. Take Screenshots or Record a Video with a single click for a quick cut and paste jobs.
Parallels Toolbox for Teams
Avoid the pain of purchasing, deploying, and maintaining individual task-based apps for your team. With over 30+ tools, quick access for both Mac and PC users, and a simple pricing model, Parallels Toolbox is a must-have, helping your team get their day-to-day tasks done easily and quickly. Whether you’re a small business owner, team lead, or project manager, stop buying individual task-based apps and give the app a try. «We constantly add newer tools—and you get to choose which ones you deploy to your team.» It’s easy to maintain and deploy, and it’ll take your team no time at all to get accustomed and start using the tool.
Presentation Mode
Whether you’re in a business or school environment, help your presentation succeed with Presentation Mode. This one-click tool hides any embarrassing notifications, disables macOS® Dock animations, keeps your display from going to sleep, and even hides files on a messy desktop. Bonus: Presentation Mode can detect external displays or projectors and enable itself automatically (or be set for a specific length of time), making setup a breeze.
Clean Drive
Computer bogged down? Clean Drive scans and cleans user cache, logs, and temporary files that can slow down your computer. This tool won’t delete anything automatically, which leaves you in complete control of what to delete or keep.
Find Duplicates
Gain more disk space by getting rid of those duplicate files everyone collects over time. You won’t waste time manually sorting and looking for duplicates. Just select the folder you want to scan, preview the duplicate files, and delete the ones you don’t want.
Download Video
Easily download your favorite videos from YouTube, Facebook, Vimeo, and more. You can download multiple videos simultaneously at a high quality (up to 1080p). Perfect for students, entrepreneurs, and on-the-go business executives who want to be able to watch videos anywhere, at any time.
Features and Highlights
Presentation Mode
Disable distractions for a better presentation experience. The Presentation Mode tool can automatically detect external displays and turn them on.
Hide Desktop
Hide all the files, folders, and other icons on your desktop when you’re doing a presentation, sharing or recording your screen, or taking screenshots.
Do Not Sleep
Prevent your computer from going to sleep and your display from dimming. Ensure a task or presentation won’t be interrupted by disabling settings that would allow the computer to go to sleep.
Do Not Disturb
Avoid distractions so you can focus on the task at hand. When activated, all notifications and the Dock app animations are disabled.
Download Video
Download favorite videos from the Internet: Facebook, YouTube, Vimeo, and many more.
Convert a Video
Optimize your home movie or television shows for iPad or iPhone.
Take Screenshots
Easily screenshot a screen, active window, or area.
Record Screen
Record a video of an area, window, or your entire screen.
Clean Drive
Keeps your Mac clutter-free and running at max speed. Scans, detects, and lets you choose what to delete.
Archive Your Files
Compress files with one click to use less storage space. Unarchive any archived files, RAR, zip, and more.
Mute Your Microphone
Prevent unauthorized or unwanted listening from other apps.
Record Audio
Use your computer’s built-in microphone and record audio with a single click. You can record from an external microphone if it’s selected as the input source in System Preferences › Sound.
Block Camera
Use this tool to block the built-in camera, making it inaccessible to applications.
Lock Screen
Immediately lock your screen to prevent unauthorized access to your computer—no need to wait until the password-protected screen saver kicks in.
Eject Volumes
Eject all volumes mounted on your Desktop, including local removable volumes like external hard drives and memory cards, network volumes, and mounted disk images.
Switch Resolution
Quickly switch screen resolution. This tool is especially useful to those who find the macOS® resolution settings a bit too limited.
Launch
Open any collection of apps, documents, or other files simultaneously with just one click.
Note: 7 days trial version.


