Загрузить — Обновление macOS High Sierra 10.13.4
Это обновление рекомендуется установить всем пользователям macOS High Sierra.
Обновление macOS High Sierra 10.13.4 улучшает стабильность работы, производительность и безопасность компьютера Mac, его рекомендуется установить всем пользователям.
В этом обновлении реализованы следующие улучшения.
- Добавлена поддержка разговоров через функцию «Деловой чат» в программе «Сообщения» для США.
- Добавлена поддержка внешних графических процессоров (внешних ГП).
- Исправлены проблемы, связанные с ошибками при выводе изображения в некоторых программах на iMac Pro.
- В Safari разрешен быстрый переход к крайней правой вкладке с помощью сочетания клавиш Command-9.
- Реализована сортировка закладок в Safari по имени или URL-адресу (необходимо щелкнуть правой кнопкой мыши, удерживая клавишу Control, и выбрать «Сортировать по»).
- Исправлена проблема, из-за которой иногда блокировался предварительный просмотр веб-страниц в программе «Сообщения».
- Усовершенствована защита конфиденциальности благодаря новой возможности автозаполнения имен пользователей и паролей в Safari только после выбора нужного поля в форме на веб-странице.
- Добавлена функция показа предупреждений в поле интеллектуального поиска Safari при взаимодействии с формами для ввода паролей или данных кредитных карт на веб-страницах без шифрования.
- Теперь при запросе личной информации в службах Apple будут отображаться значки обеспечения конфиденциальности и ссылки на соответствующие ресурсы с пояснениями, как эти данные будут использоваться и защищаться.
Сведения для предприятий:
- На устройствах, зарегистрированных в программе MDM, больше не будет отключаться загрузка расширений ядра, утвержденных пользователем. На устройствах, зарегистрированных через программу DEP или MDM (после утверждения пользователем), администраторы смогут запускать полезную нагрузку политик расширений ядра.
- Усовершенствована функция поиска файлов, сохраненных на сетевых томах, с помощью Spotlight.
- Устранены ошибки при оценке списков контроля доступа к файлам (ACL) на общих узлах SMB.
- Добавлен флажок —eraseinstall в команду startosinstall (установщик macOS, путь Contents/Resources/startosinstall). Используйте этот флажок для стирания и установки macOS на диск. Для получения дополнительных сведений запустите команду startosinstall с установленным флажком —usage .
- Обновлена утилита создания образов системы System Image Utility. Теперь с ее помощью можно создавать образы NetInstall для стирания и установки macOS на именованном целевом томе.
Подробные сведения о проблемах, устраненных в этом обновлении, см. в статье Обновления системы безопасности Apple.
Источник
Как получить старые версии macOS
Если ваш компьютер Mac несовместим с последней версией macOS, можно перейти на более раннюю версию macOS, например: macOS Catalina, Mojave, High Sierra, Sierra или El Capitan.
Для получения новейшего функционала и поддержания безопасности, стабильности, совместимости и производительности компьютера Mac крайне важно поддерживать программное обеспечение в актуальном состоянии. Apple рекомендует использовать последнюю версию macOS, совместимую с вашим компьютером Mac.
Проверка совместимости
Версия macOS, входящая в комплект поставки компьютера Mac, является самой ранней версией, которую он поддерживает. Например, если на вашем компьютере Mac была установлена macOS Big Sur, вам не удастся установить macOS Catalina или более ранние версии.
Если версия macOS не может использоваться на компьютере Mac, приложение App Store или установщик сообщит вам об этом. Например, он может сообщить о несовместимости с данным устройством или что установщик устарел для открытия в этой версии macOS. Чтобы проверить совместимость до начала загрузки, проверьте минимальные требования к аппаратному обеспечению.
- Требования к аппаратному обеспечению macOS Catalina 10.15
- Требования к аппаратному обеспечению macOS Mojave 10.14
- Требования к аппаратному обеспечению macOS High Sierra 10.13
- Требования к аппаратному обеспечению macOS Sierra 10.12
- Требования к аппаратному обеспечению OS X El Capitan 10.11
- Требования к аппаратному обеспечению OS X Yosemite 10.10
Загрузка macOS на компьютер Mac с помощью Safari
Safari использует эти ссылки для поиска устаревших установщиков в App Store. После выполнения загрузки из App Store установщик открывается автоматически.
- macOS Catalina 10.15 обновляет Mojave, High Sierra, Sierra, El Capitan, Yosemite, Mavericks
- macOS Mojave 10.14 обновляет High Sierra, Sierra, El Capitan, Yosemite, Mavericks, Mountain Lion
- macOS High Sierra 10.13 обновляет Sierra, El Capitan, Yosemite, Mavericks, Mountain Lion
Safari загружает следующие более старые установщики в виде образа диска с именем InstallOS.dmg или InstallMacOSX.dmg. Откройте образ диска, затем откройте установщик .pkg из образа диска. Он устанавливает приложение с именем «Установить [ название версии ]». Чтобы начать установку операционной системы, откройте это приложение из папки «Программы».
- macOS Sierra 10.12 обновляет El Capitan, Yosemite, Mavericks, Mountain Lion или Lion
- OS X El Capitan 10.11 обновляет Yosemite, Mavericks, Mountain Lion, Lion или Snow Leopard
- OS X Yosemite 10.10обновляет Mavericks, Mountain Lion, Lion или Snow Leopard
Источник
macOS High Sierra Patcher Tool for Unsupported Macs
Questions or comments? Feel free to contact me at [email protected] Please take a look at the FAQ located at the bottom of this page as well.
I also have a YouTube video going over the whole process.
— Early-2008 or newer Mac Pro, iMac, or MacBook Pro (MacPro 3,1 and 4,1, iMac 8,1 and 9,1, MacBook Pro 4,1, 5,1 5,2, 5,3, 5,4, and 5,5)
— Late-2008 or newer MacBook Air or Aluminum Unibody MacBook (MacBookAir 2,1, MacBook 5,1)
— Early-2009 or newer Mac Mini or white MacBook (Macmini 3,1, MacBook 5,2)
— Early-2008 or newer Xserve (Xserve 2,1, Xserve 3,1)
Machines that ARE NOT supported:
— 2006-2007 Mac Pros, iMacs, MacBook Pros, and Mac Minis (MacPro 1,1 and 2,1, iMac 4,1, 5,1, 5,2, 6,1 and 7,1, MacBook Pro 1,1, 2,1, and 3,1, Macmini 1,1 and 2,1)
— The 2007 iMac 7,1 is compatible if the CPU is upgraded to a Penryn-based Core 2 Duo, such as a T9300.
— 2006-2008 MacBooks (MacBook 1,1, 2,1 3,1 and 4,1)
— 2008 MacBook Air (MacBookAir 1,1)
— Note: Make sure SIP is disabled on the system you intend to install High Sierra on. If it’s not or you’re unsure, just boot into your Recovery partition of your currently installed copy of OS X, open Terminal, and run «csrutil disable».
— A copy of the macOS High Sierra Installer App. This can be obtained from the Mac App Store using a machine that supports High Sierra, or by using the built-in downloading feature of the tool. In the Menu Bar, simply select «Tools > Download macOS High Sierra. «

— A USB drive that’s at least 8 GB in size
— A copy of the tool — Download here (Current version: 2.7.0, SHA1: 73f180d30200ef5f6d900440fe57b9c7d22bd6bf)
— View changelog and download older versions here
— Trackpad (MacBook5,2 affected only). The trackpad in the MacBook5,2 isn’t fully supported in High Sierra. While it works and is fully usable, High Sierra detects it as just a standard mouse, preventing you from changing some trackpad-oriented settings.
1. Insert your desired USB drive, open Disk Utility, and format it as OS X Extended (Journaled). 
2. Open the «macOS High Sierra Patcher» tool, and browse for your copy of the macOS High Sierra Installer App. 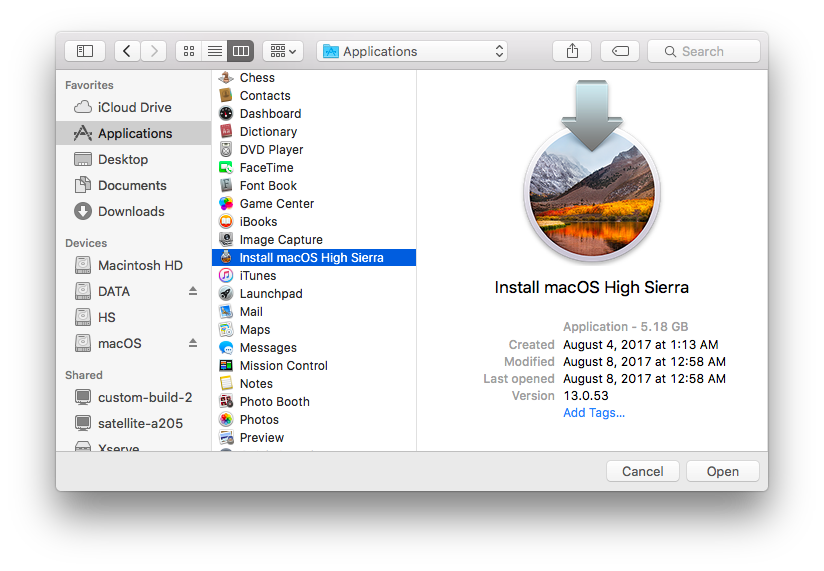
*Ensure that the tool successfully verifies the app. 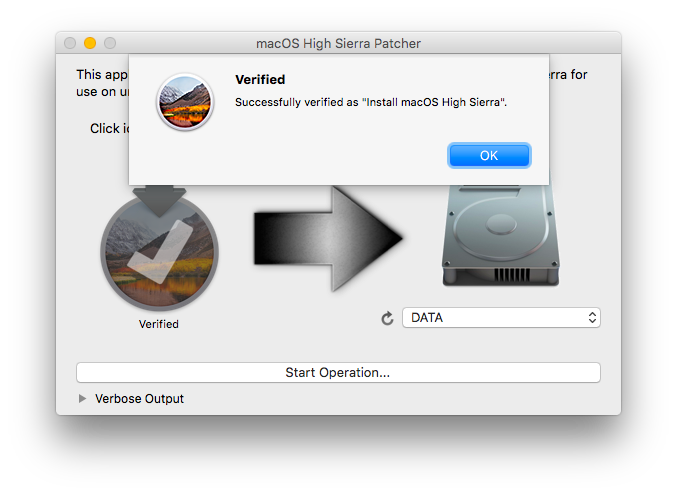
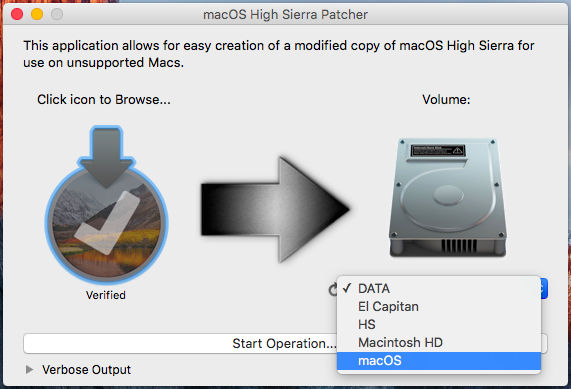
3. Next, select your USB drive in the Target Volume list, and click «Start Operation.»
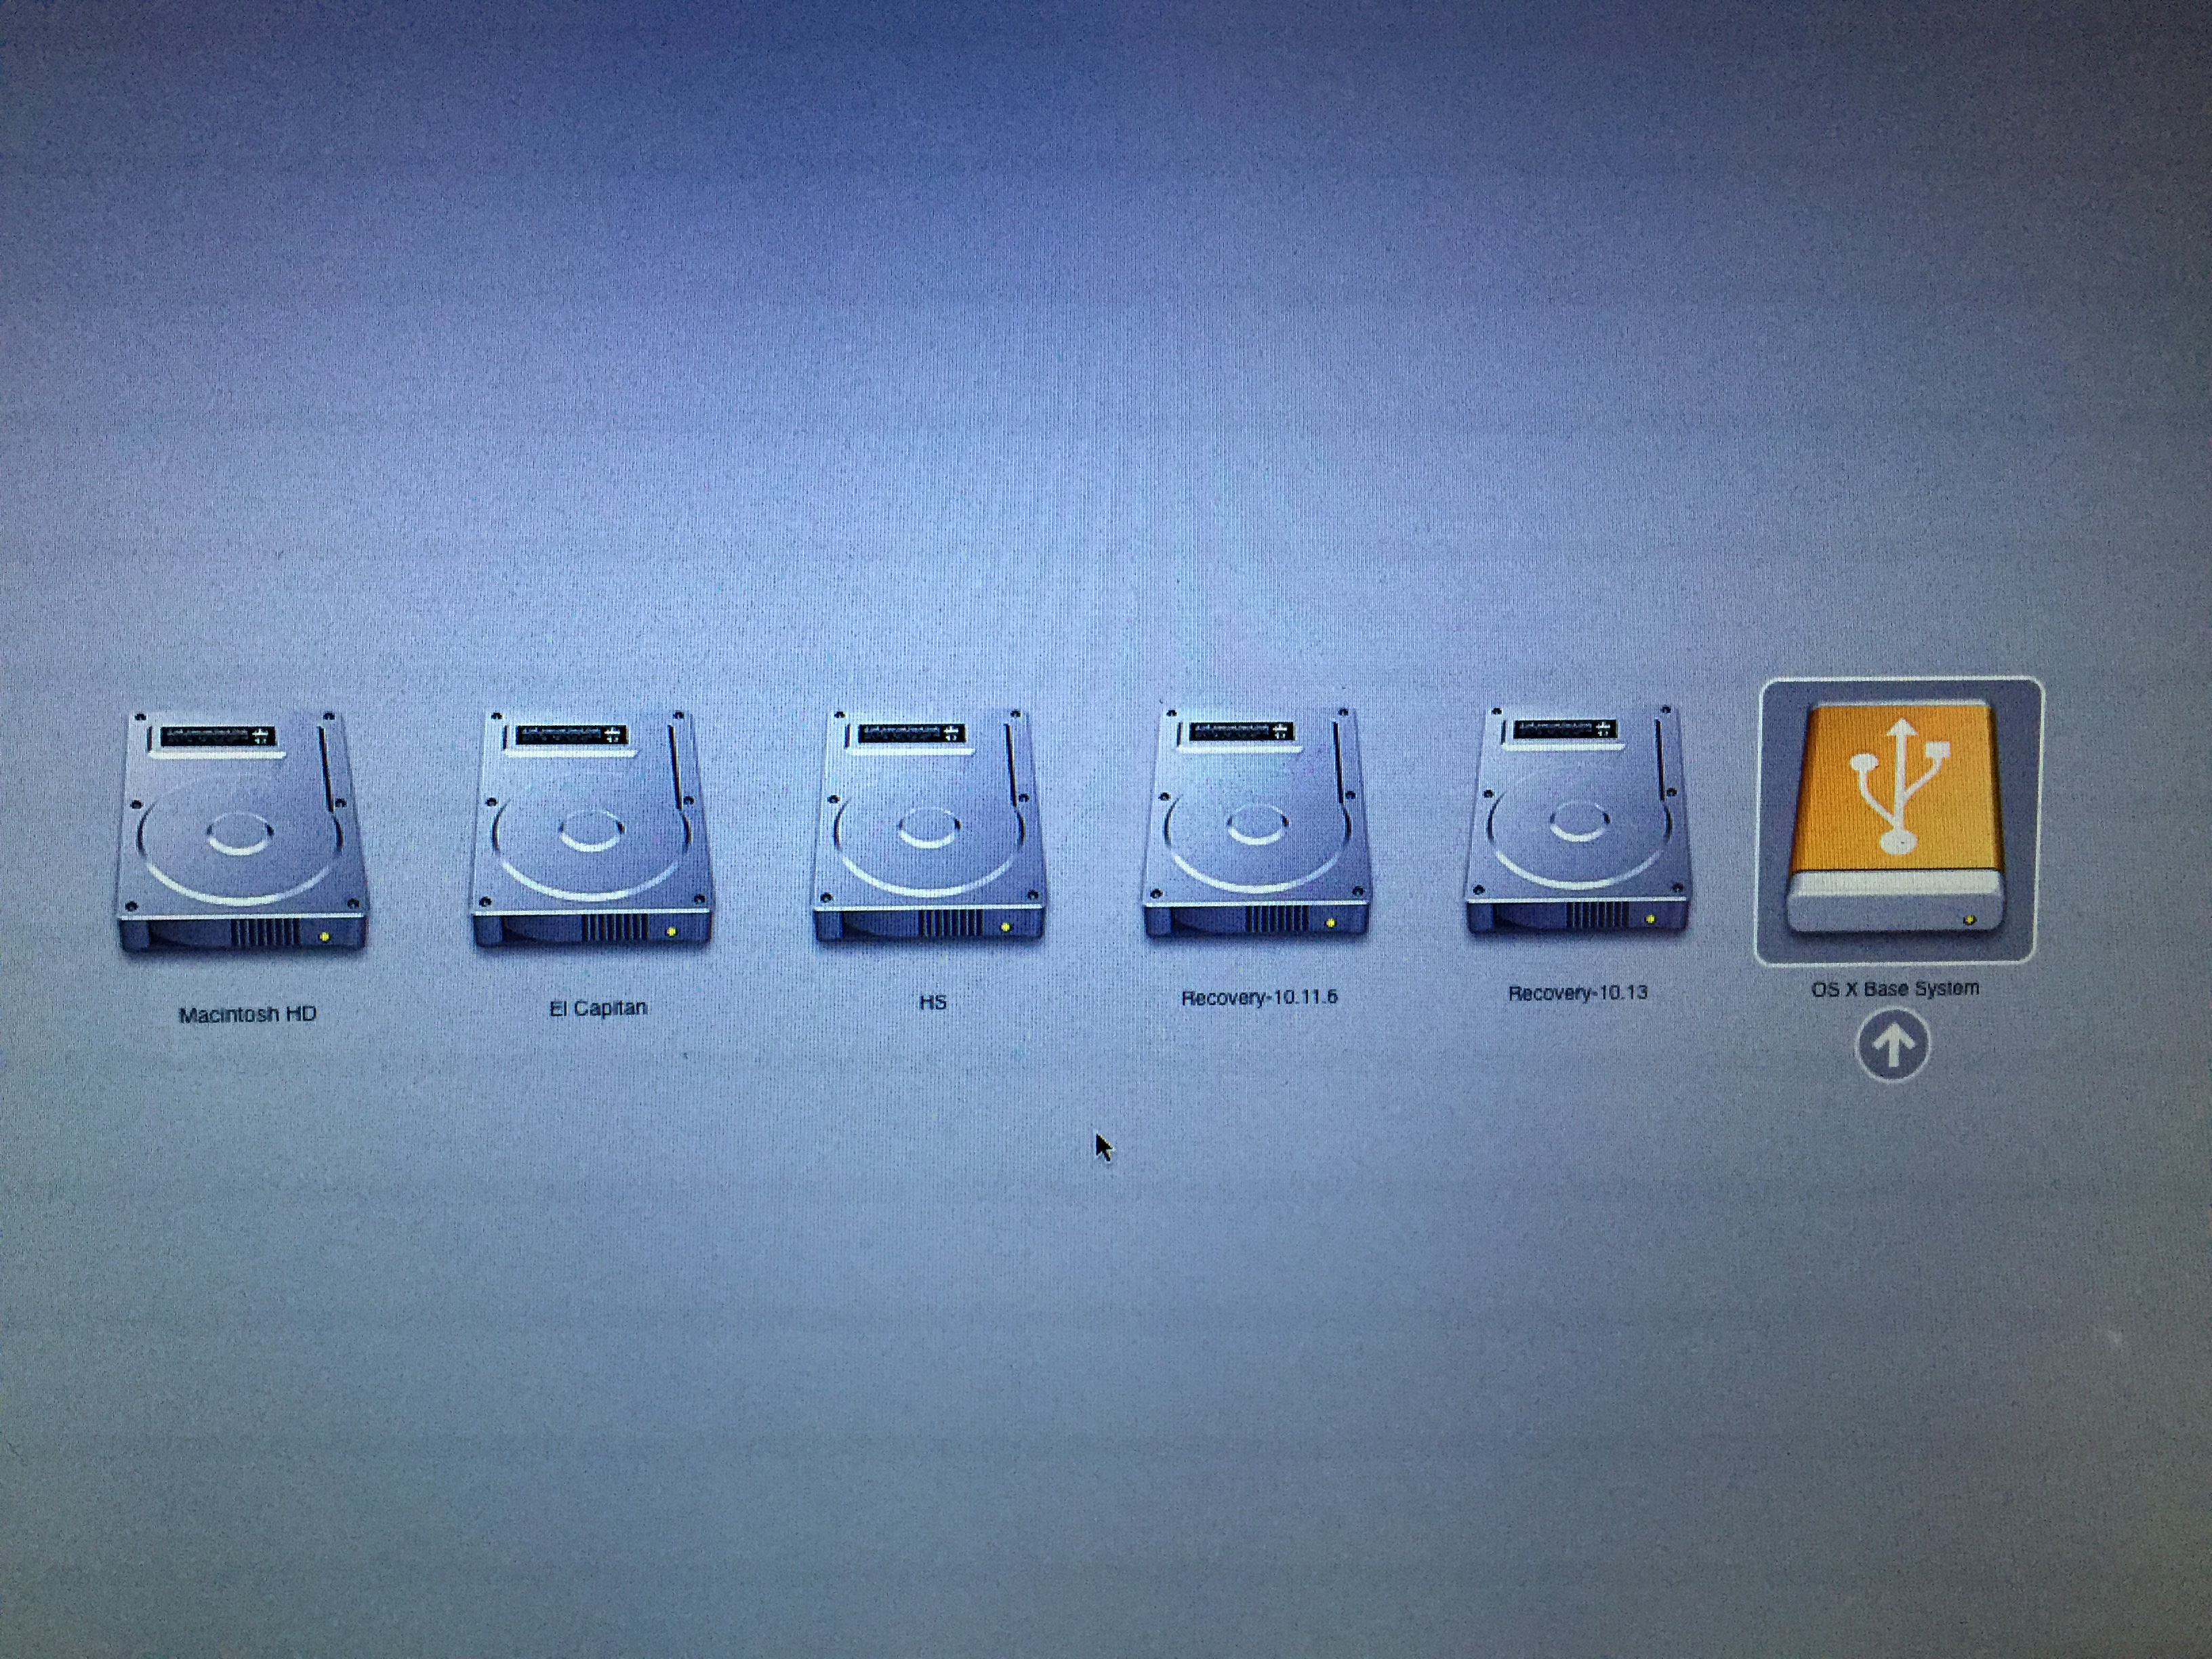
4. When the operation completes, boot your target unsupported Mac off the USB drive you just created by holding down the Option key while turning on the machine, and selecting the drive.
Note: Only perform steps 5 and 6 if you intend to do a clean install. Otherwise, you can simply skip these steps and install to your volume containg a previous version of OS X, and it’ll do an in-place upgrade.
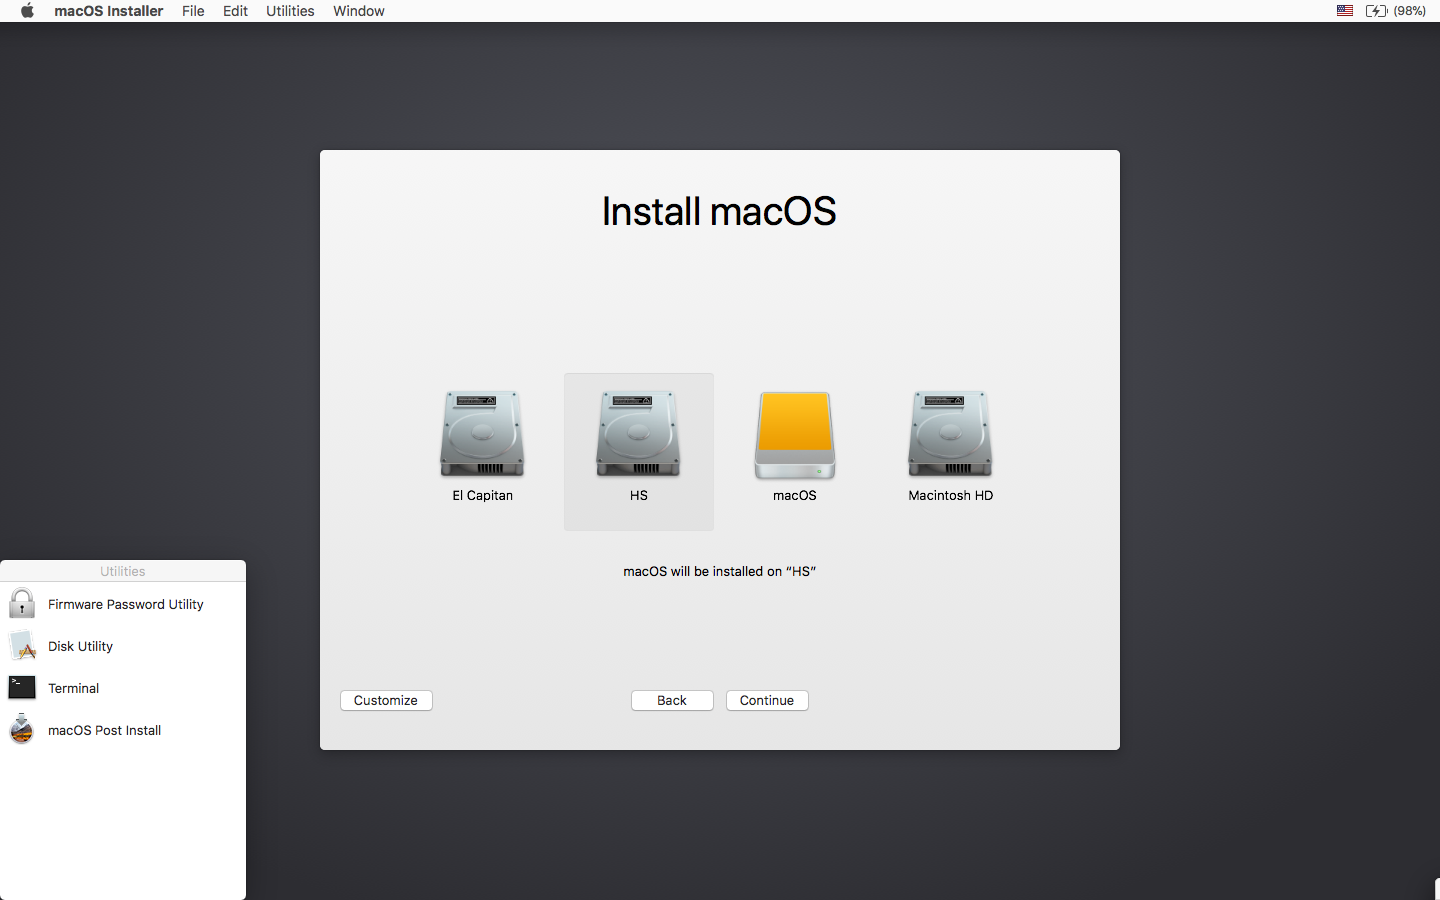
5. When the installer boots, open Disk Utility from the Utilities menu, or by double-clicking it in the Utilities window on the bottom left corner of the screen.

6. Select the disk or partition you want to install on, and erase it, ensuring to use either Mac OS Extended (Journaled), or APFS as the filesystem type. If formatting an entire drive, ensure GUID is selected.
— Please note that if you use APFS, you will not have a bootable Recovery partition.
— It is recommended that you only use APFS if the target drive is an SSD.
— If you decide to use APFS, a custom booting method will be installed by the post-install tool, as the firmware of these unsupported machines does not natively support booting from APFS volumes. It is not quite as clean as native booting, but will not cause any issues while running High Sierra. A demo of the modified booting process can be viewed here.

7. Install macOS normally onto the desired volume.
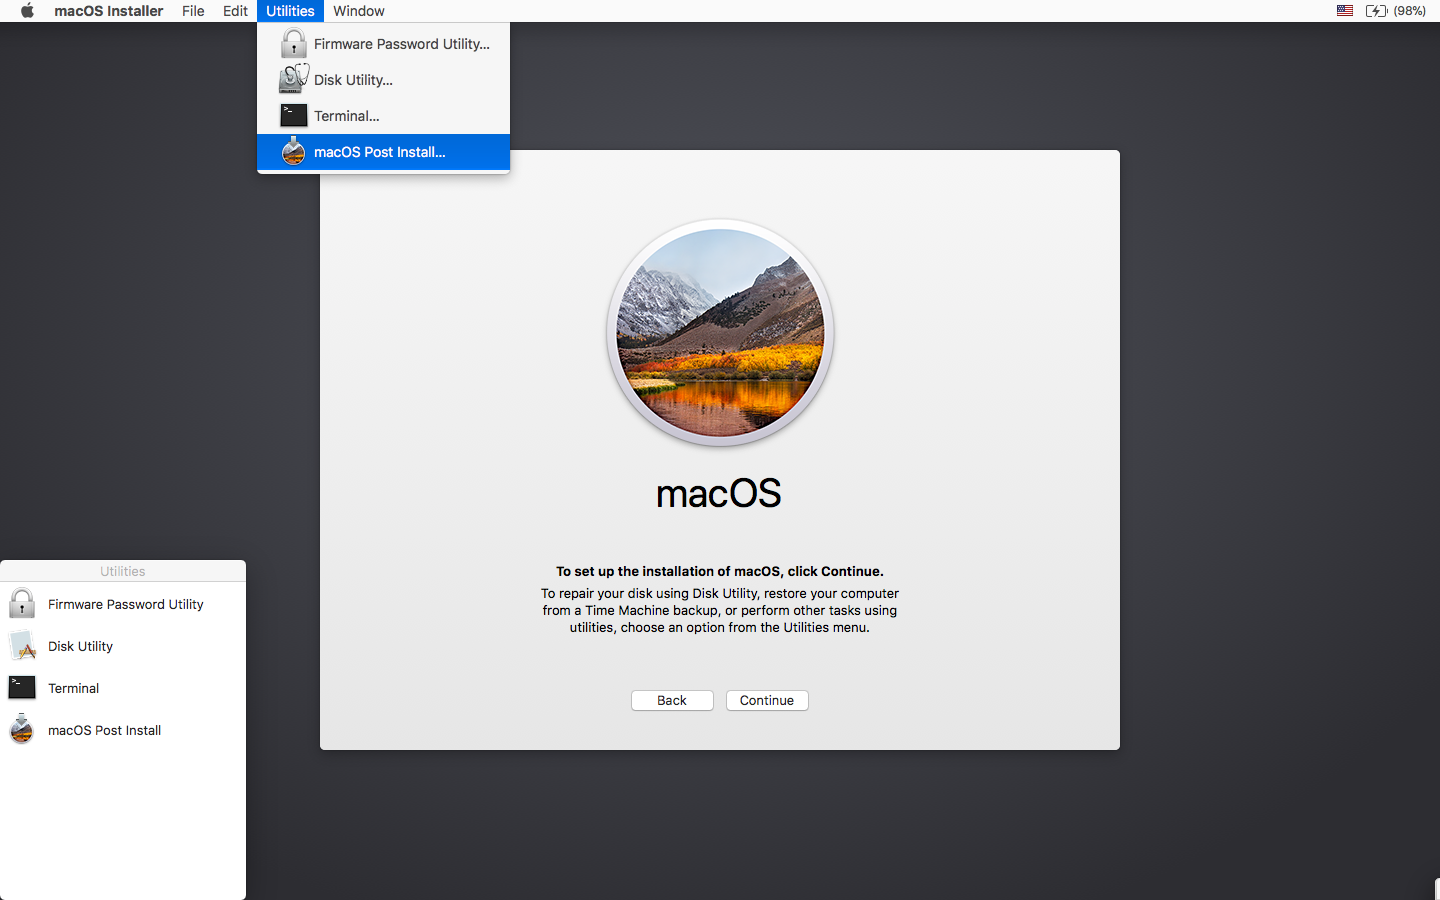
8. When the install completes, reboot back onto the installer drive. This time, open the «macOS Post Install» application.
9. In the application, select the Mac model you are using. The optimal patches will be selected for you based on the model you select. You can also select other patches of your choosing.
— The «i» button next to each patch will show more details about the respective patch.
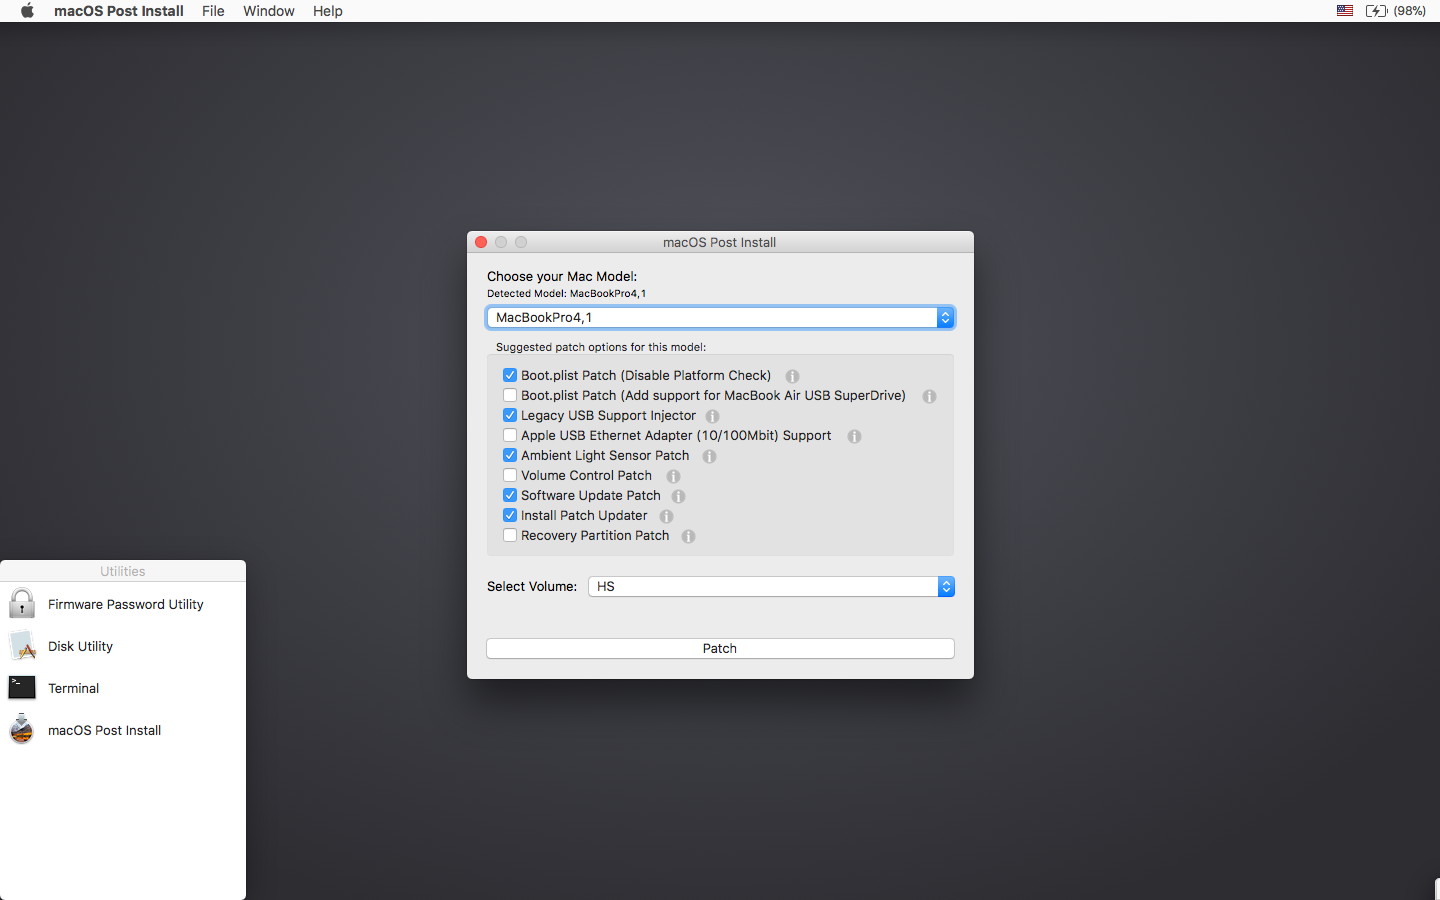
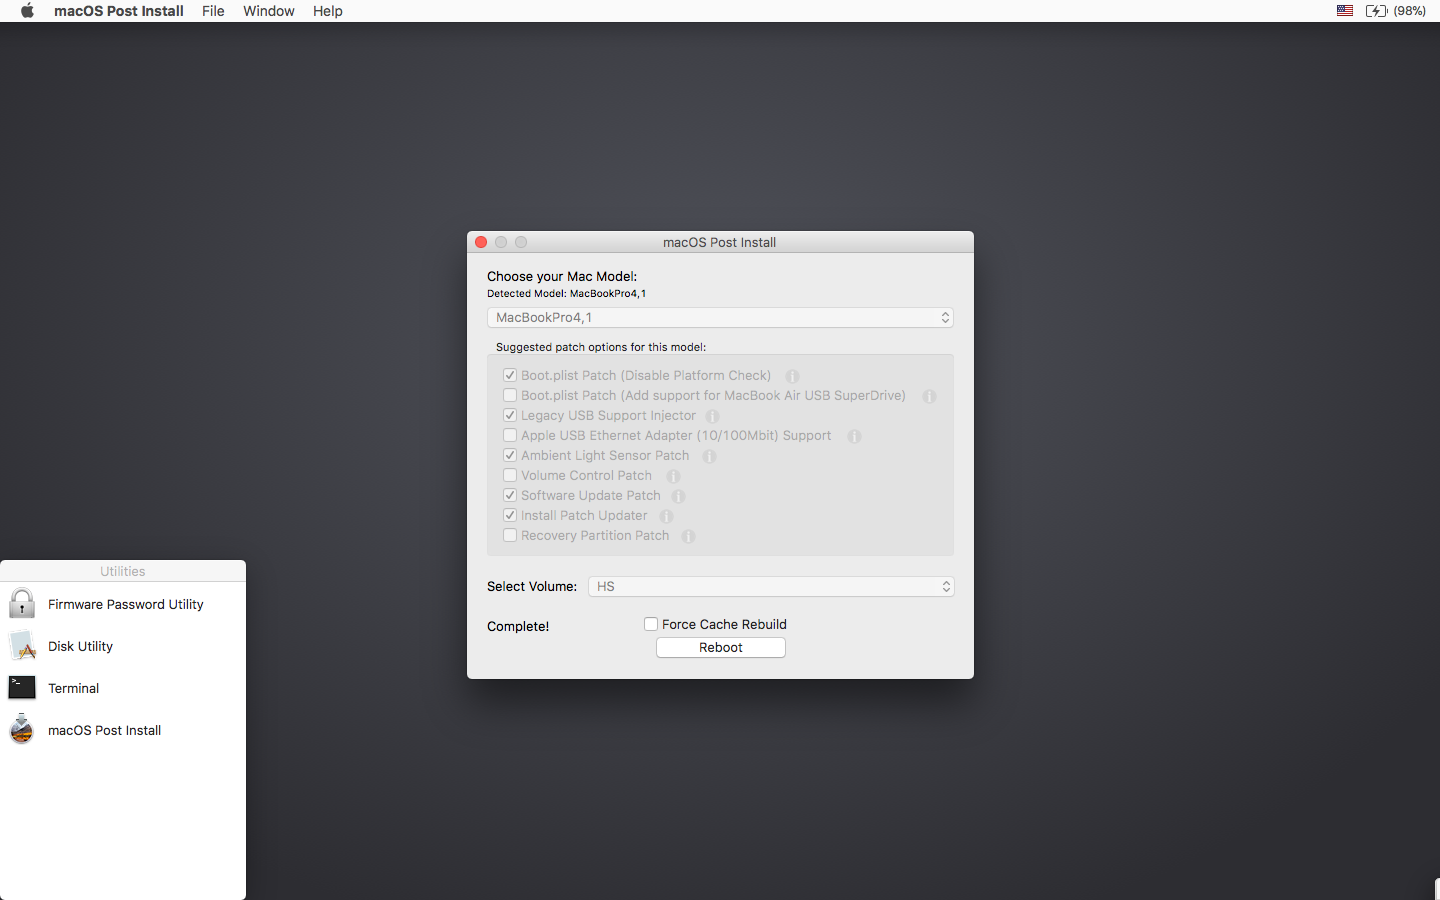
10. Select the volume you have just installed macOS High Sierra on, and click «Patch.» When it finishes patching, click «Reboot». It may sit there for a few moments rebuilding caches before rebooting.
— If for some reason the system fails to work correctly after rebooting, boot back into your installer drive, run the post install patch again, and select «Force Cache Rebuild» before rebooting. This isn’t necessary under most circumstances.
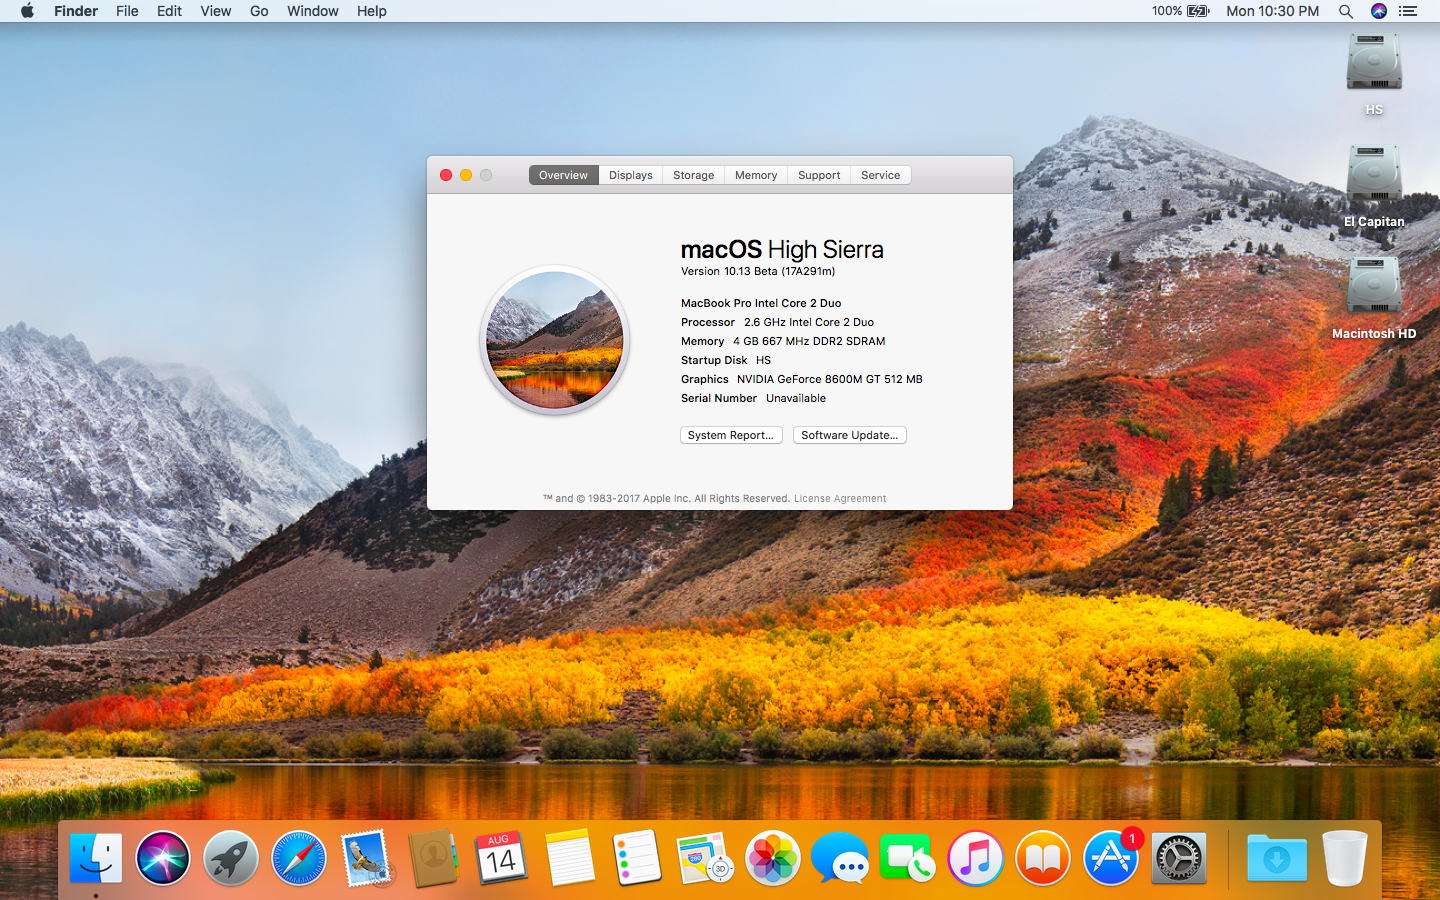
11. When it reboots, it should now boot into a fully working copy of macOS High Sierra.
— If selected in the macOS Post Install tool, your High Sierra install will have a program named «Patch Updater» located in your /Applications/Utilities folder. This program will alert you when new updates to patches are available for your machine, and will prompt you to install them. If you do not have Patch Updater installed, but would like it, you can download and run the script found here to do so. 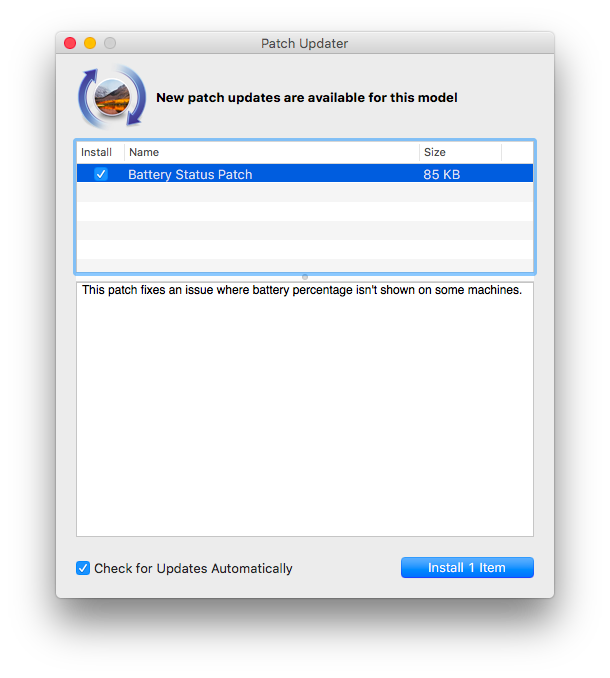
Updates
System updates, such as 10.13.1, should install normally if «Software Update Patch» was selected in the macOS Post Install tool, or installed using the Patch Updater program. If for some reason updates aren’t showing up, or you did not apply the patch, you can install it manually using the script found here.
— If the machine does not start up properly after applying a system update, you will need to boot off your patched installer volume, and re-run the post-install patch on your High Sierra volume. Ensure you select «Force Cache Rebuild» before rebooting.
Q: The tool created the USB drive successfully, but when booting, the progress bar hangs a bit more than half way.
A: Check your copy of the Install macOS High Sierra App. If you’re using the latest version of the tool, you must be using the latest version of the Install macOS High Sierra App. Version 1.1 of the patch tool and older support older versions of the installer app.
Q: The patch tool gives me errors, such as «Error copying files. «.
A: Check to make sure your USB drive is writeable. Try re-formatting it, or just try a different USB drive.
Q: The patch tool gives me a «Mounting Failed» error
A: Check to make sure your Install macOS High Sierra App is the correct one. It should be around 5GB in size. If you used the «Skip App Verification» option, you have most likely selected an invalid app that doesn’t contain the necessary files.
Q: I cannot open my copy of Install macOS High Sierra with the patch tool.
A: If you downloaded the copy linked above, it is distributed inside a DMG file. You must open this file (mount it) to access the Install macOS High Sierra App you need to select.
Q: I don’t see my hard drive partition in the installer screen or in the post-install tool.
A: Make sure FileVault is disabled, or use the instructions found here to unlock it manually using Terminal.
Q: I get a «NO» symbol when starting up after successfully installing High Sierra.
A: Make sure you have run the post-install patch on the correct volume, as detailed above in steps 8-10.
Q: I get a «NO» symbol when starting up from the patched USB drive
A: Check the supported/not supported list at the top of this page. Ensure your machine is in the supported list.
Q: My iSight camera doesn’t work after installing High Sierra
A: Make sure you properly remove (using the program’s uninstaller, not by simply dragging the application to the Trash) all virtual machine software installed on your machine, such as VirtualBox, VMWare, etc.
Q: I get «NSURL» errors when trying to update my machine or use the App Store
A: This is usually the result of having an invalid CatalogURL set. To revert to stock, simply run «sudo softwareupdate —clear-catalog» in Terminal, and then run the software update patch script located above.
Q: Safari, App Store, and/or Mail stopped working after installing a system update
A: Download and run the Onyx application, select «Maintenence» at the top, then click the Run button.
Q: I get a «No packages were eligible for install» error when attepting to install High Sierra
A: This is due to your system’s date and time being set incorrectly. To fix it, you can either boot into your current OS X install and set the date, or you can use Terminal after booting from your patched USB installer drive to set the date. Instructions to set the date using Terminal can be found here.
Источник


