- Используйте Windows Ink Workspace для личной работы с пером в Windows 10
- Как использовать Windows Ink Workspace
- Где найти и открыть Windows Ink
- Что это предлагает
- Как это использовать
- Pen interactions and Windows Ink in Windows apps
- Overview
- Components of the Windows Ink platform
- Basic inking with InkCanvas
- Basic customization with InkPresenter
- Pass-through input for advanced processing
- Example — Use unprocessed input to implement stroke selection
- Custom ink rendering
Используйте Windows Ink Workspace для личной работы с пером в Windows 10
Рабочая область Windows Ink – это одна из новых функций, появившихся в Windows 10 Anniversary Update . Благодаря возможностям более цифрового взаимодействия с вашей вычислительной средой Windows Ink позволяет вам взаимодействовать с вашей системой, перемещаться по экрану с помощью цифрового пера . В этом посте мы увидим, как использовать Windows Ink Workspace как профессионал.

У Microsoft были планы относительно Windows Ink в тайне в течение достаточно долгого времени. Когда в прошлом году Windows 10 была выпущена для широкой публики, мы увидели новый браузер Edge, включающий эту новую функцию, где вы можете делать веб-заметки и свободно взаимодействовать с самой сетью. Windows Ink можно назвать усовершенствованным инструментом системного уровня, с помощью которого вы можете выполнять несколько задач с помощью своего цифрового пера. У Microsoft есть довольно успешный ассортимент продуктов Surface, и если у вас есть один из этих планшетов или что-то вроде Dell XPS 12, Windows Ink станет более понятным для вас.
Как использовать Windows Ink Workspace
Прежде чем посмотреть, как его использовать – нужно ли загружать или устанавливать Ink Workspace? Нет – он уже есть, и вам просто нужно знать, где его найти.
Где найти и открыть Windows Ink
Windows Ink Workspace – это концентратор на вашем ПК, который содержит несколько инструментов, утилит и приложений, удобных для работы с пером. Вы можете запустить его из дальнего правого края панели задач, нажав на значок, который выглядит как ручка. Однако, если его там нет, вам, возможно, придется добавить его на панель задач. Для этого щелкните правой кнопкой мыши в любом месте панели задач и выберите кнопку Показать рабочее пространство чернил Windows .
Что это предлагает
Когда вы запускаете концентратор Windows Ink, он скользит справа, как и Action Center, содержащий несколько приложений, удобных для перьев. В верхней части вы можете увидеть такие утилиты, как Sticky Notes, Sketchpad и Screen Sketch , которые составляют основное ядро Windows Ink. Sticky Notes доступен в виде отдельного приложения для Магазина Windows, но остальные два поставляются только с Windows Ink. Мы рассмотрим, как использовать эти изящные маленькие инструменты, позже в этом посте.
Помимо этих трех основных компонентов, вы также можете увидеть приложения, которые вы недавно использовали и которые совместимы с пером.
Ниже вы можете увидеть предлагаемые приложения из Магазина Windows, которые вы можете загрузить, чтобы повысить удобство работы с пером. Нажмите Получить больше приложений для пера , чтобы попасть на страницу магазина с множеством приложений, удобных для пера. Вы можете скачать их и добавить свою коллекцию.
Как это использовать
Теперь давайте рассмотрим, как использовать три основные функции, инкапсулированные на верхнем уровне Windows Ink.
Липкие заметки
Sticky Notes , ранее входившая в Windows как встроенный системный компонент, теперь доступна каждому в виде отдельного приложения для Магазина Windows. В Windows 10 вы можете использовать Sticky Notes, чтобы установить напоминание, просмотреть информацию о рейсе, отправить электронное письмо или посетить веб-ссылки и многое другое. Вам нужно установить свой регион и язык на английский [США] и включить аналитические данные для заметок, опубликовав которые, вы сможете опробовать расширенные возможности Sticky Notes. Вы можете использовать Windows 10 Sticky Notes для создания напоминаний Кортаны.
Sketchpad
Скетчпад можно использовать для упражнений. Вы можете использовать имеющуюся ручку, карандаш, карандаши и т. Д., Чтобы рисовать, а затем поделиться с друзьями. Вы также можете использовать удобный масштаб, который позволяет рисовать прямые линии. Просто используйте перо/стилус, чтобы перемещаться по холсту.
Эскиз экрана
Подобно веб-заметкам в Edge, эти конкретные функции позволяют сделать снимок экрана открытого в данный момент окна, а затем использовать функции Sketchpad для комментирования, рисования или выделения любых частей изображения. Очень полезно, когда вы хотите поделиться аннотированным изображением среди своих друзей!
Это неотъемлемые части чернил Windows. Вы можете поиграть с этими функциями и установить другие ориентированные на ручку приложения для более богатого опыта.
Посмотрите, как вы можете настроить быстрые клавиши и настройки Touch.
Сообщите нам свои мысли о возможной полезности Windows Ink Workspace для вас.
Завтра мы увидим, как отключить Windows Ink Workspace в Windows 10.
Pen interactions and Windows Ink in Windows apps
Surface Pen (available for purchase at the Microsoft Store).
Overview
Optimize your Windows app for pen input to provide both standard pointer device functionality and the best Windows Ink experience for your users.
This topic focuses on the Windows Ink platform. For general pointer input handling (similar to mouse, touch, and touchpad), see Handle pointer input.
Using ink in your Windows app
Use Windows Pen and Ink to build more engaging enterpriseВ apps
The Windows Ink platform, together with a pen device, provides a natural way to create digital handwritten notes, drawings, and annotations. The platform supports capturing digitizer input as ink data, generating ink data, managing ink data, rendering ink data as ink strokes on the output device, and converting ink to text through handwriting recognition.
In addition to capturing the basic position and movement of the pen as the user writes or draws, your app can also track and collect the varying amounts of pressure used throughout a stroke. This information, along with settings for pen tip shape, size, and rotation, ink color, and purpose (plain ink, erasing, highlighting, and selecting), enables you to provide user experiences that closely resemble writing or drawing on paper with a pen, pencil, or brush.
Your app can also support ink input from other pointer-based devices, including touch digitizers and mouse devices.В
The ink platform is very flexible. It is designed to support various levels of functionality, depending on your requirements.
For Windows Ink UX guidelines, see Inking controls.
Components of the Windows Ink platform
| Component | Description |
|---|---|
| InkCanvas | A XAMLВ UI platform control that, by default, receives and displays all input from a pen as either an ink stroke or an erase stroke. For more information about how to use the InkCanvas, see Recognize Windows Ink strokes as text and Store and retrieve Windows Ink stroke data. |
| InkPresenter | A code-behind object, instantiated along with an InkCanvas control (exposed through the InkCanvas.InkPresenter property). This object provides all default inking functionality exposed by the InkCanvas, along with a comprehensive set of APIs for additional customization and personalization. For more information about how to use the InkPresenter, see Recognize Windows Ink strokes as text and Store and retrieve Windows Ink stroke data. |
| InkToolbar | A XAMLВ UI platform control containing a customizable and extensible collection of buttons that activate ink-related features in an associated InkCanvas. For more information about how to use the InkToolbar, see Add an InkToolbar to a Windows app inking app. |
| IInkD2DRenderer | Enables the rendering of ink strokes onto the designated Direct2D device context of a Universal Windows app, instead of the default InkCanvas control. This enables full customization of the inking experience. For more information, see the Complex ink sample. |
Basic inking with InkCanvas
To add basic inking functionality, just place an InkCanvas UWP platform control on the appropriate page in your app.
By default, the InkCanvas supports ink input only from a pen. The input is either rendered as an ink stroke using default settings for color and thickness (a black ballpoint pen with a thickness of 2 pixels), or treated as a stroke eraser (when input is from an eraser tip or the pen tip modified with an erase button).
If an eraser tip or button is not present, the InkCanvas can be configured to process input from the pen tip as an erase stroke.
In this example, an InkCanvas overlays a background image.
An InkCanvas has default Height and Width properties of zero, unless it is the child of an element that automatically sizes its child elements, such as StackPanel or Grid controls.
This series of images shows how pen input is rendered by this InkCanvas control.
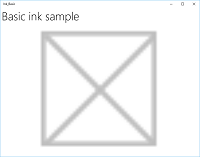 | 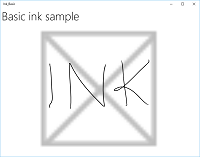 |  |
|---|---|---|
| The blank InkCanvas with a background image. | The InkCanvas with ink strokes. | The InkCanvas with one stroke erased (note how erase operates on an entire stroke, not a portion). |
The inking functionality supported by the InkCanvas control is provided by a code-behind object called the InkPresenter.
For basic inking, you don’t have to concern yourself with the InkPresenter. However, to customize and configure inking behavior on the InkCanvas, you must access its corresponding InkPresenter object.
Basic customization with InkPresenter
The InkPresenter cannot be instantiated directly. Instead, it is accessed through the InkPresenter property of the InkCanvas.В
Along with providing all default inking behaviors of its corresponding InkCanvas control, the InkPresenter provides a comprehensive set of APIs for additional stroke customization and finer-grained management of the pen input (standard and modified). This includes stroke properties, supported input device types, and whether input is processed by the object or passed to the app for processing.
Standard ink input (from either pen tip or eraser tip/button) is not modified with a secondary hardware affordance, such as a pen barrel button, right mouse button, or similar mechanism.
By default, ink is supported for pen input only. Here, we configure the InkPresenter to interpret input data from both pen and mouse as ink strokes. We also set some initial ink stroke attributes used for rendering strokes to the InkCanvas.
To enable mouse and touch inking, set the InputDeviceTypes property of the InkPresenter to the combination of CoreInputDeviceTypes values that you want.
Ink stroke attributes can be set dynamically to accommodate user preferences or app requirements.
Here, we let a user choose from a list of ink colors.
We then handle changes to the selected color and update the ink stroke attributes accordingly.
These images shows how pen input is processed and customized by the InkPresenter.
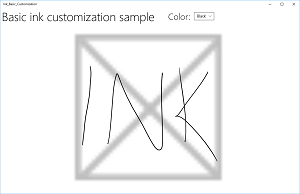
The InkCanvas with default black ink strokes.
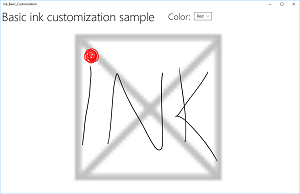
The InkCanvas with user selected red ink strokes.
To provide functionality beyond inking and erasing, such as stroke selection, your app must identify specific input for the InkPresenter to pass through unprocessed for handling by your app.
Pass-through input for advanced processing
By default, InkPresenter processes all input as either an ink stroke or an erase stroke, including input modified by a secondary hardware affordance such as a pen barrel button, a right mouse button, or similar. However, users typically expect some additional functionality or modified behavior with these secondary affordances.
In some cases, you might also need to expose additional functionality for pens without secondary affordances (functionality not usually associated with the pen tip), other input device types, or some type of modified behavior based on a user selection in your app’s UI.
To support this, InkPresenter can be configured to leave specific input unprocessed. This unprocessed input is then passed through to your app for processing.
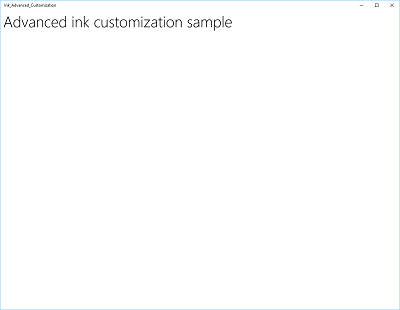
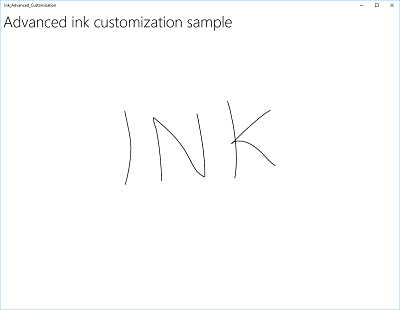
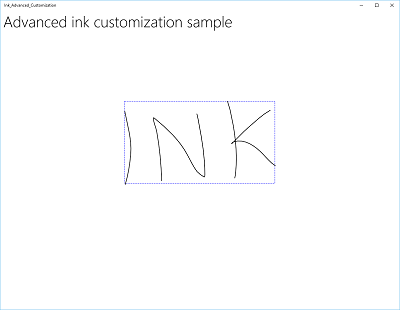
Example — Use unprocessed input to implement stroke selection
The Windows Ink platform does not provide built-in support for actions that require modified input, such as stroke selection. To support features like this, you must provide a custom solution in your apps.
The following code example (all code is in the MainPage.xaml and MainPage.xaml.cs files) steps through how to enable stroke selection when input is modified with a pen barrel button (or right mouse button).
First, we set up the UI in MainPage.xaml.
Here, we add a canvas (below the InkCanvas) to draw the selection stroke. Using a separate layer to draw the selection stroke leaves the InkCanvas and its content untouched.
In MainPage.xaml.cs, we declare a couple of global variables for keeping references to aspects of the selection UI. Specifically, the selection lasso stroke and the bounding rectangle that highlights the selected strokes.
Next, we configure the InkPresenter to interpret input data from both pen and mouse as ink strokes, and set some initial ink stroke attributes used for rendering strokes to the InkCanvas.
Most importantly, we use the InputProcessingConfiguration property of the InkPresenter to indicate that any modified input should be processed by the app. Modified input is specified by assigning InputProcessingConfiguration.RightDragAction a value of InkInputRightDragAction.LeaveUnprocessed. When this value is set, the InkPresenter passes through to the InkUnprocessedInput class, a set of pointer events for you to handle.
We assign listeners for the unprocessed PointerPressed, PointerMoved, and PointerReleased events passed through by the InkPresenter. All selection functionality is implemented in the handlers for these events.
Finally, we assign listeners for the StrokeStarted and StrokesErased events of the InkPresenter. We use the handlers for these events to clean up the selection UI if a new stroke is started or an existing stroke is erased.
All selection functionality is implemented in these handlers, including the lasso stroke and the bounding rectangle.

To conclude the PointerReleased event handler, we clear the selection layer of all content (the lasso stroke) and then draw a single bounding rectangle around the ink strokes encompassed by the lasso area.
Finally, we define handlers for the StrokeStarted and StrokesErased InkPresenter events.
These both just call the same cleanup function to clear the current selection whenever a new stroke is detected.
Here’s the function to remove all selection UI from the selection canvas when a new stroke is started or an existing stroke is erased.
Custom ink rendering
By default, ink input is processed on a low-latency background thread and rendered in-progress, or «wet», as it is drawn. When the stroke is completed (pen or finger lifted, or mouse button released), the stroke is processed on the UI thread and rendered «dry» to the InkCanvas layer (above the application content and replacing the wet ink).
You can override this default behavior and completely control the inking experience by «custom drying» the wet ink strokes. While the default behavior is typically sufficient for most applications, there are a few cases where custom drying might be required, these include:
- More efficient management of large, or complex, collections of ink strokes
- More efficient panning and zooming support on large ink canvases
- Interleaving ink and other objects, such as shapes or text, while maintaining z-order
- Drying and converting ink synchronously into a DirectX shape (for example, a straight line or shape rasterized and integrated into application content instead of as a separate InkCanvas layer).
Custom drying requires an IInkD2DRenderer object to manage the ink input and render it to the Direct2D device context of your Universal Windows app, instead of the default InkCanvas control.
Both SurfaceImageSource and VirtualSurfaceImageSource provide a DirectX shared surface for your app to draw into and compose into your application’s content, although VSIS provides a virtual surface that’s larger than the screen for performant panning and zooming. Because visual updates to these surfaces are synchronized with the XAML UI thread, when ink is rendered to either, the wet ink can be removed from the InkCanvas simultaneously.
You can also custom dry ink to a SwapChainPanel, but synchronization with the UI thread is not guaranteed and there might be a delay between when the ink is rendered to your SwapChainPanel and when ink is removed from the InkCanvas.
For a full example of this functionality, see the Complex ink sample.
Custom drying and the InkToolbar
If your app overrides the default ink rendering behavior of the InkPresenter with a custom drying implementation, the rendered ink strokes are no longer available to the InkToolbar and the built-in erase commands of the InkToolbar do not work as expected. To provide erase functionality, you must handle all pointer events, perform hit-testing on each stroke, and override the built-in «Erase all ink» command.


