- Where is PHP.ini in WordPress?
- Where is PHP.ini in WordPress?
- Where is PHP.ini in WAMP?
- Where to Find PHP.ini in XAMPP?
- Where to Find PHP.ini in Linux?
- Where is PHP.ini in cPanel?
- What are the Recommended Configurations for PHP.ini in WordPress?
- PHP.ini
- .htaccess file
- wp-config.php file
- PHP.ini Configurations You Can Change
- Memory_limit
- Max_execution_time
- Post_max_size
- Upload_max_filesize
- Max_input_time
- Where is my PHP php.ini Configuration File Located?
- Method 1
- Method 2
- Apache
- Nginx or Apache with PHP-FPM
- Method 3
- Editing php.ini in Linux
- Apache
- Nginx or Apache with PHP-FPM
- Older Versions
- Настройка файла php.ini
- Расположение и синтаксис php.ini
- Настройка файла php.ini
- Вывод ошибок в php
- Ограничения ресурсов
- Директории по умолчанию
- Загрузка файлов
- Настройка расширений
- Выводы
Where is PHP.ini in WordPress?
There are many commands in the php.ini file, by changing each command changes happen in WordPress. Therefore we need to know where is PHP.ini in wordpress.
As you probably know WordPress is developed by the powerful programming language of PHP. In this article, we would like to talk about the php.ini file and where is PHP.ini in WordPress?
Therefore, one of the most important files you may come across in the hosting panel is the php.ini file. There are many commands in the php.ini file, by changing each command a lot of things change in WordPress.
First, let us discuss where you can actually find the php.ini file in the server, Linux, XAMPP and etc. Then, we will recommend a few configurations for the php.ini file.
Where is PHP.ini in WordPress?
The first question we answer is where to find the php.ini file?
It doesn’t matter if WordPress is on a live server or a local server. The best way to find the location of this file is to create a PHP file.
It doesn’t matter what name you use for this file. You only need to use the .php extension for it.
Then copy and paste the code below into the created file:
Finally, once the file is saved, open it in the browser. After running the file, you should be able to see the information of php.ini file.
The location of php.ini should be visible in the Configuration file path or in the Loaded Configuration File.
In normal circumstances, the file will be placed in the first location. Otherwise, if the PHP is installed as a module, it will be in the second location.
Creating the .php file may not always work and you have to use other methods to find the location of the php.ini file.
Where is PHP.ini in WAMP?
If you have WordPress installed locally on your computer, you can find the file via the program you are using. Although, the location of php.ini is different in each program. Below, we discuss different programs and where to find the php.ini in each of them.
If you are using the WAMP, then finding the php.ini is an easy task. Simply, right-click on the icon of the program and from the appeared menu click on PHP. In the opened menu you will be able to see the php.ini. This is all you need to do to find the php.ini file in the WAMP server.
Where to Find PHP.ini in XAMPP?
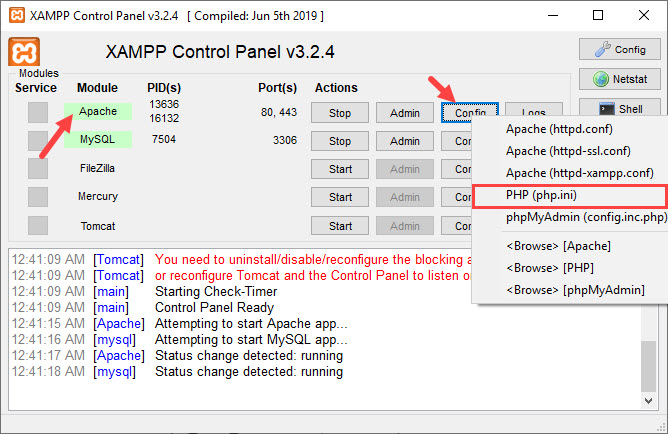
Finding php.ini in the XAMPP server is a bit different. Open the program and click on Config next to the Apache module. From the opened menu click on PHP(php.ini).
Where to Find PHP.ini in Linux?
If you are a Linux user, to find the php.ini file, type the code below in the Linux terminal:
The output you receive should be like below:
Normally, the php.ini file is located in the Loaded Configuration File. If you couldn’t find it there, simply change the path to Configuration File.
Where is PHP.ini in cPanel?
As mentioned above, it doesn’t matter if you have WordPress installed locally or on a live server.
In any case, there are multiple ways of finding the php.ini file in WordPress. Follow the steps below if you have WordPress installed on a live server and have access to the cPanel:
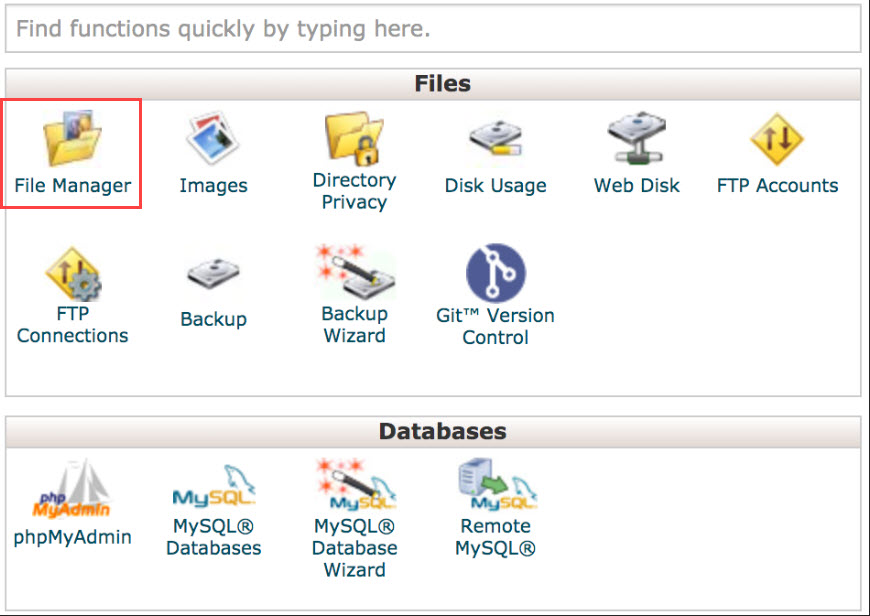
- Login to your hosting panel
- Open File Manager
- Php.ini file is located in the Root directory
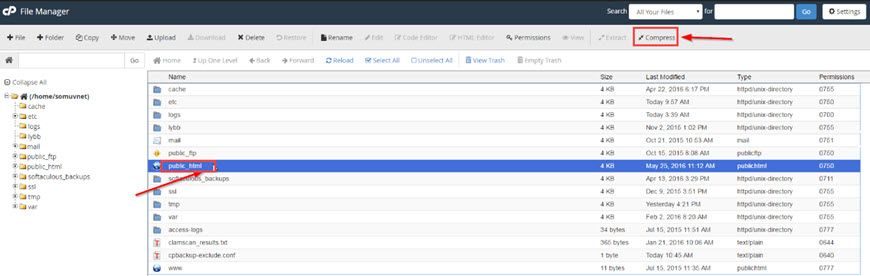
Don’t forget that the root directory is in the public_html folder. Simply click on it from the left-hand side menu.
What are the Recommended Configurations for PHP.ini in WordPress?
There are some recommended configurations for the php.ini that makes the WordPress run better. Other than php.ini configurations there are other options that we will mention down below:
PHP.ini
Copy and paste the following code in the PHP.ini file:
.htaccess file
Copy and paste the line below into the .htaccess file. This file can be found in the root directory of your website. Often, it is hidden. Therefore, use an FTP client like FileZilla to show the hidden files.
wp-config.php file
Copy and paste the line below in the wp-config.php file to eliminate the run-time limit. Or if it is already in the file, change the value to 60.
PHP.ini Configurations You Can Change
There are many commands in the php.ini file. Some of them can be changed. Below are those that we can change. Knowing what each of them does is very important.
Memory_limit
As you can probably tell by its name, memory_limit is the command to limit the memory usage of PHP in WordPress.
The value you define for the memory_limit must be more than the file you are trying to upload. This is the memory needed to upload files and run commands. The recommended value is 128 MB.
Max_execution_time
The time needed to execute every script is defined by this command. In other words, the time the server needs to run the commands.
For example, if you are uploading a fairly big size to the server, it will take more than a few seconds. Therefore, you must remove the execution time or increase it.
Post_max_size
This command defines the maximum data a post can have. To eliminate the limitation change the value to 0. By using the POST method you can call the post from the server.
Upload_max_filesize
This command defines the maximum file you are allowed to upload on WordPress. You have probably seen the limited upload number displayed in the WordPress gallery. This command defines that limitation.
If the memory limit exhaust error occurred, you must eliminate this command or increase it.
Max_input_time
This command defines the seconds required for each data to be analyzed. Data like POST and GET.
The time begins exactly when the command requests PHP from the server and it ends when the command starts. The default value is -1. To eliminate this limitation, set the value to 0.
Источник
Where is my PHP php.ini Configuration File Located?
As there are multiple versions of PHP with different sever configurations, php.ini could be located in several different folders.
Method 1
One way to find out exactly which php.ini file your web sever is using is by creating a new PHP file in document root called info.php .
Load this file in your browser, press CTRL + F (or Command + F on Mac) and search for “Loaded Configuration File”. You should see something like
This will tell you the exact location of the php.ini file you want to edit.
Method 2
In Linux, run this command to locate the PHP.ini configuration file.
Or in Windows Command Line:
The result should be something like this.
In the above example, we can see that the PHP install is located in /etc/php/7.4 . Note that there are three different configuration files you should we aware of:
/etc/php/7.4/cli/php.ini is for the CLI PHP program. Changes to this config file will only affect PHP as it runs in the terminal – it will NOT affect the web server.
Apache
/etc/php/7.4/apache2/php.ini is for the PHP plugin used by Apache. This is the one you need to edit if you are using the Apache web server.
Nginx or Apache with PHP-FPM
/etc/php/7.4/fpm/php.ini is a fastcgi-compatible ‘wrapper’ for PHP processing. This is the one you need to edit if you’re using the Nginx web server or Apache with PHP-FPM.
Method 3
Using the locate command in Linux,. If it’s not already installed, run sudo apt update && sudo apt install mlocate .
You should see a list of php.ini files here. Try editing one of them and restarting you web server to see if makes the required changes.
Editing php.ini in Linux
Apache
On Apache, php.ini is usually located in /etc/php/7.4/apache2/php.ini . Replace 7.4 with your own version, e.g, php5.6 , php7.1 , etc.
However, if you are using PHP FPM, it may be located in /etc/php/7.4/fpm/php.ini . Replace 7.4 with your own version, e.g, php5.6 , php7.1 , etc.
To save file and exit, press CTRL + X , press Y and then press ENTER
You must restart Apache after altering php.ini .
If you are using PHP-FPM, you must restart that service. Replace php7.4 with your own version, e.g, php5.6 , php7.1 , etc.
Nginx or Apache with PHP-FPM
Nginx uses PHP FPM and php.ini is usually located in /etc/php/7.4/fpm/php.ini . Replace 7.4 with your own version, e.g, php5.6 , php7.2 , etc.
To save file and exit, press CTRL + X , press Y and then press ENTER
You must restart Nginx after altering php.ini .
Older Versions
For versions of Ubuntu lower than 16.04, /etc/php/5.6/ , /etc/php/7.0/ , /etc/php/7.1/ , and so on, are replaced by /etc/php5/ and so on. Otherwise, these paths remain accurate.
Let me know if this helped. Follow me on Twitter, Facebook and YouTube, or 🍊 buy me a smoothie.
Источник
Настройка файла php.ini
PHP — это один из самых популярных языков программирования для создания сайтов и веб-приложений. На нем разработано множество готовых систем управления контентом для блогов, сайтов фирм или даже интернет-магазинов. Несмотря на то что у этого языка есть свои недостатки, он достаточно прост в освоении и поэтому очень часто используется для разработки новых сайтов.
Интерпретатор php может поставляться в виде модуля для Apache, выполнять скрипты из командной строки или в виде отдельного сервиса php-fpm. Эти сервисы отличаются своими возможностями, и предназначением, но для любого вида интерпретатора нужно задать базовые настройки, например, рабочая папка, включенные расширения, отображение ошибок и так далее. Все эти настройки задаются через файл php.ini. В этой инструкции мы рассмотрим как выполняется настройка файла php.ini в операционных системах Linux, хотя все информация подойдет и для Windows.
Если у вас еще не установлен интерпретатор языка программирования php, то вы можете ознакомиться со статьей установка lamp в Ubuntu 16.04.
Расположение и синтаксис php.ini
Для каждой версии интерпретатора конфигурационный файл php.ini находится в отдельной папке. Но все конфигурационные файлы находятся в папке /etc/php, например, /etc/php5:
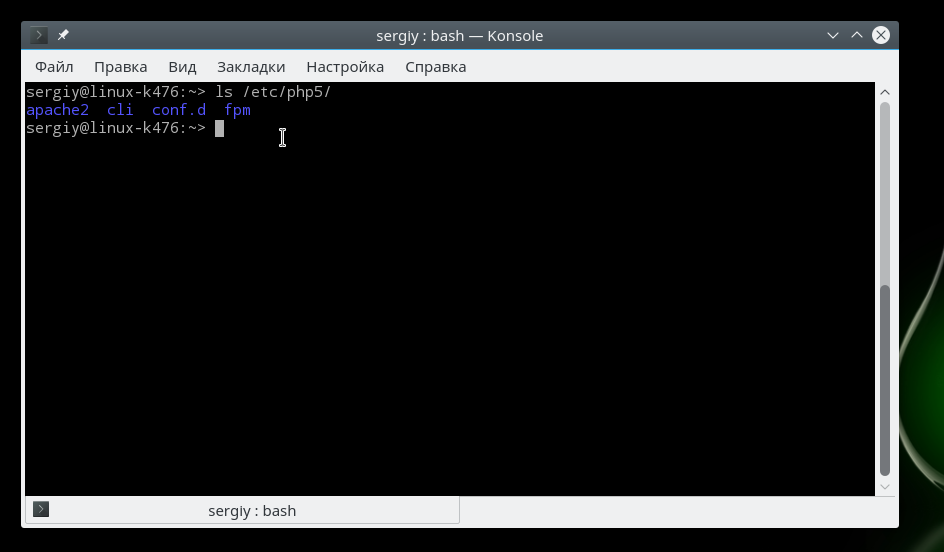
Папка conf.d содержит общие настройки для различных расширений и модулей, они не будут нас сейчас интересовать. Более интересны следующие три папки — apache, cli и fpm. В них содержатся конфигурационные файлы php.ini для каждого из этих интерпретаторов.
Если вы собираетесь использовать несколько из этих интерпретаторов, то вам придется указывать настройки для каждого из них отдельно. Вы можете убедиться, что в каждой из папок лежит файл php.ini.
Что касается синтаксиса файла, то он разделен на секции, сначала идет секция настройки php, которая разделена на подсекции в зависимости от типа настроек, дальше идут секции настройки разных модулей. Синтаксис самих настроек очень прост, он соответствует привычному синтаксису ini файлов. Строка начинается с имени настройки, затем следует знак равно, а за ним значение:
имя_настройки = значение_параметра
Символами [] обозначается имя секции, например, [PHP], а символ ; означает комментарий, он и все символы после него не читаются интерпретатором. А теперь рассмотрим как выполняется настройка php.ini и переберем самые важные параметры.
Настройка файла php.ini
Для удобства ориентирования мы разобьем все параметры по категориях в зависимости от их назначения. Вам будет достаточно найти нужный параметр и изменить его значение. А теперь откройте файл настроек php, например, для модуля apache и перейдем к настройке. Чтобы избежать ошибок не добавляйте новые строки, а ищите уже существующие и изменяйте значения на нужные:
sudo gedit /etc/php5/apache/php.ini
Сначала идет немного информации о самом файле в виде комментариев, затем интересующие нас настройки.
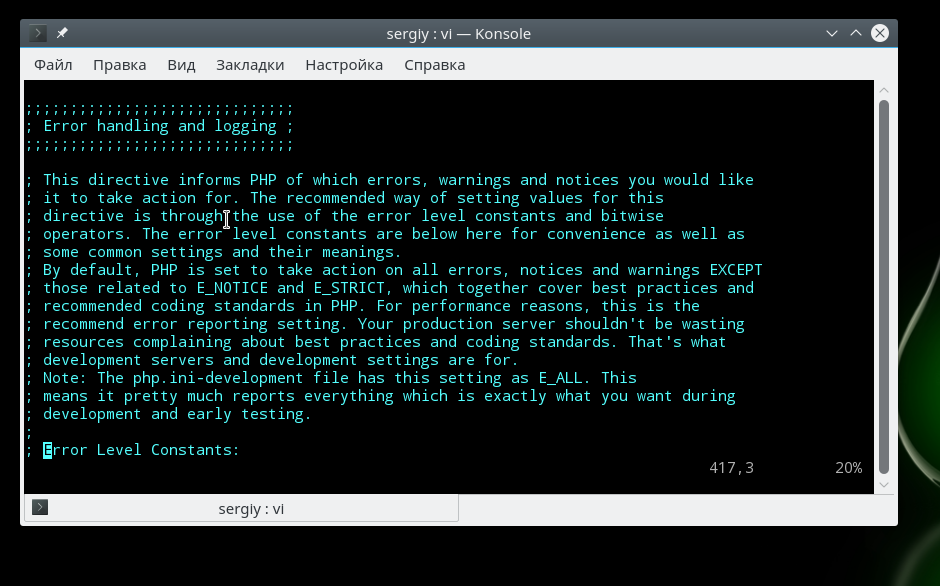
Вывод ошибок в php
Настройка php 7 обычно начинается с конфигурации вывода ошибок. Все настройки вывода ошибок находятся в разделе Error handling and logging. По умолчанию вывод ошибок на экран во время выполнения скрипта отключен. Это сделано для того, чтобы пользователи не смогли увидеть ничего лишнего. Вместо этого, все ошибки записываются в лог файл. Если вы используете php на домашнем компьютере, то такие меры не нужны и вы можете сразу выводить все на экран:
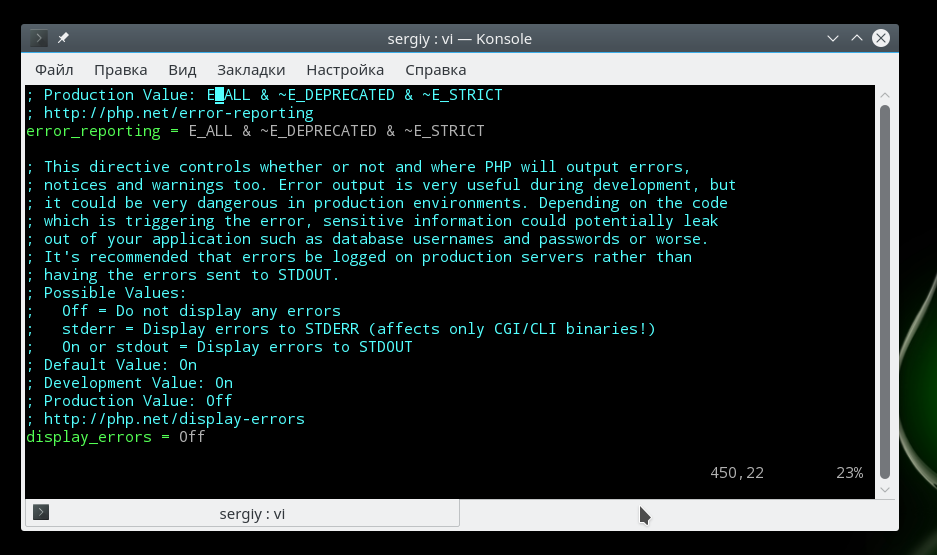
Замените off на on. В php используются различные типы ошибок, например, критические, предупреждения, ошибки синтаксиса, с помощью строки error_reporting вы можете включить вывод только определенных типов ошибок:
Если нужно объединить несколько типов ошибок, то используйте символ &, а для отключения отображения поставьте перед типом знак
. Приведенный выше пример отображает все ошибки (E_ALL), кроме сообщений об устаревших функциях (E_DEPRECATED). Вы можете отключить все типы использовав 0:
Включите запись ошибок php в лог файл, если не выводите их на экран:
Чтобы не засорять лог однотипными сообщениями можно игнорировать повторяющиеся ошибки в пределах одного исполнения:
Ограничения ресурсов
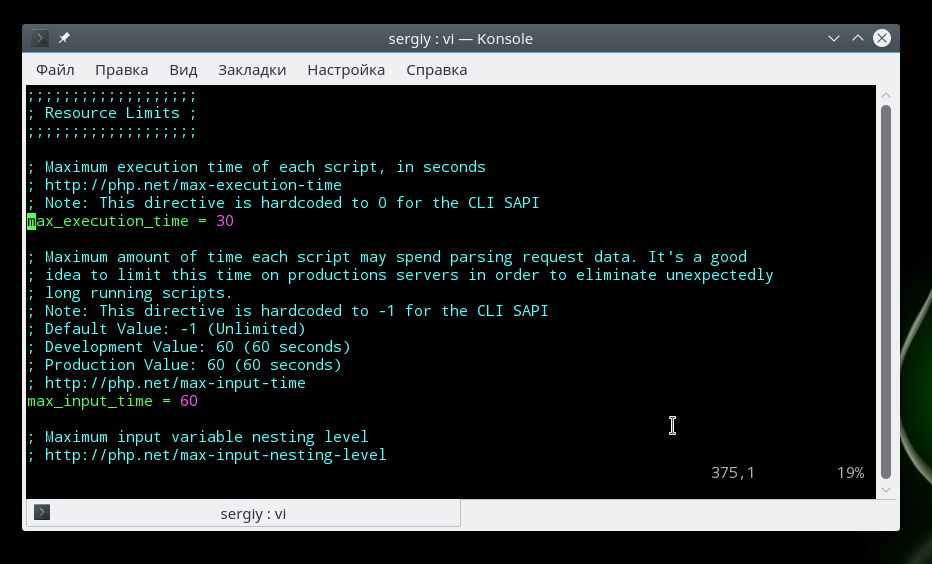
Если бы скрипты php никак не ограничивались в ресурсах, то они запросто могли бы перегрузить сервер и не дать ему нормально работать. Поэтому, по умолчанию php устанавливает жесткие ограничения, но, возможно, вам нужно будет их немного ослабить.
По умолчанию максимальное время выполнения скрипта — 30 секунд, сделаем минуту:
Если указать 0, то скрипт может выполняться бесконечно. Вы также можете ограничить время, на протяжении которого скрипт будет загружать данные, 60 секунд:
Максимальное количество переменных в GET и POST:
Следующий параметр задает максимальное количество памяти, которую может использовать один скрипт во время своего выполнения, в мегабайтах:
Максимальный размер данных, передаваемых в POST запросе тоже ограничивается, размер по умолчанию — 8 Мегабайт:
Вы можете ограничить область действия php в системе с помощью опции openbase_dir, она указывает папку, выше которой скрипт не может получить доступ к файловой системе:
С помощью директив disable_functions и disable_classes вы можете отключить использование в скриптах определенных функций или классов, например, это может быть полезно для веб-хостингов. В этом примере мы отключаем использование функции ini_set, которая позволяет менять настройки php из скрипта:
Директории по умолчанию
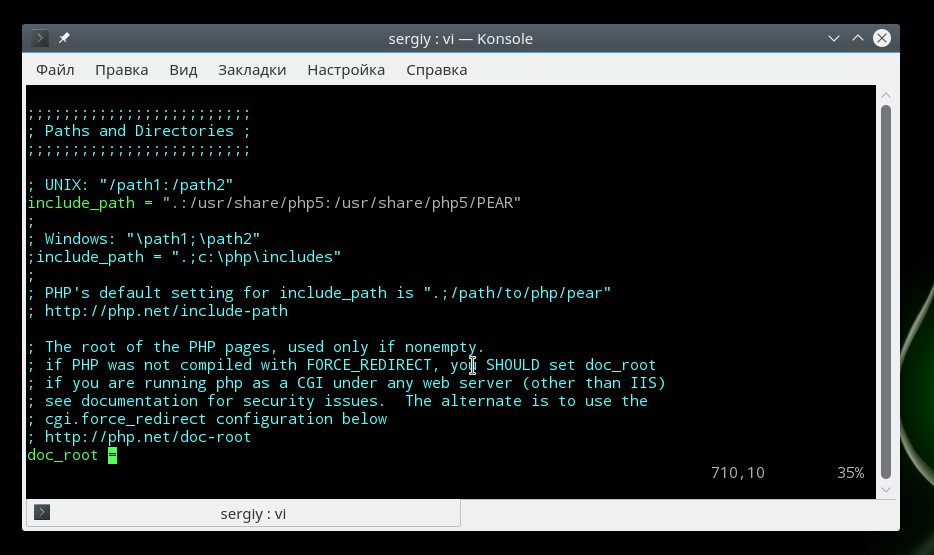
Файл настройки php.ini позволяет указать пути в файловой системе по умолчанию для различных действий. Вы можете задать папки где система будет искать скрипты, если вы попытаетесь подключить их с помощью инструкции include:
Папка с модулями php:
Папка для записи временных файлов:
Загрузка файлов
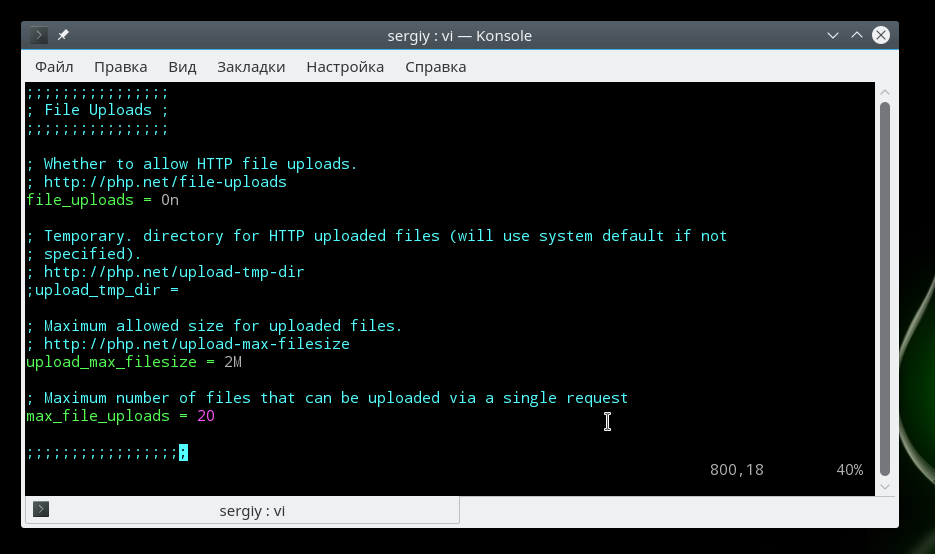
Для того чтобы пользователи могли загружать свои файлы на сервер, например, фото, нужно включить эту функцию в php:
Максимальный размер загружаемого файла:
Максимальное количество файлов, которые может загрузить один скрипт:
Настройка php.ini практически завершена, нам остались лишь расширения.
Настройка расширений
Расширения позволяют очень сильно увеличить функциональность php. Например, благодаря расширениям вы можете использовать в своих скриптах базы данных mysql, postgresql, mysqli, sqlite, графическую библиотеку gd и многое другое. Все это включается в этом разделе.
Для включения расширения достаточно убрать комментарий перед строкой с его командой, например:
extension=php_mysql.so
extension=php_mbstring.so
extension=php_pgsql.so

Обратите внимание, что для windows расширение будет иметь формат dll, но для linux нужно использовать so. В следующих секциях идет настройка каждого из расширений, но мы их рассматривать не будем потому что они обычно не требуют настройки.
Выводы
В этой статье мы рассмотрели как выполняется настройка php на сервере или обычном компьютере для разработки веб-сайтов. Файл настроек php имеет довольно простую структуру и с ним довольно не сложно справиться. После завершения всех настроек и сохранения изменений не забудьте перезагрузить веб-сервер или сервис php-fpm.
Вообще говоря, php-fpm это отдельная тема, потому что там есть много дополнительных настроек, и, возможно, мы рассмотрим его в одной из следующих статей. Если у вас остались вопросы, спрашивайте в комментариях!
Источник


