- Команда ping в Linux
- Как работает ping?
- Команда Ping
- Как пользоваться Ping?
- Выводы
- How to Ping IPv6 Address from Windows and Linux CLI
- Pinging to IPV6 Addresses
- Using Ping Command
- Using Ping6 Command
- How to find the IPV6 address of your PC?
- On Windows :
- On Linux :
- Discover Routes of IPV6 Packets
- Traceroute6 on Linux
- tracert -6 on Windows
Команда ping в Linux
Всем знакомы ситуации, когда интернет на компьютере неожиданно разрывается, такое поведение можно наблюдать при использовании ADSL модемов, Wifi на большом расстоянии, GSM и других подобных ненадежных технологий. Быстро выяснить есть ли на компьютере интернет можно с помощью утилиты ping.
Но область ее применения намного шире, ее используют сетевые администраторы для проверки доступности удаленного узла в сети, она применяется в различных скриптах и многих других местах. В этой статье будет рассмотрена команда ping в Linux, мы поговорим о том, как пользоваться утилитой, как она работает, рассмотрим ее опции и возможности.
Как работает ping?
Утилита ping — это очень простой инструмент для диагностики сети. Она позволяет проверить доступен удаленный хост или нет и все. Для этого утилита проверяет, может ли хост отвечать на сетевые запросы с помощью протокола ICMP.
Надеюсь, не нужно говорить, что все данные по сети передаются в виде небольших пакетов. Программа передает небольшой пакет с данными ICMP и ожидает получить обратно пакет ответа, если получает, то считается что удаленный узел доступен. ICMP или Internet Control Message Protocol — это надстройка над протоколом IP, которая используется для передачи служебных сообщений и сообщений и ошибках.
Протокол ICMP может передавать только два типа пакетов — это сообщения с отчетами про ошибки и сообщения запросов. В свою очередь, сообщения запросов делятся на:
- Сообщение эхо-запрос;
- Сообщение эхо-ответ.
Попытаемся разобраться что делает команда ping. Итак, когда вы отправляете запрос ping удаленному узлу, утилита устанавливает для каждого пакета уникальный идентификатор, а также TTL и время отправки пакета. Если хост доступен, он отправляет ответ, на основе времени отправки утилита может вычислить время прохождения пакета туда и обратно. Затем отправляется следующий пакет. В конце рассчитывается общее количество отправленных и принятых пакетов, процент потерь и другие данные.
Команда Ping
Теперь нам осталось немного попрактиковаться. Но перед тем, как мы перейдем к практике давайте рассмотрим синтаксис команды и ее опции. Синтаксис довольно прост:
$ ping опции адрес_узла
Формат команды ping очень прост. В качестве адреса узла можно передавать как ip адрес, так и доменное имя. Опции настраивают поведение утилиты. Рассмотрим основные из них:
- -4 — использовать только ipv4 (по умолчанию);
- -6 — использовать только ipv6;
- -A — адаптивный режим, время между отправками пакета адаптируется к времени передачи и приема пакета, но не меньше чем 200мс;
- -b — разрешить ping широковещательного адреса;
- -с — количество пакетов, которые нужно отправить;
- -D — выводить время в виде UNIX timestamp;
- -f — режим флуда, в этом режиме пакеты передаются без задержек, может использоваться для совершения DoS атак на отдельные узлы. Количество точек, которые выводит утилита обозначает количество потерянных пакетов;
- -i — интервал в секундах между отправкой пакетов;
- -I — использовать этот сетевой интерфейс для отправки пакетов;
- -l — режим перегрузки, отправляется очень много пакетов и система не следит за ответными пакетами;
- -n — не получать домены для ip адресов;
- -r — игнорировать таблицы маршрутизации и отправить пакет на указанный интерфейс;
- -s — размер одного пакета;
- -t — установить TTL вручную;
- -v — более подробный вывод.
Теперь, когда мы рассмотрели основные параметры команды ping и ее синтаксис, пришло время практики, дальше поговорим о том, как сделать ping определенного узла в Linux.
Как пользоваться Ping?
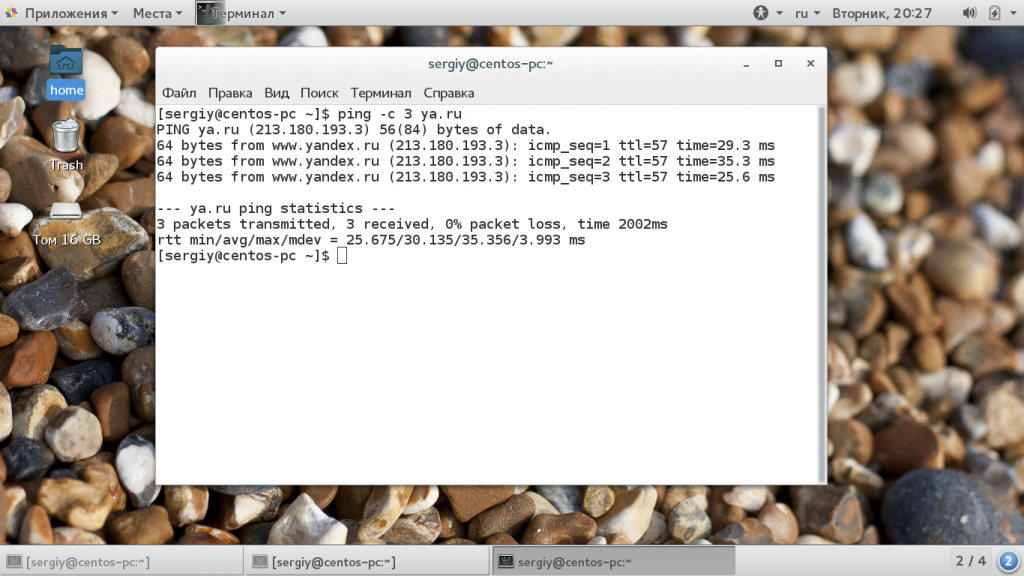
Для проверки работоспособности сети часто используется программа ping любого сайта, который всегда доступен, например, google.com или еще проще и короче ya.ru. Вам будет достаточно передать утилите в параметрах этот адрес, она сама найдет ip и сделает все нужное:

Как я и писал выше, для каждого пакета выводится уникальный идентификатор icmp_seq, количество узлов до целевого узла ttl и время, потраченное на доставку пакета time. Чтобы остановить ping нажмите сочетание клавиш Ctrl+C. В конце утилита вывела общую статистику:
- packets transmitted — отправлено пакетов;
- received — получено пакетов;
- packet loss — процент потерянных пакетов;
- time — обще время работы;
rtt min/avg/max/mdev — минимальное время/среднее время/максимальное время/квадратичное отклонение.
Если выполнение команды ping не остановить, то пакеты могут отправляться очень долгое время, это создает дополнительную нагрузку на сервер и поэтому не желательно. Вы можете сразу в вызове команды ограничить количество отправляемых пакетов с помощью опции -c:
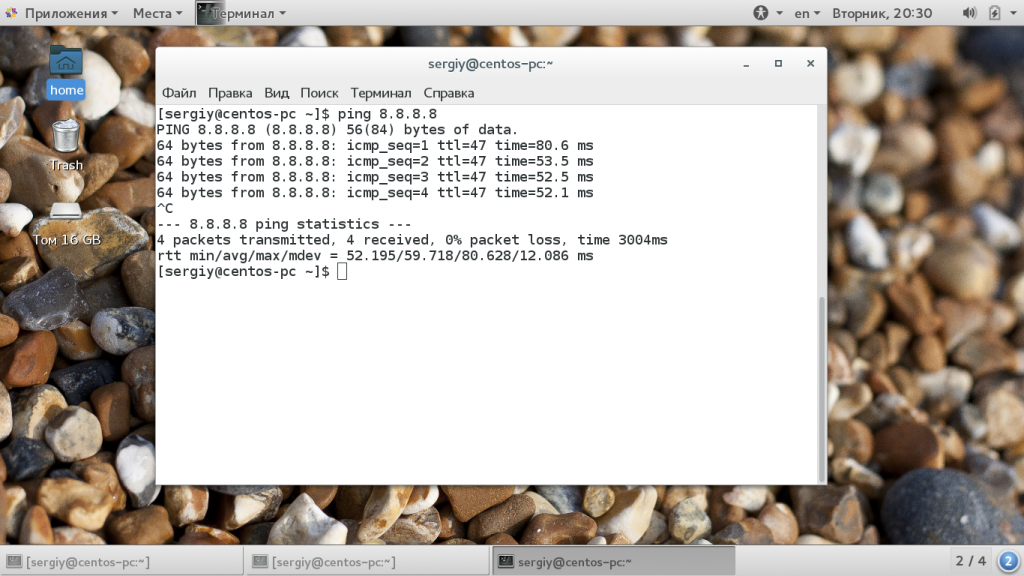
Точно так же как мы выполняем ping для домена, можно указать ip адрес напрямую. Это позволяет проверить есть ли сеть когда неверно настроены серверы DNS. Например:
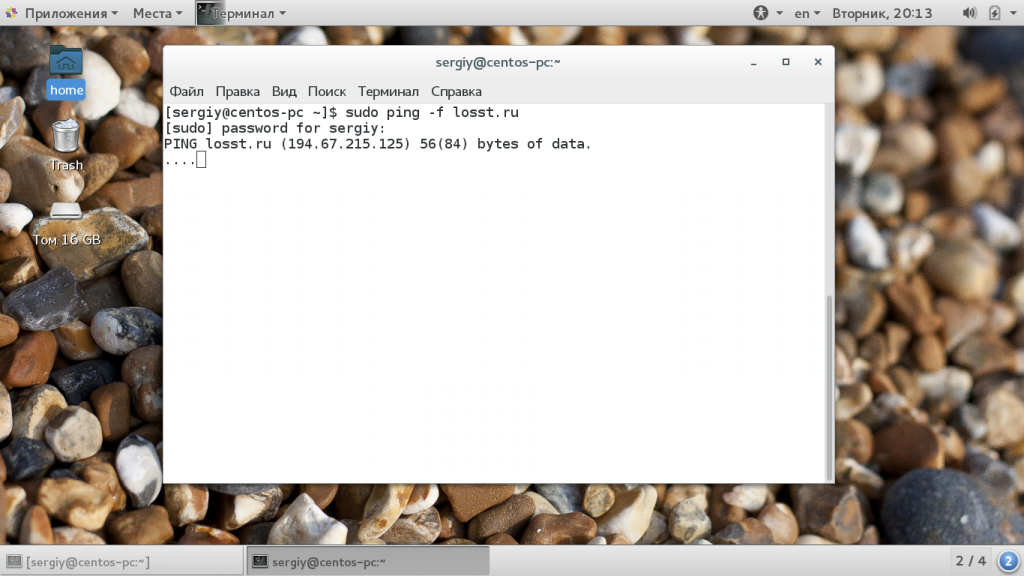
Следующий вид отправки ping сообщений, это ping флуд. С помощью таких пакетов можно выполнить нагрузочное тестирование канала или даже заглушить интернет соединение на одной из машин. Но эти функции можно использовать только с правами суперпользователя. Для организации ping флуда укажите опцию -f:
По умолчанию, в обычном режиме, каждый следующий пакет отправляется, когда получен ответ на предыдущий. Но вы можете сами установить интервал между отправкой пакетов -i:
ping -i 0.2 losst.ru
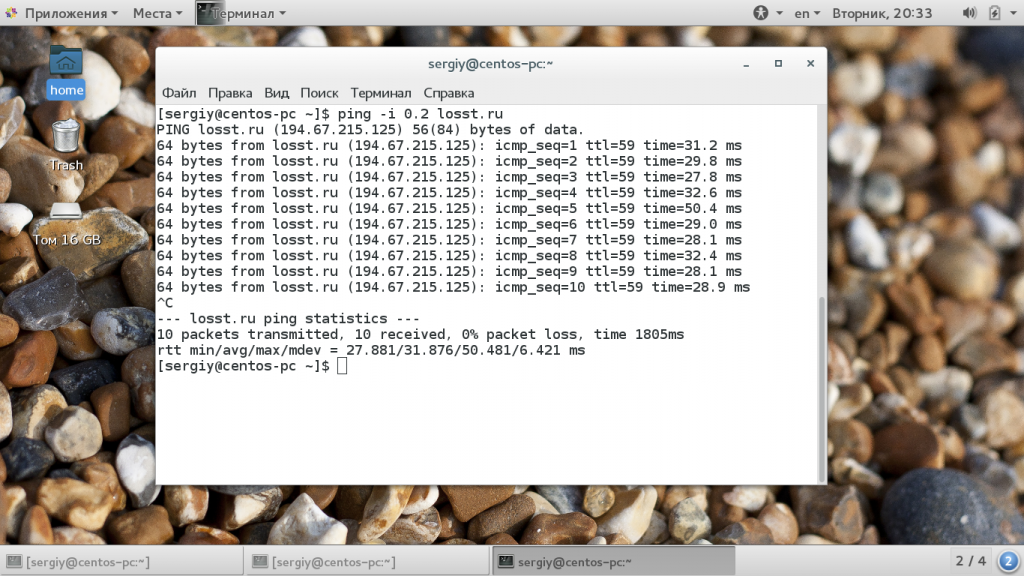
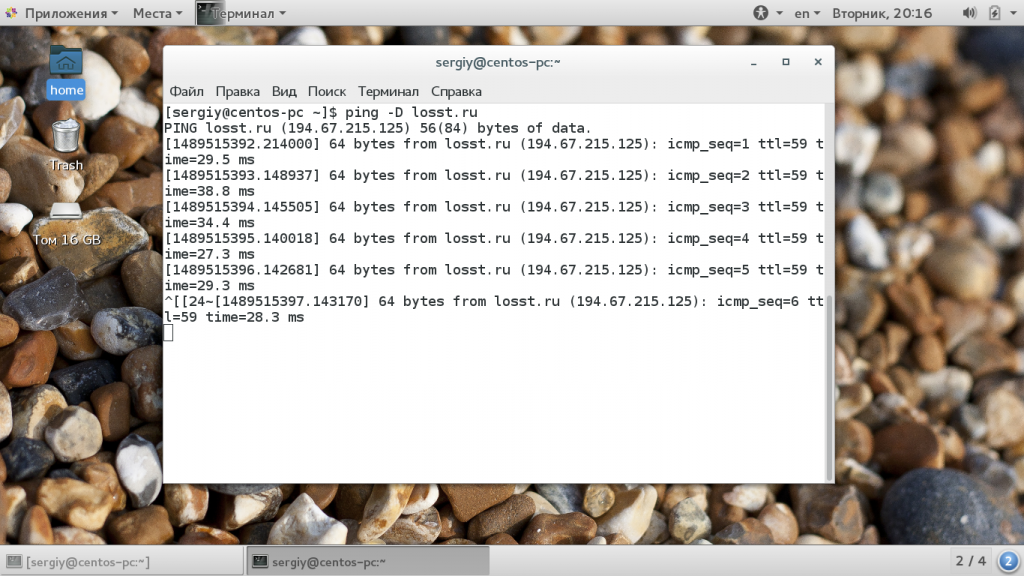
Здесь программа ping выполняет так званный, настраиваемый флуд, вы указываете с какой интенсивностью нужно отправлять пакеты. С помощью опции -D вы можете увидеть Unix Timestamp для каждого сообщения:
Выводы
В этой статье мы рассмотрели что такое команда ping в linux, как ее использовать основные параметры и методы применения. Этот очень простой инструмент можно применять для тестирования неполадок сети и их исправления. В этом плане утилита может стать незаменимой.
How to Ping IPv6 Address from Windows and Linux CLI

IPV6 stands for ‘Internet Protocol Version 6’ and this was introduced to replace IPV4 due to the exhaustion of IPv4 addresses. Due to IPV4 having limited number of IP addresses and with the expansion of Iot (Internet of Things) number of IP addresses that can be used in IPV4 have started to run out and IPV6 was introduced as a solution to this problem.
There are various benefits IPV6 has over IPV4 and some of them are;
- IPV6 provides a large pool of addresses, theoretical maximum of 2^128 addresses to be exact
- Auto Configuration: IPv6 devices can independently auto-configure themselves when connected with other IPv6 devices
- Better authentication and privacy mechanisms in IPV6
- More efficient routing due to having unique IP addresses
Pinging to IPV6 Addresses
In order to check the IPV6 connectivity from your machine, you need to have one of below prerequisites.
- Install IPV6 tunnel in your machine
- Have native IPV6 transport from your ISP to use IPv6 over the Internet
- Have IPv6 enabled networking gears such as routers, in order to use IPV6 inside your LAN/WAN
If you have any of these methods configured you can test the connectivity to IPV6 addresses using the ‘Ping’ command as below.
Using Ping Command
Ping command is used to check the connectivity to a given destination over the network and this is widely used between various parties all over the world for network troubleshooting purposes.
The ping command operates by sending Internet Control Message Protocol (ICMP) Echo Request messages to the destination and waiting for a response. By using this command we can get details such as the number of responses received from the destinations and the time it took for them to return.
The Ping command is available from within the Command Prompt in Windows 7/8/10, Windows Vista, Windows XP and all of the Linux operating systems.
You can follow below steps to ping to IPV6 addresses from your Windows machine
Step 1: Open the Command prompt of your Windows machine as described in one of the previous steps
Step 2: Type below command in Command Prompt to ping to an IPV6 address
Command : ping -6 [IPV6 address]
For testing purposes, you can simply use the IPV6 address of Google, which is ‘ipv6.google.com’

As you can see, 3 packets have been transmitted and 3 have received with 0% packet loss, which means the connectivity to the IPV6 address of Google is successful.
Using Ping6 Command
Use below steps to check the connectivity to IPV6 addresses from your Linux machine by pinging to that address
Step 1: Open the Terminal as described in one of the previous steps
Step 2: Type below command in Terminal to ping to an IPV6 address
Command : ping6 -c [Count] -I [Interface] [Destination Address/Hostname]

In here, with -C you can specify the number of packets you need to transfer and with -I you can specify the Interface.
In this example, after the destination IPV6 address ‘%eth0’ is added since it is a link-local address, and the machine has multiple interfaces (Wi-Fi/eth0), so you need to tell your device the interface/link you want to use with this link-local address. But this is not needed for other types of addresses.
How to find the IPV6 address of your PC?
There are several ways that you can find the IPV6 address of your PC and this article shows the easiest ways to find it out on both Windows and Linux OSs (Operating Systems)
On Windows :
Not all the Windows distributions support IPV6 because the deployment of Internet Protocol Version 6 (IPv6) has only been in progress since the mid-2000s and because of this Microsoft Windows has supported IPv6 only since Windows 2000.
Windows distributions that support IPV6 :
- Windows Vista
- Windows Server 2008
- Windows XP with SP1 or later
- Windows version 7/8/10
- Windows Server 2003 or above
Use the below steps to find the IPV6 address of your Windows machine.
Step 1: Go to Windows search bar and search for the Command prompt by typing ‘cmd’. There you will see the Command Prompt suggesting as below and select it

Step 2: In the Command Prompt type ‘ipconfig’ and it will then show all the current TCP/IP network configuration values in your machine

Step 3: In there under your ethernet connection details you will be able to see your IPV6 address

On Linux :
All the modern Linux distributions higher than Kernal 2.2 support IPV6 and below some of the examples
Below are the steps you can use to find out the IPV6 address of your Linux machine. In this example, we have shown you the way to find IPV6 address of an Ubuntu machine
Step 1: Go to the search bar of the Ubuntu machine that is located on the top left corner

Step 2: Search for the word ‘Terminal’ and then you will see Terminal in your search results. Select it

Step 3 : Type ‘ifconfig’ in the terminal to see all the network configurations in your Linux machine. There under eth0 configurations you will be able to see your IPV6 address

Discover Routes of IPV6 Packets
Out of all the network diagnostic tools that is available to view route information, traceroute is the most popular tool. Traceroute tracks the route packets taken from an IP network on their way to a given host. It utilizes the IP protocol’s time to live (TTL) field and attempts to elicit an ICMP TIME_EXCEEDED response from each gateway along the path to the host.
Traceroute6 on Linux
Below is the command to view the route details of IPV6 packets in a Linux machine. It displays the routes the IPV6 packets went through and the time they took to pass through them as well.
Command : traceroute6 [IPV6 IP Address]

tracert -6 on Windows
Similar to traceroute6 tool, in Windows machines tracert -6 command can be used to trace the routes of IPV6 packets. It traces path to destination discovering MTU along this path and uses UDP port port or some random port.
Command : tracert -6 [IPV6 IP Address]

Same as the above commands, there are more commands that can be used to analyze IPV6 packets. They differ from commands that are used to analyze IPV4 packets as the packet structure of IPV6 packets are different than the packet structure of IPV4 packets. Please leave your suggestions and comments. Thanks


