- Gees — In game landing analysis
- Update
- How to Install/Use?
- How to Uninstall?
- What is measured?
- Descent rate at the landing in feet per minute
- G force at the touchdown
- Airspeed and ground speed at the touchdown
- Wind speed and direction at the touchdown
- Sideslip at the touchdown
- How to compile it
- Contact
- License
- Download Transport Plane Landing for PC
- Transport Plane Landing Description
- How to: Download and Install Transport Plane Landing on your Windows PC
- 1: Download an Andriod App emulator
- 3: Using Transport Plane Landing on the computer
- Frequently Asked Questions
- Automatic Landing
- Configuring for Automatic Landing
- Key Parameters
- Setting the Flare Point
- Controlling the glide slope
- Landing Airspeed
- Controlling the approach
- Controlling the flare
- After the Flare
- Using a rangefinder
- Improving the landing
- Using DO_LAND_START
- How to abort an auto-landing
- Step 1) Abort land triggers
- Step 2) Abort land flight behavior
- Step 3) Mission state after an aborted landing completes
- Reverse Thrust Setup
- Reverse-Thrust in AutoLanding and Throttle Controlled Modes
- Key Parameters
- ESC (Electronic Speed Controller)В
- Hardware selection and programming
- Hardware configuration
- Determining your max glide slope angle
- Setting up the Pre-Flare
- Flare
- Determining actual stall speed of your aircraft
Gees — In game landing analysis


| Version | 1.1.0 |
|---|---|
| Initial Release | October 08, 2020 |
| Last Updated | November 01, 2020 |
| File Size | 759.05 KB |
| Downloads | 9,694 |
Download your files
- Main File
1.1.0 November 01, 2020 — 759.05 KB
In game landing analysis for Microsoft Flight Simulator 2020.
Update
Bouncing after landing is now detected + G’s a bit higher + Hide button + A bug fix .
For changelogs, please check the releases.
How to Install/Use?
Download the latest release from here (Assets -> File-that-is-not-source-code.zip). Unzip to your favorite location for MSFS2020 landing monitors, and start Gees.exe . You’ll see a window like this in the bottom right.

The app itself runs in the background, and you can find this status window in the status tray, as this icon:
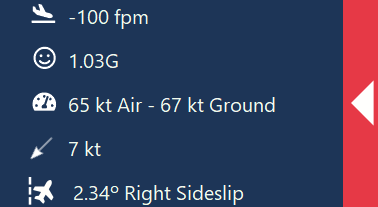
That’s it. When you start the sim the app will automatically connect and when you land, you’ll get a window similar to this slide out top-left:


You can start it before, or after the MSFS, it doesn’t matter.
How to Uninstall?
Delete the folder where the Gees.exe resides.
What is measured?
Descent rate at the landing in feet per minute
G force at the touchdown
Maximum G force impact at the moment of touchdown. Should be in theory related to the descent rate, undercarriage dampers and how much the passengers are nervous.
Airspeed and ground speed at the touchdown
Wind speed and direction at the touchdown
There’s a nice arrow, showing where the wind is blowing from
Sideslip at the touchdown
Did you do the proper de-crab maneuver, or the plane is going sideways on touchdown in the crosswind? The higher, the worse. Keep it close to 0 degrees or you might break the gear, or pop the tire (well, probably not in the sim).
How to compile it
It’s a c# WPF application. You’ll need a Visual Studio with .NET 4.7 and the following nuget libraries:
Contact
Use the reddit page, or here, the Issues page to report bugs and suggestions. Please do.
License
Distributed under the GNU General Public License v3.0 License. See LICENSE for more information. (Whatever you do with this, keep it open source)
Pretty empty over here.
Pretty empty over here.
Upload Image
Pretty empty over here.
New Features
Bouncing the plane on landing is counted now as a bounce, and not as a new landing.
If you are landing like this, you won’t get 5 average landings anymore, you’ll get one with 4 bounces. This required some changes in the interface:
You have bounce field now in the display
Auto-close timer is now also the «bounce» timer, meaning that you have this amount of time to have the plane rolling before the app will start to check for a new landing.
There is also a bounce parameter in the log.
The log is updated to v3, to have the bounces: you still have the old landings accessible in Documents\MyMSFS2020Landings-Gees\landings.v2.csv, but they are not shown in the app
Landing detection much more sensitive
To accommodate this new bounces, and to try to fix the bug where the app did not detect landings sometimes, I made the landing detection to be much more sensitive — previously, you needed to have the wheels firmly on the ground for 100ms to be «landed». Now, you need to just touch the ground.
G’s a bit higher
All for this bouncing — G’s are now not average G force over time, but maximum impact (by sim frame). The values will be higher.
Hide button
There’s a button you can use to hide the app without quitting. You know if you needed it.
Sidebar color
For all of ye that once you see something you cannot unsee it, the bar is thinner and more sky coloured. I can’t remove it completely and still have it accessible by mouse click, so I think this is better than having a floating button somewhere.
Bugs
I think the bug where when you start the app before the MSFS, it does not detect the landing, so you have to re-start etc. is fixed. Not sure though since this thing works pretty well when I try it, and then later it doesn’t. And I need like 5 mins to start the freaking game for each of these «tests».
Version 1.0.0 October 22, 2020
Major update under the hood:
The landing rate should now reflect the landing rates calculated in-game, in the landing challenges.
It is read from the sim directly.
How to install:
Download the Gees_1.0.0.zip, unzip, and run Gees.exe
Version 0.3.2 October 14, 2020
Version 0.3.1 October 13, 2020
Delete the previous app folder, download the new zip, unzip, and run the new version.
This is a major release, so there might be some breaking changes. If it doesn’t run, please revert back to 0.2.0, and report the problem here, on Reddit, or on flightsim.to
Nicer animations works well on al Windows DPI settings.
You can choose the duration of the popup before the auto-close, or don’t do auto-close at all
You can always revoke the popup with the last data, by going with the mouse in the top left part of the screen. A tiny line will be visible there.
There is now a landing history, stored in Documents\MyMSFS2020Landings-Gees as .csv file
No more wonky layouts on different «Scale and Layout» settings. I moved the code from 2001 to 2020
There should not be a false landing triggered when you go back to the main menu in mid-flight.
Download Transport Plane Landing for PC
- License: Free
- Category:Games
- Last Updated: 2020-02-20
- File size: 319.90 MB
- Compatibility: Requires Windows XP, Vista, 7, 8, 8.1 and Windows 10
Transport Plane Landing Description
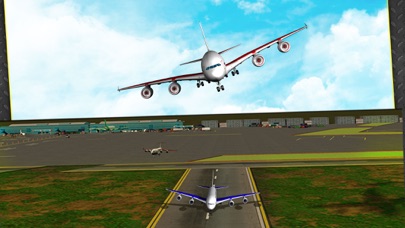
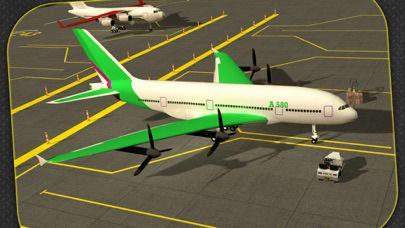
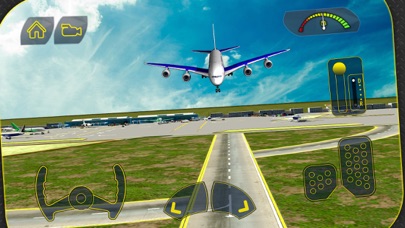
Everyone on board? Let’s take off on another flying adventure! Feel the power at your fingertips when you fly cargo planes and aircraft, and then go rave about it with your friends. Follow directions from the air tower to perfect your parking and landing skills. Transport Plane Landing is giving you this fun opportunity. Immerse yourself in the realistic ambience of an airport. Use the controls of your choice, and the carrier and runway freely. Landing the planes and parking them has never been more realistic or this challenging. Transport Plane Landing features: •3D Airport-themed environments with two jets including the Boeing Jet Airplane and a C-130 Transport •Aircraft •Realistic airport ambiance with air tower commands •Ridiculously cool graphics and carefully crafted animations •Choice of controls with three types of steering options including a steering wheel, buttons, or accelerometer based movements So buckle up and prepare for landing!
How to: Download and Install Transport Plane Landing on your Windows PC
Good news! download an app like Transport Plane Landing on Windows PC! Direct download below:
| SN | App | Download | Review | Publisher |
|---|---|---|---|---|
| 1. |  Public Transport Simulator Public Transport Simulator | Download | 4.4/5 549 Reviews | SkisoSoft |
| 2. | Transport Empire | Download | 4.2/5 288 Reviews | GAME INSIGHT UAB |
| 3. | Public Transport Simulator — Beta | Download | 4.4/5 201 Reviews | SkisoSoft |
Alternatively, follow the instructions below to use Transport Plane Landing on your PC:
To get Transport Plane Landing working on your computer is easy. You will definitely need to pay attention to the steps listed below.We will help you download and install Transport Plane Landing on your computer in 4 simple steps below:
1: Download an Andriod App emulator
An emulator imitates/ emulates an android device on your computer, making it easy to install and run android apps from the comfort of your PC. To begin, you can choose from either of the apps below:
i. Nox App .
ii. Bluestacks .
I recommend Bluestacks since it is very popular with lots of online tutorials
2: Now Install the Software Emulator on your Windows PC
If you successfully downloaded the Bluestacks.exe or Nox.exe, go to your Downloads folder on your computer or anywhere you ususally store downloaded files.
- Once found, click it. The installation process will commence.
- Accept the EULA License agreement and Follow the on-screen directives.
If you do the above correctly, the Software will be successfully installed.
3: Using Transport Plane Landing on the computer
Once installed, Open the Emulator application and type Transport Plane Landing in the search bar. Now hit Search. You will easily see your desired app. Click on it. It will display Transport Plane Landing in your Emulator Software. Hit the Install button and your application will start Installing. To use the app, do this:
You will see the «All Apps» icon.
Click to go to a page containing all your installed applications.
You will see the app icon. Click to start using your app. You can start using Transport Plane Landing for Pc now!
Transport Plane Landing is an Games App, developed by GeniApps. This site is not directly affiliated with the developers — GeniApps.
Frequently Asked Questions
Can I download Transport Plane Landing for free?
Yes! You can Download Transport Plane Landing from official sites for free using our site.
Can I use the app on PC?
It’s easy! Just follow our simple tutorial below and you will start enjoying the app in no time. Clicking the «Download» button above will redirect you to the official download site to get Transport Plane Landing for PC free.
Will Transport Plane Landing work on Windows and MAC?
Absolutely yes! Following our free tutorial below will get Transport Plane Landing for Pc working on most versions of Windows operating systems or MAC.
Automatic Landing
This article explains how to land Plane as part of a mission plan and includes information about how a landing can be safely aborted.
Configuring for Automatic Landing
Plane can automatically land an aircraft, as part of a mission plan.
To land the plane you need to add a NAV_LAND command to the end of your mission indicating the latitude, longitude and altitude of your desired touchdown point. In most cases, the altitude should be set to 0. During landing, the autopilot will shut down the throttle and hold the current heading when the plane reaches the flare point, controlled by the parameters described below.
Key Parameters
The key parameters that control automatic landing are:
The meaning and recommended value of each of these parameters is described below.
Setting the Flare Point
The “flare” is the final stage of the landing when the autopilot cuts the throttle and raises the pitch, increasing drag and slowing the aircraft to sink onto the ground. The appropriate time to flare depends on the type of aircraft, and is controlled by the LAND_FLARE_ALT and LAND_FLARE_SEC parameters.
The primary control of the flare is the LAND_FLARE_SEC parameter. This is the time in seconds before the aircraft would hit the ground if it continued with its current descent rate. So if the plane is descending at 2 meters/second and you set the LAND_FLARE_SEC to 3 then the aircraft would flare at an altitude of 6 meters above the ground. By using a time to impact to control the flare the aircraft is able to flare at a higher altitude if it is descending quickly, and at a lower altitude if it is descending slowly. That helps ensure the flare is able to produce a smooth touchdown.
The second control is LAND_FLARE_ALT . That is an altitude above the ground in meters at which the aircraft will flare, regardless of its descent rate.
The appropriate values for these two parameters depends on how the autopilot is estimating its altitude above the ground. If the autopilot has a good rangefinder ( such as LIDAR ) then you can safely choose quite small numbers, and flare close to the ground. That will generally produce a better landing. A value for LAND_FLARE_SEC of 1.5 and LAND_FLARE_ALT of 2 is a good place to start with a LiDAR. If you are relying solely on a barometer for landing altitude then you will probably need higher values, to account for barometric error.
Controlling the glide slope
Another important factor in setting up the flare point is the glide slope. The glide slope is the ratio of the distance from the last waypoint to the landing point, and the height difference between the last waypoint and the landing point. For example, if the landing point is 300 meters from the last waypoint, and the last waypoint is 30 meters above the ground then the glide slope is 10%.
If the glide slope is too steep then the aircraft will not be able to flare in time to avoid crashing, plus the autopilot may not be able to keep the plane on the approach slope accurately. It is recommended that you start with a glide slope of at most 10%. What glide slope your plane can handle will depend on how well your pitch controller tuning is, how good your TECS tuning is, and the landing speed you ask for.
If you find your aircraft is not following the desired glide slope accurately then you should first check your pitch tuning in your logs, and ensure that the demanded and achieved pitch match within a couple of degrees during landing. If they don’t then look at the documentation on pitch tuning (or possibly re-run AUTOTUNE). If the demanded and achieved pitch do match then you should check your TECS logs to ensure that the demanded and achieved airspeed are matching during landing. Have a look at the TECS tuning patch for more information.
You should also be aware that many model aircraft can glide for long distances, and it may be that your requested glide slope and airspeed combination just isn’t achievable.
Landing Airspeed
Automatic landing is greatly assisted by the use of an airspeed sensor. When using an airspeed sensor the landing approach speed (the speed coming down the glide slope) is controlled by the TECS_LAND_ARSPD parameter, in meters/second.
You need to choose a value for TECS_LAND_ARSPD that is above the stall speed of your aircraft, but low enough that the aircraft is able to lose altitude and land in a reasonable distance. Note that as the stall speed is dependent on the weight of your aircraft you will need to adjust the landing speed if you change the aircraft’s weight significantly (such as by adding batteries or a camera).
To further improve landing you can use a Pre-Flare to reduce airspeed just before the flare. This is enabled by setting either LAND_PF_ALT or LAND_PF_SEC to either enter a pre-flare state at a fixed altitude or at an estimated seconds to ground (given your current decent rate). Once the Pre-Flare is triggered the desired airspeed becomes LAND_PF_ARSPD . This value should be lower than TECS_LAND_ARSPD but greater than the stall speed. This is particularly useful where reverse thrust is available. However, some aircraft can handle a stall landing so setting this to a very low number (1) will tell the aircraft to bleed off as much airspeed as possible before the flare.
Controlling the approach
During the landing approach the autopilot needs to balance the requested airspeed (set by TECS_LAND_ARSPD ) and the requested glide slope and landing position (set by the previous waypoint and final landing point). The default configuration tries to balance these two demands equally, but for some aircraft you may want to prioritize one over the other.
The priority of airspeed control versus height control is set using the TECS_LAND_SPDWGT parameter. A value of 1 (the default) means a balance between the two. A value closer to two gives a higher priority to airspeed and a value closer to zero gives a higher priority to height control. For example, if you are landing at a speed close to the stall speed you may wish to place a high priority on the airspeed control. To do that you should set TECS_LAND_SPDWGT to a value close to 2, such as 1.9.
If what you want in a landing is precision in the position where it lands then you should set TECS_LAND_SPDWGT to a low number, such as 0.2 or even 0.0. In that case the plane will still try to achieve the target landing airspeed by using the throttle, but it will not try to control airspeed with pitch.
If you are landing a glider (or any aircraft without a motor) then you should set TECS_LAND_SPDWGT to 2.0, so that airspeed is the priority and pitch will be used to control airspeed.
In most cases a value of -1 gives the best result. This special value will auto-adjust the value during the landing, scaling it from your normal TECS_SPDWEIGHT value down to zero at the point of landing. So up in the sky during approach you maintain good airspeed but by the time you land the emphasis is on a more accurate landing.
Controlling the flare
The final stage of the landing is called the “flare”. During the flare the aircraft tries to retain a course along the line between the last waypoint and the landing waypoint, and it controls its height solely using a target descent rate. Once the flare is started the throttle is “disabled” — set to some value between THR_MIN and zero.
The main job of the autopilot in the flare is to try to achieve the descent rate specified in the TECS_LAND_SINK parameter. That defaults to 0.25 meters/second, which is a reasonable touchdown vertical speed for most models. To achieve that speed the TECS controller uses pitch control only as the motor has been forced to zero.
The primary parameters which affect the ability of the aircraft to achieve the desired descent rate are LAND_PITCH_CD , TECS_LAND_DAMP and the main pitch tuning parameters.
The LAND_PITCH_CD parameter sets the minimum pitch target in the flare (in centi-degrees). This parameter is very airframe specific and is designed to prevent the nose of the aircraft being too far down on touchdown causing issues with damaging the landing gear or breaking a propeller. For most aircraft this should be a small positive number (such as 300, meaning 3 degrees), but for some belly landing aircraft a small negative number can be good, to allow the nose to be kept down a small amount to reduce the chance of stall if the flare happens too far off the ground.
Note that the actual pitch of the aircraft can be quite a bit above LAND_PITCH_CD as the TECS controller tries to control the descent rate. The maximum pitch is controlled by the TECS_PITCH_MAX parameter if it is non-zero, otherwise by the LIM_PITCH_MAX parameter.
The TECS_LAND_DAMP parameter is a damping constant for the pitch control during flare. A larger number will cause the pitch demand to change more slowly. This parameter can be used to reduce issues with sudden pitch changes when the flare happens.
After the Flare
After the plane flares it continues to navigate, but with zero throttle. The navigation direction is a line extrapolated forward through the landing point from the last waypoint. Note that the navigation roll will be limited to LEVEL_ROLL_LIMIT (which defaults to 5 degrees) to prevent wing strike, so if there is a significant cross-wind then it is likely that the aircraft will not be able to maintain the exact path.
If your aircraft is consistently landing long (which can happen for a variety of reasons) then you can adjust TECS_LAND_SRC to either force a stall (negative) or bring it down (positive). This value will adjust your TECS_LAND_SINK proportional to the distance from the LAND point. This helps ensure you land in a reasonable distance from the LAND point.
Possible causes of landing long include ground effect giving the aircraft more lift as it is close to the ground or simply the aircraft traveling very fast.
When the plane has stopped moving for LAND_DISARMDELAY seconds (default 20 seconds) it will disarm the motor. Optionally, you can disable servo movement once LAND_DISARMDELAY has triggered by setting LAND_THEN_NEUTRL .
Using a rangefinder
If you have fitted a rangefinder to your aircraft then you can use it for much more accurate landing control. To allow the rangefinder to be used for landing you need to set the RNGFND_LANDING parameter to 1.
When using a rangefinder for landing the altitude given by the rangefinder is used only in the landing approach and to determine the flare point, and is designed to allow the aircraft to more accurately follow the glide slope and to flare at the right time.
The effectiveness of a rangefinder can depend on the surface you are flying over, so it is a good idea to do some low passes in a flight mode such as FBWA first, then examine the logs to check that the rangefinder is working correctly.
Also note that if you have a longer range rangefinder then it is a very good idea to set the minimum range of the rangerfinder well above zero. For example, the PulsedLight Lidar has a typical range of over 40 meters, and when it gets false readings it tends to read ranges of less than 1 meter. And setting RNGFND1_MIN_CM to 150 , if its the first system rangefinder, will discard any rangerfinder readings below 1.5 meters, and will greatly improve the robustness of the Lidar for landing.
Improving the landing
The key to a good landing is the autopilot knowing how far off the ground it is. With the default setup the only sensor available to detect altitude is the barometer. Unfortunately barometers suffer from three main types of error:
- barometric drift due to changes in atmospheric pressure
- barometric drift due to changes in the temperature of the autopilot electronics
- barometric error due to local pressure changes from airflow around the barometer
The ideal setup for good automatic landing is to have a Lidar . A Lidar can measure the distance to the ground very accurately, and doesn’t suffer from drift. If you have a Lidar installed you can enable its use for landing with RNGFND_LANDING=1 .
If a Lidar isn’t fitted then there are a few things you can do to minimise barometric error problems with auto-land
- perform a barometer calibration after the electronics have warmed up. The easiest way to do this with a Pixhawk is to disarm the plane with the safety switch. When the plane is disarmed it assumes it is on the ground and will zero the barometer to the current pressure.
- try to prevent direct airflow over the autopilot that could cause speed related pressure changes
- fly shorter flights, allowing for less time for airpressure changes. Check your logs and see if the landing is happening at zero altitude consistently
With planes that belly land it can also work well to setup the landing with a shallow pitch (in LAND_PITCH_CD ) and set a slightly higher altitude to flare at. That will only work if your stall speed is low enough that gliding for a while will work reliably.
Using DO_LAND_START
Sometimes it is useful to trigger an automatic landing as part of an RTL (return to launch). To do this you need to do two things:
- add a DO_LAND_START mission item to your mission, just before the start of your landing sequence
- set the RTL_AUTOLAND parameter to 1 or 2
The way it works is that when the plane enters an RTL it checks to see if the parameter RTL_AUTOLAND is set to 1 or 2. If it is then the current mission is searched for a mission item of type DO_LAND_START. If one is found then the plane will automatically enter AUTO mode and land, starting at the part of the mission just after the DO_LAND_START marker.
The exact behaviour depends on the RTL_AUTOLAND value:
- If RTL_AUTOLAND=1 then the plane will first RTL as normal, then when it starts circling the return point (home or a rally point) it will then switch to the AUTO mission after the DO_LAND_START and land
- If RTL_AUTOLAND=2 then the plane will bypass the RTL completely and go straight to the landing sequence.
You can optionally include more than one DO_LAND_START mission item in your mission. If that is done then the latitude/longitude of the DO_LAND_START mission items is used to choose which landing sequence to use. The DO_LAND_START closest to the current location is used. This can be useful if you have multiple landing sequences for different wind conditions or different areas.
How to abort an auto-landing
A landing-abort mechanism is provided to allow you to abort a landing sequence in a safe, controlled, and expected way. Custom abort behaviour can be pre-programmed as part of the mission or you can use the default abort mechanism. To enable this feature set param LAND_ABORT_THR=1.
There are three steps to this feature:
Step 1) Abort land triggers
The are three ways to trigger an auto-landing abort. All of them will only work while in AUTO mode and currently executing a LAND waypoint mission item:
- Send the «MAV_CMD_DO_GO_AROUND« command using a GCS. Mission Planner has a button labeled “Abort Landing” on the FlightData Actions tab.
- RC input Throttle > 90%. This will trigger an abort while staying in AUTO mode. The throttle only needs to be high briefly to trigger it. Don’t forget to lower it!
- Mode change. For human piloted landing abort you can switch out of AUTO mode into, for example MANUAL/STABILIZE/FBWA, and navigate the aircraft safely however you’d like. Using this method will skip abort behavior step 2 because it is being done manually. When switching back to AUTO the mission will resume as described in step 3 below.
Step 2) Abort land flight behavior
The abort behaviour has a default configuration and does not require a pre-planned mission. The default abort behavior is to simulate an auto-takeoff: pitch up at least 10 degrees and set throttle to TKOFF_THR_MAX and hold the heading until it reaches a target altitude of 30m. It is possible to override the pitch and altitude to allow for a customized behavior.
- Pitch minimum. If there was a NAV_TAKEOFF ever executed on this mission then the same pitch will be re-used here.
- Target altitude. If NAV_LAND param1 is >0 then it is used as a target altitude in meters. Else If a NAV_TAKEOFF was ever executed on this mission then the same altitude will be re-used here.
This step is skipped if the abort trigger is via mode change because it is assumed the pilot manually took over and flew the aircraft to a safe altitude at the pitch and throttle of their choosing.
Step 3) Mission state after an aborted landing completes
Once an abort land has completed, by either reaching the target altitude or switching back to AUTO, the mission index will have changed and you will no longer be executing a NAV_LAND command. The mission index will change to be one of these three options and checked for in this order:
- If the NAV_LAND mission item is followed by mission item CONTINUE_AND_CHANGE_ALT with param1 = 0 or 1 then the mission index will increment once to that command and execute it like normal. This can be followed by further post-abort mission planning for any custom planned mission behavior.
- Else If there is a DO_LAND_START in the mission then it jumps to that index.
- Else the mission index decrements once to be the index before the NAV_LAND. This will ensure the same landing approach is repeated.
Reverse Thrust Setup
Some ESC’s allow for reversing motor direction. When using reverse on the propeller it will generate a negative thrust which can be used to reduce your airspeed. During a steep landing approach this method can be used to maintain a stable and low airspeed allowing you to land much more softly and precisely. Reverse thrust can also be automatically used during automatic landings (see below) or during other throttle controlled modes to steepen descents. See Reverse Thrust Setup for details on setting up reverse thrust.
enabling reverse thrust automatically sets the SERVOx_TRIM value to LOW throttle stick for the throttle output servo. SERVOx_TRIM is normally ignored, and low stick is SERVOx_MIN! Arming in this condition with an ESC not properly setup will spin-up the motor, possibly dramatically!
Reverse-Thrust in AutoLanding and Throttle Controlled Modes
To use this feature in automatic landings, it is highly recommend to use an airspeed sensor and a rangefinder (see above) for an accurate altitude.
The below video is an example of a Skywalker X8 performing an auto-landing with a 15 degree slope. The target is the hat on the ground showing it is possible to get repeatable high precision landings where the final position error was dictated by the GPS position error. This particular aircraft has been landed at 20deg and 25deg slopes too. You may have different results depending on weight of aircraft and available thrust from motor/propeller. Typically a Skywalker X8 would need a shallow slope such at 6 to 10deg.
Key Parameters
The key parameters that control reverse thrust landing in addition to the ones listed in section 1.1 and :ref:` Reverse Thrust setup ` are:
The maximum amount of reverse thrust used in autopilot throttle controlled modes is set by THR_MIN . A value of -100 provides the maximum, while -20 would provide 20% of maximum, and so on.
The USE_REV_THRUST parameter is a bit mask that allows the setting of when reverse thrust can be activated, as when autolanding, or in other throttle controlled modes.
If an RC channel’s RCx_OPTION auxiliary function has been set to “64”, then activating the switch will also provide access to the reverse thrust capability in non-throttle controlled modes, as shown in the Reverse Thrust Setup section.
ESC (Electronic Speed Controller)В
Most important is to set the : SERVO3_TRIM (assuming the esc/motor is attached to output 3)to the point that the ESC is idle, usually around mid-range (1500us) to create an output curve that has SERVO3_MAX for full forward thrust, and SERVO3_MIN for full reverse thrust. This should be done AFTER the RC Calibrations setup step.
Hardware selection and programming
Many ESCs can operate in forwards and reverse, however that is usually not a stock feature and may need to be reprogrammed to do it. Any SimonK and BLHeli compatible ESC can be flashed to support reverse thrust.
Hardware configuration
Remove propeller while configuring ESCs and thrust parameters
Configure your ESC for reverse thrust by changing its neutral point. Many ESC require custom firmware to accomplish this. Search Google or your ESC’s mfgr for instructions on how to configure your particular ESC.
Set Minimum PWM to 1000, mid to 1500, and maximum to 2000, corresponding to maximum reverse thrust,idle, and maximum positive thrust from the ESC/Motor.
Determining your max glide slope angle
For a steep landing approach, the limitation is how well you can maintain your desired airspeed. This is determined by your aircraft’s ability to create reverse thrust (motor+prop thrust or airbrake drag ability) and its resistance to slowing down (aircraft mass). In many cases extreme steepness is unnecessary, but possible. With an over-sized motor and lightweight aircraft you can come in as steep as 60 degrees.
To determine your steepest approach angle, set TECS_APPR_SMAX very high as to not limit you (e.g. 99). Next, plan a mission with a steeper than normal approach (try 15 degrees and go up from there). Watch your airspeed on the approach — the aircraft should be able to maintain TECS_LAND_ARSPD without exceeding 75% of the available reverse throttle range. If not, you’re coming in too steep for the negative-thrust-to-mass ratio of your aircraft.
Keep in mind that whatever value you determine as your maximum may not be acceptable in all wind conditions. It is best to be a little conservative to maintain repeatability.
Setting up the Pre-Flare
With a rangefinder and airspeed sensors installed, at the pre-flare point we will have an accurate airspeed and altitude reading. This gives us a good idea of our momentum and stable “initial conditions” to the final flare. Set LAND_PF_ALT (or LAND_PF_SEC ) to a fairly high point (for example 10m) and adjust from there. Next set LAND_PF_ARSPD to a value just above your stall speed.
When LAND_PF_ALT is reached the airspeed demand will instantly go from TECS_LAND_ARSPD to LAND_PF_ARSPD. This will cause it to slam on the brakes via increased reverse thrust so that the airspeed reduces to the desired airspeed.
The trick is to set LAND_PF_ALT to an altitude where it achieves LAND_PF_ARSPD before killing the throttle at LAND_FLARE_ALT (which occurs at a somewhat low altitude — around 1 or 2m).
Example, TECS_LAND_ARSPD = 15 , LAND_PF_ARSPD = 12 , LAND_PF_ALT=12 , LAND_FLARE_ALT=2 . Depending on your slope, mass of aircraft and motor+propeller thrust ability, you’re expecting the aircraft to decelerate from 15m/s to 12m/s airspeed while dropping 10m to 2m. These are the critical params to adjust to ensure a smooth and slow flare below 2m altitude.
Flare
Now that you are starting the flare with a stable and predictable airspeed, it’s much easier to control the flare . If you’ve already tuned your flare for an auto-land without reverse thrust you’ll want to retune it. You’ll notice you’re coming in much slower ad tuning will be easier. The tweaks and compromises you had to do before are much easier to deal with.
Determining actual stall speed of your aircraft
Unless you really know what you’re doing, stall speed can be hard to estimate. Traditionally, to determine this true value you would need to slowly decrease your airspeed until you stall but that comes with the pesky problem that now you have a stalled aircraft falling out of the sky.
With LAND_PF_ALT and LAND_PF_ARSPD you can check your stall speed much lower to the ground. To know the airspeed at the exact moment it stalls, check your dataflash logs ( *.bin on SD card) for the airspeed (ARSP.Airspeed) when your wing loses lift and drops by comparing actual roll (CTUN.Roll) and desired roll (CTUN.NavPitch) diverge.
 © Copyright 2020, ArduPilot Dev Team.


