- Boot Managers
- Install to the hard disk MBR (Master Boot Record)
- 1. The install program
- 1.1 Program functions
- 1. Full boot manager install
- 2. Rewrite loader
- 3. Boot Manager update
- 4. Complete uninstall
- 5. Short uninstall
- 6. Set Boot Manager screen to text mode
- 7. Change destination hard disk
- 8. Boot Manager hotkeys
- 9. Reboot
- 2. Uninstall
- 3. Methods to start the install program
- 3.1. Floppy
- 3.2. CD
- 3.3. DOS
- 3.4. Windows boot menu (NT, 2K, XP, VISTA, Win7)
- 3.5 Syslinux, Isolinux, Extlinux
- 3.6. LILO
- 3.7. GRUB / grub4dos
- 3.8. GRUB2
- 3.9. From network
Boot Managers
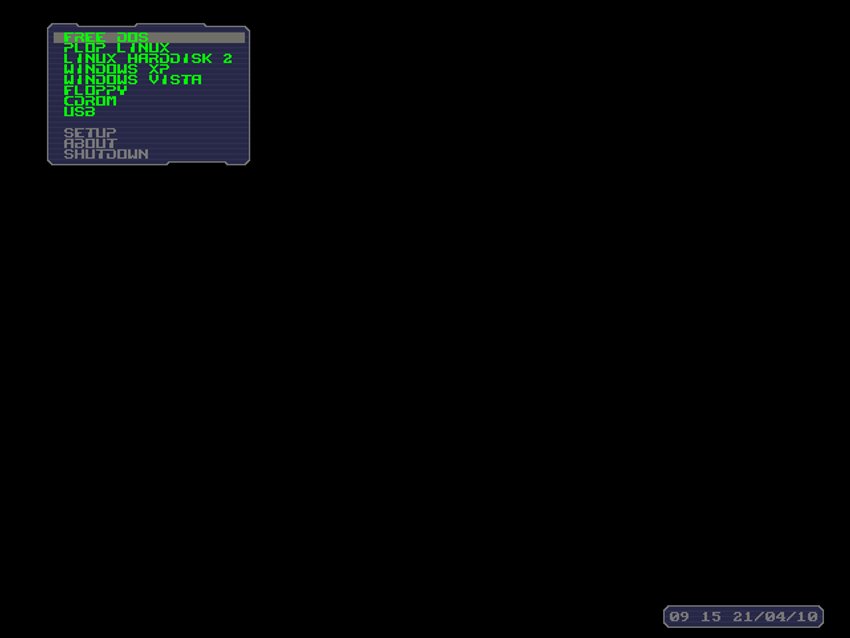
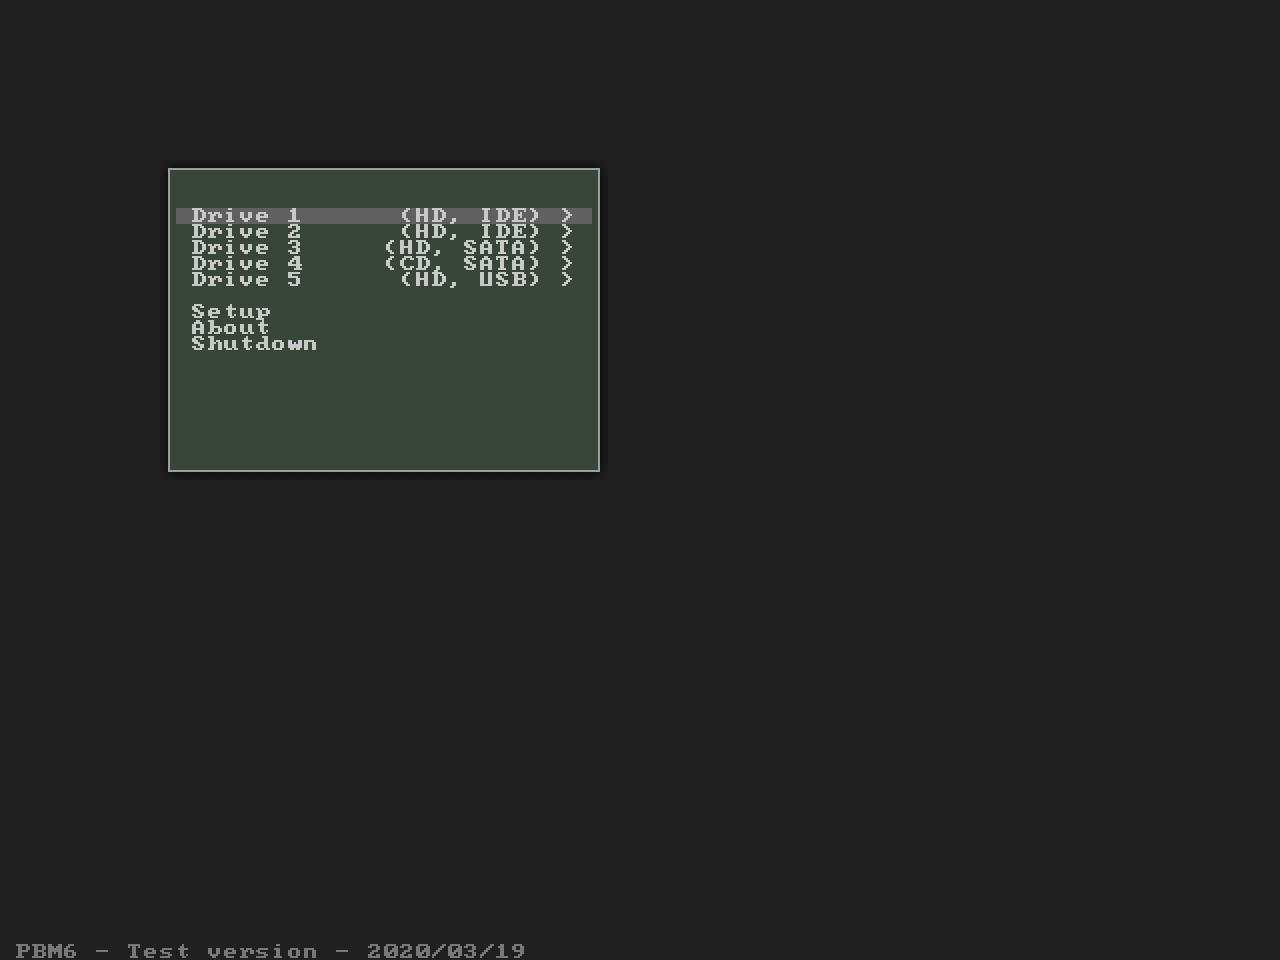
I wrote different boot managers. Three boot managers are available as download. The Plop Boot Manager 5, PlopKexec and the new boot manager PBM6. The new boot manager is under development.
Boot Manager Comparison Chart Plop Boot Manager 5 PlopKexec Plop Boot Manager 6
PBM6Version 5.0.15 1.6 Test Release Date 15/Apr/2013 14/Sep/2019 19/Jan/2021 Install to MBR YES NO NO Install into BIOS as Option Rom YES NO NO Can be started from Syslinux, GRUB, LILO YES YES YES Network YES YES YES Windows Boot Menu YES NO YES Floppy YES NO YES CD/DVD YES YES YES USB YES YES YES UEFI NO YES NO Can boot IDE/SATA Hard Disk YES YES YES USB Thumb Drive/Hard Disk YES YES YES IDE CD/DVD YES YES YES SATA CD/DVD NO YES YES USB CD/DVD NO YES YES Floppy YES NO NO MBR / Logical Limited YES YES Support for GPT NO YES YES Boot other OS than Linux YES NO YES Native Drivers IDE YES YES YES SATA NO* YES YES USB 1.1 UHCI, OHCI YES YES YES USB 2.0 EHCI YES YES YES USB 3.0 xHCI NO YES YES USB Thumb Drive/Hard Disk YES YES YES USB Keyboard NO** YES YES USB HUB NO YES YES USB CD/DVD NO YES YES PCMCIA Limited YES NO Various Configure OS partition profiles YES NO NO Hide partitions YES NO NO Hidden boot YES NO NO Password protection YES NO NO Open Source NO YES NO Support for blind people NO NO YES Screenshots

* SATA drives can be used anyway.
** USB Keyboards can be used until the USB boot option has been selected. Then it will be usable again when Linux or Windows booted.
Install to the hard disk MBR (Master Boot Record)
You can install the boot manager to the MBR of your hard disk. When you do that, then the boot manager is the first program that is started when you boot from the hard disk. That means the boot manager is started before any operating system has been started. This installation has many benefits. Some features are only available when the boot manager is installed to the MBR.
As simple alternative to the MBR installation, it’s easy to add the boot manager to an existing boot manager. See here.
Warning Linux users: Install LILO or GRUB to the boot sector of your Linux instead of the Master Boot Record (MBR). The Plop Boot Manager is not a Linux loader and cannot start Linux without LILO, GRUB, Syslinux and similar! See Linux Boot Managers.
1. The install program
There are 2 versions of the install program. Basically both versions do the same. The only difference is that plpinst.com creates a backup file plpback.bin to restore hard disk sectors for a complete boot manager uninstall. The second version plpinstc.com skips the backup part. You have to use the second version for installation from write protected media like CD’s or when you install from network or any other boot manager.
1.1 Program functions
1. Full boot manager install
With this option you install the boot manager to your hard disk. If you have an installed operating system, then the install program creates a profile for you to boot this operating system.
With the installation from floppy, the install program makes a backup of the sectors where the boot manager will be installed. The install program writes the backup to the floppy disk. With this backup it’s possible to remove the boot manager completely from your hard disk. If you use the CD installation, then it’s not possible to restore the sectors. In this case the uninstall routine creates a new MBR to boot the current operating system. The partition table data won’t be changed.
2. Rewrite loader
A small program (the loader) is required in the MBR to start the boot manager. Operating systems like Windows XP are writing during the installation their own small program into the MBR. If you install Windows XP after the boot manager, then Windows XP will start instead of the boot manager, because the loader is overwritten with the program from Windows XP. To setup that the boot manager starts before Windows XP you have to use Rewrite loader .
3. Boot Manager update
With this, you can update the boot manager. But only updates with boot manager v5 are working.
4. Complete uninstall
Warning, this option is only available with the installation from floppy.
The install program takes the backup that was saved on the floppy disk and writes it back to the hard disk.
Warning, if you changed anything with the partition table, then don’t use this option!
5. Short uninstall
With this option, the program writes a new MBR to start the current operating system. The partition table will be unchanged.
6. Set Boot Manager screen to text mode
Configures the Boot Manager to start in text mode.
7. Change destination hard disk
Set destination hard disk to install the boot manager.
8. Boot Manager hotkeys
9. Reboot
The computer will be restarted.
2. Uninstall
When you installed the boot manager to the MBR, then you can remove the boot manager in the same way that you used to install the boot manager, but you have to use the option 4 or 5 in the install program. The option 4 is only available when you install from floppy.
When you don’t want to use the install program to remove the boot manager, then you can use any other program that writes a new program to the MBR. Example FIXMBR, or «fdisk /mbr» and so on. Or you install another boot manager to the MBR.
3. Methods to start the install program
3.1. Floppy
You create the install floppy with a floppy disk image. A floppy disk image is a file that contains every sector of the floppy disk. You cannot copy the image file on a floppy disk like a common file. It’s required to use a special program that writes sector per sector of the image file to the floppy disk sectors. There are many programs available to do this.
Download the current boot manager plpbt-5.0.15.zip. Extract it to get the floppy disk image. You find the disk image in the install directory. The name of the file is plpbtin.img
How to create the floppy:
DOS: You can use diskimg.com with diskimg -d a -w plpbtin.img
Windows: Write the disk image with the program rawwritewin to the floppy disk
Linux: dd if=plpbtin.img of=/dev/fd0
3.2. CD
Download the current boot manager plpbt-5.0.15.zip. Extract it to get the iso file. You find the iso file in the install directory. The name of the file is plpbtin.iso
Notice: The CD installer makes no backup for a complete uninstall. See The install program.
You can use Nero, or the free program CDBurnerXP, or any other program that can burn ISO images.
Use the option like burn ISO on CD or burn ISO Image . Then choose the boot manager ISO and burn it.
cdrecord is the linux program to burn ISO images to a CD.
Burn the ISO with cdrecord: cdrecord -v dev=
Example:
If you access your CD burner with /dev/hdd
cdrecord -v dev=/dev/hdd plpbtin.iso
3.3. DOS
Download the current boot manager plpbt-5.0.15.zip. Extract it to get the install program. In the install directory there are 2 install programs ( plpinst.com and plpinstc.com ) for using under DOS.
plpinst.com creates a backup file plpback.bin for a complete boot manager uninstall. plpinstc.bin makes no backup. Use plpinstc.com for write protected media like CD’s.
3.4. Windows boot menu (NT, 2K, XP, VISTA, Win7)
Hint: When you don’t want to install the boot manager to the MBR then see plpbt.bin — LiveCD and . .
Download the current boot manager plpbt-5.0.15.zip. Extract the zip file. Open the folder Windows . You will find the batch program InstallToMBR . Run it as administrator in VISTA/WIN7 (right mouse click on the file and choose «Run as administrator»). The batch creates an entry in your windows boot menu called «Install the Plop Boot Manager to the MBR» . When you reboot, then use the entry to install the Plop Boot Manager to the mbr.
To remove the entry from the windows boot menu run the program c:\plop\plpbt4win . Use «l» (small «L») to list all entries. Remove the entry with «r ID» . ID is the number you have seen with «l» . See here for more info’s to plpbt4win .
Note: plpgenbtldr and contig are no longer required.
3.5 Syslinux, Isolinux, Extlinux
Download the current boot manager plpbt-5.0.15.zip. Extract it to get the boot manager install program. You find the install program plpinstc in the install directory.
Add plpinstc.com to the config file
- for Syslinux it’s syslinux.cfg
- for Isolinux it’s isolinux.cfg
- for Extlinux it’s extlinux.conf
Add the following lines to the config file
Copy plpinstc to the same directory where the config file is.
You start the install program when you select it from the menu or you enter plpinst at the Syslinux command prompt.
3.6. LILO
Download the current boot manager plpbt-5.0.15.zip. Extract it to get the boot manager install program. You find the install program plpinstc.com in the install directory.
Copy plpinstc.com to /boot .
Add to your /etc/lilo.conf the following
Run lilo to update lilo.
3.7. GRUB / grub4dos
Download the current boot manager plpbt-5.0.15.zip. Extract it to get the boot manager install program. You find the install program plpinstc.com in the install directory.
Copy plpinstc.com to /boot .
Add to your /boot/grub/menu.lst the following
When you reboot, you should be able to choose the install program from your grub menu.
Info: You have to choose the correct root settings in your configuration or you get a «Error: file not found». See also this Forum entry.
3.8. GRUB2
Download the current boot manager plpbt-5.0.15.zip. Extract it to get the boot manager install program. You find the install program plpinstc.com in the install directory.
Copy plpinstc.com to /boot .
Example file /etc/grub.d/40_custom Then run update-grub2 or update-grub .
When you reboot, you should be able to choose the install program from your grub menu.
Info: You have to choose the correct root settings in your configuration or you get a «Error: file not found». See also this Forum entry.
3.9. From network
A better documentation comes when I have more time. Meanwhile use the documentation of Plop Linux.
You need for booting over network a DHCP, TFTP server and the program pxelinux.


