- Pop!_OS
- Дистрибутив Pop!_OS
- Видео обзор
- История
- Основан на Ubuntu
- Чем отличается от Ubuntu
- Внешний вид
- Хорошая поддержка видео и «железа»
- Программные отличия
- Раздел восстановления
- Редакции
- Интерфейс
- Пакетная база
- Программы
- Менеджер пакетов Pop! Shop
- Установка
- Первый этап установки
- Разметка диска
- Второй этап установки
- Pop os grub windows
- Contents
- BIOS systems
- GUID Partition Table (GPT) specific instructions
- Master Boot Record (MBR) specific instructions
- Installation
- UEFI systems
- Check for an EFI System Partition
- Installation
- Generate the main configuration file
- Configuration
- Additional arguments
- Encryption
- Root partition
- Boot partition
- Multiple entries
- Dual-booting
- «Shutdown» menu entry
- «Restart» menu entry
- «Firmware setup» menu entry (UEFI only)
- GNU/Linux menu entry
- Windows installed in UEFI/GPT Mode menu entry
- Windows installed in BIOS/MBR mode
- Using the command shell
- Pager support
- Using the command shell environment to boot operating systems
- Chainloading a partition
- Chainloading a disk/drive
- Chainloading Windows/Linux installed in UEFI mode
- Normal loading
- Using the rescue console
- Troubleshooting
- F2FS and other unsupported file systems
- Intel BIOS not booting GPT
- Enable debug messages
- «No suitable mode found» error
- msdos-style error message
- Common installation errors
- Drop to rescue shell
- GRUB UEFI not loaded
- Default/fallback boot path
- Invalid signature
- Boot freezes
- Warning when installing in chroot
- GRUB loads slowly
- error: unknown filesystem
- grub-reboot not resetting
- Old BTRFS prevents installation
- Windows 8/10 not found
Pop!_OS
Дистрибутив Pop!_OS
- Рабочий стол:
- GNOME
- Основан на:
- Ubuntu
- Категория:
- Для настольных ПК
- Поддерживает Live-режим
- Подходит для новичков
Pop!_OS — дистрибутив, основанный на Ubuntu, от компании System76. Использует рабочий стол GNOME Shell. Устанавливается с поддержкой видео-карт Intel/AMD/NVIDIA.
Видео обзор
Видео-обзор дистрибутива, установка, внешний вид, впечатления:
История
Выпуском дистрибутива занимается американская компания System76. Компания специализируется на производстве и продаже персональных компьютеров, серверов и ноутбуков.
Изначально компания устанавливала на свои изделия дистрибутив Ubuntu. Когда компания Canonical, которая занимается разработкой Ubuntu, приняла решения отказаться от использования графического окружения Unity в пользу GNOME Shell, в System76 решили развивать свой дистрибутив на базе Ubuntu.
Скорее всего, отказ от Unity не являлся основной причиной для выпуска своего дистрибутива вместо Ubuntu. Если разработчик добавляет в дистрибутив какие-либо компоненты, то он уже не может выпустить его с названием Ubuntu, иначе компания Canonical выдвинет претензии (вплоть до судебных разбирательств). Поэтому логичным решением стало выпускать кастомизированный дистрибутив под другим названием.
Чего-то кардинально нового в компании System76 не сделали. Их цель была создать дистрибутив, который будет работать из коробки на их компьютерах и при этом быть красивым и современным.
System76 позиционирует Pop!_OS, как систему для разработчиков программного обеспечения, специалистов в области вычислительной техники, которые используют компьютер для исследования и создания.
Pop!_OS является молодым дистрибутивом. Первая версия на базе Ubuntu 17.04 была выпущена в 2017 году.
Основан на Ubuntu
Дистрибутив Pop!_OS основан на Ubuntu.
Выпуски формируются в соответствии с графиком выпуска Ubuntu.
Доступна версия Pop!_OS, основанная на свежей версии Ubuntu, а также версия, основанная на Ubuntu LTS.
Чем отличается от Ubuntu
Внешний вид
- Внешний вид интерфейса приближен к базовому GNOME 3.
- Своя тема оформления, тема иконок, измененные шрифты.
- Некоторый набор патчей для GNOME.
Хорошая поддержка видео и «железа»
- Автоматическая установка драйверов и библиотек Vulkan.
- Автоматическая установка свежих проприетарных драйверов NVIDIA (в версии Pop!_OS NVIDIA).
- Гарантированная работа «из коробки» на компьютерах от System76.
- Для ноутбуков возможность переключения режимов сохранения энергии за счет увеличения или уменьшения производительности.
- Возможность переключения между видео-картами Intel и NVIDIA (для компьютеров с двумя видео).
- Судя по отзывам, дистрибутив отлично работает и не требует настроек на некоторых компьютерах с видео-картами Nvidia и компьютерах с двумя видео — встроенное от Intel+Nvidia, на которых Ubuntu требует «ручной» донастройки. Установка проходит без каких-либо проблем. Также хорошо реализована поддержка дополнительных возможностей на ноутбуках (функциональные клавиши, засыпание и другие).
Программные отличия
- Программа установки, работающая в два этапа.
- Шаг шифрования диска во время установки.
- Минимальный набор программ.
- Можно установить CUDA Toolkit и TensorFlow одной командной:
- Вместо GRUB используется легковесный загрузчик, названный kernelstub, который основан на менеджере загрузки systemd-boot.
Раздел восстановления
- Во время установки дистрибутива автоматически создается специальный раздел на диске — Recovery partition. В нем содержится полная копия установочного образа системы. С его помощью можно восстановить/переустановить систему с сохранением пользовательских данных ( /home ) или выполнить полностью новую установку.
Редакции
Пользователь может скачать один из четырех образов дистрибутива.
Версии основанные на Ubuntu (не LTS):
- Pop!_OS Intel/AMD — для компьютеров с видео-картами от Intel или AMD.
- Pop!_OS NVIDIA — для компьютеров с видео-картами NVIDIA.
Версии, основанные на Ubuntu LTS (долгосрочная поддержка):
- Pop!_OS LTS Intel/AMD — для компьютеров с видео-картами от Intel или AMD.
- Pop!_OS LTS NVIDIA — для компьютеров с видео-картами NVIDIA.
Доступна только 64-разрядная версия.
Интерфейс
Дистрибутив использует среду рабочего стола GNOME 3 (GNOME Shell).
Используется своя тема выполненная в темных тонах.
Используется тема иконок Pop_Icons. Иконки выполнены в плоском стиле, но при этом имеют небольшой объем.
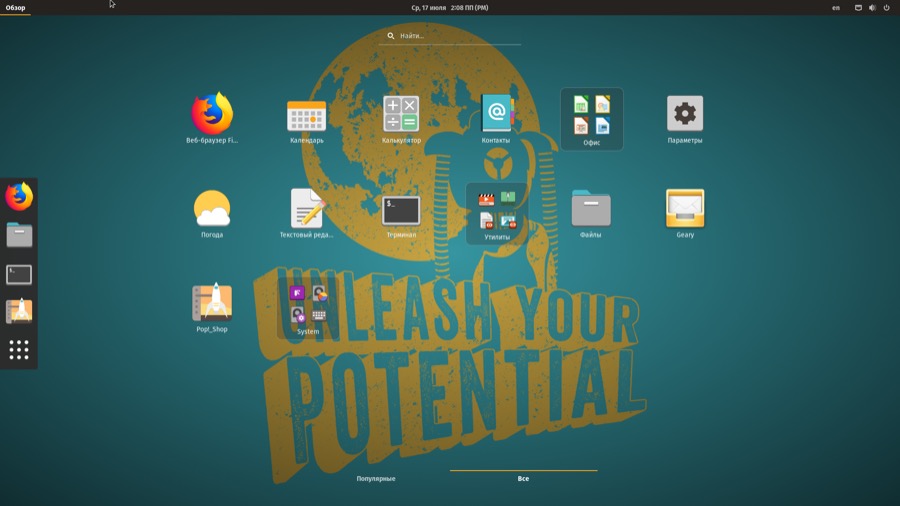 Pop!_OS 19.04: Приложения
Компоновка рабочего стола классическая для GNOME Shell. Сверху расположена панель на всю ширину экрана слева док для запуска приложений. Запуск приложений можно выполнять через меню (лаунчер). В правой части рабочего стола доступно переключение виртуальных рабочих столов.
Пакетная база
Дистрибутив использует пакетную базу Ubuntu. Используются репозитории из Ubuntu.
Также добавлены собственные репозиторий, содержащие проприетарные пакеты (драйвера Nvidia, Steam, Spotify, Visual Studio Code и другие).
Поддерживается добавление PPA-репозиториев.
Для установки и удаления DEB-пакетов используется утилита Eddy (из Elementary OS).
Программы
Предустановленных программ самый минимум. Можно отметить:
Менеджер пакетов Pop! Shop
Для установки и удаления программ используется менеджер пакетов Pop! Shop.
 Pop!_OS 19.04: Менеджер приложений Pop Shop
Программа является клоном менеджера пакетов из дистрибутива Elementary OS. При этом в состав ПО не включены программы, разрабатываемые в рамках проекта Elementary OS.
Добавлено отдельное окно настроек для включения и выключения репозиториев, добавления сторонних репозиториев и включения/выключения обновлений.
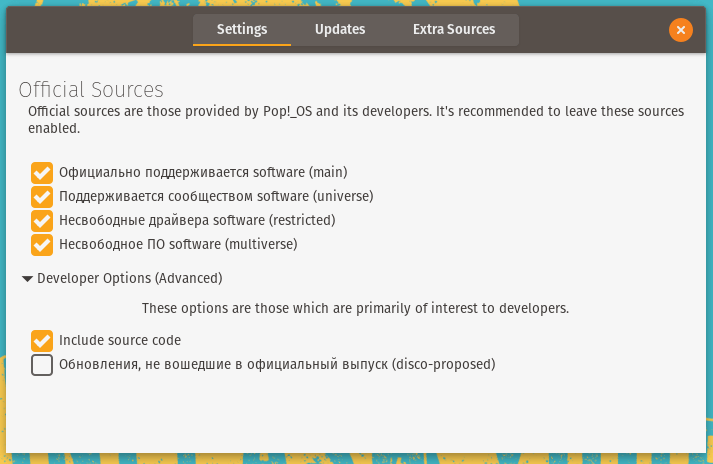 Pop!_OS 19.04: Pop Shop — Настройка репозиториев
Отсутсвует поддержка Snap-пакетов.
Установка
Установка дистрибутива выполняется из Live-режима. Используется графическая программа установки.
При запуске Live-системы программа установки открывается сразу. Пользователь может выполнить установку или использовать Live-систему.
Первый этап установки
Установка выполняется в два этапа. На первом этапе установки (в Live-режиме) выполняется:
- Выбор языка.
- Выбор языка ввода.
- Разметка диска.
- Шифрование диска (по желанию).
Разметка диска
При ручной разметке диска пользователь может использовать уже созданные заранее разделы. Если требуется создание новых или удаление/изменение разделов, то предлагается использовать программу GParted, которая вызывается прямо из программы установки. В будущем планируется перенести разметку диска в саму программу установки.
При автоматической разметке диска создается несколько разделов:
- Загрузочный ESP (Для UEFI)
- Recovery (FAT32) для восстановления системы.
- Корневой / (etx4)
- Раздел подкачки SWAP
Если система уже была установлена, то присутствует пункт — Refresh Install — Переустановка системы с сохранением текущих пользовательских данных и файлов.
Второй этап установки
После перезагрузки компьютера выполняется второй этап установки. Во втором этапе выполняется донастройка системы:
- Выбор раскладки клавиатуры.
- Установка часового пояса.
- Подключение сетевых учетных записей (по желанию).
- Указание имени пользователя и пароля.
Такой двухэтапный способ установки удобен при продаже оборудования с предустановленной системой. Первый этап выполняет производитель оборудования. А второй этап выполняется конечным покупателем.
Pop os grub windows

I’ll get straight to the point.
When I started Pop!_Planet, I launched it because I saw a need for a centralized community for Pop!_OS. To be frank, I never expected the level of popularity it has achieved. Over the last year, we have gone from under 50 users, to almost 400 users. That’s awesome! However. it also comes with a downside. We are rapidly running out of disk space on our server, and the bandwidth costs go up every month.
Pop!_Planet is not affiliated with System76 in any way, and is funded completely out of pocket. From day one, I said that I’d never use on-site ads (I hate them as much as you do), so the only monetization we get is through donations. Right now, the donations we receive don’t even cover our overhead.
I know that most users will ignore this message, and that’s ok. However, if even a few of our users are willing and able to donate a few dollars to help offset our expenses, it would be greatly appreciated.
Thank you for your time,
Dan Griffiths
Pop!_Planet Founder
GRUB (GRand Unified Bootloader) is a multi-boot loader. It is derived from PUPA which was a research project to develop the replacement of what is now known as GRUB Legacy. The latter had become too difficult to maintain and GRUB was rewritten from scratch with the aim to provide modularity and portability [1]. The current GRUB is also referred to as GRUB 2 while GRUB Legacy corresponds to versions 0.9x.
Contents
BIOS systems
GUID Partition Table (GPT) specific instructions
On a BIOS/GPT configuration, a BIOS boot partition is required. GRUB embeds its core.img into this partition.
Create a mebibyte partition ( +1M with fdisk or gdisk) on the disk with no file system and with partition type GUID 21686148-6449-6E6F-744E-656564454649 .
- Select partition type BIOS boot for fdisk, ef02 for gdisk.
- For parted set/activate the flag bios_grub on the partition.
This partition can be in any position order but has to be on the first 2 TiB of the disk. This partition needs to be created before GRUB installation. When the partition is ready, install the bootloader as per the instructions below.
The space before the first partition can also be used as the BIOS boot partition though it will be out of GPT alignment specification. Since the partition will not be regularly accessed performance issues can be disregarded, though some disk utilities will display a warning about it. In fdisk or gdisk create a new partition starting at sector 34 and spanning to 2047 and set the type. To have the viewable partitions begin at the base consider adding this partition last.
Master Boot Record (MBR) specific instructions
Usually the post-MBR gap (after the 512 byte MBR region and before the start of the first partition) in many MBR (or ‘msdos’ disklabel) partitioned systems is 31 KiB when DOS compatibility cylinder alignment issues are satisfied in the partition table. However a post-MBR gap of about 1 to 2 MiB is recommended to provide sufficient room for embedding GRUB’s core.img . It is advisable to use a partitioning tool that supports 1 MiB partition alignment to obtain this space as well as to satisfy other non-512 byte sector issues (which are unrelated to embedding of core.img ).
Installation
Install the grub package. Then do:
where /dev/sdX is the disk where grub is to be installed (for example, disk /dev/sda and not partition /dev/sda1 ).
If you use LVM for your /boot , you can install GRUB on multiple physical disks.
See grub-install(8) and GRUB Manual for more details on the grub-install command.
UEFI systems
Check for an EFI System Partition
To boot from a disk using UEFI, the recommended disk partition table is GPT and this is the layout that is assumed in this article. An EFI system partition (ESP) is required on every bootable disk. If you are installing on an UEFI-capable computer with an installed operating system, like Windows 10 for example, it is very likely that you already have an ESP.
To find out the disk partition scheme and the system partition, use parted as root on the disk you want to boot from:
The command returns:
- The disk partition layout: if the disk is GPT, it indicates Partition Table: gpt .
- The list of partitions on the disk: Look for the EFI system partition in the list, it is a small (usually about 100-550 MiB) partition with a fat32 file system and with the flag esp enabled. To confirm this is the ESP, mount it and check whether it contains a directory named EFI , if it does this is definitely the ESP.
Once it is found, take note of the partition number, it will be required for the GRUB installation. If you do not have an ESP, you will need to create one. See the EFI system partition article.
Installation
First, install the packages grub and efibootmgr : GRUB is the bootloader while efibootmgr is used by the GRUB installation script to write boot entries to NVRAM.
Then follow the below steps to install GRUB:
- Mount the EFI System Partition and in the remainder of this section, substitute esp with its mount point.
- Choose a bootloader identifier, here named GRUB . A directory of that name will be created to store the EFI binary in the ESP and this is the name that will appear in the UEFI boot menu to identify the GRUB boot entry.
- Execute the following command to install the GRUB EFI application grubx64.efi to esp/EFI/GRUB/ and install its modules to /boot/grub/x86_64-efi/ .
After the above install completed the main GRUB directory is located at /boot/grub/ . Note that grub-install also tries to create an entry in the firmware boot manager, named GRUB in the above example.
Generate the main configuration file
After the installation, the main configuration file grub.cfg needs to be generated. The generation process can be influenced by a variety of options in /etc/default/grub and scripts in /etc/grub.d/ ; see #Configuration.
If you have not done additional configuration, the automatic generation will determine the root filesystem of the system to boot for the configuration file. For that to succeed it is important that the system is either booted or chrooted into.
Use the grub-mkconfig tool to generate grub.cfg :
Configuration
This section only covers editing the /etc/default/grub configuration file. See GRUB/Tips and tricks for more information.
Remember to always #Generate the main configuration file after making changes to /etc/default/grub .
Additional arguments
To pass custom additional arguments to the Linux image, you can set the GRUB_CMDLINE_LINUX + GRUB_CMDLINE_LINUX_DEFAULT variables in /etc/default/grub . The two are appended to each other and passed to kernel when generating regular boot entries. For the recovery boot entry, only GRUB_CMDLINE_LINUX is used in the generation.
It is not necessary to use both, but can be useful. For example, you could use GRUB_CMDLINE_LINUX_DEFAULT=»resume=/dev/sdaX quiet» where sdaX is your swap partition to enable resume after hibernation. This would generate a recovery boot entry without the resume and without quiet suppressing kernel messages during a boot from that menu entry. Though, the other (regular) menu entries would have them as options.
By default grub-mkconfig determines the UUID of the root filesystem for the configuration. To disable this, uncomment GRUB_DISABLE_LINUX_UUID=true .
For generating the GRUB recovery entry you have to ensure that GRUB_DISABLE_RECOVERY is not set to true in /etc/default/grub .
You can also use GRUB_CMDLINE_LINUX=»resume=UUID=uuid-of-swap-partition«
If you use LVM for your /boot or / root partition, make sure that the lvm module is preloaded:
GRUB provides convenient handling of RAID volumes. You need to load GRUB modules mdraid09 or mdraid1x to allow you to address the volume natively:
For example, /dev/md0 becomes:
whereas a partitioned RAID volume (e.g. /dev/md0p1 ) becomes:
To install grub when using RAID1 as the /boot partition (or using /boot housed on a RAID1 root partition), on BIOS systems, simply run grub-install on both of the drives, such as:
Where the RAID 1 array housing /boot is housed on /dev/sda and /dev/sdb .
Encryption
Root partition
To encrypt a root filesystem to be used with GRUB, add the encrypt hook or the sd-encrypt hook (if using systemd hooks) to mkinitcpio. See dm-crypt/System configuration#mkinitcpio for details, and Mkinitcpio#Common hooks for alternative encryption hooks.
If using the encrypt hook, add the cryptdevice parameter to /etc/default/grub .
If using the sd-encrypt hook, add rd.luks.name :
where device-UUID is the UUID of the LUKS-encrypted device.
For further information about bootloader configuration for encrypted devices, see Dm-crypt/System configuration#Boot loader.
Boot partition
GRUB can be set to ask for a password to open a LUKS blockdevice in order to read its configuration and load any initramfs and kernel from it. This option tries to solve the issue of having an unencrypted boot partition. /boot is not required to be kept in a separate partition; it may also stay under the system’s root / directory tree.
To enable this feature encrypt the partition with /boot residing on it using LUKS as normal. Then add the following option to /etc/default/grub :
Be sure to #Generate the main configuration file while the partition containing /boot is mounted.
Without further changes you will be prompted twice for a passhrase: the first for GRUB to unlock the /boot mount point in early boot, the second to unlock the root filesystem itself as described in #Root partition. You can use a keyfile to avoid this.
Multiple entries
For tips on managing multiple GRUB entries, for example when using both linux and linux-lts kernels, see GRUB/Tips and tricks#Multiple entries.
Dual-booting
The best way to add other entries is editing /etc/grub.d/40_custom or /boot/grub/custom.cfg . The entries in this file will be automatically added after rerunning grub-mkconfig .
«Shutdown» menu entry
«Restart» menu entry
«Firmware setup» menu entry (UEFI only)
GNU/Linux menu entry
Assuming that the other distribution is on partition sda2 :
Alternatively let grub search for the right partition by UUID or label:
Windows installed in UEFI/GPT Mode menu entry
This mode determines where the Windows bootloader resides and chain-loads it after Grub when the menu entry is selected. The main task here is finding the EFI partition and running the bootloader from it.
where $hints_string and $fs_uuid are obtained with the following two commands.
The $fs_uuid command determines the UUID of the EFI partition:
Alternatively one can run blkid (as root) and read the UUID of the EFI system partition from there.
The $hints_string command will determine the location of the EFI system partition, in this case harddrive 0:
These two commands assume the ESP Windows uses is mounted at esp . There might be case differences in the path to Windows’s EFI file, what with being Windows, and all.
Windows installed in BIOS/MBR mode
Throughout this section, it is assumed your Windows partition is /dev/sda1 . A different partition will change every instance of hd0,msdos1. Add the below code to /etc/grub.d/40_custom or /boot/grub/custom.cfg and regenerate grub.cfg with grub-mkconfig as explained above to boot Windows (XP, Vista, 7, 8 or 10) installed in BIOS/MBR mode:
In both examples XXXXXXXXXXXXXXXX is the filesystem UUID which can be found with command lsblk —fs .
For Windows Vista/7/8/8.1/10:
Do not use bootrec.exe /Fixmbr because it will wipe GRUB out. Or you can use Boot Repair function in the Troubleshooting menu — it will not wipe out GRUB but will fix most errors. Also you would better keep plugged in both the target hard drive and your bootable device ONLY. Windows usually fails to repair boot information if any other devices are connected.
/etc/grub.d/40_custom can be used as a template to create /etc/grub.d/nn_custom . Where nn defines the precedence, indicating the order the script is executed. The order scripts are executed determine the placement in the grub boot menu.
Using the command shell
Since the MBR is too small to store all GRUB modules, only the menu and a few basic commands reside there. The majority of GRUB functionality remains in modules in /boot/grub , which are inserted as needed. In error conditions (e.g. if the partition layout changes) GRUB may fail to boot. When this happens, a command shell may appear.
GRUB offers multiple shells/prompts. If there is a problem reading the menu but the bootloader is able to find the disk, you will likely be dropped to the «normal» shell:
If there is a more serious problem (e.g. GRUB cannot find required files), you may instead be dropped to the «rescue» shell:
The rescue shell is a restricted subset of the normal shell, offering much less functionality. If dumped to the rescue shell, first try inserting the «normal» module, then starting the «normal» shell:
Pager support
GRUB supports pager for reading commands that provide long output (like the help command). This works only in normal shell mode and not in rescue mode. To enable pager, in GRUB command shell type:
Using the command shell environment to boot operating systems
The GRUB’s command shell environment can be used to boot operating systems. A common scenario may be to boot Windows / Linux stored on a drive/partition via chainloading.
Chainloading means to load another boot-loader from the current one, ie, chain-loading.
The other bootloader may be embedded at the starting of the disk (MBR) or at the starting of a partition or as an EFI binary in the ESP in the case of UEFI.
Chainloading a partition
For example to chainload Windows stored in the first partiton of the first hard disk,
Similarly GRUB installed to a partition can be chainloaded.
Chainloading a disk/drive
Chainloading Windows/Linux installed in UEFI mode
insmod ntfs is used for loading the ntfs file system module for loading Windows. (hd0,gpt4) or /dev/sda4 is my EFI system partition (ESP). The entry in the chainloader line specifies the path of the .efi file to be chain-loaded.
Normal loading
Using the rescue console
See #Using the command shell first. If unable to activate the standard shell, one possible solution is to boot using a live CD or some other rescue disk to correct configuration errors and reinstall GRUB. However, such a boot disk is not always available (nor necessary); the rescue console is surprisingly robust.
The available commands in GRUB rescue include insmod , ls , set , and unset . This example uses set and insmod . set modifies variables and insmod inserts new modules to add functionality.
Before starting, the user must know the location of their /boot partition (be it a separate partition, or a subdirectory under their root):
where X is the physical drive number and Y is the partition number.
To expand console capabilities, insert the linux module:
This introduces the linux and initrd commands, which should be familiar.
With a separate boot partition (e.g. when using UEFI), again change the lines accordingly:
After successfully booting the Linux installation, users can correct grub.cfg as needed and then reinstall GRUB.
To reinstall GRUB and fix the problem completely, changing /dev/sda if needed. See #Installation for details.
Troubleshooting
F2FS and other unsupported file systems
GRUB does not support F2FS file system. In case the root partition is on an unsupported file system, an alternative /boot partition with a supported file system must be created.
Intel BIOS not booting GPT
Some Intel BIOS’s require at least one bootable MBR partition to be present at boot, causing GPT-partitioned boot setups to be unbootable.
This can be circumvented by using (for instance) fdisk to mark one of the GPT partitions (preferably the 1007 KiB partition you have created for GRUB already) bootable in the MBR. This can be achieved, using fdisk, by the following commands: Start fdisk against the disk you are installing, for instance fdisk /dev/sda , then press a and select the partition you wish to mark as bootable (probably #1) by pressing the corresponding number, finally press w to write the changes to the MBR.
With cfdisk, the steps are similar, just cfdisk /dev/sda , choose bootable (at the left) in the desired hard disk, and quit saving.
With recent version of parted, you can use disk_toggle pmbr_boot option. Afterwards verify that Disk Flags show pmbr_boot.
More information is available here
Enable debug messages
«No suitable mode found» error
If you get this error when booting any menuentry:
Then you need to initialize GRUB graphical terminal ( gfxterm ) with proper video mode ( gfxmode ) in GRUB. This video mode is passed by GRUB to the linux kernel via ‘gfxpayload’. In case of UEFI systems, if the GRUB video mode is not initialized, no kernel boot messages will be shown in the terminal (atleast until KMS kicks in).
Copy /usr/share/grub/unicode.pf2 to $
If /usr/share/grub/unicode.pf2 does not exist, install bdf-unifont , create the unifont.pf2 file and then copy it to $
Then, in the grub.cfg file, add the following lines to enable GRUB to pass the video mode correctly to the kernel, without of which you will only get a black screen (no output) but booting (actually) proceeds successfully without any system hang.
After that add the following code (common to both BIOS and UEFI):
As you can see for gfxterm (graphical terminal) to function properly, unicode.pf2 font file should exist in $
msdos-style error message
This error may occur when you try installing GRUB in a VMware container. It happens when the first partition starts just after the MBR (block 63), without the usual space of 1 MiB (2048 blocks) before the first partition. Read #Master Boot Record (MBR) specific instructions
Common installation errors
- If you have a problem when running grub-install with sysfs or procfs and it says you must run modprobe efivars , try Unified Extensible Firmware Interface#Mount efivarfs.
- Without —target or —directory option, grub-install cannot determine for which firmware to install. In such cases grub-install will print source_dir does not exist. Please specify —target or —directory .
- If after running grub-install you are told your partition does not look like an EFI partition then the partition is most likely not Fat32 .
Drop to rescue shell
If GRUB loads but drops into the rescue shell with no errors, it can be due to one of these two reasons:
- It may be because of a missing or misplaced grub.cfg . This will happen if GRUB UEFI was installed with —boot-directory and grub.cfg is missing,
- It also happens if the boot partition, which is hardcoded into the grubx64.efi file, has changed.
GRUB UEFI not loaded
An example of a working EFI:
If the screen only goes black for a second and the next boot option is tried afterwards, moving GRUB to the partition root can help. The boot option has to be deleted and recreated afterwards. The entry for GRUB should look like this then:
Default/fallback boot path
Some UEFI firmwares require a bootable file at a known location before they will show UEFI NVRAM boot entries. If this is the case, grub-install will claim efibootmgr has added an entry to boot GRUB, however the entry will not show up in the VisualBIOS boot order selector. The solution is to install GRUB at the default/fallback boot path:
Alternatively you can move an already installed GRUB EFI executable to the default/fallback path:
Invalid signature
If trying to boot Windows results in an «invalid signature» error, e.g. after reconfiguring partitions or adding additional hard drives, (re)move GRUB’s device configuration and let it reconfigure:
grub-mkconfig should now mention all found boot options, including Windows. If it works, remove /boot/grub/device.map-old .
Boot freezes
If booting gets stuck without any error message after GRUB loading the kernel and the initial ramdisk, try removing the add_efi_memmap kernel parameter.
Warning when installing in chroot
When installing GRUB on a LVM system in a chroot environment (e.g. during system installation), you may receive warnings like
This is because /run is not available inside the chroot. These warnings will not prevent the system from booting, provided that everything has been done correctly, so you may continue with the installation.
GRUB loads slowly
GRUB can take a long time to load when disk space is low. Check if you have sufficient free disk space on your /boot or / partition when you are having problems.
error: unknown filesystem
GRUB may output error: unknown filesystem and refuse to boot for a few reasons. If you are certain that all UUIDs are correct and all filesystems are valid and supported, it may be because your BIOS Boot Partition is located outside the first 2 TiB of the drive. Use a partitioning tool of your choice to ensure this partition is located fully within the first 2 TiB, then reinstall and reconfigure GRUB.
grub-reboot not resetting
GRUB seems to be unable to write to root BTRFS partitions. If you use grub-reboot to boot into another entry it will therefore be unable to update its on-disk environment. Either run grub-reboot from the other entry (for example when switching between various distributions) or consider a different file system. You can reset a «sticky» entry by executing grub-editenv create and setting GRUB_DEFAULT=0 in your /etc/default/grub (do not forget grub-mkconfig -o /boot/grub/grub.cfg ).
Old BTRFS prevents installation
If a drive is formatted with BTRFS without creating a partition table (eg. /dev/sdx), then later has partition table written to, there are parts of the BTRFS format that persist. Most utilities and OS’s do not see this, but GRUB will refuse to install, even with —force
You can zero the drive, but the easy solution that leaves your data alone is to erase the BTRFS superblock with wipefs -o 0x10040 /dev/sdx
Windows 8/10 not found
A setting in Windows 8/10 called «Hiberboot», «Hybrid Boot» or «Fast Boot» can prevent the Windows partition from being mounted, so grub-mkconfig will not find a Windows install. Disabling Hiberboot in Windows will allow it to be added to the GRUB menu.


