- Вики IT-KB
- Инструменты пользователя
- Инструменты сайта
- Боковая панель
- Межсетевой экран Gufw Firewall и проблема подключения PPTP VPN в Linux Mint
- PPTP Configuration guide for Linux Mint
- Things to Consider:
- To Configure PPTP follow below Steps:
- Настройка PPTP-клиента в Linux
- Комментарии:
- Setup for Linux Mint 20.2 (Uma)
Вики IT-KB
Пошаговые руководства, шпаргалки, полезные ссылки.
Инструменты пользователя
Инструменты сайта
Боковая панель
Межсетевой экран Gufw Firewall и проблема подключения PPTP VPN в Linux Mint
 В Linux Mint имеется межсетевой экран Gufw Firewall, который довольно прост в обращении и предназначен для неискушённого пользователя. Gufw является упрощенной графической оболочкой к брандмауэру UFW (Uncomplicated Firewall), который используется по умолчанию в Ubuntu-ориентированных дистрибутивах Linux.
Если включить блокировку всех входящих соединений и разрешить исходящие соединения, то большинство приложений, работающих с Интернет будут работать по прежнему без проблем. Но для некоторых приложений может потребоваться создание дополнительных правил, разрешающих входящий трафик разного рода. Например может возникнуть проблема с VPN-подключениями по протоколу PPTP.
Если заглянуть в системный лог в ходе выполнения VPN-подключения, то можно увидеть примерно следую картину:
В данном случае в событиях [UFW BLOCK], мы видим что блокируются входящие соединения по протоколу 47 (GPE). Эти соединения нужны для успешной установки VPN-сессии по протоколу PPTP, и поэтому мы должны из разрешить в брандмауэре.
Как уже было отмечено ранее, графическая оболочка Gufw это упрощённый инструмент управления брандмауэром UFW, и поэтому в ней мы не обнаружим возможности создания правила, разрешающего протокол GRE. Для решения залдачи воспользуемся примерно следующей командой:
allow — директива «разрешить», in — направление «входящие подключения», on enp3s0 — на сетевом интерфейсе enp3s0, to 192.168.1.5 — адрес назначения — IP интерфейса (enp3s0), proto gre — протокол GRE
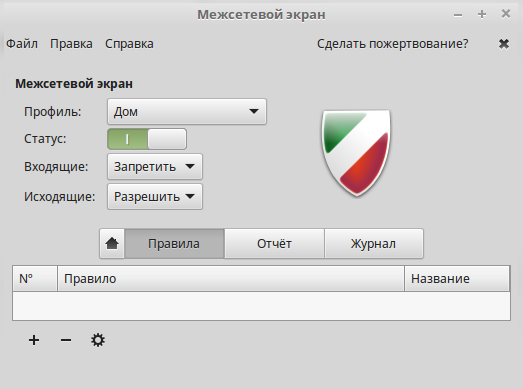
Если после этого перезапустить графическую оболочку Gufw, то увидим в ней новое правило (которое на данный момент не редактируется из графической оболочки):

После этого снова можно выполнить попытку VPN-подключения по протоколу PPTP. На этот раз в логе не должно появляться события блокировки трафика GRE, а VPN-сессия должна быть успешно установлена.
Проверено на следующих конфигурациях:
| Дистрибутив | Версии |
|---|---|
| Linux Mint | 18.2 64-bit (Cinnamon) |
 Автор первичной редакции:
Алексей Максимов
Время публикации: 18.08.2017 13:02
Источник
PPTP Configuration guide for Linux Mint


Things to Consider:
It is vital to consider the following before you begin:
- Ensure your internet connection is working.
- A device powered by Linux Mint.
- A Premium PureVPN account (if you haven’t bought it yet, click here to buy)
To Configure PPTP follow below Steps:
1 Click on “Network Connection” and select “Network Settings“

2 Click on “+“

3 Click “Create“

4 Select “Point-to-Point Tunneling Protocol (PPTP)” and click “Create“

5 Insert the following info:
- Insert “Connection name:” PureVPN PPTP
- Insert desired server in “Gateway“
- Click here to get the server list.
- Insert Username provided by PureVPN
- Insert Password provided by PureVPN
- Click on “Advanced“

6 Select the following options
- Use Point-to-Point encryption (MPPE)
- Allow BSD data compression
- Allow Deflate data compression
- Use TCP header compression
- Click “OK”

7 Click on “Save“

8 Click on “PureVPN PPTP” connection and click on switch to “Turn ON” VPN.

9 You are successfully connected now. Enjoy the FREEDOM! 🙂

To disconnect VPN, click on “Network Connection Icon” and click on switch to “Turn OFF“
Caution: If you are looking for higher security, then please follow this guide to disable your IPv6
Please use the comment box for your suggestions & feedback. For additional help, please submit support ticket with errors and screen shots (if possible) OR Contact our 24/7 live chat.
Источник
Настройка PPTP-клиента в Linux
Недавно автору этих строк понадобилось настроить PPTP-соединение в Linux. После чтения документации оказалось что всё очень просто.
Приводимые здесь инструкции применимы в первую очередь для Debian/Ubuntu, однако, скорее всего без больших изменений ими можно воспользоваться и на других дистрибутивах.
Во-первых нужно установить несколько пакетов:
Во-вторых создаём файл /etc/ppp/peers/vpn0 следующего содержания:
Далее открываем в редакторе файл /etc/ppp/chap-secrets и добавляем строку:
Наконец выполняем команду:
И всё работает. В системе должен появиться новый ppp-интерфейс. Проверить это можно командой:
Если же соединения не происходит, то можно попытаться выполнить команду:
И посмотреть какие ошибки будут выданы на экран.
Если нужно чтобы соединение выполнялось автоматически при загрузке компьютера, то нужно добавить в файл /etc/network/interfaces строки:
Таким способом автор успешно подключается к описанному ранее PPTP-серверу.
Комментарии:
Небольшое дополнение: чтобы вальнуть весь трафик через vpn нужно добавить в /etc/ppp/peers/vpn0 строчку:
Единственным недостатком такого подключения является то, что, если по каким либо причинам соединение разорвалось, то интерфейс падает и не переподключается. Мне нужно было создать впн подключение, что бы оно было на фиксированном интерфейсе(для создания правил в iptables), при разрыве переподключалось и не пересоздавала интерфейс(что бы можно было удобно всё это дело мониторить по snmp)
В общем нашел такое решение в роутере ASUS wl500gP, и сплагатил их конфиг себе
Ну собственно создаём файл /etc/ppp/peers/vpn0 с таким содержимым:
noauth refuse-eap
user ‘ ‘
password ‘ ‘
connect true
sync pty ‘pptp —idle-wait 0 —nolaunchpppd —nobuffer —sync’
lock
idle 1800 demand
maxfail 0
#Отвечает за переподключение при падении соединения
persist
ktune
default-asyncmap nopcomp noaccomp
novj nobsdcomp nodeflate
lcp-echo-interval 10
lcp-echo-failure 6
defaultroute
#Создадим подключение на интерфейсе ppp999
unit 999
Anonymous 2011-06-24 11:22:53 (#)
Уважаемый MooSE, не могли бы Вы дополнить статью нюансами подключения к офисному pptp-серверу (построеному по http://www.ylsoftware.com/news/538) через домашний роутер (типа TRENDnet TEW-432BRP). Несколько часов блуждания по форумам успеха не принесли. Напрямую, без роутера, всё работает.
Не могу:) Да и не хочу:) Потому что я знаю в чём проблема и решать еёё дело не благодарное. Сабжевый роутер скорее всего использует классический NAT, описанный ещё в RFC 1631. Этот NAT не содержит хаков для поддержки PPTP, который defective by design.
Моё ИМХО: или ставить роутер с соответствующими хаками, или не использовать сей арахичный протокол, ибо существуют куда как более вменяемые альтернативы.
Основная проблема PPTP в том что он использует GRE, который не работает через NAT. Есть роутеры, которые палят пакеты, идущие на tcp/1723 и вытаскивают из них информацию о туннеле после чего его корректно натят. Но это нарушение RFC 1631. Так что нафиг такое счастье.
Источник
Setup for Linux Mint 20.2 (Uma)

However, at the popular request of our users, we will continue to support the following locations for users to connect using PPTP, L2TP, and SSTP protocols:
Germany: de1.pointtoserver.com
Netherlands: nl1.pointtoserver.com
United Kingdom: ukl1.pointtoserver.com
United States: usil1.pointtoserver.com
United States: ustx1.pointtoserver.com
United States: usca1.pointtoserver.com
United States: usfl1.pointtoserver.com
United States: usny1.pointtoserver.com
United States: uswdc1.pointtoserver.com
Australia: au-sd1.pointtoserver.com
PureVPN’s setup guide for mint will help you establish a secure internet connection without compromising on your internet speed. You can set up PureVPN on your Linux Mint system using any of the three available protocols.
Things to Consider:
Before you begin, please make sure that:
- You have a working internet connection
- Linux Mint Supported Device.
- A Premium PureVPN account (If you haven’t bought yet click here to buy)

- Once logged in go to Account & Billing section.

- On Account and Billing section click on drop-down icon

- Click on Show/Update VPN password

- Note down your PureVPN username and click on Eye icon to make your password visible and use it in the manual configuration.

The following instructions outline the setup process for the PPTP connection on Mint 20.2 (Uma):
1 Go to the ‘Terminal’ window and type the following commands one by one:
- sudo apt-get update
- sudo apt-get install pptpd
2 Now Select the following options:
- Click on “Wired Connection“
- Go to “Network Connections”

3 Click on the ‘+’ icon to add a VPN connection and select ‘Point-to-Point Tunneling Protocol (PPTP)’ option to create a PPTP profile.

4 When new window appear, complete the fields as below:
- Connection name: PureVPN
- Gateway: (You can use the servers mentioned in the above provided note.)
- User name: Your VPN username
- Password: Your VPN password

Now, go to the ‘Advanced…’ option.
Only check/allow the following options:
Also, select the following:
- Allow BSD data compression
- Allow Deflate data compression
- Use TCP header compression

Click “OK” and then click “Add” button.
5 Now go to the “Wired Connections” option and under “VPN Connections” click on the newly created “PureVPN” connection to activate the VPN connection.

You are connected now!
The following instructions outline the setup process for L2TP connection on Mint 20.2 (Uma):
1 Go to the ‘Terminal’ window and install L2TP Type the following commands one by one:
- sudo apt-get update
- sudo apt-get install xl2tpd
- sudo apt-get install network-manager-l2tp
- sudo apt-get install network-manager-l2tp-gnome
2 Now Select the following options:
- Click on “Wired Connection“
- Go to “Network Connections”

3 Click on the ‘+’ icon to add a VPN connection and select ‘Layer 2 Tunneling Protocol (L2TP)’ option to create a L2TP

4 When new window appear, complete the fields as below:
- Connection name: PureVPN
- Gateway: (You can use the servers mentioned in the above provided note.)
- User name: Your VPN username
- Password: Your VPN password

Now, go to the ‘IPsec Settings…’ button.
Check the ‘Enable Ipsec tunnel to IPsec host’
Pre-share key: 12345678
Under the Advanced section, specific the connection algorithms:
- Phase 1 algorithms: 3des-sha1-modp1024
- Phase 2 algorithms: 3des-sha1

Now, go to the ‘PPP Settings…’ button.
Only check/allow the following options:
Also, select the following:
- Allow BSD data compression
- Allow Deflate data compression
- Use TCP header compression

Сlick “OK” and then click “Add” button.
5 Now go to the “Wired Connections” option and under “VPN Connections” click on the newly created “PureVPN” connection to activate the VPN connection.

You are connected now!
*To configure SSTP on Mint you have to install the packages first. Follow the below steps to download/install required packages and configure SSTP*
and download the following packages as per your OS / bit.
For Mint 32bit download:
For Mint 64bit download:
- Right click on libsstp-client0_1.0.9_i386.deb and open with “GDebi Package Installer“
- Click “install package” to continue
- Enter your Mint password and click on “OK” to continue
- Once installed. Go back to downloads folder
3 Do the following:
- Right click on sstp-client_1.0.9_i386.deb and open with “GDebi Package Installer“
- Click “install package” to continue
- Enter your Mint password and click on “OK” to continue
- Once installed. Go back to downloads folder
4 Do the following:
- Right click on network-manager-sstp_0.9.4-0ubuntu2_i386.deb and open with “GDebi Package Installer“
- Click “install package” to continue
- Enter your Mint password and click on “OK” to continue
- Once installed. Go back to downloads folder
5 Do the following:
- Right click on network-manager-sstp-gnome_0.9.4-0ubuntu2_i386.deb and open with “GDebi Package Installer“
- Click “install package” to continue
- Enter your Mint password and click on “OK” to continue
- Once installed. Go back to downloads folder
- After installing pacakges. Reboot your system.
6 Click on “Network Manager Icon” and select “Network Settings“
8 Click on “Create“ .
9 Select “Secure Socket Tunneling Protocol (SSTP)” and click “Create”
10 Do the following:
- Enter Connection Name “PureVPN SSTP“
- Insert the desired server: Please refer to the server address shared in the above note.
- Enter Username provided by PureVPN
- Enter Password provided by PureVPN
- Check “Ignore certificate warnings“
- Click “Advanced”
11 Do the following:
- Uncheck “Use Point-to-Point encryption (MPPE)“
- Check “Send PPP echo packets“
- Click on “OK“
12 Click on “Save“
13 Click on “PureVPN SSTP” connection and click on switch to “Turn ON” VPN.
14 You are connected now. Enjoy the FREEDOM!

15 To disconnect VPN
- Click on “Network Connection Icon” and click on switch to “Turn OFF” VPN.
The following is required for OpenVPN client to work on Linux Mint 20.2:
- A working installation of Linux Mint (This guide uses Linux Mint (Uma) 64-bit)
- A device with internet access
- A PureVPN premium account (Don’t have one? Sign up now!)
1 First, open the web browser (Firefox) and download the PureVPN OpenVPN configuration files from this link and extract them.

2 Go To to the Terminal window and install OpenVPN client. Type the following commands one by one.
- sudo apt-get update
- sudo apt-get install openvpn
- sudo apt-get install network-manager-openvpn
- sudo apt-get install network-manager-openvpn-gnome
3 Now Select the following options:
- Click on “Wired Connection“
- Go to “Network Connections”
4 Click on the ‘+’ icon to add a VPN connection and select ‘Import from file…’ option to upload an OpenVPN profile.

5 Go to the folder where you have downloaded the OpenVPN files and select your desired .ovpn file to connect.

5 When the new window appears, complete the fields as below:
- Insert Connection name: PureVPN
- Insert Gateway: (already selected/entered)
- Connection Type: Password from drop down menu
- Insert Username provided by PureVPN
- Insert Password provided by PureVPN
- CA Certificate: Already uploaded.
- Сlick “Add” button.

7 Now go to the “Wired Connections” option and under “VPN Connections” click on the newly created “PureVPN” connection to activate the VPN connection.

You are connected to PureVPN now!
Источник


