- How to Set Up and Configure File History on Windows 10
- What is File History in Windows 10?
- Turn On File History
- Configure File History
- Back Up to a Network Location
- Recover Files Using PC Settings
- Recover Files Using File Explorer
- Clean Up File History
- Backing Up Should Be Part of a Regular Routine
- Previous Windows 10 version won’t restore? Here’s what to do
- Unable to restore the previous version in Windows 10? Here’s what to do
- 1: Make sure that File History is enabled
- 2: Check associated services
- 3: Create a backup
- 4: Use a third-party software
How to Set Up and Configure File History on Windows 10


Windows 10 includes a lot of helpful features to recover your files or restore your entire system. One feature you might not be aware of is called File History. Here’s a look at what it is, how to turn it on, and use it.
What is File History in Windows 10?
File History is a built-in tool that was first introduced in Windows 8 and it allows you to recover files you might have accidentally deleted, or restore a modified document to an earlier version. It’s essentially like Apple’s Time Machine but for Windows.
To use it, you’ll need an external hard drive or a large capacity USB flash drive. You can set it up to use a network location, too. File History will automatically back up Favorites, Contacts, Desktop items, and more.
All this data can add up in a hurry, but you can configure File History to exclude certain folders and how often it saves copies of files.
Turn On File History
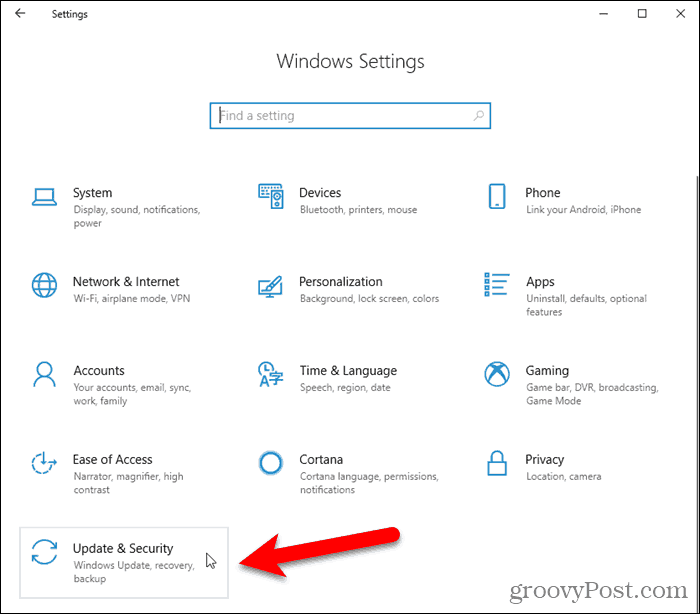
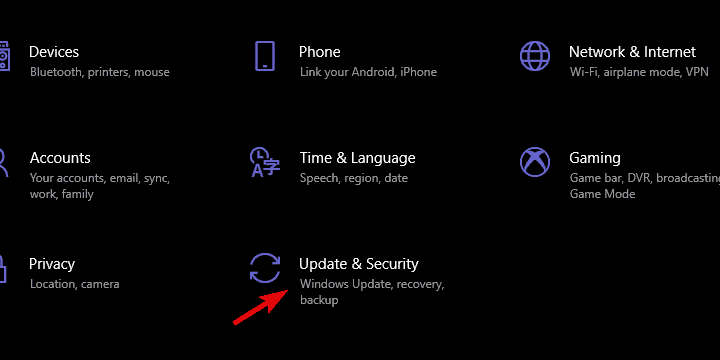
File History is turned off by default. To begin, connect your external drive. Then, open PC Settings from the Start menu and click Update & Security.
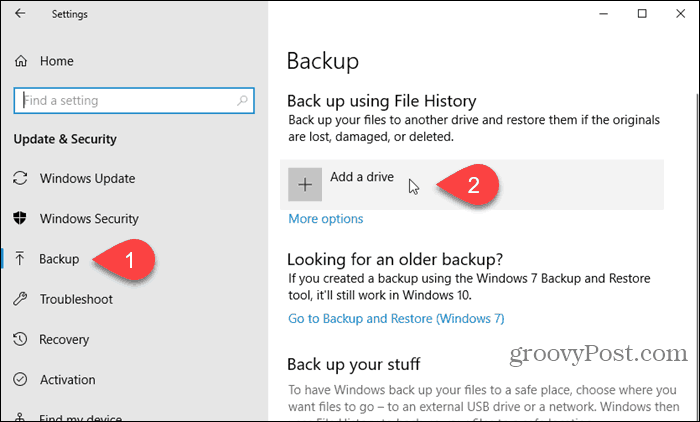
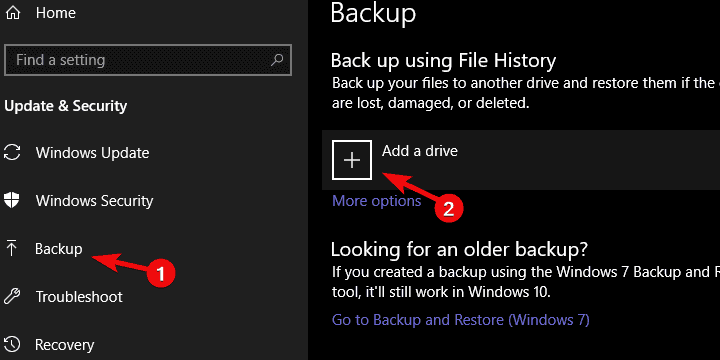
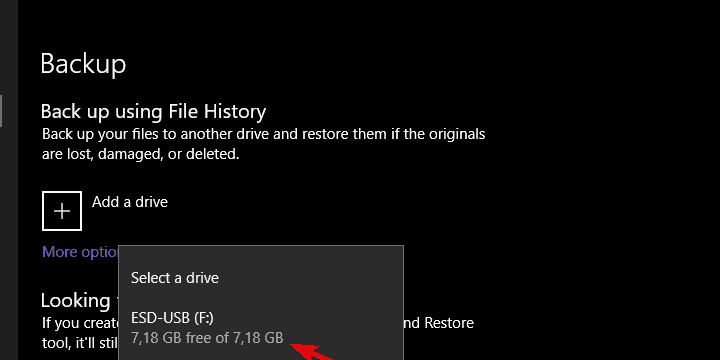
On the left pane, click Backup. Then, click Add a drive on the right.
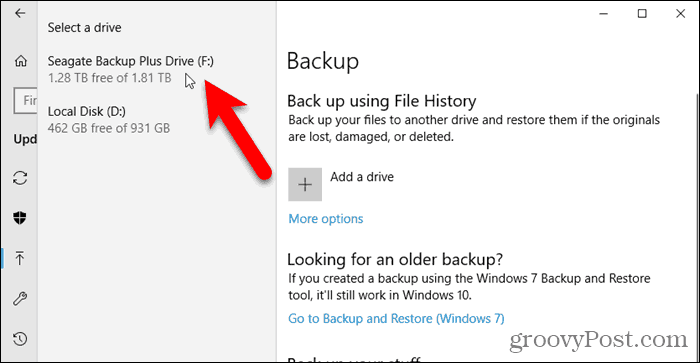
A list of available drives displays on the left. Click the one you want to use.
Configure File History
Once you select a drive, Windows automatically turns on File History.
To configure File History, click More options on the Backup screen.

The Backup options screen allows you to set how often File History backs up your files and how long versions are saved. Select options from the Back up my files and Keep my backups drop-down lists.

File History automatically adds certain folders to the backup. Before you begin the backup process, you can remove folders you don’t want to back up.
Under Back up these folders, select a folder you don’t want to back up and click Remove. Repeat for each folder you want to remove.

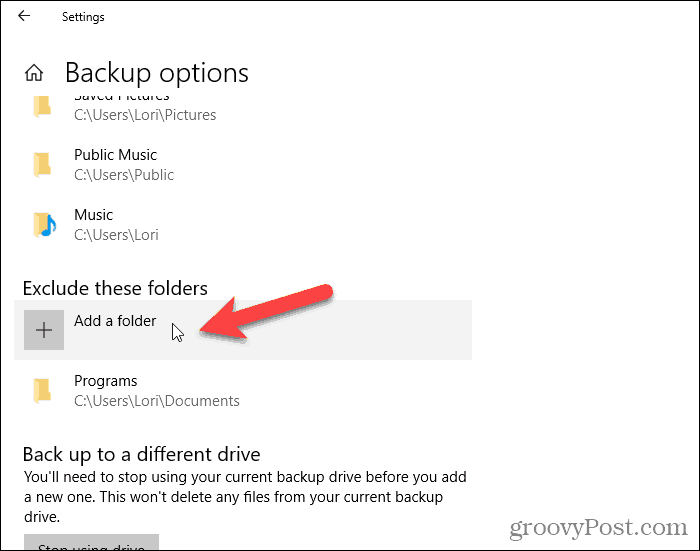
You can also specifically exclude folders. For example, if there’s a subfolder in one of the folders being backed up that you don’t want to back up, you can exclude that subfolder.
Under Exclude these folders, click Add a folder. Select a folder to exclude on the Select Folder dialog box and click Choose this folder.
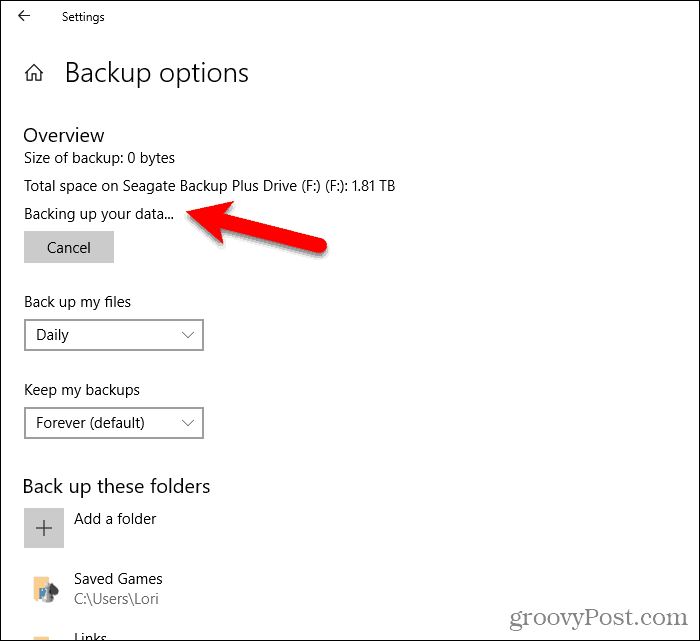
When you ready to start the backup process, click Back up now under Overview.
You’ll see a message saying File History is backing up your data. But, unfortunately, there is no estimated time listed. The initial backup may take a while.
Back Up to a Network Location
As we mentioned previously, you can use a network location for your backup as well. Maybe you have a home server or network attached storage (NAS) box that you want to use.
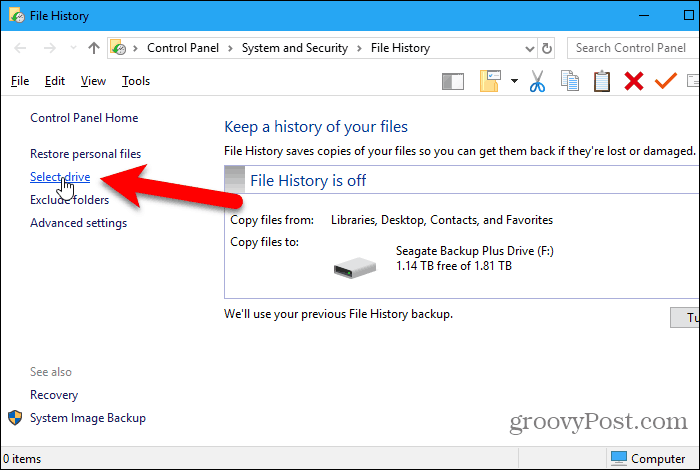
Go to the Backup options screen, if you’re not already on it, and click See advanced settings under Related settings.

Click Select drive in the right panel on the File History screen in the Control Panel.
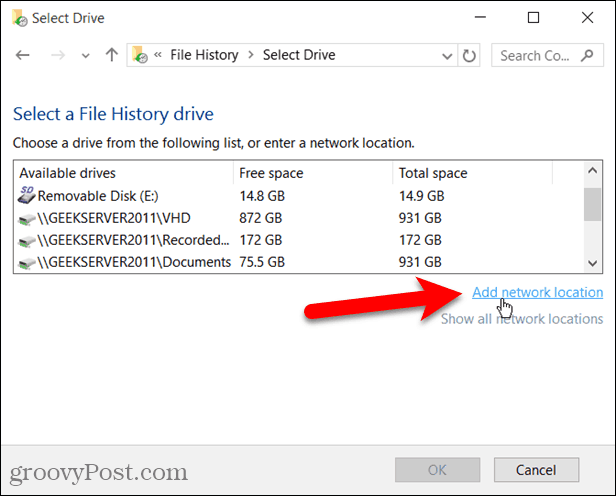
On the Select a File History drive screen, you’ll see local and network drives listed. If you don’t see the network drive you want to use, click Add a network location and select it.
Recover Files Using PC Settings
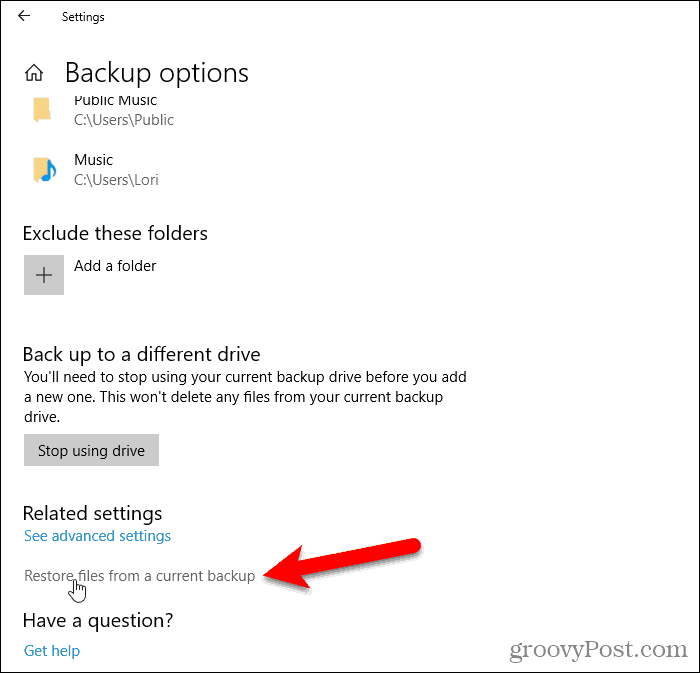
If you need to recover a file or directory stored on a local drive (not cloud storage), open PC Settings and go to Update & Security > Backup. Then, click More options.

On the Backup options screen, click Restore files from a current backup under Related Settings.
Navigate to the file you want to restore and use the arrow buttons to select a version of the file to restore.
Then, click the green Restore button.

Recover Files Using File Explorer
Or you can use File Explorer to restore a previous version of a file.
Open up File Explorer and select the file you want to restore a version of. Then, click History on the Home tab.

Again, you can go back in time using the arrow buttons and select a different version of the files to restore.
Click the green restore button to restore the selected version.

Or, you can right-click a file and select Properties. Click the Previous Versions tab and select the version of the file you need. This is a good way to grab an individual document you made changes to but want to work with a previous draft instead.
Click Restore to restore the version of the file to the original location. If you want to restore the file to a different location, click the down arrow on the Restore button and select Restore To.
On the Restore to dialog box, navigate to the folder where you want to restore the selected version of the file to and click Select Folder. If the file already exists in that location, you’ll be asked if you want to replace the file.

Clean Up File History
After a while, depending on the drive size, and your configured settings, you might get a notification that you need to free up space on your File History drive.

If you get that message, go to PC Settings > Update & Security > Backup > More options > See advanced settings. Then, click Advanced settings on the left.
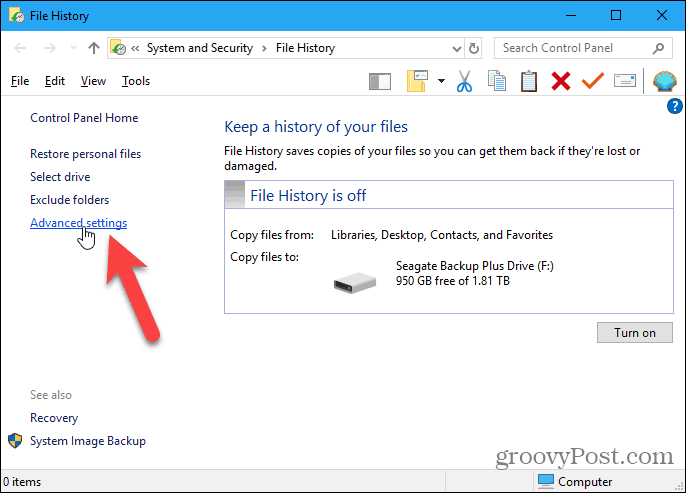
On the Advanced settings screen, click Clean up versions.

Select how far back you want to delete folders and files from the drop-down list. Then, click Clean up.

Backing Up Should Be Part of a Regular Routine
Make sure you back up regularly to avoid data loss.
File History backs up data files, but not the Windows system. But you can create a Windows 10 system image to do that.
You can also create a Windows 10 restore point to go back in time to a previous version of your system. This is useful if you’re going to install some software and you want a way to go back to before the installation in case something goes wrong. Creating a system restore point is also recommended before making changes to the registry. The registry can be backed up on its own, too.
If Windows 10 becomes slow and unresponsive at times, you can reset it. This resets Windows 10 to factory default but keeps all your data. After a reset, you must reinstall all your software, so be sure you have the time to do this before resetting Windows 10.
Previous Windows 10 version won’t restore? Here’s what to do

Backing your data and restoring it in the dire need was always an important feature of the Windows platform. However, Microsoft’s meddling with these options made things a lot more complicated. The inability to restore the previous version of files or directories from the recovery points made things a lot harder for users.
For that reason, we decided to shed some light on the matter and provided a few solutions (and workarounds). Make sure to check them out below.
Unable to restore the previous version in Windows 10? Here’s what to do
1: Make sure that File History is enabled
In order to load, access, and restore previous file versions on Windows 10, you’ll need to enable this option it in the System Settings. Of course, you’ll need an external device or a network location to backup your data. After that, plug in the external media, right-click on the file or folder you want to inspect and choose Properties > Previous Versions.
You can also use backups to restore the previous versions, but versioning (various versions of a single file) won’t be available. You’ll be stuck with a single version.
Here’s how to enable File History:
- Press Windows key + I to open Settings.
- Choose Update & Security.

- Select Backup from the left pane.
- Plug in an external drive and click on Add a drive.
- Choose the drive from the drop-down menu.
- Click on More options to select the backup schedule and folders you want to backup.
2: Check associated services
If you’ve managed to get the File History protocol up and going but it still fails to deliver, we recommend checking the Recovery points. There are two services which should concern you in this matter. Two services you’ll need to look out for are “Volume Shadow Copy” and “Windows Software Shadow Copy”. Just type Services in the Search bar, and open Services. Once there, navigate to aforementioned services and make sure they’re enabled.
Of course, before navigating to Services, make sure to inspect current System protection is enabled. Here’s where to find it:
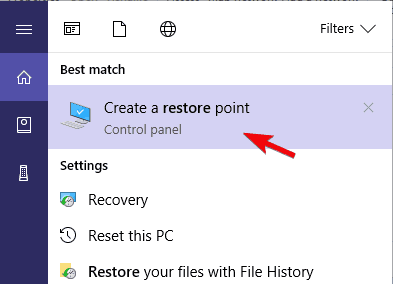
- Type Create in the Windows Search bar and open “Create restore point” from the list of the results.
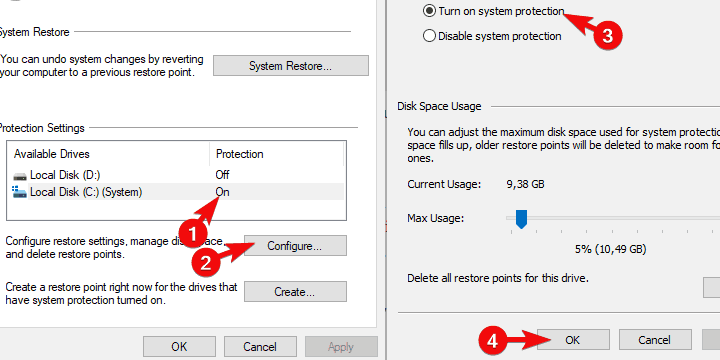
- Choose the system partition and click Configure.
- Enable System protection.
- From now on, you should be able to restore the affected files in case they get deleted or corrupted by restoring the system from a restore point.
3: Create a backup
With Windows 10, Microsoft ditched some old backup-based features which were rather useful. Luckily, it retained the option to backup everything on a local drive. This way of cautious data preservation can take a lot of storage space. But, if that doesn’t bother you, you can use this feature to backup and later restore files with rather ease.
Here’s how to create a full backup of all your digital belongings in Windows 10:
- Press Windows key + I to open Settings.
- Choose Update & Security.
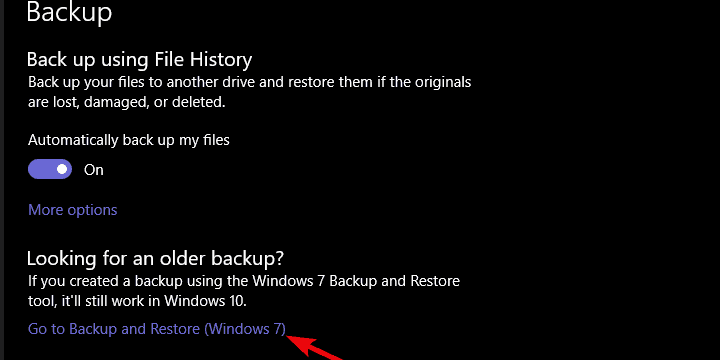
- Select Backup from the left pane.
- Click on the “Go to Backup and Restore (Windows 7)” and backup your data on a data partition.
4: Use a third-party software
Finally, we’re living in the cloud era, where the storage space can be enlarged and accessed from any place. There are a lot of available services you can use to back up the most important files. Some are for Enterprises and some, like OneDrive, Google Drive, or Dropbox should be enough to keep the most important files safe and sound.
And, when it comes to interacting with local files without a cloud, we recommend ShadowExplorer. This application can read from Restore points and allow you to access older iterations of files and folders. You can download this nifty utility, here.
That should do it. In case you’re still in need of some extra information or have something to add, feel free to comment in the comments section below.
RELATED STORIES YOU SHOULD CHECK OUT:


