- Компьютер не видит принтер? Решение проблемы!
- Шаг №1. Проверка подключения по USB
- Шаг №2. Соединение по WiFi или Bluetooth
- Шаг №3. Установка драйверов
- Шаг №4. Выбор принтера по умолчанию
- Шаг №5. Запуск Диспетчера печати
- Full Fix: Printer has no IP address on Windows 10, 7
- What can I do if the printer has no IP address?
- 1. Update your drivers
- DriverFix
- 2. Check your printer’s manual
- 3. Print a test page
- 4. Make sure that your printer is using DHCP
- 5. Set the IP address manually
- 6. Make sure that your configuration is correct
- 7. Check the address from the Control Panel
- Fix printer problems in Windows 7 and Windows 8.1
- Connecting your printer
- To install a printer
- To install (add) a local printer
- To install a network, wireless, or Bluetooth printer
- Troubleshoot printer problems
- Start by checking your hardware
- Use a troubleshooter
- Update drivers
- For Windows 8.1
- For Windows 7
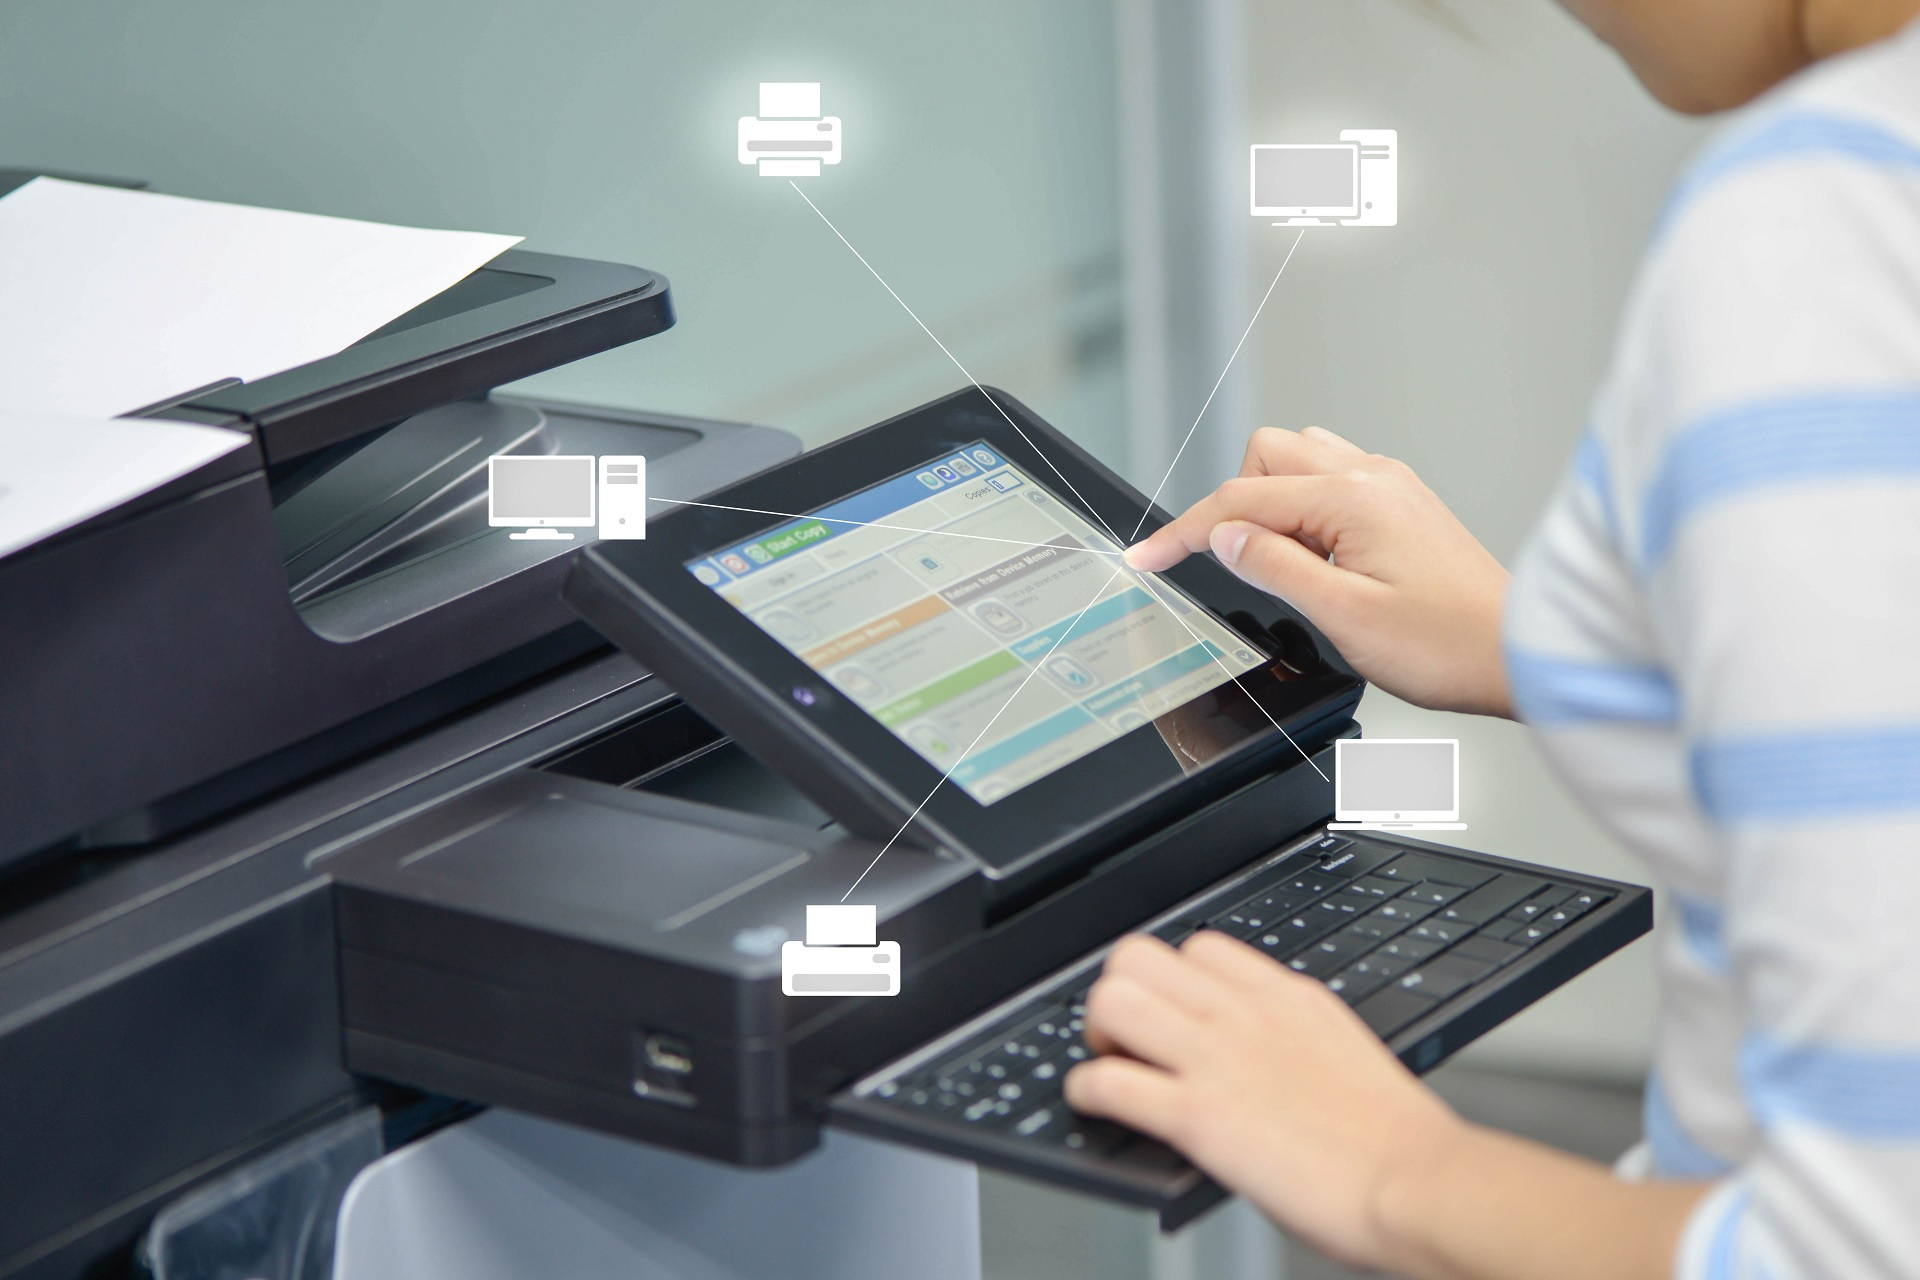
Компьютер не видит принтер? Решение проблемы!
Если компьютер не видит принтер, не спешите нести печатающее устройство в сервисный центр. Для начала проведите диагностику аппарата в домашних условиях, пользуясь пошаговой инструкцией от специалистов ТонерДруг .
Так вы не только сэкономите денежные средства, но и убережете себя от бесполезной траты времени. Только в ыполняйте все действия последовательно. Не нашли решение на первом шаге? Переходите к следующему!
Данный алгоритм подходит для любых современных принтеров, работающих по технологиям лазерной или струйной печати.
Шаг №1. Проверка подключения по USB
Для начала отключите все беспроводные интерфейсы. Отдайте предпочтение подключению по USB напрямую. Использовать разветвители не рекомендуется!
Также важно не перепутать стандарты USB-разъемов, которые широко распространены на новых ПК и ноутбуках. 
Старые принтеры могут не поддерживать современные стандарты USB. В таких случаях, если воткнуть соединительный кабель в разъем USB 2.0, то печатающие устройства успешно распознаются, а с USB 3.0 — работать не будут.
Гнезда у третьего поколения USB визуально отличаются от устаревших благодаря синему цвету коннектора.
Отдельно стоит проверить кабель, он не должен быть заломлен или перетёрт.
Шаг №2. Соединение по WiFi или Bluetooth
Актуально только для тех принтеров, которые поддерживают беспроводную связь с компьютером.
К сожалению, WiFi— и Bluetooth—интерфейсы на аппаратах бюджетного и даже среднего класса очень часто выходят из строя. Однако их можно использовать в целях диагностики, если ранее вы были подключены к ПК только через USB.
Успешное соединение принтера по воздуху говорит о том, что используемый кабель или USB-порты нуждаются в обновлении.
 Соединение по WiFi
Шаг №3. Установка драйверов
Проверить отсутствие драйверов на печатающем устройстве довольно просто. Следуйте цепочке:
- Мой компьютер;
- Свойства;
- Диспетчер устройств.
 Диспетчер устройств
Увидели во вкладке Очереди печати нераспознанные принтеры? Отправляйтесь на сайт службы поддержки производителя, чтобы скачать свежие драйвера.
Обновлять драйвера рекомендуется даже в том случае, когда аппараты успешно распознаются операционной системой. Иногда потеря видимости может быть обусловлена проблемой совместимости устаревшего ПО с накопительными апдейтами Windows .
Шаг №4. Выбор принтера по умолчанию
Оргтехника вошла в готовность и разогрелась, но после отправки документа в печать ничего не происходит? Скорее всего ваш аппарат не выбран в качестве приоритетного.
 Панель управления
Перейдите Панель управления — Оборудование и звук — Устройства и принтеры . Наведите курсор на необходимую модель принтера, а затем установите его по умолчанию, открыв контекстное меню правой кнопкой мыши.
Шаг №5. Запуск Диспетчера печати
В погоне за оптимизацией ПК, многие пользователи ограничивают работу тех процессов, которые в определенное время им не нужны.
Тоже самое проделывают и продавцы в магазинах, чтобы реализовывать бюджетные компьютеры, первое время обладающие молниеносным откликом.
Случайно или намеренно под оптимизацию могла попасть служба Диспетчера печати. Включить ее можно следующим образом (на примере Windows 10):
- войдите в Диспетчер задач (одновременное нажатие кнопок ctrl , alt и delete );
- в открывшемся окне выберите вкладку Службы , там же нажмите Открыть службы ;
- в списке процессов найдите Диспетчер печати и запустите его правой кнопкой мыши.
Если после проделанных процедур компьютер по-прежнему не видит принтер, обращения в сервисный центр избежать не удастся.
Full Fix: Printer has no IP address on Windows 10, 7

- The Printer has no IPaddress message may show up when you’re trying to use a network printer.
- To solve the issue, make sure to update your drivers and verify that the configuration is correct.
- You can also use the best printer management software to handle all printing tasks like a real pro.
- Our Windows 10 Troubleshooting Hub can help you fix various errors, so feel free to bookmark it.
- Download and install here this Driver Updater tool
- Once installed, click Scan to find outdated and bad printer drivers
- Click the Update Your Drivers Now after the scan to start the repair/update process
Fix all printer
related issues right now!
The Printer has no IP address error message can appear if you’re trying to use a network printer. This IP-related problem can prevent you from printing remotely.
That’s indeed unpleasant, but there are a few ways to fix this printer issue on Windows 10 and prior versions alike. Check them out below.
What can I do if the printer has no IP address?
1. Update your drivers

Printer problems are usually caused by outdated drivers, and if your printer has no IP address, the issue might be your drivers.
According to users, they managed to fix this problem by downloading the latest drivers for their printer.
Usually, printer drivers come with dedicated software that will automatically configure your printer, so be sure to download it. Once you download the latest drivers, check if the problem is still there.
Downloading drivers manually can be a tedious task, especially since you need to know the model of your printer and how to find the proper drivers for it.
If you want to automatically update your drivers, we suggest you give a try to DriverFix. When we say drivers, we do mean all your drivers at once, to make sure that no time is wasted.

Besides that, DriverFix discovers all missing or faulty drivers in seconds, so there’s literally nothing stopping you from installing it.
DriverFix
2. Check your printer’s manual
If your printer has no IP address, the problem might occur because you’re not setting up the printer properly. To fix that, be sure to check the printer manual and follow all the instructions carefully.
Sometimes your wireless printer might not support the encryption method that your Wi-Fi network is using, so be sure to check that first.
After doing that, check if your SSID and password are properly set in the printer configuration page. After making sure that your settings are correct, the printer should work again.
3. Print a test page
If you’re using a wireless printer, you need to know your IP configuration. If your printer has no IP address, you might be able to see its IP configuration simply by printing a test page.
This method differs for all printers, but in most cases, you need to press and hold a certain button for a couple of seconds and your printer will print the test page.
On that test page, you’ll see all the relevant IP configuration that should allow you to access your printer.
4. Make sure that your printer is using DHCP

If your printer has no IP address, the problem might be your configuration.
Routers and other network devices are using the DHCP network protocol in order to automatically assign an IP address to a network device.
If you’ve assigned a static IP address to your printer, be sure to remove it, and enable DHCP on your printer.
Now restart your printer a couple of times and an IP address should be assigned to it automatically.
5. Set the IP address manually

- Use physical buttons on your printer to select the Network option.
- Now choose WLAN or Wired LAN > TCP/IP > IP Address.
- Now set the desired IP address.
Setting an IP address on your printer is relatively simple, and in most cases, you can do it right from the printer itself. This is quite simple to do, and you can do it by following the above procedure.
If you want, you can also set the IP address from your browser. To do that, follow these steps:
- Enter the IP address of your printer in the browser.
- Go to the Network >Wired or Wireless section.
- Now enter the desired IP address and the required information.
After doing that, your printer should be recognized by your network. Keep in mind that these are just general instructions, and the process will most likely be a bit different on your printer.
6. Make sure that your configuration is correct
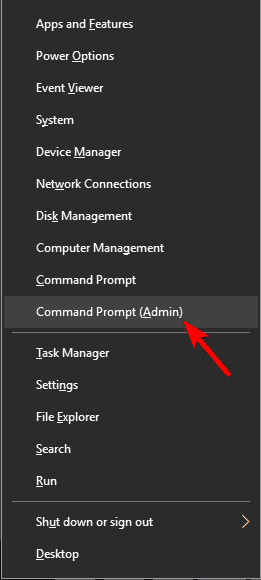
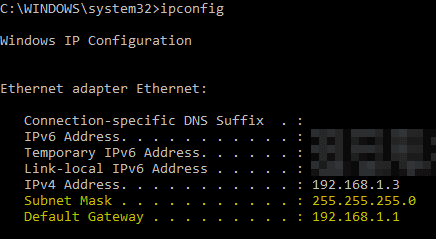
- Press Windows Key + X to open the Win + X menu. Select Command Prompt (Admin) or PowerShell (Admin).

- Now enter ipconfing command and press Enter.
- Locate your network connection and pay attention to Subnet Mask and Default Gateway values.
Configuring a network device such as a wireless printer isn’t always simple, especially if you don’t know your network parameters.
If you don’t know your network parameters, you can obtain them by following the above steps.
If this method seems too complicated for you, you can also check your network configuration by doing the following:
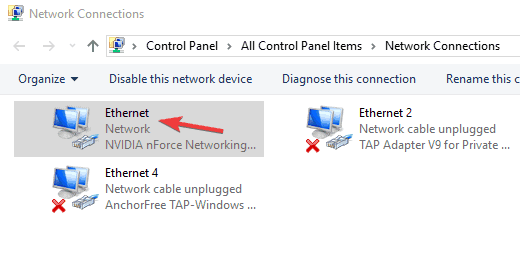
- Click the network icon on your Taskbar and select your network from the list.
- Now select Change adapter options.
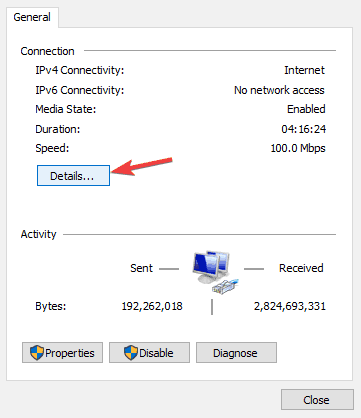
- Locate your current network connection and double-click it.
- When the Properties window opens, click Details.
- Now you should be able to see Subnet Mask and Default Gateway values.

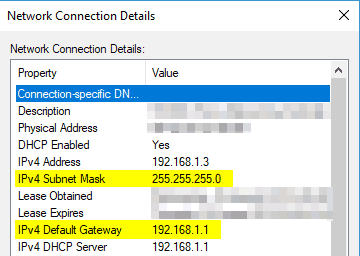
Both methods will give you the same information, and you can use either one.
When you’re configuring your wireless printer, be sure to enter the Subnet Mask and Default Gateway values that you obtained in previous steps.
As for IP Address, you can use 192.168.1.X. Just replace X with any value that’s currently not in use by your network.
As a rule of thumb, you can use values higher than 10 or 20 without any problems. Once you properly configure your printer, the issue should be resolved.
7. Check the address from the Control Panel
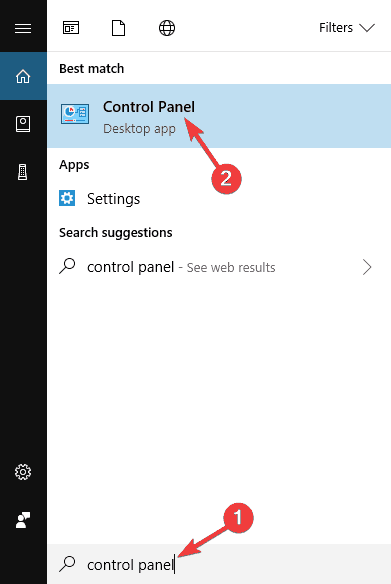
- Press Windows Key + S and enter control panel. Now choose Control Panel from the list of results.
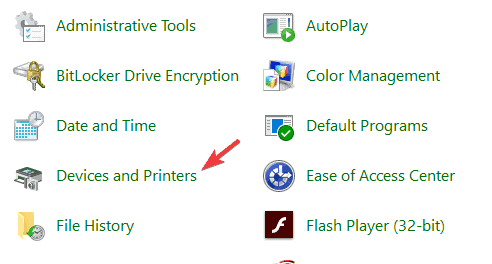
- Go to the Devices and Printers section.
- Locate your printer, right-click it, and choose Properties from the menu.
- Once you open the Properties window, you should be able to see the IP address of the printer under the Location section.
If your printer has no IP address, you might be able to see it manually from Control Panel. This is a simple task, and you can do it by following the above steps.
You can’t open Control Panel? Take a look at this step-by-step guide to find a solution.
If your printer has no IP address or you’re getting a message saying that the HP printer IP address is not connected – that can be a big problem.
We hope that you managed to fix this issue by using one of our solutions.
Fix printer problems in Windows 7 and Windows 8.1
Connecting your printer
When you connect a printer to your PC or add a new printer to your home network, you can usually start printing right away. Windows supports most printers, and you probably won’t have to go out of your way to install special printer software. If you’re using Windows 8.1 or Windows RT 8.1, additional printer support and drivers are available through Windows Update.
To install a printer
In most cases, all you have to do to set up a printer is to connect it to your PC. Simply plug the USB cable from your printer into an available USB port on your PC, and turn the printer on.
For wireless printers with Windows 8.1:
Note: If you have a new wireless printer that hasn’t been added to your home network, read the instructions that came with the printer to learn how to add it. Check the printer manufacturer’s website to learn more and to get up-to-date software for your printer.
Swipe in from the right edge of the screen, tap Settings, and then tap Change PC settings. (If you’re using a mouse, point to the lower-right corner of the screen, move the mouse pointer up, click Settings, and then click Change PC settings.)
Tap or click PC and devices, and then tap or click Devices. If your printer is installed, it should appear under Printers.
If your printer isn’t listed, tap or click Add a device, and then select your printer to install it.
To install (add) a local printer
Click the Start button, and then, on the Start menu, click Devices and Printers.
Click Add a printer.
In the Add Printer wizard, click Add a local printer.
On the Choose a printer port page, make sure that the Use an existing port button and the recommended printer port are selected, and then click Next.
On the Install the printer driver page, select the printer manufacturer and model, and then click Next.
If your printer isn’t listed, click Windows Update, and then wait while Windows checks for additional drivers.
If none are available and you have the installation CD, click Have Disk, and then browse to the folder where the printer driver is located. (For additional help, consult the printer manual.)
Complete the additional steps in the wizard, and then click Finish.
Tip: You can print a test page to make sure the printer is working correctly. If you’ve installed the printer but it doesn’t work, check the manufacturer’s website for troubleshooting information or driver updates.
To install a network, wireless, or Bluetooth printer
If you’re trying to add a network printer at the office, you’ll usually need the name of the printer. If you can’t find it, contact your network administrator.
Click the Start button, and then, on the Start menu, click Devices and Printers.
Click Add a printer.
In the Add Printer wizard, click Add a network, wireless or Bluetooth printer.
In the list of available printers, select the one you want to use, and then click Next. (If your computer is connected to a network, only printers listed in Active Directory for your domain are displayed in the list.)
If prompted, install the printer driver on your computer by clicking Install driver.  If you’re prompted for an administrator password or confirmation, type the password or provide confirmation.
Complete the additional steps in the wizard, and then click Finish.
Tip: Available printers can include all printers on a network, such as Bluetooth and wireless printers or printers that are plugged into another computer and shared on the network. You might need permission to install some printers. You can confirm the printer is working by printing a test page.
Note: After your printer is installed, you can keep it up to date with automatic Windows 7driver updates.
Troubleshoot printer problems
Start by checking your hardware
Make sure that the printer’s electrical cord is plugged into an electrical outlet and that the power switch is turned on. If you’re printing to a shared printer or a printer on a network, make sure that all necessary computers and routers are turned on too. If your printer or other equipment is plugged in to a surge protector or a backup power supply, make sure that hardware is plugged in and turned on as well.
If you’re using a wired printer, make sure that the printer cable is properly connected from the printer to your PC.
For wireless printers, check the wireless connection. Make sure the printer’s wireless option is turned on and available. Many printers have a button that displays a blue wireless icon when wireless is available.
Next, run the printer’s wireless connectivity test. Read the instructions that came with the printer or check the printer manufacturer’s website for instructions about how to do this.
Use a troubleshooter
A troubleshooter is an automated tool that can find and automatically fix some problems with your PC. The printing troubleshooter can fix problems with installing and connecting to a printer.
Update drivers
Most printers require driver software to work properly. If you recently upgraded from one version of Windows to another, it’s possible that the current printer driver is for the previous version of Windows. If you’ve had recent power outages, viruses, or other computer problems, it’s possible that the drivers have become damaged. Downloading and installing the latest driver for your printer can resolve these types of problems.
Three ways to find and install a driver:
Use Windows Update. Windows Update might have an updated version of your printer driver.
Install software from the printer manufacturer. If your printer came with a disc, that disc might contain software that installs a driver for the printer.
Download and install the driver yourself . You can search for a driver on the manufacturer’s website. Try this if Windows Update can’t find a driver for your printer, and the printer didn’t come with software that installs a driver.
For Windows 8.1
To print webpages using Internet Explorer, click the Tools button, select Print, and then select Print again. See what the printed page will look like by selecting Print Preview. Or, print pages by pressing Crtl + P.
To print only a picture from a page (and not the whole page), right-click on the picture, and select Print. In the Print dialog box, select Print again.
For Windows 7
To print webpages using Internet Explorer, press Crtl + P and choose which of your installed printers to print from.


