- Printscreen no mac os
- Изменить расширение/ формат скриншотов в Маке.
- Изменить место сохранение принтскринов в Маке.
- Отключить тень у скриншотов.
- Как сделать снимок экрана (print screen) в Mac OS?
- Первый способ: сочетания клавиш
- Второй способ: программа Снимок экрана
- Как сделать снимок экрана на Mac
- How to Print Screen on a Mac, 6 different ways to capture screenshot on a Mac
- How to Capture Print Screen on a Mac
- 1. Method
- 2. Method
- 3. Method
- Change the File Format Your Mac Uses to Save Screenshots
- Update:
- Share This
- Aigars
- Related Posts
Printscreen no mac os
Дословно, скриншот (screenshot) – это снимок экрана. Например в Windows для этой цели необходимо нажать клавишу «PrintScreen», после чего копия содержимого будет скопирована в буфер обмена, для того что бы получить изображение, необходимо открыть редактор (например, paint) и вставить содержимое буфера и сохранить изображение. Поскольку в Маке нет кнопки «PrintScreen», возникает резонный вопрос — Как сделать скриншот/ принтскрин на Маке? В Mac OS X все проще, для этого используются сочетание клавиш.
Итак, для того что бы сделать скриншот в Mac OS используйте следующее сочетание клавиш:
+ + сохранить снимок всего экрана на рабочий стол.
+ + + сделать снимок активного окна и сохранить его на рабочий стол.
+ + выделить область и сохранить ее на рабочий стол.
Если к любой этой комбинации добавить , то изображение будет сохранено в буфер обмена. Это удобно если вы хотите сделать скриншот и сохранить его в документе или электронном письме. Для вставки его туда используйте сочетание клавиш + .
Изменить расширение/ формат скриншотов в Маке.
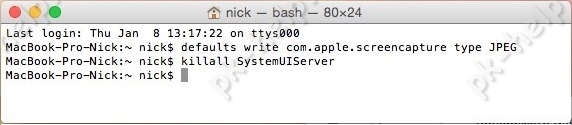
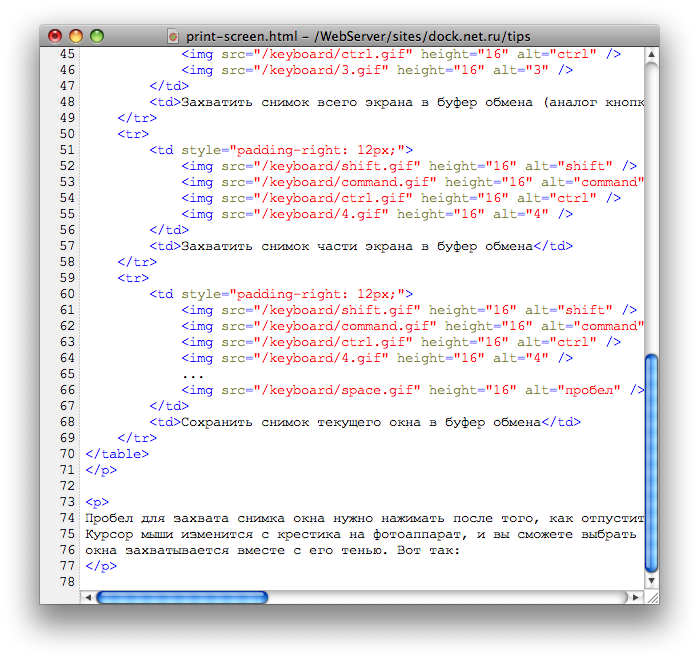
По умолчанию все скриншоты будут сохраняться с расширение .PNG, если вы хотите изменить расширение на любой из этих: JPEG, TIFF, PDF GIF, BMP, PNG, необходимо запустить Терминал и выполнить команды (учтите, что терминал чувствителен к регистру, если в команде используется заглавная буква, то и в терминале необходимо использовать заглавную):
defaults write com.apple.screencapture type format
killall SystemUIServer
Например, ниже команда, которая изменяет расширение принтскрина на JPEG
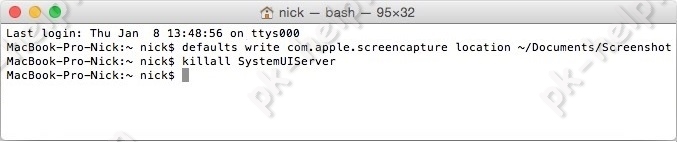
Изменить место сохранение принтскринов в Маке.
По умолчанию все скриншоты сохраняются на рабочий стол, что не совсем удобно, поскольку он захламляется. Удобнее будет указать другую папку для сохранения скриншотов. Для этого в терминале выполните команды:
defaults write com.apple.screencapture location
killall SystemUIServer
Например, в папке Документы я сделал папку Screeshot и выполнил команды, после которых все принтскрины сохраняются в папку Screeshot в директории Документы:
defaults write com.apple.screencapture location
killall SystemUIServer
Если вы хотите вернуть все по умолчанию, выполните команды:
defaults write com.apple.screencapture location
killall SystemUIServer
Отключить тень у скриншотов.
По умолчанию при создании скриншота отдельного окна, вокруг него будет тень по всему контуру, что бы отключить эту тень при создании принтскрина, используйте команды:
Источник
Как сделать снимок экрана (print screen) в Mac OS?
Поскольку на маках нет кнопки PrintScreen, многим новичкам не понятно, как сделать снимок экрана в Mac OS X. На самом деле, делается это просто, причем есть даже несколько вариантов, не предусмотренных в Windows.
Первый способ: сочетания клавиш
В Mac OS X предусмотрено несколько специальных сочетаний клавиш для сохранения снимка экрана или его части. Их несложно запомнить:
   | Сохранить снимок всего экрана на Рабочий стол |
 | Сохранить снимок части экрана на Рабочий стол |
.  | Сохранить снимок текущего окна на Рабочий стол |
 | Захватить снимок всего экрана в буфер обмена (аналог кнопки Print Screen в Windows) |
| | Захватить снимок части экрана в буфер обмена |
| . | Сохранить снимок текущего окна в буфер обмена |
Пробел для захвата снимка окна нужно нажимать после того, как отпустите остальные клавиши. Курсор мыши изменится с крестика на фотоаппарат, и вы сможете выбрать нужное окно. Снимок окна захватывается вместе с его тенью. Причем тень полупрозрачна, благодаря чему картинку потом можно поместить на любой фон без дополнительной обработки. Вот так:
Второй способ: программа Снимок экрана
Если вы не хотите забивать голову сочетаниями клавиш или предпочитаете работать мышью, для вас Apple создала специальную программу. Называется она «Снимок экрана» (Grab.app в английской версии), и находится в папке «Программы/Сисменые программы» (Applications/Utilities).
Запустите программу, и выберите нужное действие в меню Снимок.
Источник
Как сделать снимок экрана на Mac
В меню «Снимок экрана» можно найти все необходимые элементы управления для создания снимков и записей экрана. Вы также можете записывать голос при создании записи экрана. Оптимизированный процесс работы в приложении позволяет Вам делать фото и видео экрана, а затем без труда публиковать, редактировать или сохранять их.
Доступ к элементам управления для работы со снимком экрана. Нажмите сочетание клавиш Command-Shift-5. Вы можете сделать снимок всего экрана, выбранного окна или области окна. Можно также сделать запись всего экрана или его области.
Используйте значки в нижней части экрана, чтобы сделать снимок выбранной области  , сделать запись экрана
  и др. Нажмите «Параметры», чтобы изменить место сохранения снимка, установить таймер перед созданием снимка, настроить параметры аудио и микрофона или показать указатель мыши. Нажмите «Снять» или «Записать», чтобы сделать снимок или видеозапись экрана.
По завершении создания снимка или видеозаписи экрана в углу экрана появляется миниатюра. Можно перетянуть миниатюру в документ или папку, смахнуть по ней вправо для быстрого сохранения или нажать ее для редактирования или отправки.
Примечание. Также можно открыть утилиту «Снимок экрана» из папки «Другие» в Launchpad или из папки «Программы» > «Утилиты» в Finder.
Разметка снимка экрана. Нажмите на миниатюру снимка экрана, чтобы использовать инструмент «Разметка» и добавить к нему аннотации. Чтобы сразу отправить размеченный снимок экрана коллегам или друзьям, нажмите «Поделиться»  . См. раздел Добавление примечаний к файлам на Mac в Руководстве пользователя macOS.
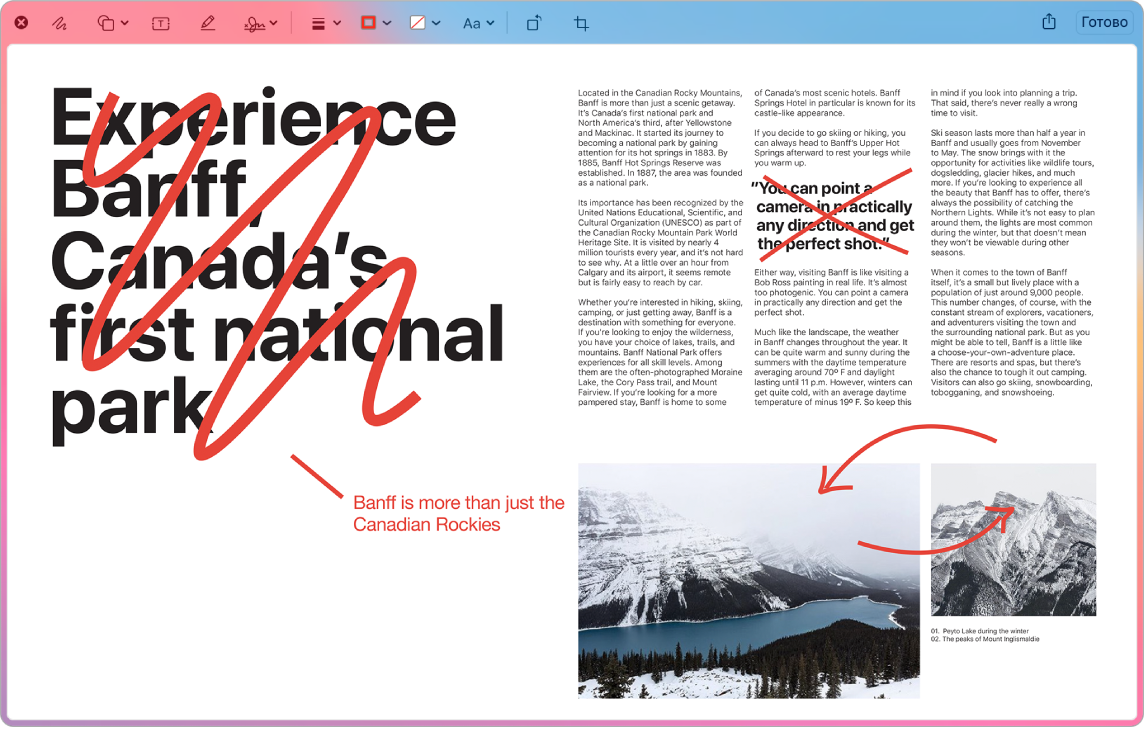
Подробнее. См. раздел Создание снимков экрана и записей экрана на Mac в Руководстве пользователя macOS.
Источник
How to Print Screen on a Mac, 6 different ways to capture screenshot on a Mac
If you Googled “How to do Print Screen on a Mac” it means that you recently have switched from Windows to a shiny Mac and have no idea where to find the “Print Screen” button which is present on most keywords designed for Windows. There are some exceptions but almost all Windows keyboards have the “Print screen” button somewhere. Unfortunately, there is no such button on your Mac but it doesn’t mean that you can’t take a screenshot, you can but the process is a bit more complicated, harder to memorize but is much more flexible when it comes to output and what you are specifically looking to capture in a screenshot.
There are 6 (!) different ways to capture a screenshot on your Mac, 3 different approaches with 2 different outputs for each but personally, I use only two and I call myself a heavy Mac user and I have taken thousands of screenshots in the last year alone that are all published on these WordPress theme collections. I have no idea how many are there but I am sure that there are at least tens of thousands of screenshots all captured using macOS 11 Big Sur, 10.14: Mojave, macOS 10.13: High Sierra, and older versions of macOS.
I originally decided to write this tutorial because dozens of people have asked how I have created all those screenshots on this website and I will leave this blog post as a reference to anyone asking the same question again.
How to Capture Print Screen on a Mac
1. Method
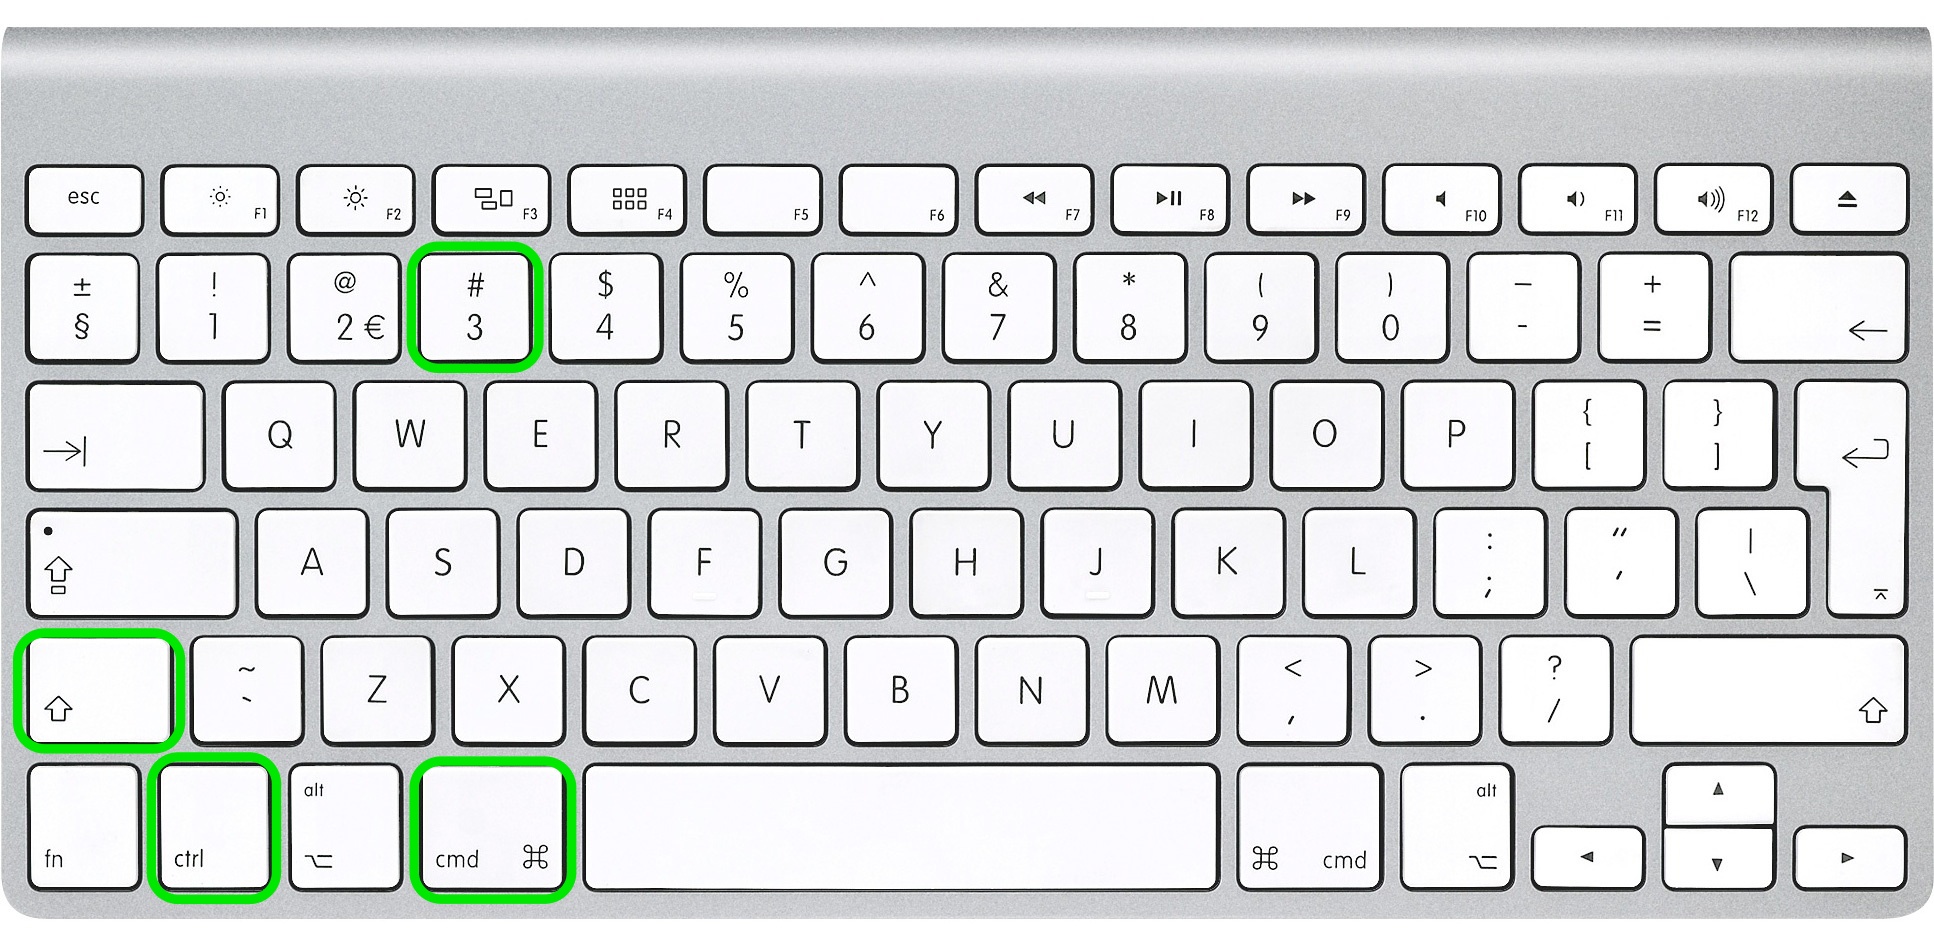
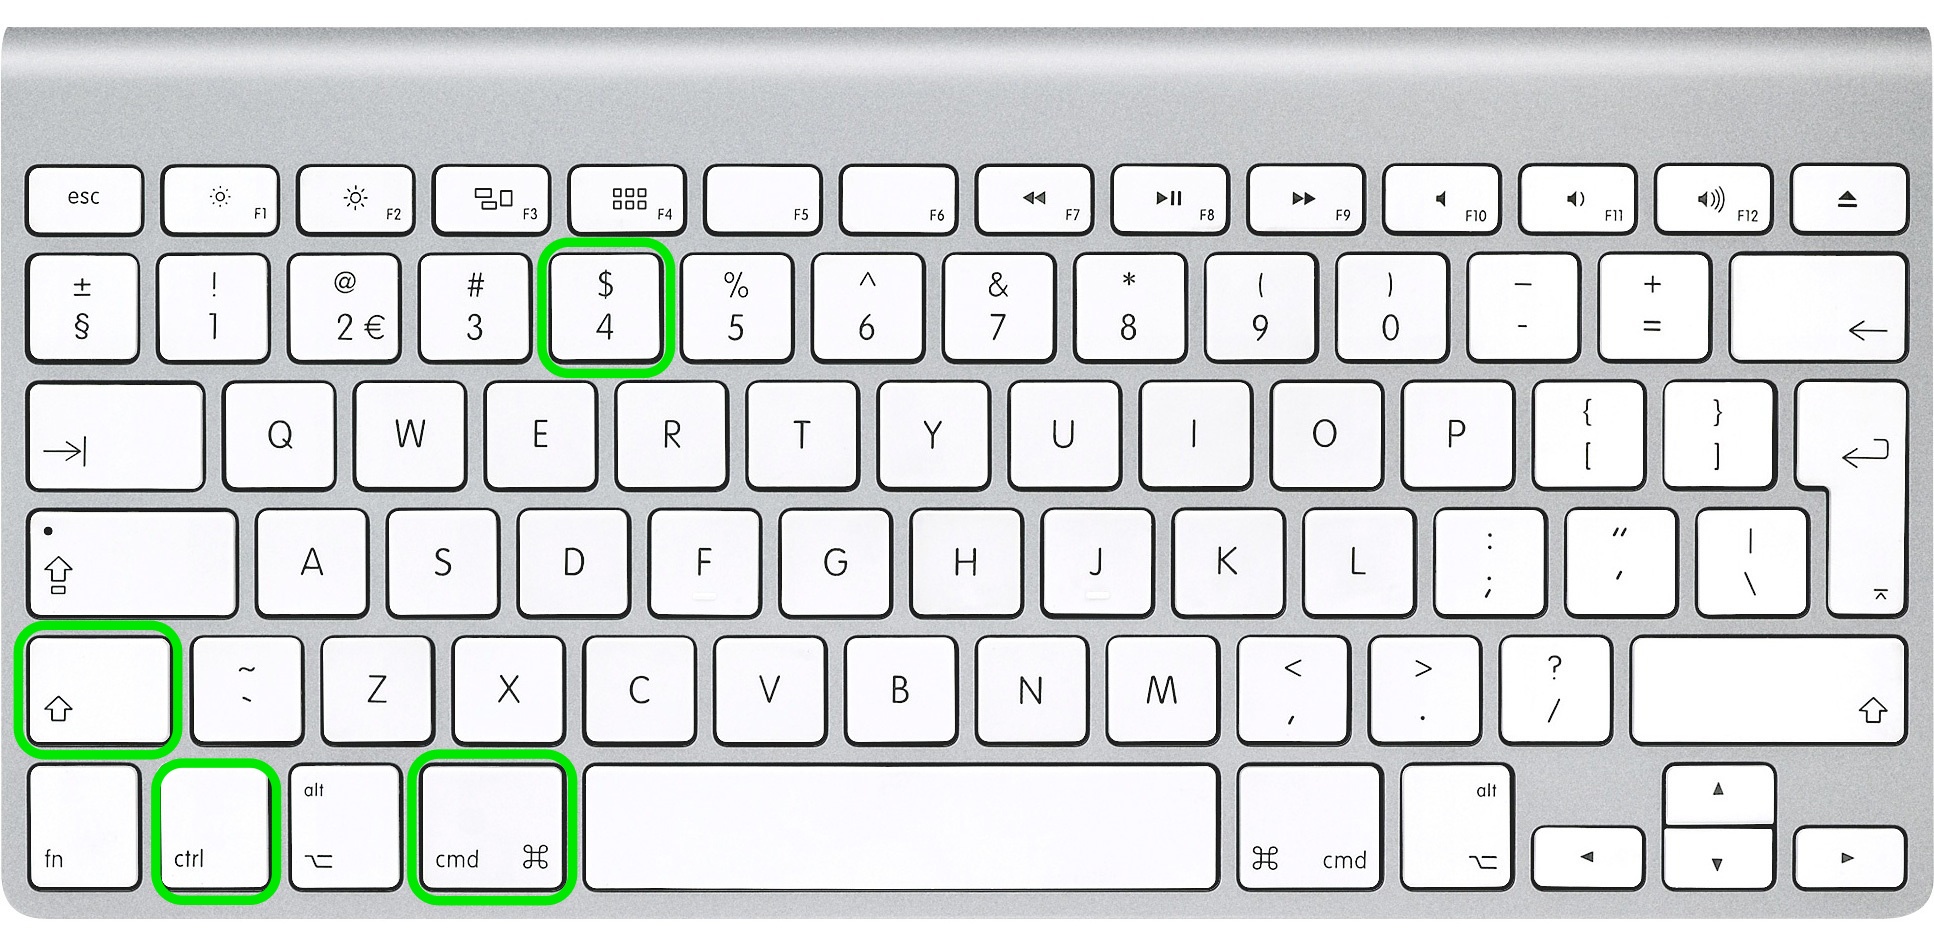
1.1 Capture entire screen area and save it to clipboard
Command ⌘ + Control + Shift + 3
Command ⌘ + Control + Shift + 3
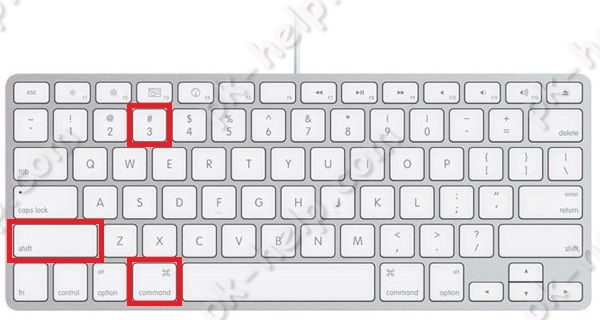
1.2 Capture entire screen area and save it to a file on your desktop
Command ⌘ + Shift + 3
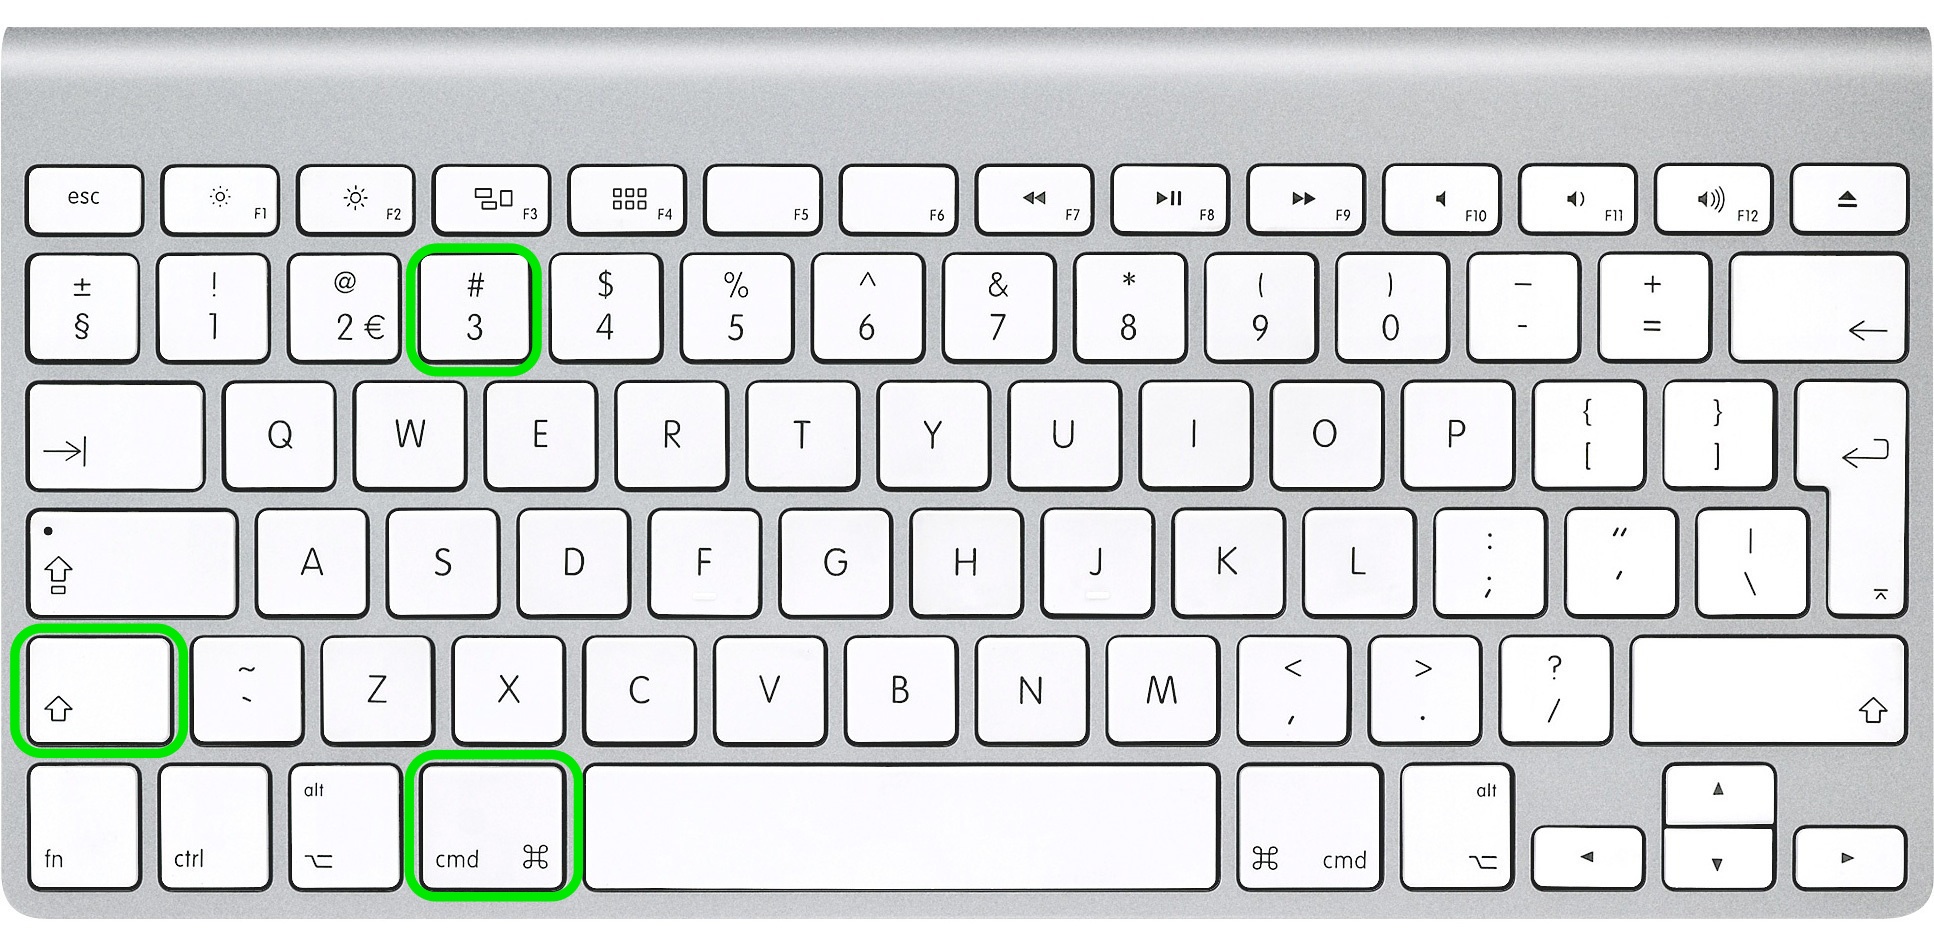
Command ⌘ + Shift + 3 – Capture screenshot and save it as a file
2. Method
This method will help you to capture a selected area of our screen such as the menu bar, opened applications, some part of the desktop, some application window, or anything else. This is a slightly more “advanced” method but it is very useful if you get used to it. Personally, I use this method a lot but you have to repeat this method to memorize and learn how to use it properly on your Mac.
2.1 Capture selected screen area and save it to the clipboard for further use in apps
 Command ⌘ + Control + Shift + 4 + Drag with mouse. Capture the selected area of the screen and save it on the clipboard.
- Press the Command ⌘ + Control + Shift + 4 (for older Mac versions use Apple key ⌘+ Control + Shift + 4) all at the same time.
- You will notice that your mouse cursor changes to “+” with pixel coordinates on the right side
- Now click and drag a box around the section that you want to capture and release the mouse button when you are done
- Now screen capture is saved on the clipboard for further use in apps
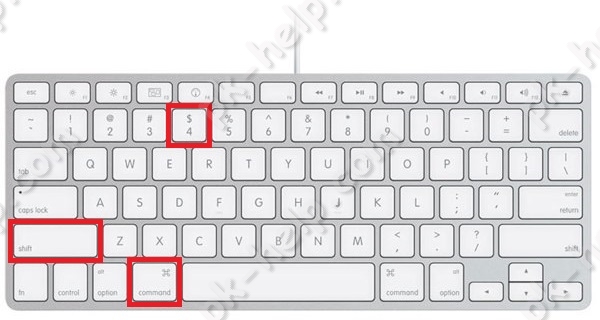
2.2 Capture selected screen area and save it to a file on your desktop

Command ⌘ + Shift + 4 + Drag with mouse. Capture the selected area of the screen and save it as a file on your desktop.
- Press the Command ⌘ + Shift + 4 (for older Mac versions use Apple key ⌘ + Shift + 4) all at the same time.
- You will notice that your mouse cursor changes to “+” with pixel coordinates on the right side
- Now click and drag a box around the section that you want to capture and release the mouse button when you are done
- Now screen capture is saved on a PNG file on your desktop (if not otherwise specified)
3. Method
This method will help you to save a print screen of a particular application window such as a web browser, Keynote, Pages, Numbers or other.
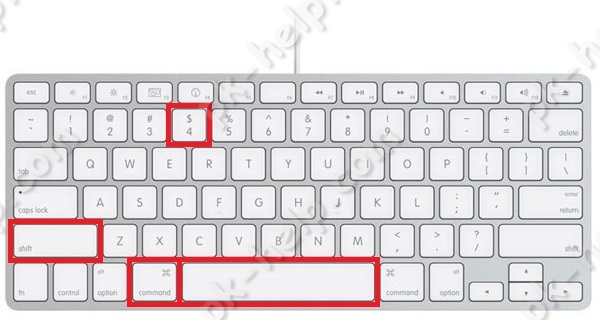
3.1 Capture a screenshot of a particular app window and save it to the clipboard
Command ⌘ + Control + Shift + 4 + Space bar + Mouse Click. Print screen particular windows on save it on the clipboard
- Command ⌘ + Control + Shift + 4
- You will notice that your mouse cursor changes to “+” with pixel coordinates on the right side
- Now with spacebar (that very wide button on your keyboard )
- Now click on the window you would like to capture in a screenshot
- The screenshot is now saved on your clipboard for further use in apps
3.2 Capture a screenshot of a particular app window and save it to a file on your desktop
Command ⌘ + Shift + 4 + Space Bar + Mouse Click. Print screen particular windows on save it as a file on the desktop.
- Command ⌘ + Shift + 4
- You will notice that your mouse cursor changes to “+” with pixel coordinates on the right side
- Now with space bar (that wide button on your keyboard )
- Now click on the window you would like to capture in a screenshot
- The screenshot is now saved on a PNG file on your desktop (if not otherwise specified)
As I said, there are 3 methods with 2 different outputs and we have covered them all. If you are having trouble with any of these methods, please let us know in the comments below.
You don’t need to memorize all these methods and the best solution here is to find the one or two that you like the most and practice for a while to memorize the theme. If you think that you will definitely forget, make sure to bookmark this page for further reference.
Change the File Format Your Mac Uses to Save Screenshots
If you did try to use some of the above-mentioned methods, you might have noticed that screenshots saved as PNG files. In most cases, it is OK to use this file format because you will get the best image quality but if you are using MacBook Pro Retina or some other 4K monitor you will notice that screenshots can be as large as 5-8MB and that is unacceptable for sending several such files via email.
There is a solution for this as you can change the default file type for screen captures by using a simple terminal command. Every installation of Mac OS X includes the Terminal which you can find in Applications -> Utilities. Or use search to find “Terminal” faster.
Most major image formats are supported by this OS X function including PNG, PDF, GIF, TIFF, and JPG, we’ll go with JPG since that is a common type and will output smaller image size than the default PNG.
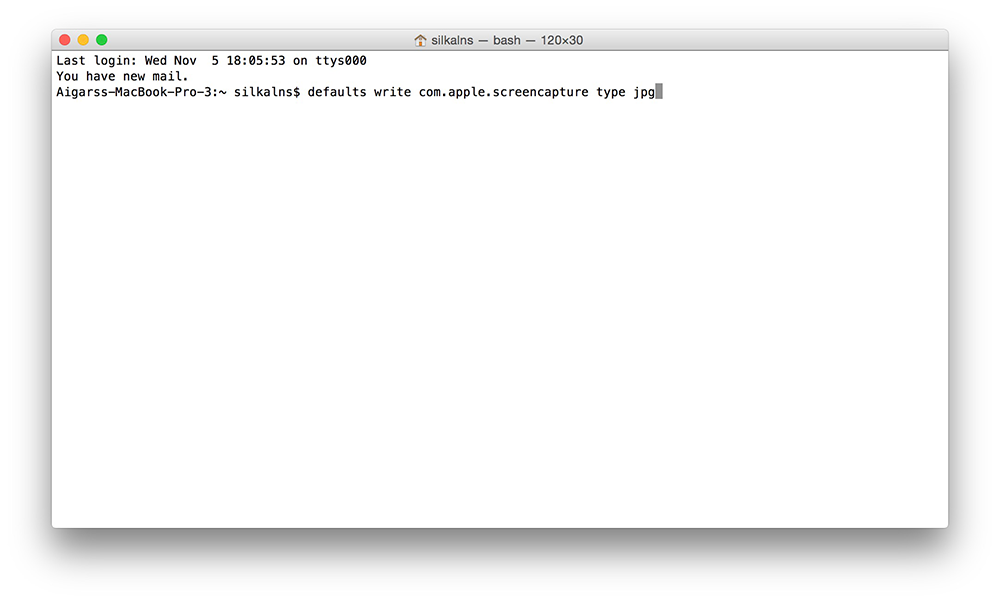
Now that you have Terminal opened copy/paste this command and hit enter (return):
You might have to input your Mac user password, if so, just go ahead and do it.
These changes will take effect after the next restart but you can use this command to make these changes instant. Again copy/paste this command in the Terminal window and hit enter (return).
Screen captures will now be saved as JPG files. To change back to PNG or to any other file format just run through the process again setting ‘png’ or other as you type in the first Terminal command.
In case you are looking for the original image of the Mac keyboard we used for this tutorial you can download it from here.
Update:
It has been 8 years since we first published this tutorial and over time it has been viewed by several million users. We are glad that you found it useful and have shared it so many times on social media. This tutorial is still up to date and nothing has changed since.
Since then we have grown a lot and now we offer mockups that might come in handy if you are a designer and want to combine them with screenshots you have taken using the methods above. Since there are too many mockups to list them in a single line we are presenting them in a beautiful list:
Why we even mention mockups here? Because we combine mockups with Mac screenshots to make product presentations such as these.
Thank you for visiting Colorlib and reading this article! We highly appreciate it! Now you might want to learn how to make a website using our free WordPress themes.
Share This

Aigars
Frontend web developer and web designer specialized in WordPress theme development. After graduating with BBA he self-though frontend web development. Currently, has over 10 years of experience in mainly CSS, HTML (TailwindCSS, Bootstrap), JavaScript(React, Vue, Angular) and PHP. Obsessed with application performance, user experience and simplicity.
Related Posts

MailChimp is one of the very best newsletter software on the planet. It’s straightforward to…

Trying to figure out how to create a website? Today you will find out! An…

Is your WordPress site slow? If yes, we need to work on that. Ohh and…

Every once in a while, you need to remove those pesky cobwebs to keep your…

Your Internet experience is only as fast as the websites you visit. Typically, the best…

If you are looking for web host for your new WordPress site, then you have…
Источник


