- FIX: Distorted display problem in Windows 10 [Full Guide]
- How do I fix a distorted display on Windows 10?
- 1. Install the latest Windows updates
- 2. Install the latest drivers
- DriverFix
- 3. Install the drivers in compatibility mode
- 4. Reinstall the default display driver
- 5. Set a custom refresh rate
- How to Solve Stretched Screen Display Problem on Windows 10
- On this page you can learn how to fix stretched screen display problem on windows 10.
- Overview of Stretched Screen Issues
- Solution 1. Go to Display Settings
- Solution 2. Use the Function Key
- Solution 3. Using the Slider
FIX: Distorted display problem in Windows 10 [Full Guide]

- If your monitor is blurry and distorted on Windows 10, it’s surely due to some GPU-related error.
- The first thing you should do to remove the screen distortion on Windows 10 is updating your OS.
- Updating your display drivers is also highly recommended. You can use a third-party tool for this.
- You can also fix the distorted screen on Windows 10 by changing your monitor’s refresh rate.
- Download Restoro PC Repair Tool that comes with Patented Technologies (patent available here).
- Click Start Scan to find Windows issues that could be causing PC problems.
- Click Repair All to fix issues affecting your computer’s security and performance
- Restoro has been downloaded by 0 readers this month.
Windows 10 is the latest Operating System and Microsoft constantly resolving any potential issues to make the user experience as smooth as possible.
One of the more annoying issues is distorted display after the update to Windows 10, but worry not, because there are few solutions that can help you resolve this issue.
According to users these issues manifest when watching online videos, and the picture gets cut in half and one side gets covered by horizontal lines and becomes distorted.
Like most issues with Windows 10, it’s usually the driver incompatibility with Windows 10.
Distorted display can be a big problem on your PC that can interfere with your everyday tasks. Speaking of this issue, users reported the following problems as well:
- Windows 10 display stretched – Many users reported that their display is stretched on Windows 10. This is usually caused by your display or graphics card settings, so be sure to change them to fix the problem.
- Computer screen distorted lines – This problem can appear due to a corrupted driver or faulty graphics card. If installing the default drivers doesn’t help, be sure to check if your graphics card is faulty.
- Windows 10 screen distortion – Screen distortion can appear for various reasons, and sometimes the problem might be a third-party application. Applications that modify the user interface can cause this issue, so be sure to remove them.
- Distorted monitor display problems – These problems can appear on any PC, and if you encounter this issue, be sure to try some of our solutions.
- Distorted display after Windows update – In some cases, this problem can appear after a Windows update. To fix the issue, you need to find and remove the problematic update. In addition, it’s a good idea to block the update from installing again.
How do I fix a distorted display on Windows 10?
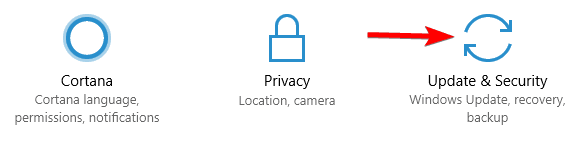
1. Install the latest Windows updates
- Open the Settings app.
- Navigate to Update and Security section.

- Click on Check for updates button.

Sometimes installing the necessary Windows updates can get the job done. So, just reach for the Settings app, and see if there are any updates available at the moment:
By installing Windows 10 updates you’re minimizing compatibility issues, and if Microsoft has fixed this issue, it’s available in Windows 10 update.
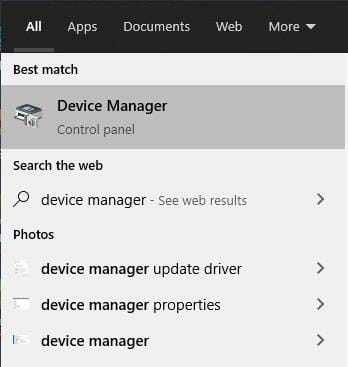
2. Install the latest drivers
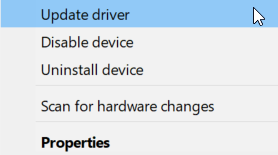
- Press the Win Key + S and search for Device Manager.
- In the Device Manager, look for the device you need to update.
- Right-click on it and select Update driver.
Sometimes issues are caused by your display driver that isn’t compatible with Windows 10, so you need to download the latest drivers for your graphics card and motherboard.
Just head to the Device Manager and check if your graphics card drivers are up to date.
Update drivers automatically
Updating your drivers manually is quite tedious and it requires some background knowledge. Moreover, there is also the possibility of installing the wrong driver, or an incompatible one.
Therefore, we recommend downloading this driver updater tool (100% safe and tested by us) to do it automatically. Thus, you will prevent file loss and even permanent damage to your computer.
DriverFix
3. Install the drivers in compatibility mode
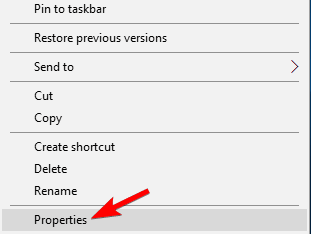
- Right-click the driver setup file and select Properties from the menu.
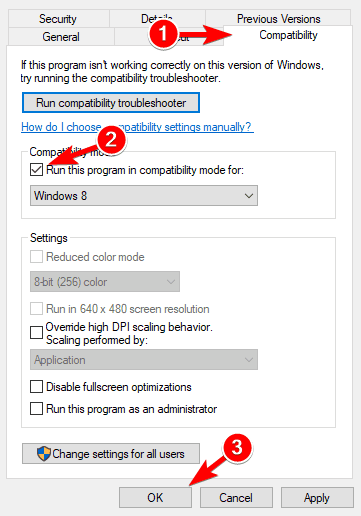
- Navigate to the Compatibility tab and check the Run this program in compatibility mode and select the operating system from the list.
- Click OK to save changes.
If Windows 10 drivers aren’t available for download, you need to download the latest drivers and install them in compatibility mode. After you’re done, try installing the driver again.
4. Reinstall the default display driver
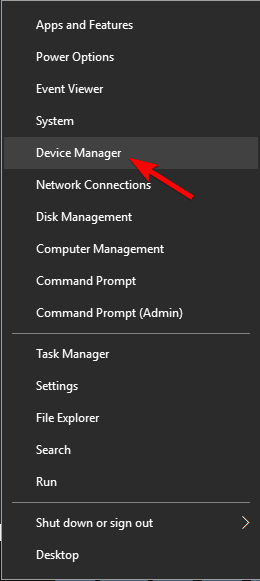
- Press Windows Key + X to open Win + X menu.
- Now choose Device Manager from the list.
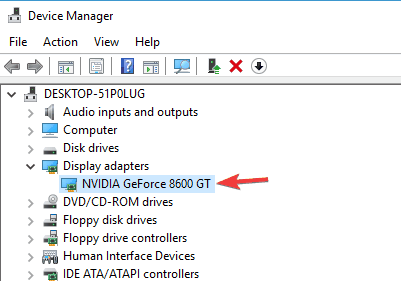
- When Device Manager opens, expand Display adapters section and double click your display adapter.
- When Properties window opens, navigate to Driver tab and click on Roll Back Driver button.
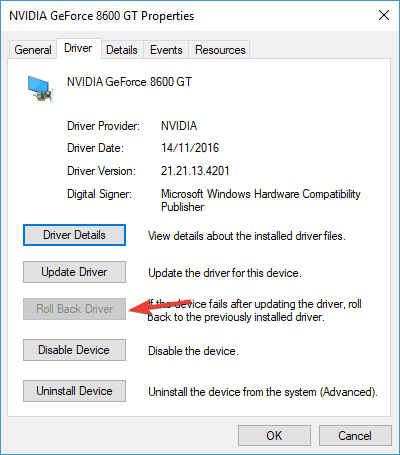
Sometimes you can encounter distorted display problem due to your drivers. Your display driver might be corrupted and that can lead to this problem.
However, you can fix this issue simply by rolling back to an older display driver. This is rather simple and you can do it by following these steps:
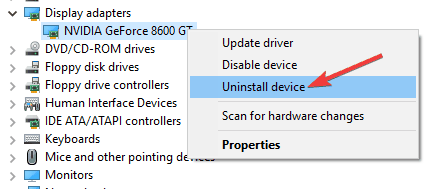
If the Roll Back option isn’t available, you’ll need to remove the driver. To do that, follow these steps:
- Start Device Manager.
- Locate your display driver, right click it and choose Uninstall device from the menu.
- Check Delete the driver software for this device option and click the Uninstall button.
- Once the driver is removed, restart your PC.
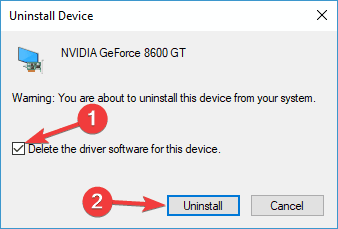
When your PC restarts, Windows will automatically install the default driver and the problem should be resolved.
Keep in mind that this method might not always remove all files associated with your display driver.
5. Set a custom refresh rate
- Open Nvidia Control Panel.
- In the Display category select Change Resolution.
- Click Customize.
- Click Create Custom Resolution and set a different refresh rate or try a different resolution.
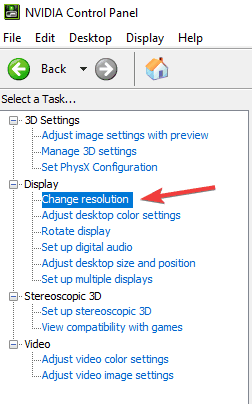
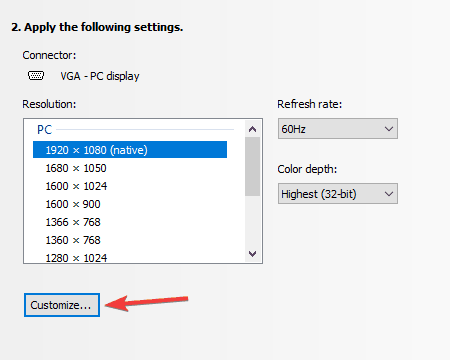
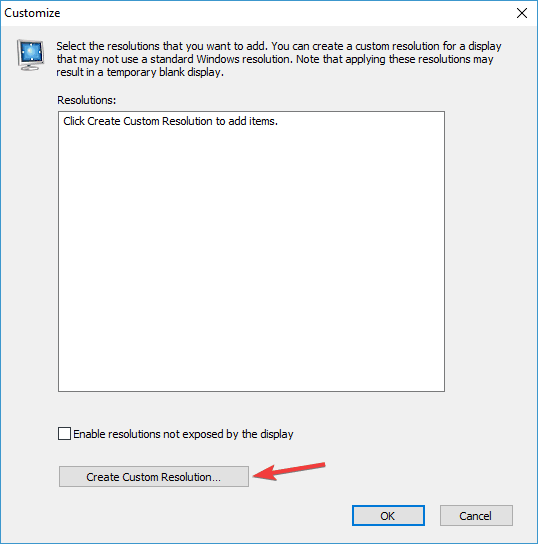
If your display is distorted, the problem might be your refresh rate. Several users reported that they fixed the problem simply by changing their monitor refresh rate.
We have to warn you, changing the refresh rate can lead to certain problems, so be careful. To change the refresh rate, do the following
How to Solve Stretched Screen Display Problem on Windows 10
On this page you can learn how to fix stretched screen display problem on windows 10.

David Darlington
Dec 21, 2020 • Filed to: Windows Computer Solutions • Proven solutions
Your screen, apart from your PC’s processor, is an important component of your computer. After all, this is where you visualize everything you’re making on your computer. However, it’s inevitable to have problems with the display. Sometimes, you’ll encounter a screen that looks oddly stretched wherein you cannot read the text or see the icons on the monitor properly. You may also find that some pixels look dead, and the pictures on the screen don’t look right. In this case, you may be dealing with a resolution problem. In this article, we’ll provide you with three sure and easy solutions to fix this problem.
Overview of Stretched Screen Issues
Usually, the stretched screen display is caused by the user accidentally. This may be from random presses on the keyboard or on the monitor that changes the display settings. On rare occasions, this can be caused by issues with a new update of your software.
If you want to solve this problem without calling tech support, you absolutely can. Here’s how you can fix Stretched Screen Issues for Windows 10
Solution 1. Go to Display Settings
Display Settings can be located in the Settings app on your computer. It is where you can modify your PC’s display configuration and preferences. You can identify and detect monitors or connect to a wireless display through this tool.
1. Go to the Desktop and make a right-click on the screen and selectВ Display Settings.
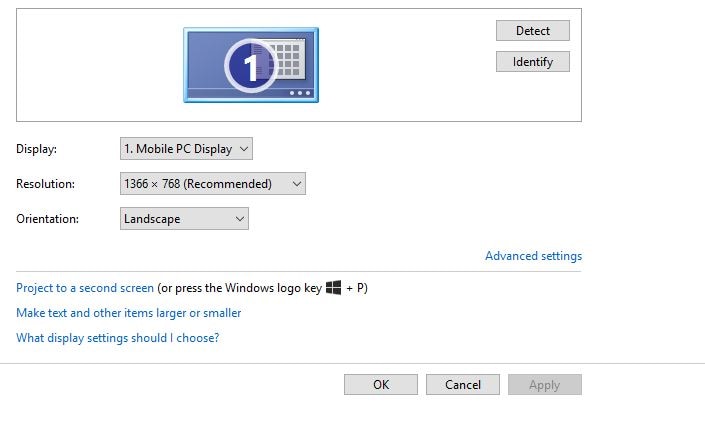
2. The Settings will now launch. SelectВ Advanced SettingsВ and set the resolution of the screen toВ recommend. This is usually set at 1366×768, but you can also opt to set it at 1260×768. Setting the resolution below this level might distort the display.
Solution 2. Use the Function Key
Many are unaware that many problems within the PC are resolvable with just the keyboard on their computers. Your keyboard is designed to be powerful enough to make changes within the computer without actually going to the Settings or manipulating the configurations or troubleshooting. Windows created commands on the keyboard that allows users to make changes with just a few presses easily. This is so the changing of the settings is more convenient and quick for users. This is often the reason why most settings are made when users accidentally hit random keys.
If you’re looking for another way to fix this problem, you can use the Function (Fn) key on your keyboard. Carefully follow the steps below:
Press and hold on theВ FnВ key on the keyboard while you hold on to the space bar.
Solution 3. Using the Slider
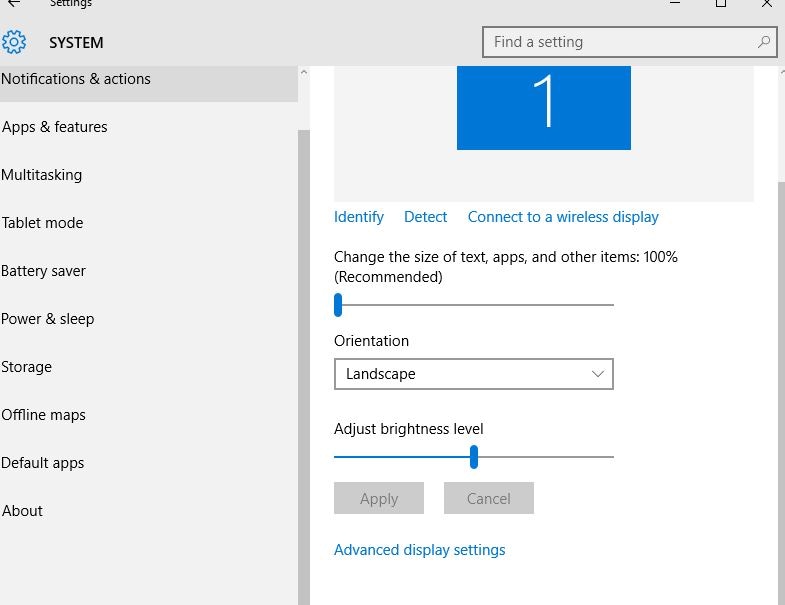
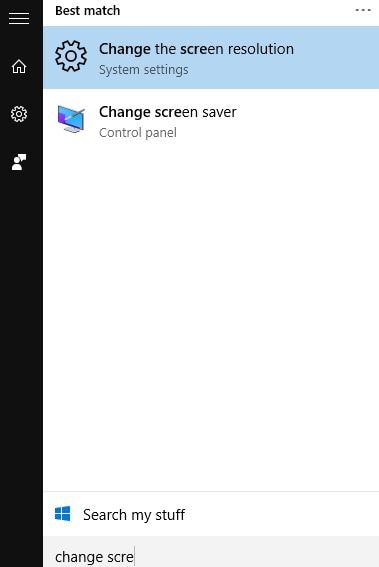
1. Go to Settings by typing it in the Search bar or looking for it in the Start menu. Look for Display Settings.

2. Move the slider underВ Change the size of text, apps, and other items: 100% (Recommended). Change it to which the resolution would look the best.
3. Press the Start button on your keyboard or click on it on the screen at the bottom portion. Type in the Search bar, Changes the screen resolution, and pressВ Enter.
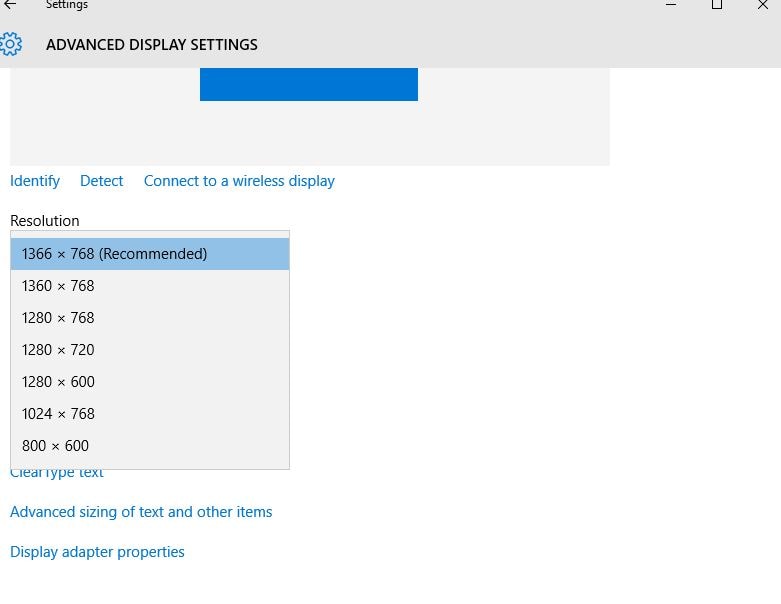
4. SelectВ Advanced Sizing of Text and other itemsВ under Related Settings.

5. On the left-side menu, selectВ Adjust resolution.
6. Then, selectВ Advanced settings.
7. SelectВ List All ModesВ under theВ AdapterВ tab.
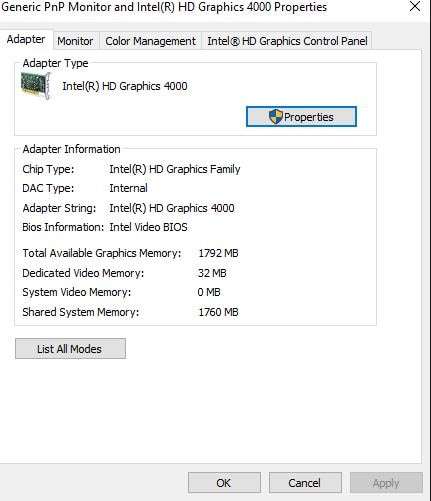
8.В List All ModesВ window will show you a list of valid modes. These are:
640 by 480, True Color (32 bit), 60 Hertz
800 by 600, True Color (32 bit), 60 Hertz
1024 by 768, True Color (32 bit), 60 Hertz
1280 by 600, True Color (32 bit), 60 Hertz
1280 by 720, True Color (32 bit), 60 Hertz
1280 by 768, True Color (32 bit), 60 Hertz
1366 by 768, True Color (32 bit), 60 Hertz
Choose whatever model is compatible with your resolution. We recommend nothing lower than 1280, as further lowering the resolution would result in blurry or hazy images.
9. Select theВ OKВ button and hitВ ApplyВ to apply the changes.
10. After applying the settings, your screen will turn black but don’t worry; this is just the computer adjusting the settings. After a few seconds, your screen will return with improved resolution and ratio.
Many users highly value a good display when it comes to their laptops or computer. If you use your computer for playing video games, it’s the most important part of your gaming experience. If you enjoy watching movies on your computer, you surely want a perfect and bright screen. Even if you’re only using your computer for work or school to complete some tasks, you would still need a relatively good screen that allows you to read texts perfectly. It’s only understandable for most users to get annoyed whenever an issue with the screen’s display comes up. If you’ve encountered this problem, one of the methods above should help fix this.


