- Windows Logon User Interface Host Problem
- Как исправить такую ошибку интерфейса не поддерживается в Windows
- Перезапуск Проводника Windows
- Обновление за апрель 2021 года:
- Восстановление профиля пользователя
- Перерегистрировать потенциально скомпрометированные файлы DLL
- Удаление папок, настроек меню, миниатюр и кэшей значков
- Заключение
- Fix Wi-Fi connection issues in Windows
- Troubleshooting network problems in Windows
Windows Logon User Interface Host Problem
Use the Clean Boot and other methods to try to determine the cause of and/or eliminate the issues.
References to Vista also apply to Windows 7.
What antivirus/antispyware/security products do you have on machine? Include any you have EVER
had on this machine including those you uninstalled (they leave remnants behind which can cause
strange issues).
Do these :
Try these to clear corruption and repair/replace damaged/missing system files.
Start — type this in Search Box -> COMMAND find at top and RIGHT CLICK — RUN AS ADMIN
Enter this at the prompt — sfc /scannow
How to analyze the log file entries that the Microsoft Windows Resource Checker (SFC.exe) program
generates in Windows Vista cbs.log
http://support.microsoft.com/kb/928228
Also run CheckDisk so we can rule out corruption as much as possible.
After the above :
How to troubleshoot a problem by performing a clean boot in Windows Vista or
Windows 7
http://support.microsoft.com/kb/929135
Optimizing Microsoft Windows Vista Performance
http://support.microsoft.com/kb/959062
To see all that is loading bootup — wait a few minutes without doing anything — then Right Click
TaskBar — Task Manager — take a look at Appplications — Processes — Services — this is a quick
reference (if you have a little box on Lower Left — Show for All Users then check that).
A quick check to see which are loading is Method 2 there — using MSCONFIG then post a list of
those here.
———————————————————————
Tools that should help :
Process Explorer — Free — Find out what files, registry keys and other objects processes have open,
which DLLs they have loaded, and more. This uniquely powerful utility will even show you who owns
each process.
http://technet.microsoft.com/en-us/sysinternals/bb896653.aspx
Autoruns — Free — See what programs are configured to startup automatically when your system boots
and you login. Autoruns also shows you the full list of Registry and file locations where applications can
configure auto-start settings.
http://technet.microsoft.com/en-us/sysinternals/bb963902.aspx
Process Monitor — Free — Monitor file system, Registry, process, thread and DLL activity in real-time.
http://technet.microsoft.com/en-us/sysinternals/bb896645.aspx
WhatsInStartUP — Free — This utility displays the list of all applications that are loaded automatically
when Windows starts up. For each application, the following information is displayed: Startup Type (Registry/Startup Folder), Command -Line String, Product Name, File Version, Company Name,
Location in the Registry or file system, and more. It allows you to easily disable or delete unwanted
programs that runs in your Windows startup.
http://www.nirsoft.net/utils/what_run_in_startup.html
There are many excellent free tools at NirSoft
http://www.nirsoft.net/utils/index.html
Window Watcher — Free — Do you know what’s running on your computer? Maybe not. The Window
Watcher tells all, reporting every window created by every running program, whether the window
is visible or not.
http://www.karenware.com/powertools/ptwinwatch.asp
Many excellent free tools and an excellent newsletter at Karenware
http://www.karenware.com/
Consider this an absolute must — manually updating your drivers.
Vista and Windows 7 love updated drivers so here is how to update the major ones.
This is my generic how to for proper driver updates :
This utility makes it easy to see which versions are loaded :
DriverView — Free — utility displays the list of all device drivers currently loaded on your system.
For each driver in the list, additional useful information is displayed: load address of the driver,
description, version, product name, company that created the driver, and more.
http://www.nirsoft.net/utils/driverview.html
For Drivers check System Maker as fallbacks and Device Maker’s which are the most current.
Control Panel — Device Manager — Display Adapter — write down the make and complete model
of your video adapter — double click — Driver’s tab — write down the version info. Now click UPdate
Driver (this may not do anything as MS is far behind certifying drivers) — then Right Click —
Uninstall — REBOOT this will refresh the driver stack.
Repeat that for Network — Network Card (NIC), Wifi, Sound, Mouse and Keyboard if 3rd party
with their own software and drivers and any other major device drivers you have.
Now go to System Maker’s site (Dell, HP, Toshiba as examples) (as rollback) and then Device
Maker’s site (Realtek, Intel, Nvidia, ATI as examples) and get their latest versions. (Look for
BIOS, Chipset and software updates at System Maker’s site while there.)
Download — SAVE — go to where you put them — Right Click — RUN AD ADMIN — REBOOT after
each installation.
Always check in Device Manager — Drivers tab to be sure the version you are installing actually
shows up. This is because some drivers rollback before the latest is installed (sound drivers
particularly do this) so install a driver — reboot — check to be sure it is installed and repeat as
needed.
Repeat at Device Makers — BTW at Device Makers DO NOT RUN THEIR SCANNER — check
manually by model.
Manually look at manufacturer’s sites for drivers — and Device Maker’s sites.
http://pcsupport.about.com/od/driverssupport/ht/driverdlmfgr.htm
Installing and updating drivers in Windows 7 (updating drivers manually using the methods
above is preferred to ensure the latest drivers from System maker and Device makers are
found)
http://www.sevenforums.com/tutorials/43216-installing-updating-drivers-7-a.html
If you update drivers manually then it is a good idea to disable Driver Installations in Windows
Updates, this leaves Windows Updates ON however it will not install drivers which will usually be
older and cause issues. If Updates suggests a new driver then HIDE it (Right Click on it) and then
go look for new ones manually if you wish.
Disable Windows Update Device Driver Search Prompt In Windows 7 / Vista (for Professional,
Ultimate, and Enterprise)
http://www.addictivetips.com/windows-tips/disable-windows-update-device-driver-search-prompt/
Refer to these threads for many more excellent tips however be sure to check your antivirus
programs, update major drivers and BIOS, and also troubleshoot with the cleanboot method
first.
Hope this helps.
Rob Brown — Microsoft MVP Rob Brown — past Microsoft MVP — Windows Insider MVP 2016 — 2021
Microsoft MVP Windows and Devices for IT 2009 — 2020
Как исправить такую ошибку интерфейса не поддерживается в Windows
Это сообщение об ошибке, с которым многие пользователи Windows сталкивались в прошлом и продолжают сталкиваться. Пользователи Windows, затронутые этой проблемой, будут получать сообщение об ошибке «Такой интерфейс не поддерживается» каждый раз при попытке запустить или получить доступ к программе или приложению, затронутому этой проблемой.

В большинстве случаев эта проблема затрагивает встроенные приложения Windows, такие как Проводник Windows (explorer.exe), но эта проблема может также затрагивать различные сторонние программы.
Однако, когда эта проблема затрагивает встроенные приложения Windows, такие как Windows Explorer, она проявляется в самой раздражающей и опасной форме — просто представьте, насколько проблематично было бы, если бы вы не могли запустить Windows Explorer или открыть компьютеры, документы или даже Панель управления и вместо этого получать сообщение об ошибке каждый раз, когда вы пытаетесь это сделать.
Перезапуск Проводника Windows
Иногда может потребоваться перезапустить Windows Explorer, чтобы решить проблему, связанную с тем, что такой интерфейс не поддерживается. Вы можете сделать это с помощью этих методов.
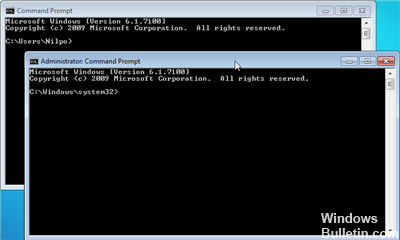
Метод командной строки:
- Закройте все открытые окна.
- В меню «Пуск» откройте командную строку и выполните команду с правами администратора.
- Теперь введите taskkill / f / в explorer.exe и нажмите Enter.
- Теперь введите explorer.exe и снова нажмите Enter.
- Теперь вы готовы начать.

Метод диспетчера задач:
- Нажмите Ctrl + Shift + Esc, чтобы открыть диспетчер задач.
- На вкладке «Процессы» щелкните «Показать все процессы пользователей», выберите «Обзор» и щелкните его правой кнопкой мыши.
- Теперь выберите End Process Tree.
- Затем нажмите на меню «Файл» в диспетчере задач.
- Нажмите Запустить новую задачу, введите explorer.exe и нажмите кнопку ОК.
Обновление за апрель 2021 года:
Теперь мы рекомендуем использовать этот инструмент для вашей ошибки. Кроме того, этот инструмент исправляет распространенные компьютерные ошибки, защищает вас от потери файлов, вредоносных программ, сбоев оборудования и оптимизирует ваш компьютер для максимальной производительности. Вы можете быстро исправить проблемы с вашим ПК и предотвратить появление других программ с этим программным обеспечением:
- Шаг 1: Скачать PC Repair & Optimizer Tool (Windows 10, 8, 7, XP, Vista — Microsoft Gold Certified).
- Шаг 2: Нажмите «Начать сканирование”, Чтобы найти проблемы реестра Windows, которые могут вызывать проблемы с ПК.
- Шаг 3: Нажмите «Починить все», Чтобы исправить все проблемы.

Восстановление профиля пользователя
Следующий вариант — вам нужно перейти на новый профиль пользователя для Windows 10.
Для этого создайте новую учетную запись пользователя и перенесите все личные файлы из текущей папки профиля пользователя в C: \ Users в новую папку профиля пользователя в той же папке.
Перерегистрировать потенциально скомпрометированные файлы DLL

Откройте командную строку Windows от имени администратора. Введите следующее и нажмите Enter, чтобы повторно сохранить файл DLL
regsvr32 c: \ windows \ system32 \ actxprxy.dll
Это должно помочь. Если это не так, используйте эту команду:
FOR / RC: \% G IN (* .dll) DO «% systemroot% \ system32 \ regsvr32.exe» / s «% G»
После завершения работы перезагрузите компьютер. Теперь проблема должна быть решена.
Удаление папок, настроек меню, миниатюр и кэшей значков
1. Введите cmd в поиске Windows, щелкните правой кнопкой мыши и выберите «Запуск от имени администратора».
2. Введите следующую команду и нажмите Enter после каждой команды:
а) reg удалить «HKCU \ Software \ Classes \ Local Settings \ Software \ Microsoft \ Windows \ Shell» / f
б) reg удалить «HKCU \ Software \ Microsoft \ Windows \ CurrentVersion \ Explorer \ Streams» / f
c) reg удалить «HKCU \ Software \ Microsoft \ Windows \ CurrentVersion \ Explorer \ StuckRects2» / f
г) reg удалить «HKCU \ Software \ Microsoft \ Windows \ CurrentVersion \ Explorer \ MenuOrder» / f
e) attrib -r -s -h «% userprofile% \ AppData \ Local * .db»
f) del «% userprofile% \ AppData \ Local * .db»
3. Закройте cmd и перезагрузите компьютер, чтобы сохранить изменения.
Заключение
Я надеюсь, что вы поняли процесс и теперь можете решить его самостоятельно.
Если вы нашли эту статью полезной, вы также можете добавить ее в закладки или поделиться с другом. Если у вас есть какие-либо сомнения или вопросы, пожалуйста, присылайте нам свои комментарии в поле ниже.

CCNA, веб-разработчик, ПК для устранения неполадок
Я компьютерный энтузиаст и практикующий ИТ-специалист. У меня за плечами многолетний опыт работы в области компьютерного программирования, устранения неисправностей и ремонта оборудования. Я специализируюсь на веб-разработке и дизайне баз данных. У меня также есть сертификат CCNA для проектирования сетей и устранения неполадок.
Fix Wi-Fi connection issues in Windows
Troubleshooting network problems in Windows
If you can’t get email, browse the web, or stream music, chances are you’re not connected to your network and can’t get onto the internet. To fix the problem, here are some things you can try.
Try these things first to help you fix or narrow down the connection problem.
Make sure Wi‑Fi is turned on. Select the «No internet connection» icon  on the right side of the taskbar, and make sure Wi-Fi is turned on. If it isn’t, select it to turn it on. Also, make sure Airplane mode is turned off.

Afterwards, see if a Wi-Fi network you recognize and trust appears in the list of networks. If it does, select the Wi-Fi network, and they try to connect to it. If it says Connected underneath the network name, select Disconnect, wait a moment, and then select Connect again.
Try connecting to a network on a different frequency band. Many consumer Wi-Fi routers broadcast at two different network frequency bands: 2.4 GHz and 5 GHz. These will appear as separate networks in the list of available Wi-Fi networks. If your list of available Wi-Fi networks includes both a 2.4 GHz network and a 5 GHz network, try connecting to the other network. To learn more about the differences between 2.4 GHz networks and 5 GHz networks, check out Wi-Fi problems and your home layout.
Make sure the physical Wi‑Fi switch on your laptop is turned on. (An indicator light usually shows when it’s on.)
Run the Network troubleshooter. The Network troubleshooter can help diagnose and fix common connection problems.
To run the Network troubleshooter
Select the Start button > Settings > Network & Internet > Status.
Open Network & Internet Status settings
Under Change your network settings, select Network troubleshooter.
Follow the steps in the troubleshooter, and see if that fixes the problem.
Restart your modem and wireless router. This helps create a new connection to your internet service provider (ISP).
When you do this, everyone that is connected to your Wi-Fi network will be temporarily disconnected. The steps you take to restart your modem and router can vary, but here are the general steps. ( Note: If you have a cable modem/Wi-Fi router combo device, you only need to follow the steps for the single device.)
Unplug the power cable for the router from the power source.
Unplug the power cable for the modem from the power source.
Some modems have a backup battery. If you unplug the modem and lights stay on, remove the battery from the modem.
Wait at least 30 seconds or so.
If you had to remove the battery from the modem, put it back in.
Plug the modem back into the power source. The lights on the modem will blink. Wait for them to stop blinking.
Plug your router back into the power source.
Wait a few minutes for the modem and router to fully power on. You can usually tell when they’re ready by looking at the status lights on the two devices.
On your PC, try to connect again.
Connection problems can be due to a variety of reasons—problems with the website, your device, the Wi-Fi router, modem, or your Internet Service Provider (ISP). Try the following steps to help narrow down the source of the problem.
If the «Wi-Fi connected» icon appears on the right side of the taskbar, visit a different website. If the website opens, there might be a problem with the specific website. If you can’t connect to another website, go to the next step.
On another laptop or phone, try to connect to the same network. If you can connect, the source of the problem is likely due to your device—go to the section Network troubleshooting on your device. If you can’t connect to the network on any device, continue to the next step.
Check to see if there is a problem with the connection to your Wi-Fi router. Do this by using a ping test.
In the search box on the taskbar, type Command prompt. The Command Prompt button will appear. To the right of it, select Run as administrator > Yes.
At the command prompt, type ipconfig, and then select Enter. Look for the name of your Wi-Fi network within the results, and then find the IP address listed next to Default gateway for that Wi-Fi network. Write down that address if you need to. For example: 192.168.1.1
At the prompt, type ping and then select Enter. For example, type ping 192.168.1.1 and select Enter. The results should be something like this:
Reply from 192.168.1.1: bytes=32 time=5ms TTL=64
Reply from 192.168.1.1: bytes=32 time=5ms TTL=64
Reply from 192.168.1.1: bytes=32 time=5ms TTL=64
Reply from 192.168.1.1: bytes=32 time=5ms TTL=64
Ping statistics for 192.168.1.1: Packets: Sent = 4, Received = 4, Lost = 0 (0% loss), Approximate round trip times in milli-seconds: Minimum = 4ms, Maximum = 5ms, Average = 4ms
If you see results like this and are getting a reply, then you have a connection to your Wi-Fi router, so there might be a problem with your modem or ISP. Contact your ISP or check online on another device (if you can) to see if there’s a service outage.
If the results of the ping test indicate that you are not getting a reply from the router, try connecting your PC directly to your modem by using an Ethernet cable (if you can). If you can connect to the internet using an Ethernet cable, it confirms the connection problem is due to the Wi-Fi router. Make sure you’ve installed the latest firmware and see the documentation for your router.
Run network commands
Try running these network commands to manually reset the TCP/IP stack, release and renew the IP address, and flush and reset the DNS client resolver cache:
In the search box on the taskbar, type Command prompt. The Command Prompt button will appear. To the right of it, select Run as administrator > Yes.
At the command prompt, run the following commands in the listed order, and then check to see if that fixes your connection problem:
Type netsh winsock reset and select Enter.
Type netsh int ip reset and select Enter.
Type ipconfig /release and select Enter.
Type ipconfig /renew and select Enter.
Type ipconfig /flushdns and select Enter.
Uninstall the network adapter driver and restart
If the previous steps didn’t work, try to uninstall the network adapter driver, and then restart your computer. Windows will automatically install the latest driver. Consider this approach if your network connection stopped working properly after a recent update.
Before uninstalling, make sure you have drivers available as a backup. Visit the PC manufacturer’s website and download the latest network adapter driver from there. If your PC can’t connect to the internet, you’ll need to download a driver on a different PC and save it to a USB flash drive so you can install the driver on your PC. You’ll need to know the PC manufacturer and model name or number.
In the search box on the taskbar, type Device Manager, and then select Device Manager from the list of results.
Expand Network adapters, and locate the network adapter for your device.
Select the network adapter, and then select Uninstall device > the Delete the driver software for this device check box > Uninstall.
After uninstalling the driver, select the Start button > Power > Restart.
After your PC restarts, Windows will automatically look for and install the network adapter driver. Check to see if that fixes your connection problem. If Windows doesn’t automatically install a driver, try to install the backup driver you saved before uninstalling.
Check if your network adapter is compatible with the latest Windows Update
If you lost your network connection immediately after upgrading or updating Windows 10, it’s possible that the current driver for your network adapter was designed for a previous version of Windows. To check, try temporarily uninstalling the recent Windows Update:
Select the Start button, then select Settings > Update & Security > Windows Update > View update history > Uninstall updates.
Select the most recent update, then select Uninstall.
If uninstalling the most recent update restores your network connection, check to see if an updated driver is available:
In the search box on the taskbar, type Device Manager, and then select Device Manager from the list of results.
Expand Network adapters, and locate the network adapter for your device.
Select the network adapter, select Update driver > Search automatically for updated driver software, and then follow the instructions.
After installing the updated driver, select the Start button > Power > Restart if you’re asked to restart, and see if that fixes the connection issue.
If Windows can’t find a new driver for your network adapter, visit the PC manufacturer’s website and download the latest network adapter driver from there. You’ll need to know the PC manufacturer and model name or number.
Do one of the following:
If you couldn’t download and install a newer network adapter driver, hide the update that’s causing you to lose your network connection. To learn how to hide updates, see Hide Windows Updates or driver updates.
If you could successfully install updated drivers for your network adapter, then reinstall the latest updates. To do this, select the Start button, then select Settings > Update & Security > Windows Update > Check for updates.
Use network reset
Using network reset should be the last step you try. Consider using it if the steps above don’t help to get you connected.
This can help solve connection problems you might have after upgrading from a previous version of Windows to Windows 10. It can also help to fix the problem where you can connect to the internet, but can’t connect to shared network drives. Network reset removes any network adapters you have installed and the settings for them. After your PC restarts, any network adapters are reinstalled, and the settings for them are set to the defaults.
Note: To use network reset, your PC must be running Windows 10 Version 1607 or later. To see which version of Windows 10 your device is currently running, select the Start button, then select Settings > System > About.
Select the Start button, then select Settings > Network & Internet > Status > Network reset.
Open Network & Internet Status settings
On the Network reset screen, select Reset now > Yes to confirm.
Wait for your PC to restart, and see if that fixes the problem.
After using network reset, you might need to reinstall and set up other networking software you might be using, such as VPN client software or virtual switches from Hyper‑V (if you’re using that or other network virtualization software).
Network reset might set each one of your known network connections to a public network profile. In a public network profile, your PC is not discoverable to other PCs and devices on the network, which can help make your PC more secure. However, if your PC is part of a homegroup or used for file or printer sharing, you’ll need to make your PC discoverable again by setting it to use a private network profile. To do this, select the Start button, then select Settings > Network & Internet > Wi-Fi . On the Wi-Fi screen, select Manage known networks > the network connection you want to change > Properties. Under Network profile, select Private.
Check your Wi-Fi settings
Wi-Fi adapter manufacturers might have different advanced settings you can change based on your network environment or connection preferences.
Check the Wireless Mode setting for your network adapter and make sure it matches the capabilities of the network you’re trying to connect to. If it doesn’t match, you won’t be able to connect, and the network might not appear in the list of available networks. The Wireless Mode will often be set to Auto or something similar by default, which enables connection for every kind of network that’s supported.
To find the wireless mode setting
In Device Manager, select Network adapters, and then double-click the network adapter name.
Select the Advanced tab and look for a Wireless Mode setting. Make sure it’s set to the mode your network is using.
Wi-Fi profile settings
Windows uses the Wi-Fi profile to save the settings that are needed to connect to a Wi-Fi network. These settings include the network security type, key, network name (SSID), and so on. If you can’t connect to a Wi-Fi network that you could connect to before, it’s possible that the network settings might have changed or the profile is corrupted.
To fix this, remove (or «forget») the network connection, then reconnect to the network. When you forget a network connection, it removes the Wi-Fi network profile from your PC.
To forget a network
Select the Wi-Fi network icon on the right side of the taskbar, then select Network & Internet settings.
Select Wi-Fi , then select Manage known networks.
Select the network you want to forget, then select Forget.
Afterwards, select the Wi-Fi icon on the taskbar and try to reconnect to the desired network to renew the network connection.
Check your home layout
Your Wi-Fi network might be affected by the network’s frequency band, channel congestion, and/or signal strength. For more info, see Wi-Fi problems and your home layout.
Check for additional symptoms for the «No internet connection» icon
There may be additional troubleshooting steps you can try, depending on which symptoms you’re having. To view these steps, check out Wi-Fi connection icons and what they mean.
Make sure Wi-Fi is turned on.
Swipe in from the right edge of the screen, select Settings, then select the Network icon.
Make sure the physical Wi‑Fi switch on your laptop is turned on. (An indicator light usually shows when it’s on.)
Make sure your PC isn’t in airplane mode.
Swipe in from the right edge of the screen, select Settings, then select the Network icon.
Turn off Airplane mode.
Move closer to the router or access point if you can.
If you don’t see the network name at all, the router or access point might not be set to broadcast the network name. In this case, you’ll need to connect to it manually.
Swipe in from the right edge of the screen, and then select Settings.
Select the Network icon, and then select Hidden network.
Type the network name and select Next.
Type the password and select Next.
Follow any additional instructions to get connected.
The network will be added to your list of networks and will be available to connect to when your computer is in range of the network. To connect to the network, follow these steps:
Open Connect to a Network by selecting the network icon in the notification area.
Select Unnamed Network, select Connect, and then type the network information. The network will be added to your list of networks and will be available to connect to in the future when your computer is in range of the network..
Let Windows try to help you fix the problem. Try running the Network troubleshooter to see if it can diagnose and fix the problem.
Select the Start button, start typing Network problems, and then select Identify and repair network problems in the list.
The Network Troubleshooter (mentioned above) can help diagnose and fix common connection problems. After using that, try running the network commands below because the combination of doing these two things can help you get connected.
If your problem isn’t fixed after running the Network troubleshooter, try to:
Reset the TCP/IP stack.
Release the IP address.
Renew the IP address.
Flush and reset the DNS client resolver cache.
Here’s how to run networking commands in a command prompt:
Select the Start button, start typing cmd, right-click Command Prompt in the list, select Run as Administrator, and then select Yes.
At the command prompt, run the following commands in the listed order and then check to see if that fixes your connection problem:
Type netsh winsock reset and press Enter.
Type netsh int ip reset and press Enter.
Type ipconfig /release and press Enter.
Type ipconfig /renew and press Enter.
Type ipconfig /flushdns and press Enter.
This helps create a new connection to your Internet service provider (ISP). When you do this, everyone that is connected to your Wi-Fi network will be temporarily disconnected.
The steps you take to restart your modem and router can vary, but here are the general steps:
Unplug the power cable for the router from the power source.
Unplug the power cable for the modem from the power source.
Some modems have a backup battery. So if you unplug the modem and lights stay on, remove the battery from the modem.
Wait at least 30 seconds or so.
If you had to remove the battery from the modem, put it back in.
Plug the modem back into the power source. The lights on the modem will blink. Wait for them to stop blinking.
Plug your router back into the power source.
Wait a few minutes for the modem and router to fully power on. You can usually tell when they’re ready by looking at the status lights on the two devices.
On your PC, try to connect again.
Make sure it’s not a problem with your cable modem or Internet service provider (ISP). If it is, contact your ISP.
Select the Start button, start typing cmd, right-click Command Prompt in the list, select Run as Administrator, and then select Yes.
At the command prompt, type ipconfig.
Look for the IP address listed next to Default gateway. Write down that address if you need to. For example, 192.168.1.1.
At the prompt, type ping and press Enter. For example, type ping 192.168.1.1 and press Enter.
The result should be something like this:
Reply from 192.168.1.1: bytes=32 time=5ms TTL=64
Reply from 192.168.1.1: bytes=32 time=5ms TTL=64
Reply from 192.168.1.1: bytes=32 time=5ms TTL=64
Reply from 192.168.1.1: bytes=32 time=5ms TTL=64
Ping statistics for 192.168.1.1: Packets: Sent = 4, Received = 4, Lost = 0 (0% loss), Approximate round trip times in milli-seconds: Minimum = 4ms, Maximum = 5ms, Average = 4ms
If the ping is successful and you see results similar to the results above, but you can’t connect to the Internet on your PC, there may be a problem with your modem or Internet service provider (ISP).
If you’re still having trouble connecting to a network, it might be related to your network adapter.
Try using the Network Adapter troubleshooter to automatically find and fix some problems. This troubleshooter will disable and re-enable the adapter, and try some other common repairs.
Select the Start button, start typing Troubleshooting, and then select Troubleshooting in the list. Select View all > Network Adapter.
Update the network adapter driver. An outdated or incompatible network adapter driver can cause connection problems. Check to see if an updated driver is available.
Select the Start button, start typing Device Manager, and then select it in the list.
In Device Manager, select Network adapters, right-click your adapter, and then select Properties.
Select the Driver tab, and then select Update Driver.
Select Search automatically for updated driver software.
If Windows can’t find a new driver for your network adapter, visit the PC manufacturer’s website and download the latest network adapter driver from there. If your PC can’t connect to the Internet, you’ll need to download a driver on a different PC and save it to a USB flash drive so you can install the driver on your PC. You’ll need to know the PC manufacturer and model name or number.
Here are some things to check and try with your router if you’re at home and having trouble getting connected.
If you don’t see the network name, sign in to your router and check to see if it’s set to broadcast the network name.
Connect your PC to your router using an Ethernet cable.
Open your web browser and type the IP address for your wireless router. (For example, 192.168.1.1 or 172.16.0.0—check the documentation for your router to find the default IP address.)
Sign in with your user name and password, then make sure an option labeled Enable SSID Broadcast, Wireless SSID broadcast, or something similar is turned on. This setting is often on a Wireless Settings page.
Check to see if your Wi-Fi network uses Media Access Control (MAC) address filtering for security. If it does, you’ll need to add the MAC address for your PC to the access list on your router before you can connect.
Select the Start button. Start typing cmd and right-click Command Prompt in the list. Select Run as Administrator, and then select Yes.
At the command prompt, type ipconfig /all.
Write down the address that appears next to Physical Address for your wireless network adapter. This is the address you’ll need to add to the access list on your router.
To add the MAC address to the access list on your router:
Open your web browser and type the IP address for your wireless router. (For example, 192.168.1.1 or 172.16.0.0—check the documentation for your router to find the default IP address.)
Sign in with your user name and password, then look for a setting that says MAC Address Filter or something similar.
Add the MAC address you wrote down for your PC to the access list and save your changes.
On your PC, try to connect to the Wi-Fi network again.
Make sure Wi-Fi is turned on.
On a laptop, open Windows Mobility Center by selecting the Start  button and then selecting Control Panel > Mobile PC > Windows Mobility Center.
Look in the Wireless Network section. If Wi-Fi is on, the button should say Turn wireless off.
Make sure the physical Wi‑Fi switch on your laptop is turned on. (An indicator light usually shows when it’s on.)
Check and make sure your PC isn’t in airplane mode.
Move closer to the router or access point if you can.
If you don’t see the network name at all, the router or access point might not be set to broadcast the network name. In this case, you’ll need to connect to it manually.
Open Manage Wireless Networks by selecting the Start button, and then selecting Control Panel. In the search box, type wireless and then select Manage wireless networks.
Select Add, and then select Manually create a network profile.
Type the network information.
If you want Windows to automatically connect when the network is in range, select the Start this connection automatically check box.
Select the Connect even if the network is not broadcasting check box, select Next, and then select Close.
The network will be added to your list of networks and will be available to connect to when your computer is in range of the network. To connect to the network, follow these steps:
Open Connect to a Network by selecting the network icon in the notification area.
Select Unnamed Network, select Connect, and then type the network information. The network will be added to your list of networks and will be available to connect to in the future when your computer is in range of the network..
Let Windows try to help you fix the problem. Try running the Network troubleshooter to see if it can diagnose and fix the problem.
Open the Network troubleshooter by right-clicking the network icon in the notification area and then selecting Troubleshoot problems.
The Network Troubleshooter (mentioned above) can help diagnose and fix common connection problems. After using that, try running the network commands below because the combination of doing these two things can help you get connected.
If your problem isn’t fixed after running the Network troubleshooter, try to:
Reset the TCP/IP stack.
Release the IP address.
Renew the IP address.
Flush and reset the DNS client resolver cache.
Here’s how to run networking commands in a command prompt:
Select the Start button . Type cmd in the search box, right-click cmd in the list, select Run as administrator, and then select Yes.
At the command prompt, run the following commands in the listed order and then check to see if that fixes your connection problem:
Type netsh winsock reset and press Enter.
Type netsh int ip reset and press Enter.
Type ipconfig /release and press Enter.
Type ipconfig /renew and press Enter.
Type ipconfig /flushdns and press Enter.
This helps create a new connection to your Internet service provider (ISP). When you do this, everyone that is connected to your Wi-Fi network will be temporarily disconnected.
The steps you take to restart your modem and router can vary, but here are the general steps:
Unplug the power cable for the router from the power source.
Unplug the power cable for the modem from the power source.
Some modems have a backup battery. So if you unplug the modem and lights stay on, remove the battery from the modem.
Wait at least 30 seconds or so.
If you had to remove the battery from the modem, put it back in.
Plug the modem back into the power source. The lights on the modem will blink. Wait for them to stop blinking.
Plug your router back into the power source.
Wait a few minutes for the modem and router to fully power on. You can usually tell when they’re ready by looking at the status lights on the two devices.
On your PC, try to connect again.
Make sure it’s not a problem with your cable modem or Internet service provider (ISP). If it is, contact your ISP.
Select the Start button . Type cmd in the search box, right-click cmd in the list, select Run as administrator, and then select Yes.
At the command prompt, type ipconfig.
Look for the IP address listed next to Default gateway. Write down that address if you need to. For example, 192.168.1.1.
At the prompt, type ping and press Enter. For example, type ping 192.168.1.1 and press Enter.
The result should be something like this:
Reply from 192.168.1.1: bytes=32 time=5ms TTL=64
Reply from 192.168.1.1: bytes=32 time=5ms TTL=64
Reply from 192.168.1.1: bytes=32 time=5ms TTL=64
Reply from 192.168.1.1: bytes=32 time=5ms TTL=64
Ping statistics for 192.168.1.1: Packets: Sent = 4, Received = 4, Lost = 0 (0% loss), Approximate round trip times in milli-seconds: Minimum = 4ms, Maximum = 5ms, Average = 4ms
If the ping is successful and you see results similar to the results above, but you can’t connect to the Internet on your PC, there may be a problem with your modem or Internet service provider (ISP).
If you’re still having trouble connecting to a network, it might be related to your network adapter.
Try using the Network Adapter troubleshooter to automatically find and fix some problems. This troubleshooter will disable and re-enable the adapter, and try some other common repairs.
Open the Network Adapter troubleshooter by selecting the Start button and then selecting Control Panel. In the search box, type troubleshooter and then select Troubleshooting > View all > Network Adapter.
Update the network adapter driver. An outdated or incompatible network adapter driver can cause connection problems. Check to see if an updated driver is available.
Open Device Manager by selecting the Start button , selecting Control Panel, selecting System and Security, and then, under System, selecting Device Manager  . If you’re prompted for an administrator password or confirmation, type the password or provide confirmation.
In Device Manager, select Network adapters, right-click your adapter, and then select Properties.
Select the Driver tab, and then select Update Driver.
Select Search automatically for updated driver software.
If Windows can’t find a new driver for your network adapter, visit the PC manufacturer’s website and download the latest network adapter driver from there. If your PC can’t connect to the Internet, you’ll need to download a driver on a different PC and save it to a USB flash drive so you can install the driver on your PC. You’ll need to know the PC manufacturer and model name or number.
Here are some things to check and try with your router if you’re at home and having trouble getting connected.
If you don’t see the network name, sign in to your router and check to see if it’s set to broadcast the network name.
Connect your PC to your router using an Ethernet cable.
Open your web browser and type the IP address for your wireless router. (For example, 192.168.1.1 or 172.16.0.0—check the documentation for your router to find the default IP address.)
Sign in with your user name and password, then make sure an option labeled Enable SSID Broadcast, Wireless SSID broadcast, or something similar is turned on. This setting is often on a Wireless Settings page.
Check to see if your Wi-Fi network uses Media Access Control (MAC) address filtering for security. If it does, you’ll need to add the MAC address for your PC to the access list on your router before you can connect.
Select the Start button. Type cmd in the search box and right-click cmd in the list. Select Run as administrator, and then select Yes.
At the command prompt, type ipconfig /all.
Write down the address that appears next to Physical Address for your wireless network adapter. This is the address you’ll need to add to the access list on your router.
To add the MAC address to the access list on your router:
Open your web browser and type the IP address for your wireless router. (For example, 192.168.1.1 or 172.16.0.0—check the documentation for your router to find the default IP address.)
Sign in with your user name and password, then look for a setting that says MAC Address Filter or something similar.
Add the MAC address you wrote down for your PC to the access list and save your changes.
On your PC, try to connect to the Wi-Fi network again.


