- Product key windows longhorn
- Инструкции
- Содержание
- Как установить Windows Longhorn на виртуальную машину? [ править | править код ]
- Ключики и дата [ править | править код ]
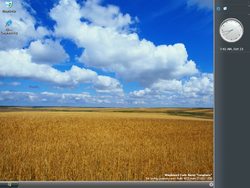
- Снимок системы [ править | править код ]
- Проблемы с активацией [ править | править код ]
- Установка драйверов [ править | править код ]
- Как установить build5048 [ править | править код ]
- Windows «Vista».У кого есть активационный ключ, от нее?
- Windows Longhorn build 4053
- Contents
- Bugs and quirks [ edit | edit source ]
- Control Panel [ edit | edit source ]
- Start Menu [ edit | edit source ]
- Notifications [ edit | edit source ]
- Upgrade [ edit | edit source ]
- Setup [ edit | edit source ]
- Microsoft Longhorn
- Activation cracks
Product key windows longhorn
Windows «Vista» Serial Keys
Windows Vista build 5270 (December CTP) Client:
R4HB8-QGQK4-79X38-QH3HK-Q3PJ6
Windows Vista build 5270 (December CTP) Server:
WBVG8-4JPQB-6HJ6H-XH7YY-D2GQY
Windows Vista build 5259:
TGX39-HB48W-R29DH-6BVKB-3XFDW
Windows Vista build 5231 (October CTP):
TGX39-HB48W-R29DH-6BVKB-3XFDW
Windows Vista build 5231:
GKFV7-F2D9H-QKYXY-777P3-4M73W
Windows Vista pre-Beta 2 build 5219:
GKFV7-F2D9H-QKYXY-777P3-4M73W
Windows Vista Beta 1 build 5112:
TCP8W-T8PQJ-WWRRH-QH76C-99FBW
Windows «Longhorn» build 5048:
TCP8W-T8PQJ-WWRRH-QH76C-99FBW
Windows «Longhorn» build 4074:
K4RBR-F3K42-M9RXG-48TPR-H6BPB
TCP8W-T8PQJ-WWRRH-QH76C-99FBW
CKY24-Q8QRH-X3KMR-C6BCY-T847Y
Windows «Longhorn» build 4053:
TM44C-92G7F-29924-2J8VH-RPCKB
TCP8W-T8PQJ-WWRRH-QH76C-99FBW
C9BX4-GHPXX-VR993-FWRF3-6HQJT
K4RBR-F3K42-M9RXG-48TPR-H6BPB
Windows «Longhorn» build 4051:
TCP8W-T8PQJ-WWRRH-QH76C-99FBW
Windows «Longhorn» build 4029:
CKY24-Q8QRH-X3KMR-C6BCY-T847Y
Windows Longhorn Build 3683
CKY24-Q8QRH-X3KMR-C6BCY-T847Y
FGQQD-FDFWC-P276Q-GXHGW-4JPJM
JC88B-F9HYF-3MPBK-GK99R-HCR9B
JCC43-C89QG-V8HFR-HV3VH-46WXB
JC836-RRQFM-FWDY9-YPMR7-H4JXB
JC83J-6G28P-MB76M-PJQRV-BGRCY
JCBJ8-GH7JJ-KVHY4-JPX62-PWT6M
JC8P4-XG438-7H9C8-9WDB7-YCG6M
JC7XJ-G46WH-XQ36P-R8RDB-H63GM
Инструкции
Содержание
Как установить Windows Longhorn на виртуальную машину? [ править | править код ]
В бета-версиях программ Microsoft используются time bomb («временные бомбы»). Time bomb — это кусок кода, который отключает бета версию через некоторое время после её выхода в свет.
Во всех сборках Windows Longhorn есть «временные бомбы». Для установки системы в виртуальной машине необходимо изменить дату и время в BIOS.
В VmWare (есть бесплатный Vmware Workstation Player и для Windows и для Linux) есть настройка BIOS (открывается F2 при включении виртуалки).

В них нужно вбить необходимую дату, иначе установка у вас просто не запустится.
Но как быть с Qemu и VirtualBox, где такой функции нет?
В данном случае перед установкой Longhorn вам нужно загрузится с диска/дискеты MS-DOS/FreeDOS и командой
изменить дату на виртуальной машине и перезагрузить виртуальную машину.[1]
Ключики и дата [ править | править код ]
На тех же BetaArchive thecollectionbook смотрите даты для BIOS.
Снимок системы [ править | править код ]
В некоторых случаях тестируя систему ее можно случайно сломать и чтобы не переустанавливать заново можно заранее сделать снимок системы.
Если в VirtualBox понятно как его делать, то в бесплатной версии Vmware Workstation — Vmware Player данная функция спрятана.
Для этого вам надо отредактировать с помощью текстового редактора файл настроек виртуальной машины (файл *.vmx). После параметра ide0:0.present = . в следующей строчке добавьте ide0:0.mode = «independent-nonpersistent».
У вас появится следующая возможность. При работе системы данные будут записываться в специальный снимок. При нормальном завершении работы данные будут сохранятся в основной образ. Но, если вы выключите виртуальную машину «горячим отключением» (Virtual Machine>Power>PowerOff Guest) то специальный снимок удалится и у вас останется предыдущее состояние.[2]
Проблемы с активацией [ править | править код ]
Для активации Longhorn используйте TweakNT. [3]
Установка драйверов [ править | править код ]
Скачайте из файлообменника пакет драйверов, перенесите его в виртуальную машину, распакуйте и с помощью диспетчера устройств вручную установите драйвера указав путь к папке с драйвером.
Как установить build5048 [ править | править код ]
При установке сборки 5048 система не дает отформатировать диск/создать раздел. Нажимаем Shift+F10. Вводим следующие команды:
Windows «Vista».У кого есть активационный ключ, от нее?
Windows Vista build 5381.1: подходит для build 5536
2J4JT-P34KF-YMGH8-FKDRQ-JP8M9 – Ultimate
PVYFQ-2JTBV-9KXQ2-FQHDY-MTBVH — Ultimate
Windows Vista build 5365 (April CTP):
2J4JT-P34KF-YMGH8-FKDRQ-JP8M9 — Ultimate
PVYFQ-2JTBV-9KXQ2-FQHDY-MTBVH — Ultimate
Windows Vista build 5342:
2J4JT-P34KF-YMGH8-FKDRQ-JP8M9 — Ultimate
PVYFQ-2JTBV-9KXQ2-FQHDY-MTBVH — Ultimate
Windows Vista build 5308 (February CTP):
R4HB8-QGQK4-79X38-QH3HK-Q3PJ6 — Ultimate
TGX39-HB48W-R29DH-6BVKB-3XFDW — Ultimate
WGDJW-B8DYC-WVKX4-6MKF4-B8PK8 — Ultimate
RK83M-X2CQ4-6K2CW-W7HKF-TPTBW — Home Premium
J6FD6-RRXHG-2QW9Q-PKJX9-DX2MT — Home Basic
WBVG8-4JPQB-6HJ6H-XH7YY-D2GQY — Enterprise Server
BB8B9-VJVXP-MR7GG-8FBYK-DPRVM — Enterprise Server
WHPY8-M92RQ-2KMD9-QWQMK-8KV4M — Business
Windows Vista build 5270 (December CTP):
R4HB8-QGQK4-79X38-QH3HK-Q3PJ6 — Ultimate
TGX39-HB48W-R29DH-6BVKB-3XFDW — Ultimate
WBVG8-4JPQB-6HJ6H-XH7YY-D2GQY — Enterprise Server
Windows Vista build 5259 (от 13 и от 17 ноября):
TGX39-HB48W-R29DH-6BVKB-3XFDW
Windows Vista build 5231 (October CTP):
TGX39-HB48W-R29DH-6BVKB-3XFDW
Windows Vista build 5231:
GKFV7-F2D9H-QKYXY-777P3-4M73W
Windows Vista pre-Beta 2 build 5219:
GKFV7-F2D9H-QKYXY-777P3-4M73W
Windows Vista Beta 1 build 5112:
TCP8W-T8PQJ-WWRRH-QH76C-99FBW
Q8WDJ-TR4KJ-X8WHM-GVGV3-H74C3
Windows Longhorn build 5048:
TCP8W-T8PQJ-WWRRH-QH76C-99FBW
Windows Longhorn build 4083:
TCP8W-T8PQJ-WWRRH-QH76C-99FBW
Windows Longhorn build 4074:
TCP8W-T8PQJ-WWRRH-QH76C-99FBW
Windows Longhorn build 4053:
TM44C-92G7F-29924-2J8VH-RPCKB
TCP8W-T8PQJ-WWRRH-QH76C-99FBW
C9BX4-GHPXX-VR993-FWRF3-6HQJT
K4RBR-F3K42-M9RXG-48TPR-H6BPB
Windows Longhorn build 4051:
TCP8W-T8PQJ-WWRRH-QH76C-99FBW
Windows Longhorn build 4029:
CKY24-Q8QRH-X3KMR-C6BCY-T847Y
Windows Longhorn build 4015:
CKY24-Q8QRH-X3KMR-C6BCY-T847Y
Windows Longhorn build 4008:
CKY24-Q8QRH-X3KMR-C6BCY-T847Y
Windows Longhorn build 3718:
CKY24-Q8QRH-X3KMR-C6BCY-T847Y
Windows Longhorn build 3683:
CKY24-Q8QRH-X3KMR-C6BCY-T847Y
Windows Longhorn build 4053
6.0.4053.main.031022-1720
| Build of Windows Longhorn | |
 | |
| Architecture | x86 |
|---|---|
| Compiled | 2003-10-22 |
| Timebomb | 2004-04-19 (+180 days) |
| About | |
| SKUs | |
| Professional | |
| Key | |
| CKY24-Q8QRH-X3KMR-C6BCY-T847Y | |
|
Windows Longhorn build 4053 is a Milestone 7 build of Windows Longhorn. This build is reported to have leaked on 1 March 2004 [1] . Overall, this build is very similar to build 4051, but with networking bugs patched. ContentsBugs and quirks [ edit | edit source ]
Control Panel [ edit | edit source ]
Start Menu [ edit | edit source ]The most frequently used items list of the Start menu resets itself after every reboot. Notifications [ edit | edit source ]Notifications tend to re-appear quite a lot. Fully closing the notifications may take several attempts. Upgrade [ edit | edit source ]After the first reboot when upgrading from build 4033 or build 4029, an «Unknown problem in upgrade happened» error will appear, clicking «OK» will cause the machine to restart. After restarting, setup will continue normally until another reboot takes place, in which «The file WinSetup.dll could not be loaded or is corrupt. Setup cannot continue.» will appear. Clicking OK will restart the computer and on some machines, there will be no mouse and keyboard support (since the hardware detection phase of setup did not start), and the only workaround is to reinstall Windows. Setup [ edit | edit source ]Setup is mostly similar to previous builds of Longhorn. You can also upgrade to this build from previous builds too. Microsoft LonghornActivation cracksRun Microsoft’s Windows “Longhorn” today using these activation cracks for each build. Simply replace the “winlogon.exe” in your System32 folder with the copies contained in the ZIP below. There are two ways to do this. The first is to replace it from within the Windows install itself. This will mean that your Longhorn installation must be fully functional first. You cannot delete winlogon.exe – it’s in use. You can, however, rename it – simply rename it to “winlogon.bak” or something similar. Then copy in the copy from the archive below. Now restart your installation and it should now no longer check the activation at logon. This means you can move the date forward to the correct time. You can also now delete the “winlogon.bak” file from System32 if you wish, though it’s advisable to keep it to hand in case something breaks later. The second method is to replace it offline. This requires you to be able to connect the hard drive to a working PC, or if it is in a virtual machine, to mount the virtual drive either on your host operating system or in another virtual machine with a working Windows install. Once you have done this, you can simply navigate to that drives’ System32 folder and drag-and-drop the winlogon.exe in to replace the existing copy with the patched copy from the archive below. Note that, although the cracks below remove the need of activation, they do not alter or remove the 180 day usage restriction (time-bomb) that may be present in the build. To remove the time-bomb you will need another tool, called TweakNT. | |


