- 8 best free Android emulators for Windows 10
- What are the top 10 Android emulators for Windows PC?
- LDPlayer
- LDPlayer
- BlueStacks
- Bluestacks
- Nox Player
- Run a System Scan to discover potential errors
- Droid4x
- Genymotion
- Koplayer
- Best 15 Tips and Tricks to Use Windows 10 in Tablet mode
- Mehvish
- How to Enable Tablet Mode on Windows 10
- 1. Hide Taskbar
- 2. Hide App Icons Only
- 3. Go to Tablet Mode Settings Quickly
- 4. Use Back Button
- 5. Open Right-Click Menu
- 6. Open Touch Keyboard Automatically When Not in Tablet Mode
- 7. Launch Touch Keyboard from Taskbar
- 8. Enable Word Prediction for Software Keyboard
- 9. Change Keyboard Type
- 10. Launch Handwriting Panel Automatically
- 11. Input Text in Handwriting Panel with Fingers
- 12. Snap Apps
- 13. Windows 10 Tablet Mode Gestures
- Close App
- Open Action Center
- View Hidden Taskbar
- 14. Switch Between Apps
- 15. Enable or Disable Auto Rotate
- Bonus Tip: Chrome Gestures
- Devour the Tablet
- Read Next
- Top 8 Ways to Fix Driver Error Code 43 on Windows 10
- How to Fix Windows Store Slow Download Speeds Issue
- Difference Between an App and a Program in Windows 10: GT Explains
- 11 Ways to Fix Sticky Keys Not Working on Windows 10 Error
- How to Fix Windows Clipboard Not Working on Windows 10
- How to Speed up Thumbnail Loading in Windows 10
- How to Fix Blank Icons in Windows 10 Desktop Error
- 7 Best Ways to Fix Mouse Wheel Scrolls Up When Scrolling Down Issue
- Did You Know
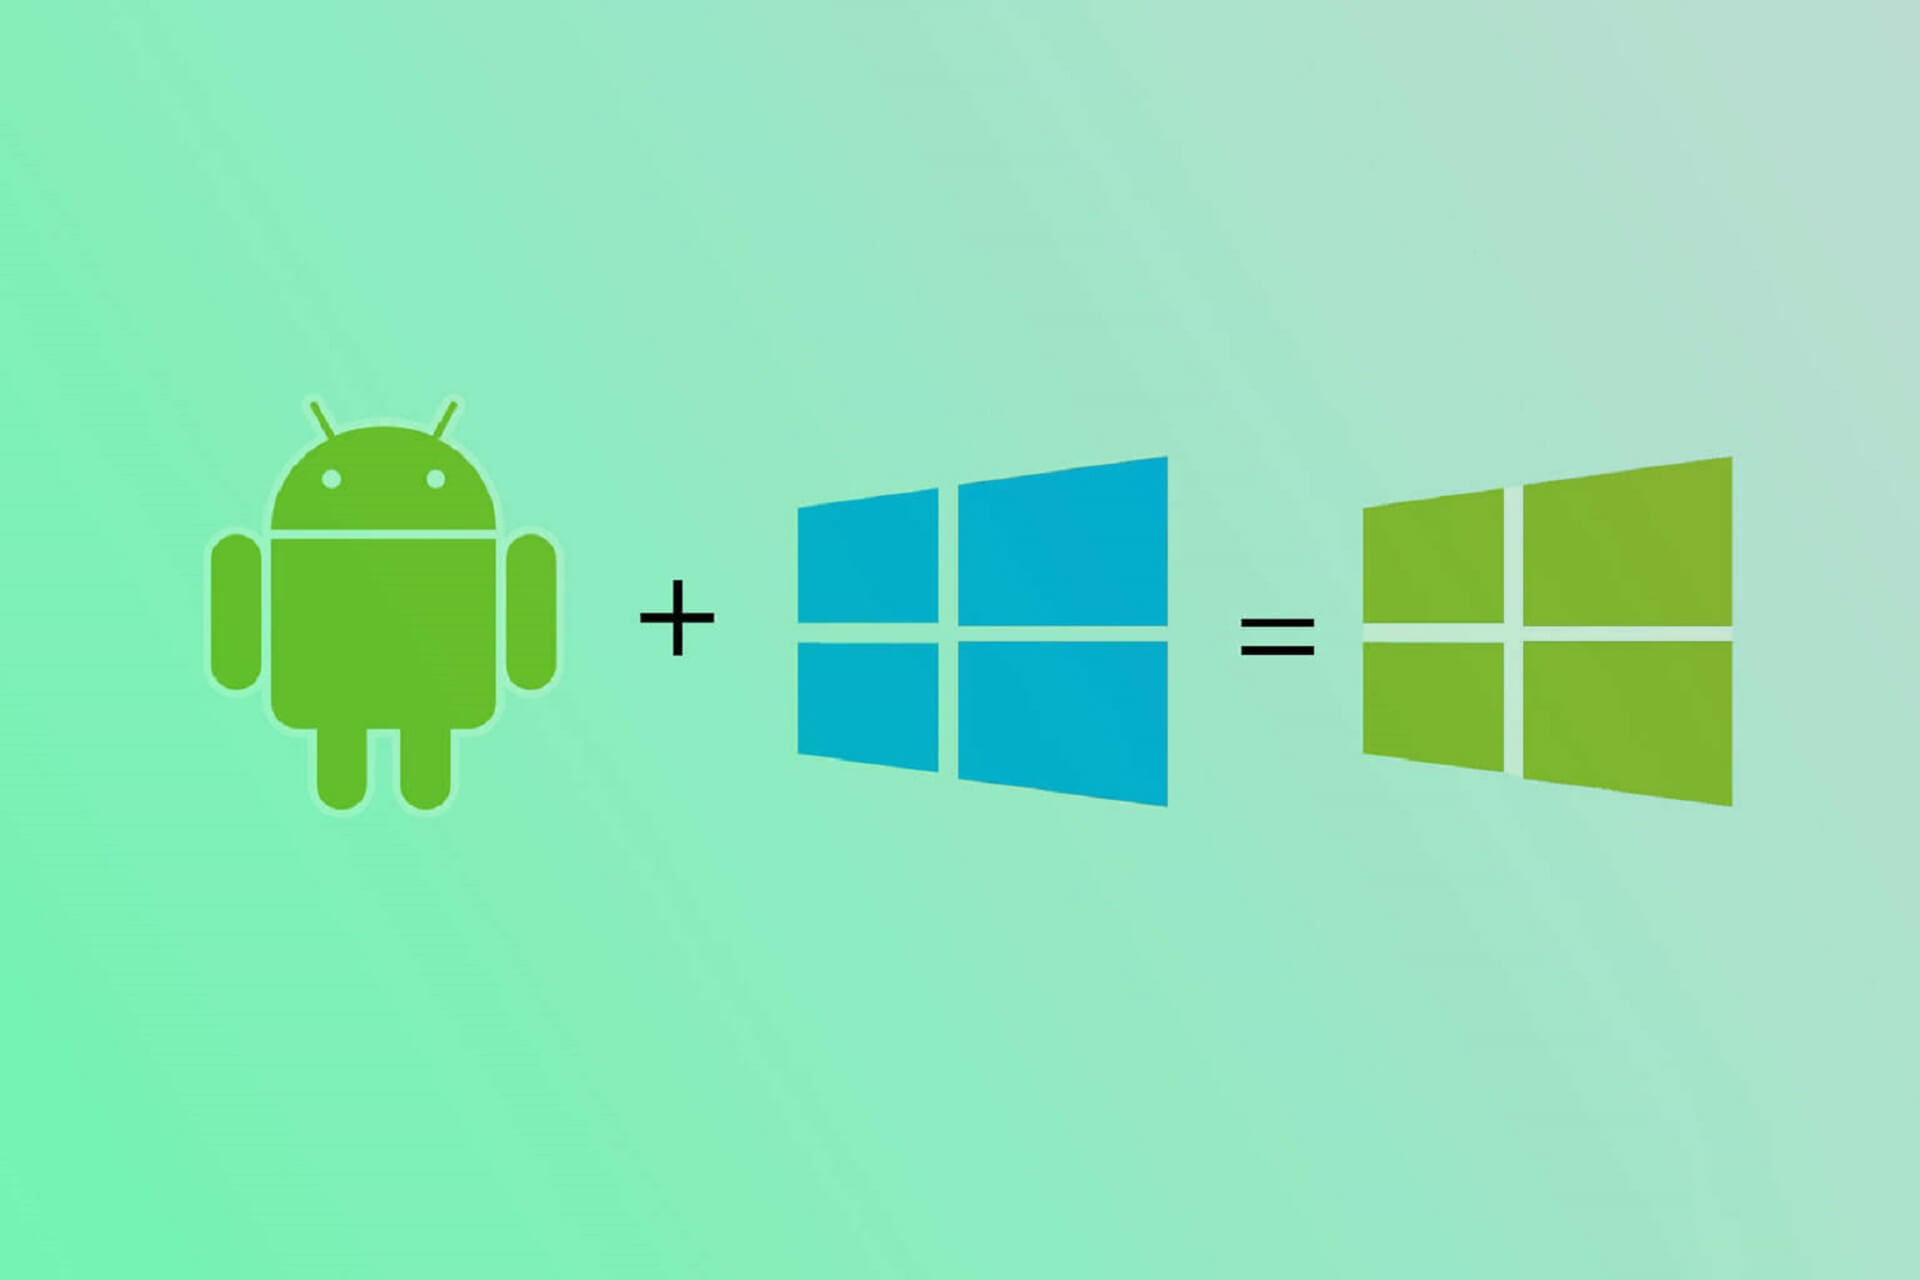
8 best free Android emulators for Windows 10

- If you have trouble using Android apps on your Windows device, try one of these best free Android emulators.
- Emulators are tools that allow Android-compatible programs to run on Windows PC.
- Luckily, there are plenty of such tools on the market and you’ll easily find an Android emulator online.
- LD Player or BlueStacks are just some of the most common names that you’ll see here.
- Download Restoro PC Repair Tool that comes with Patented Technologies (patent available here).
- Click Start Scan to find Windows issues that could be causing PC problems.
- Click Repair All to fix issues affecting your computer’s security and performance
- Restoro has been downloaded by 0 readers this month.
We’re all about Windows 10 Mobile here, but the fact is that a lot more users use Android. However, a lot of Android users are also using Windows 10-powered computers.
We’re going to combine these two things, and present you the best Android emulators for your Windows PC you can find.
Although the title of the article says Windows 10, because that’s the most used OS by our readers, all these Android emulators will work for other Windows versions that you might be running, such as Windows XP, Windows 7 and Windows Vista.
As usually, the 1st position is the one we suggest as being the best and with the most features, but feel free to examine all your options.
What are the top 10 Android emulators for Windows PC?
LDPlayer
Topping off our list is an android emulator that deserves the #1 one spot not only because it is indeed completely free, but also because it is the best there is.
While relatively newer to the market and maybe not with the same resounding name as our other entries, LDPlayer does a wonderful job of breaking the barrier between mobile and PC gaming.
Enjoy all of the top games on Android on your PC device, and instead oh wearing and tearing through your phone’s battery and touchscreen, simply use your mighty PC with a mouse, keyboard, or controller.
The games will run smoothly, no matter how complex or large they are, even full-scale mobile MMORPGs.
All in all, LDPlayer is our top choice when it comes to merging Android and Windows OS.

LDPlayer
BlueStacks
BlueStacks is definitely the most famous Android emulator (founded 8 years ago) on our list, and it is also the most widely used one. And rightfully so.
It is totally free and after several tests, we concluded that this is the best Android emulator for Windows XP, Windows 7, Windows 8/8.1 or Windows 10 .
BlueStacks runs 97% of what’s inside the Google Play Store on your Windows PC, as long as you run Windows XP or later.
It is the single Android App Player that we recommend virtualizing the full Android experience as a Windows software without any harm to your system.
In general, BlueStacks is the best for playing Android games on their computers, but it’s okay for other purposes, as well. Also, it’s very simple to use, so even if you’re not an ‘advanced’ user, you’ll do good with this emulator .
Unlike others, BlueStacks 3.0 allows you to run multiple Android Apps and Games simultaneously.
Furthermore, the most recent update – BlueStacks + N Beta, represents the first and only Android gaming platform to have Android 7 while the majority of other Android emulators run Android 4.4 .
This means you will use an upgraded graphics engine, making your games faster and better looking. And this is exactly why BlueStacks is our single and most honest recommendation.

Bluestacks
Make sure to download the associated game, as shown in the screenshot above to get bonus Pika points .
You will be able to use them for special features and products. Once the link opens, you will get a ‘Download the Bla Bla Bla game’. When you click on it, BlueStacks automatically downloads and you can proceed from there.
Nox Player
Nox Player is another great Android emulator for playing Android games on your PC.
To complete the gaming experience, Nox offers some additional utilities and additions, such as the support for the computer’s keyboard and mouse, as well as the gamepad.
It could be laggy sometimes, but the overall impression is satisfying. Another good thing is that it doesn’t come with any additional software.
MEmu is an excellent Android emulator created for one purpose only: gaming. Supporting both AMD and Intel chipsets, this tool will run on every computer.
It also supports KitKat, Lollipop and Android Jelly Bean. This makes it extremely powerful and puts it in a good position.
Run a System Scan to discover potential errors


You can play and run almost every apps and game (problematic apps and games are problematic for every emulator, right?). From all its features, here are the most important that you should consider:
- Sharing files between Android and Windows PC
- GPS location simulation
- Watch live shows and TV channels
- Fast APK installation
- Great experience with a well-designed user desktop
Droid4x
Droid4X is one of the best choices for simulating Android on your computer. Addons are among the most interesting things in this emulator, which you can use to enhance the application’s functionality.
It comes with a pre-installed Google Play Store, and also beats the competition in gaming, although there are better options in terms of stability.
Another great feature is an app that you can install on your Android phone, so you can control games on your computer. Use this free Android emulator for your Windows PC with confidence.
Genymotion
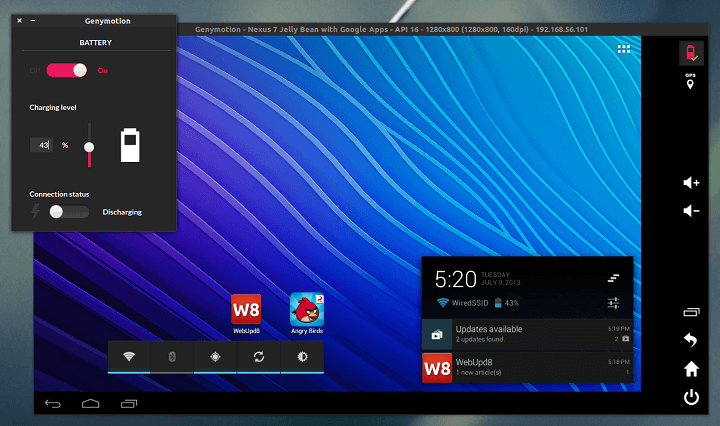
And now something for developers! Genymotion is absolutely the best Android emulator you can get, if you’re into developing Android games on your computer.
It emulates apps and games on a variety of Android devices, without requiring you to own that device.
Also, besides choosing the device Genymotion will ‘act’ as, you can also set up various versions of Android , so you can experience how apps and games work in different environments.
You can, as well, easily switch between devices, by your desire. Genymotion is something like the opposite of AMIDuOS, because it’s great for developers, but not so great for regular users.
⇒ Download Genymotion
Andy is a lesser known Android emulator for Windows PC users, but it’s completely free. It used to be a little buggy when it first came out, but most of the issues have been fixed since then.
Andy supports some unique features that are not supported by all Android emulators out there, like remotely playing games on your computer from a mobile phone, ARM support, and the ability to directly install apps, using your desktop browser.
This emulator is also interesting because it nsures most up to date Android OS at all times.
⇒ Download Andy
Koplayer
Koplayer is a well-rated app that is totally free and lets you open all the apps from Google store.
This emulator uses a brand new x86 Kernel technology that should make it faster,r better and more compatible than any other emulators. Koplayer is compatible with Windows 7, 8/8.1 and 10.
The game supports gamepad, mouse, and keyboard so your gaming sessions could be more pleasant. It also offers you some interesting features for the camera, keyboard, and microphone.
That lets you record your gaming sessions, make screenshots and share it with your friends.
You can try it and let us know in the comments section how does it work.
We’ll end our list here. As you can see, there are a lot of useful Android emulators for Windows out there, which is a great improvement over a few years’ periods.
You basically can choose the right emulator , based on your needs, skill level, and desires, which is great.
To help you with that, here are a few more specific lists of emulators, depending on where you want to use them, and for what purpose:
What’s your favorite Android emulator to use on your Windows 10 computer? Or you maybe know some quality emulator that we didn’t list here? Tell us in the comments.
Best 15 Tips and Tricks to Use Windows 10 in Tablet mode
Mehvish
09 Apr 2019
Windows 8 didn’t excite the users of touch-based laptops as the touchscreen experience looked half-baked. But the touch usage on Windows 10 running laptop feels like a bed of roses. The credit goes to the dedicated tablet mode on Windows 10 that makes it more user-friendly.

Even though you can use your touch laptop without venturing into the tablet mode, the features offered by that mode make it tempting and attractive. What are these hidden features? Well, get ready to be surprised with this post.
Here you will get to know how to use and enjoy touchscreen on Windows 10 along with the top tips and tricks.
How to Enable Tablet Mode on Windows 10
It’s quite easy to do so. First, tap or click on the Action Center icon present in the taskbar and then select Tablet mode to enable it. Alternatively, use the keyboard shortcut Winkey + A to activate it. On some laptops, touching the laptop touchpad with four fingers also activates the Action Center.

Now let’s jump into the tablet mode shortcuts, tips, and tricks.
1. Hide Taskbar
Taskbar forms an important part of a laptop in the normal mode. However, we can’t say the same about the tablet mode. If you don’t like the presence of the taskbar in the tablet mode, you can hide it with the available setting. When you do so, the taskbar will disappear when you enter the tablet mode.
To enable (or disable) the setting, go to Settings > System > Tablet mode. Turn the toggle on for ‘Automatically hide the taskbar in tablet mode.’

2. Hide App Icons Only
If the icons on the taskbar are distracting you and not the entire taskbar, Microsoft provides a way to disable them in the tablet mode.
For that, go to Settings > System > Tablet mode. Enable ‘Hide app icons on the taskbar in tablet mode.’

3. Go to Tablet Mode Settings Quickly
Instead of going through Settings > System > Tablet mode to open the tablet mode settings, you can directly enter it via the Action Center.
To do so, first, open the Action Center, then tap and hold on the Tablet mode option. From the menu, select Go to Settings.

4. Use Back Button
If you look closely next to the Start Menu, you will find a back button in the tablet mode. Tapping it will take you back to the previously opened apps. In other words, use the button to cycle back to previous apps. For instance, if you open Chrome and then launch Candy Crush followed by File Explorer, tapping the back button will first take you back to Candy Crush and then to Chrome.

5. Open Right-Click Menu
The charm of using a laptop is in its right-click menu. Switching to the tablet mode on Windows doesn’t mean you lose out on it. Just tap and hold on the item (icon, desktop, taskbar, files, etc.) using one finger to open the context menu aka right-click menu. To our delight, the menu is modified for touch use.

Also on Guiding Tech

How to Use HP Active Pen: A Guide with Tips
6. Open Touch Keyboard Automatically When Not in Tablet Mode
Typically, when you use your laptop in a tablet mode, the touch or software keyboard will appear automatically by tapping on a text field. However, if you use your laptop as a tablet but not in a tablet mode, the keyboard won’t appear.
To open it automatically even in normal mode, go to Settings > Devices > Typing. Scroll down and enable ‘Show the touch keyboard when not in tablet mode and there’s no keyboard attached’ present under Touch keyboard.

7. Launch Touch Keyboard from Taskbar
If the touch keyboard isn’t opening when you tap on a text field, you can open it from the taskbar too. Right-click on the taskbar (touch and hold) and enable Show touch keyboard button from the menu.
Once enabled, you will see the touch keyboard icon in the taskbar. Tap or click to launch it.

8. Enable Word Prediction for Software Keyboard
I really miss the text suggestions on a laptop. Sure, you can enable it for the physical keyboard too, but the suggestions are limited. Thankfully, things are different for the touch keyboard as you get 10+ options to choose from.

To enable text suggestions, go to Settings > Devices > Typing. Enable ‘Show text suggestions as I type on the software keyboard’ present under Typing.

9. Change Keyboard Type
Just as smartphones let you change the keyboard type, Microsoft is generous enough to offer the same capability. To start with, you can undock the touch keyboard and move it around. Next, you can change its size from the available types to suit your requirements. You can even switch to the handwriting recognition mode.

To change the keyboard type, you must launch the touch keyboard first. Then tap or click on the small keyboard icon with the tiny gear. The first row shows different types of keyboards and the second row lets you dock and undock the keyboard.

10. Launch Handwriting Panel Automatically
If your laptop supports input from a digital pen, tapping with it on any text field will directly open the handwriting panel. Anything you write in that panel will be converted to the text format using the incredible handwriting recognition.
11. Input Text in Handwriting Panel with Fingers
By default, you can only write with your pen or mouse on the handwriting panel. If you wish, you can use your fingers to jot down text too.
To do so, go to Settings > Devices > Pen & Windows Ink. Check the box next to the setting ‘Write in the handwriting panel with your fingertip.’

Also on Guiding Tech
# Tips & Tricks
12. Snap Apps
Multitasking forms the heart of laptop experience even for tablets. Sure, you can keep multiple apps open at the same time on your tablet but what if you want to keep them stacked side by side? Similar to the laptop mode, you can snap apps in the tablet mode too.
For instance, you want to watch a live stream on YouTube and at the same time, scroll through your tweets without any other distraction. That’s where snapping windows comes into the picture.
For that, tap and hold the top of the first app and drag it either to top-right or top-left of the screen. You will see that the window is snapped and you will now have to choose the second app from the list of the open apps. Tap on the app that you want to open. If the function isn’t working, then follow our guide that includes many fixes.

13. Windows 10 Tablet Mode Gestures
Tablet mode supports the following gestures:
Close App
To close a currently opened app, hold its top area and drag it to the bottom of the screen.

Open Action Center
Action Center can be launched without tapping its icon in the taskbar. Just swipe left from the right edge of the screen to open Action Center. This trick also works in the laptop mode on the touchscreen laptops.
View Hidden Taskbar
If you like to keep the taskbar hidden, use the swipe up gesture from the bottom of the screen to view the hidden taskbar.
14. Switch Between Apps
It’s quite easy to view the recently opened apps on smartphones. Fortunately, you can do the same on your Windows laptop too when in the tablet mode.
Either swipe right from the left edge of the screen or tap on the Task View icon present next to Cortana on the taskbar. On the next screen, you will see all your open apps. Tap on any app to switch to it.

15. Enable or Disable Auto Rotate
In traditional laptops, the screen was always in one direction. Things changed with convertible laptops, and now rotation plays an important part.
By default, the display orientation will automatically change as you rotate the screen. But if you don’t like that behavior, you can disable auto rotation and lock the current orientation mode.
For that, open Action Center and then tap on Rotation Lock to enable it. When activated, the tile is highlighted. The Rotation lock tile is available only in the tablet mode. In the standard laptop mode, the tile will appear grayed out.

Bonus Tip: Chrome Gestures
While using Google Chrome, you can swipe right or left anywhere on the screen to open the previous and next page respectively. The feature will soon land on Android phones too.
Also on Guiding Tech

5 Best Alternatives to Windows 10 Photos App
Devour the Tablet
The touch experience on Windows 10 sweeps you off your feet. With the above tips and tricks, you can truly reap the benefits of the tablet mode. I really like the gestures and the ease of use offered by the tablet mode. Do let us know your favorite feature of the tablet mode.
Next up: Want to save space on your Windows 10 laptop. Do it with Storage Sense. Get to know what it is and how to use it.
Last updated on 5 Jul, 2019
The above article may contain affiliate links which help support Guiding Tech. However, it does not affect our editorial integrity. The content remains unbiased and authentic.
Read Next

Top 8 Ways to Fix Driver Error Code 43 on Windows 10
Are you facing the ‘Error Code 43’ on your # Windows 10 computer screen? We have compiled a list of all possible solutions to fix the hardware device related issue. Check it out.

How to Fix Windows Store Slow Download Speeds Issue
Are you experiencing slow download speeds in the # Windows Store? Here are 10 ways to fix this issue so you can download your favorite app in no time again.

Difference Between an App and a Program in Windows 10: GT Explains
Learn subtle differences and similarities between an app and a program on # Windows 10. Understand how they are different yet similar to, and need, each other.

11 Ways to Fix Sticky Keys Not Working on Windows 10 Error
Check out these 11 ways to fix Sticky Keys not working on # Windows 10 error. These steps will help you get back to typing better in no time at all.

How to Fix Windows Clipboard Not Working on Windows 10
Is the # Windows Cloud # Clipboard not working? Follow the steps in this post to get it back to working on your # Windows 10 computer.

How to Speed up Thumbnail Loading in Windows 10
Is a slow load time of media files and image thumbnails annoying you? Learn how to fix the slow loading of image thumbnails in # Windows 10.
How to Fix Blank Icons in Windows 10 Desktop Error
Do you see missing or blank # icons on your # Windows 10 desktop? Here are 8 ways to fix this error so you can identify files, folders, and apps quickly.

7 Best Ways to Fix Mouse Wheel Scrolls Up When Scrolling Down Issue
Is your # mouse scrolling the wrong way or keeps jumping up and down? Find out how to fix the mouse scroll keeps jumping issue.
Did You Know
Windows 10 is the last Windows since Microsoft is changing the approach of building and delivering OS.


